Showing posts with label tile repair. Show all posts

Tuesday, November 24, 2020

How to Renovate a Quarry Tiled by Northamptonshire Tile Doctor

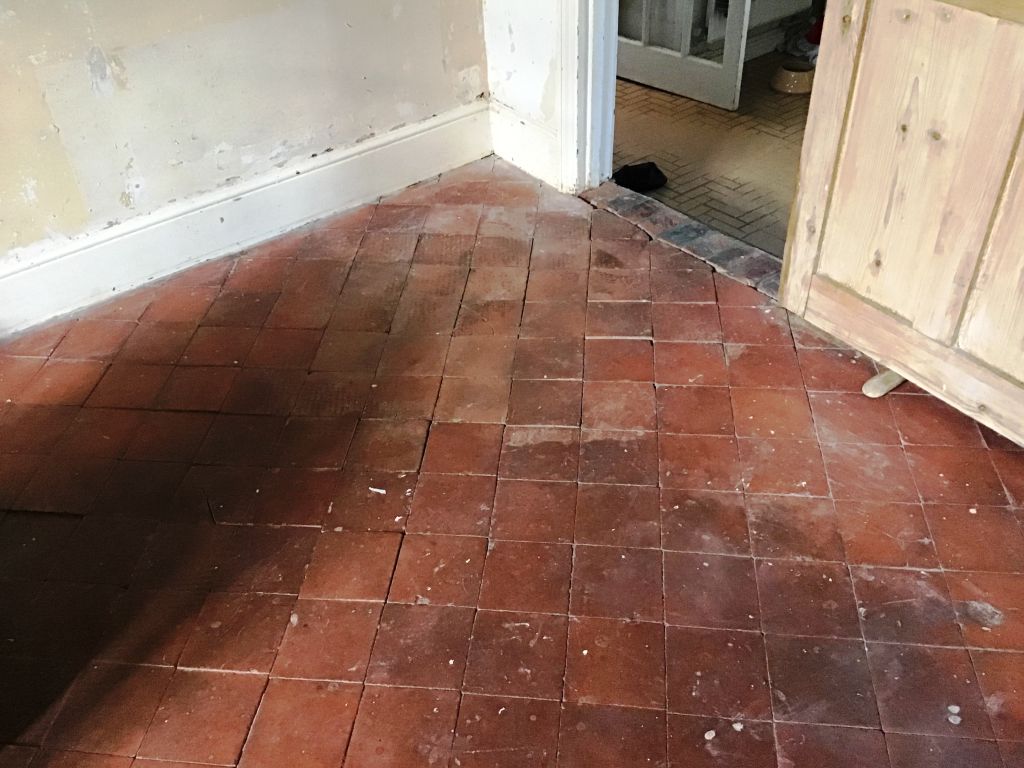
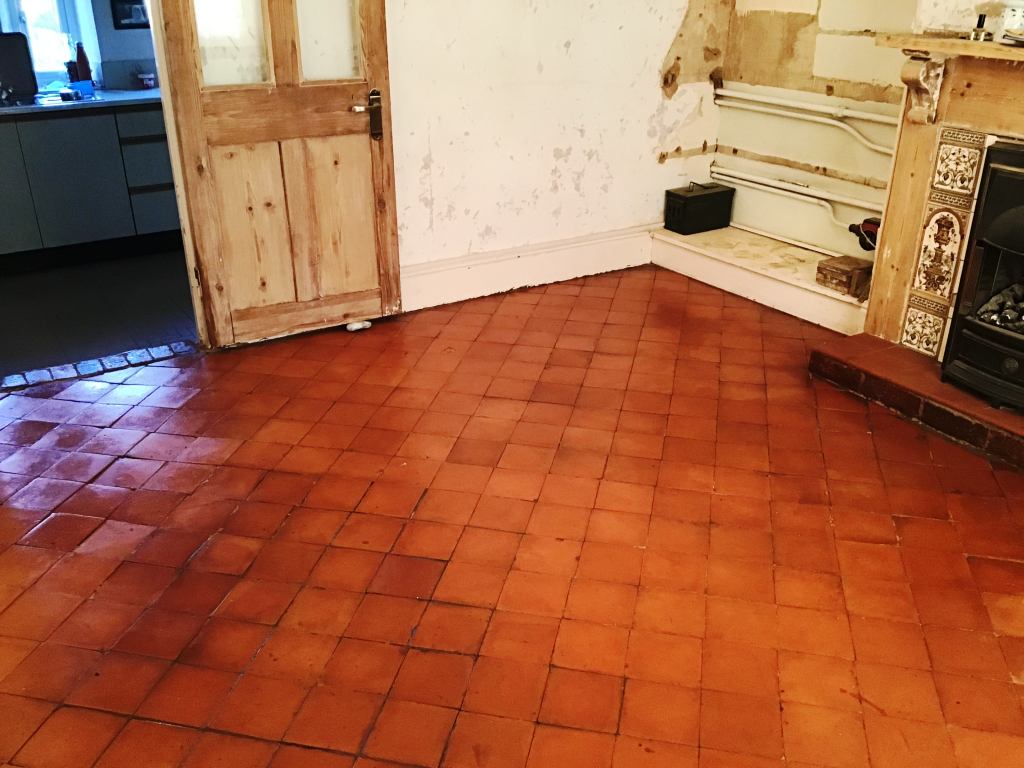
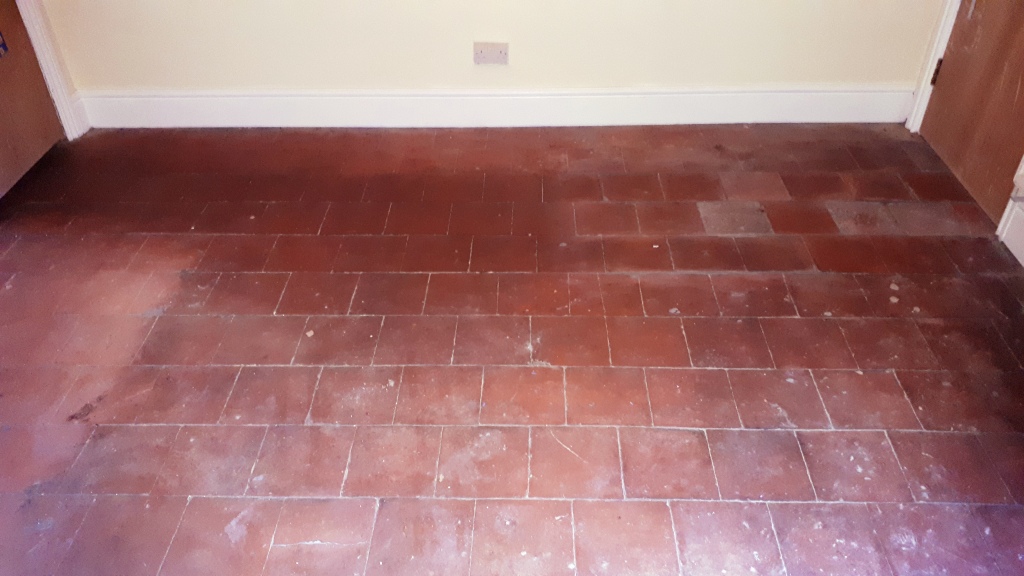
The following photos are of a Quarry tiled dining room floor in a period cottage located in the small village of Bozeat. My customer had removed a carpet and discovered them underneath, as you can see from the photographs however the tiles were in a poor state of repair. Undaunted the owner wanted to restore them as a lovely period feature and contacted Tile Doctor.

 
Quarry Tile Floor Before Restoration Bozeat Cottage Quarry Tile Floor Before Restoration Bozeat Cottage

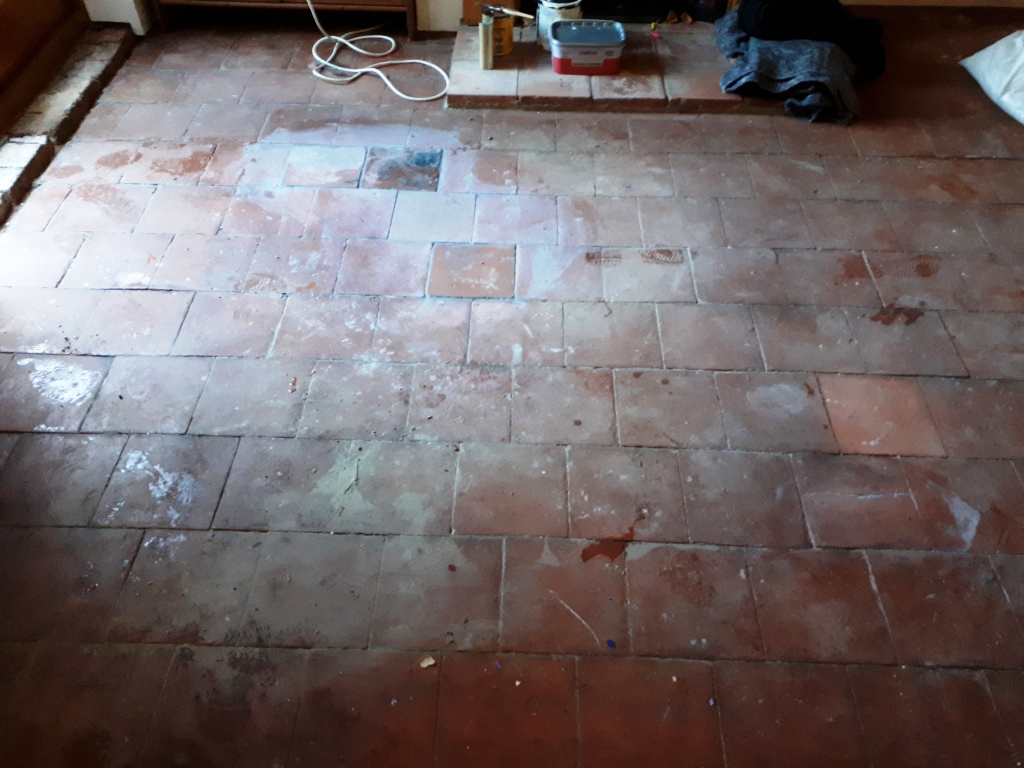
I went over to survey the Quarry tiles and could see the floor had not faired well under the carpet over the years, several tiles were cracked and 40 to 50 tiles were loose and would needed resetting to stop them moving underfoot, especially in the high traffic areas. I discussed with them that Tile Doctor could repair the floor and clean it and would be able to restore in a few days. They were happy to go ahead with my quote and we arranged a mutually convenient time to carry the work out.


Cleaning and repairing a Quarry Tiled Hallway Floor

My first course of action was to deep clean the floors using Tile Doctor Oxy-Gel which is an alkaline cleaner. Working in small areas the Gel was worked in using a stiff brush on a rotary machine using a little water. As this process was completed in each area, I rinsed off the resulting slurry away with water and then extracted using a wet vacuum. The initial clean removed most of the black staining and paint spots which had occurred over the years, but more work was needed.

The next step was to apply Tile Doctor Grout Clean-Up to further clean up the tiles and tackle the cement residue and other staining. I used a repeat of the cleaning process and rinsed twice with plain water to ensure all traces of product were removed. The next step was to tackle the broken and loose tiles however it was now the end of day one, so after assessing the floor for all repairs required, I installed a portable dryer to aid drying and left for the day.

 
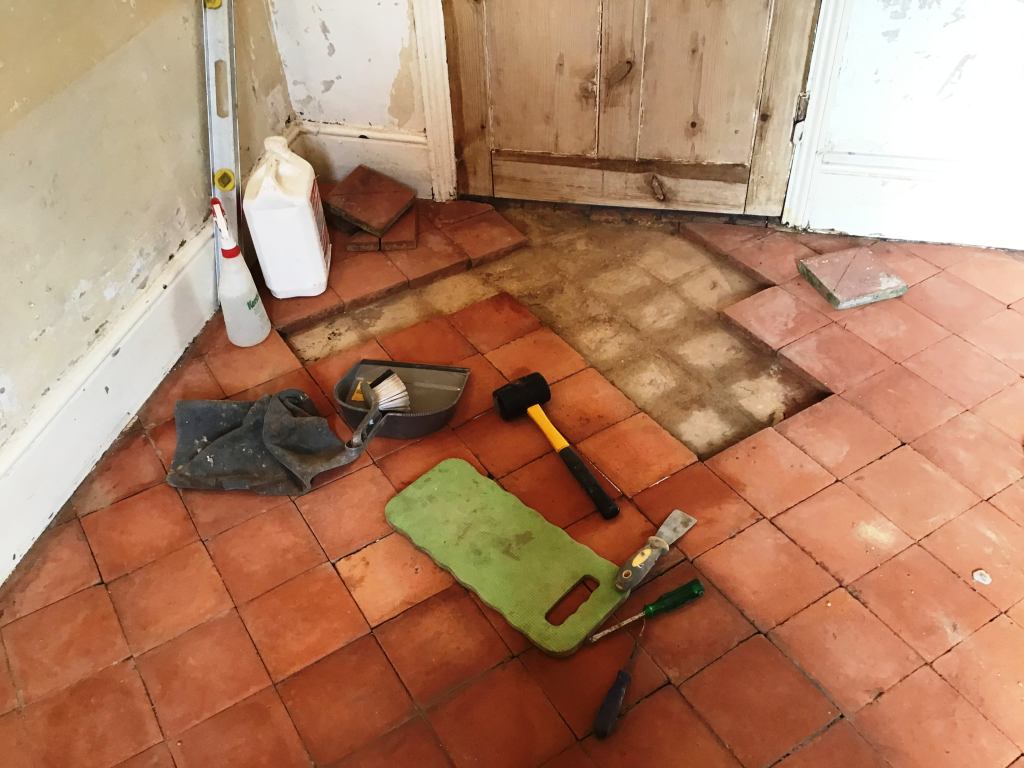
Quarry Tile Floor During Repair Bozeat Cottage Quarry Tile Floor During Repair Bozeat Cottage

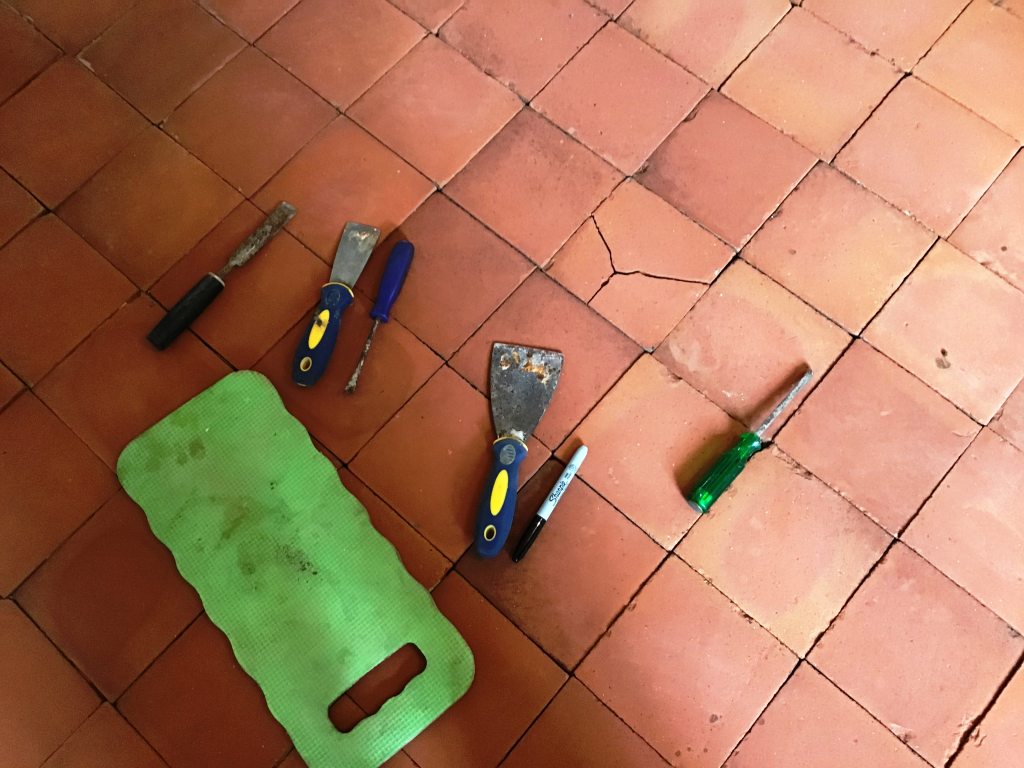
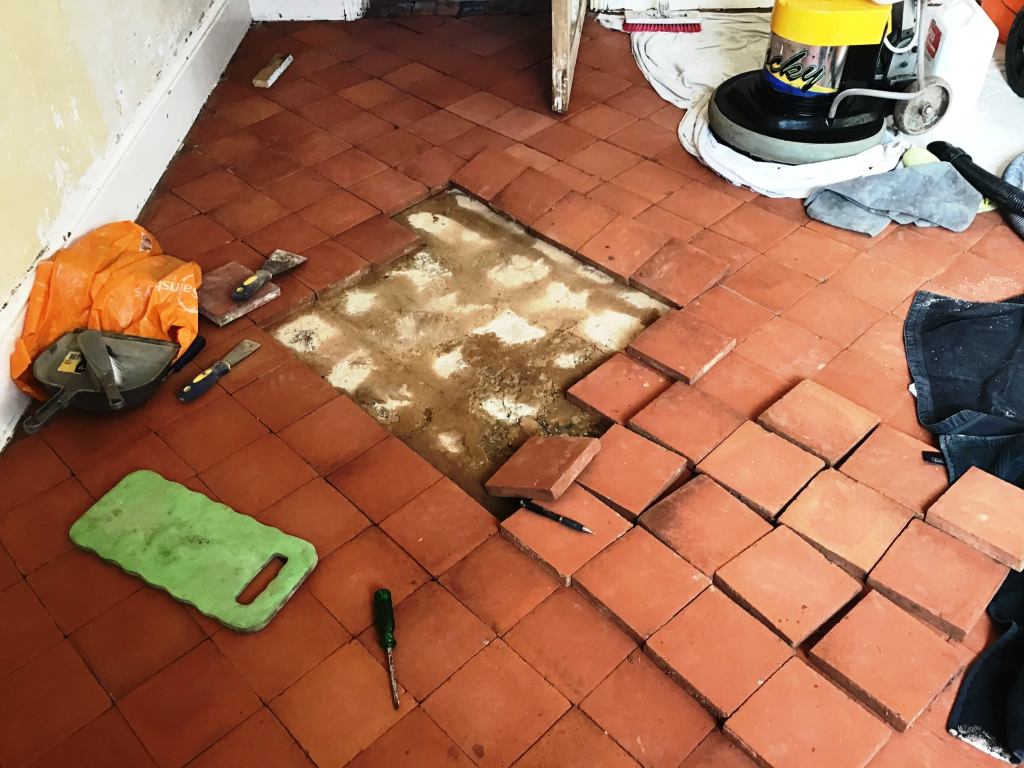
The next day I returned to begin repairs starting by lifting all the loose tiles, working in one square metre sections at a time. Fortunately, my customer had already managed to obtain reclaimed tiles from a reclamation yard so that saved me a job. The colours matched with the originals; however, the reclaimed tiles were slightly larger than the originals and needed to be cut into shape as required. Working methodically, I re-laid the tiles on a fresh bed of screed and grouted them in to match the original floor as best possible.

 
Quarry Tile Floor During Repair Bozeat Cottage Quarry Tile Floor During Repair Bozeat Cottage

After the repairs were completed I allowed the floor to fully dry for four days, I needed the tiles dry and the newly laid adhesive and grout to set and bed in before the next step. Before leaving I gave my customer strict instructions not to walk over these areas whilst I was gone.


Sealing a Quarry Tiled Hallway Floor

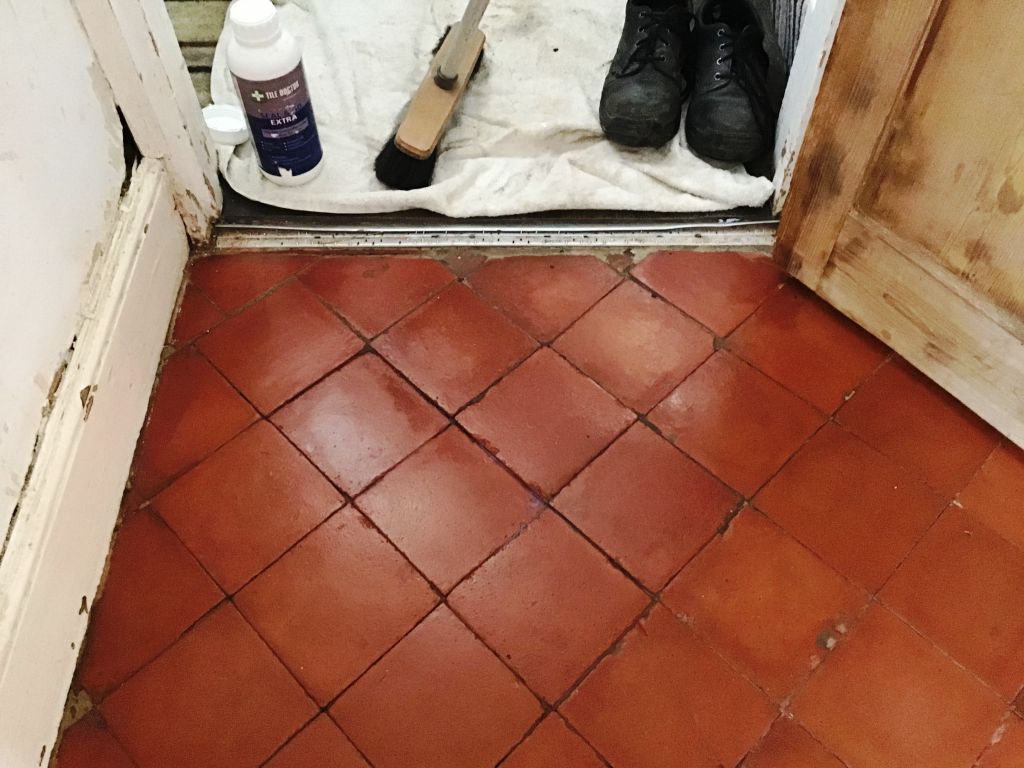
Returning later the following week, I first checked the floor was dry using a damp meter, once satisfied I was able to start the sealing process. The customer had requested a silk finish, however because of the age of the cottage and the possibility of damp in this old floor my choice of sealer was limited to those that are fully breathable.

 
Quarry Tile Floor After Restoration Bozeat Cottage

On this occasion I chose to apply several coats of Tile Doctor Seal & Go Extra, this product will allow the floor to breathe and provide the desired finish. It was a good decision, and as hoped it enhanced the appearance of the floor beautifully.

 
Quarry Tile Floor After Restoration Bozeat Cottage

My customer was very happy with the renovation and the transformed floor and left the following feedback:

 
"Friendly service, reasonably priced and a good standard of work. Has breathed new life into my old quarry tile floor."


Source: Quarry Floor Restoration in South Yorkshire

Thursday, January 23, 2020

How to Renovate a Victorian Tiled Hallway

Here’s the 2nd part of the floor restoration work I did for a property developer last year in Harborne, this time detailing the renovation of the Victorian tiled hallway floor. I must credit the builder for engaging me on this project as many builders would attempt this work themselves, rather call in a professional, which often leads to a less than desirable result.

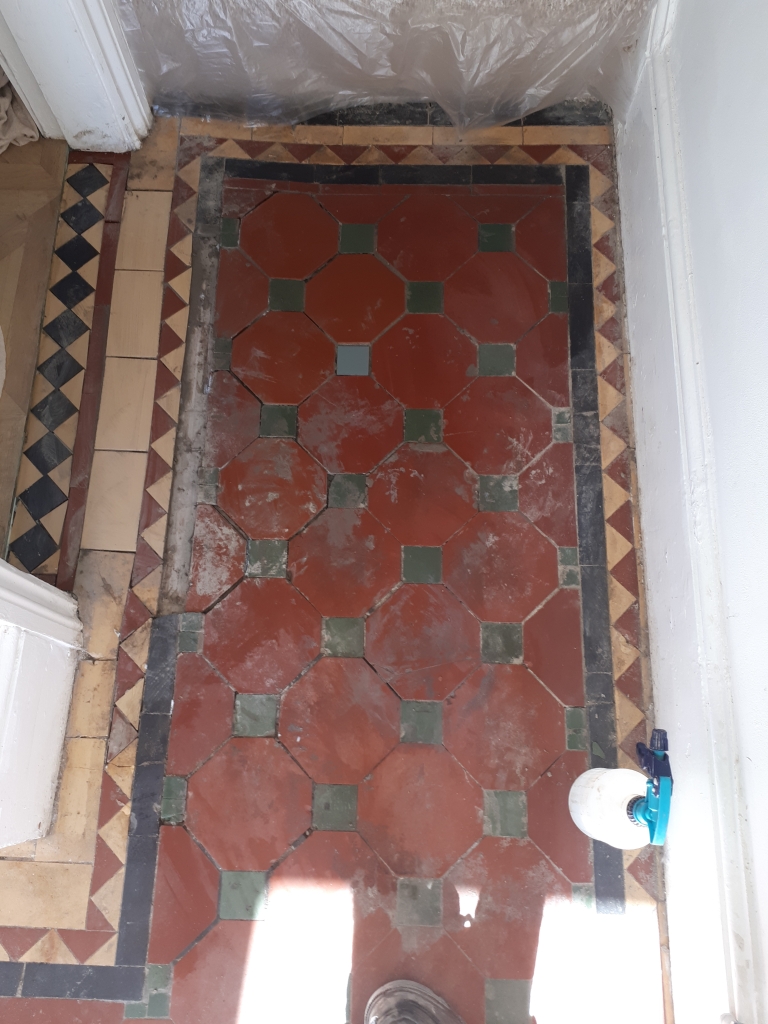
Victorian Tile Hallway Before Renovation Harborne

The house dated from the 1800's and contained two old floors that needed restoration. I didn’t want to trample over a recently renovated hallway floor whilst rebuilding the old Quarry tiled floor in the front room so naturally I addressed that first. If you missed the first post detailing its restoration you can find it here: Victorian Quarry Tiled Floor Restoration in Harborne

Victorian Tile Hallway Before Renovation Harborne Victorian Tile Hallway Before Renovation Harborne

Once the front room restoration was complete, I moved onto the original Victorian Hallway which was dull, dirty and needed some tiling work around one of the door thresholds.

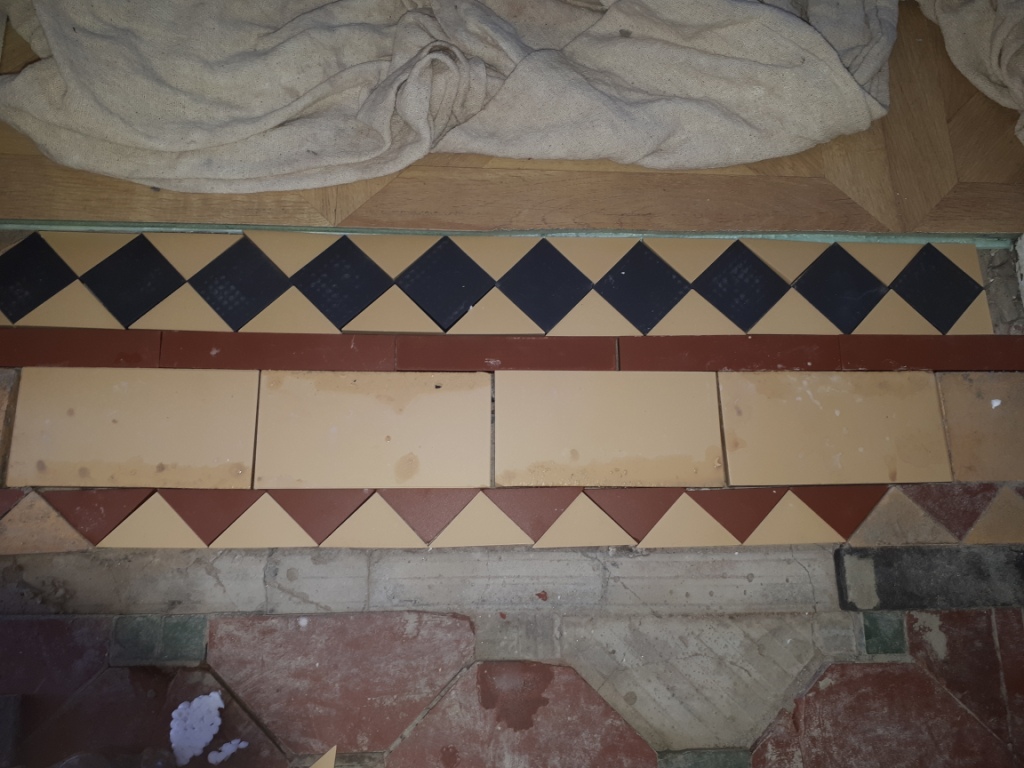
Victorian Tile Hallway During Renovation Harborne


Cleaning and Repairing a Victorian Tiled Hallway Floor

The Victorian Hallway needed to have a threshold restoring, luckily the builders had kept the original tiles. Firstly, the space below the tiles needed to be filled with quick drying cement. The tiles were then re set and grouted.

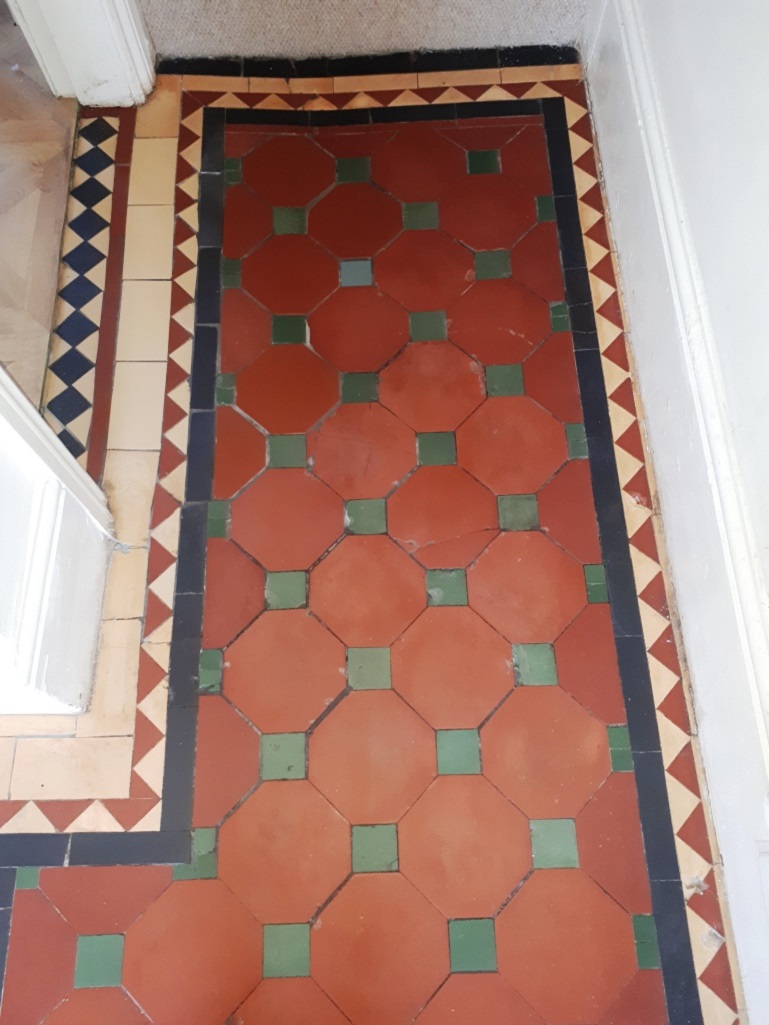
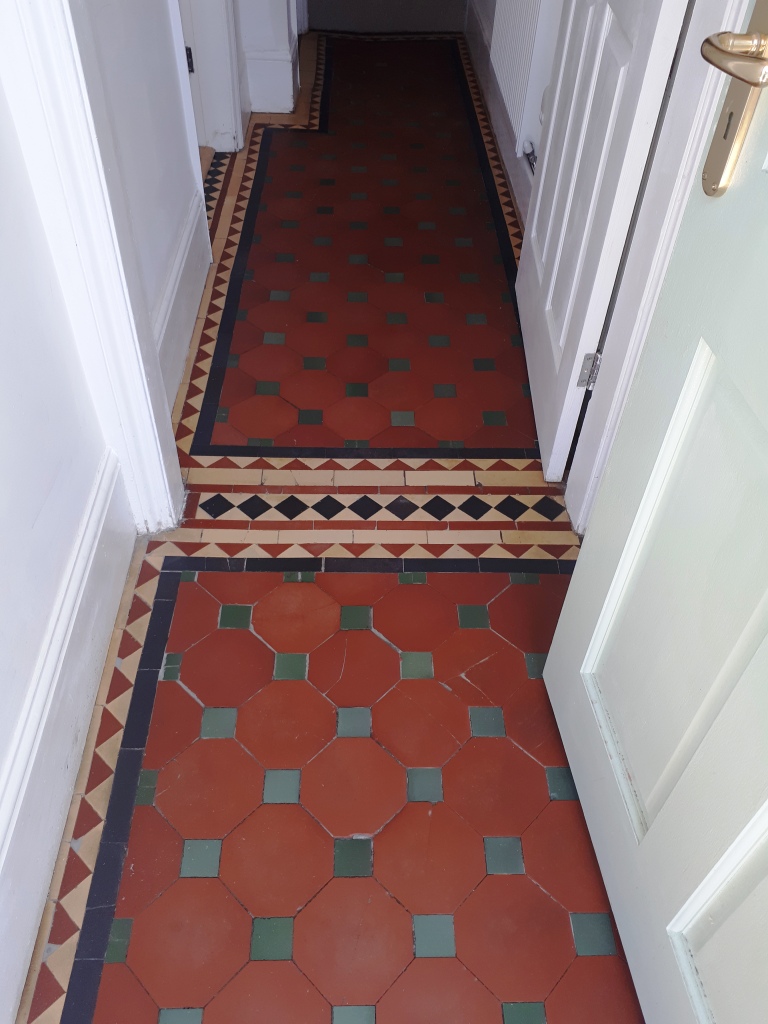
Victorian Tile Hallway After Renovation Harborne

Next issue was to tackle the paint spots and carpet adhesive. I did this by spraying the surface of the tile with a strong solution of Tile Doctor Remove and Go and after leaving to for ten minutes to soak in and soften the glue and paint. I was then able to carefully scrape of the glue and paint with hand scrapers. The floor was then deep cleaned with a 200-grit diamond pad on a weighted rotary machine. The edges and corners were done by hand with diamond blocks. The floor was then rinsed with water and the soil extracted with a wet vacuum. Last stage of the cleaning process was to give the floor an Acid Wash with Tile Doctor Grout Clean-Up to further clean up the floor and neutralise any efflorescent salts that may have been present in the tiles. Efflorescence can be a big problem for old floors like these which don’t have a damp-proof membrane. I gave the floor another rinse and extraction before leaving for the day and left the floor to dry out overnight.


Sealing a Victorian Tiled Hallway

On return both the floors were checked for moisture with a damp meter to ensure they were dry. The readings were good, so I proceeded to start the long process of applying the sealer. On this occasion I chose Tile Doctor Colour Grow sealer, main reasons being its fully breathable so will cope well with any moisture evaporation due to there being no damp-proof membrane also its really good at bringing out the colours in the tiles. Three coats were applied, allowing each coat to dry before applying the next. I then buffed off any excess with a white pad.

Victorian Tile Hallway After Renovation Harborne Victorian Tile Hallway After Renovation Harborne

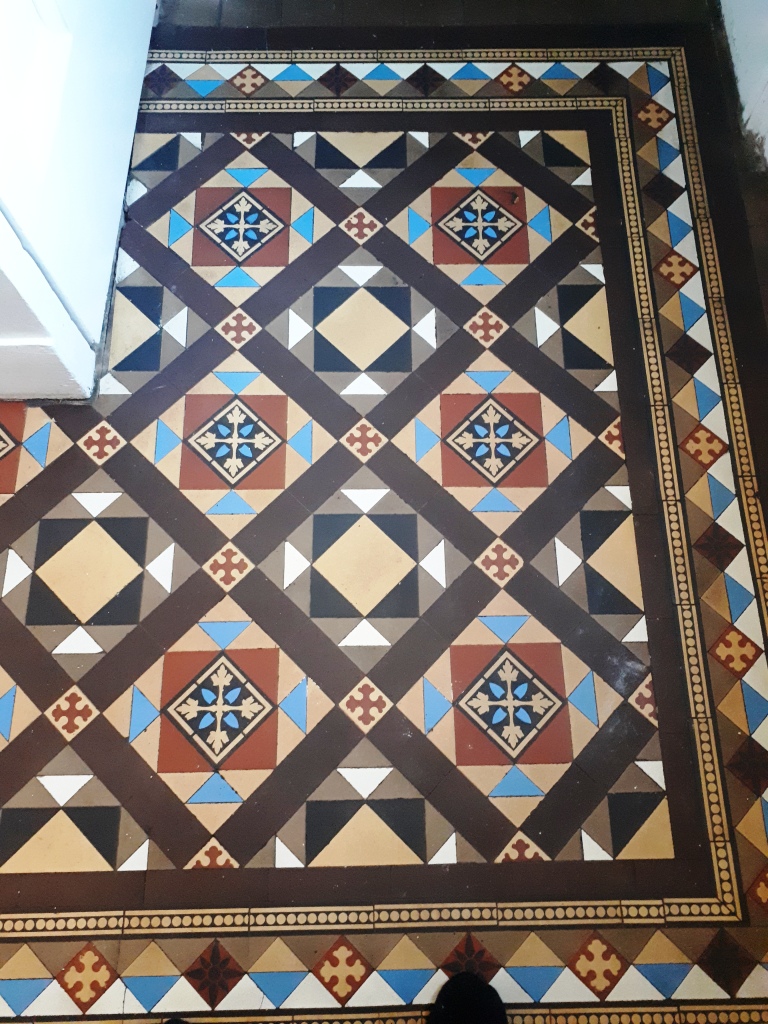
The new sealer really brought the Victorian tiles to life and allowed the colour and geometric patterns in the Victorian hallway floor to shine through.

Victorian Tile Hallway After Renovation Harborne


Source: Victorian Floor Cleaning and Sealing Service in Birmingham

Thursday, August 15, 2019

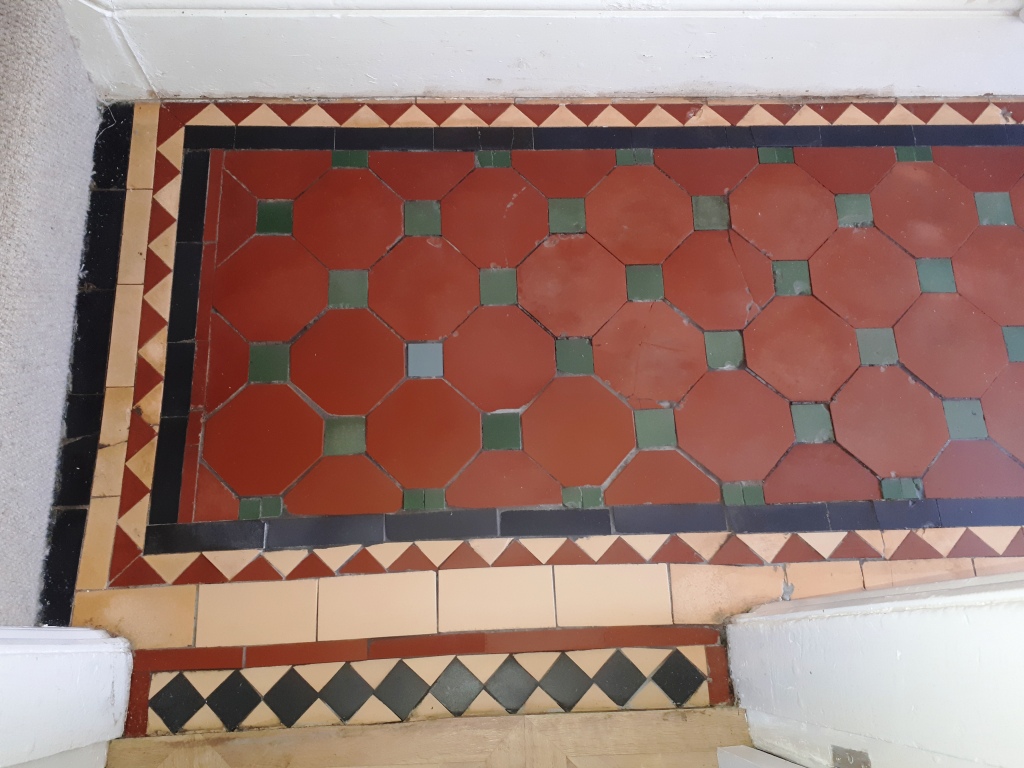
How To Repair and Restore an Old Victorian Tiled Floor

This detailed Victorian tiled hallway at a property in Camden was overdue some much-needed repair and maintenance. The owners of the property appreciated that original period features like this add a lot of value to a property and asked me to visit the property to quote for renovating it. The property was in a terrace of similar properties most of which appeared to have retained their Victorian character.

Victorian Hallway Floor Tile Before Restoration Camden

I inspected the floor and found there were a couple of loose, cracked, worn and broken tiles that needed to be replaced. In addition, the floor tiles needed a deep clean and then seal to bring back the wow factor. I was confident we could renovate the floor but at that point unsure if we would be able to find exact match replacements for the damaged tiles. Fortunately, Victorian tiles are still in demand and I knew of several companies I could check with so I was confident they could be found.

Victorian Hallway Floor Tile Before Restoration Camden

We discussed how long the work would take and assuming I could source the replacements agreed a price for the full restoration of the floor. After doing some research I managed to find suitable replacements with a company called Original Style and the work was scheduled for the following month.


Cleaning/Repairing a Victorian Tiled Hallway Floor

Firstly, we prepared all areas with protective tapes to threshold edges and skirting. This was followed by spaying the tiles with a strong dilution of Tile Doctor Remove & Go which is product designed to remove old sealers and coatings. After about ten minutes the tiles were scrubbed with black scrubbing pads and scrubbing brushes. Fresh water was used to rinse the floor and the slurry was extracted using a wet vacuum.

The floor was inspected and then a second clean carried out, this time using Tile Doctor Pro-Clean which is a Tile and Grout cleaning agent. The same process of application was used and after rinsing and extracting the dirt the tiles were given a steam clean. This ensured all the dirt was lifted out of the pores of the tile and the floor was now as clean as it possible could be.

The next step was the remove the loose and cracked tiles using the reclaimed tiles we had sourced earlier. Some cuts were necessary to get the replacements to match the originals but overall the plan worked. A quick drying adhesive was used to secure the tiles so we could apply the grout shortly after. The whole floor was then re-grouted and cleaned off to ensure a good match. The floor was left to dry off overnight, and you could already see it was now looking considerably improved.


Sealing a Victorian Tiled Hallway Floor

Returning the next morning we checked the floor was dry using a moisture meter, this is important as to apply a sealer to damp tiles will lead to a patchy experience. All was well so we were ready to apply the sealer.

To start a single base coat of Tile Doctor Colour Grow sealer was applied to the floor and left to dry. This sealer is an impregnator that protects from within by occupying the pores in the clay tile improving colour in the process. This sealer does leave a matt finish however and the client wanted a subtle shine so one dry it was followed by four coats of Tile Doctor Seal & Go. The combination of the two sealers works really well to add long lasting protection to the tiles and provide the desired finish to the floor.

Victorian Hallway Floor Tile After Restoration Camden

The floor was much improved, and the client was delighted. The detailed pattern and colours were now much more prominent, and the hallway looked much more inviting for both the owner and their guests. For the aftercare of Victorian tiles, I recommended the use of Tile Doctor Neutral Cleaner which is pH neutral and won’t prematurely erode the life of the sealer.


Source Victorian Tile Cleaning and Restoration Service in North London

Monday, August 12, 2019

How to Renovate a Victorian Tiled Hallway Floor

This beautiful Geometric Victorian Tiled Hallway at a property in the small Cumbrian town of Sedbergh had been covered by carpet and then Vinyl beneath the carpet. Far from causing an issue with the floor however it had protected the beautiful old tiles, but they needed a deep clean and seal. The client really wanted to make the most of the character features of the property and the hall floor was their first priority.

Geometric Victorian Tiled Hallway Before Cleaning Sedbergh

I discussed with the client the process of cleaning and we agreed a quote for the work, arranging a date for the work to be carried out later in the month. If you have never been Sedbergh is well worth a visit, it sits just within the Yorkshire Dales National Park at the foot of the Howgill Fells making it very popular with walkers.

Geometric Victorian Tiled Hallway Before Cleaning Sedbergh


Cleaning a Victorian Tiled Hallway Floor

The floor had a lovely decorative tile border that ran along the perimeter of the hallway however some damage had occurred when fitting central heating pipers many years earlier. There were also small holes around the edges that I suspect were used to secure the carpet gripper. To resolve this my first task was to replace the damaged tiles and fill the small holes with grout in a matching colour. 

Once the repairs had set, I started the cleaning process with a coarse 200-grit Diamond pad followed by a 400-grit pad which were run over the floor using a weighed buffing machine. Only water is used during this process to add lubrication, no chemicals are needed and once done the floor is rinsed with water and the slurry removed with a wet vacuum.

The corners and edges which were are not accessible with the machine had to be done by hand, so we used small burnishing blocks for these. The Green block is great at getting the dirt off the tiles, but leaves the pores of the clay open, so this needs to be finished with the Black 100, Red 200 and Yellow 400 Diamond Block used in sequence which then matches the pores of the clay tiles in the rest of the floor.

We finished the clean, with a light acid rinse using Tile Doctor Grout Clean-up, left on the surface for no more than 5 minutes before rinsing and extracting. This process further cleans the floor and counters any potential efflorescence issues by neutralising alkaline salts in the floor. This is a common problem with old Victorian tiles which don't have a damp-proof membrane.


Sealing a Victorian Tiled Hallway Floor

The floor was left to dry out overnight and the next day I came back to inspect the floor and make sure it was dry so it could be sealed. Usually one night to dry is fine during the summer although in the winter sometimes it takes two or even three days. Sealers don’t cure well on damp floors resulting in a patchy appearance so before sealing we always check the floor is fully dry with a damp meter in several areas. Only once we are happy that the moisture readings in the floor are below a certain level do go ahead and apply a sealer.

Geometric Victorian Tiled Hallway After Cleaning Sedbergh

To seal and protect the Victorian tile, a couple of coats of Tile Doctor Colour Grow were applied to the floor. Colour Grow is a fully breathable, colour enhancing sealer which ticks a lot of boxes for this type of floor as old floors don’t have a damp-proof membrane fitted. This is an important consideration as moisture will be also to rise through the tile from the subfloor and not get trapped underneath where it could spread to the walls. Other types of sealer such as acrylic, wax, polishes etc don’t last long if there is dampness in the floor. Tile Doctor Colour Grow copes well in these conditions and can be used in wet rooms, shower cubicles and external patio areas so its’s more than suitable for a slightly damp floor which is often the case with a Victorian base.

Geometric Victorian Tiled Hallway After Cleaning Sedbergh


Source: Victorian Tiled Floor Cleaning, Renovation and Sealing service in Cumbria

Thursday, April 4, 2019

Whats Involved Restoring an Old Victorian Tiled Floor

A customer from Epsom called me regarding the restoration of her Victorian tiled hallway which was previously covered in carpet and in a poor state of health. Intrigued and having spoken on the phone I agreed a time to call in and survey the floor and work out a way forward. I visited the property and could immediately see considerable repair work including resolving problems with the sub floor and tile replacement would be required and all this before cleaning and sealing.

Victorian Tiled Hallway Floor Before Rebuild in Epsom

This house had undergone some serious renovations recently and the floor was left till last. I’m not a structural engineer so was unable to advise what had happened to the floor, but all the faults appeared to run in a line from the kitchen to the front door. It was an old house so who knows what might have caused it, it might even have been bomb damage from the 2nd world war.

There were three main problem areas. The worst was by the front door where an area of about a metre square was just loose tiles and laid on rubble. The family had got used to jumping across the threshold so as not to make the problem worse. Next was a strip through the middle that was totally exposed and a massive trip hazard. The floor boards were visible as was the floor base. There was another area by the front room entrance that had some loose pattern tiles that clunked every time someone entered the room. Finally, there was a small area to the entrance to the basement that had been patched in with cement.

Victorian Tiled Hallway Floor Before Rebuild in Epsom Victorian Tiled Hallway Floor Before Rebuild in Epsom

It was clearly going to be a challenging restoration for several reasons. Had the customer kept all the loose tiles? If not, could I source matching replacements? Would it be possible to level the floor that appeared to be sloping towards the front door? Could I remove loose and broken tiles without disturbing others? Could I manage the customers high expectations?

Having worked on numerous Victorian floor restorations in the past I knew where I could potentially source replacement tiles. I also had the full backing of the Tile Doctor network so knew I could always reach out to other Tile Doctors should I face any major problems. Undaunted we agreed a date for me to return and start the work and in the mean time I would talk to several specialist tile suppliers about replacements.


Rebuilding a Victorian Tiled Hallway Floor

Before starting any tiling work, I photographed the whole floor extensively from different angles so I would have something to refer to later. Then I removed all the loose tiles placing them in buckets for further cleaning. I now had three areas that I could see beneath the floor boards and another area of cement that I broke up using a chisel drill. In total I filled six buckets with rubble and broken tiles, all of which were taken off site and disposed of at a local recycling centre.

Victorian Tiled Hallway Floor During Rebuild in Epsom Victorian Tiled Hallway Floor During Rebuild in Epsom

The next step was to ensure I had a level and flat base in the newly exposed areas on which to lay the tiles. I managed this by laying down a self-levelling compound. The compound is mixed in a bucket and poured into the holes up to the required level allowing gravity to do the levelling work for you. It is then left to dry and harden overnight.

Victorian Tiled Hallway Floor During Rebuild in Epsom Victorian Tiled Hallway Floor During Rebuild in Epsom

The next day I started by re-fixing the loose tiles in areas where the subfloor was still solid. Close packed Victorian tiles are very tough but can be brittle, often removing a single tile can cause chips or break surrounding tiles. I always buy more replicas than the job requires for this very reason. This can be very frustrating work, so I find its best approach is to remove as few tiles as possible. I explained to the customer that the floor is over 100 years old and some chips and scratches give the floor character. Perfection is an unrealistic expectation where some marks are permanent.

Part of the other renovations included the removal of two antique radiators leaving some strips of carpet and adhesive attached to the floor. I removed this using a strong mixture of tile doctor remove and go and a little encouragement from a 50-grit diamond block.

The preparation continued with the cleaning up of the three buckets of tiles recovered at the beginning of the restoration. Old adhesive and cement must be removed before refitting to ensure they can be laid flush to the adjacent tiles. Luckily for me the weather was warm and sunny, so I sat on the garden wall for the afternoon using a combination of a wet tile cutter, Fein tool and diamond blocks to get them clean while I took in the sun.

Victorian Tiled Hallway Floor During Rebuild in Epsom

The next day was spent re-laying the tiles. The tiles are in an intricate pattern and in various shapes and sizes. The main area by the front door took all day. The difference in thickness between the original and replacement tiles made the work particularly difficult. Interested neighbours came and went commenting on my progress throughout.
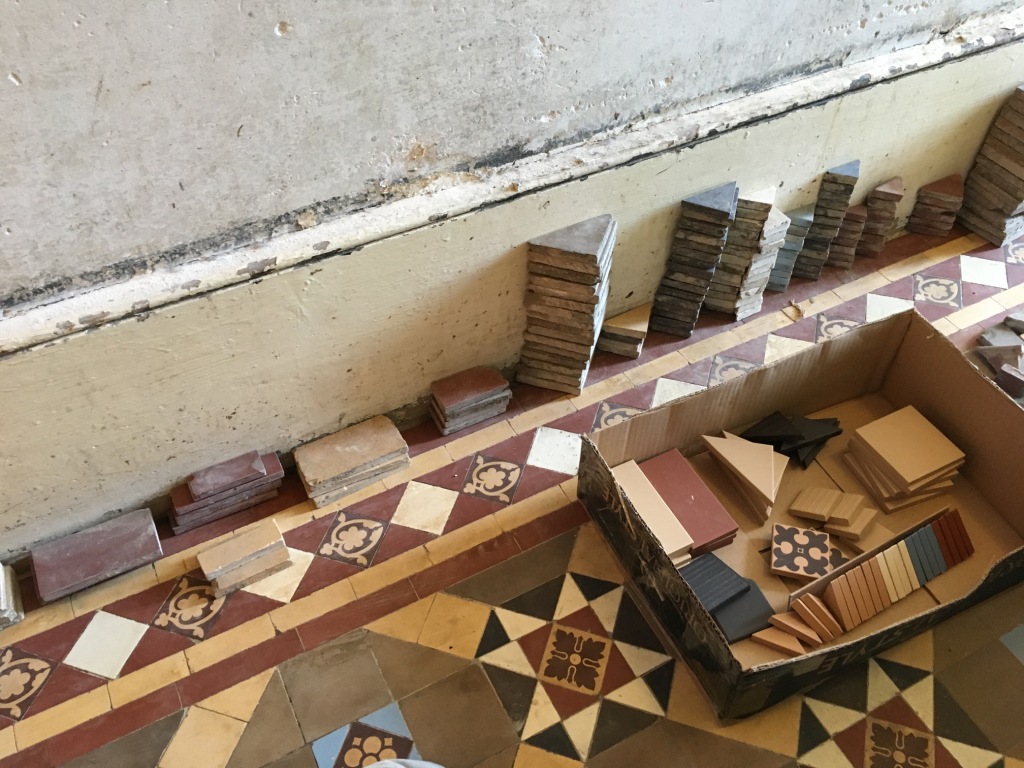
Victorian Tiled Hallway Floor During Rebuild in Epsom


Cleaning a Victorian Tiled Hallway Floor

The next day I soaked all the tiles with tile doctor Acid Gel and left to dwell for 30 minutes. This was to work into the porous areas and to break down years of dirt. Then attaching a very coarse 100-grit diamond encrusted pad attached to a rotary floor machine I cleaned the tiles with a dilution of Tile Doctor Pro-Clean. This process skims away a small layer of the tiles thus the dirt too. All the soil was extracted from the floor using a wet vacuum. I repeated this process twice for maximum effect. The customer was amazed at the result and I wasn’t finished yet. When wet the contrast between the white tiles and dark were astonishing, however this was temporary so I made sure the customer aware that without a sealer they would look washed out and colourless. I left the scene overnight with a couple of warm air movers in place to fully dry out the tiles.


Sealing a Victorian Tiled Floor

The tiles need to be dry before sealing so the next day my first action was to test the floor for moisture using a damp meter. They passed and were ready to take a sealer, so I discussed the different options and finishes with the customer. It was a very interesting house, full of retro artefacts so we needed something that would blend in, more importantly she had four children and a husband who bought a cycle through the house twice a day. I recommended Tile doctor seal and Go Extra. It's super tough, offering great protection and gives a subtle sheen that I felt would suit the house. Three coats later and I was done, closing the door behind me as everyone was at school and work.

Victorian Tiled Hallway Floor After Rebuild in Epsom Victorian Tiled Hallway Floor After Rebuild in Epsom

I popped back later that evening to discuss the job. The newly applied sealer had intensified the depth of colour in the Victorian tiles and returned the brightness to the floor. She was very pleased and even gave me a carrot cake to take home with me.

Victorian Tiled Hallway Floor After Rebuild in Epsom


Source: Victorian Tile Cleaning and Restoration Service in Epsom, Surrey
Monday, February 25, 2019

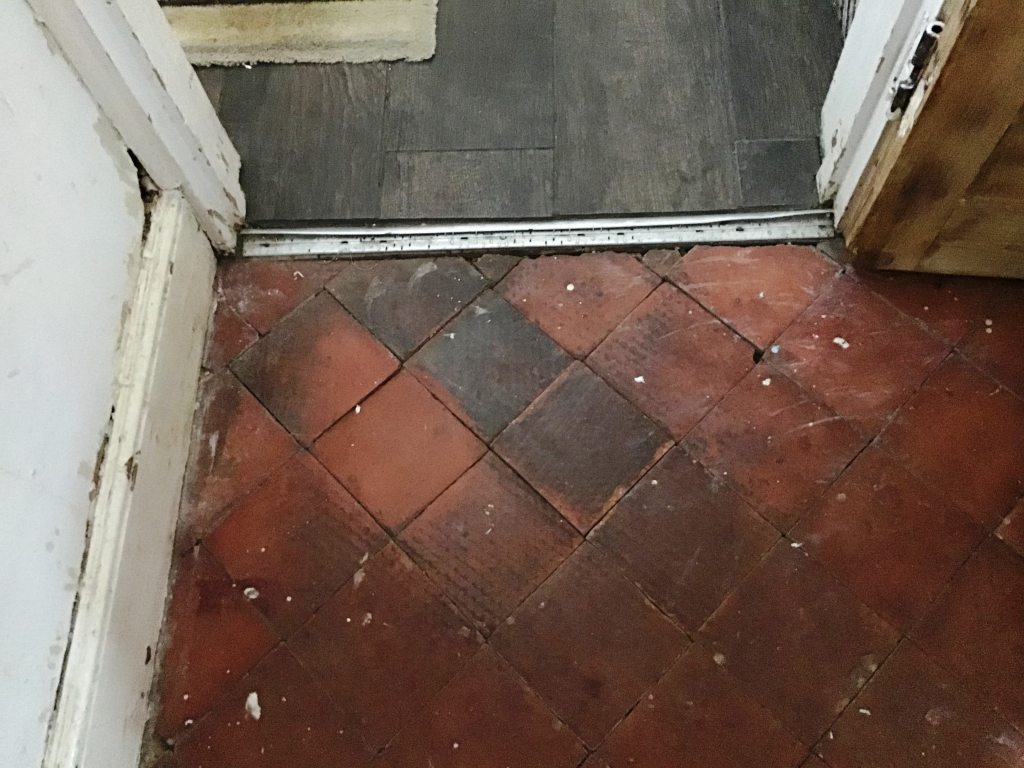
Repairing a Flood Damaged Quarry Tiled Floor in Bearwood, Birmingham

My client contacted me regarding their quarry tiled floor which hadn't been in a good condition for some time. A recent flood in the house, caused by a ruptured pipe in an upstairs boiler had only added to the problem. As you can see from the before pictures, the floor was in a sorry state. On the plus side the flood had led to an insurance claim which would cover the cost of the restoration.

I visited the property and did a test clean on a section of Quarry tiles which came up well. The client was happy the result and agreed to go ahead, my quote was agreed, and the job booked in. The property was in Bearwood which is in the southern part of the Birmingham suburb of Smethwick.

Flood Damaged Quarry Tiled Floor Before Cleaning Bearwood


Cleaning and Repairing a Quarry Tiled Kitchen Floor

The client also needed some Quarry tiles replacing due to them being broken and damaged. So before returning my first task was to source some replacement quarry tiles that would be a good match for the existing. Fortunately Quarry tiles are still popular and I was able to find a set of reclaimed tiles that would make good replacements.

I was able to get the replacements delivered in time for the job starting which was just as well as my first task would be to repair the floor. Fitting the replacements was tricky work as some of the tiles were up to two inches thick and came in various sizes and so had to be cut to size with a wet tile cutter. The tiles were a good match though and they were set in place. Later that day I was able to grout them in using a matching grout along with some other areas that needed re-grouting. By the end of the first day the floor was already looking much improved.
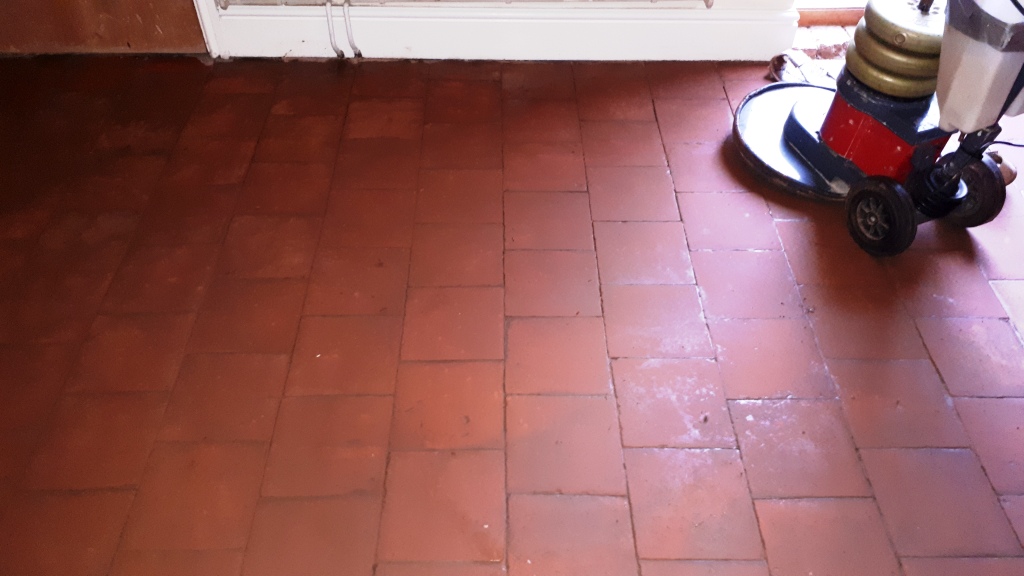
Flood Damaged Quarry Tiled Floor During Repair Bearwood Flood Damaged Quarry Tiled Floor During Repair Bearwood

The next day the floor was cleaned with a strong solution of Tile Doctor Pro-Clean. The solution is left on the tiles to dwell for about ten minutes so it can start to soak into the deep-seated dirt and break it down. The tiles were then scrubbed with a black pad fitted to a weighted rotary machine. The grout was also cleaned at this point using more Pro-Clean and a hand-help scrubbing brush.

There was also a fireplace hearth that needed cleaned, this also had to be cleaned by hand as the machine was too large. The floor was then rinsed with water and the resultant slurry extracted with a wet vacuum.

Flood Damaged Quarry Tiled Floor Before Cleaning Bearwood

The last part of the cleaning process was to give the tiles and acid-wash using a dilution of Tile Doctor Grout Clean-Up. This is an acidic product that can remove mineral staining and will also counter any alkaline salt deposits in the pores of the tile that could surface as the floor dries later. The floor was rinsed again and allowed to dry out for two days before I returned.


Sealing a Quarry Tiled Hallway Floor

On the final day I first confirmed the Quarry tiles had dried out were ready for sealing. I then sealed the tiles using Tile Doctor Colour Grow which is a fully breathable sealer that would protect whilst allowing moisture in the floor to rise through the tile. This sealer will also enhance the strong natural colour of the quarry tiles. The tiles were quite porous so four coats of sealer were needed, then after drying the floor was buffed with a white pad.

Flood Damaged Quarry Tiled Floor After Restoration Bearwood

The work transformed the floor and my customer was over the moon with the end result.

Flood Damaged Quarry Tiled Floor After Restoration Bearwood

For after-care I left the customer with a complimentary bottle of Tile Doctor Neutral Tile Cleaner. This is a pH neutral product that is safe to use on sealed surfaces and won’t prematurely erode the sealer.


Source: Quarry Tile Cleaning and Sealing Service in Bearwood, Birmingham

Friday, August 10, 2018

Cement Screed Covered Victorian Floor Restored in Birmingham

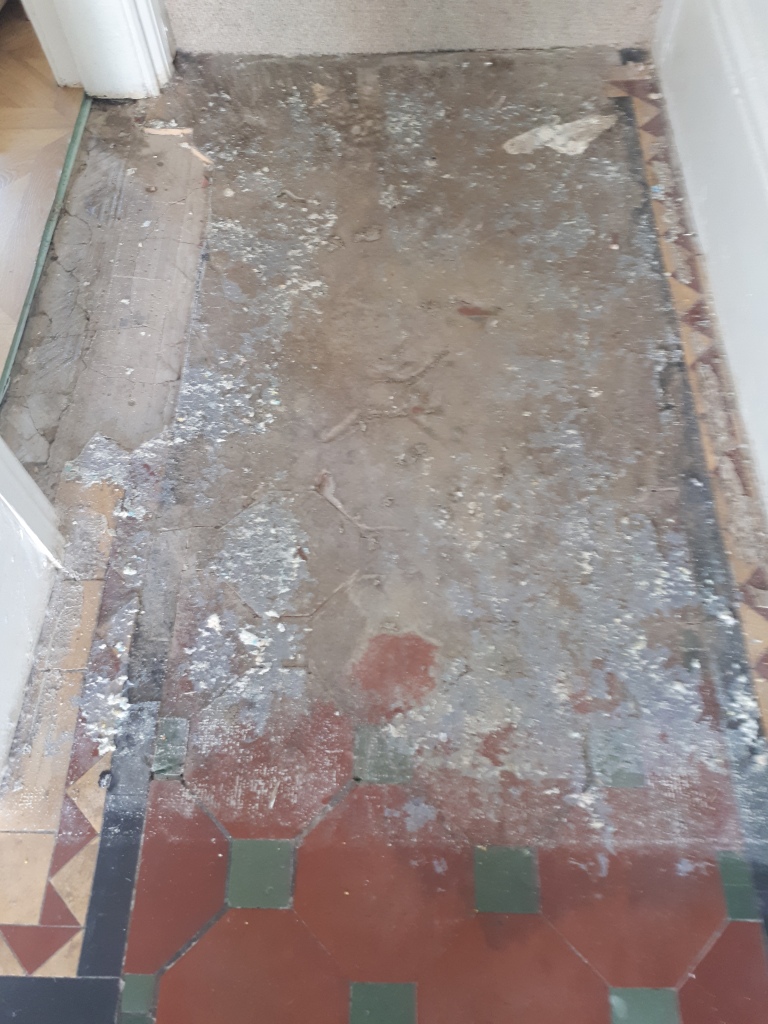
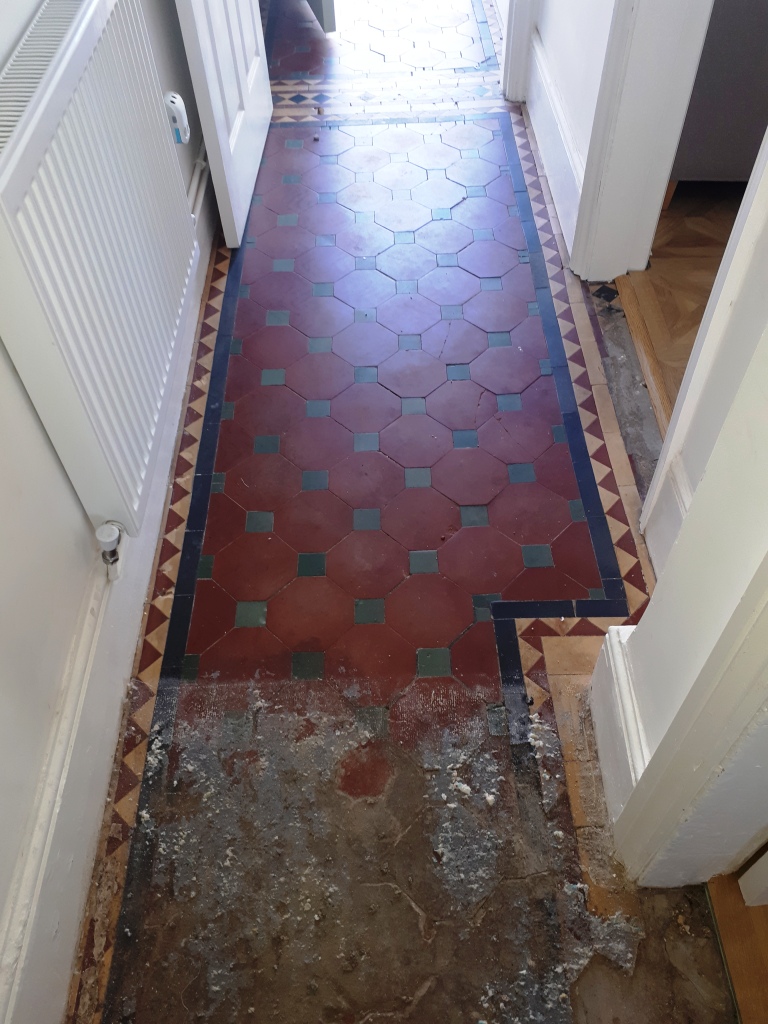
This customer got in touch with me to see if there was anything I could do to restore a Victorian tiled floor they had discovered under carpet in their hallway. Interestingly they had been told previously that the floor was beyond repair and had been quoted thousands of pounds to have it completely ripped up and replaced.

Victorian Hallway Before Restoration Bearwood Victorian Hallway Before Restoration Bearwood

I visited the property in Bearwood near Smethwick, to take a look and could see that there was a section under a cement screed. The floor was in a truly sorry state, so I could see why the other company were not keen on restoring it. Undeterred I did a test clean to see if I could remove the screed which was encouraging however without removing all the screed it would not be possible to see what condition the tiles underneath were in. I agreed with the customer to order some replacement tiles which were needed along with extra ones just in case. The job would take a few days to allow for cleaning, repairing, drying out and sealing. The client wasn’t too optimistic, but I reassured them we could definitely get a good result.

Victorian Hallway During Restoration Bearwood

Cleaning and Repairing a Victorian Tiled Hallway

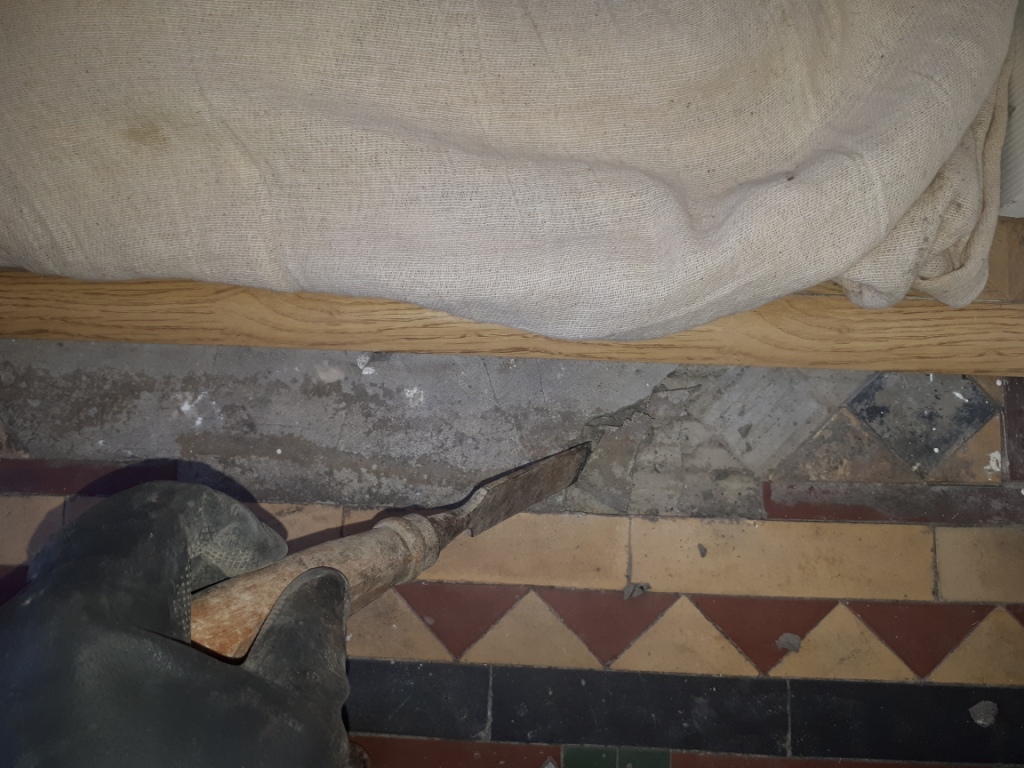
The first day was spent removing the cement screed which was quite thick in parts, so I went down the route of steaming it first to help soften the covering and then carefully scraping it off. This was quite labour intensive, but it did the job. Once the cement was removed I was left with some tiles that were ok but quite a few needed to be replaced.

Victorian Hallway During Restoration Bearwood Victorian Hallway During Restoration Bearwood

There were also two doorways, one that needed completely relaying and one needed part relaying. Some of the tiles needed to be cut to size, there were many tiles that needed resetting and re-grouting along with grout being applied to the new tiles.

Victorian Hallway During Restoration Bearwood

The next day the tiles were deep cleaned with a 50:50 combination of Tile Doctor Pro-Clean mixed with Nanotech HBU which stands for Heavy Build-Up Remover, which was quite appropriate in this case. This cocktail of tile cleaning products was left to dwell on the tiles for a while then worked in with a black scrubbing pad fitted to a weighted rotary machine. The floor was then rinsed off with water and then the soil extracted with a wet vacuum.

My next step was to give the floor and acid wash to remove any old grout smears and neutralise other mineral contaminates such as salts that can get deposited on the surface of the tiles as moisture evaporates as the floor dries. This is always a risk with old floors where no damp proof membrane exists. To do this I applied a dilution of Tile Doctor Grout Clean-Up which is scrubbed into the tiles with a deck brush and then rinsed off the floor with water and a wet vacuum. The floor was then left to dry out for a couple of days.

Sealing a Victorian Tiled Hallway Floor

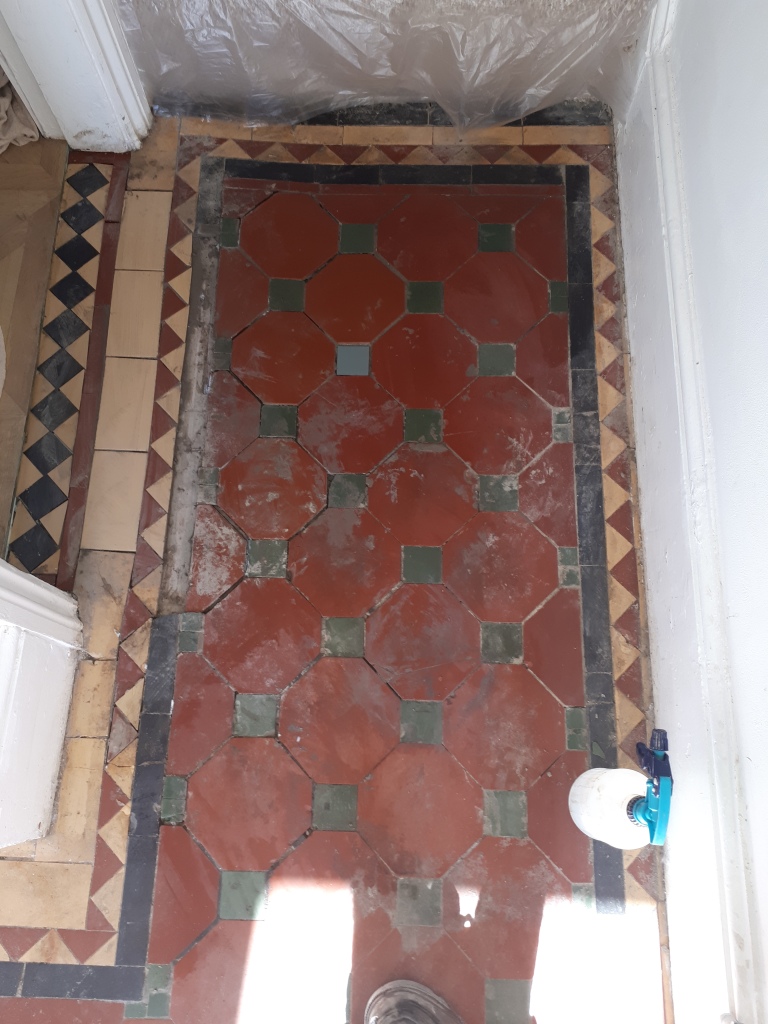
I returned to seal the floor and after check it had dried sufficiently applied three coats of Tile Doctor Colour Grow sealer. This sealer seeps into the pores of the tile enhancing the colours and leaves a matt finish which the customer had previously specified. The floor was then buffed with a white pad and the customer left with a bottle of Tile Doctor Neutral Tile Cleaner to clean the floor with moving forward.

Victorian Hallway After Restoration Bearwood Victorian Hallway After Restoration Bearwood

The customer was delighted with the results and left the following feedback on the Tile Doctor feedback system.

"Kieron has done a fantastic job of our Victorian hallway tiles. We had been quoted several really high prices by other companies, but Kieron’s quote was a fraction of these. I initially wondered whether this meant the job wouldn't be as good but after 3 days of solid work the results are fantastic! He managed to transform it to its former glory, a hallway that was partly cemented over, had missing and loose tiles all over the place and was filthy. He definitely does a lot more than just cleaning! We couldn't be happier with the results!"


Victorian Hallway After Restoration Bearwood


Source: Victorian Tile Cleaning and Restoration Service in Birmingham