Sunday, February 21, 2021

Grout Restoration and Recoloring

Grout restoration and recoloring can be a major concern whether you just bought an older home or have developed dirty, dingy lines between your tiles over time. Grout is not just the glue that holds your tiles together; it can also be an important decorative element in your floors and walls. Unfortunately, grout is also prone to absorbing liquids and aging as it comes into contact with air, water and chemicals, which can result in an unsightly appearance.

Stained and discolored grout is particularly frustrating because it can poorly affect the visual appearance of the space in such a dramatic fashion. Fortunately, as you’ll find out below, there are several DIY methods ranging from the cheap and easy to the slightly more expensive that anyone can try to restore their gout to its former glory.

What You'll Need:

  • Water
  • Vinegar
  • Heavy-duty cleaner
  • Acid-based cleaner
  • Grout dye
  • Grout Respirator

Simple Fixes: Vinegar and Water

If you have a simple case of grout discoloration that has resulted from stagnant water in the bathroom or a spill in the kitchen, a first line of defense is a solution of water and vinegar. Mix one part warm water with one part vinegar in a bucket, and scrub the affected area with a soft brush or sponge. Repeat as necessary, then rinse and dry.

Other Options: Chemicals Cleaners

For severely discolored grout, chemical solvents might be the answer to restoring the grout to its original color. Start off with heavy-duty cleaners intended for removing rust and calcium deposits, like those available at most grocery stores. Scrub carefully without damaging the tiles. If this doesn’t do the trick, kick it up a notch with a powerful acid-based cleaner. When using this type of cleaner, be cautious: wear rubber gloves and make sure you have adequate ventilation. You’ll also want to test these cleaners on a small piece of tile first to make sure they won’t be damaged.

Grout Dyes

Still can’t get that grout white, light-brown or any other desired color? Try one of the grout dyes that are readily available at hardware stores. If you don’t have the time or energy to replace the grout completely, choose one of these colorants (available in white, gray and many other colors) to brighten up the appearance of your floor. Start by thoroughly cleaning and drying the entire working surface. Then carefully apply the colorant to the grout (avoiding tiles) with a brush, let dry and enjoy. A good quality colorant can retain its pigment for over 10 years.

Repairing Cracked Grout

If your grout is also cracking, flaking and crumbling, then it can’t just be restored: it will need to be replaced. First, verify that your damaged grout isn’t a sign of severe water damage under the tiles, which would necessitate a much more intensive job. If the floor or wall is fine, then use a utility knife to scrape out the old, damaged grout. Mix up the new grout and spread it in between the tiles with a trowel, quickly wiping the excess away with a sponge. Make sure to take care of any drips within 30 minutes so that the grout doesn’t set on the tile.


Source: www.DoItYourself.com

Saturday, February 20, 2021

How to use a Pin Gun to remove Self-Levelling Compound from a Quarry Tiled Floor

We were contacted by a client from Formby asking for advice on how to remove a thick layer of floor leveller from her Quarry tiled floor. I suspect at some point in the past a previous owner had decided to cover the tiles with lino and a cement-based levelling compound was applied to level the floor first. My client had tried to remove it herself but found it very hard going and after realising she had quite a project on her hands decided to call us instead and see if we could help with the restoration.

 
Quarry Tiled Floor During Self-Levelling Compound Removal Formby

I worked out a quote for the client which would include removing the self-levelling compound, cleaning up the tiles and then sealing them to improve its appearance and protect it going forward. The quote was accepted, and a date agreed for the restoration to be completed which would take two days.


Cleaning and restoring a Stone Tile Kitchen Floor

We have a variety of tools that we can use for removing cement but in this case, I decided to use an air operated pin gun. The head of the gun has long pins of different length which are fired at the floor gently chipping away at the floor compound, this made short work of breaking up the cement so it could be swept away. A lot easier than the method the client had previously tried.

Quarry Tiled Floor During Self-Levelling Compound Removal Formby Quarry Tiled Floor During Self-Levelling Compound Removal Formby

With the floor clear of cement, it was given an acid wash with Tile Doctor Acid Gel scrubbed in with a buffing machine fitted with a black pad. The acidic formula cleans up the stone of old cement including fine particles of dust. Afterwards the gel was rinsed off the floor with water and extracted with a wet vacuum.


Sealing a Stone Tiled Kitchen Floor

We let the floor dry out overnight and returned the next morning to apply the sealer. For the best results, the stone needs to be dry so before sealing I always take several moisture readings with a damp meter to make sure. The results were good so the first of what would be three coats of sealer were applied to the floor. I used Tile Doctor Colour Grow for sealing, it is an impregnating sealer that works by occupying the pores in the store thereby protecting it from within, it also brings out the colour in the stone.

Once done the floor looked great, the old self-levelling compound was gone and the rich colours in the tile had been restored. In fact is was only when finished did we realise these were in fact Baked Clay Quarry Tiles, minerals are added during manufacturing to give then colour, although 95% clay they are very tough like stone. The client was over the moon with the outcome, the floor had been restored to its’ former glory.

 
Quarry Tiled Floor After Self-Levelling Compound Removal Formby

For aftercare I recommended the use of Tile Doctor Neutral Tile Cleaner to keep the floor in good condition. It is pH neutral so will ensure the newly applied sealer is not compromised and the floor will continue to look good for a long while to come.


Saturday, February 6, 2021

Installing Mexican Tile: What You Should Know

Mexican tiles or Talavera tiles are famed for their bright colors and uniqueness.

Variations

No two Mexican tiles are the same because they are all made and decorated by hand. They are mostly quite small – up to 6inches square. As well as minor color variations, sizes can differ. The glaze can appear crazed (*see note below), some tiles are warped or bowed, and it is not unusual to find cracks in Mexican tiles. Even when sets of tiles are produced they are all slightly different from each other.

Best Use

Mexican tiles are unique and very colorful so they tend to be used to create highlights. A very popular use is to frame house numbers and yet they lend themselves equally well to covering whole walls in a riot of color. The tiles are water proof so they are used in bathrooms and around swimming pools as well as in kitchens where they make excellent back splashes.

Versatility

Mexican tiles can be applied to any surface that will take a setting adhesive. With standard tiles it is necessary to use spacers to create space for grouting but the irregular sizes and shapes of Mexican tiles make that unnecessary.

Laying Out

If you are trying to create a particular pattern with Mexican tiles it is advisable to lay the pattern out on a bench or table to see what the final result might look like. If many tiles are warped or don’t lie flat the lay out will show where there will be tiles standing proud and, if that is not a desired effect, the tiles can be moved around to minimize the effect.

Use on a Flat Surface

Mexican tiles have been used to surface tables but when they are used on flat surfaces the tiles need to be supported to prevent a heavy object that has been placed on the table from breaking tiles that are warped. The tiles are unsuitable for kitchen surfaces because they are not smooth and are difficult to keep hygienically clean.

In the Garden

Mexican tiles can be used to create highlights on fountains, garden furniture, patios and planters. Surprisingly they make very hard wearing additions to footpaths if they are set in cement or concrete.

Easy Care

As pretty as Mexican tiles are, they are simplicity itself to care for. Tiles that are outdoors can be almost ignored because the normal rainfall is enough to keep them clean and sparkling. Indoors all that is needed is an occasional wash with mild soapy water. Abrasives should never be used on Mexican tiles because they will eventually destroy the glaze and the tile would be spoiled by water penetration.

If you are looking for something bright and different, why not explore Mexican tiles. Maybe you can install one on each of the risers of your staircase or create a colorful panel around your house number or name.

*Crazed – This is an industry wide term used to describe a random network of fine cracks that can appear in the glaze of ceramic objects. Crazing can be the result of over-heating the kiln during the firing when the glaze cannot expand as quickly as the base material of the object. The apparent crazing on Mexican tiles is usually the result of an over generous application of glaze which allows the top surface bake and then be cracked by the lower levels of glaze expanding. The crazing could be limited to small areas of the product where an extra coat of glaze has been made in error. Crazing does not weaken the ceramic object but they should be sealed before use to prevent the penetration of liquids that might weaken of discolour the object.


Source: www.DoItYourself.com

Monday, February 1, 2021

How to Restore Old Quarry Tiles Covered by Vinyl

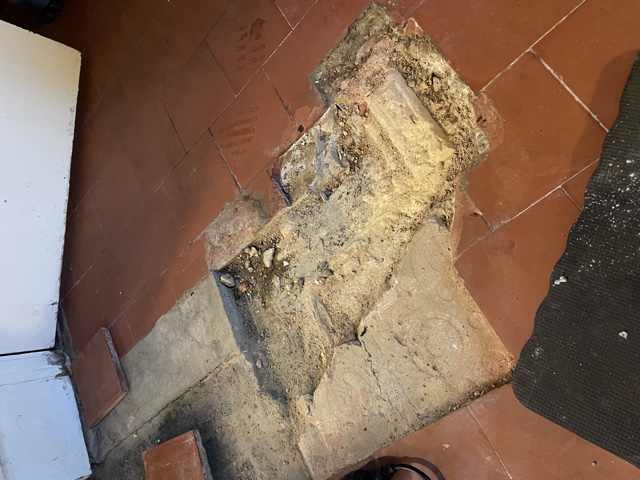
The owner of this property in the South London suburb of Cheam got in touch about restoring a Quarry tiled floor that had been covered with Vinyl tiles. After surveying the floor, it became clear that some of the original Quarry tiled floor was missing and had been replaced with concrete before covering with Vinyl.
     
Vinyl Covered Quarry Tiled Floor Before Restoration Cheam Vinyl Covered Quarry Tiled Floor Before Restoration Cheam

To fully restore the Quarry tiles floor, it would therefore be necessary to dig out the concrete sections and tile with matching quarry tiles which had been supplied by the client. Once done we would then need to renovate both the old and the new sections of floor and seal them to achieve a consistent appearance. I was also asked to dig out an old matwell and prepare it for a new mat as part of the work.  

This was a large job, but following a site visit I was able to provide my client with an accurate price and arranged a time to carry the work out which would take five days.
    

Removing Vinyl Tiles

The first part of the job was to lift the existing Vinyl tiles which had been laid on top of the Quarry tiles. I used a heat gun to help loosen the adhesive and then assisted with a steamer scrubbed Tile Doctor HBU Nanotech stripper into the floor to remove the glue and bitumen from the surface of the newly exposed Quarry tiles.
    
Vinyl Covered Quarry Tiled Floor During Restoration Cheam Vinyl Covered Quarry Tiled Floor During Restoration Cheam


Restoring the Appearance of a Quarry Tiled Floor

The soiled solution was extracted with a wet vacuum and I followed up by giving the Quarry tiles an acid rinse using Tile Doctor Acid Gel. The Gel is applied to the tiles and then scrubbed in with a Black pad fitted to a rotary machine. This process removes old traces of cement and grout from the quarry tiles and further cleans them up. After this the floor was rinsed thoroughly and the soil extracted with a wet vacuum.
   
Vinyl Covered Quarry Tiled Floor During Restoration Cheam Vinyl Covered Quarry Tiled Floor During Restoration Cheam

The next focus was on digging out the concrete areas mentioned earlier and then preparing the subfloor for tiling with self-levelling compound, which of course needs time to set. Once ready the replacement tiles were fixed in place making cuts as necessary and placing them to follow the original floor pattern. This may sound quite this sound straight forward, but this part of the job took some time to complete. The floor was left for a couple of days so the new tiles could set and the whole area could dry out before sealing.

 
Vinyl Covered Quarry Tiled Floor After Cleaning Cheam


Sealing a Quarry Tiled Hallway Floor

I returned later to seal all the Quarry tiles with Tile Doctor Colour Grow which brings out the deep Orange colours in the tiles whilst adding protection from staining and ingrained dirt. This sealer works by occupying the pores in the tile so dirt cannot become ingrained there. Four coats of sealer where applied across the whole floor leaving a nice matt finish that was consistent across the whole floor.

Vinyl Covered Quarry Tiled Floor After Sealing Cheam Vinyl Covered Quarry Tiled Floor After Sealing Cheam

Before leaving I discussed with the client the best way to maintain the floor in the future and recommended the use of Tile Doctor Neutral Tile Cleaner which is a pH neutral cleaner. This is important as its gentle enough to use frequently and won’t strip off the newly applied sealer like many household floor cleaners will. Its supplied in concentrated form so a small amount of cleaner goes a long way.

The client was delighted with the results, they were very pleased to see the back of the tired Vinyl floor and pleased the floor now looked consistent throughout.