Wednesday, August 29, 2012
How to Restore Victorian Floor Tiles
By Kevin McDermott, eHow Contributor
Victorian floor tiles are renowned for their unique designs and colors, but if the glaze over the tiles becomes dull and cloudy, they lose their impact. One way to restore the luster of those tiles without changing the design and colors is to apply new gloss over the surface. The old glaze must be dulled and thoroughly cleaned first, to allow the new gloss to stick. Use oil-based floor-grade polyurethane, which takes a long time to dry but leaves a much harder glaze than acrylic gloss.
Things You'll Need
Belt sander with a medium sandpaper belt
Trisodium phosphate cleanser
Scrub brush
Mop
Oil-based, floor-grade polyurethane gloss
Paintbrush
Extra-fine sandpaper
Instructions
1
Sand the surface of the tiles with your belt sander and medium sandpaper. Don't try to sand off the whole top layer; just get the tiles dull and clean. They should end up looking less shiny than they were, but otherwise the same.
2
Scrub down the tiles with a solution of 1 cup of trisodium phosphate to 1 gallon of warm water. Rinse-mop the floor very well. Let it dry for 24 to 48 hours.
3
Spread a coat of polyurethane over the tiles, using a paint brush. Brush it on tile by tile, keeping the polyurethane very thin and even, and avoiding the formation of bubbles. Let the polyurethane set for 48 hours.
4
Dull the surface of the dried polyurethane with extra-fine sandpaper, using quick, small strokes until it turns slightly milky. Wipe up the dust. Re-apply a second layer. Let it dry for 48 hours.
5
Dull the surface of the second layer of polyurethane in the same manner as before. Clean up the dust. Brush on a third and final layer of polyurethane. Let it set for another three to four days before using the floor.
Source: www.eHow.com
Tuesday, August 28, 2012
How to Clean a Limestone Floor
By Erica Roth, eHow Contributor
Limestone creates a natural, elegant look for your home when used as flooring material. Limestone floors are soft and pick up dirt and everyday grime more quickly than marble or hardwood floors. Maintain your limestone floor with routine care, reserving heavy-duty cleaning for serious spills and stains.
Things You'll Need
-Broom
-Microfiber dust cloths
-Paper towels
-Sponge
-Mop
-Dish detergent
-Bucket
-Bleach
How to Clean a Limestone Floor
1
Sweep your limestone floor on a regular basis, daily if possible. Sand, leaves and other dirt that may be tracked inside can scratch the floor and dull its shine when left on the surface for too long. Use a dry dusting mop system with microfiber cloths as an alternative to a broom.
2
Attend to wet spills to avoid penetration into the limestone and possible staining. Blot water and other liquids with absorbent paper towels. Remove sticky residue with a damp sponge and a few drops of dish detergent.
3
Remove mud and other debris with a soft mop and a soapy mixture of warm water and dish detergent. Avoid using abrasive cleaners or solvents that are highly acidic as these solutions can harm the finish of the limestone.
4
Clean mildew and plant-based stains such as algae with a weak bleach solution. Combine 1/4 cup bleach with a gallon of water and use the mixture to mop the limestone floor.
Source: www.eHow.com
Limestone creates a natural, elegant look for your home when used as flooring material. Limestone floors are soft and pick up dirt and everyday grime more quickly than marble or hardwood floors. Maintain your limestone floor with routine care, reserving heavy-duty cleaning for serious spills and stains.
Things You'll Need
-Broom
-Microfiber dust cloths
-Paper towels
-Sponge
-Mop
-Dish detergent
-Bucket
-Bleach
Instructions
How to Clean a Limestone Floor
1
Sweep your limestone floor on a regular basis, daily if possible. Sand, leaves and other dirt that may be tracked inside can scratch the floor and dull its shine when left on the surface for too long. Use a dry dusting mop system with microfiber cloths as an alternative to a broom.
2
Attend to wet spills to avoid penetration into the limestone and possible staining. Blot water and other liquids with absorbent paper towels. Remove sticky residue with a damp sponge and a few drops of dish detergent.
3
Remove mud and other debris with a soft mop and a soapy mixture of warm water and dish detergent. Avoid using abrasive cleaners or solvents that are highly acidic as these solutions can harm the finish of the limestone.
4
Clean mildew and plant-based stains such as algae with a weak bleach solution. Combine 1/4 cup bleach with a gallon of water and use the mixture to mop the limestone floor.
Source: www.eHow.com
Sunday, August 26, 2012
Installing Porcelain Tile
Installing porcelain tile requires some methods and tools that are different than installing ceramic tile. If you are considering installing porcelain tile yourself you should make yourself familiar with all the aspects of installing ceramic tile, plus the additional porcelain tile installation information below.
Porcelain tile hardness
Porcelain floor tile as well as porcelain wall tile are made up of about 50% of a product called feldspar with the other half containing various high quality light firing ball clays. Also because porcelain is pressed under higher pressure than other tiles it is more dense than regular ceramic tile. The higher firing temperatures also give porcelain tile flooring a much lower rate of absorption. These traits that differ in ceramic vs porcelain tile cause us to consider additional factors when installing porcelain tile.
Beginning your porcelain tile installation
First the surface to be tiled must be clean, dry, flat and structurally sound (does not flex when weight is applied), secure, and free from any type of contamination that can act as a bond breaker or bond inhibitor. If there is any substance present that could inhibit the bond of the mortars used, it must be completely removed. Suitable substrates include, but are not limited to, exterior grade plywood, cement backer board, concrete, mortar beds, cement plaster, and existing ceramic. Just as with installing any other ceramic tile each of these acceptable substrates may require various different methods of preparation.
Be sure to get the right mortar. Depending on the application and conditions present, the use of a liquid-latex fortified sanded cement mortar, polymer modified sanded cement, medium bed, or epoxy mortar is recommended for the installation of Porcelain tile. It can also be installed in mortar bed (i.e., thick bed) applications. Consult the installation materials manufacturer for additional information and installation instructions. Ensure that adequate coverage of mortar is present under the tiles to provide proper bedding coverage and problem-free performance. We recommend a quality premium polymer modified thinset mortar for most normal porcelain tile installations.
Next you will lay out your project just as you would with any other tile installation project. Take special note of any cuts that will need to be made (this the biggest different between porcelain vs ceramic tile installation projects). Cutting porcelain tiles is more difficult than regular ceramic tile.
Cutting porcelain tile
When cutting porcelain tile be sure to always use a very sharp or even a new blade. One of the biggest contributors to breaking porcelain tile when trying to install is due to the wrong or a dull blade. Another common problem is if your cutting head bearings are worn it can cause vibration which will contribute to breakage when cutting.
In most cases a wet saw is the best tool to cut porcelain tile with. We recommend using a continuous rim diamond tip blade designed for porcelain tile and glass as it has a softer rim that exposes a fresh diamond cutting edge when used on hard dense porcelain. I also brings a smoother cut and less chipping as the diamonds are smaller and closer together.
Also when cutting porcelain tiles using minimum but firm pressure will bring the best results.
Grouting porcelain tile
After you have finished installing porcelain tile, a polymer-modified, liquid-latex fortified or epoxy grout should be used. While grout-staining problems are extremely rare when using Porcelain tile products, a small test patch is recommended when using a dark grout over a light-colored tile, or vice versa. The test patch will also verify cleanability of the grout with heavily textured tile surfaces.
Porcelain Tile Installation
Just as with laying ceramic tile, laying porcelain tile can be tedious and time consuming work, there are many accepted installation techniques, and in most cases there is a reason for that. The job conditions, skill level of the installer (maybe you!) the products being used, and the expected usage after installation will all contribute to the final installation methods. We will go much more in depth into the different ways of laying tile for your tile flooring project in our how to install tile flooring section. If you have purchased porcelain tile flooring or porcelain wall tile for yor project yo will need to know about some unique aspects of porcelain ceramic tile before you attempt to install it.
Just as with laying ceramic tile, laying porcelain tile can be tedious and time consuming work, there are many accepted installation techniques, and in most cases there is a reason for that. The job conditions, skill level of the installer (maybe you!) the products being used, and the expected usage after installation will all contribute to the final installation methods. We will go much more in depth into the different ways of laying tile for your tile flooring project in our how to install tile flooring section. If you have purchased porcelain tile flooring or porcelain wall tile for yor project yo will need to know about some unique aspects of porcelain ceramic tile before you attempt to install it.
Porcelain tile hardness
Porcelain floor tile as well as porcelain wall tile are made up of about 50% of a product called feldspar with the other half containing various high quality light firing ball clays. Also because porcelain is pressed under higher pressure than other tiles it is more dense than regular ceramic tile. The higher firing temperatures also give porcelain tile flooring a much lower rate of absorption. These traits that differ in ceramic vs porcelain tile cause us to consider additional factors when installing porcelain tile.
Beginning your porcelain tile installation
First the surface to be tiled must be clean, dry, flat and structurally sound (does not flex when weight is applied), secure, and free from any type of contamination that can act as a bond breaker or bond inhibitor. If there is any substance present that could inhibit the bond of the mortars used, it must be completely removed. Suitable substrates include, but are not limited to, exterior grade plywood, cement backer board, concrete, mortar beds, cement plaster, and existing ceramic. Just as with installing any other ceramic tile each of these acceptable substrates may require various different methods of preparation.
Be sure to get the right mortar. Depending on the application and conditions present, the use of a liquid-latex fortified sanded cement mortar, polymer modified sanded cement, medium bed, or epoxy mortar is recommended for the installation of Porcelain tile. It can also be installed in mortar bed (i.e., thick bed) applications. Consult the installation materials manufacturer for additional information and installation instructions. Ensure that adequate coverage of mortar is present under the tiles to provide proper bedding coverage and problem-free performance. We recommend a quality premium polymer modified thinset mortar for most normal porcelain tile installations.
Next you will lay out your project just as you would with any other tile installation project. Take special note of any cuts that will need to be made (this the biggest different between porcelain vs ceramic tile installation projects). Cutting porcelain tiles is more difficult than regular ceramic tile.
Cutting porcelain tile
When cutting porcelain tile be sure to always use a very sharp or even a new blade. One of the biggest contributors to breaking porcelain tile when trying to install is due to the wrong or a dull blade. Another common problem is if your cutting head bearings are worn it can cause vibration which will contribute to breakage when cutting.
In most cases a wet saw is the best tool to cut porcelain tile with. We recommend using a continuous rim diamond tip blade designed for porcelain tile and glass as it has a softer rim that exposes a fresh diamond cutting edge when used on hard dense porcelain. I also brings a smoother cut and less chipping as the diamonds are smaller and closer together.
Also when cutting porcelain tiles using minimum but firm pressure will bring the best results.
Grouting porcelain tile
After you have finished installing porcelain tile, a polymer-modified, liquid-latex fortified or epoxy grout should be used. While grout-staining problems are extremely rare when using Porcelain tile products, a small test patch is recommended when using a dark grout over a light-colored tile, or vice versa. The test patch will also verify cleanability of the grout with heavily textured tile surfaces.
Read more: www.FlooringProfessor.com
Thursday, August 23, 2012
Anti Slip for Tile at the Millennium Galleries, Sheffield
 |
 |
The museum buildings manager was concerned about slipping on the floor tiles in the main entrance lobby covering approx 144m2, the tiles are of a high gloss porcelain variety which are by their nature slippery when wet. We gladly responded to the request and applied the Tile Doctor Anti-Slip treatment to a small area so they could see for themselves how effective the treatment is. The solution we use is not an Anti Slip coating but an invisible treatment which only becomes active when wet. The management team soon came back with a positive response and gave us the green light to complete the remainder of the floor.

Before applying the Anti Slip treatment we cleaned the floor using Anti-slip Pre-cleaner diluted 1 part cleaner to 4 parts water, this was applied using a slow speed buffing machine fitted with a black buffing pad and then the floor was rinsed with water and left to dry for 30 minutes.
Once dry the Anti-slip solution was applied neat using a pump action spray, this was then worked into the tiles using a deck brush taking care to avoid splashing any exposed metalwork or glass. After 4 to 5 minutes the Lock-in solution was applied again diluted 1 part solution to 4 parts water and applied directly on top of the Anti-slip solution, this was worked into the tile using a black buffing pad. We used a low speed Victor Trojan Buffing machine to do this, the low speed reduces splashing.

The last step was to polish the floor with a white buffing pad and wash down with clean water to neutralise any remaining anti slip solution which was then removed with a Wet and Dry Vacuum.
Read more: Anti Slip for Tile in Sheffield
Wednesday, August 22, 2012
How to Clean Sandstone Tile
By eHow Contributor
Sandstone is a natural stone that can be used throughout a home to add a beautiful natural element in decorating inside as well as out. It's excellent for use around a pool or patio, as it's porous surface makes it non-slip. However, it does have some special care requirements to keep it looking its best.
Things You'll Need
Instructions
Tips & Warnings
Source: www.eHow.com
Things You'll Need
- Sandstone tile
- Water
- Sponge
- Neutral pH cleaners
- Dust Mop
- Mop
Instructions
- The first step to keeping sandstone clean is prevention. A good sealer applied after the sandstone is installed is a must, along with periodic resealing as most sealers can break down over time. If you purchase a home with sandstone already installed and don't know or can't determine when it was last sealed, check with an installer in the area to determine if you have a sealer that can be reapplied without stripping the old sealer, or if you need to have the old sealer removed completely before resealing.
- Sandstone may be a stone, but it has a relatively weak, porous structure. Sandstone counters are particularly prone to stains from liquid spills and wet items set on them. It can also be easily scratched if dust and dirt are allowed to accumulate, particularly on floors. Floors should be cleaned daily with a non-treated, dry dust mop. Wipe spills immediately with a damp sponge and warm water.
- Most outdoor sandstone is stained by organic materials, such as leaves, tree sap, or grass stains, or mold and mildew. Counter tops are frequently stained by greasy or oily stains, such as food or cooking oil. A traditional way of cleaning both these kinds of stains from sandstone is called poulticing. It involves using an absorbent material, such as talc, shredded white paper, or sawdust, mixing it with a cleaning agent (depending on the type of stain; see next step) and applying the mixture to the stain, making a mound about an inch thick. Plastic can be taped over the mixture. This method may need to be repeated several times.
- Hydrogen peroxide, 30/40 volume, which can be purchased from beauty supply outlets, can be used for mildew or mold and most organic stains. It acts as a bleach and removes most organic stains. Acetone, available at hardware stores, can be used for oily stains. Talc as an absorbent material works particularly well on oily or greasy stains.
- Deeply etched sandstone can be sanded down to eliminate the scratched area, but the area may end up a different color than the rest of the stone.
- Never use chlorine bleach as it can damage the sandstone. Also never use grout cleaner, or any cleanser with abrasives as sandstone is damaged by these chemicals. Avoid acidic cleaners as they will etch the stone. Lemon juice and vinegar are acidic and if spilled on counters, should be wiped up as soon as possible.
Tips & Warnings
- Start with the gentlest cleaning method first, before moving on to more aggressive methods or cleaners.
- Use a soft bristled brush to gently agitate warm water or a gentle cleaning solution in grout lines, to help loosen ground in dirt.
Source: www.eHow.com
Saturday, August 18, 2012
Tips for Maintaining Natural Stone
- Keep surfaces dust free.
- Dust mop regularly with soft, clean, lint-free mop. Tend to spills immediately.
- Use mats at entrances to trap dirt, sand, gravel, etc.
- Clean your natural stone on a regular basis with warm water and a clean non-abrasive cloth, sponge or mop.
- What do I use as an every-day cleaner? We recommend using a neutral cleaner specially formulated for natural stone which will help remove soils that normal dusting or damp mopping leave behind. Acidity / alkalinity or even abrasives in ordinary cleansers may cause etching or scratching. Ask your local stone retailer which neutral cleaner they recommend.
- Squeegeeing shower walls and floors after showering removes soap and chemical residues that can damage your stone. It is critical to clean and seal shower stalls on a regular basis due to their exposure to soaps and moisture.
- Polish, rather than wax, with a polishing system suited to your particular type of stone. If your marble, lime stone, or any other natural stone in your home or business appears dull, stained or scratched, Marin Stone Care can restore your stone to its original beauty and luster.
Wednesday, August 15, 2012
Limestone - Cleaning and Sealing
General
Limestone is reputed in the international market for its premium quality, toughness and durability. It is often the preferred choice for interior and exterior in both commercial and domestic for flooring, wall cladding, paving and facades of buildings, railway stations, pavement, landscaping and garden stone.
Limestone Maintenance
| Mix Remove and Go 50/50 with Nanotech Ultra Clean and leave in place for an hour before scrubbing and rinsing the floor with water. You may need to hire a Wet Vac machine to soak up the excess residue, then scrub and rinse with water again, cleaning the grout lines as you go. | 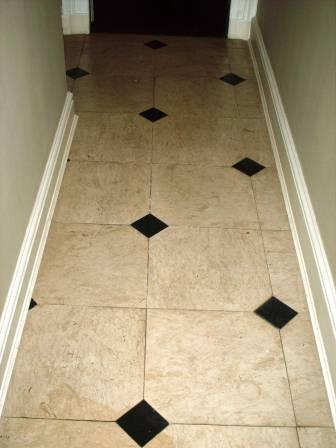 |
| Remove any cleaning solution using a wet-dry vac machine (any cleaning solution left on the surface may impact the performance of the sealer) then neutralise floor with clean water prior to sealing, remove with a wet-dry Vac machine and allow to dry overnight. | |
| Alternatively if you have the use of a 350 RPM (or higher) buffing machine use a Red Twister pad to take off the Old sealer and ground in dirt, add water to the area and then go over each Tile 3 or 4 times, then remove the dirty water using a Vac machine and rinse the floor. Next take off the Red pad and apply a White Twister pad, repeat the process with this pad followed by the Yellow Twister Pad, remove the water with a Vac machine and then finally complete the polishing by applying a Green Twister Pad and polish with a squirt of water. When polishing is complete proceed to clean the grout. | 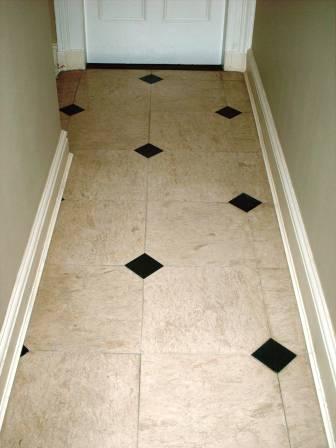 |
| When the floor is fully dry apply 2 coats of Tile Doctor Colour Grow colour enhancing sealer using a clean dry terry cloth (not the fluffy variety). Rub Sealant into the tile. Allow to dry before applying a second coat. Use a water test to achieve full cure sealability (F.C.S.). | |
| For regular cleaning use a sealer friendly cleaning product such as Neutral Tile Cleaner which has been especially formulated for the regular cleaning of Sealed Stone and Tile surfaces keeping them fresh with a pleasant mint scent. | |
| PLEASE NOTE: Most sealers break down after 2-3 years (depending on usage) and will need to be re-applied. | |
Source: Limestone Cleaning
Friday, August 10, 2012
Riven Slate Floor Cleaning in Lincoln
Slate floors especially riven slate can be a nightmare to keep clean as the uneven surface of a riven tile traps dirt and makes it difficult to clean. Our client in Lincoln had this issue, however as you will see from the pictures below we managed to get it looking like new again.
The client was so pleased he has booked us in to return and do some more work for him.
Source: Slate Floor Restoration in Lincolnshire
Slate Floor Cleaning
The Slate Floor Cleaning process involved a good cleaning with Tile Doctor Pro-Clean Tile and Grout cleaner, it’s an alkaline rather than acidic product that doesn’t harm the surface of the stone but is very effective at cleaning. We left the product to dwell for a while before giving the tile a good scrub to lift the soil and dirt trapped into the pores of the riven slate floor tile. Once the slate tile and grout were looking clean we gave the floor a good wash down to remove any remaining chemical and neutralise the floor. |
 |
| Slate Floor Before Cleaning and Sealing | |
|---|---|
Sealing the cleaned Slate Floor
We left the floor to dry overnight and came back the next day to seal it using Tile Doctor Pro-Seal which is gives the floor a natural look and really lifts and reveals the colours in the slate. You can see from the photographs the difference and how amazing the colours are. |
|
| Slate Floor After Cleaning and Sealing | |
|---|---|
The client was so pleased he has booked us in to return and do some more work for him.
Source: Slate Floor Restoration in Lincolnshire
Wednesday, August 8, 2012
How to Repair and Replace Travertine Tile
Sometimes, no matter how careful a person is to care for their travertine tile, the tile sustains damage and must be repaired or replaced. Loose or damaged tile is most often the result of issues with the subflooring or improper installation. Though it is not the easiest or most pleasant task in the world, it can be done. Fixing loose tiles and/or replacing broken ones as needed is the best way to preserve the rest of the tile.
How to Repair a Loose Tile
First, identify loose tiles by listening for noise when walked on or a hollow sound when the tile is hit. In most cases, replacing the tile all together is the best thing to do. If this is not possible for financial or aesthetic reasons, injecting an epoxy glue solution underneath the tile to re-bond it to the subfloor is the only other option.
The tools needed for this job are: a drill, carbide tipped blade equal to or slightly smaller than the grout joint size, a large construction syringe, a high quality two part epoxy, and matching grout.
On either side of the loose tile, carefully drill holes into the grout joints. Mix the epoxy solution according to the directions. Carefully inject epoxy into one hole, until enough works its way through the tile to come out the hole on the other side. It may be a good idea to use a golf tee in the other hole to ensure the epoxy solution fills all voids before coming out the other side.
Dig out the epoxy slightly and allow it enough time to cure. After the mixture cures, fill the holes with the matching grout to finish the job.
How to Repair a Damaged Subfloor
If the subfloor is damaged, it should be repaired before the initial installation of the tile floor, to prevent further complications and issues as the floor ages. If the subfloor damage has to be repaired after a floor installation, the tile must be removed to expose it, therefore creating more work in the long run.
Use tools such as a: reciprocating saw, circular saw, jigsaw, or handsaw to carefully remove any damaged subfloor material. Wear the appropriate safety to protect from injury. When removing the damaged subfloor, practice care to avoid damaging any adjacent areas that are in good shape.
After the damaged material is removed, replace it with new materials. Secure it accordingly.
Once the damaged subfloor has been replaced, follow tile installation instructions to install the new tile floor.
Source: www.Learn.BuildDirect.com
Tuesday, August 7, 2012
How to Install a Tile Marble Floor
By Kevin McDermott, eHow Contributor
Marble tile floors have been around for centuries. Even today, in an age of much simpler and less expensive options, marble remains synonymous with elegance and class. Installing marble is more complicated than installing ceramic or other types of tiles because the marble can't be cut on a standard tile cutter, instead needing a wet saw. Also, since the tiles are straight-cut in their manufacture, the tile surfaces have to be completely even with one another.
Things You'll Need
Instructions
Step One
Use the chalk line to divide the floor into four quadrants, laying two intersecting lines across, the middle of the floor.
Step Two
Spread down mortar at the intersection with your notched trowel, covering three or four square feet at the center of the floor with thin-set mortar. Keep the thin-set in one of the four corners of the intersection.
Step Three
Press a marble tile into the mortar bordered by two of the lines of the intersection. Set two spacers along one side of the tile. Press a second tile there, lining up the edges. Set a third tile alongside the others.
Step Four
Set the straight board over the three tiles so it spans all of them. Gently tap the board with your mallet to get the tiles flat and even with one another.
Step Five
Spread more mortar and set additional marble tiles, building out from the middle in a grid pattern and working toward the edges of the room. Put spacers between all of them. Stop after every group of three tiles and even them out with your mallet.
Step Six
Cut the tiles for the perimeter, by the walls, using your wet saw.
Step Seven
Let the tiles set overnight. Pull out the spacers.
Step Eight
Grout the tiles, spreading the unsanded grout over them with your grout float, forcing the grout into the spaces between the tiles and scraping it off the surface. Wipe up the excess grout with a damp sponge. Let it set for 24 hours.
Source: www.eHow.com
Marble tile floors have been around for centuries. Even today, in an age of much simpler and less expensive options, marble remains synonymous with elegance and class. Installing marble is more complicated than installing ceramic or other types of tiles because the marble can't be cut on a standard tile cutter, instead needing a wet saw. Also, since the tiles are straight-cut in their manufacture, the tile surfaces have to be completely even with one another.
Things You'll Need
- Chalk snapline
- Thin-set mortar
- Notched trowel
- Marble floor tiles
- Marble tile spacers
- Three-foot board (very straight)
- Rubber mallet
- Wet saw
- Unsanded grout
- Grout float
- Sponge
Instructions
Step One
Use the chalk line to divide the floor into four quadrants, laying two intersecting lines across, the middle of the floor.
Step Two
Spread down mortar at the intersection with your notched trowel, covering three or four square feet at the center of the floor with thin-set mortar. Keep the thin-set in one of the four corners of the intersection.
Step Three
Press a marble tile into the mortar bordered by two of the lines of the intersection. Set two spacers along one side of the tile. Press a second tile there, lining up the edges. Set a third tile alongside the others.
Step Four
Set the straight board over the three tiles so it spans all of them. Gently tap the board with your mallet to get the tiles flat and even with one another.
Step Five
Spread more mortar and set additional marble tiles, building out from the middle in a grid pattern and working toward the edges of the room. Put spacers between all of them. Stop after every group of three tiles and even them out with your mallet.
Step Six
Cut the tiles for the perimeter, by the walls, using your wet saw.
Step Seven
Let the tiles set overnight. Pull out the spacers.
Step Eight
Grout the tiles, spreading the unsanded grout over them with your grout float, forcing the grout into the spaces between the tiles and scraping it off the surface. Wipe up the excess grout with a damp sponge. Let it set for 24 hours.
Source: www.eHow.com
Monday, August 6, 2012
How to Make Floor Tiles Shine
By Kitty Cruiser, eHow Contributor
Tiles are a common flooring option because of their durability and low-maintenance factor. Over time, though, floor tiles can build up a layer of dirt and grime, making them dingy and dull. Fortunately, cleaning and revitalizing floor tiles is a relatively simple process. Restore the shine of floor tiles with the help of a few household items.
Things You'll Need
Source: www.eHow.com
Tiles are a common flooring option because of their durability and low-maintenance factor. Over time, though, floor tiles can build up a layer of dirt and grime, making them dingy and dull. Fortunately, cleaning and revitalizing floor tiles is a relatively simple process. Restore the shine of floor tiles with the help of a few household items.
Things You'll Need
- Broom
- Dustpan
- Bleach
- Water
- Spray bottle
- Toothbrush
- Cloth
- Distilled white vinegar
- Bucket
- 2 sponges
- Lemon juice
- Remove the surface dirt from the floor tiles with a broom. Sweep it into a dustpan and discard.
- Create a solution of equal parts bleach and water. Pour into a clean spray bottle.
- Spray the solution directly onto the grout. Scrub the solution into the grout using a toothbrush.
- Wipe the floor tiles and grout with a damp cloth to remove the water-bleach mixture.
- Pour equal parts distilled white vinegar and cool water into a bucket.
- Submerge a sponge in the solution. Wash the floor tiles with the saturated sponge. Start at one corner of the room and work toward the other corner.
- Allow the floor tiles to air dry.
- Saturate a clean sponge with lemon juice and wring out the excess liquid. Wipe the floor tiles with the sponge to make them shine and to fill the air with a pleasant aroma.
Source: www.eHow.com
Subscribe to:
Posts (Atom)