Friday, November 24, 2017

Getting the Dirt out of Paving in East Sussex

So, I had an enquiry from a very nice lady in Eastbourne who wanted to know if I could use some old tiles she had dug up from her garden. It seems her house was the last one to be built in the street many years ago and the builders threw all the tiles into her garden. Since then some were recovered to make a mosaic front pathway but there were four buckets of tiles she couldn't use.

I’m based in Eastbourne, so it was no trouble to go around and take a look. I popped round and in my profession you never know when they might come in handy so I bought them off her for £20 which was a bargain really. Well I was very grateful to her and after seeing her front pathway and garden I offered to clean the paving and tiles up for free.

Buff Patio Paving Before Cleaning in Eastbourne Mosaic Pathway Before Cleaning in Eastbourne

There were two sections of paving that needed cleaning including the mosaic tiles and with my van being parked right in front of the house I was able to reach them with my van mounted high-pressure cleaning system.

Mosaic Pathway Before Cleaning in Eastbourne

Cleaning Dirty Paving

The first job was to use low pressure jet wash to the paving to remove surface dirt and then apply a medium dilution of Tile Doctor Pro-Clean and let it soak into the tile for about ten minutes. The solution was then scrubbed into the tile using a stiff brush to release the ingrained dirt.

The last step was to finish the process using our high-powered state of the art truck mount extraction system. These machines are a big investment but well worth the cost in the amount of time they save. They work by applying hot water under pressure to the surface via a special spinner tool whilst simultaneously extracting the soiled water back to a collection tank on the van. You can set the pressure of the machine and in the case of paving I use a lower pressure to ensure the mortar between the paving isn’t dislodged.

Buff Patio Paving After Cleaning in Eastbourne Mosaic Pathway After Cleaning in Eastbourne

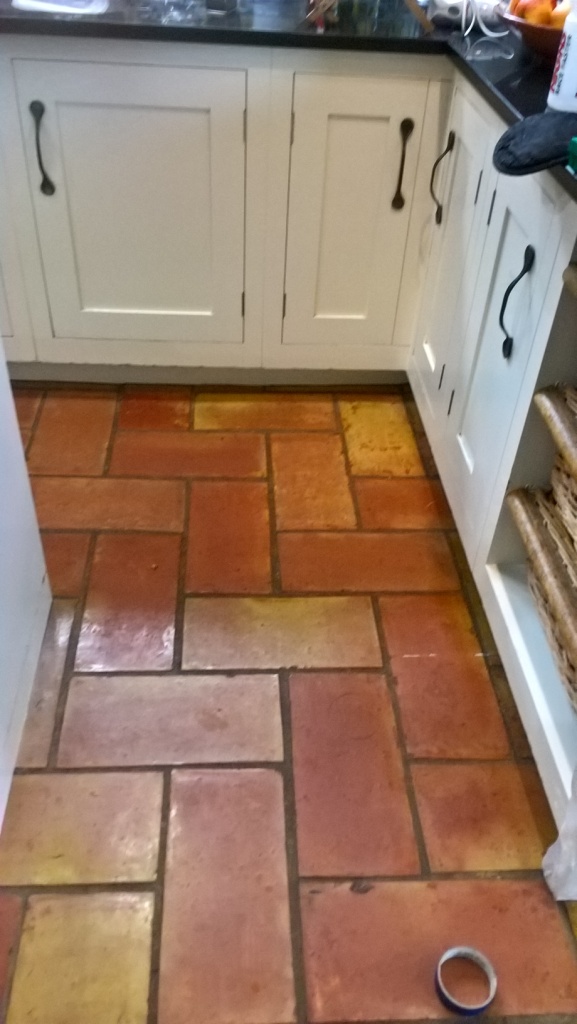
The paving came out remarkably well as you can see from the photographs.

Mosaic Pathway After Cleaning in Eastbourne

Thank you Joy for your enthusiasm in the finished product, for the opportunity to reveal your lovely pathway, for the buckets of tiles you recovered and for the copious amounts of tea you served to me.


Source: Pavement and Patio Tile Cleaning and Renovation Service in East Sussex

Thursday, November 23, 2017

Installing Self Adhesive Vinyl Tiles Over Concrete

Installing self adhesive vinyl tiles over concrete is not always easy, especially if you remove carpets from the concrete base. If you want to install the tiles properly, you should prepare the floor, making sure that the surface is clean, without any remains of sealers, adhesive, or anything else. Self adhesive tiles can reduce the installation time, offering you a fully professional look.

Vinyl tiles can be a very convenient and attractive option for most people, especially for those who want to do the task on their own. They are also a rather affordable solution, and a cost effective solution in flooring. However, you need to be very careful before installing the vinyl tiles over concrete because there might be moisture problems. Here is a short list of steps and tips on how to install self adhesive vinyl tiles over concrete.

What You'll Need:
  • Floor scraper
  • Bags
  • Sponges
  • Alcohol
  • Measuring tape
  • Chalk
  • Self adhesive vinyl tiles
Step 1 – Preparation

Preparation is the most important part of any installation process. Use the scraper to remove any glued materials or adhesive remaining on the floor. Once you are done you should sweep the remains and throw them away. If the scraper doesn’t do the job properly, you can use the alcohol to remove the any stains. Make sure that the concrete base is clean and does not have any cracks or remains from older flooring.

Step 2 – Test the Area

One of the first things you need to do after you clean the concrete floor is to test it; if you don’t do so, you might find out a few months later that the adhesive gets loose because the floor is very moist and unsafe. Taking precautions is absolutely necessary; the most reliable test you can run is the calcium chloride test which is easy to find at any local store. You must follow the instructions on the test. You should have the results within 18-24 hours. This test checks the amount of moisture and water that comes up from the concrete base. If the levels are too high, you will need to de-moisturize the floor before installing the tiles. If the number shown from the test is not high, you can start with your project and lay the tiles directly on the concrete floor. 

Step 3 – Measuring the Room

Measure the room and mark the center of each wall in the room using the chalk. Draw a line towards the center of the room. You do the same thing with all four walls until you draw 2 bisecting lines that divide the room in quarters.

Step 4 – Install the Tiles

Make sure that the concrete surface is clean and will adhere to the tile. Take the vinyl tiles and place them in the center of the room where the lines bisect. You can install them removing the back paper to expose the sticky part of the tiles. You can keep installing the tiles working from the center towards the walls. Make sure that you press them flat and firmly on the floor to ensure proper placement so that you finish the task in a totally professional way.


Saturday, November 18, 2017

Rebuidling and Cleaning a Victorian Tiled Hallway in the English Lake District

A customer who lives in Kendal recently called us out to examine their Victorian tiled hallway which when walked upon, sounded like it was a making a crunching noise. This may seem like an odd phenomenon, but it can be reasonably easily explained. These tiles, being made of Victorian-style encaustic cement, are very hard-wearing. However, the cement screed upon which they were laid had lost its bond with the tiles and the tiles were now loose.

Most other types of tile would crack under the pressure of being walked upon, but since Victorian tiles are quite small and hard-wearing, they don’t seem to suffer this problem. Instead, they just make this crunching noise when walked upon.

So, what would we need to do to resolve the situation? In theory, it should be the simple matter of taking up the loose tiles and relaying them. Yet this takes a lot of preparation, including removing the old cement from the back and sides of the individual tiles and then smoothening the floor so that the tiles can be re-laid flat. This is easier said than done with a floor of this age.

Victorian Tiled Hallway Being Relaid in Kendal


Repairing and Cleaning Loose Victorian Tiles

We began the restoration by lifting the loose tiles, cleaning the old cement off and then re-laying them using a suitable tile adhesive. Once the adhesive had set, we grouted the tiles with a grout that matched the original.

Victorian Tiled Hallway After Being Relaid and Grouted in Kendal

The floor was left to set overnight, and we returned to the property the next day. The floor was checked and then we carried out a full deep clean of tiles using Tile Doctor Pro Clean, our go-to cleaning product for tile, stone and grout. The product, which is alkaline-based, was worked into the tiles using a black buffing pad fitted to a rotary machine.

In some of the harder to reach areas and corners of the room – those which the buffing rotary machine struggles to reach – we used diamond-encrusted handheld blocks to grind away the stubborn dirt and stains.

The soiled cleaning solution was rinsed off the tiles with water and extracted using a wet vacuum to get the as much moisture off the tiles as possible.

Sealing Victorian Tiles

After the cleaning process was complete, we left the floor for another few days to dry off completely. A suitable drying period is especially important for Victorian tiles, since most of these old properties do not have a damp proof membrane installed.

We then returned to seal the tiles with several coats of a breathable, impregnating sealer called Tile Doctor Colour Grow that not only protects it also enhances the natural colours in the tile. Now, much to the customer’s pleasure the tiles are fully functional again with there’s no crunching noise when you walk on them. They also look amazing as well.

You will see in the photos below the level of work that goes into a job like this but, as this is an original Victorian floor, a restoration will add great value to the house upon re-sale.

Victorian Tiled Hallway After Full Restoration in Kendal


Source: Victorian Tile Cleaning and Restoration Service in South-Cumbria

Thursday, November 16, 2017

How to Patch a Vinyl Tile Floor

If your vinyl tile floor is damaged, it is a good idea to repair it as quickly as possible. If your floor is in poor condition, a small liquid spill can end up causing big problems by seeping into a crack. Fortunately, getting your vinyl floor back into good working order does not necessarily involve paying for expensive repairs. If you know where to begin, you can repair your own vinyl floor without any trouble, saving yourself money both in the short term and in the long term. What follows should give you enough information to fix any damage to your vinyl floor on your own.

What You'll Need:
  • New Matching Vinyl Tile
  • Aluminum Foil
  • Iron
  • Stiff Putty Knife
  • Adhesive
  • Rolling Pin
  • 1/8 Inch Trowel
Step 1 - Match a Tile

If you can buy a tile identical to the one that is damaged, this step should be very easy. However, you may not be this lucky. In this situation, simply try your best to come close. However, if the results are not satisfactory, you can use the steps listed below to remove a tile in a less visible location, and use that tile to replace your damaged one. If you do this, use the unsatisfactory match you found to replace the tile you removed from your floor, so that it is not very visible.

Step 2 - Preparing the Damaged Section

Before you install your new vinyl tile, you must remove the damaged section. Doing this is straightforward, but you must do it carefully and correctly to avoid causing further damage.

To begin, heat up your iron as if you were going to use it normally. While it is heating up, place aluminum foil flat on top of the damaged tile, being sure to cover it completely with extra room to spare.

Finally, use your heated iron on the aluminum foil to heat up the tile and adhesive.

Step 3 - Removing the Damaged Section
Use your stiff putty knife to lever the damaged tile away from the floor. It should be loose enough to remove now that you have heated it. Once it is completely separated from the floor, discard it and begin scraping away at the substrate that is left behind. Continue once you have all of it removed.

Step 4 - Replacing the Tile


Using the adhesive according to the manufacturer's instructions, spread it in the empty space on your floor. Use a 1/8 inch trowel to do this. Next, place your new tile in the correct position. Finally, use your rolling pin to flatten the tile once it is placed. This will also ensure that the adhesive is spread evenly.

Step 5 - Finishing Up

Be sure that you do not leave any of the adhesive behind to dry on your floor. If there is adhesive left behind in a visible place when you are finished installing the tile, the manufacturer's instructions should tell you how to get it off. Usually wet adhesives can be removed with ordinary water and a sponge, but many will require a specific solvent, which the manufacturers instructions should list.


Tuesday, November 7, 2017

Stripping and Resealing a Terracotta Tiled Kitchen Floor in Bristol

Terracotta tiles are always a popular choice for Kitchens but being made from clay they are porous and need to be sealed to prevent dirt from becoming ingrained in the tile. Once sealed though you need to remember Kitchens are high traffic areas, so you can expect the sealer to wear off quicker than it would elsewhere.

I mention this as a customer from Bristol asked me to do a survey on her Varnish Sealed Terracotta Kitchen Tiles where the seal had worn down and were now dull, and the grout had darkened. I surveyed the floor and completed a test clean on a section of the floor which came out well impressing the customer who was happy for me to proceed with cleaning and sealing the floor.

Terracotta Kitchen Floor Tiles in Bristol Before Cleaning Terracotta Kitchen Floor Tiles in Bristol Before Cleaning

Traditionally Terracotta tiled floors have been sealed with a number of products over the years including Wax, Linseed Oil and on this occasion Varnish however all these products have their disadvantages and don’t compare to modern sealers which are designed for the job.

Terracotta Kitchen Floor Tiles Bristol Before Cleaning

Cleaning a Dirty Terracotta Tiled Kitchen Floor

The first day was spent trying to get the Varnish off the floor which somebody had used on the floor as a sealer; Varnish is easily scratched by furniture, so I certainly wouldn’t recommend it. I worked out however that it could be scrubbed off once coated in a combination or Tile Doctor products Pro-Clean, Remove and Go and Nano-Tech HBU which would be left to soak in for a while and then softened with steam.

Mechanical assistance from a buffing machine fitted with a large black scrubbing pad helped reduce the amount of elbow grease that was required and once I was happy the tiles were clean the now soiled solution was rinsed off with water and extracted using a wet vacuum.

The next day and with the floor now clear I was able to see those areas that needed further re-treatment and also turn my attention to the grout which was cleaned using more cleaning solution worked in with a stiff narrow grout brush that gets into the grout lines. Once I was completely happy with the floor its was given a final rinse with water to remove any trace of cleaning products and then dried with a wet vacuum to remove as much moisture as possible.

Terracotta Kitchen Floor Tiles in Bristol After Cleaning

Sealing a Dirty Terracotta Tiled Kitchen Floor

It’s important that the tiles are dry before sealing so I left the floor to dry out for three days before returning to seal them. No Varnish this time of course, Tile Doctor has a range of sealers for every type of situation and what I find works best on Terracotta tiles is a single coat of Tile Doctor Colour Grow topped off with multiple coats of Tile Doctor Seal and Go.

Terracotta Kitchen Floor Tiles in Bristol During Cleaning

Tile Doctor Colour Grow is an impregnating sealer that penetrates into the pores of the clay protecting it from within whilst enhancing colour whilst Seal and Go completes the sealing process and adds a nice sheen to the look of the tile.

Terracotta Kitchen Floor Tiles in Bristol After Cleaning and Sealing Terracotta Kitchen Floor Tiles in Bristol After Cleaning and Sealing

As you can see from the final photographs the floor looked really good and the customer gave me top marks for feedback.

Terracotta Kitchen Floor Tiles in Bristol After Cleaning and Sealing


Source: Terracotta Tile Cleaning and Restoration Service in Bristol

Thursday, November 2, 2017

How to Strip Wax off Linoleum Floors

Linoleum is the material of choice for flooring when you are on a tight budget but still wish to have flooring that is stylish and up to date. Linoleum floors are very easy to install, clean and will last a long time when properly taken care of. Dirt and grime always can find a way to penetrate the protective wax coating on top of the linoleum flooring. When this happens you will need to strip the linoleum floor's wax. This is a process that can be messy and can take a lot of time but it is a necessity if you want a clean floor. Many people confuse linoleum for vinyl floors but they are actually different as linoleum has completely different properties than vinyl even though vinyl is often referred to as linoleum. You can strip a vinyl floor with pretty much any type of floor stripper but linoleum requires specific chemicals to strip it. The article that follows will show you how to strip linoleum floors properly.

What You'll Need:
  • Floor stripper
  • Old mop
  • Buckets
  • Scrub brush
  • Wet and dry vacuum
  • Push broom
  • Dust pan

Step 1 – Sweep the Floor

Linoleum is a very forgiving material, like vinyl, and in order to be able to strip the linoleum floor you will need to clean it first. There is no need to really mop the linoleum floor but you should clean off as much of the dust and debris that is sitting on the surface of the floor. A vacuum does not do the proper job needed to get up all of the dirt. A push broom will be able to get the job done correctly.

Step 2 – Apply the Linoleum Floor Stripper

Linoleum stripper tends to be concentrated and it needs to be mixed in order for it to do its job correctly. Read the back of the bottle and mix the stripper according to the directions found there. Before applying it to the entire floor test it out on a small obscure section. You want to make sure it will not damage the linoleum. Use an old mop to apply the mixed linoleum stripper to the floor in a 3-foot section. You want to keep it to a minimal area because the stripper could dry too fast and you may have to reapply the stripper for a second time.

Step 3 – Remove the Finish

Steps 2 and 3 will have to be repeated for each section of the linoleum floor. Always follow the instructions on the back of the bottle when it comes time to remove the polish and wax. Wait for the floor to turn a milky white. This will indicate that the polish is ready to be removed as it has been softened. Use the scrub brush and scrub the section down to remove the polish. Using a stiff brush or automatic scrubbing pad can easily damage the linoleum. When the polish is ready to be removed do so with a fresh mop and clean water. You may have to change the water several times.


Wednesday, November 1, 2017

Restoring Colour to Limestone Patio Pavers in North Yorkshire

Jura Limestone is is a high-quality stone mined in quarries in the Bavaria region of Germany. It is perhaps the best-known stone mined in the country, and it is in strong demand throughout Europe and the rest of the world.

It’s not difficult to see why – this Limestone has some fantastic aesthetic qualities while also being durable and hard. This makes it a popular material for floor tiles in residential properties. I recently encountered a wonderful coffee-coloured Jura Limestone tiled floor at a property in Beckwithshaw, a small village of around 400 people near Harrogate. Harrogate is well known as one of Britain’s best-known spa towns, and attracts many tourists each year to visit its baths.

Unfortunately, the property owner had accidentally spilt a bottle of bleach over some of the tiles. Exposure to the bleach had caused unsightly white marks to appear on the stone and, upon seeing the floor in person, I noticed that the tiles had, in any case, not been polished correctly. They had, however, been sealed with many coatings of satin sealer which would need to be removed to facilitate the polishing of the floor.

Large Jura Limestone Floor Before Cleaning Beckwithshaw Near Harrogate

The floor was 150m2 and it would have been quite expensive to strip the whole floor of sealer and start again so I decided the best thing to do would be to spot treat the damaged areas.

Polishing Damaged Jura Limestone Tiles

To remove the stains, I needed to use a system we have developed at Tile Doctor, which is known as burnishing. This is a style of stone polishing that involves the application of Diamond encrusted pads. Each pad in the system has its own level of grit and is applied in sequence from coarse to fine in order to re-hone the finish on the stone.

To start I used two small handheld diamond blocks (the 200 grit and 400 grit) to carefully take off the old sealer in the affected areas. This would not be enough to remove the stains on the stone, so I followed this up with the application of the Tile Doctor burnishing system which consists of four 6-inch pads of different grits fitted to a handheld buffer. 

This involved starting with the Coarse 400 grit pad and then moving on to the Medium 800 grit pad, Fine 1500 grit pad and finally the Very Fine 3000 grit pad to achieve a refined polished finish.

The process of burnishing removed not only the white marks, but also the very top layer of stone which had suffered from pitting. Pitting is a natural form of corrosion that causes small holes to appear in Limestone, encouraging dirt and general muck to become ingrained.

Finally, the floor was rinsed and then left to dry and buffed a last time using a soft white pad. I don’t think my photographs really show the difference that well however I can tell you the result was far better than the customer had hoped for. I had managed to successfully blend the new polished finish on the affected tiles with the satin sealer which already existed across the rest of the floor.

Large Jura Limestone Floor After Cleaning Beckwithshaw Near Harrogate Large Jura Limestone Floor After Cleaning Beckwithshaw Near Harrogate


Source: Limestone Patio Cleaning and Restoration Service in North Yorkshire