Sunday, August 28, 2016

How to Clean Flagstone Floors

While you might think of flagstone floors as requiring little maintenance due to their rugged nature, the truth is that they require regular cleaning. What follows should give you enough information to keep your flagstone floors clean and tidy.

What You'll Need
  • Broom and dustpan
  • Mop
  • Bucket
  • Water
  • Floor sealer

Step 1 - Remove the Debris

In order to avoid moving dirt around and causing stains when you mop, you should always sweep before washing flagstone floors. Use your broom and dust pan to remove as many loose particles as you can before you start to mop.

Step 2 - Mop the Floor

Fill your bucket with water and soak your mop in it. Next, wring out the mop so it is only damp. Place the mop on the floor and move it up and down. Repeat as necessary until you have covered the whole floor. (Reapply water to your mop as needed.)

Step 3 - Seal the Floor

You can get the best results by using a sealing product on your flagstone floors. Empty out your bucket and fill it with sealer. Use your mop to apply the sealer in a back-and-forth motion.

Tuesday, August 23, 2016

Putting New Life Into Industrial Yorkstone Flagstones

For this job, I had the pleasure of visiting the historic Salts Mill, a former textile mill turned art gallery, shopping centre, and restaurant complex near Bingley, West Yorkshire. It was built in 1853 by the famous manufacturer and philanthropist, Sir Titus Salt, and was at one point the largest industrial building in the world by total floor area.

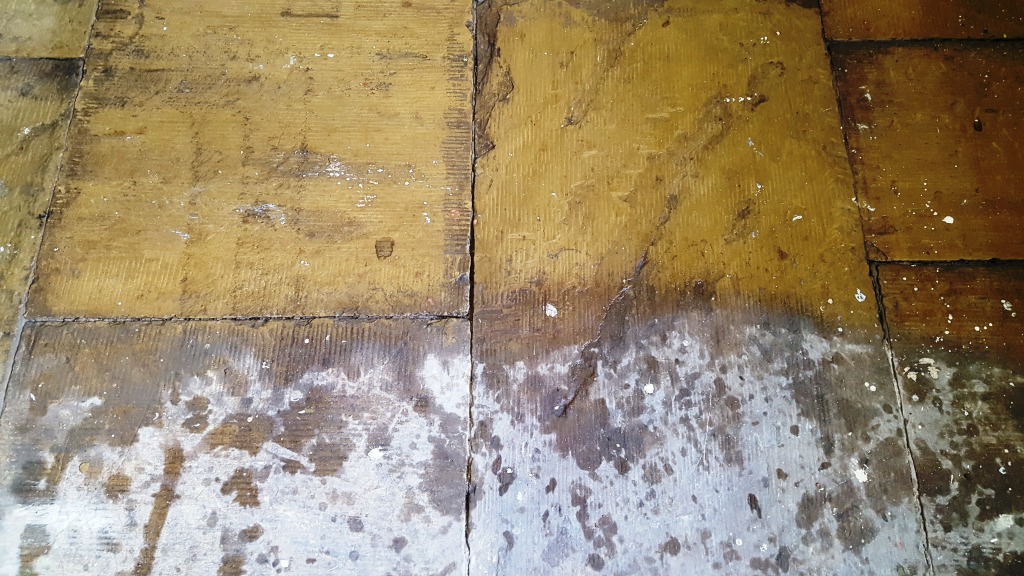
Salts Mill Yorkshire Stone Before Cleaning
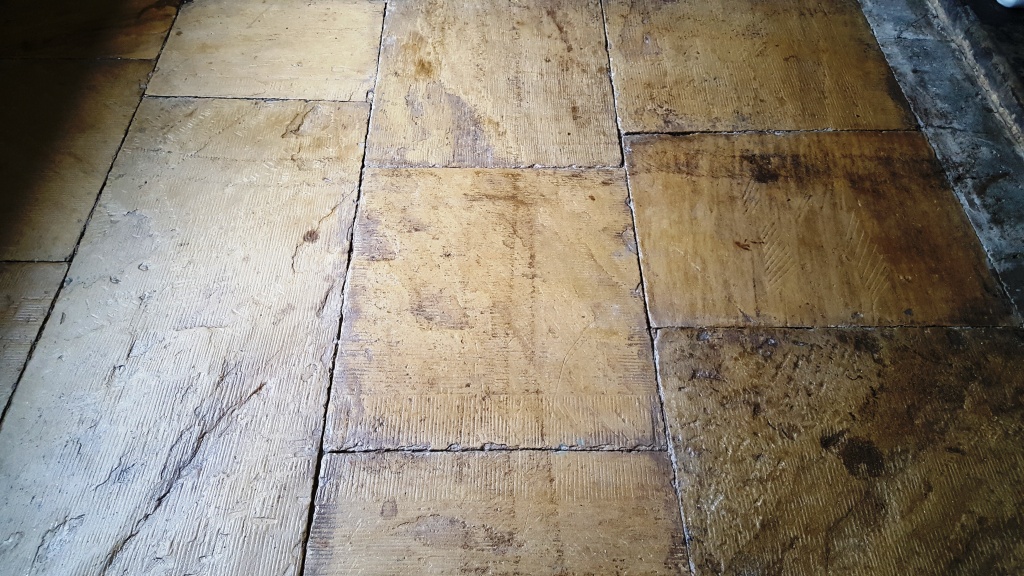
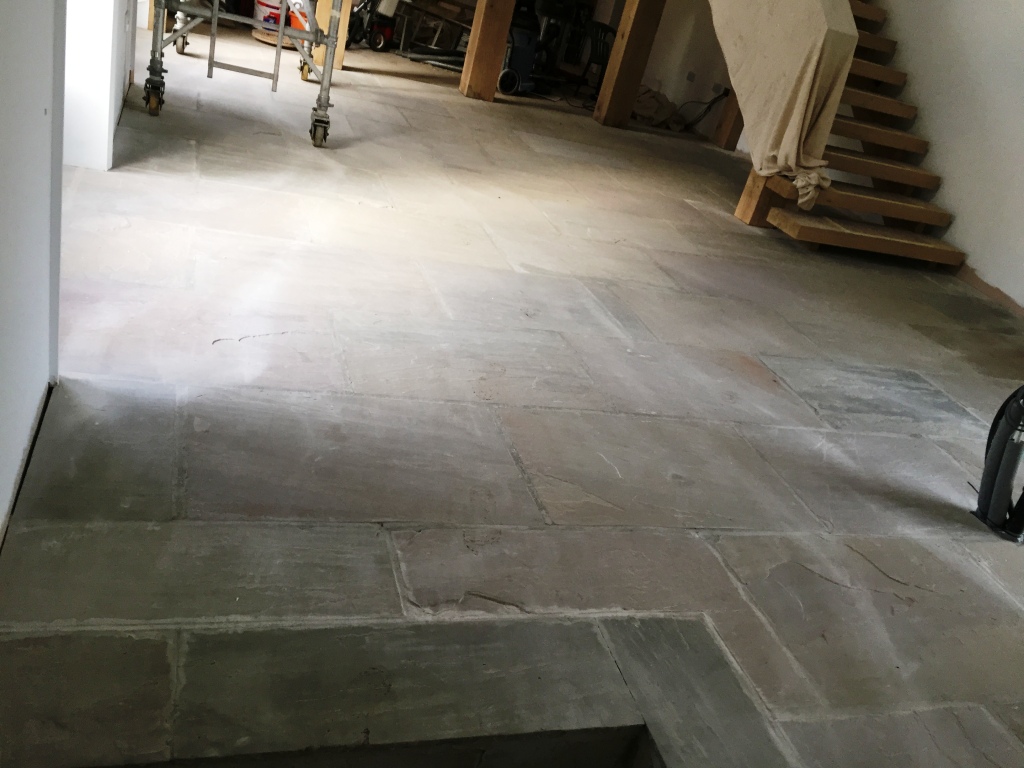
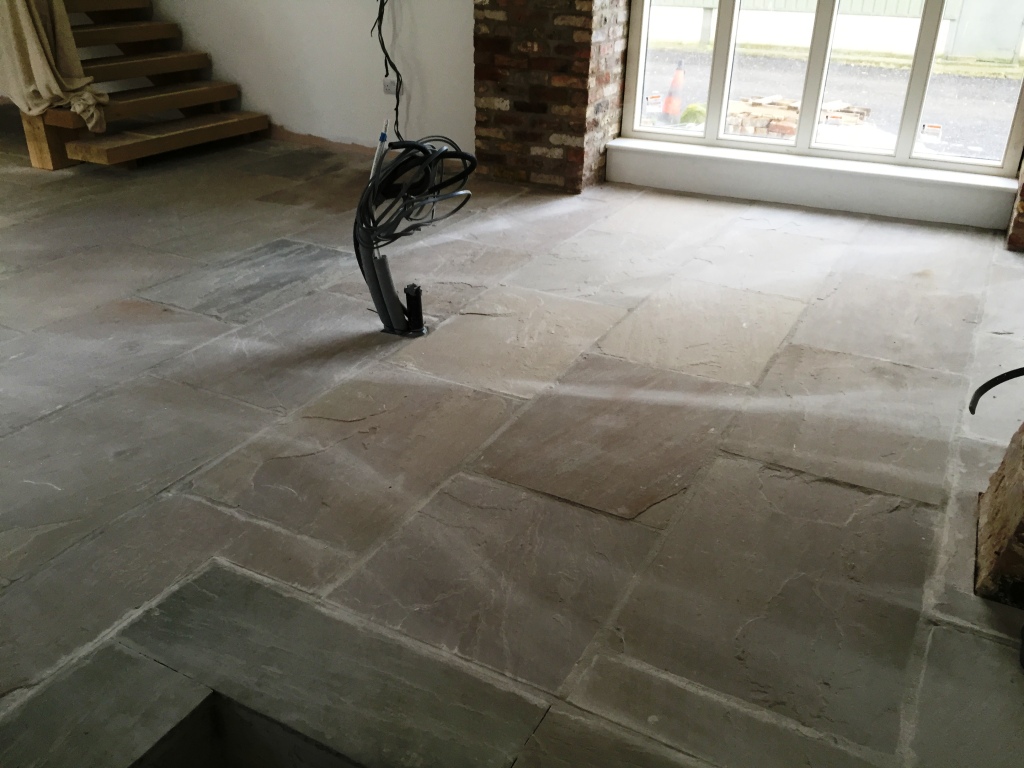
As you can imagine, a lot of the rooms at Salts Mill are over a century and a half old. Most of them also contained stone flooring made from Yorkstone - a type of Sandstone unique to Yorkshire, and easily distinguishable due to its rich, natural yellow colouring. Unfortunately, one such floor in the Salts Mill was in quite a bad state. It has completely lost its vibrance - appearing more grey than yellow - and was evidentially in need of a very deep clean and fresh seal.

Salts Mill Yorkshire Stone Before Cleaning

Cleaning an Old Yorkstone Floor

I started the Yorkstone tile restoration by soaking the floor in a strong dilution of our reliable alkaline-based tile cleaner, Tile Doctor Pro Clean, and scrubbing it in using a rotary machine fitted with a scrubbing pad. This quickly removed the initial layers of muck and, in the process, revealed oil-based paint and glue stains all over the floor.

Salts Mill Yorkshire Stone During Cleaning

To break down the oil and paint I applied Tile Doctor Remove & Go, which is our heavy duty stripper, remover and degreaser. This quickly ate through the paint and glue, and I followed by giving the floor another thorough clean with Pro Clean. Finally, I rinsed the floor with clean water before leaving it to dry for a full two days due to the amount of chemical cleaning product and water applied.

Sealing an Old Yorkstone Floor

Upon my return to the Salts Mill two days later, I ran some quick damp tests to check for any excess moisture which could've prevented me from sealing the floor. Thankfully, the floor was dry and ready to be sealed, but it is always recommended, especially with older floors, to be aware of damp issues as these can be very troublesome.

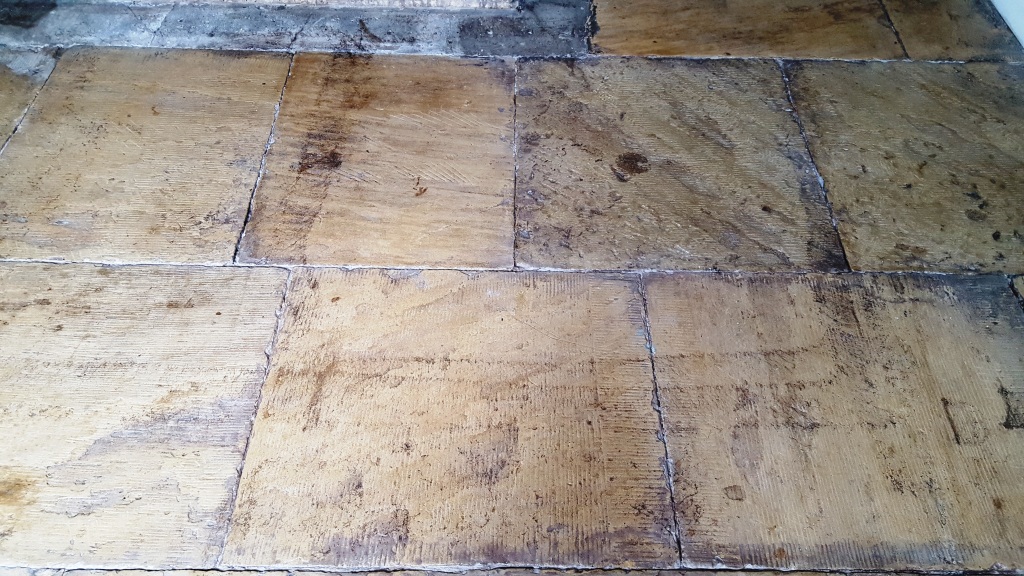
Salts Mill Yorkshire Stone After Cleaning

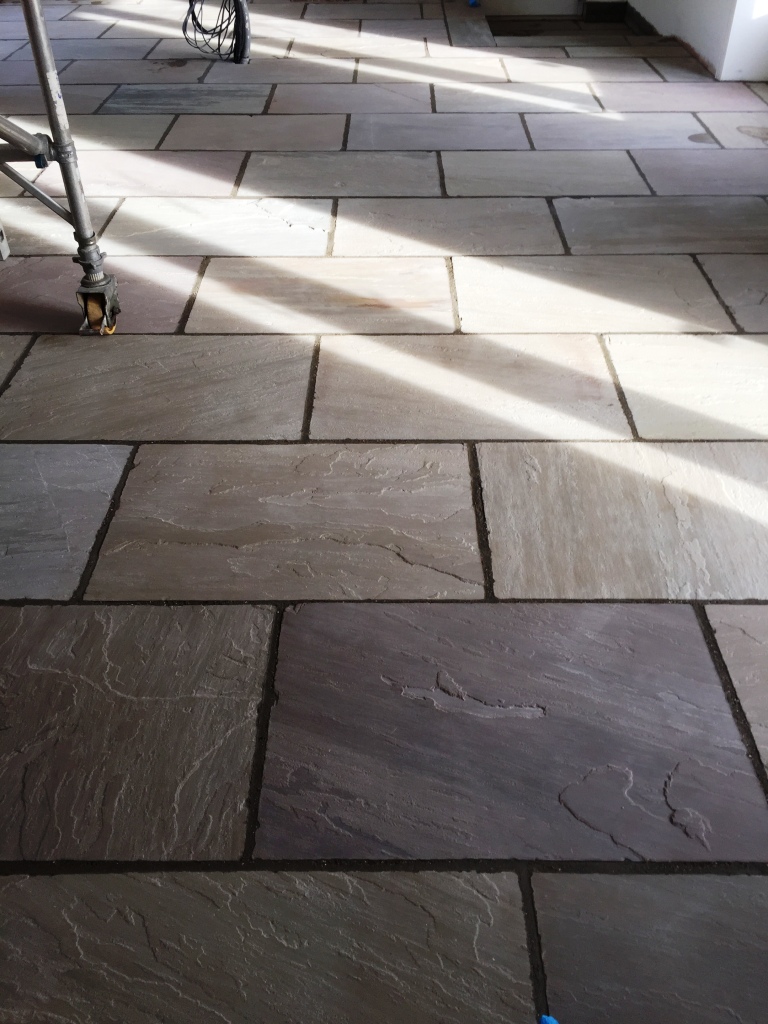
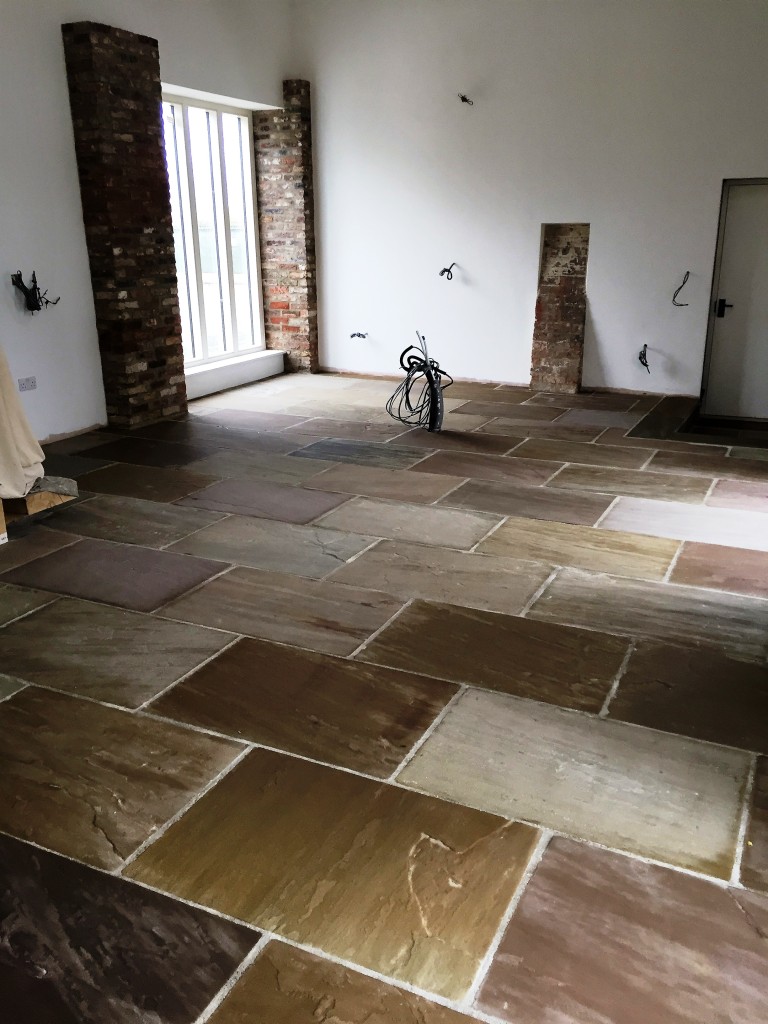
My choice of sealer was Tile Doctor Seal and Go, a topical sealer which provides a robust, stain resistant seal and a durable low sheen finish all in one product. Multiple coats of Seal and Go were applied, bringing the life and character back to these classic tiles.

Salts Mill Yorkshire Stone After Cleaning


Source: Cleaning and Restoring Yorkstone Flagstone Service in North West Yorkshire

Sunday, August 21, 2016

Cleaning Ceramic Tile Floors

Cleaning ceramic tile floors is necessary in order to keep them looking good over the long-term. The process of cleaning them is not especially difficult but, you do need to be dedicated in order to keep them clean. Here are a few things to consider about how to clean your ceramic tile floors.

Regular Cleaning

You should clean your tile floor regularly in order to keep the dirt and dust off of it. For example, you should consider sweeping or vacuuming your tile floor once every week in order to remove the dust that regularly accumulates on it.

Steam Cleaning

One of the best ways to clean ceramic tile floors is with steam. You may not have a steam cleaner in your possession, but you could potentially rent one. There are also a number of cleaning companies out there that regularly steam clean ceramic tile. Steam cleaning is going to use extreme temperature and water pressure in order to clean your tile. This works very well for removing stains and dirt from deep within the grout. This is the most effective way to clean your tile. If you do not have access to a steam cleaner, it can be expensive to get this done. Therefore, you may want to only do this occasionally and use other methods for your regular cleaning.

Avoid Harsh Cleaners

When you are cleaning your tile, there are certain types of cleaners that you are going to want to avoid. For example, you should never use bleach or ammonia on your tile. Bleach and ammonia can both discolor the grout in between the tiles. If you had a darker grout, the bleach and ammonia could lighten it up considerably. There are also other harsh chemicals out there that you will want to avoid using on your tile. Before using something on your tile, do some research to find out if it is acceptable cleaner for this application.

Vinegar

One of the best things that you can use on your tile is vinegar. Vinegar can be mixed with water in your mop bucket to clean tile very well. Vinegar is not harsh and it is not going to discolor your grout or your tile. It will also help disinfect the tile and kill the germs that are living on your floor. While you might notice a strong smell when you do this, it should dissipate within 20 to 30 minutes. 

Tile Cleaner

There are also several different types of tile cleaners that you could use in this application. Tile cleaners can be purchased from home improvement stores, online, or at a general store. These cleaners are specially formulated to be used on ceramic tile and other types of tile floors. When you are considering making a purchase of this type of cleaner, you will want to get online and do some research about it. You will need to read some reviews about the cleaners to make sure that other customers have been satisfied with this type of cleaner. 

Wednesday, August 17, 2016

Putting the Colour back Into a Dull Slate Tiled Kitchen Floor

This customer, who lives in Paisley, one of Scotland's biggest towns - and one with a rich history in the textiles industry - had not been completely satisfied with her Slate tiled kitchen floor since it had been laid. Having only been laid recently, the tiles themselves were in good shape, but Read more...

Contact Us

Why not take advantage of our free local survey service and arrange for us to visit you at your home or premises where we can listen to your needs and use our knowledge and experience to put new life into your tiles. Remember prevention is cheaper than the cure so do talk to us about grout sealing and regular maintenance. Complete the form below or call us on 0845 652 4652 and we will be in touch. What Our Recent Customers Have to Say Click here to read more feedback Other Tile Doctor Web Sites Read more...

Black Slate Kitchen Tiles Rejuvenated in Paisley

This customer, who lives in Paisley, one of Scotland's biggest towns - and one with a rich history in the textiles industry - had not been completely satisfied with her Slate tiled kitchen floor since it had been laid. Having only been laid recently, the tiles themselves were in good shape, but they lacked the aesthetic quality desired by the customer. She wanted them to be a richer, darker black in colour while keeping the matte look - as she had seen advertised in the tile shop - but once Read more...

Tuesday, August 16, 2016

Putting the Life Back Into Slate Tiles

This customer, who lives in Paisley, one of Scotland's biggest towns - and one with a rich history in the textiles industry - had not been completely satisfied with her Slate tiled kitchen floor since it had been laid. Having only been laid recently, the tiles themselves were in good shape, but they lacked the aesthetic quality desired by the customer. She wanted them to be a richer, darker black in colour while keeping the matte look - as she had seen advertised in the tile shop - but once laid the tiles had been left looking rather unexceptional. The floor area itself was only small (at around 12 metres squared), and I was confident I could have it looking much nicer in no time at all using the right products.

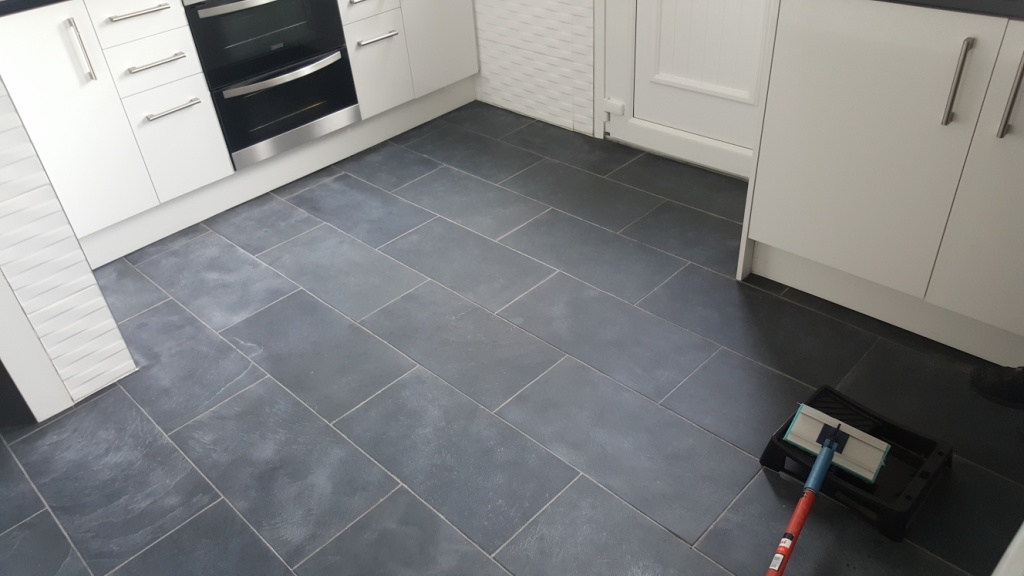
Slate Floor Cleaned in Paisley

Cleaning a Slate Tiled Kitchen Floor

To begin, I stripped away any previous sealer using a diluted mixture of Tile Doctor Pro Clean and Tile Doctor Remove and Go scrubbed into the tiles. This also helped to remove and bits of dirt and dust left on the floor. While the tiles, as mentioned, were in relatively good nick, I wanted to get the floor as clean as possible before giving it a fresh seal and my chosen combination of products did not let me down. The floor was then neutralised with clean water, removing any outstanding cleaning chemicals, and the resulting cleaning slurry was promptly removed using a wet-vac machine. To finish the clean, I washed the tiles in pH Neutral Tile Cleaner, leaving it fresh and ready to be sealed.

Sealing a Slate Tiled Kitchen Floor

The next day I returned to the property to seal the Slate tiles making sure first that the tiles were dry. To restore the colour and texture of the Slate I started with an application of Tile Doctor Stone Oil which impregnates the pores of the stone and like a sealer provides a barrier to ingrained dirt once cured. To maintain the matt finish, as requested by the customer, I added a coat of Tile Doctor Ultra Seal.

Slate Floor Treated with stone oil in Paisley

Just looking at the before and after photographs it's clear to see that the customer got that the exact result she had requested. Stone Oil worked wonders to restore the rich, dark tones to the Slate that had been so sorely lacking previously. The customer can also be assured that the sealer will be keep the floor easy to clean for a long time to come.

Slate Floor Cleaned and seaeled in Paisley


Source: Slate Tile Restoration Service in Glasgow

Monday, August 15, 2016

Encaustic Cement Tiles Burnished and Sealed in Stockport

I'm often asked if you should seal a tile before grouting and the answer is a definite yes, and this Encaustic Cement tiled bathroom floor installation in Stockport is a great example as to why. The tiles had not been sealed before grouting and then, once the tiler went to grout the newly installed tiles with a grey grout, the colour ran into the tiles, staining them and leaving them looking grubby and dirty. Had the tiles been sealed it would of made the process of removing the grout from Read more...

Marble Tile Floor Installation Tips

Installing a marble tile floor can provide you with an extremely beautiful addition to any room. Marble tile has a unique grain to it that you really cannot get from any other product. While there are some cheaper imitations, nothing can replace real marble tile floor. When installing this type of product, there are several things that you will want to keep in mind. Here are some installation tips when installing a marble tile floor.

Subfloor Preparation

When you plan on installing marble tile, you need to make sure that you are dealing with a structurally sound subfloor. If you have a concrete subfloor, you can install the marble directly onto it. Concrete is strong enough that it will support the marble tile and prevent it from breaking. If the concrete is not level, you may need to use some self-leveling compound to even it out. You could also simply apply some more thinset to the uneven areas when you are installing the tile as well.
If you have a wood subfloor, you will need to reinforce it with cement board before installing the marble tile. Some people try to take a major shortcut by installing the marble tile directly on to the wood subfloor. If you do this, it will not be long before the tile has broken into pieces. Wood subfloor moves too much to support marble tile. Therefore, you need to install cement board first. In order to install cement board, you will need to apply thinset between the cement board and the floor. You can then screw or nail the cement board down to the wood subfloor. Fill each one of the holes in the cement board with a nail or screw.

Cutting the Marble

When you are installing a marble tile floor, you will need to make some cuts to finish the job. While you might try to get by with standard tile snappers, this will not be sufficient when working with marble. While tile snappers are great for ceramic tile, you should not try to cut marble with them. Instead, you will need to use a wet saw for this project. The wet saw needs to have a diamond tipped blade to cut through marble. You need to be very careful when cutting marble because it has a tendency to break with the grain inside of the tile. This means that you need to be sure to make a clean cut.

Cleaning the Tile

Once you have put the tile on the floor, you need to make sure that you thoroughly clean it. If you get any of the thinset or grout on top of the tile, it could dry and cause you serious problems. Use a sponge and a bucket of water to clean off the top of the tile before you finish the job. This will provide you with a very clean look and it will look more like a professional installation.

Friday, August 12, 2016

Cleaning Stains From a Natural Stone Fireplace Hearth in East Byfleet

This is a follow-on post from the Travertine Kitchen floor that I wrote about recently, you may recall the customer from East Byfleetalso asked me to clean the stains from the hearth of their Natural Stone Fireplace as well. Stone Fireplace Hearth Stain Removal The fireplace was suffering from general dirt build-up as well as bad rust and oil stains. I treated the rust stains using Tile Doctor Rust Remover which is a specialist product developed by Tile Doctor especially for the removal of Read more...

Deep Cleaning a Stone Fireplace Surround in Surrey

This is a follow-on post from the Travertine Kitchen floor that I wrote about recently, you may recall the customer from East Byfleetalso asked me to clean the stains from the hearth of their Natural Stone Fireplace as well. Stone Fireplace Hearth Stain Removal The fireplace was suffering from general dirt build-up as well as bad rust and oil stains. I treated the rust stains using Tile Doctor Rust Remover which is a specialist product developed by Tile Doctor especially for the removal of Read more...

Wednesday, August 10, 2016

Restoring Travertine Kitchen Tiles in East Byfleet

This customer, who lives in East Byfleet had been experiencing difficulties in keeping her fantastic Travertine tiled kitchen floor in good condition. Over the years it had suffered from a heavy build up of dirt and oily stains, not to mentioned a number of cracks and small holes. Needless to say, the customer was keen to restore the Travertine tiles to their former glory. Restoring Travertine Tiles To begin the restoration, I applied Tile Doctor Remove and Go across the entirety of the Read more...

Restoring a Well Worn Travertine Kitchen Floor

This customer, who lives in East Byfleet had been experiencing difficulties in keeping her fantastic Travertine tiled kitchen floor in good condition. Over the years it had suffered from a heavy build up of dirt and oily stains, not to mentioned a number of cracks and small holes. Needless to Read more...

Monday, August 8, 2016

Fireplace Tiled in Oyster Slate in Wawne

The owner of this property in Wawne Village was keen to have their electric fireplace - which was built into the wall - spruced up with some patterned tiles. While at Tile Doctor we most often focus on cleaning and sealing tiles many of the team such as myself are fully trained tilers we are also carry out full installations where requested. I suggested that the fireplace would look fantastic if tiled with the Oyster Slate and you may recall I did a similar fireplace in Hull which worked Read more...

Tiling a Fireplace in Oyster Slate

The owner of this property in Wawne Village was keen to have their electric fireplace - which was built into the wall - spruced up with some patterned tiles. While at Tile Doctor we most often focus on cleaning and sealing tiles many of the team such as myself are fully trained tilers we are Read more...

Tiling, Cleaning and Sealing a Fireplace in Oyster Slate

The owner of this property in Wawne Village was keen to have their electric fireplace - which was built into the wall - spruced up with some patterned tiles. While at Tile Doctor we most often focus on cleaning and sealing tiles many of the team such as myself are fully trained tilers we are also carry out full installations where requested. I suggested that the fireplace would look fantastic if tiled with the Oyster Slate and you may recall I did a similar fireplace in Hull which worked Read more...

Friday, August 5, 2016

Flood Damaged Quarry Tiles Restored in Hessle

Flooding in the UK seems to have become more frequent and devastating in recent years, with areas such as Cumbria and Yorkshire being among those that have been particularly badly affected. Of course, flooding hits many homes directly, causing often irreparable damage and problems that can last for years following the incident. This property in Hessle had been damaged by the terrible flood that hit Hull in 2007. Nearly a decade on from the incident, the property's Quarry tiled conservatory Read more...

Restoring the Appearance of Flood Damaged Tiles in Yorkshire

Flooding in the UK seems to have become more frequent and devastating in recent years, with areas such as Cumbria and Yorkshire being among those that have been particularly badly affected. Of course, flooding hits many homes directly, causing often irreparable damage and problems that can last Read more...

Ceramic Tiled Shower Cubicle Refreshed in Wigan

Shower cubicles can be the most difficult of tiled features to keep clean. Most are exposed to various acid-based soaps and shampoos on a daily basis, allowing mould and general muck to quickly build up along the grout lines and silicone. This leaves the entire area looking quite unappealing. In some cases, the grout lines become stained beyond a point where they can be restored to their original condition, so property owners will typically request to have the grout cut out and replaced Read more...

Refreshing the Appearance of a Ceramic Shower Cubicle

Shower cubicles can be the most difficult of tiled features to keep clean. Most are exposed to various acid-based soaps and shampoos on a daily basis, allowing mould and general muck to quickly build up along the grout lines and silicone. This leaves the entire area looking quite unappealing. In Read more...

Thursday, August 4, 2016

4 Tips for Cleaning Marmoleum Flooring

If your Marmoleum flooring has recently become dirty, you're probably wondering how to go about cleaning it. While cleaning  Marmoleum flooring requires a little bit more finesse than cleaning regular flooring, making your Marmoleum floor spotless can be a relatively simple task, particularly if undertaken with a helpful set of hints at your disposal. So if you're ready to say goodbye to your dirty Marmoleum floor, simply read on to learn everything you'll need to know.

Tip#1 - Make Sure the Floor is Free of Dust

Before you begin the cleaning process, you should vigorously vacuum or sweep your Marmoleum floor and make sure it has been completely purged of dust. Additionally, you may want to run a wax stripper across the floor. This will help ensure that the cleaning goes over smoothly. Any remaining dust is liable to cause problems once the cleaning process is underway, so make sure to give your floor a thorough dusting before proceeding any further.

Tip #2 - Vinegar Cleaning

Vinegar can be a very effective tool in keeping your Marmoleum floor clean, as the chemicals found in many commercial cleaning products are often too harsh for this type of flooring. When cleaning your floor with vinegar, make sure to dilute it with water and use it in conjunction with a clean cotton washcloth. Certain brands of vinegar can be somewhat harsh on Marmoleum floors, so if vinegar is your cleaning tool of choice, just remember to dilute. Additionally, you may to consult some online testimonials to determine the best brands of vinegar to use for floor cleaning.

Tip #3 - Select the Proper Type of Cleaning Product

If you choose to clean your Marmoleum flooring with a commercial floor cleaner, make sure it is a product designed to clean linoleum. The best types of linoleum cleaners can be purchased from Marmoleum dealers and various online retailers. Should you choose a less specialized cleaning product, however, make sure its packaging states that it is safe to use in conjunction with linoleum. Also, if you're at loss for what brand of floor cleaner to use, you may want to seek out online consumer testimonials from other Marmoleum floor cleaners.

Tip #4 - Don't Neglect Your Floor Grooves

Marmoleum floors tend to have deeper grooves than other types of flooring. These grooves often act as veritable breeding grounds for bacteria, so when cleaning your floor, take care to pay special attention to the grooves. The most effective tool for groove cleaning is a small nylon brush that has been lightly dipped in a mild detergent. However, be careful not to allow the detergent-dipped brush to come into contact with your Marmoleum floor. If you want to be extra-cautious, simply line the edges of your floor with strips of masking tape.
So there you have it. When cleaning your Marmoleum flooring, remember to carefully consider these four tips and your floor will be spotless in no time. Enjoy your freshly cleaned floor!

5 Benefits of Choosing Marmoleum

When choosing flooring for your home, do consider Marmaloeum. Marmaloeum is the new eco-friendly option that is now available for home and office flooring. Using this type of flooring can help minimize the environmental impact. This flooring has received the ISO 14001 and the SMART certification. Marmaloeum was earlier popularly known as linoleum.

Different Types of Flooring Options

Today most people are choosing Marmaloeum over two of the most used flooring options: vinyl and carpeting. Carpets attract millions of allergens like dust, pollen, animal dander, mildew, and mold in spite of proper cleaning. Vinyl flooring can off gas air pollutants like PVC, cadmium, lead, dioxins, and phthalate plasticizers in the home

Advantages of Using Marmaloeum

Marmaloeum is made using a combination of rosins, linseed oil, pine, limestone, cork flour, and wood flour. The product is available in the form of flooring sheets and tiles. The non-toxic ingredients, when put together result in a hard and durable material. Moreover, anti-bacteria and anti-static properties that are available naturally are added to the mixture. This helps the flooring to resist dust and inhibit bacteria.
Additionally, the flooring clicks together effectively. This means no adhesives are required to join the flooring tiles so no nasty fumes are emitted. Since the flooring is made using all natural materials, it does not off gas toxic VOCs. Many dangerous health concerns have been considered and linked to the type of flooring used. Fortunately, none have been found yet when using Marmaloeum. In fact, Marmaloeum does not result in any health concerns when disposed as it is 100 percent biodegradable. 
Apart from being extremely eco-friendly, this flooring is very easy to clean, as stains cannot penetrate through the hard protective layer of Marmaloeum. The surface can be cleaned using a vacuum or a mop. The manufacturer suggests using its own cleaning solution, which is easily available. No water must be used to clean the surface.
The next advantage is the variety of designs that Marmaloeum offers. This flooring offers consumers a variety in terms of color and designs. The manufacturer gives a selection of almost twenty-four colors that can be chosen by the consumer. Thus, Marmaloeum can be used in the kitchen, bedroom, bathroom, and corporate offices thanks to the variety available. 
The last advantage of installing Marmaloeum is the price and its cost of replacement. Prices range from $5 to $8 per square foot with extra installation charges. However, the benefit is that these tiles can be replaced. The tiles can also be replaced partly if only few tiles are damaged.

Disadvantages of Marmaloeum

With so many advantages, just 2 disadvantages exist. The color of the Marmaloeum can be different from the sample chosen. This is because the ingredients used in this flooring are natural and can change over time. Secondly, unfortunately Marmaloeum cannot be recycled. However, it would decompose in a landfill without emitting any harmful chemicals. Thus, consumers can be sure their flooring, when dumped, will not release any harmful chemicals or materials in the ground, air and water.

Dull Terracotta Tiles Restored in Great Gransden

Due to its naturally high porosity, Terracotta is more susceptible to ingrained dirt than other types of stone tile. Typically, this downside is simple to offset with professional maintenance, including deep cleaning with suitable products and maintaining the sealer. Unfortunately, this Terracotta tiled floor at a property in Great Gransden (famous for being home to England's oldest remaining windmill), had not been treated to professional maintenance for at least a decade. As you can Read more...

Leave a Review

Read more...

Refreshing the appearance of Terracotta Tiles in Cambridgeshire

Due to its naturally high porosity, Terracotta is more susceptible to ingrained dirt than other types of stone tile. Typically, this downside is simple to offset with professional maintenance, including deep cleaning with suitable products and maintaining the sealer. Unfortunately, this Read more...

Wednesday, August 3, 2016

Sealing Newly Installed Sandstone Tiles in Yorkshire

Yorkstone is a variety of Sandstone unique to Yorkshire, and is known for its hard wearing and durable qualities. It was first manufactured during medieval times, but is still used for a range of building and construction purposes including, of course, tiled floors in houses. Yorkstone comes in a variety of natural colours, depending on the mineral makeup of the stone, and means that the tiled floors often have a unique look to them. This customer, living in the small Yorkshire town of Read more...

Recently Installed Yorkstone Tiles Cleaned and Sealed in Driffield

Yorkstone is a variety of Sandstone unique to Yorkshire, and is known for its hard wearing and durable qualities. It was first manufactured during medieval times, but is still used for a range of building and construction purposes including, of course, tiled floors in houses. Yorkstone comes in a variety of natural colours, depending on the mineral makeup of the stone, and means that the tiled floors often have a unique look to them. This customer, living in the small Yorkshire town of Read more...

Sandstone Tile Sealing

Yorkstone is a variety of Sandstone unique to Yorkshire, and is known for its hard wearing and durable qualities. It was first manufactured during medieval times, but is still used for a range of building and construction purposes including, of course, tiled floors in houses. Yorkstone comes in a variety of natural colours, depending on the mineral makeup of the stone, and means that the tiled floors often have a unique look to them.

Yorkshire Stone Floor Before Cleaning and Sealing Driffield

This customer, living in the small Yorkshire town of Driffield is the lucky owner of a fantastic new Yorkstone tiled living room floor. Unfortunately, the floor had been installed by an independent builder, as opposed to a professional tiling company, and had been left with no sealer to ensure it would stay looking great for a long time to come. Over time, the lack of a sealer has allowed the dirt to become ingrained in the stone, making it increasingly difficult for the customer to keep the tiles clean. I was called in to bring completion to what was an unfinished job!

Yorkshire Stone Floor Before Cleaning and Sealing Driffield

Cleaning a Yorkstone Tiled Living Room Floor

As you can see from the photographs, the entire floor was quite dusty and dull looking following the recent installation. To get the tiles clean, I mixed a strong 60-40 mix of Tile Doctor Pro Clean and clean water. Pro Clean is a reliable alkaline cleaner suitable for use on most natural stone floors, including Sandstone, Quarry, and Slate. The cleaning solution was applied to the floor and left to dwell for 20 minutes, allowing it time to penetrate the stone. Then, using my 17” rotary machine fitted with a black scrubbing pad, I proceeded to deep clean the tiles, leaving them looking immediately cleaner and more vibrant. Any resulting cleaning residue was promptly soaked up using a wet vacuum.

Yorkshire Stone Floor After Deep Cleaning Driffield

The process was repeated in the more stubborn areas, and I gave the floor a final rinse with water and left it to dry. Typically, we would leave a 12 to 24 hour drying period, depending on whether there is a damp proof membrane installed. However, this floor had underfloor heating and so dried really quickly, allowing me to seal it on the same day.

Sealing a Yorkstone Tiled Living Room Floor

The customer wished to have a matt, natural finish for the Yorkstone tiled living room, so I applied two coats of Tile Doctor Colour Grow, our impregnating sealer which offers a natural, no-sheen look for textured floors, while providing durable protection against ingrained dirt and stains.

Yorkshire Stone Floor After Cleaning and Sealing Driffield

As the name of the product suggests, Colour Grow contains colour intensifying properties which really helped to accentuate the rich variety of colours in the customer's Yorkstone tiles. The results were fantastic and you can see from the water test we performed after the sealer dried how water now bubbles up on the surface of the stone.

Yorkshire Stone Floor Cleaned and Sealed Water Test Driffield


Source: Sandstone Tile and Grout Cleaning and Sealing Service in Yorkshire

Travertine Kitchen Tiles Transformed in Sleaford

This fantastic Travertine tiled kitchen floor was in a bad way. Not only had it not been treated to a proper clean and seal in a long while, but it has also suffered from natural pitting, leaving lots of little holes that damaged the overall appearance of the floor. Travertine is very aesthetic, but suffers from the drawback of being quite soft compared to other types of stone (typically it sits between 3-4 on the Moh's scale of mineral hardness). The customer, who lives in the town of Read more...

To read more on this topic click here

Tuesday, August 2, 2016

Maintaining And Polishing Travertine Tiles in Lincolnshire

This fantastic Travertine tiled kitchen floor was in a bad way. Not only had it not been treated to a proper clean and seal in a long while, but it has also suffered from natural pitting, leaving lots of little holes that damaged the overall appearance of the floor. Travertine is very aesthetic, Read more...

Maintaining Spanish Terracotta Tiles in Yorkshire

Terracotta is an interesting type of stone manufactured using a variety of techniques dependant on the country of origin which leads to a number of differences such as Spanish Terracotta being less porous than its Mexican counterpart: the former is semi-hand made and finished in a factory kiln, Read more...

Spanish Terracotta Tiles Refreshed in Halifax

Terracotta is an interesting type of stone manufactured using a variety of techniques dependant on the country of origin which leads to a number of differences such as Spanish Terracotta being less porous than its Mexican counterpart: the former is semi-hand made and finished in a factory kiln, while the latter is completely handmade. Spanish Terracotta is therefore a lot less than porous and ultimately, of a higher quality. But despite the Spanish Terracotta being less porous, and Read more...

Monday, August 1, 2016

How to Seal a Travertine Floor

While there are many advantages to a travertine floor, there are several drawbacks. The most important one is travertine's vulnerability to various types of damage and stains due to its porous nature. Because of this, sealing your travertine floor properly is very important. While you can have a professional seal your floor, there is no reason why you cannot do it yourself as well. With an appropriate sealing agent, cleaner, and a few ordinary household items, you will be able to accomplish this task without problems. What follows should give you all of the information you need to complete the job.

Step 1 - Selecting a Sealer

There are many sealers that are specifically designed for use with travertine. It is important that you select one of these. Purchase your choice, then read the instructions carefully, as they may impact the other materials that you need.

Step 2 - Cleaning the Floor

To seal your travertine floor effectively, you will have to it thoroughly first to assure that no dust or debris gets trapped under the seal, thus weakening it and potentially coming loose.
First, to remove any large particles such as dirt, small stones, and dust, you should sweep or dust your floor carefully. Once you have done this, get out your vacuum cleaner and ready its attachment. Use your vacuum cleaner attachment to pick up any particles that you may have missed when sweeping. When you have gone over your entire floor, you can use a commercial cleaning product on your floor according  to its instructions. If your sealer recommends a type of cleaning product, be sure to use that.
Once you have cleaned your floor, allow it to dry overnight.

Step 3 - Sealing the Floor

To begin, fill a spray bottle with water. Use this spray bottle evenly on your floor to get it damp. Once the water starts to dry, you can begin sealing your floor.
Spread your choice of sealer evenly on your damp floor. Once you have done this, wait 30 minutes for it to dry. At this point, you must remove the excess sealer that your travertine floor has not been able to absorb. To do this, you will need the sealer to be wet, and unfortunately adding more water at this point will damage your floor's seal. Because of this, you will need to reapply sealer to get your floor damp again, loosening the excess sealer in the process. Once you have done this, mop up the wet sealer on the surface.

Step 4 - Finishing Up

Leave your floor alone for at least 48 hours. However, the longer you can keep off of your floor, the better, as leaving it alone for more time will lead to a stronger seal. Once you have allowed sufficient time for the sealant to cure, you should test it to be sure that it has worked. Pour a few drops of water onto your travertine floor. If they form beads, your seal has worked. If they behave normally, you will have to try again.

Post Installation Cleaning and Sealing of a Slate Floor

One of the worst examples of bad tiling practice is to leave a newly installed floor unsealed and therefore unprotected. This is exactly the problem that had occurred at this property in Lymm, West Cheshire. A builder has installed a new Slate tiled floor in the kitchen of this property, but had Read more...

Maintaining the Look of a Quarry Tiled Floor

This Quarry tiled kitchen floor was in very good condition, with no cracked or broken tiles. However, my customer, who lives in the town of Tutbury, near Burton-on-Trent, was keen to boost the condition of the tiles further through professional maintenance, including a deep clean and a fresh Read more...