Thursday, April 25, 2019

How to Remove Grout Smears from Encaustic Cement Floor Tiles

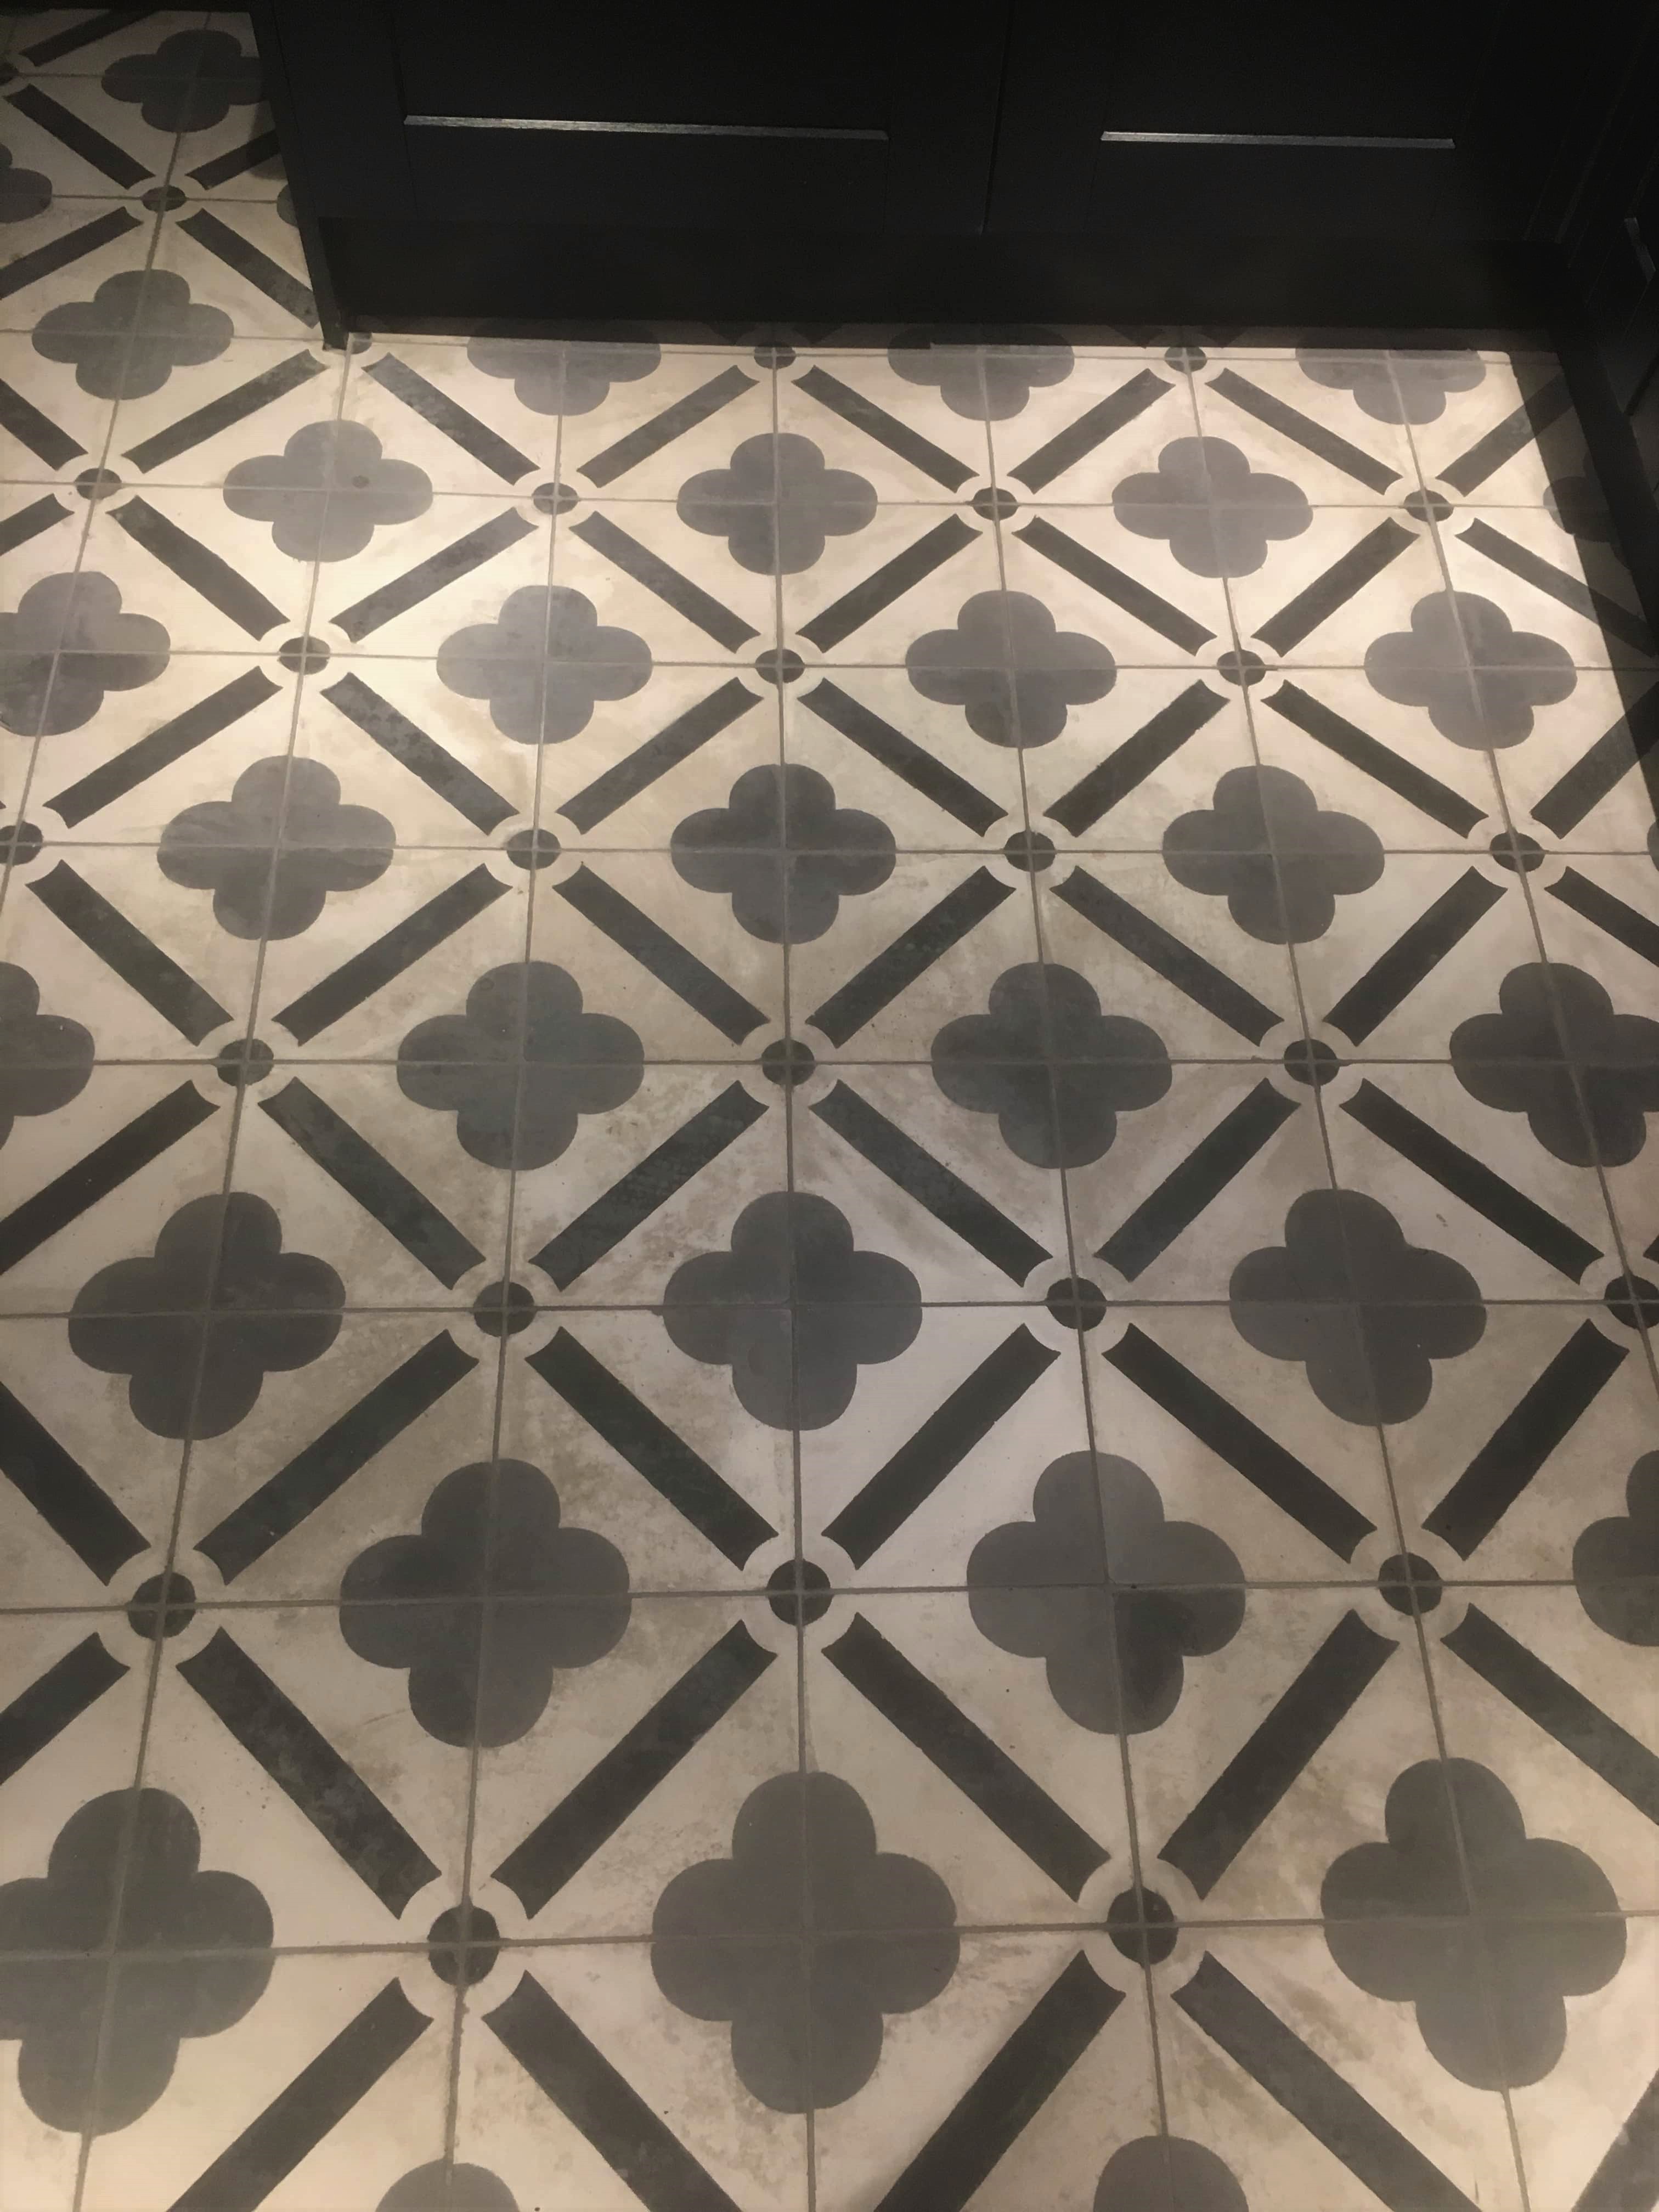
The photographs on this page are of Encaustic Cement tiles where the grout had not been wiped off the surface properly after being laid. This in turn allowed dirt to become easily trapped and they soon became grubby. We see this problem a lot at Tile Doctor where it is commonly referred to has Grout Smears or Grout Haze. The customer from Chipping Norton had tried to remove it themselves without success and decided to give us a call.
Encaustic Cement Tiles Before Cleaning in Chipping Norton
If you haven’t come across them before Encaustic Cement tiles are often hand painted and are available in a range of beautifully artistic patterns. Being cement based however they do need to be sealed for best results.

Burnishing and Sealing Encaustic Cement Tiles

To remove the grout and dirt and restore the look of the tiles I opted to use diamond encrusted burnishing pads. Tile Doctor supply a set of these pads comprising of four pads of increasing grits. I started with the coarse 400-grit burnishing pads running it over the floor with a rotary floor machine and lubricated with a small amount of water. Following this I worked my way through the system, applying Medium 800-grit and Fine 1500-grit pads rinsing off the slurry generated in-between and extracting with a wet vacuum. The last Very Fine, 3000-grit pad is applied dry with only a little water spayed onto the floor using a process we call a “Spray Burnish”. This really refines the look of the tiles and usefully leaves them dry. This process took up the whole morning and the next step would be to seal the tiles, so I went for lunch at this point to give the tiles more time to dry.

Sealing Encaustic Cement Floor Tiles

To be sure they were dry I tested the floor with a damp meter, the readings were fine, and I was satisfied I could go ahead and apply the sealer. To seal the tiles, I used two coats of Tile Doctor Colour Grow, this is an impregnating sealer that penetrates and occupies the pores of the tile thus prevent dirt from becoming ingrained there. Colour Grow also leaves a matt finish which is ideal for this type of tile.
Encaustic Cement Tiles After Cleaning in Chipping Norton
With the grout and dirt removed and a sealer in place to protect them this floor will be much easier for the customer to keep them clean in future.

Get the Encaustic Look

If you like the look of Encaustic tiles but don’t want the hassle of having to maintain them it’s worth looking at their equivalent in Glazed Porcelain which are very low maintenance. CTD have a Cuban and Havana range which are inspired by the intricate geometric shapes found in Encaustic tiles, both are made from Glazed Porcelain which doesn’t need to be sealed and are therefore very low maintenance. CTD have over 100 tile shops in the UK and you can also buy on-line or order free samples via their website: www.CTDTiles.co.uk   Source: Encaustic Cement Tile Cleaning and Sealing Service in Chipping Norton, Oxfordshire

Monday, April 22, 2019

Pros and Cons of a Travertine Floor

It is important to know the pros and cons of a travertine floor before determining the suitability of using it for any specific application. Travertine is a type of sedimentary stone, and is made of carbonate compounds. Because of its marble like look, it is very famous as flooring materials.

Pros:

Travertine comes with wide range of beautiful colors. You can choose from cream, gold, ivory, walnut and many more. Travertine is easy to cut and shape, and allows you to form various patterns. You can go for different finishing options like brushed, shiny, matte with travertine. Travertine tiles do not crack easily; it is both beautiful and durable like marble. Polished travertine tiles allow easy removal of dirt.

Cons:

There are some disadvantages to be kept in mind. Travertine is naturally porous and susceptible to acids. Even spillage of orange juice and vinegar can cause it to be discolored and etched, which is why many times people do not go for travertine tiles in kitchens and bathrooms. Normally the pores are filled in the factory for a smooth look, and maintenance of the tiles involves filling the pores whenever needed. Keep in mind that wet travertine tiles are slippery.


Wednesday, April 17, 2019

How to Remove Carpet Glue from Old Edwardian Floor Tiles

This customer bought an Edwardian property in Worcester and discovered a stained yet beautiful tiled period floor when removing the hallway carpet. They were delighted to find the tiles were in good physical condition but as you would expect the floor needed a thorough clean and then sealing to protect the tiles and improve the finish.

Edwardian Hallway Tiled Floor Before Clean and Seal

The property was well located, close to the city centre, River Severn and the stunning historic 12th century Worcester Cathedral. Neighbouring houses were of a similar age and it was lovely to see so many of them had retained their Edwardian tiled porchways. Naturally the new owners were keen to retain as many of the period features of the property as possible, and so over the moon to discover the original hallway.

Edwardian Hallway Tiled Floor Before Clean and Seal Edwardian Hallway Tiled Floor Before Clean and Seal

After popping round to survey the floor I discussed my plan for restoring the hallway and submitted a quote based on two days’ work. The quote was accepted, and the work was scheduled for later in the month.


Cleaning an Edwardian Tiled Hallway Floor

The first day was spent cleaning the floor, firstly removing the carpet glue which was quite heavy on the edges of the floor. I used Tile Doctor Remove and Go for this and ceramic hob scraper, sometimes the oddest tools are the best! I then sprayed more Tile Doctor Remove and Go on to the remaining tiles leaving it to dwell for ten minutes. Then working the solution into the tiles with a 200-grit diamond pad fitted to my rotary scrubber, I really started to make some progress.

The soil generated was extracted with a wet vacuum and I made a start on giving the floor an acid wash. For this I applied Tile Doctor Acid Gel and pasted it onto the floor again working the gel into the tiles. Tile Doctor Acid Gel is particularly useful for removing cement and grout smears. Also, there was some evidence of salt stains (Efflorescence), old floors like these don’t have a damp-proof membrane so it’s quite normal for moisture to rise through the tile.

I removed the slurry with a heavy duty wet and dry vacuum cleaner. Then as a final measure I used micro fibre cloths and some Tile Doctor Grout Clean-up to remove any remaining smears once the floor was clean. I left for the day allowing the floor to dry overnight and would return the following day to seal.


Sealing a Edwardian Tiled Hallway Floor

Returning the following morning, I first checked the floor with a moisture meter to ensure it had dried off fully overnight. The sealer I would use as agreed with the customer would be Tile Doctor Seal and Go Extra. This is a topical fully breathable semi-gloss sealer and would give a nice light sheen and allow the colours in the tile to shine through. This sealer is fully breathable and would cope well with the light efflorescence issues the floor had experienced in the past.

Edwardian Hallway Tiled Floor After Clean and Seal Edwardian Hallway Tiled Floor After Clean and Seal

The moisture readings were fine, so I started to apply the first coat of sealer using micro fibre cloths. After allowing the required drying time between coats I started on the second coat. Leaving the right amount of time between coats is especially important in winter when drying takes longer. The floor was treated to five coats of sealer in total and the customer was very satisfied with the finish.

Edwardian Hallway Tiled Floor After Clean and Seal


Source: Edwardian Tile Cleaning and Sealing Service in Worcester, Worcestershire

Tuesday, April 16, 2019

Natural Homemade Grout & Tile Cleaner

Combining "green" ingredients like baking soda with old-fashioned elbow grease works just as well as chemical cleaners in most cases, the Environmental Protection Agency reports. If you have a challenging tiled area in your bathroom or kitchen, consider giving it an initial scouring with baking soda first. Add the power of white vinegar if your tiles and grout have soap scum or film. If the grout remains dirty or mildewed, give it special attention with a paste of baking soda and water. A spray of food-based hydrogen peroxide, available at health food stores, may put the final nail in the mold's coffin.

  1. Sprinkle baking soda on a cloth or sponge that has been dampened with either warm water or vinegar.
  2. Rub the sponge or cloth over both the tiles and grouting. Dampen the sponge with water or vinegar as needed, and add more baking soda to the sponge as needed.
  3. Rinse out the sponge and replace it with an old toothbrush for the grout-only cleaning. Rub the baking soda into the grout with the toothbrush.
  4. Rinse the tiled area with warm water.
  5. Mix baking soda and warm water in a medium plastic bowl until the mixture reaches a paste-like consistency.
  6. Work the baking soda mixture into the grout with the toothbrush.
  7. Fill a spray bottle with equal parts water and hydrogen peroxide at 35 percent strength.
  8. Spray the grout twice with the hydrogen peroxide formula, with an interval of at least 30 minutes between sprays.
  9. Leave the mixture on overnight.
  10. Rinse the tiled area with warm water. Wipe tiles and grout with a clean, dry cloth or squeegee.

Things You Will Need
  • 3 to 4 cups baking soda
  • 1 cup white vinegar (optional)
  • 2 to 3 cups warm water
  • 1 cup hydrogen peroxide, 35 percent strength
  • Sponge or microfiber cloth
  • Old toothbrush
  • Clean, dry cloth or squeegee
  • Spray bottle

Tips
Borax may be substituted for baking soda.
Baking soda is helpful for keeping shower and sink drains clog-free organically. Scoop any leftover baking soda mix into the drain, let it sit for a few minutes and run hot water into the drain.

Warning
White vinegar may scratch ceramic tile. Use it cautiously, or substitute warm water for vinegar when scouring tiles with baking soda or borax.


Wednesday, April 10, 2019

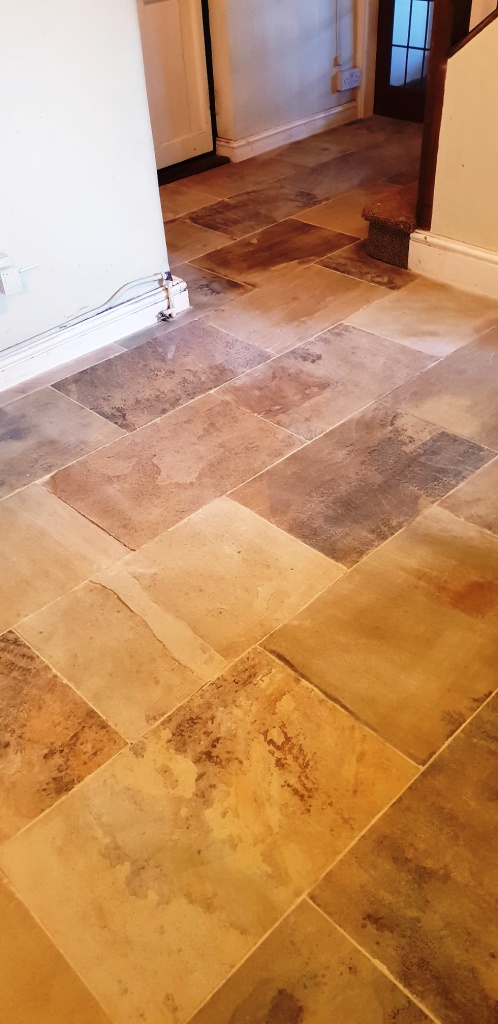
Restoring the Appearance of a Dirty Flagstone Floor

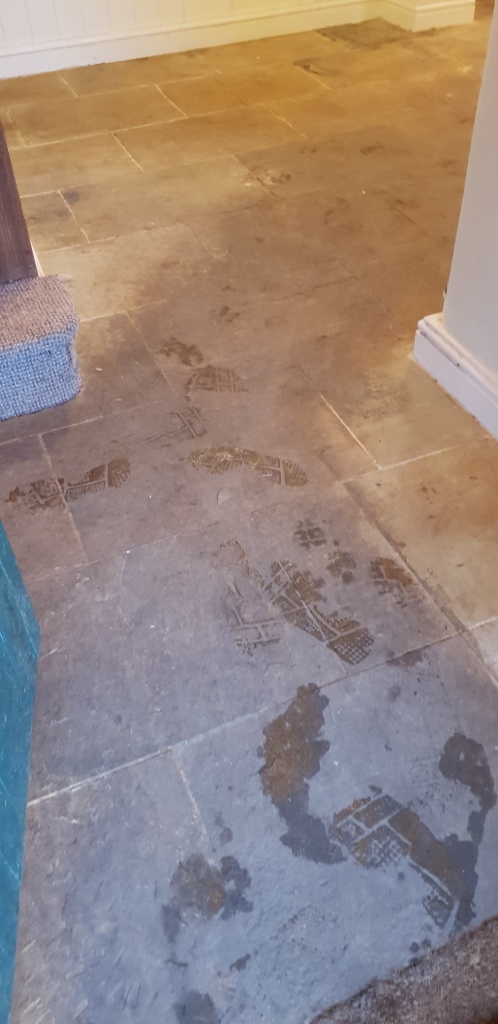
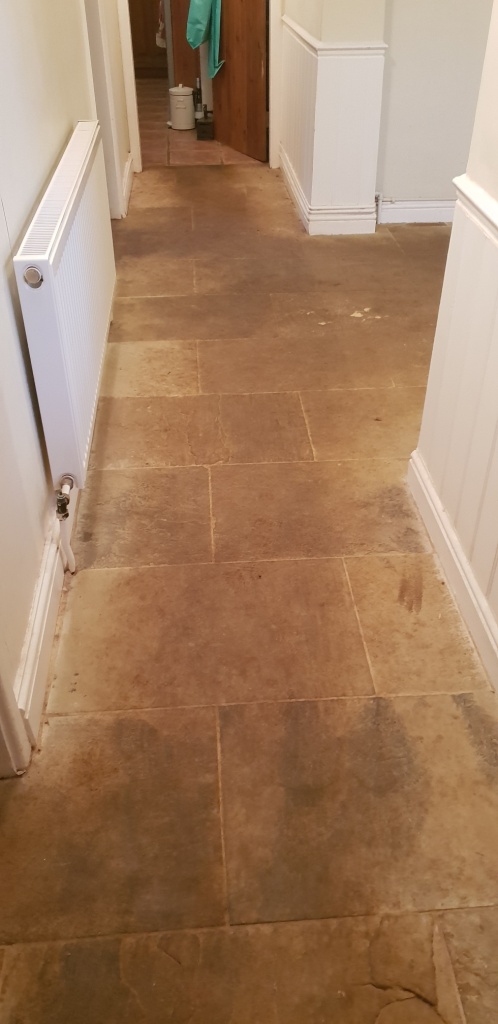
We were asked by a client who had rented her property out near Spilsby Lincolnshire, if we could restore her very dirty natural flagstone hallway. The previous tenants had subjected the floor to heavy usage and unfortunately it had not been maintained very well. Spilsby is a small market town that has retained its’ character and not changed much since the 19th century. Being about 17 miles East of my base in Woodhall Spa it wasn’t long before I was able to go over and survey the floor.

Natural Stone Floor Before Cleaning Spilsby Natural Stone Floor Before Cleaning Spilsby


As you can see from the pictures the flagstones were very well used and had lost all their natural beauty. The stone would normally have a lovely mixture of colours and grains showing, as you can see these were nowhere to be seen. I suspect the tenants had been using household cleaners on the floor which tend to strip the protective sealant due to their acidic composition leaving the stone vulnerable. The stone tiles were riven so once the sealant had started to break down the dirt soon becomes ingrained in the uneven surface making them difficult to clean.

The client was keen to get the floor looking nice and clean ready for the next tenants to move in so after discussing the process to get the floor looking good again, we agreed a price and booked in a date for the work to be completed.

Cleaning and Restoring a Natural Stone Tiled Hallway Floor

Arriving on the first day, we taped up the skirting and plinth to prevent them getting damaged. A strong dilution of Tile Doctor Pro-Clean was then applied to the stone floor and left to soak in for ten minutes so it could get to work breaking down the dirt and any remaining sealer. Pro-Clean is a professional tile and grout cleaning product that is ideal for cleaning dirty stone tiles like these.

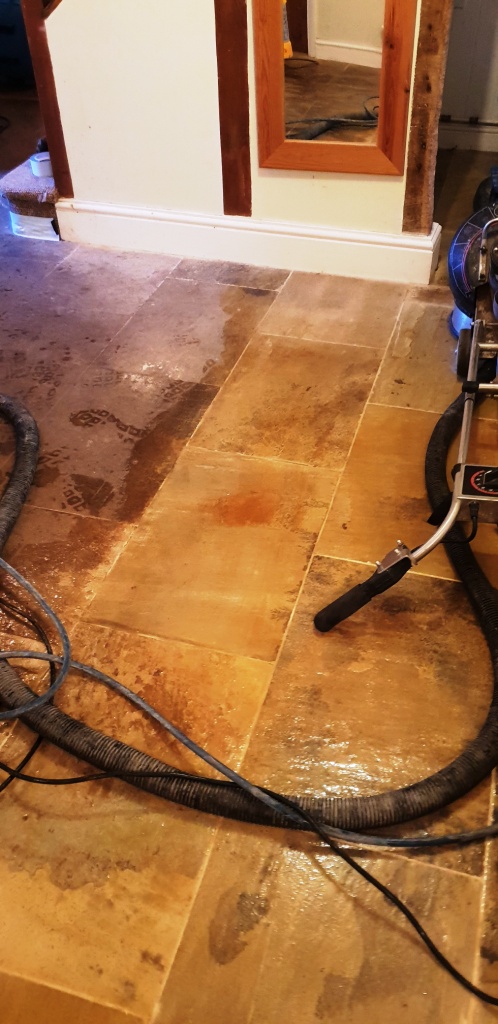
The stone tiles were riven (not a smooth) so we used a Rotovac system to get the tiles clean. The machine scrubs the floor with soft brushes whilst simultaneously extracting the soil using self-contained pressurised water. It’s a very efficient way to deep clean the floor and vacuum all the dirty solution away from the floor. It immediately transformed the look of the stone and achieved a 1st class result in removing all the grime and dirt from the stone.

Natural Stone Floor During Cleaning Spilsby Natural Stone Floor After Cleaning Spilsby
The cleaning process went very well and by the time we had finished the whole area looked much brighter. The natural tones of the stone had come back to life and with the application of a sealer they should stay that way for some time to come. Before this could happen however the floor needed to be dry so we the help of a couple of turbo dryers the floor was left to dry off overnight.

Sealing a Natural Stone Tiled Hallway Floor

The following day after making sure the floor was dry by testing with the moisture meter, we sealed the floor with two coats of our natural look sealer Tile Doctor Ultra-Seal. This is an impregnating sealer that works by seeping into the pores of the stone thereby preventing dirt and liquid from becoming ingrained there.

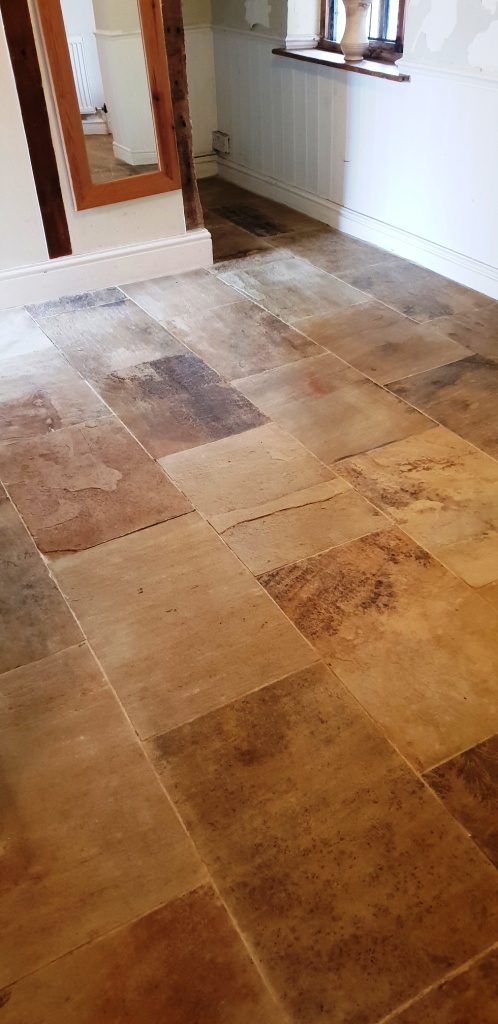
Natural Stone Floor After Cleaning Spilsby

The sealer gave the stone a natural look that the client requested, and she was delighted with the end result. Hopefully she will have no trouble renting out the property, the floor now looks stunning!


Source: Flagstone Tile Cleaning and Sealing Service in Spilsby, Lincolnshire

Tuesday, April 9, 2019

How to Remove Glue From Self-Stick Floor Tiles

After removing self-stick tiles from the floor, there is often a glue residue remaining on the floor that is hard to remove with just a putty knife and warm, soapy water. The industrial glue used on self-stick tiles is an adhesive made at cement-bonding strength to prevent tiles from moving when walked on or cleaned. This strength level requires a special adhesive remover because it is not easily removed with simple cleaning or scraping.

Mineral Spirits

Step 1
Pour a capful of mineral spirits into a rag to get the rag wet but not dripping.

Step 2
Rub the wet cloth over the adhesive in circular motions until the mineral spirits dissolve the adhesive.

Step 3
Scrape any remaining adhesive with a putty knife. This will not require much strength if the mineral spirit-covered rag had been wet enough to soak the adhesive without soaking the floor.

Step 4
Wet the rag again with mineral spirits if the adhesive is difficult to remove with a few passes of the putty knife and rub the adhesive longer.

Step 5
Wash the floor with warm, soapy water to remove mineral spirits before beginning the new floor placement.

Dry Ice

Step 1
Place a block of dry ice on the tile adhesive while wearing gloves to protect your hands from damage.

Step 2
Allow the dry ice to freeze the adhesive for five minutes.

Step 3
Place the dry ice on another section of adhesive and scrape the frozen adhesive off the floor with a putty knife. The adhesive should lift from the floor in frozen chunks after some strong scraping.

Step 4
Continue this pattern until the entire floor is clear of adhesive.


Source: www.Hunker.com

Thursday, April 4, 2019

Whats Involved Restoring an Old Victorian Tiled Floor

A customer from Epsom called me regarding the restoration of her Victorian tiled hallway which was previously covered in carpet and in a poor state of health. Intrigued and having spoken on the phone I agreed a time to call in and survey the floor and work out a way forward. I visited the property and could immediately see considerable repair work including resolving problems with the sub floor and tile replacement would be required and all this before cleaning and sealing.

Victorian Tiled Hallway Floor Before Rebuild in Epsom

This house had undergone some serious renovations recently and the floor was left till last. I’m not a structural engineer so was unable to advise what had happened to the floor, but all the faults appeared to run in a line from the kitchen to the front door. It was an old house so who knows what might have caused it, it might even have been bomb damage from the 2nd world war.

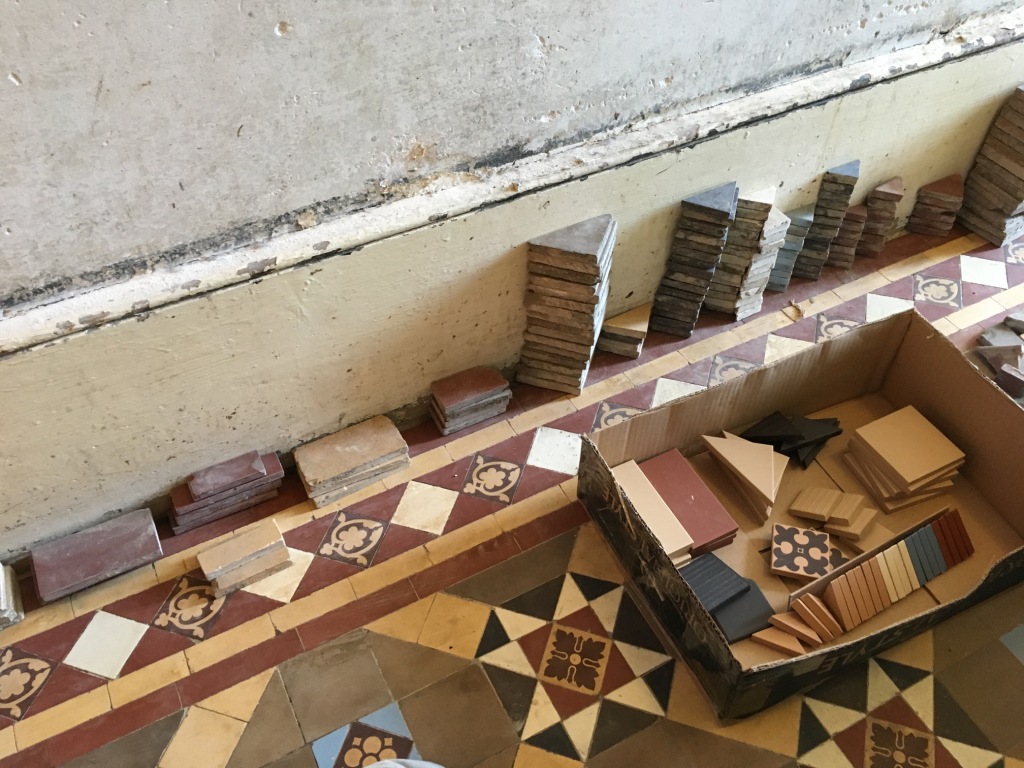
There were three main problem areas. The worst was by the front door where an area of about a metre square was just loose tiles and laid on rubble. The family had got used to jumping across the threshold so as not to make the problem worse. Next was a strip through the middle that was totally exposed and a massive trip hazard. The floor boards were visible as was the floor base. There was another area by the front room entrance that had some loose pattern tiles that clunked every time someone entered the room. Finally, there was a small area to the entrance to the basement that had been patched in with cement.

Victorian Tiled Hallway Floor Before Rebuild in Epsom Victorian Tiled Hallway Floor Before Rebuild in Epsom

It was clearly going to be a challenging restoration for several reasons. Had the customer kept all the loose tiles? If not, could I source matching replacements? Would it be possible to level the floor that appeared to be sloping towards the front door? Could I remove loose and broken tiles without disturbing others? Could I manage the customers high expectations?

Having worked on numerous Victorian floor restorations in the past I knew where I could potentially source replacement tiles. I also had the full backing of the Tile Doctor network so knew I could always reach out to other Tile Doctors should I face any major problems. Undaunted we agreed a date for me to return and start the work and in the mean time I would talk to several specialist tile suppliers about replacements.


Rebuilding a Victorian Tiled Hallway Floor

Before starting any tiling work, I photographed the whole floor extensively from different angles so I would have something to refer to later. Then I removed all the loose tiles placing them in buckets for further cleaning. I now had three areas that I could see beneath the floor boards and another area of cement that I broke up using a chisel drill. In total I filled six buckets with rubble and broken tiles, all of which were taken off site and disposed of at a local recycling centre.

Victorian Tiled Hallway Floor During Rebuild in Epsom Victorian Tiled Hallway Floor During Rebuild in Epsom

The next step was to ensure I had a level and flat base in the newly exposed areas on which to lay the tiles. I managed this by laying down a self-levelling compound. The compound is mixed in a bucket and poured into the holes up to the required level allowing gravity to do the levelling work for you. It is then left to dry and harden overnight.

Victorian Tiled Hallway Floor During Rebuild in Epsom Victorian Tiled Hallway Floor During Rebuild in Epsom

The next day I started by re-fixing the loose tiles in areas where the subfloor was still solid. Close packed Victorian tiles are very tough but can be brittle, often removing a single tile can cause chips or break surrounding tiles. I always buy more replicas than the job requires for this very reason. This can be very frustrating work, so I find its best approach is to remove as few tiles as possible. I explained to the customer that the floor is over 100 years old and some chips and scratches give the floor character. Perfection is an unrealistic expectation where some marks are permanent.

Part of the other renovations included the removal of two antique radiators leaving some strips of carpet and adhesive attached to the floor. I removed this using a strong mixture of tile doctor remove and go and a little encouragement from a 50-grit diamond block.

The preparation continued with the cleaning up of the three buckets of tiles recovered at the beginning of the restoration. Old adhesive and cement must be removed before refitting to ensure they can be laid flush to the adjacent tiles. Luckily for me the weather was warm and sunny, so I sat on the garden wall for the afternoon using a combination of a wet tile cutter, Fein tool and diamond blocks to get them clean while I took in the sun.

Victorian Tiled Hallway Floor During Rebuild in Epsom

The next day was spent re-laying the tiles. The tiles are in an intricate pattern and in various shapes and sizes. The main area by the front door took all day. The difference in thickness between the original and replacement tiles made the work particularly difficult. Interested neighbours came and went commenting on my progress throughout.
Victorian Tiled Hallway Floor During Rebuild in Epsom


Cleaning a Victorian Tiled Hallway Floor

The next day I soaked all the tiles with tile doctor Acid Gel and left to dwell for 30 minutes. This was to work into the porous areas and to break down years of dirt. Then attaching a very coarse 100-grit diamond encrusted pad attached to a rotary floor machine I cleaned the tiles with a dilution of Tile Doctor Pro-Clean. This process skims away a small layer of the tiles thus the dirt too. All the soil was extracted from the floor using a wet vacuum. I repeated this process twice for maximum effect. The customer was amazed at the result and I wasn’t finished yet. When wet the contrast between the white tiles and dark were astonishing, however this was temporary so I made sure the customer aware that without a sealer they would look washed out and colourless. I left the scene overnight with a couple of warm air movers in place to fully dry out the tiles.


Sealing a Victorian Tiled Floor

The tiles need to be dry before sealing so the next day my first action was to test the floor for moisture using a damp meter. They passed and were ready to take a sealer, so I discussed the different options and finishes with the customer. It was a very interesting house, full of retro artefacts so we needed something that would blend in, more importantly she had four children and a husband who bought a cycle through the house twice a day. I recommended Tile doctor seal and Go Extra. It's super tough, offering great protection and gives a subtle sheen that I felt would suit the house. Three coats later and I was done, closing the door behind me as everyone was at school and work.

Victorian Tiled Hallway Floor After Rebuild in Epsom Victorian Tiled Hallway Floor After Rebuild in Epsom

I popped back later that evening to discuss the job. The newly applied sealer had intensified the depth of colour in the Victorian tiles and returned the brightness to the floor. She was very pleased and even gave me a carrot cake to take home with me.

Victorian Tiled Hallway Floor After Rebuild in Epsom


Source: Victorian Tile Cleaning and Restoration Service in Epsom, Surrey
Wednesday, April 3, 2019

How to Sand Your Wood Floor

Sanding your wood floor is a mandatory task you have to do before refinishing or finishing your floor. Before you start sanding your wood floor yourself you must be aware that there are a few steps to follow in order to make you don’t ruin your floor. Sanding can be a tricky task to handle if you don’t have any experience.

Which Tools to Use?
There isn’t many tools required to sand your floor. You can rent a sanding machine (if you think you will be using it quite often you may want to buy one), an edger (a small sander you can use against walls). And finally a hand scraper for areas you can reach with the edger or the sanding machine. A nail set and a hammer will also be required to remove any exposed nails in the floor.

Belt Sanding
Before you start the sanding proces sink all the exposed nails in the floor. If you don’t do so they will damage the sanding machine.

Once you are ready you can start sanding, first use a 60-grit paper and sand with the grain on the floor. Doing it the other way round will cause important damage to your floor. Never let the sander still. You have to keep moving it around the room or it will sand ruts into the floor. This will be very hard to remove.

Once you have finish with the 60-grit you can use a 80-grit and finally move on to a 100-grit for a smooth finish.

Edger Sanding
Once you have finished with the belt sanding you’ll have to move on to the edger. It will help you sand the areas – especially next to the walls the sanding machine has missed. You have to keep the edger moving from back to front a bit like the sanding machine. First start with a 60-grit paper and then move on to 80-grit and after to 100-grit.

Hand Sanding
Corners are not accessible with large tools. That’s why you’ll have to use a hand scraper. This will enable you to reach tricky areas. Make sure the areas you’ve sanded with the edger and the hand scraper blend in nicely with the rest of the room.


Monday, April 1, 2019

How to Repair a Hairline Crack in Tile

While tile is a sleek, durable material for kitchen floors and bathroom walls, it’s not indestructible and can chip or crack over time. It can also crack if the material underneath the tile is unstable and begins to shift slowly over time. While most experts believe that the best way to repair any size crack is by replacing the tile completely, there is at least one method to fix a small hairline crack. However, keep in mind that any crack in your tile is often a sign of a larger problem—namely, an unstable foundation.

Things You’ll Need
  • Two-part epoxy
  • Small plastic plate or bowl
  • Wooden stick
  • Two small brushes
  • Rag
  • Paint
  • One-coat sealer
Instructions

  1. Squeeze the two-part epoxy out into a plastic plate or bowl and mix each component together with a wooden stick until they are well-blended.
  2. Dip your brush into the epoxy, dabbing the brush directly onto the hairline crack. Wait for the adhesive to dry and then wipe away any excess epoxy with a rag.
  3. Assess whether the tile could use a coat of paint so that it matches the other tiles better. Some hairline cracks are so small that paint isn’t necessary.
  4. If so, purchase paint that is suitable for tile. Try to find a shade that matches your original tile as closely as possible. While you’re there at the hardware store, purchase some clear coat sealer for after the paint dries.
  5. Brush some paint very lightly over the crack so that it’s layered, yet not too thick. Allow the paint to dry according to the directions on the can or package and then dab on a layer of one-coat sealer to protect the paint once it has dried.


Source: HomeGuides.sfgate.com