Friday, March 22, 2019

Dealing with Salt Damaged Kitchen Quarry Tiles in Droitwich-Spa, Worcestershire

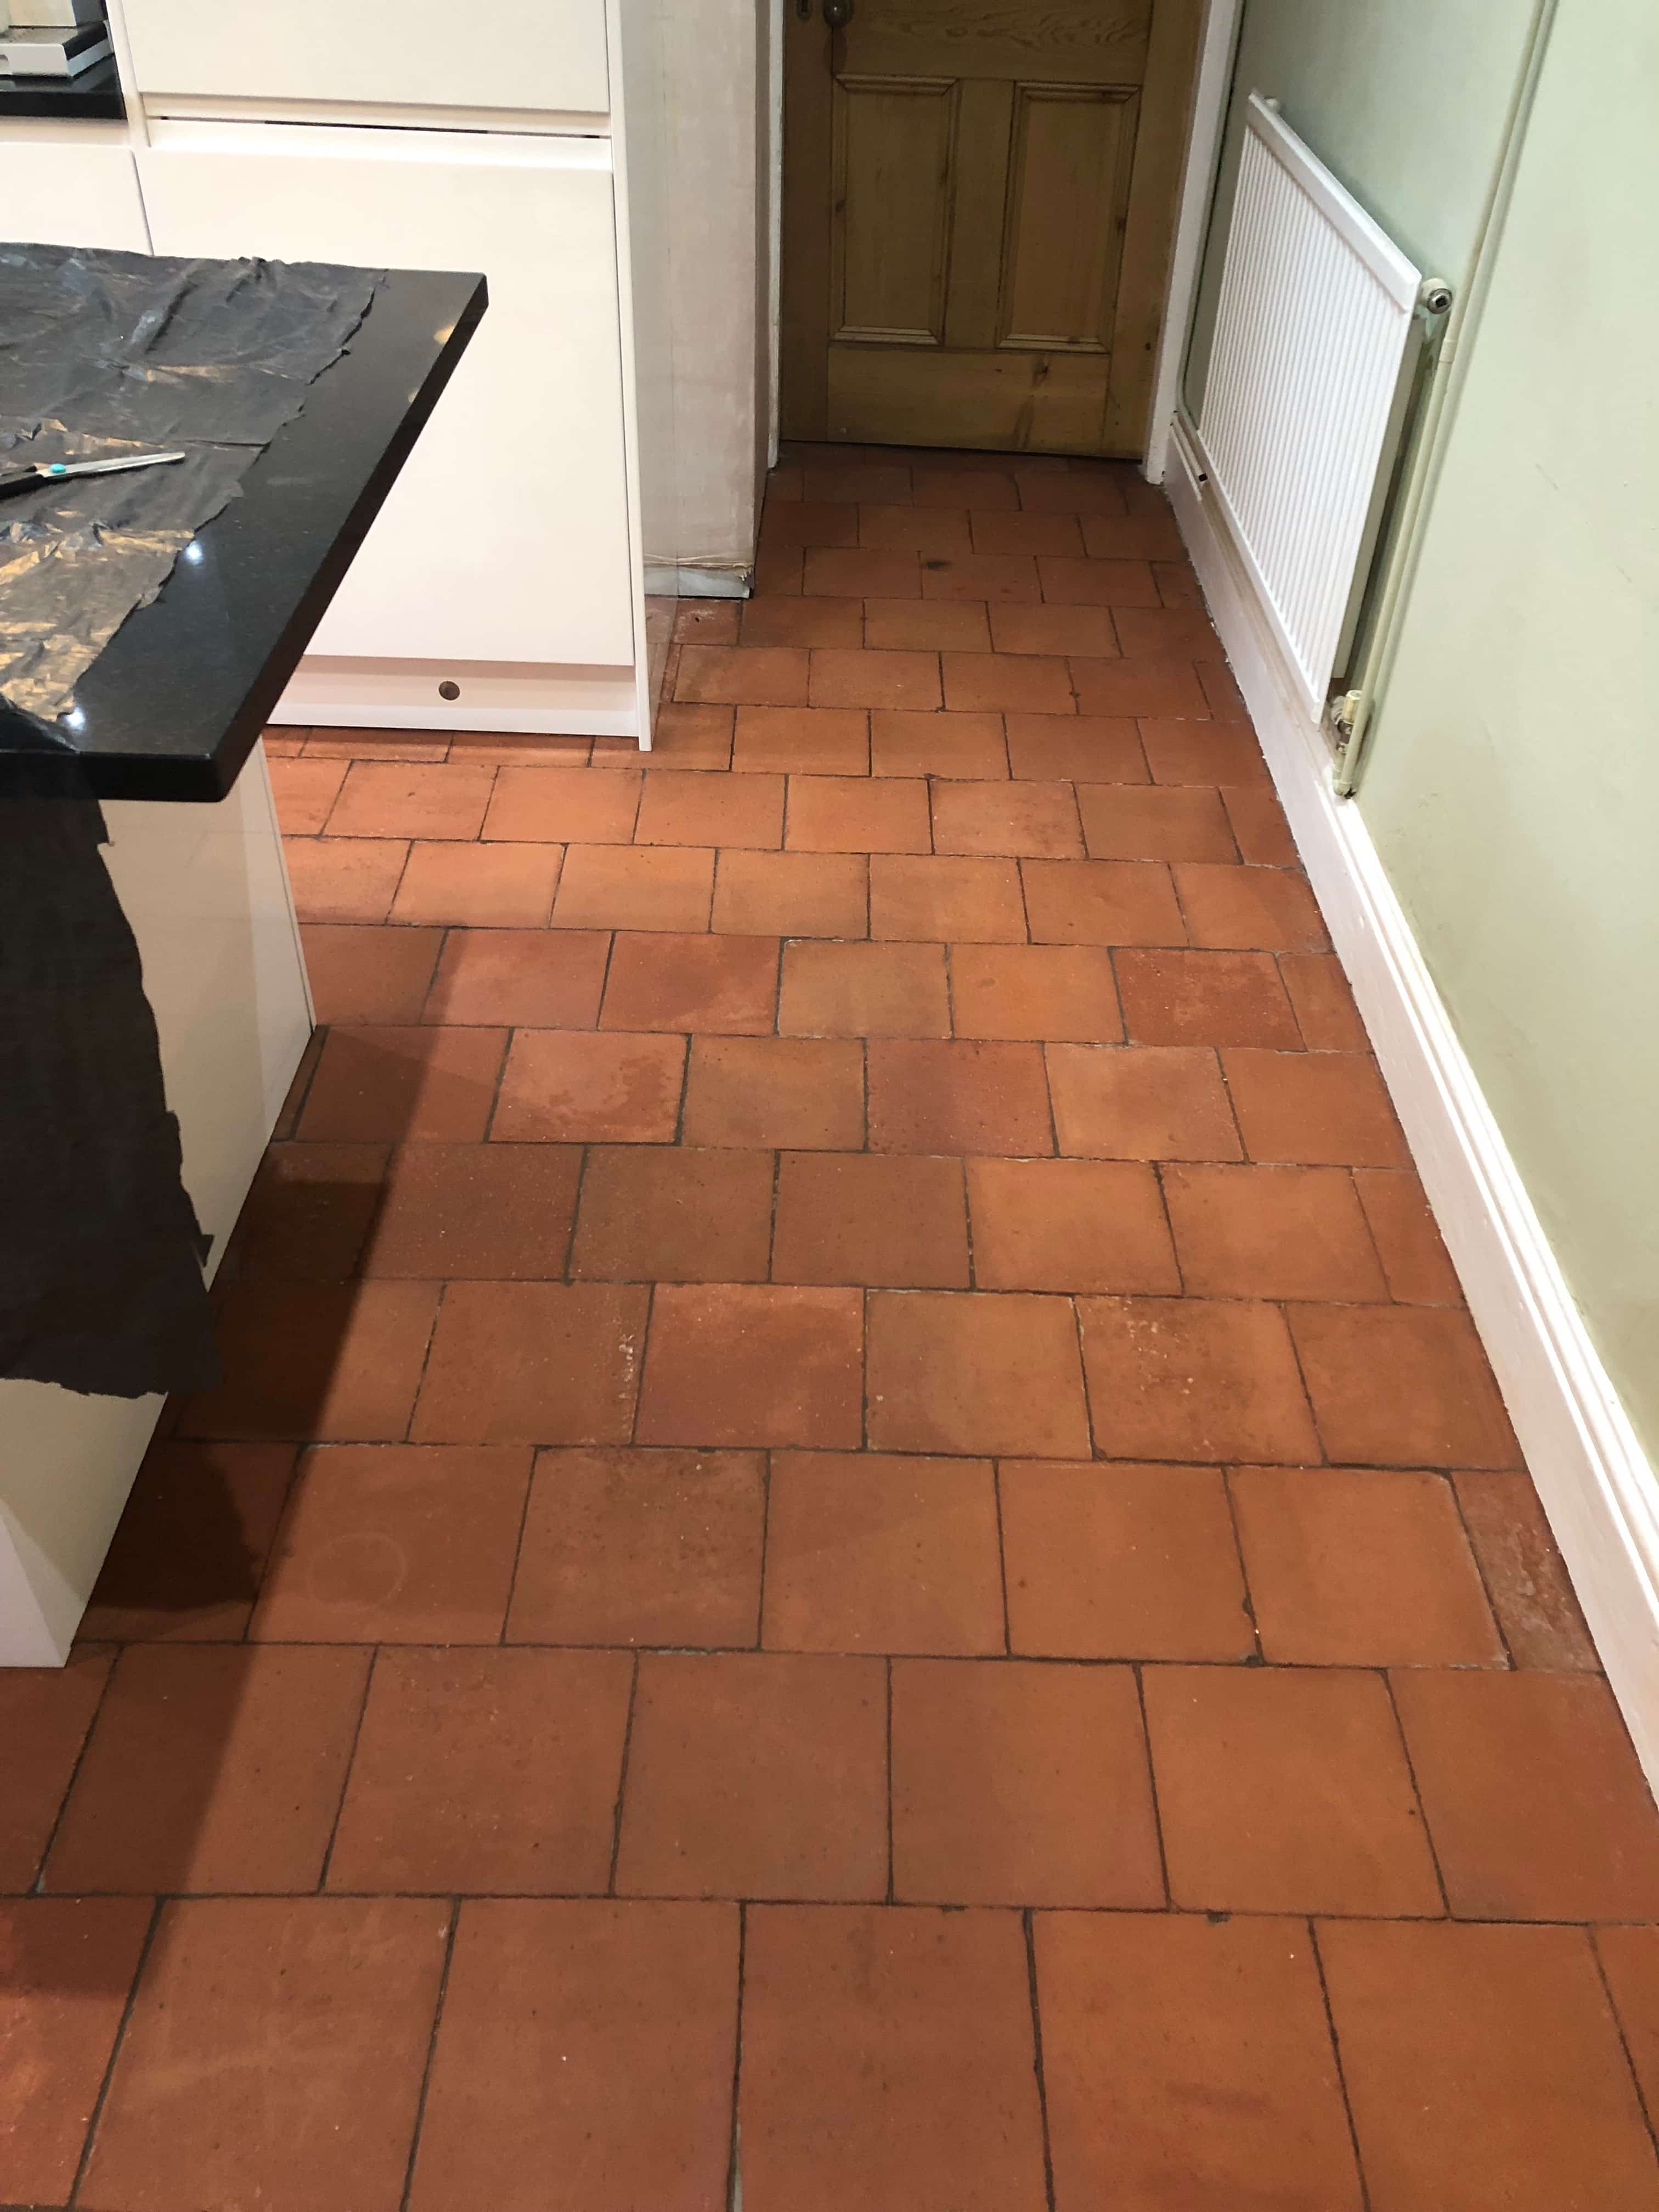
I was contacted to inspect a quarry tiled floor in the kitchen of a property in Droitwich Spa which was in need of repair and also in need of a clean and seal. Having spoken to the customer previously, I was aware there were several damaged tiles that would need replacing so before visiting the property to survey the floor I sourced potential replacements from several manufacturers so I could find one that would be a good match to the originals.

Once that was done, I went over with the samples to inspect the floor and whilst I was there marked all the damaged tiles that would need lifting and replacing. The house was quite old and many of the tiles had been badly affected by salt damage at some point in the past. Given the age of the property it could have been from efflorescence or it is possible it was flood damage as the property was about 700m from the River Salwarpe which has a history of overflowing. In fact, Droitwich Spa is known for its salt deposits and became a Spa town when the salt industry started to dwindle towards the end of the 19th century.

I worked out a quote to repair the floor, then clean and seal it which was accepted, and the work scheduled.


Cleaning and Repairing a Quarry Tiled Kitchen Floor

The first job was to remove the damaged tiles from the floor using various tools to prise the tiles away from the substrate. I then used a self-leveller to level the screed. All the new tiles would need cutting so I used a Bridge Saw with a diamond blade and proceeded to cut all the tiles to shape. The replacement tiles were then fixed in place using flexible adhesive and left to dry and then grouted.

Quarry Tiled Kitchen Floor During Tile Replacement Droitwich Spa Quarry Tiled Kitchen Floor After Tile Replacement Droitwich Spa

The following day I moved onto cleaning the tiles. Tile Doctor Remove and Go was used to tackle any previous sealers. leaving the product to dwell for the required time and then working it into the floor with a rotary scrubbing machine. I then used Tile Doctor Acid Gel to remove old grout smears and combat any efflorescence the floor was encountering, before vacuuming the remaining slurry with a wet vacuum. Once I was happy the floor was as clean as it could be, I left the tiles to dry overnight so they could be sealed the following day.

Quarry Tiled Kitchen Floor During Cleaning Droitwich Spa Quarry Tiled Kitchen Floor After Repair and Cleaning Droitwich Spa


Sealing a Quarry Tiled Kitchen Floor

I returned the next day and began by using a moisture meter to ensure the floor was dry. All was well so I proceeded to seal the floor using Tile Doctor Seal and Go Extra, a semi-gloss breathable sealer that will allow moisture to rise through the tile unimpeded which was important considering its history. The floor required five coats of sealer to completely seal the floor and the customer was very pleased with the result as indicated in the feedback below:

"We are very happy with the work that Mark carried out for us. Mark was very professional and always responded quickly to any enquiries that we had. We have recommended Mark to our friends and family. Thank you. Lydia B, Droitwich Spa"

Quarry Tiled Kitchen Floor After Sealing Droitwich Spa


Source: Quarry Tile Cleaning and Repair Service in Droitwich-Spa, Worcestershire
Thursday, March 21, 2019

Natural Homemade Grout & Tile Cleaner

Combining "green" ingredients like baking soda with old-fashioned elbow grease works just as well as chemical cleaners in most cases, the Environmental Protection Agency reports. If you have a challenging tiled area in your bathroom or kitchen, consider giving it an initial scouring with baking soda first. Add the power of white vinegar if your tiles and grout have soap scum or film. If the grout remains dirty or mildewed, give it special attention with a paste of baking soda and water. A spray of food-based hydrogen peroxide, available at health food stores, may put the final nail in the mold's coffin.

Things You Will Need
  • 3 to 4 cups baking soda
  • 1 cup white vinegar (optional)
  • 2 to 3 cups warm water
  • 1 cup hydrogen peroxide, 35 percent strength
  • Sponge or microfiber cloth
  • Old toothbrush
  • Clean, dry cloth or squeegee
  • Spray bottle

  1. Sprinkle baking soda on a cloth or sponge that has been dampened with either warm water or vinegar.
  2. Rub the sponge or cloth over both the tiles and grouting. Dampen the sponge with water or vinegar as needed, and add more baking soda to the sponge as needed.
  3. Rinse out the sponge and replace it with an old toothbrush for the grout-only cleaning. Rub the baking soda into the grout with the toothbrush.
  4. Rinse the tiled area with warm water.
  5. Mix baking soda and warm water in a medium plastic bowl until the mixture reaches a paste-like consistency.
  6. Work the baking soda mixture into the grout with the toothbrush.
  7. Fill a spray bottle with equal parts water and hydrogen peroxide at 35 percent strength.
  8. Spray the grout twice with the hydrogen peroxide formula, with an interval of at least 30 minutes between sprays.
  9. Leave the mixture on overnight.
  10. Rinse the tiled area with warm water. Wipe tiles and grout with a clean, dry cloth or squeegee.

Tips
  • Borax may be substituted for baking soda.
  • Baking soda is helpful for keeping shower and sink drains clog-free organically. Scoop any leftover baking soda mix into the drain, let it sit for a few minutes and run hot water into the drain.
Warning
  • White vinegar may scratch ceramic tile. Use it cautiously, or substitute warm water for vinegar when scouring tiles with baking soda or borax.

Thursday, March 14, 2019

Renovating Dirty Travertine Floor Tiles in Lincolnshire

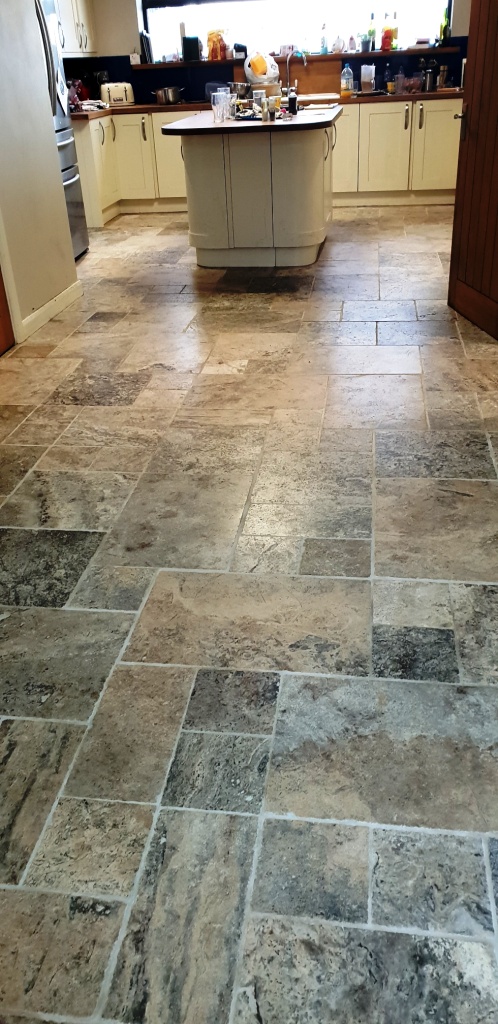
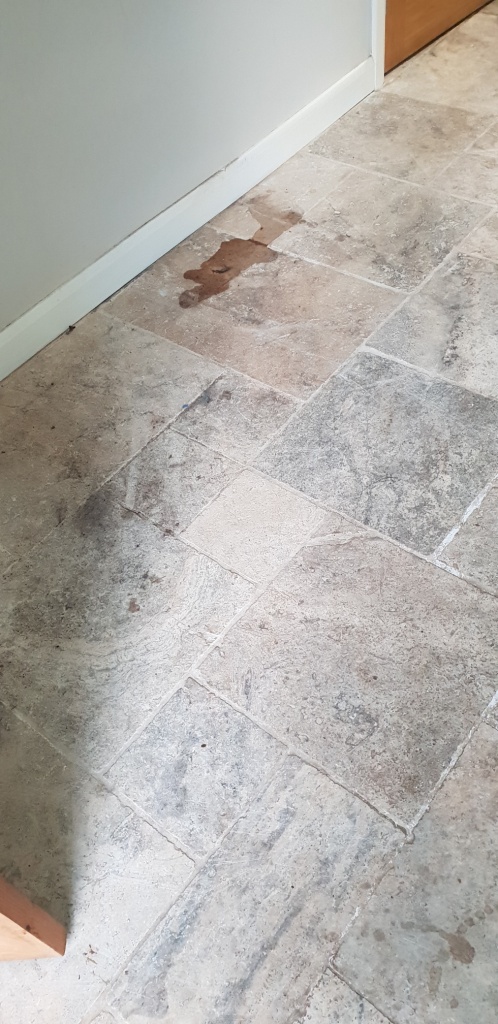
A customer from the village of Coningsby was having trouble keeping their Travertine tiled Kitchen floor clean. Another company had sealed the flooring previously, but it clearly hadn’t lasted and dirt had now become ingrained in the pores of the stone. As a result, mopping the floor wasn't effective at removing the dirt from either the Travertine or the grout lines.

This was a busy work kitchen that needed to have a floor that is easy to maintain; now frustrated with the way the floor looked they considered having it taken up and replaced but decided to contact Tile Doctor first looking for a remedy.

Travertine Floor Coningsby Before Cleaning Travertine Floor Coningsby Before Cleaning

We visited the property to survey the floor and discuss the issues they were facing with the floor. It clearly needed to be deep cleaned and then resealed properly with a more effective product. I explained our process and discussed the result they were looking for. They were happy for me to go ahead and requested a Matt finish rather than a shine or gloss look as it was a high use kitchen.


Cleaning and Burnishing a Travertine Tiled Floor

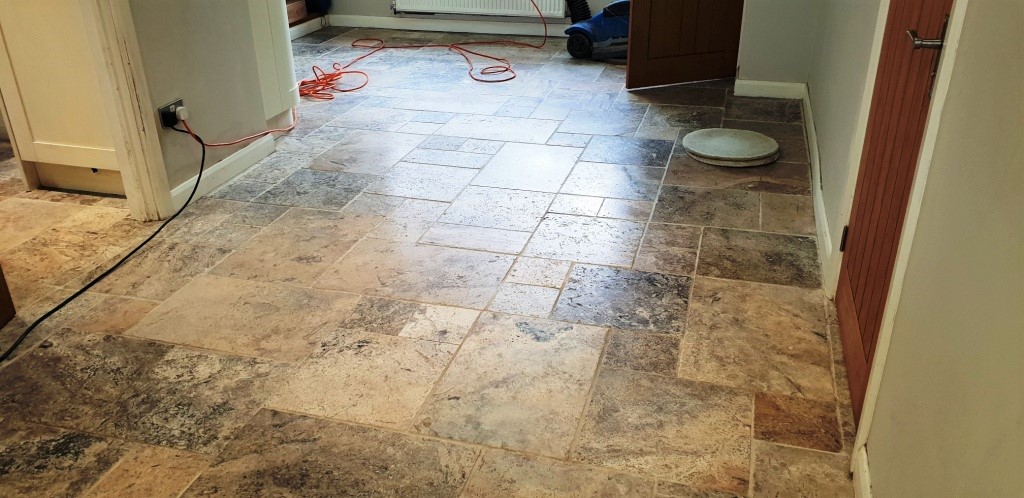
I returned on the agreed date and spent the first day removing the old sealer that was no longer working and deep cleaning the flooring. To achieve this, I used a series for burnishing pads of different grits. After each pad the floor was rinsed using our Rotovac system which rinses the floor and extracts the dirty water off the floor at high speed. Although an expensive investment the machine makes light work of cleaning hard floors and saves a lot of time.

Travertine Floor Coningsby During Cleaning

After cleaning the floor, a turbo dryer was installed to speed up the drying process so the floor can be inspected, and any stubborn areas redone. The tiles looked nice and clean, but I could see some areas of grouting needed more work so these were hand scrubbed with Tile Doctor Pro-Clean followed by another rinse to remove the soil.

Travertine Floor Coningsby During Cleaning Travertine Floor Coningsby After Cleaning

At this stage I also noticed a few holes in the travertine that were filled for the customer with a matching colour. This is a common problem for Travertine and unfortunately, they easily attract dirt, so filling makes the floor much easier to clean going forward.


Sealing a Travertine Tiled Floor

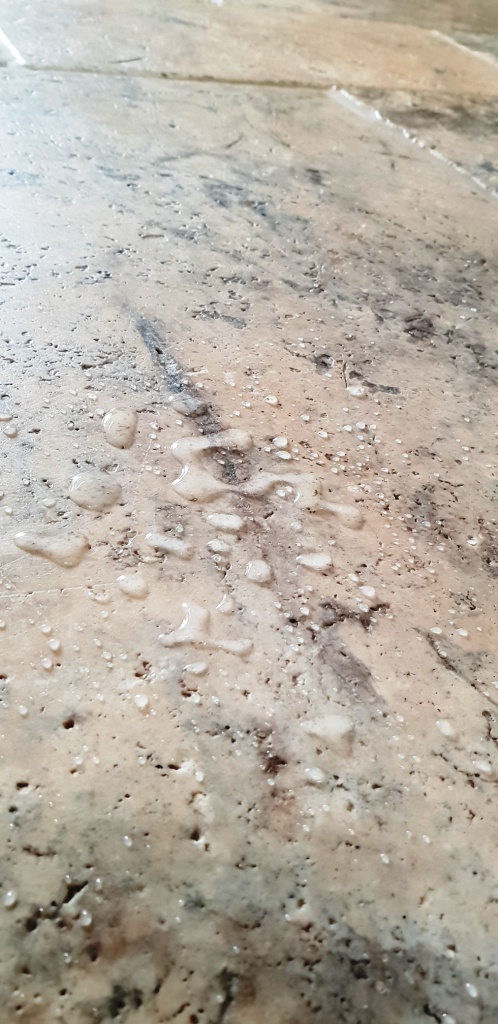
We returned the following morning and tested the flooring with a damp meter to make sure it was fully dry. All was well and it was ready to seal with our quality impregnator Tile Doctor Colour Grow which protects the floor from within whilst enhancing the natural colours in the stone in the process. The Travertine proved more absorbent than usual for this type of stone and took three coats before a water test indicated the floor was fully sealed.

Travertine Floor Coningsby After Sealing Water Test

You can see from the photo above that the water beaded up on the surface and can be simply wiped away even after a few minutes. This shows maximum protection has been applied. Given my experience with this floor I suspect the previous company had not applied enough sealer and this would explain why it failed, had they conducted a water test then this should have been obvious.

We then gave a final polish with our buffer and a white soft pad to really strengthen the seal and give the best finish. I should mention that Colour Grow leaves a matt finish which matches the customer’s request.

Travertine Floor Coningsby After Cleaning Travertine Floor Coningsby After Cleaning

For aftercare cleaning going forward I left the customer a complimentary bottle of Tile Doctor Neutral Tile Cleaner that looks after the seal better than any high alkaline or acidic cleaners like bleach or washing up liquid which will prematurely erode the seal.

The customer was delighted with the results, commenting on how much brighter the whole room looked.

Travertine Floor Coningsby After Cleaning


Source: Travertine Tile Cleaning and Sealing Service in Coningsby, Lincolnshire

Wednesday, March 13, 2019

How to: Replace a Broken Tile

Cracks in the tile are generally caused by the building settling, but can also be due to improper tile installation, the wrong kind of tile being used, or accidents. Whatever the reason, broken tiles are generally considered unsightly, and can even lead to more serious problems if moisture happens to get into and under the cracks.

Obviously, in most cases, you won’t want to replace the entire floor due to one or two broken tiles. Here is how to remove and replace the broken tiles easily.

Materials:
  • Replacement tile
  • Tile adhesive
  • Grout
  • Water
Tools:
  • Grout Scraper
  • Hammer
  • Pry bar
  • Safety glasses
  • Trowel
  • Grout float
  • Sponge
  • Small bucket
  • Filling knife
1. Scrape the Grout
Working around the tile joints (seams), scratch out the grout using the grout scraper. You’ll be getting a pretty fine mess going, but you need to get as much of the grout out as possible. This will separate the broken tile(s) from the ones that are not broken and will make it easier to get a pry bar under the edges if necessary later on.

2. Break/Loosen the Tile
With the hammer, hit the tile a couple of times to loosen it from the surface it is adhered to. Depending on the size of the tile, you will probably have to remove it in chunks. Once you’ve broken it up, use the other side of the hammer or the pry bar to lift up the tile pieces.
3. Scrape Adhesive
Once you’ve gotten as much of the tile as possible removed, you need to get rid of the old adhesive. Use a scraper, filling knife or even putty knife to scrape it all off.
4. Clean the surface
To be sure your new tile properly adheres; you will need to at least dust off the surface. At best, try to clean the surface with a damp cloth and some mild soap. Wait until it is completely dry before moving to the next step. Do not use a wet cloth! Damp will pick up the dust; wet will get water under the adjacent tiles and cause a lot of issues later on.
5. Add New Adhesive
Use the trowel to apply the adhesive back onto the surface (just as the old stuff was.) The layer should be only about ¼ inch.
6. Set the Tile
Now place the new tile on top of the adhesive and press firmly in the middle, corners, and along the sides. Press many times and even wiggle the tile a little bit to be sure it is set firmly.
7. Re-grout
Now you can mix up your grout into the same paste consistency as the adhesive and use your grout float to smear it along the sides of the tile. Be sure the grout is getting into all of the seams around the tile – don’t leave gaps; fill up each seam completely!
8. Clean up
Finally, you can use your sponge and bucket of water to clean all of the excess grout off the surface of the tiles. The sponge should be damp enough to pick up excess grout, but NOT soaking wet enough to alter the consistency of the grout in the joint.


Sunday, March 10, 2019

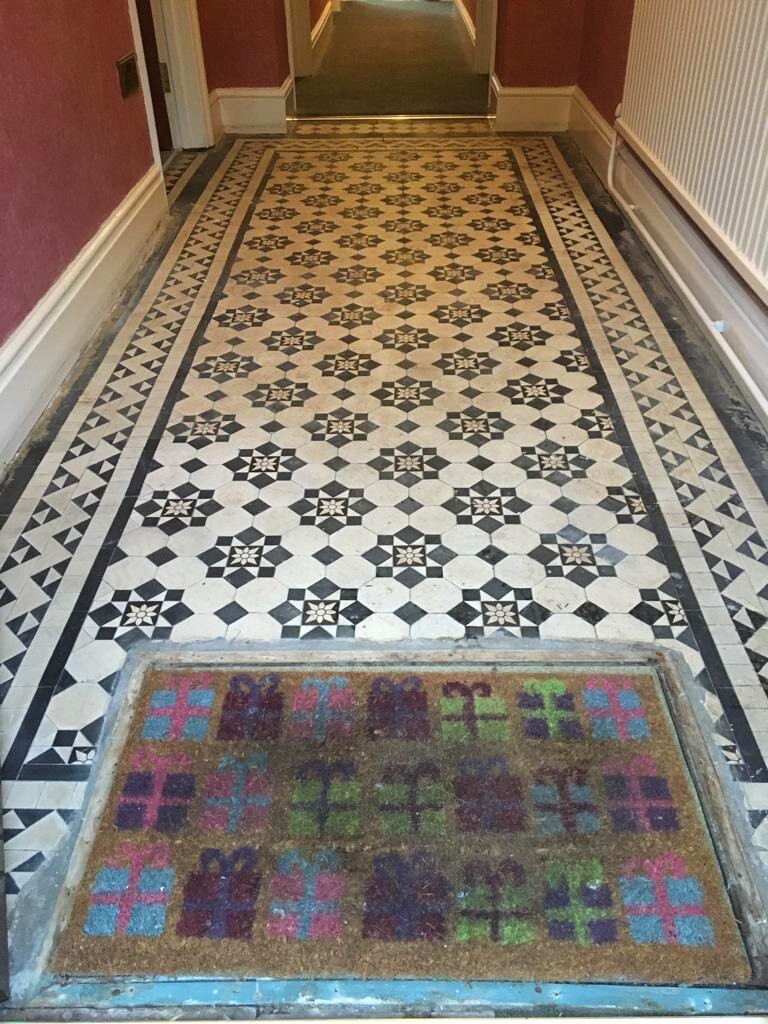
Renovating Dull Victorian Hallway Tiles in Monmouthshire

I was contacted by a professional couple who were despairing over the state of their Victorian tiled hallway floor which was dull and uninviting. The property was in Newport which is on the south east side of Wales around twelve miles east of the bustling city of Cardiff.

I went over to visit the property which was a beautiful Victorian period terrace house nestled amongst other properties of a similar age properties. The couple wanted their Victorian hallway floor to be brought back to life, so I demonstrated the cleaning process I intended to use on a small part of the floor. Immediately it had the desired effect and the floor looked much cleaner. I could see that there were no structural issues with the floor and the test clean proved it was just ingrained dirt that was the problem. The clients were happy with the result of the demonstration and subsequent quote, so we arranged a suitable date to come back and complete the work.

Victorian Tiled Hallway Before Cleaning Newport Gwent


Cleaning/Repairing a Victorian Tiled Hallway Floor

When I arrived, I started by protecting the skirting boards with tape and then set about giving the Victorian tiles a deep clean. I applied a combination of Tile Doctor Pro-Clean and Remove and Go leaving it to dwell for a short time to allow the products to soak into the pores of the tiles and start breaking down the ingrained dirt. After about ten minutes I scrubbed the floor with black scrubbing pad attached to a rotary floor buffer which released the years of grime and dirt. The floor was then rinsed with water and the soil removed using a wet vacuum. I repeated the process to ensure the floor was as clean as possible.

A further inspection of the Victorian tiles revealed a few stubborn marks which were dealt with using handheld diamond burnishing blocks. These are also handy for getting into the corners of the floor which were difficult to reach with the rotary machine. The floor was then left overnight to dry out.


Sealing a Victorian Tiled Hallway Floor

The following day I returned, and I checked the floor was dry using a moisture meter to ensure it was dry. Once I was happy, I started to seal the floor with Tile Doctor Seal & Go which is a water-based sealer that works well on Victorian tiles. Several coats were applied building up layers to produce a stunning satin finish.

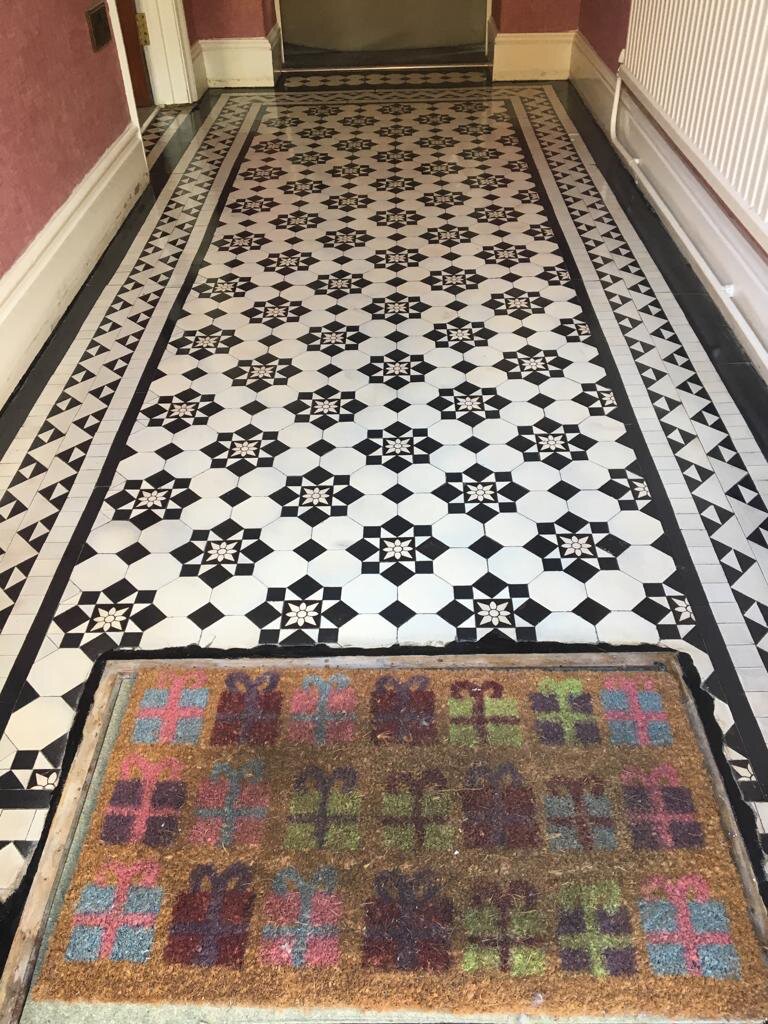
Once I had finished the floor was looking so much cleaner and brighter and the addition of the sealer will protect the floor from dirt and keep it looking good for some time to come. My clients were over the moon with the floor!

Victorian Tiled Hallway After Cleaning and Sealing Newport Gwent

For aftercare I recommend Tile Doctor Neutral Tile Cleaner, which unlike the stronger products you find in supermarkets is ideal for cleaning sealed floors and will ensure the sealer stays in good condition.


Source: Victorian Tile Cleaning and Renovation Service in Newport, Monmouthshire

Saturday, March 9, 2019

How to Grout Tile With No Gap

Until very recently, tiles needed to be installed with a minimum of a 1/16-inch grout joint. This joint was required not only to help seal out moisture, but to prevent damage from tiles rubbing against one another and to make up for uneven tile sizes.

New technologies have helped to produce a method of tile production that uses compressed clay to produce tiles that are extremely even in size with crisp, straight edges. These tiles, known as vitrified tiles, can be installed with no gap or grout joint between them. If this is a dry-wall application, such as a kitchen backsplash, you may not wish to grout this tiles at all. If this area will be subject to water or moisture, you will still need to grout the tiles, despite their lack of joint. Unsanded grout can be used to pack these tiny gaps, sealing the tiles.

Things You’ll Need
  • Unsanded grout
  • Grout float
  • Damp sponge
Instructions
1. Mix the unsanded grout to the consistency of slightly runny peanut butter, according to the manufacturer’s instructions. Unsanded grout is made up of extremely fine particles of cement and can be pushed into the space left between tiles that have been butted up against one another.

2. Scoop up some grout with the flat of the grout float and begin to scrape it over the tiles’ edges. Press the grout float onto the tiles’ edges first on its edge, and then with the flat side of the float. This will pack the joints with the unsanded grout. Because there is not a large space, you will be able to scrape up the grout with the float and continue using the same scoopful for an extended period of time. The grout will seek out any gaps and fill them, no matter how small. Just be sure to use some pressure as you apply the float to push the grout in tightly.

3. Wipe up the excess grout from the tiles with a damp sponge after about 10 minutes. This will give the grout time to set in the joints, but not enough time to dry on the tiles. Be sure not to use a lot of water, because this could wash the grout back out of the joints before it dries. Allow the grout to dry completely for 24-hours.


Source: www.eHow.com

Friday, March 8, 2019

How to Add Shine to Hardwood Floors

Hardwood floors need regular maintenance to protect the showroom shine you first fell in love with. Basic precautions and a regular cleaning schedule should keep hardwood floors in excellent condition for decades. However, if your hardwood floors have scratches, ingrained dirt or dull areas, you will need to deep-clean them, recoat them or resand them, depending on the extent of the damage. These are heavy-duty cleaning projects, which require training, experience and expensive machinery, so it pays to keep a good maintenance schedule to avoid them altogether.

Maintenance

1. Sweep your hardwood floors regularly. If you use a vacuum, attach a felt head to avoid damaging your floor. Built-up grit damages hardwood floors and makes them look dull. Regular sweeping and dusting is the easiest and cheapest way to keep your floors with the shine you love.

2. Clean spills on your floor quickly with a soft cloth. If spills are not cleaned at once, they can damage the fiber in the wood and require expensive treatments to fix.

3. Dust mop your hardwood floors with a microfiber cloth dampened in hardwood cleaner. According to the National Wood Flooring Association, standing water and other liquids will dull the finish and damage your hardwood floors. Use wood cleaners recommended or sold by hardwood floor manufacturers.

Floor Repairs to Add Shine

1. Treat your hardwood floor to an intensive clean. You will need a professional wooden floor cleaning machine. Scrub the floor with an intensive hardwood floor cleaner recommended by the manufacturer. Scrub again with a commercial floor cleaner and polish with a microfiber cloth.

2. Re-coat your floor before it wears down to bare wood. First clean it thoroughly with a wooden-floor intensive cleaner recommended by your hardwood floor manufacturer. Apply regular floor cleaner and scrub with a professional cleaning machine. Apply a new coat of finish and repolish with a cleaning machine.

3. Re-sand your hardwood floors when they are worn down to bare wood. Use a professional floor sanding machine. Clean with a wooden-floor intensive cleaner and apply a new coat of finish. This is an extreme fix for severely damaged floors; you should never have to do this if you take good care of your hardwood floors.

Things You'll Need:
  • Soft broom
  • Vacuum cleaner with felt head
  • Microfiber cloths
  • Hardwood floor cleaner
  • Professional floor cleaner
Tips
  • Avoid wax- or silicone-based cleaners. Instead of making your hardwood floors shine, it will make them harder to clean and damage the floor's finish.
  • Keep your pet's nails short. Avoid using high heels inside the house, and place rubber mats under furniture.