Monday, August 28, 2017

Original Period Victorian Hallway Floor Restored in South Wales

Many property owners who are lucky enough to have an original Victorian tiled floor in their homes face the same conundrum: can an old and potentially very damaged floor be salvaged and restored to peak condition or should I replace it? Some people would instinctively tell you that the answer is no – even trained professionals! In fact, a leading tile restoration company (which shall remain unnamed) based in Cardiff told a recent customer of mine that her original Victorian tiled floor, dating back to 1905, was beyond repair. The company recommended that she not waste any money on having it restored and instead that she should have it ripped up and replaced.

Victorian Tiled Hallway in Cardiff Before Restoration

It was in a bad state, however replacing the floor would incur a significant cost and the original characteristics of the period floor would be lost. The customer was feeling rather deflated and was left undecided on what to do. Fortunately after browsing the web for a solution, she came across Tile Doctor and I was asked to pop over and take a look. I visited the customer at her home and removed parts of her hallway carpet to get a better look at the Victorian tiles beneath. The floor was certainly in a very poor state, there were many old paint splash marks covering the tiles and the surface of the floor was deeply darkened after many years’ worth of wear and tear. In my opinion however, it was still salvageable, and the customer was happy to see what could be done.

Cleaning an Original Victorian Tiled Floor

A week before I was due to start the restoration, I asked the customer to remove the foam-backed carpet to let the floor breathe a bit. Before beginning the work, I ran a few damp tests and the floor proved surprisingly dry considering how old it is and the very probable lack of a damp proof membrane. I started by manually scraping as much of the old paint staining off the stone as possible and cleared other debris from the surface. Knowing that clay based Victorian tiles like these easily soak up paint splashes, I knew it would take a thorough clean to remove them completely. I firstly soaked the floor with water and left it to dry slightly before mixing a concoction of Tile Doctor NanoTech HBU, Tile Doctor Pro-Clean, and Tile Doctor Remove and Go. NanoTech HBU is a particularly powerful cleaner which uses nano-sized particles to penetrate the pores of the stone, while Pro-Clean is an alkaline-based cleaner that tackles heavy soil build-up. Remove and Go is a multi-purpose product which both cleans and strips away any old sealer. I left this mixture to dwell on the floor for around half an hour, scrubbed it in firstly using a black scrubbing pad fitted to a rotary machine and then a wire wool pad. I followed by rinsing the products off with water and extracted up the excess with a wet vacuum machine. This technique was repeated until I was satisfied with the condition of the floor.

Sealing an Original Victorian Tiled Floor

After leaving the floor to dry off completely overnight, I returned to the property the next day to carry out the sealing process. I applied seven coats of Tile Doctor Seal and Go, which not only adds a protective covering to the tile, but also enhances its appearance. The customer was absolutely thrilled with the results of the restoration, especially considering that she was told the floor was ruined by a leading company and not worth saving.
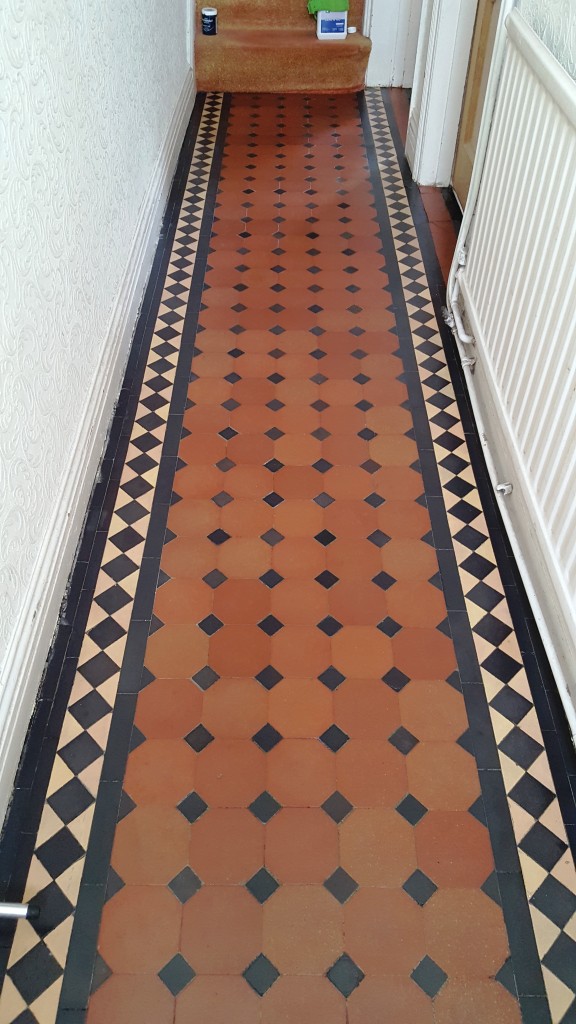
Victorian Tiled Hallway in Cardiff After Restoration


Source: Victorian Tile Cleaning and Restoration Service in South Wales
Thursday, August 24, 2017

Slate Tiled Shower Cubicle Restoration in Oxfordshire

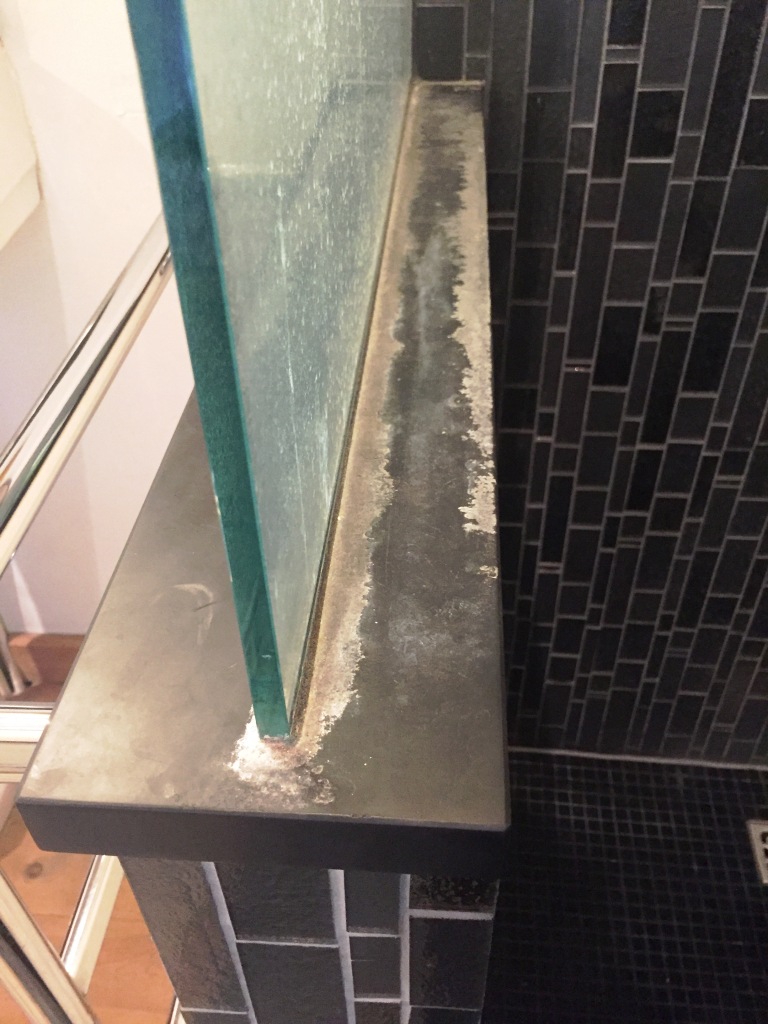
Just Southwest of Bicester, Kidlington is one of the largest villages in England with a population of nearly 14,000. There are a lot of amenities, making it a great place for families to make their homes and I recently visited the area to see a customer with a Slate tiled shower cubicle in need of restoration.

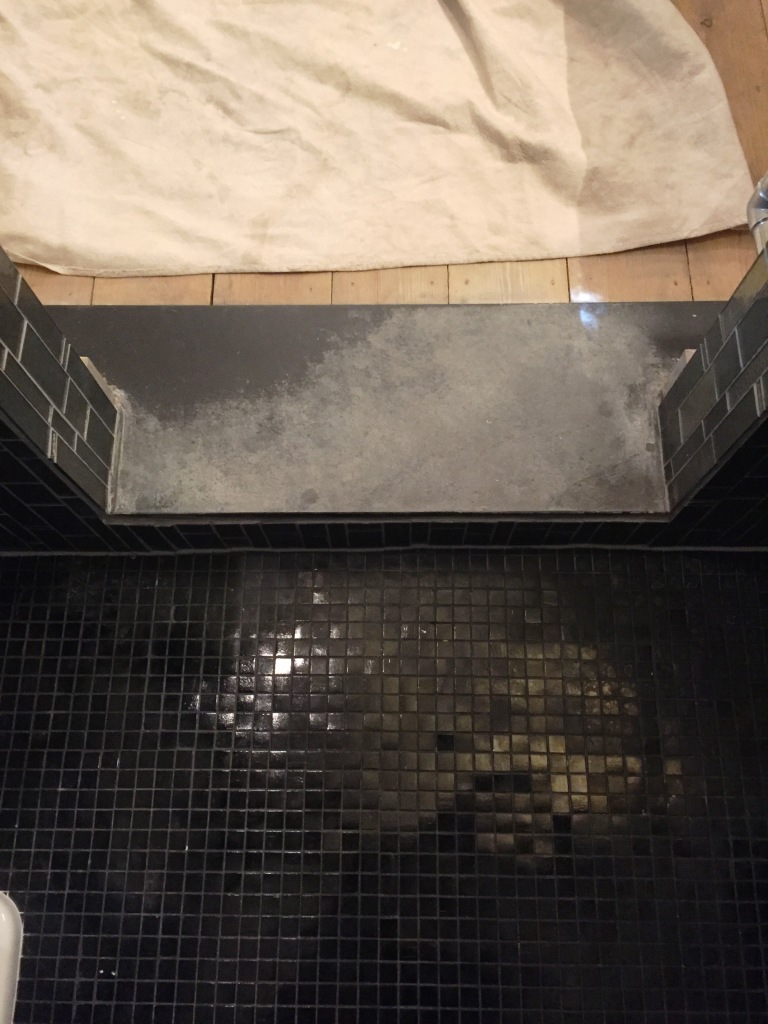
Slate Bathroom Kidlington Before Cleaning Slate Bathroom Kidlington Before Cleaning

It’s not unusual to get asked to restore natural stone shower cubicles because they can suffer with mould, water marks and Limescale issues and can easily get into poor condition. Quite a lot of these problems can be avoided by rinsing the tiles down after a shower to remove traces of shampoos and soaps and ensuring the room has adequate ventilation. If you want to read more on this subject take a look at http://shower.tilecleaning.co.uk/

Cleaning a Slate Tiled Shower Cubicle

The first process involved in restoring this cubicle was to cover the entire area in Tile Doctor Remove and Go, which is a multi-purpose cleaner designed to strip away any old sealers, synthetic finishes, adhesives and paint stains. It also helps to draw out ingrained stains and remove heavy grease build-up. The product was left to dwell for roughly ten minutes before I scrubbed it into the tiles and grout with a stiff hand brush. Next, I rinsed the area with water to remove traces of chemicals and wiped it dry with a cloth. Following this, I covered the tiles with Tile Doctor Grout Clean-Up, which is a concentrated phosphoric acid cleaner formulated to remove grout smears and mineral deposits such as Limescale. The product was scrubbed into the grout a couple of times, before the area was rinsed again with water and wiped dry with a cloth. Grout Clean-up is an acidic product and so shouldn’t be left on stone for too long as it can damage it.

Sealing a Slate Tiled Shower Cubicle

To seal the Slate, I used Tile Doctor Stone Oil, which is an easy-to -apply, impregnating sealer that is particularly effective on low porosity stone. It is formulated to restore the naturally dark colour and patina in the stone. To finish I applied a single coat of Tile Doctor Ultra Seal which is an impregnating sealer that gives a natural look finish to the slate. I applied the sealer with a lint-free cloth, left it for about 30 minutes to cure and then wiped off any excess with a clean cloth.

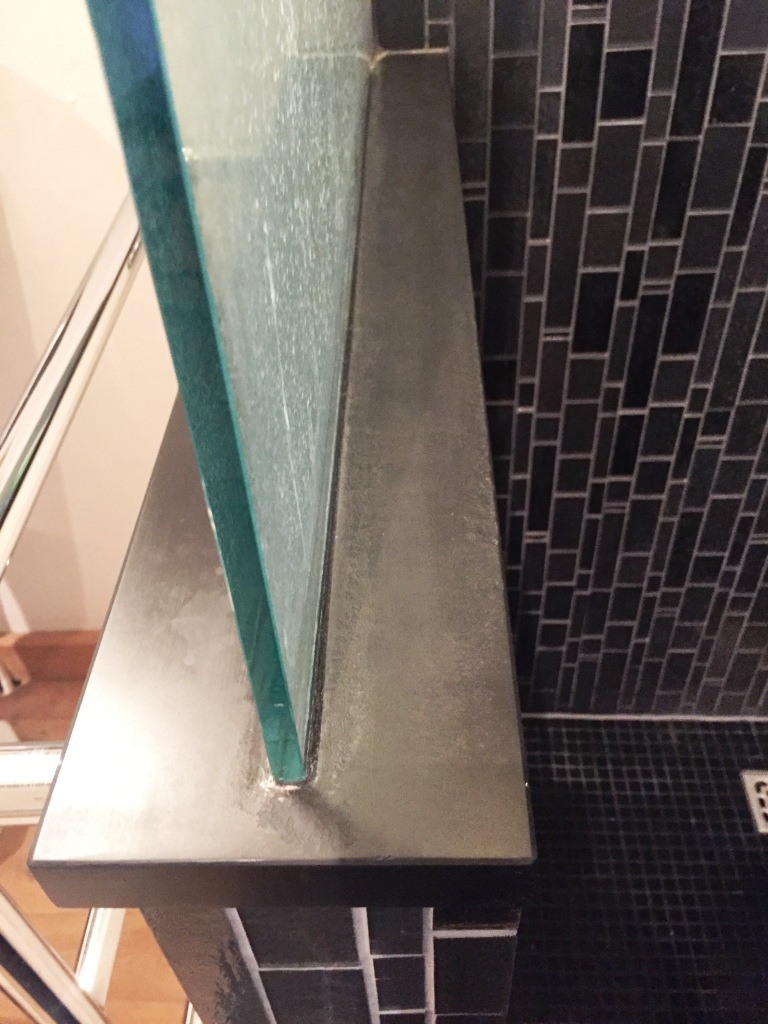
Slate Bathroom Kidlington After Cleaning Slate Bathroom Kidlington After Cleaning

The results were fantastic and the customer was especially pleased with the clean, natural look the sealer had given the Slate.


Source: Slate Tile Cleaning and Restoration Service in Oxfordshire

Tuesday, August 22, 2017

The Difference Between Linoleum and Vinyl Flooring

Linoleum and Vinyl flooring are sometimes thought of as the same thing. Although these terms are often used interchangeably, there is a fundamental difference between the two. The following guidelines will help you distinguish between them.
Different Composition
Linoleum is produced by mixing linseed oil, cork or wood flour, ground limestone, tree resins, and organic pigments that are pressed onto a jute support. On the other hand, vinyl is made from petrochemicals. It consists of a triple layer (i.e. a backing made from either fiberglass or felt, a middle layer that bears the designs and patterns, and a clear top layer or sealant to protect the flooring).
With time, you’ll notice that the patterns on the vinyl flooring have become faded or damaged. This happens when the vinyl sealant is spent. Direct exposure to the sun and foot traffic cause the sealant to wear away. Linoleum flooring, on the other hand, tends to respond better to such exposure. The natural components of the linoleum flooring gain a deeper color that is actually quite pleasant aesthetically.  
Because of vinyl flooring's composition, you can choose from a wide variety of designs. Linoleum flooring typically is produced with only a single pattern or color.
Health Hazards
One of the main reasons people invest in linoleum floors is because this flooring material is less hazardous to your health than the vinyl alternative.
Linoleum flooring is made from natural products. This means there is no risk of inhaling the toxic fumes associated with vinyl flooring. The only fumes you will be subjected to by linoleum are from linseed oil, but these fumes have no negative health effects.
Another major advantage of using linoleum flooring is that it has hypoallergenic properties that repel particles of dirt and dust.
Linoleum and Vinyl Maintenance
The process of installing vinyl flooring is simple. The only maintenance you’ll be required to do is resealing the flooring once the initial coat of sealant wears off. Manufacturers’ advice against applying wax on vinyl flooring, more so after the sealant wears off.
Linoleum is harder to install and typically requires professional assistance.
Linoleum requires more maintenance than vinyl and you’ll definitely need some elbow grease to apply either a wax or a polish on the floor. The frequency of doing this is more often than if it were vinyl. Proper care of linoleum floors will also prevent moisture from seeping between the seams.
Note that there are polishes that suit both linoleum and vinyl flooring.
Comparing the Longevity
Linoleum floors can last for as much as forty years if properly maintained. Vinyl floors hardly last a third of this time, even with proper care. Of the two flooring surfaces, linoleum is the least affected by scratches and nicks. Such defects will hardly be noticeable since the patterns are embedded unlike vinyl’s surface patterns.
Linoleum floors are however more adverse to acidic liquids like vinegar, and also to water.
Price Difference
Linoleum flooring is more expensive because it's a natural product. Vinyl is cheap to produce, making it inexpensive in comparison.

Wednesday, August 16, 2017

Restoring Polished Marble Bathroom Tiles Blighted by Limescale

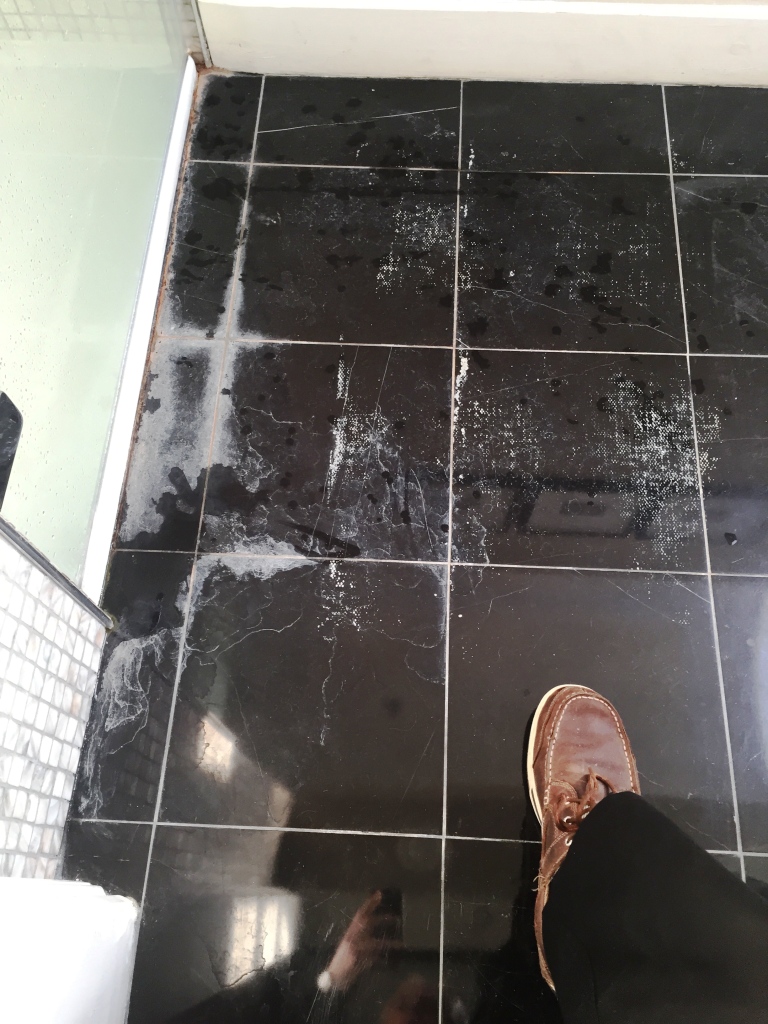
This customer in Baldock, North Hertfordshire has a beautiful Black Marble bathroom floor which unfortunately was far from looking its best due to a build-up Limescale. Normally this can be removed with an acidic cleaning product however Marble like all natural stones is acid sensitive would be damaged in the process.

Black Polished Marble Bathroom Floor in Baldock Before Limescale Removal

The only way to remove the Limescale would be to polish it off using a set of diamond pads which would also restore a high shine finish to the Marble floor tiles.

Removing Limescale from Polished Black Marble

The first step before starting the process was to cover the threshold edges, skirting’s and doors with tape to protect it from splashing etc. Next we used a medium dilution of Tile Doctor Pro Clean which is an alkaline tile and grout cleaner with hand brushes to clean-up the thin gout lines and remove any grit from the floor.

The floor was then rinsed with fresh water to remove the now soiled cleaning product and also steam cleaned to neutralise floor. The water was extracted from the floor using a wet vacuum.

Honing Black Marble to Restore Polish

To bring back the natural shine we honed the floor using a series of diamond-encrusted burnishing pads. Firstly, I applied a Coarse 400 grit pad to strip away what remained of the old sealer and Limescale, rinsing the floor afterwards. I then applied the Medium 800 grit and Fine 1500 grit pad to gradually close the pores of the stone which, in turn, restores the polished effect. Again each pad is used in combination with a small amount of water and any excess moisture is removed with a wet vacuum. The final 3,000 grit pad brings up a really deep shine and is applied with small amounts of water sprayed onto the tile.

Sealing Polished Black Marble Tiles

After drying the floor the Marble tiles were sealed with two coats of Tile Doctor Ultra-Seal which is a natural look sealer that doesn’t alter the appearance of the stone and protects it from staining by occupying the pores in the stone.

The last step was to buff the Marble tiles with a white buffing pad.

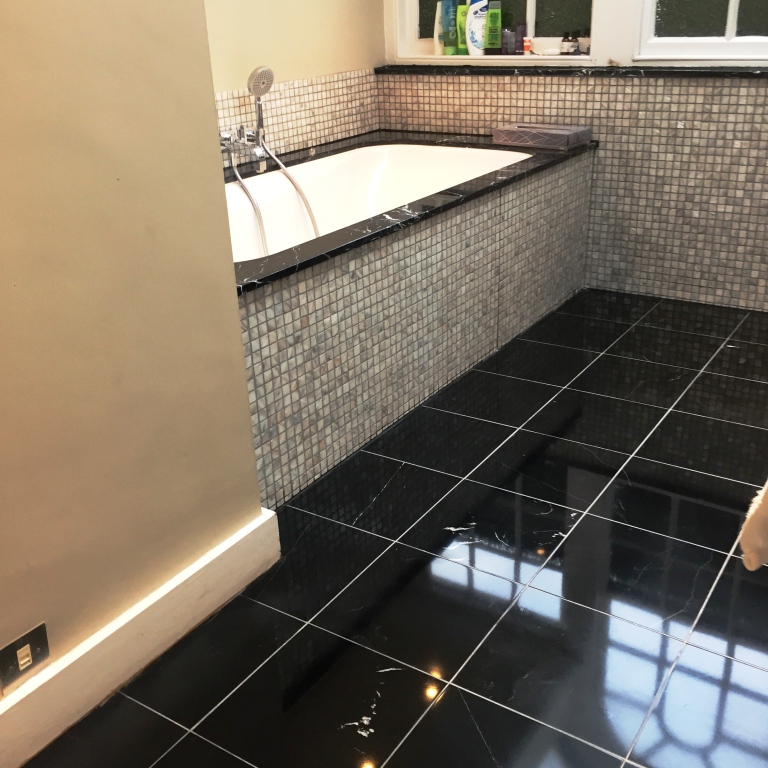
Black Polished Marble Bathroom Floor in Baldock After

The floor now looks fantastic and you can really see your reflection in the shine of the black Marble tiles.


Source: Marble Tile Cleaning and Restoration Service in Hertfordshire

Old Linoleum: Restore or Replace?

Deciding to restore or replace old linoleum is an individual choice. Your budget is one consideration. Other considerations take into account are the physical state of the linoleum. Many grades of linoleum can last quite a long time if they were properly maintained. Sometimes when purchasing a home that has a linoleum floor, restoration is a less expensive project to restore the look that might have been dulled through years of poor maintenance or lots of waxy build up that once removed, might be the simple solution toward obtaining the desired linoleum floor look you want.

Restoration First

Restoration is the least expensive method to gain a lustrous linoleum floor. A floor can be restored if the color and or pattern still compliment the room's décor. Since linoleum flooring has a long life – up to 30 years or more, if well maintained, the design may no longer be contemporary enough to match a newer looking kitchen, bathroom or other room in the home. Sometimes linoleum flooring needs replacement during an entire room makeover, especially when new marble kitchen countertops are installed. A new linoleum floor may be a need to match the marble countertop. However, you may wish to choose kitchen décor to match the linoleum once it is restored to that desired sheen you seek.

Linoleum – both sheet and tile – come in a variety of different marble effects that can easily be matched with kitchen countertops. The same holds true for bathroom makeovers where new cabinets with natural stone countertops are installed. However, if the linoleum flooring still suits your color and pattern likes, attempt restoration at least once before discovering you may need to replace it.

Try This First

Clean your linoleum floor carefully with warm, soapy water making sure to mop it well and then let it dry. If this doesn’t produce a lustrous glow, then strip and re-wax. If this still doesn’t produce the results you want, then a full blown restoration is in order.

Use a mixture of turpentine and liberal apply the mixture to the floor with a clean mop. Use a bucketful of straight warm water to rinse the floor. Try not to use a mop that has had turpentine on it previously. No matter what degree of cleaning you give a mop dipped in turpentine, some residue is left on it even though you think it clean.

After the floor dries, examine it for scuff marks. Use toothpaste on a rag to cover the marks. Then re-wax the linoleum flooring, applying several coats, and letting each dry before another is applied. If your flooring still looks worn, replacing the floor is required.
Replacing the Floor

Replacing linoleum flooring can be easy, be sure to carefully research your choices, paying particular attention to color and pattern. Select the linoleum flooring that will complement the existing room décor. Decide whether to use sheet or tile linoleum and before buying materials, check for local discounts or coupons at supply stores.


Source: www.DoItYourself.com

Wednesday, August 9, 2017

Sealing Porcelain Tiles in Surrey

Photographs below from a lovely house in Windlesham where I was asked to do something about the Porcelain floor tiles which had become extremely dirty and were proving impossible to clean. Infact my customer was pulling her hair out about how to fix this issue of deeply ingrained muck and was on the verge of pulling the whole lot up.

Porcelain Tiled Floor Before Cleaning Windlesham

Porcelain Tile Cleaning

Normally Porcelain tiles are fairly easy to maintain and it’s just a question of keeping the grout clean however I have to confess these tiles were perplexing indeed. In fact to be honest...I tried every product in my van to get them clean, finally settling on Oxy Gel. I left it to soak on the floor for 30 minutes and then worked it in with an aggressive 200 grit pad. I’m happy to report the transformation was amazing, all the muck was released from the tile and I was able to extract it from the floor using a wet vacuum. My last step was to give the grout a good scrub using more Oxy Gel, rinse off with water and extract as much moisture as possible with the wet vacuum.

Porcelain Tile Sealing

I speed dried the floor with an air mover and once the floor was dry I applied a coating of Tile Doctor Ultra Seal. Now Porcelain tiles don't usually take a sealer however these tiles were unusual in that they were trapping dirt and it’s possible they were in fact micro-porcelain so a coat of sealer was added for good measure.

Porcelain Tiled Floor After Cleaning Windlesham

My customer was really pleased with the difference and left the following comment on the Tile Doctor feedback system:

“Here's what she said-
"Rupert was a total professional from start to finish. I was worried as to how good he would be able to make the floor - the floor consists of almost white porcelain tiles, that my tiler had failed to seal. This meant they had absorbed dirt over the last two years - even after me scrubbing the floor, they always looked dirty. The room was big - a 24 feet long kitchen/dining room. But Rupert assured me he could get it clean again - and he was as good as his word. When I saw the room for the first time, I said "I have my new kitchen back - the floor looks as good as it did the day the tiler had put the tiles down". He left everything clean and tidy after the job - I wish I had discovered your website 18 months ago ! Thank you, Rupert, brilliant work."”


Source: Porcelain Cleaning and Sealing Service in Surrey

Tuesday, August 1, 2017

Removing Coatings and Sealers from Stone

Slightly different story for you below; this time from the medieval town of Tewksbury which dates all the way back to the 8th century. A customer there had asked if there was anything that could be done to restore the appearance of their polished Limestone kitchen floor on which he had previously applied a wood sealer which had turned the tiles brown. I inspected the floor and ran a test clean on a small section of tile which successfully removed the wood seal. This gave the customer the confidence to book me into to complete the job which I estimated would take three days to strip off the old sealer, deep clean and reseal with a more appropriate product.

Limestone Tiles Sealed With Brown Wood Sealer before restoration in Tewksbury

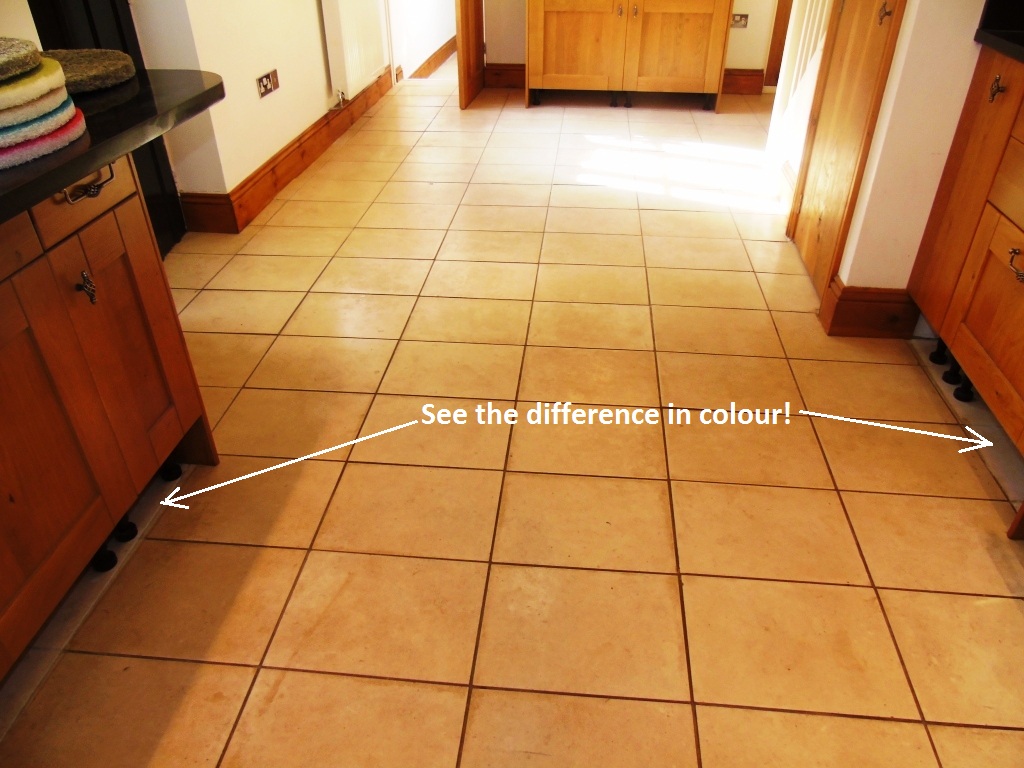
You probably can’t appreciate how bad the tiles looked from the photograph above but if you look at the indicated area under the kitchen units where the kick boards have been removed you can really see how the brown stain in the wood sealer has darkened the look of the tile.

Removing Old Sealers from Limestone Kitchen Floor

On the first day I prepared the area by removing the kick boards from the underneath the kitchen units so they wouldn't get affected by the cleaning process and started wetting the floor with water. The water lubricates the burnishing process whereby coarse diamond encrusted pads are applied to the floor with a buffing machine. We started the process using a very coarse 100 grit milling pad to remove the wood sealer before moving onto the finer pads from 200 grit, 400 grit, 800 grit and finally 1500 grit pad building the finish of the floor as we progressed. The floor is rinsed with water between pads and the slurry is removed using a wet vacuum. This burnishing process took up all of the first day so the next day I returned to focus on the edges I had missed and the grout lines, being a relatively small format tile for Limestone there was a lot of grout to cover. I tacked the grout lines with Remove and Go which is a powerful stripper and cleaning agent which is applied along the grout line and then scrubbed in with a narrow stiff brush before being rinsed away with water. The edges were treated with a set of small six inch milling pads fitted to a hand held buffing machine in a similar process as on the first day.

Sealing a Limestone Tiled Floor

On the third and final day the floor was spray burnished which a process is involving a very fine 3,000 grit floor burnishing pad and a little water spayed onto the floor during the application. This process really tightens up the pores in the stone and restores its appearance. After making sure the floor was free of any lose grit I then proceeded to seal the Limestone with Tile Doctor Ultra Seal which is a natural look sealer that doesn’t alter the appearance of the stone but penetrates into the pores of the stone to protect it from within. I left it to dry for an hour then buffed the floor with a white buffing pad before apply a second coat. This was also left to dry for an hour before running the buffing pad over for a last time.

Limestone Tiles Sealed With Brown Wood Sealer After restoration in Tewksbury

It took a fair amount of work to get the floor looking back the way it was meant to be but I’m very pleased with the outcome and more importantly my customer was really happy.

Limestone Tiles Sealed With Brown Wood Sealer After restoration in Tewksbury


Source: Limestone Cleaning and Sealing Service in Gloucestershire