Wednesday, January 31, 2018

Old Quarry Tiled Floor Reconstruction in South-London

There is perhaps nothing more irritating for a homeowner than to discover a leaking pipe. Even worse still is when that leak occurs underneath a natural stone floor!

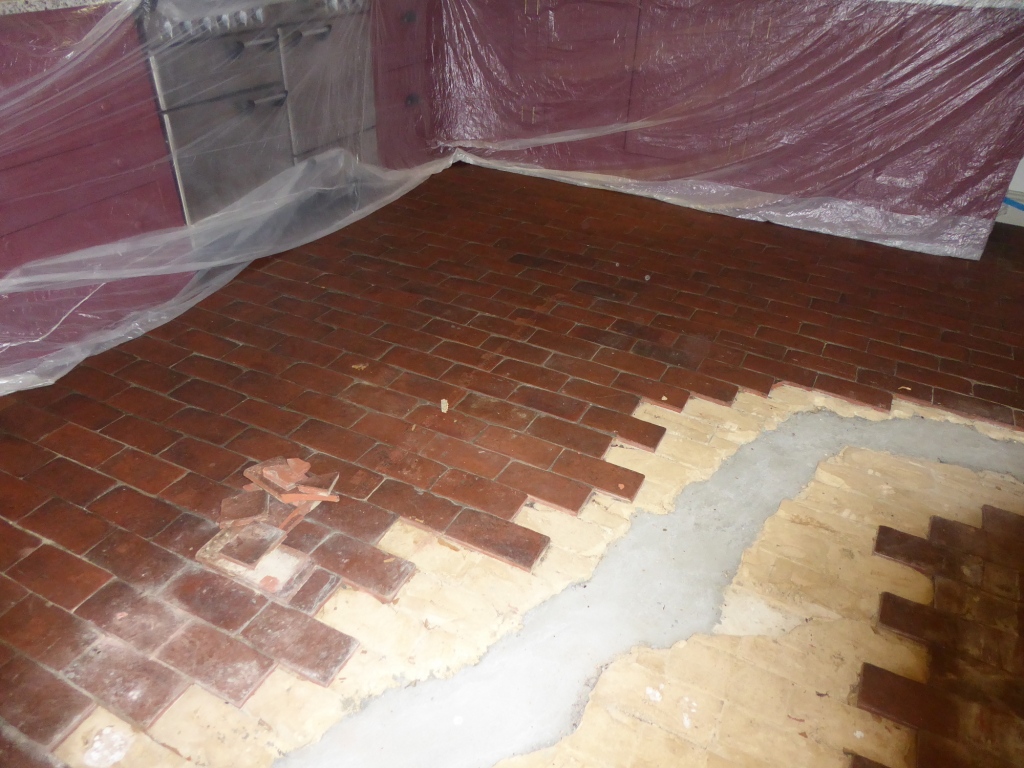
This recent customer of mine, who lives in Croydon, had unfortunately discovered a leaking pipe underneath her Quarry tiled kitchen floor. The plumbers had dug a trench in the floor to replace the pipe and fix the problem. As you can see in the photos below, the original tiles were not replaced and the entire floor was generally left in a bit of a mess.

Quarry Tiled Floor Before Rebuild Croydon Quarry Tiled Floor Before Rebuild Croydon

The customer had been trying to find a professional company to restore the floor, but her insurance company would only agree to sending normal cleaning companies to the job. Given the reality of the situation, you won’t be surprised to know that these companies all politely refused!

The situation went unresolved for over six months before the customer finally decided to contact Tile Doctor to restore the floor.

Rebuilding and Cleaning a Quarry Tiled Floor

The restoration took place over the space of six days. Our first port of call was to replace the tiles that had been removed as part of the plumbing work. This wasn’t the easiest process as we had to level up the floor before the tiles could be replaced.

Making matters more complicated, the tiles were all hand-made, and it was a bit like completing a jigsaw to avoid lippage. Lippage – for those unfamiliar with the term – means when a floor is laid unevenly and it can make walking on it hazardous.

Quarry Tiled Floor During Rebuild Croydon Quarry Tiled Floor During Rebuild Croydon

Once the tiles were reinstalled, it was time to give the whole floor a deep clean. For this, we used Tile Doctor Oxy Gel, leaving it to dwell on the surface for around ten minutes, before scrubbing it into the stone in combination with hot water. Oxy Gel is a strong, alkaline-based cleaner which works effectively to break down dirt and grime, as well as old sealers and waxes.

The next stage of the restoration was to rinse the floor with fresh water, and then lay down Tile Doctor Acid Gel for 15 minutes. Acid Gel is a blend of phosphoric and hydrochloric acids in gel form which is used to neutralise any grout haze and efflorescence on the tiles.

Sealing a Quarry Tiled Floor

After completing the deep cleaning process, we rinsed the floor again with fresh water and then left it to dry for three days. Giving the floor enough time to dry was important, since any excess moisture would not have allowed us to complete the restoration by sealing the tiles.

After a few days, however, the floor was indeed thoroughly dried and could receive a fresh seal. We sealed the floor using five coats of Tile Doctor Seal and Go, a topical sealer which eliminates traditional two-step sealing methods. What this means is that it provides both a robust surface seal and a high-quality low sheen finish – in one product.

After six months of difficulty and disruption, the customer was very happy to have her Quarry floor completely restored in just six days. Check out the photos below to see the outcome.

Quarry Tiled Floor After Rebuild Croydon Quarry Tiled Floor After Rebuild Croydon


Source: Quarry Tile Cleaning and Sealing Service in Croydon, South-London
Tuesday, January 30, 2018

Are Raised Floors Better than Concrete Slab Floors?

Raised floors are a much better, drier and warmer alternative than concrete slab floors. However, many home owners like the industrial look of polished concrete slab floors. Both have their advantages and disadvantages. The primary considerations are warmth, maintenance, comfort, durability and cost.

The Advantages of Raised Floors

Raised floors are the floor of choice for many reasons. They're easier to walk and stand on than concrete slabs. Wood floors give a little, making it easier on your knees and back if you must stand on them for any length of time. While a concrete slab may be easier to clean in a kitchen, workshop or bathroom, it's also harder on the body. If you live in a flood zone, you'll pay less insurance for a raised floor system.

Raised floors give a warmth and color to a room and are the classic and timeless choice for floors. Concrete can be painted or stained to appear warm, but nothing says true warmth like wood. They can also be installed in any room with ease.

Raised floors are warmer. Concrete tends to hold cold and to suck away warmth. If the concrete slab is on the ground, it will also tend to pick moisture up into the home and be a constant source of mold, even if sealed.

Raised floors allow homeowners to relocate plumbing with much greater ease. Pipes set into concrete slab are literally "set in stone." To move a kitchen sink, toilet or plumbing requires tearing up the concrete floor and re-pouring it. With a raised floor you'll have easy access to all your pipes, clean-outs and machinery.

Cost is a primary factor as well. If you're building in a flood zone or on a slope, the cost of pouring a concrete slab to meet code is much less expensive than setting a foundation on posts and beams and installing a raised floor. On the other hand, concrete slab poured on clay or unstable soil means you'll make up the difference in cost by repeated repairs to cracked concrete and ruptured pipes.

It's possible to add a raised floor to a concrete floor. If you have a loft, warehouse, commercial property or building where the floor already exists, you may be wondering whether to keep the concrete, or install a raised floor.

If you're constructing a home, raised floor construction makes it easier for others to continue work on the house.

Advantages of a Concrete Floor


Some of the advantages of a concrete floor include low maintenance. Once sealed and finished, a concrete floor is essentially a no-maintenance floor. If sealed, there aren't a whole lot of things that will penetrate the seal. Dropping objects on the concrete will do more harm to the object. If the concrete is chipped or damaged, it's easy to repair. Concrete can be painted or stained to look like wood, brick or tile. Heating elements can be installed in the concrete to make it less cold. Concrete, once laid, can also be tiled, carpeted or even finished in a variety of colors if you get tired of it.


Friday, January 26, 2018

Restoring the Appearance of Victorian Hallway Tiles in Norfolk

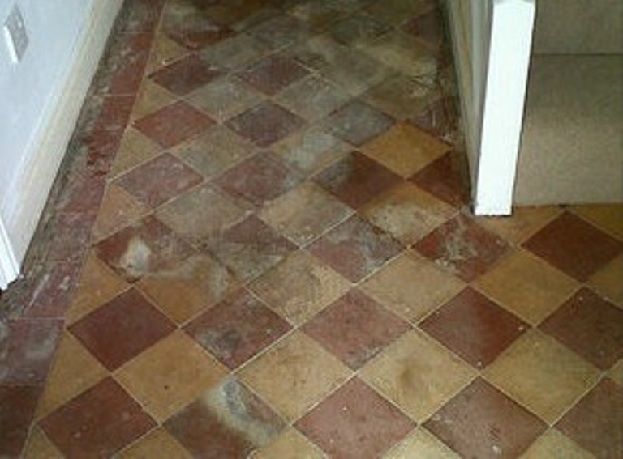
There are thousands of Victorian tiled hallways in and around Norwich and I often get called to work on them, however this was a particularly abused and neglected example I thought you might find interesting. The surface had clearly been both painted red at some point (possibly with an old lead-based paint) and then completely covered with rubber-backed underlay and carpeted, a thick layer of double-sided carpet tape remaining firmly stuck in patches around all the edges of the floor area.

Victorian Hallway Floor Tiles Before Cleaning Norwich


Cleaning a Victorian tiled floor

Firstly, we cleaned the whole area using a strong solution (1:3) of Tile Doctor Pro-Clean, which is a high alkaline stripper and cleaner, agitated with a black scrubbing pad fitted to a rotary machine. All products and slurry were then power rinsed and vacuumed away to reveal the improved floor. There were still a significant number of glue patches and paint spots around the edges of the floor, so these were tackled using Tile Doctor Remove & Go, which softened them enough to enable us to remove them with a sharp-bladed scraper. Unfortunately, the decaying rubber underlay had left a pattern on the tile surface which was most obvious at the doorway into the terracotta tiled kitchen. We almost completely removed this using Tile Doctor Oxy-Gel which being in gel form allows it work on the problem area longer. It was painted on a brush and kept moist for two hours under a layer of cling film which drew out virtually all the contaminant from the tile. The next concern was that an original Victorian floor of this age would almost certainly have no damp proof membrane and an area near the front door which showed evidence of efflorescence salts was treated with Tile Doctor Acid Gel in order to remove the white deposits and further inhibit the production of more in the future. The whole area was then lightly buffed using the rotary machine and a 1500 grit diamond pad with water in order to remove any remaining fine paint spots and restore a silky feel to the surface of the tiles before leaving the floor to dry overnight with assistance from our dehumidifier.


Sealing a Victorian tiled floor

When we returned the following morning, our damp meter showed us that the moisture content in the substrate was probably going to be too high to allow us to use an acrylic sealer to provide the sheen which the client had requested; so we decided to spray-buff the floor using a 3000 grit diamond pad on the rotary machine followed by the application of Tile Doctor Colour Grow, a colour enhancing penetrating sealer which sits just below the surface of the tile and leaves no visible finish. Finally, the whole floor was spray buffed to a low sheen with a white maintenance pad on the rotary machine and any resulting dust vacuumed away.

Victorian Hallway Floor Tiles After Cleaning Norwich

The Victorian tiles now look fantastic and have become a great asset to the property as original features like these are very sought after.


Source: Victorian Tile Cleaning and Restoration Service in Norfolk

Monday, January 22, 2018

Restoring an Old Brick Floor in Oxford

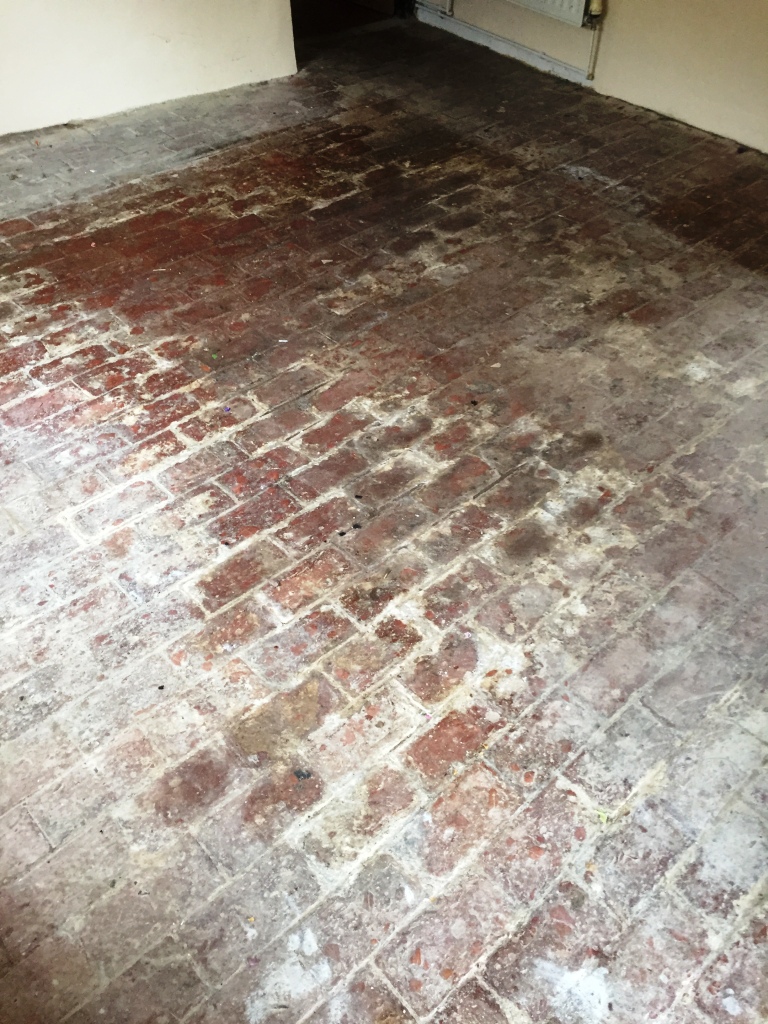
We were contacted by a customer living in Oxford who had a property with a brick floor in the living room that was in a bad state and in need of restoration. Brick has always been used as an alternative flooring material to stone due its durability and low cost. Oxford has a long history dating back over a thousand years so it not unusual to discover something like this in older properties. The owner believed the floor to be over 100 years old and had been patched up in numerous places in the past with holes filled in with modern bricks and concrete. I was confident we could dramatically improve the floor but naturally give its long history it would never look like it was new again.

100 Year Old Brick Floor Before Cleaning


Restoring a Brick Floor

To remove the dirt I stated with the application of a strong dilution of Tile Doctor Pro Clean, a high alkaline product that is our go to cleaning product. I applied the product to the floor and left it to dwell for twenty minutes before scrubbing into the brick with a black scrubbing pad fitted to a low speed rotary machine. The soiled cleaning solution was then extracted using a wet vacuum and the floor rinsed with water. With a lot of the dirt removed I could see I would need to use something abrasive to remove the layers of concrete and give the floor a consistent appearance. Fortunately we a number of techniques we can use for dealing with these issues and in this case I opted to apply a series of coarse abrasive milling pads. I started with the 50grit grit pad which is applied by attaching it to a weighted floor buffer and lubricated with water. Then the floor is rinsed and the process repeated with a 100 grit pad and finally a 200 grit pad to finish the process. The pads use industrial diamonds to slowly grind down the surface and improve its appearance. After the final rinse I could see the floor was much improved, I then had to wait for the floor to dry off fully before I could seal it.


Sealing a Brick Floor

On my return the next day I checked the floor with a damp meter to make sure it had dried. All was well so I set about applying a sealer to protect the floor from staining going forward and also make it easier to clean. This sealer I opted for was Tile Doctor Colour Grow which protects the brick from within by become ingrained into the pores of the material and has the added benefit of enhancing the natural colour to bring back the redness of the brick in the process.

100 Year Old Brick Floor After Cleaning

I appreciate the photographs are not my best but hopefully you can appreciate the improvement, certainly the customer was very pleased with transformation and left the feedback for me below. In fact they were originally of the opinion that it probably wasn’t salvageable so this was a major bonus. We went from dirty old brick living room floor to shiny new (looking) floor in the space of two days. Barry called back immediately came round to have a look the same day then set a date and time and met every promise.


Source: Brick Tile Cleaning and Restoration Service in Oxford

Monday, January 15, 2018

Renovating an Old Terrazzo Floor in West Midlands

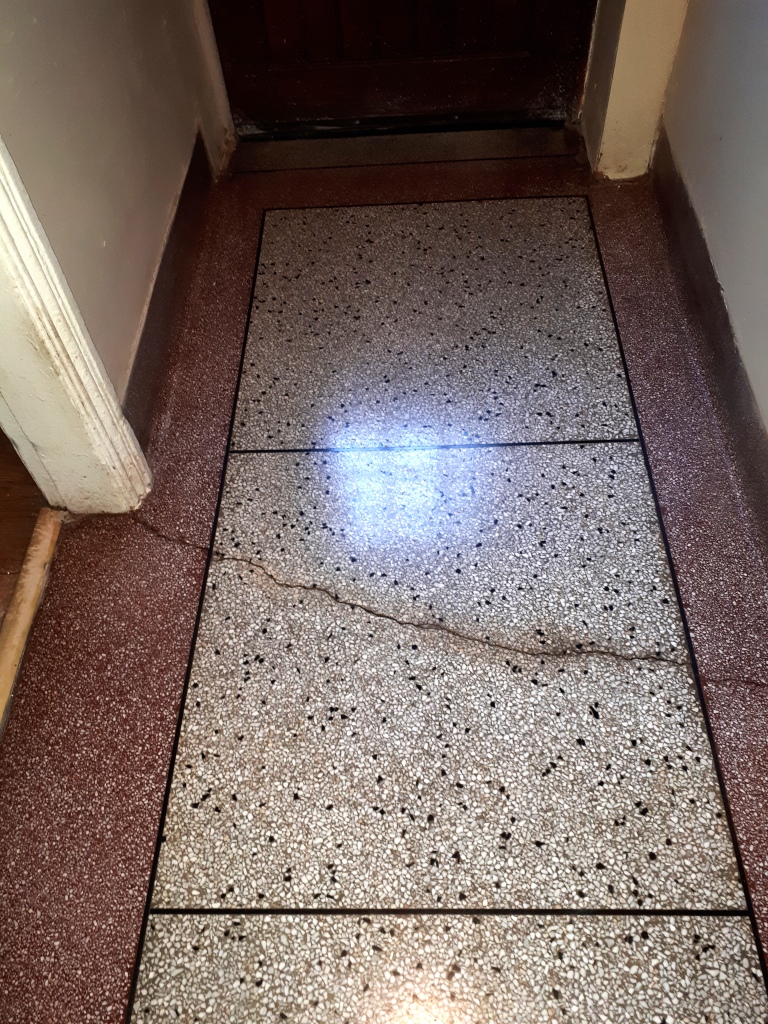
This post follows on from the Victorian Tiled floor article I published earlier, if you recall I was asked to restore a Victorian Tiled Hallway at a house in Dudley and there was a section that was Terrazzo, so I thought it would make sense to write about this separately as the cleaning method is different. Both period floors were original, having been installed when the house was built over 100 years prior and whilst Victorian tiles are quite the norm in these properties it’s quite unusual to find Terrazzo as this was mostly used in large public buildings. There was a crack running across the floor which is quite a common problem with Terrazzo as it’s laid in one piece like concrete and any movement in the ground will cause stress leading to a crack. Unfortunately, the only way to resolve this properly is to have a Terrazzo expert relay that section of the floor which would prove expensive.

Terrazzo Hallway Floor Before Cleaning Dudley

Terrazzo is the by-product of broken pieces of stone, often Marble, Limestone and Granite, which rather than being wasted are set into to a cement screed and poured onto the floor, then once the screed is set it is grinded to a polish.

Cleaning Original Victorian and Terrazzo Tiles

The polish on Terrazzo will eventually wear down with use and to restore the appearance it needs to be burnished with a series of pads with different grits from coarse to fine. So, to start the renovation I gave it a general clean with Tile Doctor Pro-Clean mainly to remove any grit before burnishing. Next, the Terrazzo tiles were cleaned using a coarse 400 grit pad fitted to a rotary machine and lubricated with water. This process removes dirt and any coatings such as sealers and the floor needs to be rinsed afterwards to remove the slurry that is generated. Then to build back the polished appearance, the floor is burnished with an 800 grit medium pad followed by a 1500 grit fine pad. Less water is used this time, but you do need to rinse the floor again after each pad to remove any slurry gets generated during the process. Once this was done the floor was dried with a wet vacuum and left to dry off fully overnight.

Sealing a Terrazzo Floor

The next day, I returned to the property and started with a damp test to make sure the floor was dry and ready for sealing. The floor was dry so I finished the Burnishing process by applying the last pad in the set which is a 3,000 grit (very fine) pad that adds the final polish to the Terrazzo. To protect the floor from staining and dirt becoming ingrained in the pores of Terrazzo it was then sealed with two coats of Tile Doctor Colour Grow which is a colour enhancing impregnating sealer that protects from within. Once the sealer had dried the floor was buffed with a white pad.

Terrazzo Hallway Floor After Cleaning Dudley

The floor looked a lot cleaner and shiner at the end and the customer was very happy with the transformation.


Source: Terrazzo Tile Cleaning and Restoration Service in Dudley, West Midlands

How to Repair Raised Flooring Pedestals

Raised flooring pedestals are what support a raised floor off the ground, if these become bent or damaged it can affect the structure of the whole raised floor. This is why it's so important to learn how to fix raised flooring pedestals. With the right tools and equipment, you can repair the problem and improve the overall health of your flooring.

What You'll Need:
  • Replacement raised flooring frames
  • Replacement raised flooring pedestals
  • Replacement raised flooring panels (optional)
  • Screwdriver
  • Spanner
  • Measuring Tape
  • Cleaning Solution
Step 1 - Removing the Raised Flooring Panel

The first thing that you should do is remove the raised flooring panels from the affected area. You can't only remove the panel which is affected because you will need access around the entire frame. Remove the square of panels so that you can access the area needed.

Step 2 - Assessing the Situation

Once the area is uncovered, take a look at the problem, there are a few other problems which can result in similar symptoms to a broken pedestal, including a break in the frame itself.

Step 3 - Removing the Damaged Frame


Remove the damaged frame from the floor. Depending on the floor you are using, you will either need to unscrew the frame, or alternatively it might just lift out. Normally you will need to unbolt the frame before it can be removed. Once it is removed take a look at it again to ensure that the problem is actually caused by a damaged pedestal.

Step 4 - Repairing the Frame

Depending on the type of floor frames that you used, you might be able to repair the frame by screwing in new pedestals. However most frames are welded together which doesn't make this a sensible option for most people. Most people will have to replace the frame entirely. When replacing the frame, choose a frame that is exactly the same size as your existing frame. If you do not, you will not be able to properly install the flooring.

Step 5 - Replacing the Frame


Once you have either repaired or replaced your frame, you will need to fit it again. This is done in exactly the same way as when you took it out, only in reverse. Start by adjusting the feet so that the frame is the right height off the floor. Also make sure that the frame will be level with all of the others.

Then, you need to decide whether or not you want to replace the panels. If one of the pedestals becomes damaged, your floor can bow and look unsightly. If any of the panels need to be replaced, be sure you choose the right shape and size of floor panel.

Step 6 - Finishing Touches


It is normal to leave fingerprints on the metal panels. Consider cleaning the floor panels using stainless steel polish to get a better result.


Thursday, January 11, 2018

Renovating Tired Terracotta Tiled Floors in East Sussex

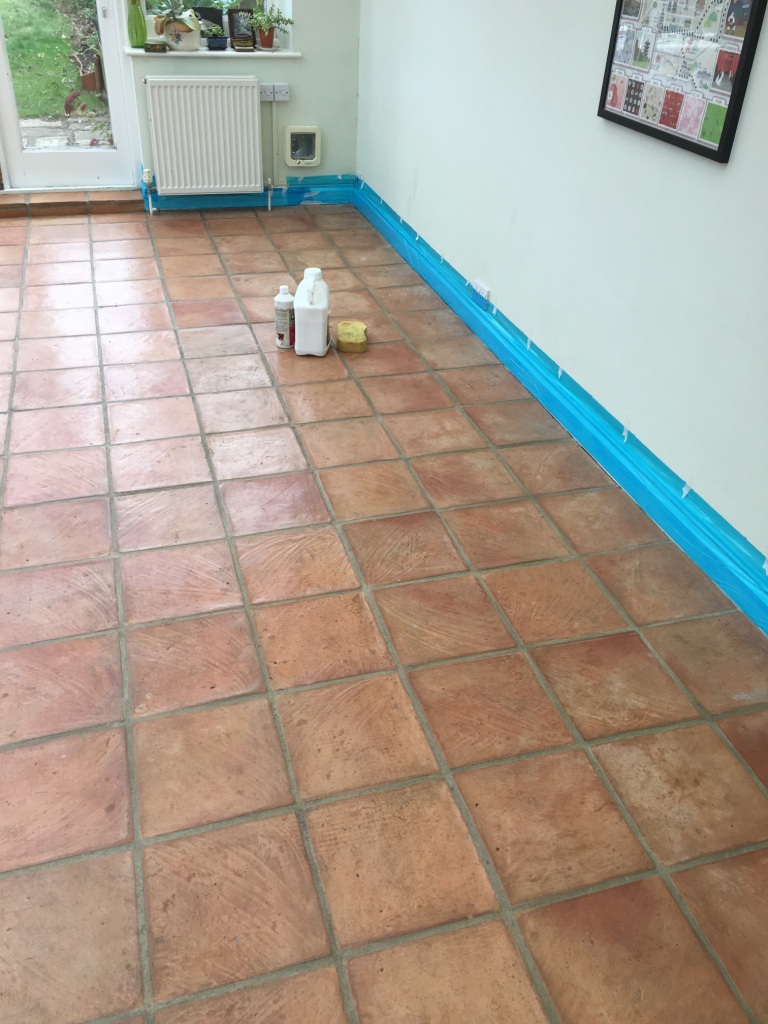
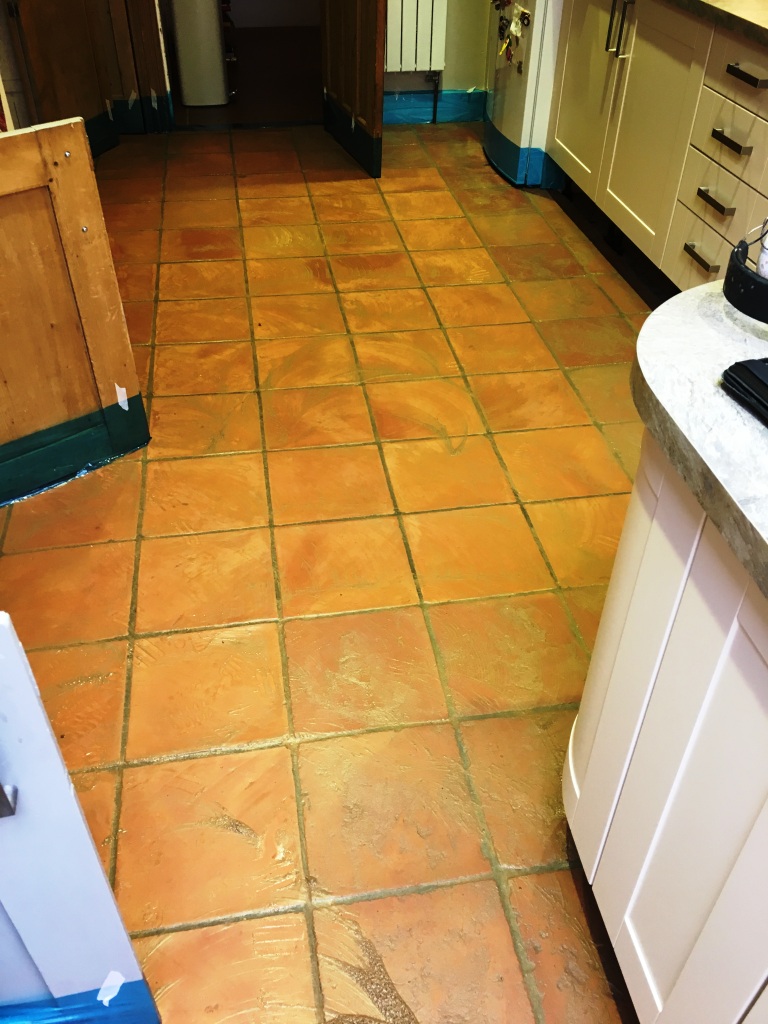
This couple, who live in the seaside resort of Brighton, had purchased their house four months before Christmas and wanted to have the fantastic Terracotta tiled floor in the kitchen and conservatory looking its best before the festive period, since they had family visiting. The floor was looking washed out and it was clear the sealer had failed in the high traffic areas and was now allowing dirt to penetrate into the pores of the tile making it difficult to clean.

Terracotta Floor Before Cleaning Brighton

We often get calls from new home owners keen to put their own stamp on a property shortly after moving in; stone floors rarely come with cleaning instructions so if you have a stone floor it makes sense to get in touch, so we can advise you on how best to maintain it.

Terracotta Floor Before Cleaning Brighton

We provided a quote which included stripping the floor of old sealers, cleaning, oiling and then sealing it again to restore cleanliness and character to the Terracotta. There was a lot to do and two areas to clean so I anticipated it would take four days to complete.

Cleaning a Terracotta Tiled Kitchen Floor

Having accepted the quote our first task upon returning to the property was to give the Terracotta tiles a deep clean and remove any remaining sealer present on the tile. This was achieved by applying a strong combination of Tile Doctor Pro-Clean and Tile Doctor NanoTech HBU to the tiles and then covering it in a plastic sheet, so it wouldn’t dry out. This method allows the products to really soak into the pores of the Terracotta and draw out the dirt. I should also mention that Pro-Clean is a very effective Tile and Grout cleaner whilst HBU enhances it by adding nano-sized cleaning particles.

Terracotta Floor During Cleaning Brighton Terracotta Floor During Cleaning Brighton

The plastic blanket was left in place for a few hours before being peeled off and then the cleaning products scrubbed into the tile and grout using a black pad fitted to a rotary floor machine and hand brushes. The now soiled product was rinsed off with water which was then extracted using a wet vacuum. The floor was inspected, and stubborn marks spot treated until the floor was clean.

Terracotta Floor During Cleaning Brighton

After thoroughly cleaning the Terracotta over two days, we left the floor to completely dry off over the weekend. The tiles would need to be sufficiently dry to receive fresh sealant, as excess moisture can cloud the sealant and prevent it from working correctly.

Sealing a Terracotta Tiled Kitchen Floor

When we returned to the property, we proceeded to apply Tile Doctor Stone Oil to the tiles. Stone Oil is a sealer which restores the colour and texture of tiled floors, as well as mechanical strength once cured.

We applied a single coat of the Stone Oil before topping it up with multiple coats of Tile Doctor Seal and Go, a topical sealer which provides a high-quality sheen finish to help accentuate the appearance of the Terracotta tiles as well as adding protection.

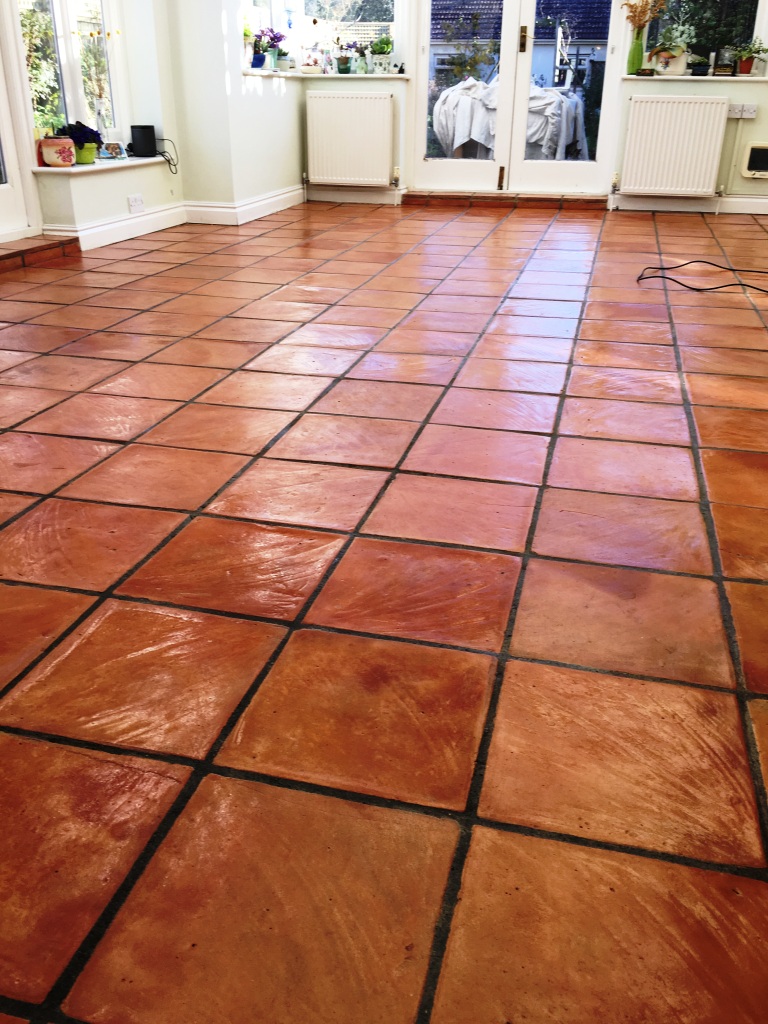
Terracotta Floor After Cleaning Brighton

You can see the results of the restoration below. The couple were so impressed that they have now agreed to have Tile Doctor visit once a year (at a fraction of the cost of the original restoration) to complete a maintenance clean. This will make sure this Terracotta is always looking at its best!

Terracotta Floor After Cleaning Brighton


Source: Terracotta Tile Cleaning and Restoration Service in Brighton, East-Sussex

Monday, January 8, 2018

Protecting A Wood Threshold

Wood thresholds take quite a pounding when you think about it. There they lie across a door way and virtually everybody that passes over them will, at some time, hit them with something.

A nice threshold can add welcome to a house and indicate security but a damaged one can do just the opposite. So how can you protect your wood threshold?

Cambering
By having the threshold cambered you can reduce the impact of objects hitting it. A shoe can deliver quite a damaging blow and the cumulative effect of people kicking a threshold can be very destructive, Cambering the threshold lowers the leading edge so that people walking across the threshold either miss it altogether or simply give it a glancing blow. Cambering also avoids much of the damage caused by objects being dragged into the house.

Coating
Coating can also protect your wood threshold. Some coats like paint or varnish can absorb blows and protect the underlying wood and others, like rubber, can offer even more protection. Although rubber sheeting has not been used extensively on domestic thresholds, it is becoming more popular as commercially produced thresholds try to find more cost effective production methods without affecting how long the product will last.

Abutting
In many homes with fitted carpets thresholds are given added protection by having the fitted carpet butted right against them. This has the effect of lowering the apparent height of the threshold so that people don’t kick it so much – the same effect as cambering. Even without fitted carpets, a simple welcome mat or a rug against the threshold can make a contribution.

Regular Cleaning
Thresholds tend to be left out of the normal house keeping routines and this neglect soon starts to show. By having a regular cleaning session thresholds will lose much of the accumulated dirt and grit that would otherwise be continually grinding away at the surface. There is also a psychological effect with cleaning. It has been well observed that things that are clean get treated better and a nice clean threshold benefits from this effect.

Awareness
Maybe the best protection of all for wood thresholds is simply an awareness that they are there. Although you probably would not hesitate to warn someone to ‘mind the step’ how many times have you warned about the threshold? While you can’t be forever pointing thresholds out, maybe it would help if your wood thresholds were in contrasting colors to the floor they were on. It is much easier to miss something if you can see it.

Water Proofing
Much damage to wood thresholds is caused by water penetration. By waterproofing your threshold you protect it from the weather and from accidental spillage. Sometimes it is enough to waterproof the top of the threshold but for the maximum effect it is much better to waterproof all surfaces of the threshold.

Protecting your wood thresholds can pay dividends in making your house look more inviting but it can also help you to protect your wood floors. After all, if your threshold is suffering from water damage and rough treatment, your floor may be having the same problems.


Friday, January 5, 2018

Lay a Floor Joist in 4 Steps

Laying a floor joist in a wood frame house is a simple procedure that can be done in 4 easy steps. Wood joists are structural framing members that are laid upright (on edge) and nailed equally spaced (usually 16 inches on center) onto the wall plates. Joists range in size from 2 x 6 to 2 x 12 based on the distance being spanned. Joists are cut to lay flush with the outer surface of the exterior walls and usually run parallel to the short overall dimension of the floor plan. If the house is a multi-story structure, the joists would function as ceiling joists for the lower floor and floor joists for the upper floor. When used as floor joists, subflooring or decking is installed onto the upright joists in either 4 x 8 sheets of plywood or interlocking tongue and groove boards.

What You'll Need:
  • Joists
  • Framing hammer
  • Framing square or measuring square
  • Measuring tape
  • #16 nails
  • Circular saw
Step 1: Select Appropriate Boards for the Joists
A board can be curved in 3 different directions. A bow refers to the curve in a plane perpendicular to the face (long dimension) of the board. A board that is twisted is curved in a plane that is perpendicular to both the short and long dimension (thickness and width). A board with a pronounced “crown” or side bend has a curve in the plane parallel to the face of the board. Select boards that are neither twisted nor bowed for the joists. A board with a crown is acceptable and even preferable. Joists are installed with the crown pointing up so that over time the applied loads will cause it to straighten. A board installed with the crown pointing downward is sagging and will most likely sag even further.

Step 2: Remove Material to Expose the Rough Framing
Installing joists in new home construction is much easier than replacing joists in an existing house, but the end result is the same. If you are replacing existing joists, you will most likely have to remove the flooring and subflooring to get to the structural framework.

Step 3: Install the Joists

Measure the distance being spanned and cut the joists to length. If the plate is on an interior wall, the joists may extend past the plate. Layout the joists (mark equal spacings) onto the plates; continue the spacing pattern of the existing adjacent joists. Place the joists upright onto the plates on the marks and toenail each joist into the plate with 2 nails on each side. Make sure that the joists are installed parallel to adjacent joists. Measure the spacings between adjacent joists at both ends of each joist.

Step 4: Install Bridging for Spans Over 15 Feet
Many building codes require bridging for joist spans greater than 15 feet. Bridging consists of short blocks that maintain equal spacing and prevent buckling. Using lumber of the same dimensions as the joists, cut blocks to fit the cavity between each pair of joists. Install the blocks staggered, flush with the top edge and perpendicular to the joists at the midpoint of the span.


Wednesday, January 3, 2018

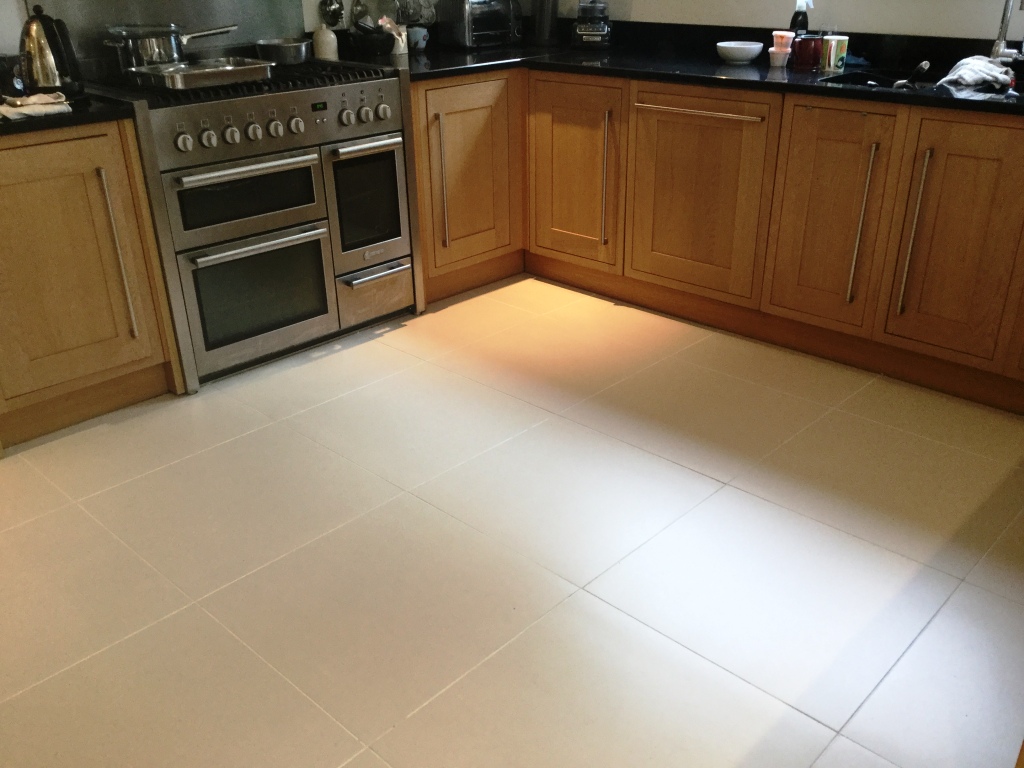
White Floor Grout Refurbished in Bedfordshire Kitchen

This customer called us as she was deeply concerned by several problems with the grout between her large format white Porcelain kitchen tiles. The grout was not only very soiled, but had also cracked and dislodged in places because of her underfloor heating. The constant heating and cooling of the floor had caused the grout to expand and contract – and because it was not the flexible variety, it had cracked quite easily. The tiles themselves were not proving too difficult to keep clean as Porcelain is naturally quite durable. However, every time the customer had cleaned the floor, the grout never really improved in condition. In fact, it was getting worse over time.

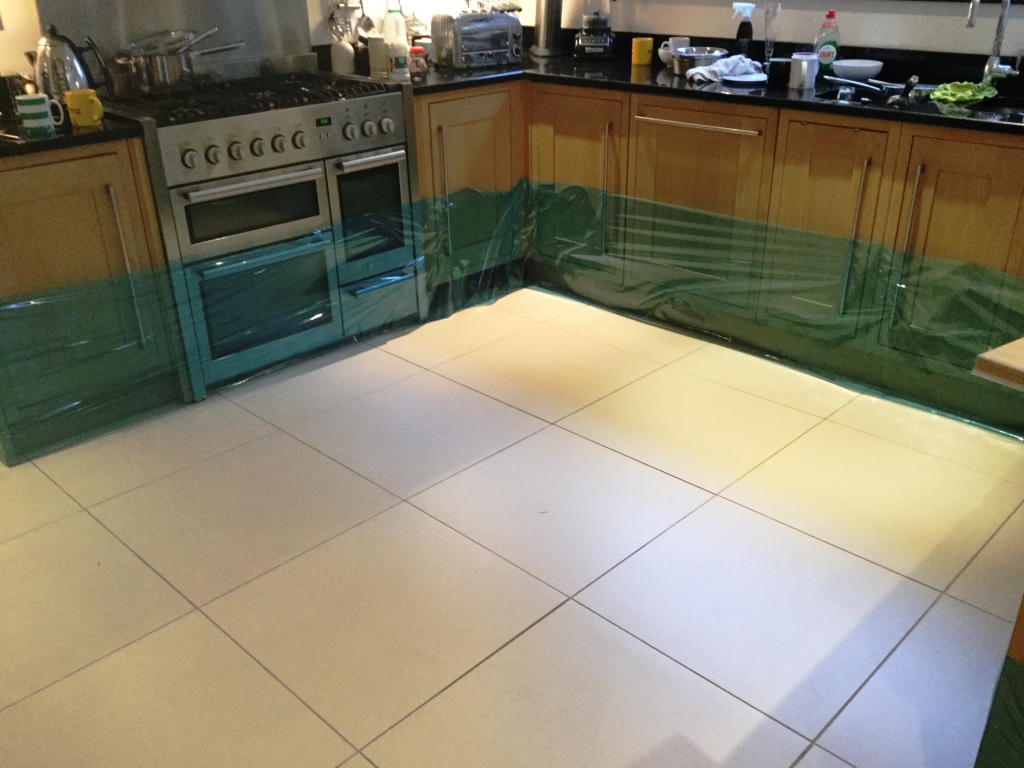
Porcelain Floor Tile Grout Before cleaning and recolouring Studham Porcelain Floor Tile Grout Before cleaning and recolouring Studham

A quote was given to restore the grout and the work was booked in the following month. The property was in Studham on the edge of the Chiltern Hills in Bedfordshire.

Cleaning and Re-Grouting for Porcelain Kitchen Tiles

The first thing we did was to protect the kitchen units with a plastic wrap and remove the plinths under the kitchen units to prevent them from exposure to any cleaning products. The tiles were vacuumed to remove any loose debris and dirt, before being washed using a mild solution of Tile Doctor Pro-Clean, which is an alkaline-based cleaner that’s safe to use on tile and grout. As aforementioned, the Porcelain tiles were in good condition to begin with, so the cleaning process was not too intensive. We also scrubbed the Pro-Clean into all the grout lines to remove as much staining as possible, as well as to prepare them for recolouring. Next, the area was rinsed with water to remove any trace of cleaning product and the resulting slurry was extracted using a wet vacuum. The floor was then dried quickly using fans so that we could assess how well the grout had responded to cleaning. Following this, any loose grout was dug out and replaced with fresh grout.

Grout Re-Colouring for Porcelain Kitchen Tiles

Once the grout was fully dry, we started the process of re-colouring it. This was done using our own Tile Doctor Grout Colourant, which seals and rejuvenates grout joints, protecting them from everyday staining and ingrained dirt.

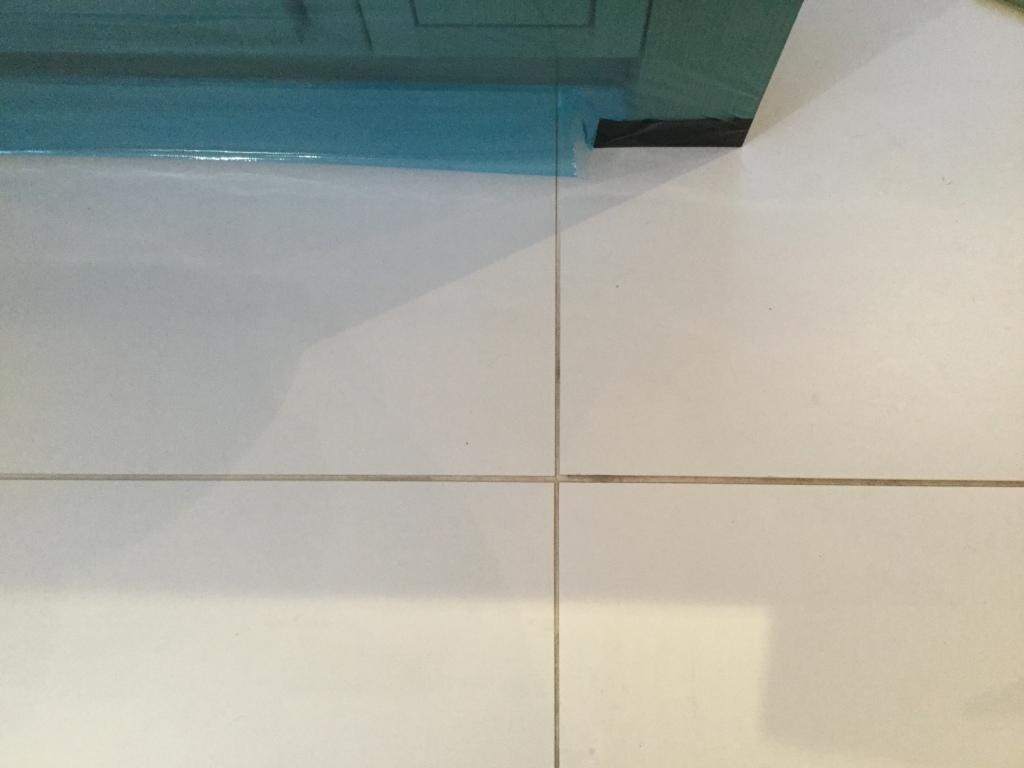
Porcelain Floor Tile Grout During cleaning and recolouring Studham Porcelain Floor Tile Grout After cleaning and recolouring Studham

There are 10 different colours of Grout Colourant available in our range, including Charcoal Grey, Black, Cappuccino, Limestone, and White – the latter being the colour the customer opted for this time. The product is applied by hand using a small brush. You allow it to dry partly and then any excess is wiped off the tiles, as once set it is extremely hard and durable.

Porcelain Floor Tile Grout Before cleaning and recolouring Studham Porcelain Floor Tile Grout After cleaning and recolouring Studham

The pictures above show the difference our grout re-colouring service can make. The customer commented that the work made the floor look newly installed, as she felt it had never looked truly clean before. Another satisfied customer and with the colourant protecting the grout it should stay that way for some time.

Porcelain Floor Tile Grout After cleaning and recolouring Studham


Source: Kitchen Tile Cleaning and Sealing Service in Greater Manchester