Thursday, May 31, 2018

How to Install Transition Strips

Installing transition strips is an often overlooked part of the installation of hard surface flooring. If you are installing laminate or hardwood, you will most likely need to put some transition strips down at some point. These can finish off the edge of a floor and make the job look much more professional. Here are the basics of how to install transition strips effectively.

What You'll Need:
  • Transition strips
  • Saw
  • Tape measure
  • Pencil
  • Liquid nails
  • Caulk gun
  • Drill
  • Heavy objects
Step 1 - Determine the Proper Transition Piece

When you are installing wood or laminate, there are several different types of transition pieces that you could potentially install. Before installing, you need to make sure that you choose the proper piece for the job. If you are going from wood or laminate to carpet, you need to use an end mold which is also sometimes referred to as a carpet reducer. If you are going to a vinyl floor, you will need a vinyl reducer. If you are going up to another hard surface floor, you should use a t-mold.
Step 2 - Measure

Measuring is perhaps the most important step of this process. Transition pieces are generally very expensive and if you cut the transition short, you will either have to live with a gap or purchase another piece. Because of this, you need to take great care when you are measuring and try to be as detailed as possible. Measure down to the smallest increment that you can find. Take your tape measure and stretch it across the opening on the floor.
Step 3 - Mark the Transition

Once you have the dimension that you need, mark the transition piece that you are about to cut. Stretch out your tape measure on the transition piece and then use your pencil to mark the appropriate dimension.
Step 4 - Make the Cut

After marking the transition piece, you need to cut it so that it will fit in the opening on the floor. If you have a table saw, this would be the easiest way to cut the transition piece. Place the transition under the saw blade and hold it steady. If you can put the transition piece in a vice, this would be ideal. If you are cutting a laminate transition, you need to be extremely careful. The top layer of a laminate transition piece is a type of construction paper. If you do not make a clean cut, you will tear the edge of the paper.
Step 5 - Attach the Transition

You can attach the transition in one of two ways. You can glue it to the floor with liquid nails or you could use the track that comes with it to attach it. If you are using liquid nails, apply a bead of the liquid nails to the underside of the transition. Then press it onto the floor. When using the track, you will screw the track down to the ground and then snap the transition into place. If you glue down the transition piece, you need to put something heavy on top of it while it dries.


Monday, May 28, 2018

Renovating an Old Quarry Tiled Floor in Shropshire

This was a property adjacent to Benthall Hall which is a historic building owned by the National Trust near Much Wenlock. Many of the buildings in this town date back hundreds of years including Benthall Hall which is recorded in the Domesday Book of 1086.

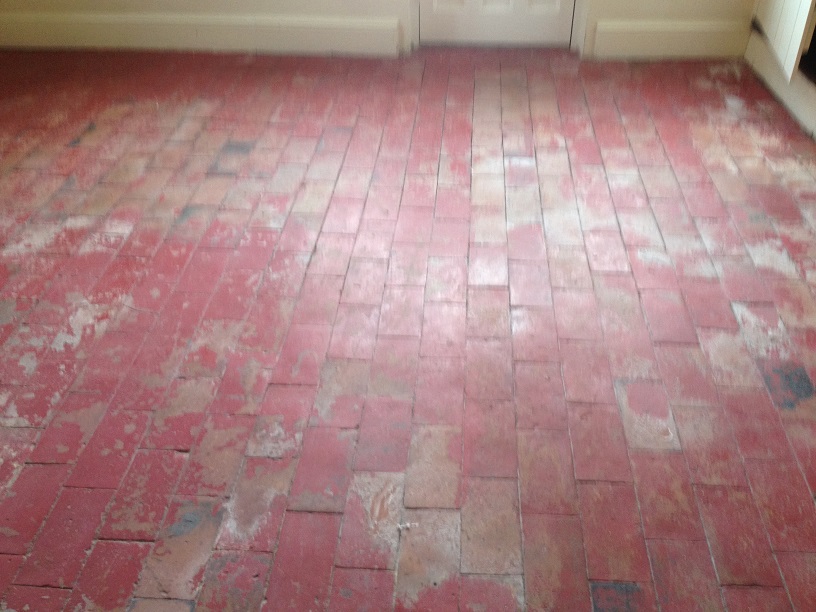
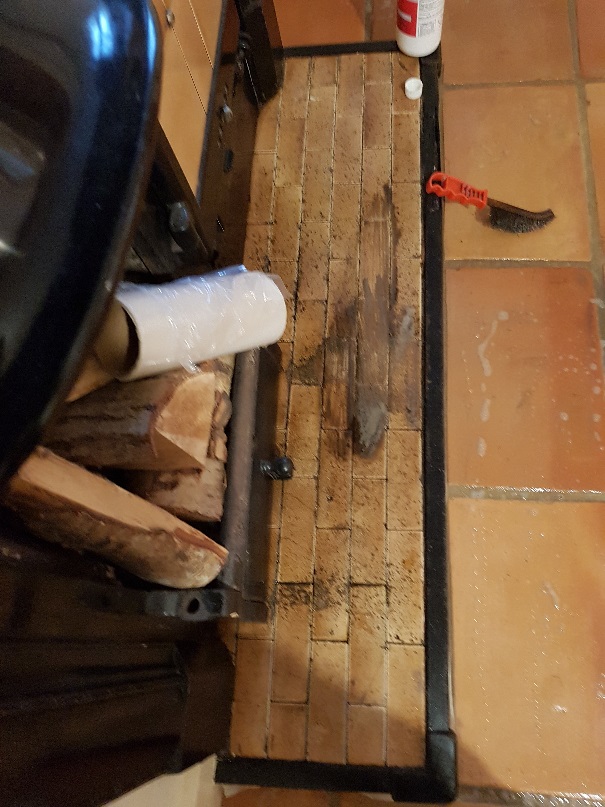
Brick Pattern Quarry Tiled Floor Before Renovation Much Wenlock

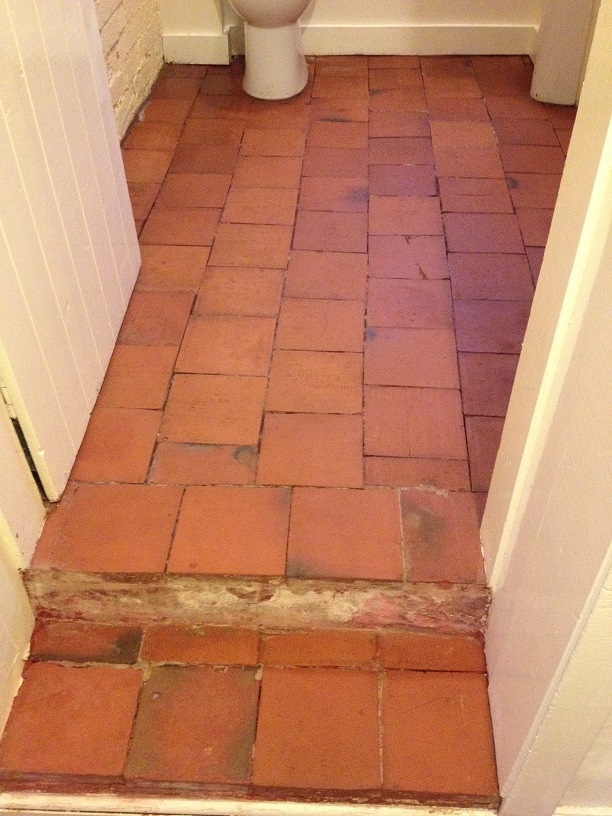
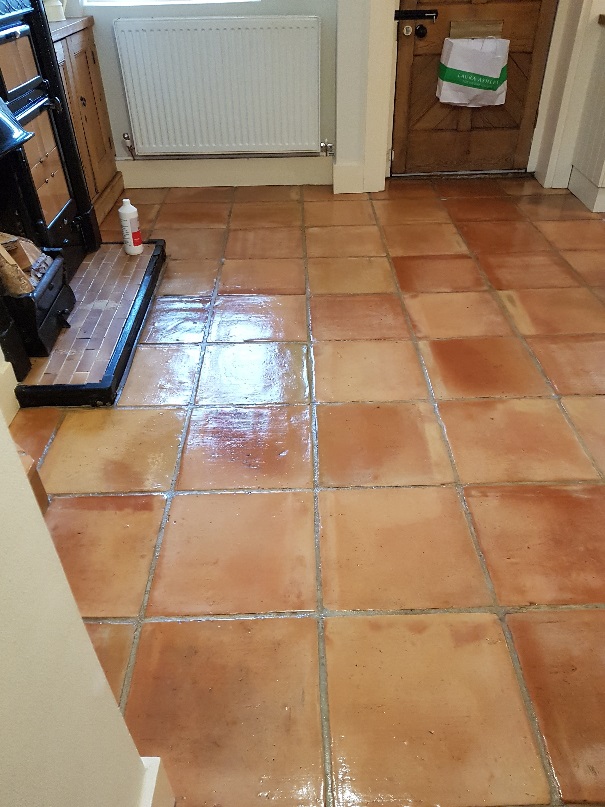
The property hadn’t been lived in for several years and the new tenants wanted to sympathetically improve the look of the Brick Shaped Quarry Tiles on the lounge floor and in the toilet where the floor had been laid with nine-inch square quarry tiles. Both floor areas had been painted over previously and due to dampness issues the paint was flaking off leaving a very unappealing look. No doubt this contributed to the reason the property has been left un-occupied for so long.

Quarry Tiled Floor Before Renovation Much Wenlock


Cleaning a Quarry Tiled Floor

To give the floor a deep clean I would need to remove all the flaking paint; there were several ways I could go about this so after some consideration I decided to try Tile Doctor Remove and Go.

Remove and Go is a multi-purpose coatings remover that can strip sealers off tiles as well as remove paint and other coatings, it’s also designed for use on Tile, Stone and Grout so safe to use. I applied a strong dilution of the product to the floor and left it to soak in for a good ten minutes. It was then scrubbed into the floor using a black seventeen-inch scrubbing pad fitted to a rotary floor machine. The floor was then rinsed down with water and the soil extracted using a wet vacuum. With the floor clean I could see I had been successful in removing most of the paint but there were areas where further work was needed and so I repeated the process three or four times and used a steamer on the stubborn areas until I was happy with the condition of the floor. After rinsing for a final time, I inspected the floor and could see the tiles looked a hundred times better.

My next thought was to seal the Quarry tiles to protect them from future staining and enhance their look. The problem however with old floors like these is that they don’t have a damp proof membrane and can have damp problems. The floor needed to be dry before applying a sealer and with all the water used to rinse the floor it may take some time to dry out. I discussed this issue with the customer and we agreed that I will return to monitor the floor and arrange to seal it when it was dry. In-fact I did return after a week and tested the floor with a damp meter which confirmed the floor still was still too damp.


Sealing a Quarry Floor Sealing

They were due to move into the property in a months’ time, so I visited them again to check the floor and unfortunately the damp level was still too high. I concluded that there were several factors preventing the quarry tiles from drying out: the tiles were laid on sand, the property as I mentioned had not been lived in for years also there had been a lot of rain over the last couple of months.

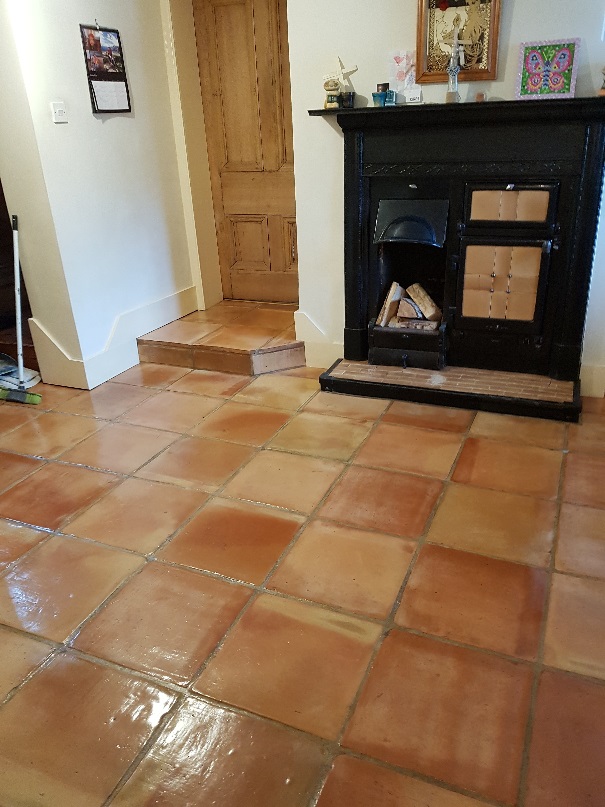
Brick Pattern Quarry Tiled Floor After Renovation Much Wenlock

We agreed that once they move in and start to heat the building up, the floor have a much better chance for drying and when it looks dry, they will give me a call and I will check it for them and seal it if possible.

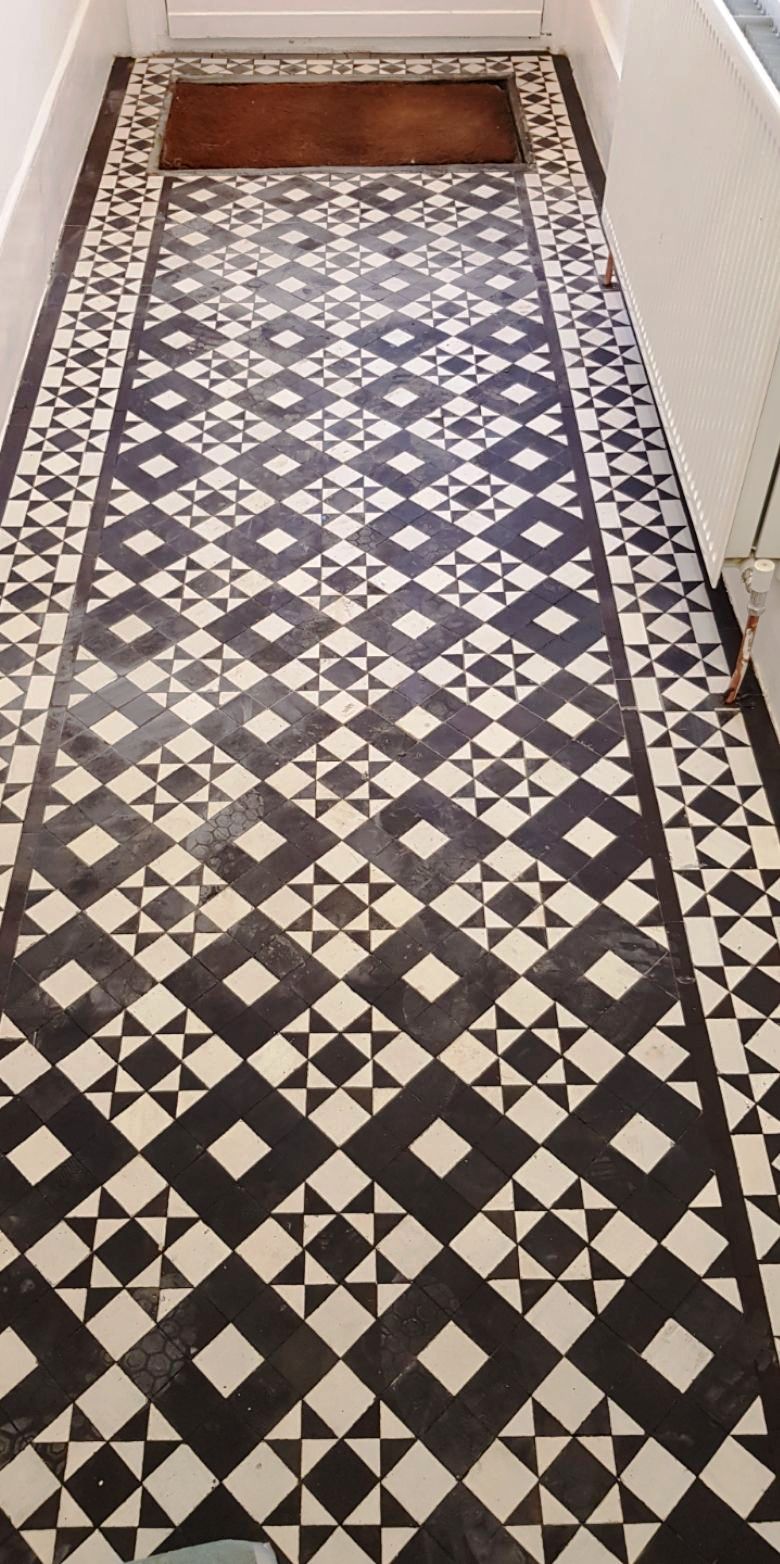
Given the damp issues my thoughts are to seal the floor with a coat of Tile Doctor Colour Grow and then finish with Seal and Go Extra, both are which breathable sealers and will leave the floor with a nice sheen finish.

Quarry Tiled Floor After Renovation Much Wenlock


Source: Quarry Tile Cleaning and Renovation Service in Shropshire

Friday, May 25, 2018

Advantages to Treating Plywood Subfloor in High-Humidity Areas

A plywood subfloor supports the finished floor on the joists. In areas with high humidity, which will also be hot areas, treating the plywood subfloor will help it last longer.

Wood

Wood is a porous substance. In high humidity areas, moisture will enter the plywood subfloor. Over time, it will cause the plywood to come apart and disintegrate. That will mean tearing up the entire floor to replace the subfloor, a lengthy and expensive process.
Mold

Where there is high humidity, there can also be mildew. Once the moisture collects in the wood, it can easily turn to mold. By treating the plywood subfloor before it’s laid, you stop moisture from entering the plywood, so it will last much longer.

Treating a plywood subfloor is a step most people forget or ignore, but it’s an important one. An investment of an hour and a few dollars can save a great deal of work later and also save health, as mold can cause illness.
When to Treat

For the best protection, treat the plywood subfloor after cutting but before you put it down. This means the cut edges will be treated, too, preventing moisture from entering any part of the plywood. Allow time for the treating agent to dry in the wood before laying the subfloor.


Wednesday, May 23, 2018

Renovating Dirty Terracotta Floor Tiles in Derbyshire

Terracotta Tileshave been around in certain parts of the world for over two millennia; in fact, the word Terracotta means burned earth. The ancient Romans used a variety of Terracotta tiles in their villas and palaces for many centuries.

Terracotta tiles are thicker than most modern tiles, giving them strength and durability. The one big downside to Terracotta, however, is that it has no glaze on the surface and can pick up and store muck and dirt very quickly. If you have ever owned a Terracotta floor before you will be able to relate to this problem.

Such was the dilemma facing our client in rural Hope Valley in the Peak District National Park of Derbyshire. Her Conservatory had been laid with Terracotta tiles around 25 years ago and over the years had been continuously covered with wax. Now, no matter how many times she mopped the floor it never looked clean because all the dirt over many years had been drawn in and sealed into the wax. She called in Tile Doctor to deep clean the floor and treat it with a gloss finish.

Terracotta Tiled Conservatory Before Cleaning Hope Valley


Cleaning a Terracotta conservatory floor

I started by removing the layers of wax with Tile Doctor Nano-Tech HBU (a heavy build-up remover that is designed to work where other cleaners won’t) and Tile Doctor Remove and Go, specially formulated to draw out ingrained stains and remove heavy grease build-up. I combined both products into a powerful cleaning cocktail and left them to soak into the floor for about twenty minutes. The solution was then scrubbed into the tile and grout using a black scrubbing pad fitted to a rotary machine. The resultant soil was rinsed off with water and then extracted from the floor using a wet vacuum.

After cleaning I inspected the floor and could see there was still some wax left in the grout between the Terracotta tiles, so I went over the floor with a hand-held steamer and scrub brush, it took some time, but the process was perfect to remove the last traces of wax. Finally, I washed the floor with clean water twice and left it to thoroughly dry overnight.

Terracotta Tiled Conservatory During Cleaning Hope Valley


Colour Restoring and Sealing a Terracotta tiled floor

The following day I went back to seal the floor but found there were still a few areas with higher levels of damp than I would have liked. My solution was to seal the tiles with Tile Doctor Colour Grow. This is a superb colour intensifying matt sealer that provides durable protection and enhance colour but importantly, it’s fully breathable therefore allowing any damp in the tiles to evaporate. I then left the floor to completely dry out, which took five days.

On my return I finished the sealing of the floor with four coats of Tile Doctor Seal and Go. This is a specially formulated water-based blend of acrylic polymers that provides a stain-resistant surface seal and a durable low-sheen finish that works really well on Terracotta.

Terracotta Tiled Conservatory During Sealing Hope Valley

The conservatory looked beautiful with its clean Terracotta tiles. The unsightly and grimy orange-brown floor had been restored to its original Terracotta colour with a very attractive sheen. And, of course, the floor was now correctly sealed to prevent the problem happening again and to make mopping easy. I left the house with good feeling!

Terracotta Tiled Conservatory After Cleaning Hope Valley

The customer was delighted and left this positive feedback:

“Henry did a brilliant job, friendly professional polite and efficient. He kept us fully informed of the procedures he was using. We would not hesitate to use him again or to recommend him to others.”

Terracotta Tiled Conservatory After Cleaning Hope Valley


Source: Terracotta Tile Cleaning and Sealing Service in Derbyshire

Monday, May 21, 2018

Top 3 Woods for a Hardwood Subfloor

A hardwood subfloor is vital to give a good surface for the hardwood floor. The subfloor itself doesn't have to be made of hardwood.

Douglas Fir

The ideal subfloor is Douglas fir. It should be boards that are nailed down at 90 degrees to the joists. Having them at an angle holds everything much more firmly. You should use sold #2 or a better grade of Douglas fir.

Pine

Frame grade pine boards also make a good hardwood subfloor. Like fir, the wood is tight in grain. In both cases the boards should be 1 inch by 6 inches.

Plywood

Plywood is the most common hardwood subfloor. It’s cheaper than boards and quicker to install. The best plywood subfloor will be ¾ inch thick. This will give ample strength to support the floor and people. A Sturdi Floor plywood subfloor is recommended most highly by hardwood associations.

It’s followed by ¾ inch OSB, or oriented strand board, plywood. Like all subfloors it should be attached at 90 degrees to the joists for strength and tightness.

Among the recommended subfloors, the lowest on the list is 5/8 inch plywood. This is cheaper but not as thick and, therefore, not as strong as a hardwood subfloor.


Tuesday, May 15, 2018

Renovating Dirty Terracotta Tile and Grout in East Cheshire

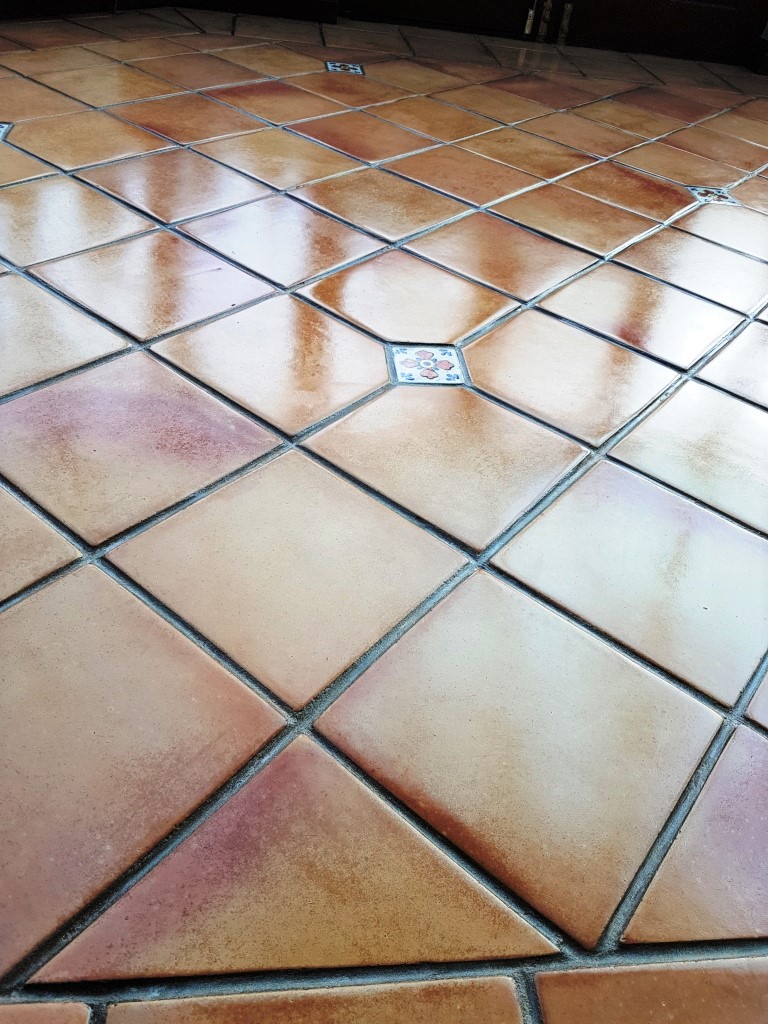
We were asked if we could restore the appearance of a large Terracotta tiled floor in a kitchen/dinner that had not been cleaned for many years. The sealer had mostly worn off in the high traffic areas but was still fairly thick under the table. Terracotta tiles are made from soft clay making it very porous and likely to absorb anything that lands on it; as a result, it’s important to maintain the sealer to stop this happening. Now with the sealer worn off completely in the busy parts of the floor anything that landed on the floor was very quickly absorbed into it.

Terracotta Tiled Floor Before Cleaning Knutsford Terracotta Tiled Floor Before Cleaning Knutsford

The house was in Knutsford on the East side of Cheshire which was named as Best Place to Live in the North West” by the Sunday Times in 2017; being close to the Peak District and within easy reach of Liverpool and Manchester its easy to see why.


Deep Cleaning a Spanish Terracotta Tiled Kitchen Floor

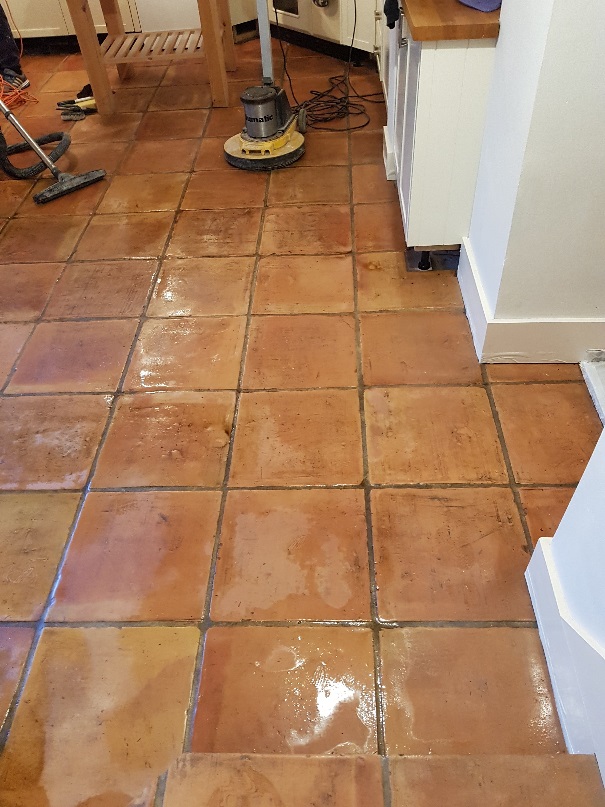
My first task would be to completely remove the old sealer so the whole floor could be given a deep clean before resealing. It’s not a good idea to add a new sealer on top of another especially if you don’t know what was used before, it can also lead to a build of sealers on the tile which will darken their appearance. To do this I soaked the tiles in a strong dilution of Tile Doctor Remove and Go which is a powerful stripping and cleaning solution that’s designed to removes old coatings on tiles and draw out ingrained staining. After twenty to thirty minutes the solution was worked into the tiles using a black buffing pad fitted to a rotary buffer machine. I also used a wire hand brush along the grout lines to make sure they were cleaned as the scrubbing pad can fail to reach into the recess. It wasn’t long before the old sealer and dirt was released from the Terracotta which was then washed off the floor using water and a wet vacuum.

Terracotta Tiled Floor During Cleaning Knutsford Terracotta Tiled Floor During Cleaning Knutsford

I inspected the floor at this stage and retreated any stubborn areas using the same process. I did have a few problems removing some greasy marks however I managed to get rid of these by applying Tile Doctor Wax Away worked in by hand with a scrubbing brush. Once I was happy that the floor was clean and free of old sealers it was given a final rinse to remove any trace of cleaning product, dried with the wet vacuum and left to dry out fully overnight.


Sealing a Terracotta Tiled Kitchen Floor

On my return the next morning I took a few damp readings to check the floor was dry before starting with the next step of sealing the tiles. All was well so began to add the first of multiple coats of Tile Doctor Seal and Go which is a water-based sealer that works really well on Terracotta and leaves a nice subtle sheen to the tile. Being was based it has the added advantage of not leaving a solvent smell as it dries.

Terracotta Tiled Floor After Cleaning Knutsford Terracotta Tiled Floor After Cleaning Knutsford

The Terracotta took some time to seal completely, in fact ten coats of sealer were required to fully seal the tile. You can always tell when a tile is sealed by adding a small drop of water to the surface, if it forms into a bubble then its’ fully sealed.

Terracotta Tiled Floor After Cleaning Knutsford Terracotta Tiled Floor After Cleaning Knutsford

I’m not sure you can appreciate the difference from my photographs but hopefully you can see that Terracotta tiles now look much fresher and the grout cleaner and lighter in colour.


Source: Terracotta Tile Cleaning and Sealing Service in East-Cheshire

Monday, May 14, 2018

Common Problems Installing a Subfloor Over Concrete

If you are installing a subfloor over concrete, there are several problems that you could run into. This process is commonly done to provide a subfloor to attach hardwood flooring. Consider the following common problems that may arise when you attempt to add a subfloor over concrete.

Choosing the Adhesive

When you attach plywood to a concrete subfloor, you will need to make sure that you get the right type of adhesive. Many people purchase the wrong kind of adhesive for this project, and the plywood ends up coming off the floor.
Spreading the Adhesive

When it comes time to apply the adhesive to the floor, you must take care to do it properly. The adhesive is very thick, so you have to use a trowel to apply it to the floor. Take your time to ensure that the adhesive is adequately spread.
Doors

Another problem that many people have is going through a door with the subfloor. If you have connecting rooms, you will need to cut the plywood to fit in the doorways. This can be difficult for many people, and it takes some patience and skill to cut it properly.


Thursday, May 10, 2018

Major Restoration of a Victorian Tiled Hallway in London

A customer in Winchmore Hill which is part of the London borough of Enfield was having major refurbishment works done to their home which included an upgrade to the central heating system. As part of the work a new radiator had been installed in the hallway however the utility company when putting in the new heating system had chased out two deep pipe channels in the central part of their beautiful Victorian tiled hallway floor.

Victorian Hallway Before Restoration Winchmore Hill Cropped Victorian Hallway Before Restoration Winchmore Hill

This was a real shame as the majority of the floor was in good condition; the owner of course wanted the floor restored so our brief was to do exactly that and carry out repairs to the pipe channels and to all the door thresholds that were either existing or new so they all matched in.


Restoring a Victorian Tiled Hallway

Our first task was to clean the tile and grout and strip off old sealers and waxes which we did by applying a dilution of Tile Doctor Remove & Go combined with equal part of Tile Doctor Pro-Clean. This was scrubbed into the floor with a black scrubbing pad fitted to a rotary machine and then rinsed off with water and extracted with a wet vacuum.

Victorian Hallway During Restoration Winchmore Hill

After deep cleaning we then carried out the tile repairs and replacements to pipe channels, missing and mislaid tiles to thresholds. Some or the tiles were replaced with matching reclaimed tiles and others were new sourced from Original Style who have a large range. Altogether we replaced circa 500 pieces of tile in order to repair the damage caused by the heating engineers and achieve a consistent pattern throughout the hallway.


Sealing Victorian Tiles

The cleaning and re-tiling work was carried out over three days and we returned on the fourth day to seal the floor with an initial two coats of Tile Doctor Colour Grow which is an impregnating sealer that enhances colour. We then protected the floor for a further week with cardboard cut to size, this allowed other trades to finish their work without messing up the floor. A week later we returned to lift the cardboard to apply the finishing seal using Tile Doctor Seal & Go which adds the final protection. Five coats were applied to reach the right level of protection and desired satin finish restoring the natural appearance and lustre of the tiles.

Victorian Hallway After Restoration Winchmore Hill Cropped Victorian Hallway After Restoration Winchmore Hill

The whole job allowing for the drying times of adhesive, grout and sealing took five days in total. It was worth it though as restored Victorian hallway really gives the property the Wow factor as you enter.

Victorian Hallway After Restoration Winchmore Hill


Source: Victorian Tile Cleaning and Sealing Service in London

Tuesday, May 8, 2018

Removing Candle Wax from Premium Lapicida Sandstone Tiles in Yorkshire

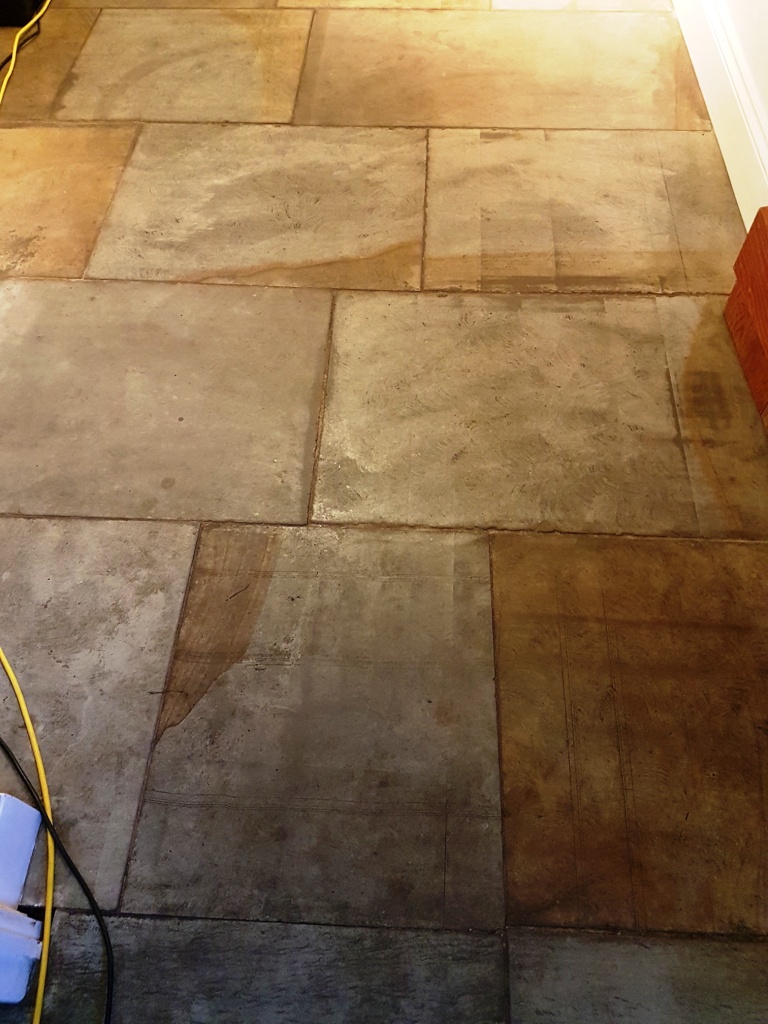
This customer who lived in the old North Yorkshire market town of Bedale, had a Lapicida Sandstone floor installed many years prior and over the years the sealer had worn off and dirt had become ingrained into the pores of the stone making it dull and difficult to clean effectively. Based in Harrogate, where they have Europe’s largest stone gallery, Lapicida are a premier Tile and Stone company that specialise in reclaimed Sandstone with prices that range from £79 to £594 per square metre.

Dirty Lapicida Sandstone Floor Before Cleaning Bedale

Naturally having such an expensive stone floor installed my customer wanted it to look its best however when your living with a stone floor day in, day out you fail to notice the gradual decline in its overall appearance. Then one day you suddenly realise the floor is overdue a deep clean and reseal and call in Tile Doctor; there is an alternative however, simply speak to Tile Doctor about setting up an annual Maintenance Plan whereby we pop by once a year to clean the floor and top up the sealer.

Dirty Lapicida Sandstone Floor Before Cleaning Bedale


Deep Cleaning a Lapicida Sandstone Floor

To deep clean the floor the sandstone flagstones were covered in a strong 1:3 dilution of Tile Doctor Pro-Clean which was left to dwell and soak into the stone for ten minutes before being scrubbed clean using a rotary buffing machine fitted with a black pad. The now dirty cleaning solution was then removed using a wet vacuum and then the whole floor washed down with water and stubborn areas re-treated until I was satisfied. Unusually for Sandstone it was all graded and uniformly flat which made cleaning a lot easier.

With the floor clean and all the dirt removed it revealed some black marks, most of which were from candle wax which is very difficult to get off. To tackle this problem a heat gun was used to melt the wax and then it was dappled with a clean cloth. This process was mostly successful, but some still left a faint Mark which the customer was ok with.

After giving the floor a final rinse and drying it as much as possible with a wet vacuum it was left to dry off fully overnight.


Sealing a Lapicida Sandstone Floor

I returned the next day to seal the floor first checking it for dampness using a damp meter. The flagstones were dry. I was going to seal the Stone with Tile Doctor Colour Grow which would have enhanced the natural colours in the stone, but the customer liked the light appearance of the cleaned stone, so l used Tile Doctor Ultra Seal instead; Ultra-seal is a natural look sealer, so it doesn’t darken the stone. Both sealers are what we call impregnators which work by soaking into the pores of stone protecting it from within by preventing dirt from becoming ingrained.

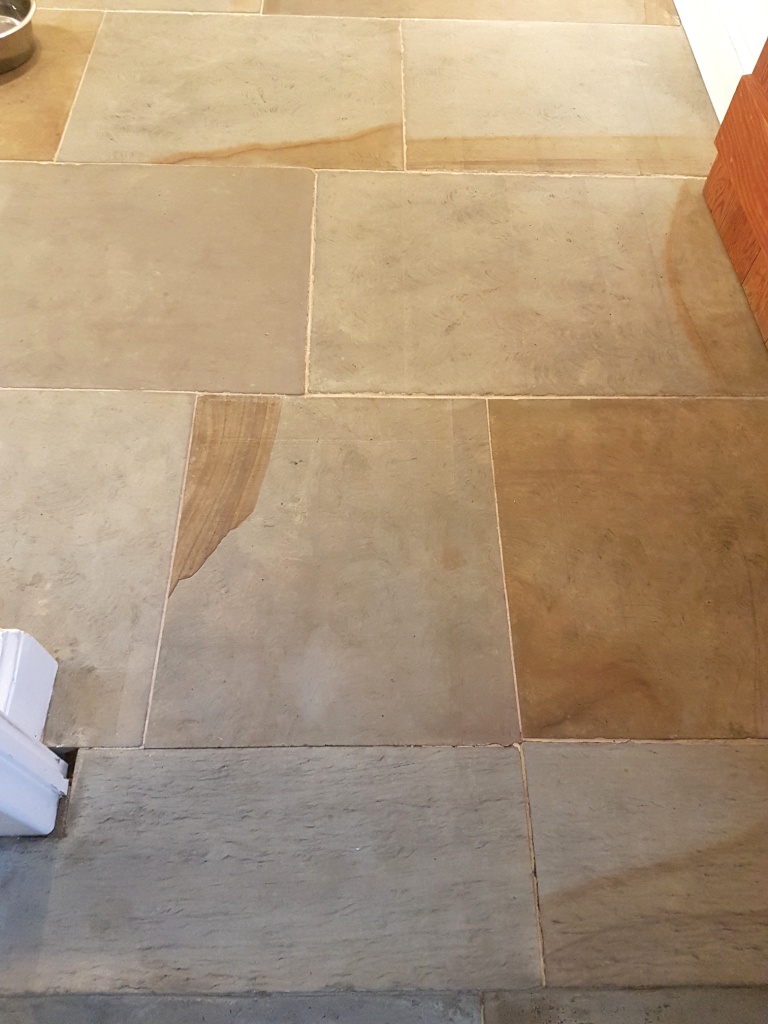
Dirty Lapicida Sandstone Floor After Cleaning Bedale

I’m sure you will agree the floor looks much improved, certainly the customer and myself were both very pleased with the transformation of the floor; my customer even left the following testimonial on the Tile Doctor feedback system.

Nigel Stoker was knowledgeable, efficient and very pleasant. My floors are looking amazing. Claire G, Bedale

Dirty Lapicida Sandstone Floor After Cleaning Bedale


Source: Lapicida Sandstone Cleaning and Sealing Service in Yorkshire

Monday, May 7, 2018

Floor Joist Repair: Fixing a Broken Floor Joist

To prevent your floor from sagging and being damaged, you may need to make a floor joist repair if the joist is broken. This should be done as soon as possible after you find a broken joist to avoid damage.

What You'll Need:
  • Saw
  • Wooden board the same thickness and width as the joist
  • Drill
  • Bolts and Nuts
  • Tape measure
Step One: Cut the Board

You will need to cut the board at least 6 inches longer on each side of the break to give it proper support. Measure the broken area and cut the board accordingly. Then, using the drill, drill two holes in each end of the board about 2 inches from the end the size of the bolt that you have purchased. Be sure the bolts are long enough to go through this board and also through the broken floor joist board.

Step Two: Install the Board

Use the new board to measure where the holes for the bolts should be on the existing floor joist and mark them, then drill. If the broken joist has shifted a bit, you will first need to install one side of the brace board you have made by bolting it onto the old joist and securing with nuts. Then have someone push the old boards until they are even while you bolt in the other side of the new brace and tighten.


Thursday, May 3, 2018

Achieving a High Shine on a Travertine Tiled Floor

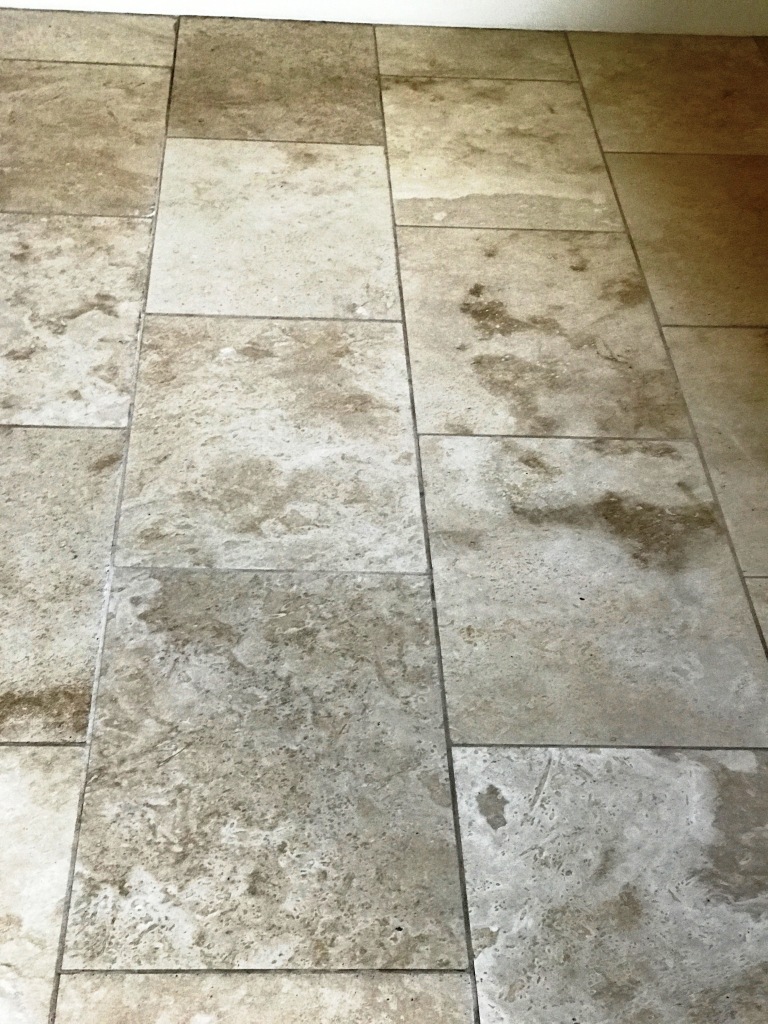
This customer from Swansea was unhappy with the look of her Travertine floor tiles and so decided to call in tile doctor after she had seen pictures of other travertine floor tiles on one of our websites and wanted hers to look the same. The natural brown shades of her own Travertine tiles had become very dark and were looking dull and lifeless in comparison. It was clear to me that the Sealer was wearing thin with use and dirt had now penetrated the pores of the stone making it difficult to clean effectively. This is a common problem with stone floors and this is why Tile Doctor offer a maintenance service where we pop round once a year to top-up the sealer on your floor.

Travertine Floor Swansea Before Cleaning Travertine Floor Swansea Before Cleaning


Stripping and Re-Polishing Travertine

To restore the polished appearance of the floor the stone would need to be stripped of any remaining sealer and dirt, re-polished and then sealed; we find the best way to achieve that is through the application of a set of Diamond encrusted burnishing pads. I started the burnishing process by fitting a coarse 400 grit no.1 burnishing pad to a floor buffer and running at a slow speed ran the pad across the whole floor. This coarse pad is designed to strip off old sealers and dirt from the tile. You use a little water to help lubricate and once complete it’s necessary to rinse the area with water to remove the soil that is generated. The next step is to start building back the polish with the 800 and then 1500 grit pads which are applied in the same manner. The floor was then rinsed again with water and I turned my attention to the grout which was scrubbed by hand using Tile Doctor Pro-Clean and a stiff brush. The floor was given another rinse and then inspected to ensure I hadn’t missed anything. Before leaving for the day I used the wet vacuum to extract as much moisture from the floor as possible.


Sealing Travertine Floor Tiles

On the second day I finished the banishing process with the application of the final of the four pads which is a very fine 3000 grit pad which adds a final polish to the surface leaving it looking shiny. This last pad is applied with a small amount of water spayed onto the tile in a process we call a spray burnish. The use of water is so small the floor remains dry enabling us to apply a sealer shortly afterwards. There are some beautiful brown shades in Travertine and so to really make them standout I sealed the floor using a couple of coats of Tile Doctor Colour Grow which is a colour enhancing impregnating sealer that soaks into the pores of the stone protecting it from within. The sealer will also make ongoing cleaning and maintenance easier for the customer.

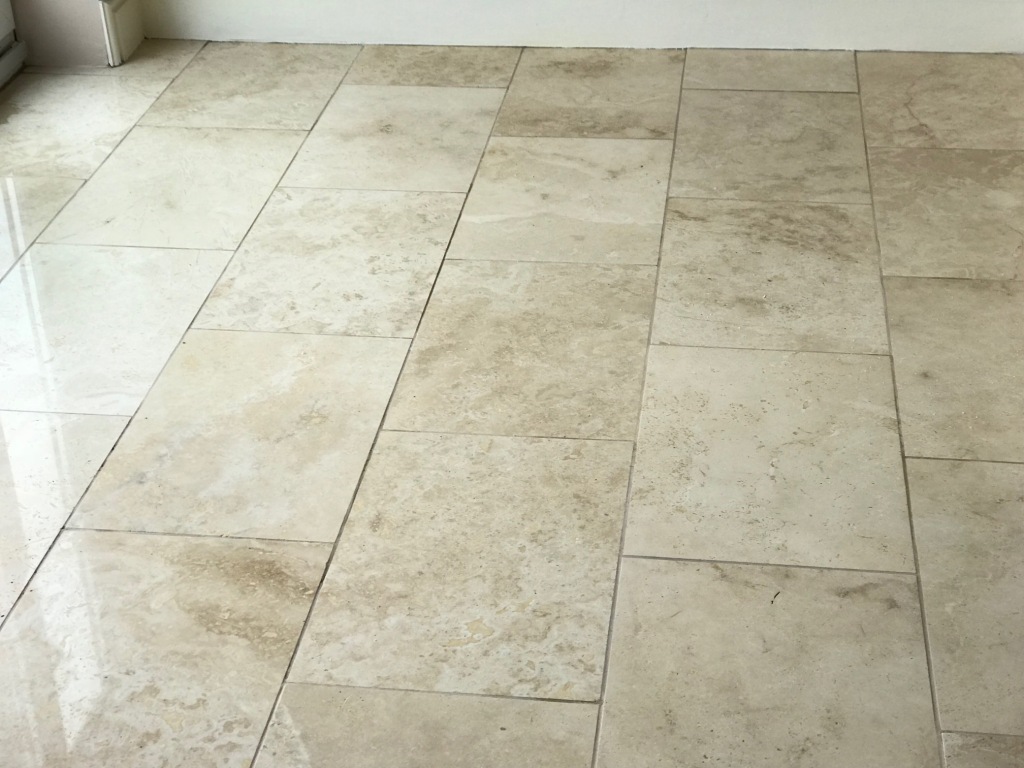
Travertine Floor Swansea After Cleaning

The customer was very pleased with the result and commented on how clean and deep the shine had come out using the Diamond pad system.

Travertine Floor Swansea After Cleaning

Before leaving I recommended the use of Tile Doctor Stone Soap as an aftercare cleaner, this produce is specially designed for cleaning polished stone, not only does it helps build patina, but it won’t prematurely erode the sealer like many acidic cleaners you find in the supermarket which should really only be used on ceramics and Vinyl tiles.


Source: Travertine Cleaning and Polishing Service in Swansea

Wednesday, May 2, 2018

How to Connect Wood Floor Joists to Cinder Block Walls

Wood floor joists can be connected to cinder block walls. You will find that you will simply need to know the tricks and the hints that will help get the job done. This may be something that you need to do because you are finishing your basement or redoing an addition that has cinder block walls. Whatever the case may be, this is not a task that is impossible, but it will need the right tools.

What You'll Need:
Masonry Nails
Masonry Screws (Tapcon or Blue Screw)
Hammer Drill
Safety Glasses

Step 1 – Options

There are a few different options that you will have when it comes to connecting wood floor joists to concrete walls. You will find that usually the least expensive way to do it is by purchasing masonry nails. They work great with connecting the concrete and the wood together. You may also want to try masonry screws. Usually, masonry screws are called blue screws or tapcons at hardware stores. When you choose a masonry screw, you will simply need to make sure that you have a screw that will have the ability to go all the way through a concrete wall. Usually, screws that are 1 3/4 inch or 1 inch will suffice.

Step 2 – Masonry Nail

If you have taken the masonry nail route you will need to make sure that you have the nail driven in between the blocks of the mortar. The most common mistake people will make is screwing the masonry nails into the actual blocks themselves. When you drive the nail into the concrete block you can expect the nails to hold a lot better and the blocks will not be running the risk of breaking.
Step 3 – Masonry Screws

Whenever you are using masonry screws, you will need to begin by pre-drilling the holes that the screws will go in. The diameter of the holes should be anywhere from 1/16 inch to 1/32 inch. When you are pre-drilling the holes, you will need to do it into the concrete block wall that the wood will be attached to. Whenever you are using the hammer drill you should go slowly and have patience. You will need to apply pressure since you are drilling a concrete block, but make sure that you are not doing all of the work. Simply apply enough pressure so that you are backing up the drill as it does its job.
Step 4 – Safety

It is always important to remember safety whenever you are working on this type of project. Safety glasses are a necessity. You will especially want to use safety glasses whenever you are pre drilling the holes for the masonry screws. Failure to take the necessary safety precautions could result in serious injury. You should also keep in mind that masonry screws and nails should be the only thing that you attempt to use for this task.