Looking for an alternative solution they reached out to Tile Doctor and so I went over to take a look. After surveying the floor, I came up with a completely different solution which involved milling the stone with coarse abrasive pads to remove the screed and bitumen and then resurface with diamond encrusted burnishing pads of medium and fine grits which would result in a smooth finish. Not only would this be much easier to clean going forward it would also be much more attractive, especially once sealed.
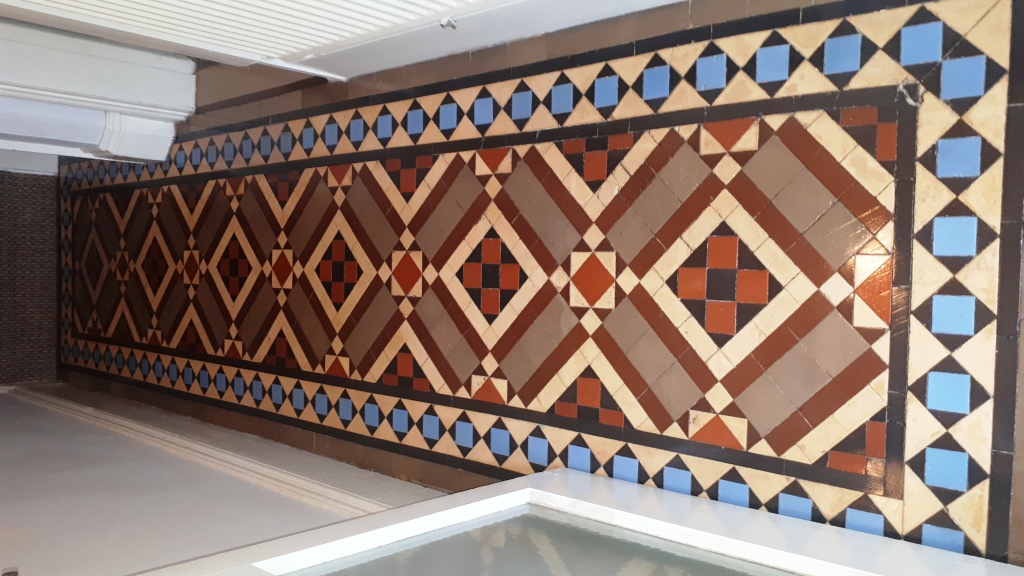
The floor was completely transformed by the end of the third day, you would not have known it was the same floor. It was now clear of all the previous coverings and now looked like a characterful old Flagstone floor should.
 |
 |
Happy with our alternative we arranged a date to come and do the work which would take three days, two days to prepare the floor and a third to apply a sealer.
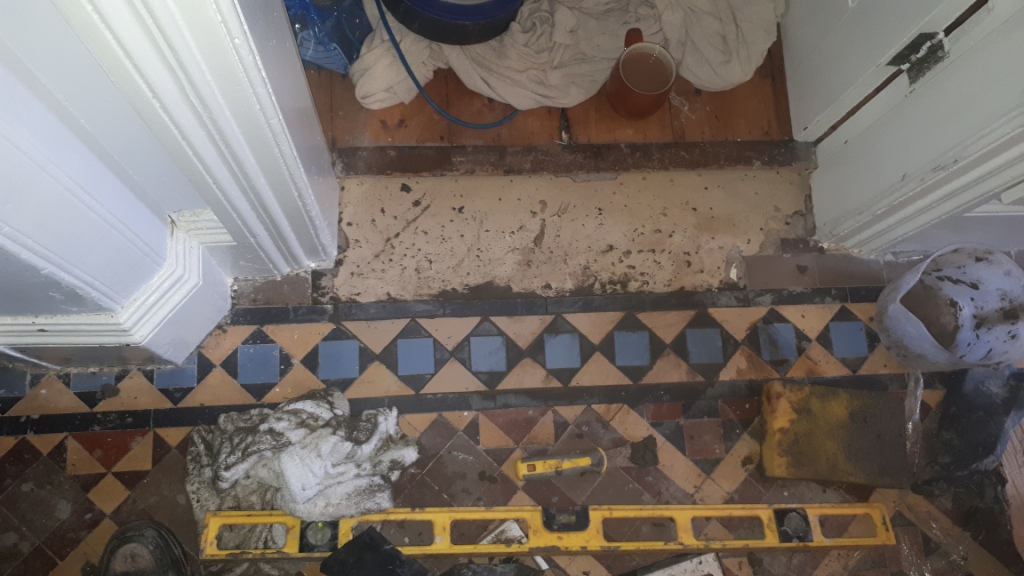
Cleaning a Flagstone Tiled Ground Floor
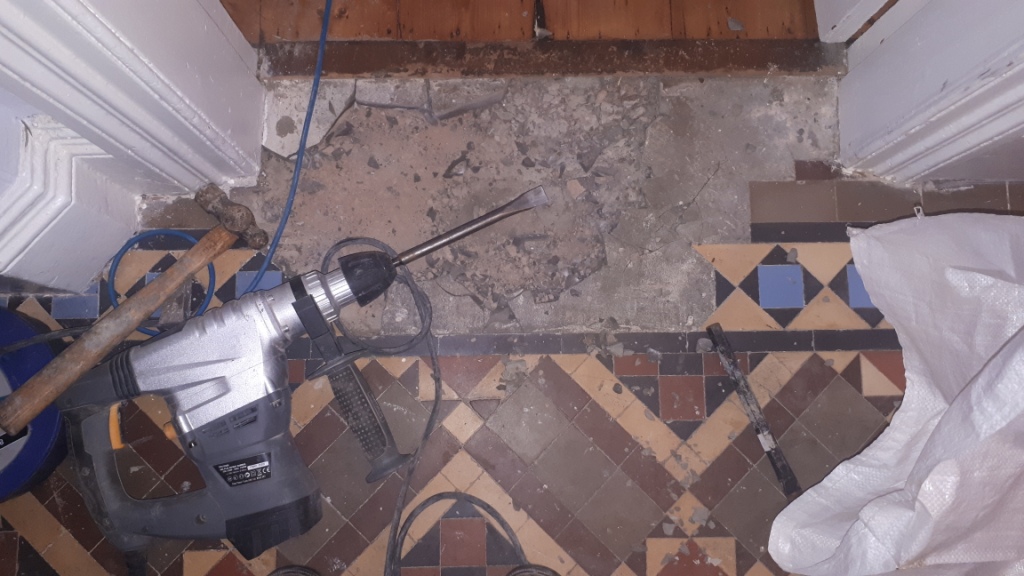
Milling a floor is arduous work and requires the use of a heavy rotary machine that can apply weight onto the stone so the milling pads can really get a bite into the surface. Because of this I roped in a colleague to help take some of the strain. Some of the areas of bitumen and screed were so prominent we used an SDS hammer action drill with a flat bit to chisel them off first, this can leave a few marks in the stone which we then level out with the milling pads starting with a 50 grit and go all the way up to a 400 grit. |
 |
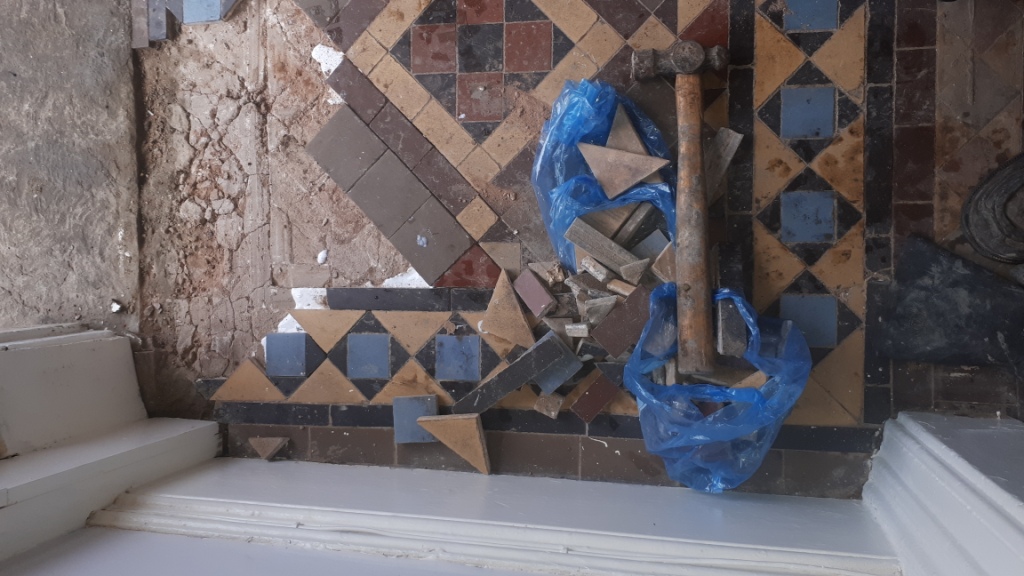
We used a lot of water during this process to help lubricate the abrasive action of the milling pads, this also helps to rinse off the soil that is created, all of which is extracted with a wet vacuum.
Next step is to give the floor an acid rinse with Tile Doctor Grout Clean-Up which is designed to neutralise any alkaline salts in the stone that could result in efflorescence later.
With the floor cleaned up the last step was to re-point between the Flagstones using a breathable pointing product called GFtK 800.
 |
 |
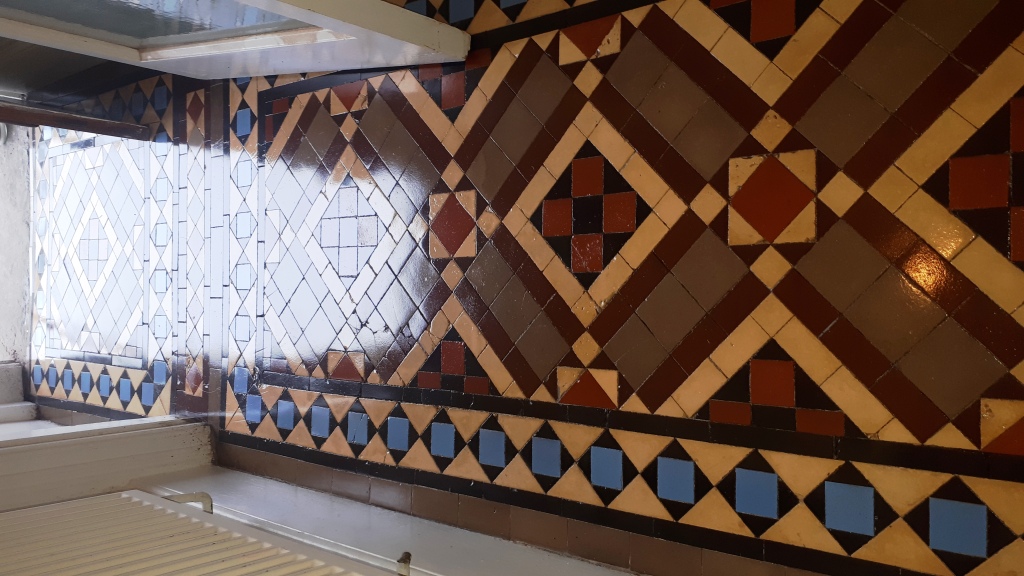
Sealing a Flagstone Tiled Ground Floor
Sealing was the next step however the floor was still quite damp after the initial renovation, so it was left for a few days to dry out first.We selected a fully breathable sealer for this floor, this is an important requirement for a floor with no damp proof membrane as it will allow moisture to rise through the flagstone and evaporate at the surface. The concrete screed and bitumen covering will have prevented this previously which is dangerous as a build up of moisture in the stone can lead to it crumbling and you risk moisture reaching out to the walls where it can lead to rising damp.
Tile Doctor has three breathable sealers to choose from and in this case the customer decided to go with Tile Doctor Colour Grow which is an impregnating sealer that protects from within and enhances the natural colours in the stone.
 |
 |
Before leaving I recommended, they use Tile Doctor Neutral Cleaner for everyday cleaning, being pH neutral it won’t prematurely erode the sealer allowing it to work for longer. I also advised that it’s possible that parts of the stone may go a shade darker in winter and a shade lighter in summer due to the moisture rising through the floor.