Thursday, January 24, 2019

Resurfacing a Flagstone Kitchen Floor in Broadbottom, Greater Manchester

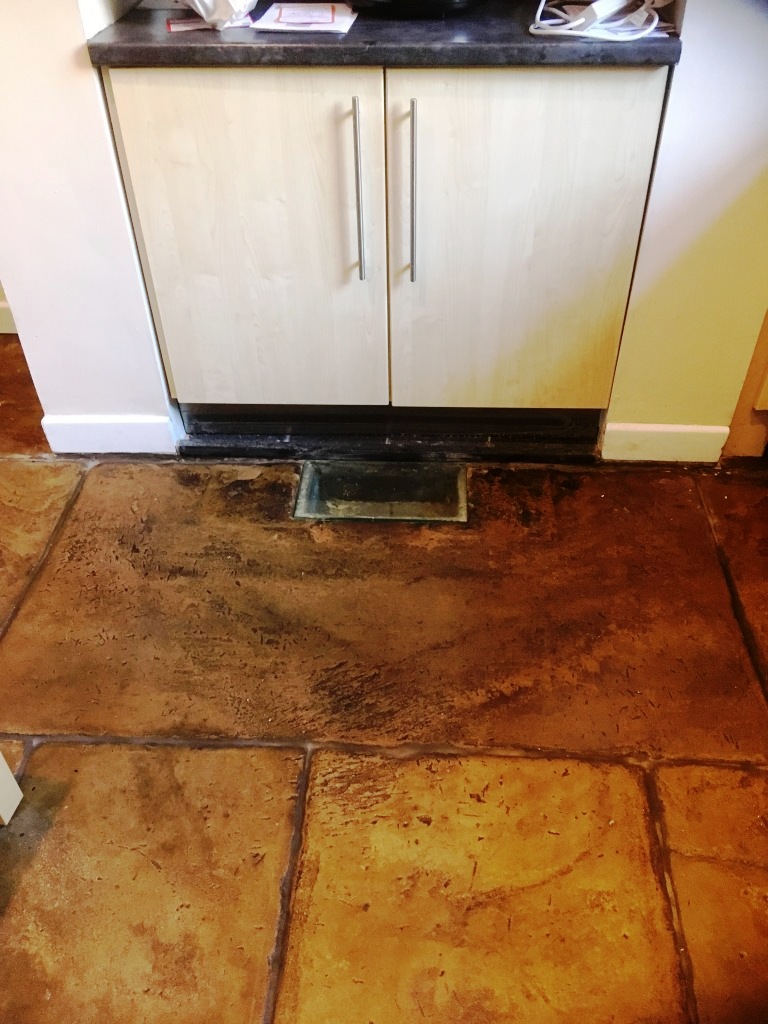
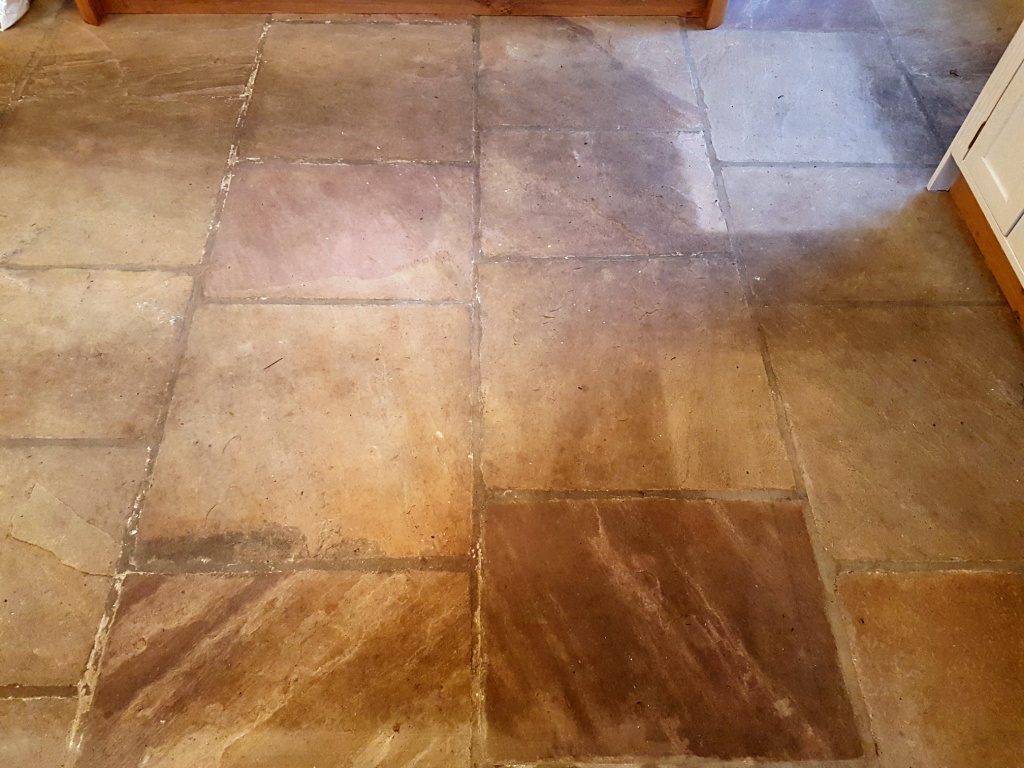
The new owners of this lovely terraced house in the village of Broadbottom that was built circa 1900, inherited with it a lovely old flagstone floor in the Kitchen which was now in a rather bad state with ingrained dirt and stains.

Old Flagstone Floor Before Cleaning Broadbottom

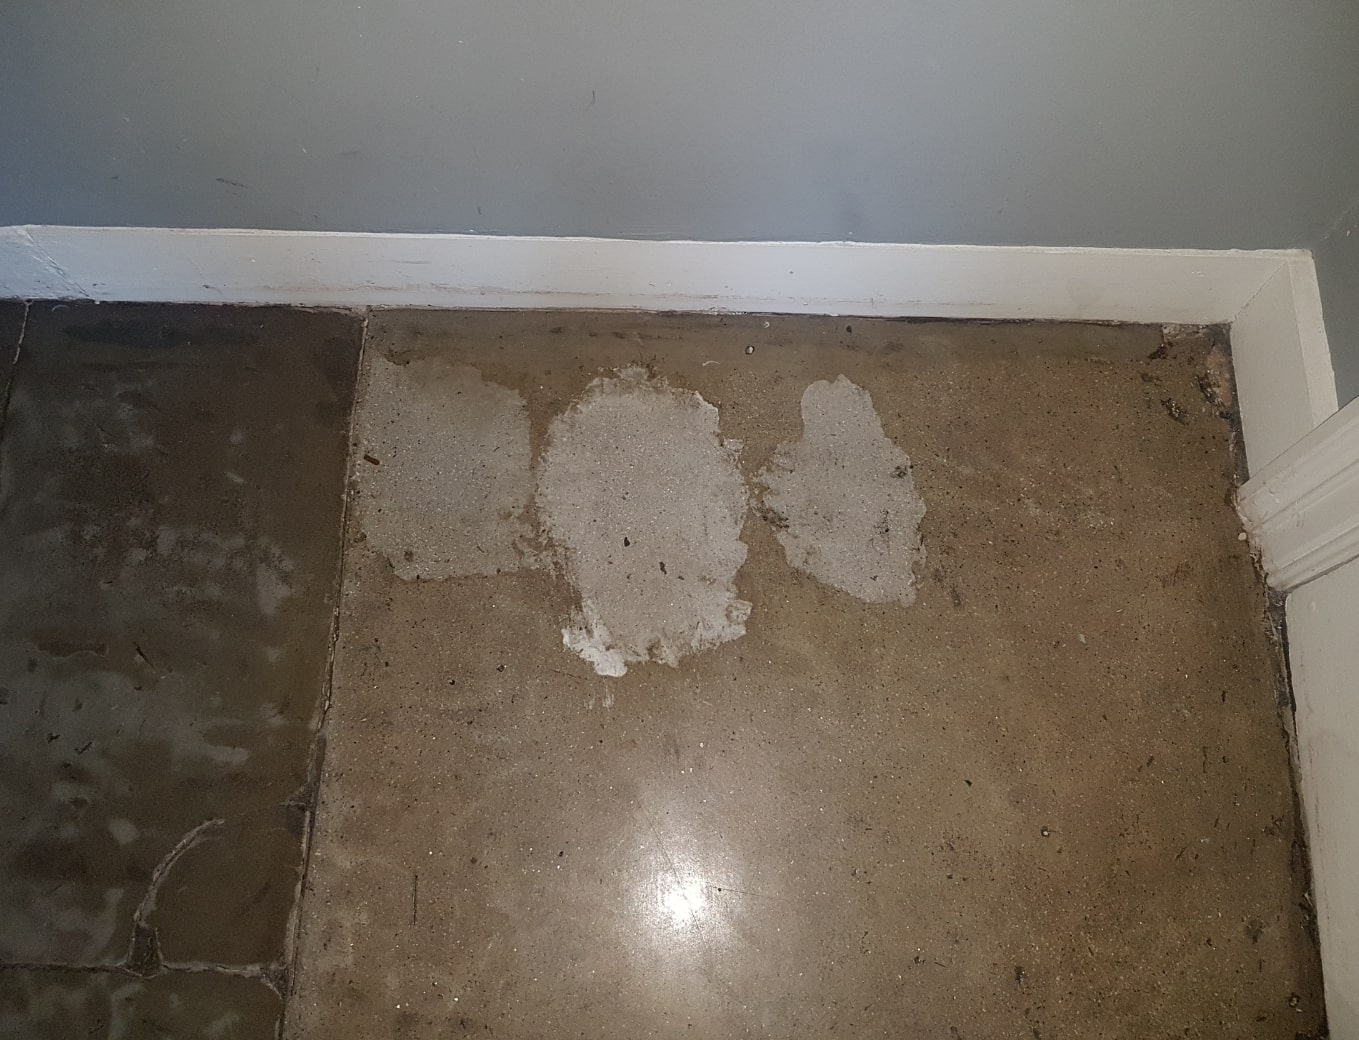
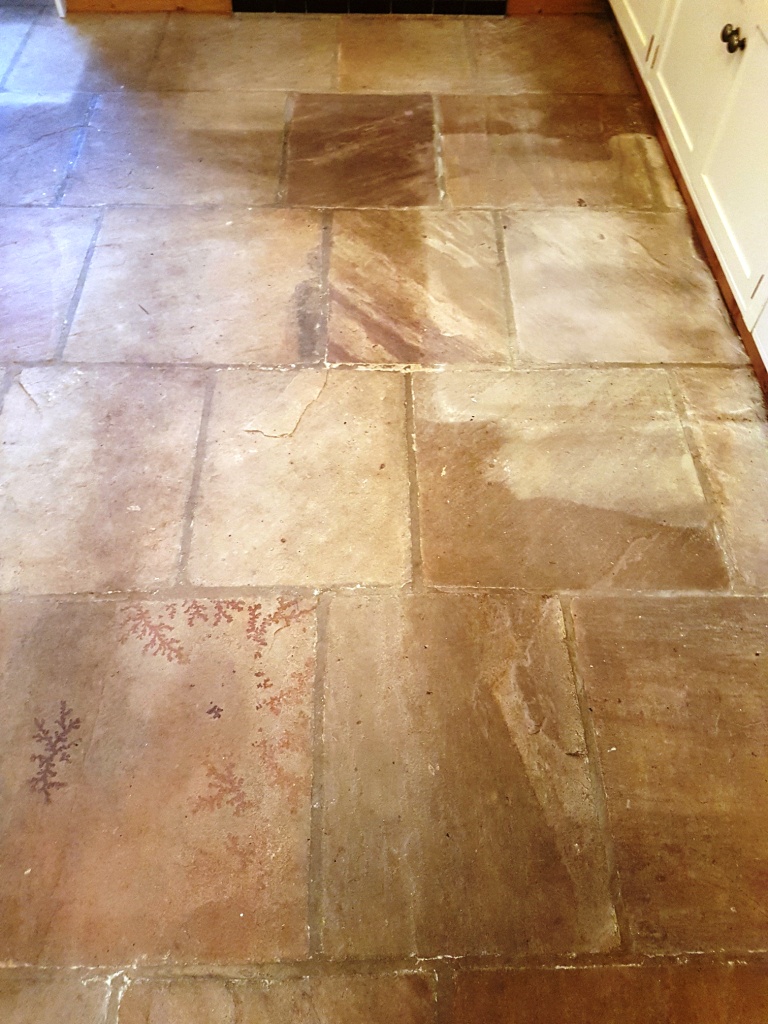
I suspected that the White staining was due to alkaline salts, a problem more commonly known as efflorescence. However, I took a moisture reading of the floor with a damp meter and the readings were normal, so it may have been a historic damp problem that cause it. We are always wary of efflorescence issues when it comes to older properties as damp proof membranes which resolve this problem are a relatively modern invention.
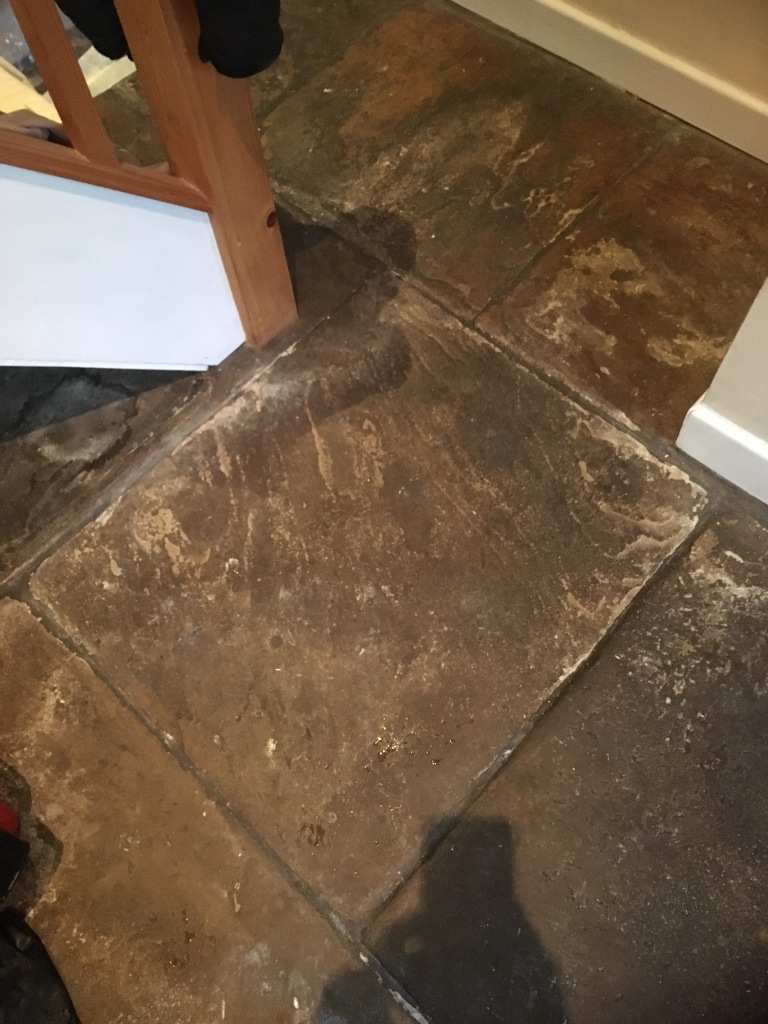
Old Flagstone Floor Before Cleaning Broadbottom

After explaining the process, I worked out a quote which was accepted and booked a date in the diary for the work to commence, which would take place over two days.


Cleaning and Grouting a Flagstone Kitchen Floor

First the floor was in a terrible state and needed to be resurfaced if it was going to live up to its potential. To do this I used a 100 followed by a 200-grit coarse Diamond milling pads to grind off the top layer of ground in dirt, resurface the stone and reveal the beautiful stone beneath. These abrasive pads are run over the floor with a weighted floor buffer running on a nice slow speed and lubricated with water. The floor is rinsed with more water after each pad and then the soil extracted using a wet vacuum.

As the floor had quite a few areas where the grout had cracked and crumbled, I decided to rake this out and replaced it with a flexible grout using a colour sympathetic to the original. This and the milling made an immediate improvement to the overall appearance of the floor. The floor was then left to dry off overnight and I came back the next day to apply a sealer.


Sealing a Flagstone Tiled Kitchen Floor

The next day I checked the floors moisture level before sealing, all was well, so I applied a couple of coats of Tile Doctor Colour Grow. This is an impregnating sealer that has a matt finish. Tile Doctor Colour Grow is also fully breathable so should cope well with any damp issues and allow moisture to rise through the stone and evaporate. This is important as otherwise moisture could become trapped under the floor where it could eventually cause problems in the walls.
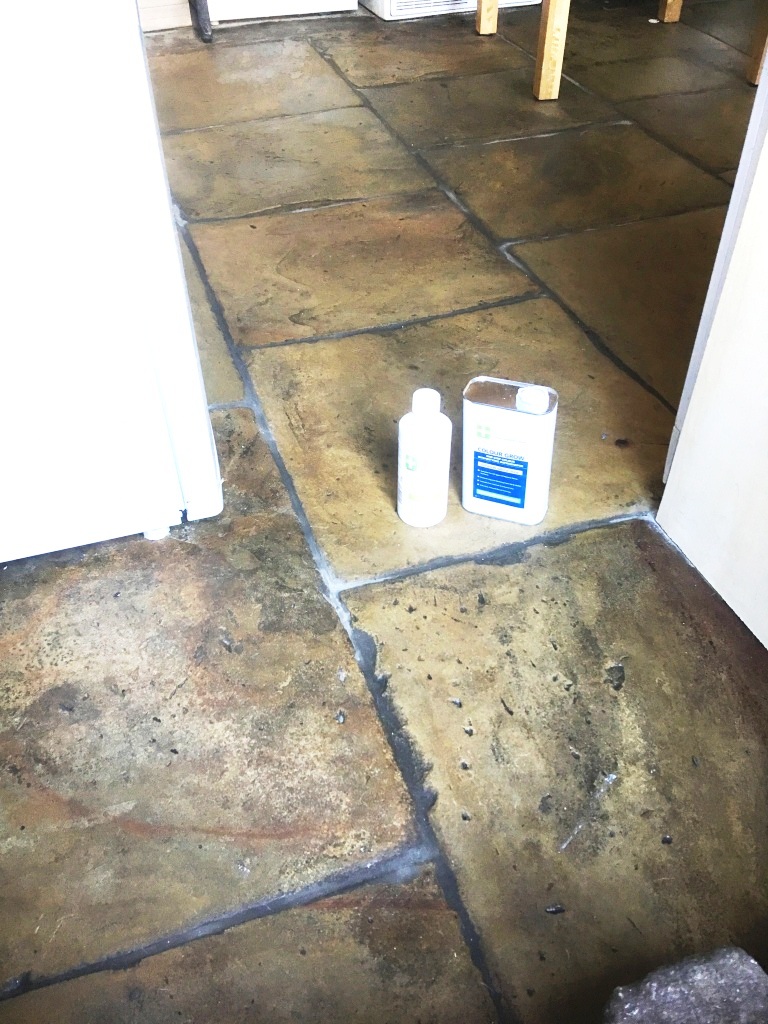
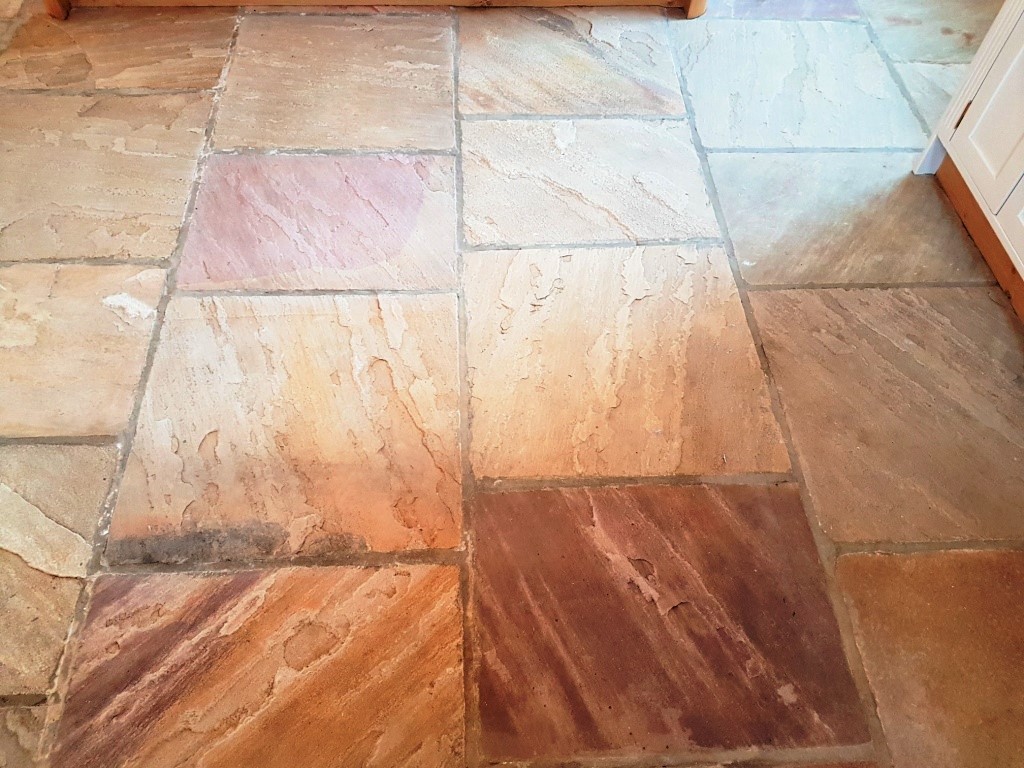
Old Flagstone Floor After Sealing Broadbottom Old Flagstone Floor After Sealing Broadbottom

The customers were delighted with the outcome, the colour of the stone had really improved also Milling the surface of the floor makes it smoother so it would now be much easier for them to keep clean in future.
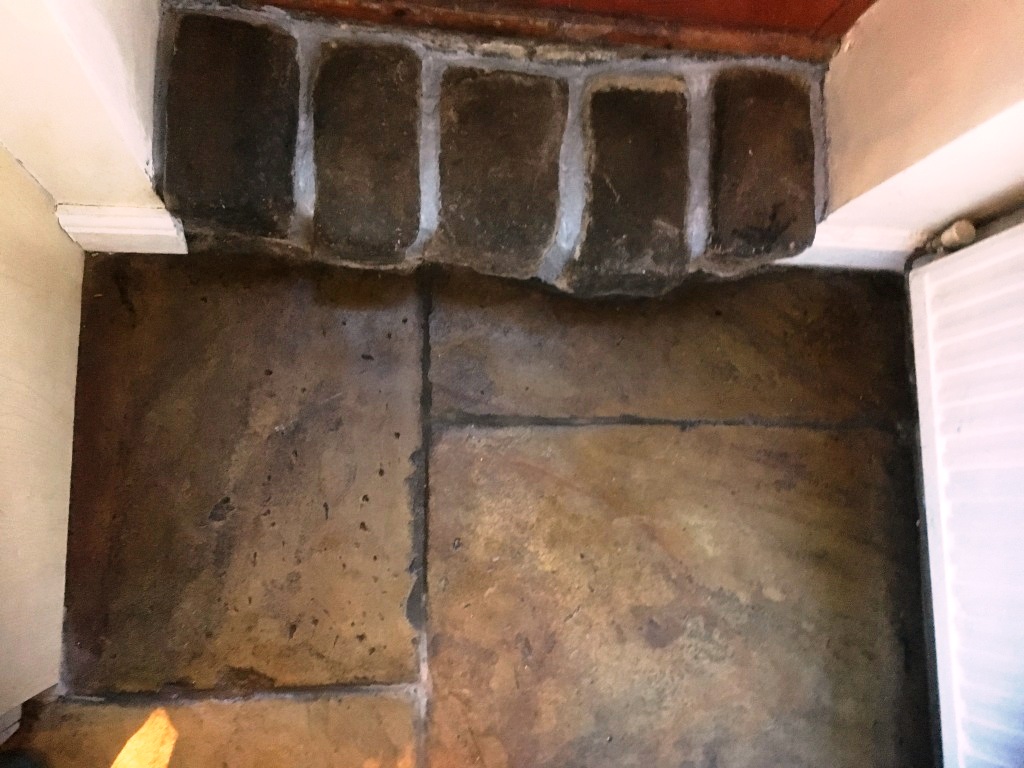
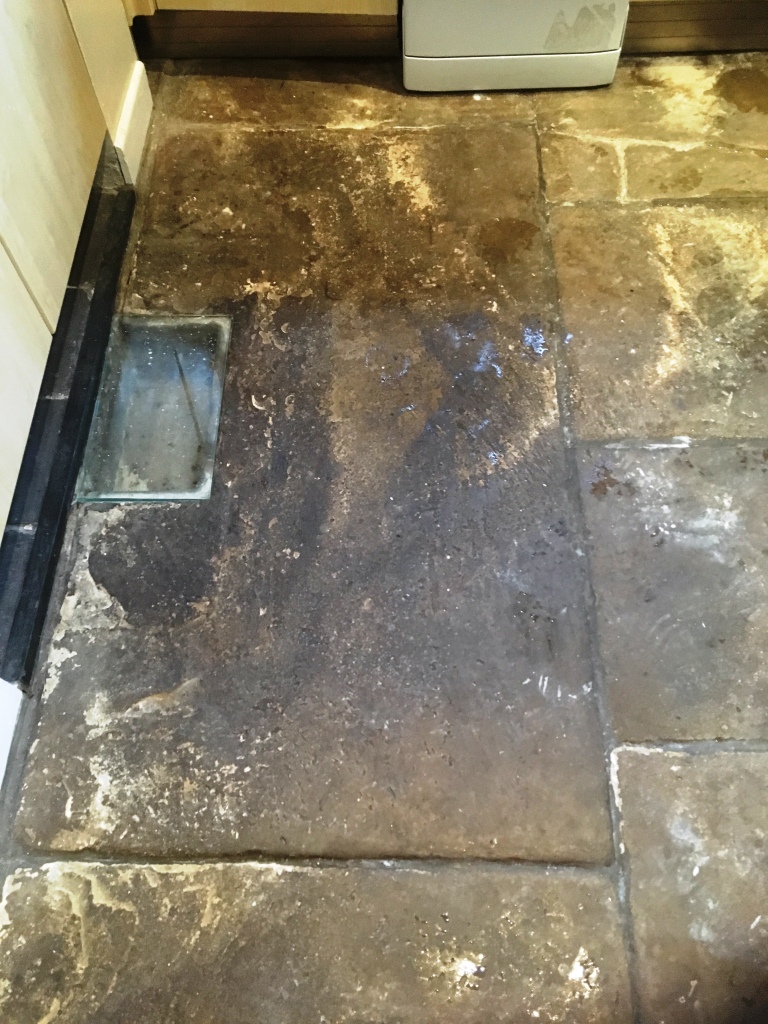
Old Flagstone Floor After Sealing Broadbottom

For aftercare I left them with a bottle of concentrated Tile Doctor Neutral Tile Cleaner which once diluted is a pH neutral product that will not erode the newly applied sealer. Many household cleaners are too strong for sealed floor and will prematurely erode the sealer over time.


Source: Flagstone Floor Cleaning and Sealing Service in Broadbottom, Greater Manchester
Wednesday, January 23, 2019

How to Install a Travertine Tile Shower

A travertine tile shower is beautiful and can increase your home’s value. Learning how to make your own travertine tile shower can save you money. Creating a travertine tile shower is not difficult but it does take patience and time. The information below will explain how to install a travertine tile shower.

What You’ll Need:
  • Travertine tiles
  • Cement backboard
  • Wet saw
  • Measuring tape
  • Grout
  • Sponge
  • Thinset
  • Plastic spacers
  • Sponge
  • Screws
  • Power screwdriver
  • Drywall mud
  • Putty knife
  • Sanding block
  • Paint roller
  • Grout float

Step 1 – Backboard
The cement backboard holds the travertine tiles so it needs to be installed first, over the plywood wall. Measure the wall where the backboard is to be placed and then trim the board to that size. Slice through the paper and then snap along the scoring. Hold the backboard up to the wall and make sure it is even and then fasten with screws. Cover the screws using drywall mud and a putty knife. When it is dry you can then sand the area flat.

Step 2 – Place the Travertine Tiles
The likelihood that a travertine tile shower is going to be completely even is not very likely. For this reason you need to measure from the top of the wall down the size of one tile plus 1/8-inch and draw a line across. Do the same for the bottom of the wall. These areas will be worked on last and represent areas where tile will most likely have to be cut. Use the straight edge of the trowel and begin applying the thinset to the cement backboard as well as to the back of each travertine tile. Place a tile on the backboard followed by a 1/16-inch plastic spacer. Continue until the wall (with the exception of your marked areas) is full.

Step 3 – Top and Bottom
Apply thinset to the space above the line and below the line on the bottom of the wall as well as to travertine tiles. Place the tiles and spacers as you did until a full sized tile can no longer fit. Use a tape measure and record the space that is leftover and then cut the travertine tiles for the shower using the wet saw. Place them on the wall.

Step 4 – Sealer
A travertine tile shower is very porous and will soak up water that hits the travertine. This means they need to be sealed. Allow the thinset to dry overnight and then remove the spacers. Apply the sealer over the travertine tiles with a paint roller until each is covered. Allow the sealer to dry for several hours.

Step 5 – Grouting
The grout seals the spaces between the travertine tiles in the shower. Use the grout float to apply the grout over the travertine tiles. Make sure you fill all of the gaps between the tiles. Apply as much grout as you need to do the job. As you are working, wipe away grout with a damp sponge so you do not create a haze over the tiles. Let the grout cure for several days before using the travertine tile shower.

Source: www.DoItYourself.com

Thursday, January 17, 2019

Stained Ceramic Tile and Grout Renovated in Leicestershire

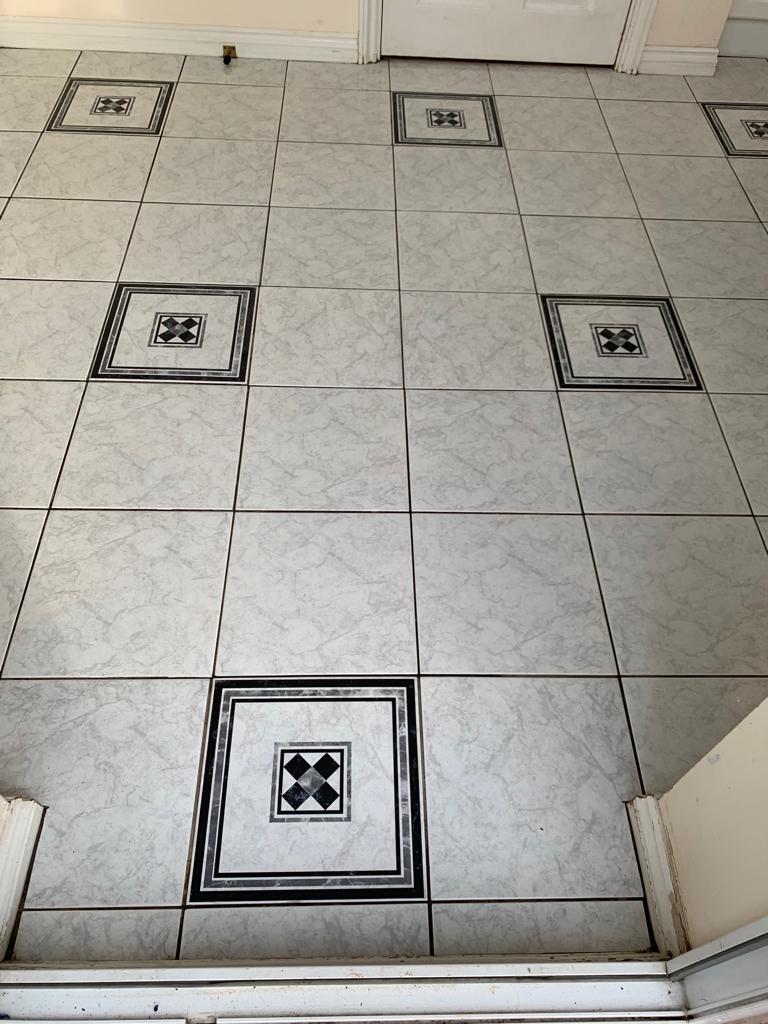
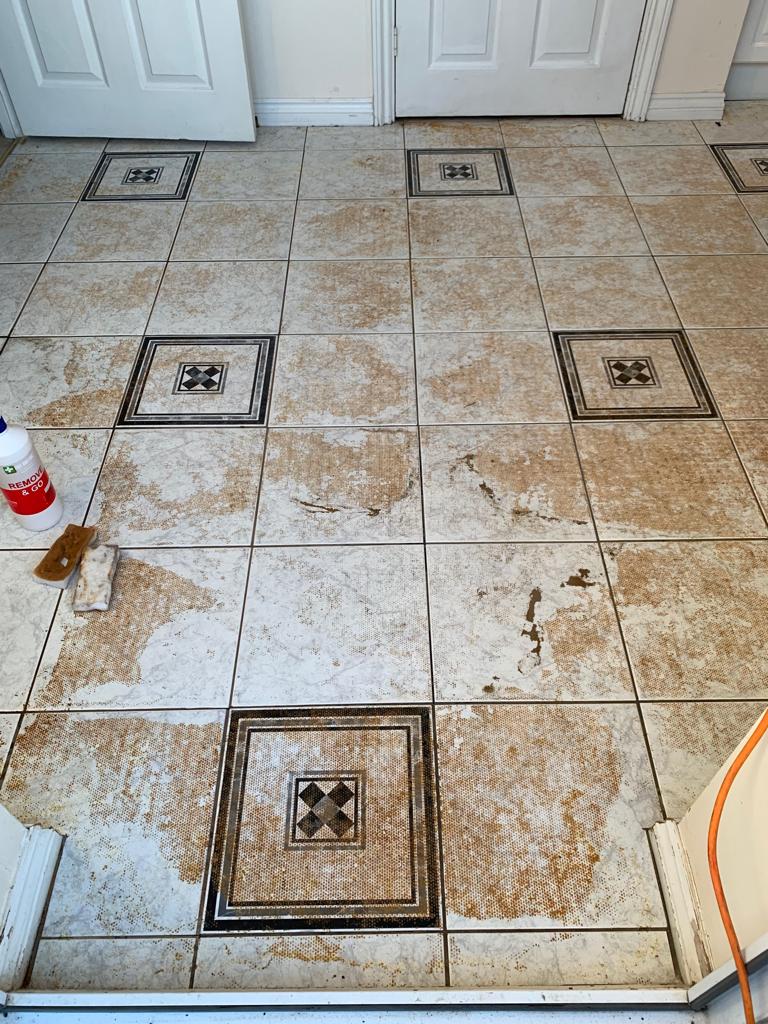
The pictures below are of a Ceramic tiled floor covered in carpet glue at a house in the old Leicestershire village of Measham. The owner of the property had contacted us for a solution after deciding to remove the carpet in the kitchen which had been down for around 15 years. Ideally, he wanted to have the ceramic tiles restored to new, but this would depend on how well the glaze on the tiles had stood the test of time.

Ceramic Tiles with Carpet Adhesive Contamination Before Cleaning Measham Ceramic Tiles with Carpet Adhesive Contamination Before Cleaning Measham

We called round to the property and could clearly see residue from the carpet adhesive used to secure the carpet had stained the tiles and contaminated the grouting.


Cleaning Adhesive Contaminated Ceramic Tiles

Before starting we removed the kitchen unit kickboards to protect them during cleaning. Next, we turned our attention to the floor and after fully removing the carpet could see that some of the adhesive had turned to powder, so our first step was to remove it by thoroughly vacuum the floor. We then reviewed the range of Tile Doctor cleaning products and problem solvers to determine which product would be the most effective at breaking down the residue. Our first thought was to use Remove & Go as it was developed as coatings remover and we have used it before to remove old worn sealers, paint as well as adhesive contamination.

A strong application would be needed to remove the glue to it was applied neat to the tile and grout. I left it to dwell for about 20 minutes, so it could get to work breaking down the adhesive contaminates. This was followed by mechanical agitation with a rotary floor machine fitted with a poly scrub brush. This quickly broke up the adhesive from the tile allowing it to be removed from the tile and grout with a wet vacuum.

Ceramic Tiles with Carpet Adhesive Contamination During Cleaning Measham

We then scrub cleaned the floor with Tile Doctor Grout Clean-Up which is a strong acidic product. It was diluted at 1:20 with water and scrubbed into the floor to ensure any remaining contaminants were removed and the pH of the floor lowered so that no sticky residues remained.

The process went well and as you can see form the photographs the Ceramic tiles had stood up well to the adhesive and now look as though they were only just installed. The last step was to rinse the floor with fresh water which was then extracted with the wet vacuum and the floor force dried with air movers. After reinstalling the kickboards, they floor was finished much to the delight of the owner.

Ceramic Tiles with Carpet Adhesive Contamination After Cleaning Measham Ceramic Tiles with Carpet Adhesive Contamination After Cleaning Measham


Source: Ceramic Floor Cleaning and Renovation Service in Measham, Leicestershire

Chipboard Flooring: How Much Chipboard Do You Need?

Accurate measuring and a few calculations is all it takes to find out how much chipboard flooring you need to cover your room. Follow these instructions and always remember to double check all calculations, even if you use a calculator.

What You'll Need:
  • Pencil
  • Paper
  • Tape measure
  • Masking tape
  • Calculator


Step 1 - Draw the Room

On piece of paper draw out the shape of the room including any diagonal walls and alcoves. The drawing does not have to be scaled.

Step 2 - Section Your Drawing

Your room likely has a few alcoves. Draw a line from the corner of each alcove to the other side of the room. This should create a rectangular shape. If there is a diagonal wall, draw a line from the smaller corner straight down to the other side of the room. This will give you a triangular section.
Step 3 - Section the Room

Using your drawing as a guideline, section off the room. Apply tape to the floor to section off the alcoves creating smaller rectangles.
Step 4 - Measure the Sections

Use your tape measure to measure the sections you have marked with tape. If you already have the chipboard you intend to purchase decided, use the unit of measure the chipboard is sold in. For these instructions we will use inches as the unit of measure.

Measure one section at a time. Measure the length then the width of the section and write down the measurement along the corresponding line on your drawing. If the walls are straight there is no need to measure both widths and lengths of the sections, you can just measure one of each. Do this for each section. Measure each section twice to ensure accuracy.

If you marked a diagonal wall, measure the width of the triangle you marked and the length of the straight line section. Do not measure the length of the actual wall.
Step 5 - Calculate Area

Now you must calculate the area for each section. The area is calculated by doing length multiplied by width. This will give you the number of square inches needed. Write the number of square inches in the middle of each section on your paper.

For the diagonal wall, multiply the width of the triangle by the length of the straight line section. Do not use the length of the diagonal wall. Divide that total by 2 then write the answer in the triangle on your sheet. This is the square inches of the triangular area.
Step 6 - Total the Area

Add up all the areas on your sheet. This will give you the total square inches of the room.
Step 7 - Convert if Necessary

If the chipboard you plan to buy is measured in inches, you don't have any conversions to do. If you did not use the same unit of measure that the chipboard is sold in, you will need to do conversions from square inches to that unit.
Step 8 - Calculate the Area of Chipboard

To find the area of each piece of chipboard, multiply the sheet length by sheet width.
Step 9 - Find the Number of Boards

Now you are ready to find out how many pieces of chipboard you need. Divide the room's total square inches by the square inches of each board. The answer is the number of boards you need to cover the room. If you get a decimal answer, always round up.

When purchasing your chipboard buy a few extra sheets. When you lay the boards out on the floor you will likely find some pieces are too small, others are too big, and there will be some cutting.


Tuesday, January 15, 2019

How to Install Chipboard Flooring

Chipboard flooring (also known as particle board) is made from coarse sawdust that is mixed with resin. High-density chipboard can be used as sub-floor with various types of flooring, such as slate, tile, stone, wood, carpet or vinyl flooring.

What You'll Need:
  • Chipboard flooring
  • Measuring tape
  • Hammer
  • 2 inch ribbed nails
  • Electric saw
  • Safety glasses
  • Pencil
  • Ruler


Step 1 - Decide on the Right Type of Chipboard

Solid timber has a longer life span than chipboard flooring does but high-density chipboard is less expensive and quite durable. The width of chipboard varies and is identifiable by a color-coded system. High-density chipboard is the thickest and is used for sub-flooring. Medium-density chipboard is firmer than normal-density chipboard, which is relatively soft. You might have seen less dense types of chipboard inside dresser drawers. Lower-density chipboard swells or breaks down when water logged. High-density is much more water-resistant than medium- or normal- density chipboards are. It can be used for kitchen cabinet frames and even fire doors.

As an added precaution, when you are using chipboard as a sub-floor, you might want to check building codes to determine the required thickness. Local building inspectors can answer any questions about which type they expect you to use.

Step 2 - Measure

Measure the room you’ll be laying the chipboard flooring in with your measuring tape. To establish how many sheets you’ll need to buy, divide your total room area by the size of the board.
Step 3 – Make Your Mark

Don’t forget to make a mark on the wall above every floor joist in the room where you’ll be laying your chipboard flooring. Make your marks on both sides of the joists on each wall. That way, you’ll know where the centers of the joists are when nailing down your chipboard.
Step 4 - Lay it Out

Once you’ve determined the amount you’ll need and purchased your chipboard flooring, lay the boards down. Cover as much floor as you are able to. You’ll notice that the edges of the boards have color-coded tongues made of PVC (Polyvinyl Chloride.) They ensure that the boards will fit securely together. If they are not fitted together tightly, there’s a risk of squeaking or that the floors will feel bouncy when walked on.
Step 5 – Nail it Down

After you’ve laid down the sheets and fitted them together, you can nail them down. Use 2 inch ribbed nails to attach them to your floor joists. If you experience bubbling or blistering, sand it down flat.
Step 6 – Fit it into the Corners

Measure your remaining chipboard sheets to fit into the corners and edges of the floor. Cut them to fit with the electric saw and nail them down.

Now that you’ve installed your chipboard sub-flooring, you’ll be able to choose your main flooring and lay it down over top.


Wednesday, January 9, 2019

Renovating an Old Flagstone Floor in Glasgow

These photographs are of a Flagstone floor tiled floor we stripped and sealed at a house in the West End of Glasgow. If you’re not familiar with Glasgow that well then, it’s worth knowing that the West End of Glasgow is the more favoured end and contains the best hotels and attractions, where as the East End is traditionally the industrial part.

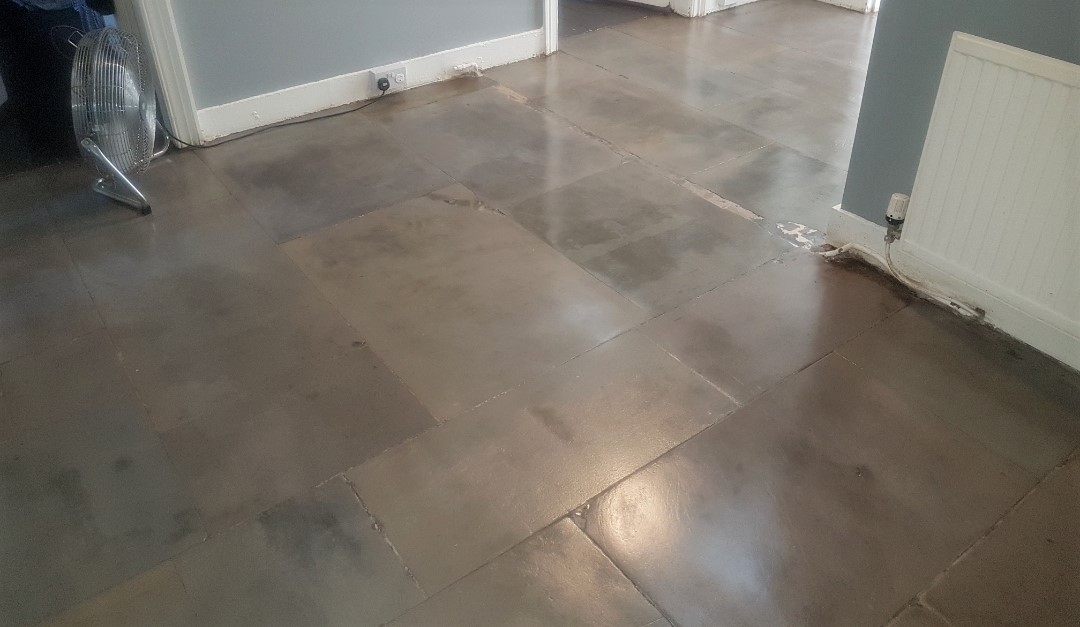
Flagstone Floor Glasgow West End Before Restoration

The flagstone floor was very dirty and had numerous marks and staining. Interestingly we were not the first company to work on this floor, in fact before we got the call another company had already tried to carry out the work and made a mess of the floor followed by giving up and walking away from the job.

Flagstone Floor Glasgow West End Before Restoration

We clearly had our hands full however we have done this sort of work before and being part of the Tile Doctor network means we have the resources and experience of a large organisation behind us, so we were not overly concerned.

Cleaning a Flagstone Floor

Working in sections we stripped the floor using a strong solution of Tile Doctor Pro-Clean mixed 50:50 with Remove and Go. This creates a powerful coatings stripper and tile cleaner that can safely shift coverings from tiles. The solution was left to dwell before going over the floor with a very coarse 100 and then 200-grit diamond milling pad which worked well with the cleaning products to restore the look of the flagstones. Naturally it wasn’t as easy as it sounds, the process needed to be repeated several times to get the previous sealer removed and the stone surface restored.

Once satisfied the Flagstone surface was restored, we then gave the floor a couple of cleans using Tile Doctor Pro-Clean to remove any remaining soil and to get the grout lines clean. Then to neutralise the pH level of the floor prior to sealing it was rinsed with tile doctor neutral tile cleaner. 

The floor was then left to dry out overnight assisted by a couple of turbo air movers and a heater that we left behind.

Sealing Flagstone Flooring

The next day we returned to seal the floor first checking the floor had dried. Fortunately, the equipment we left behind had done their job and so we could proceed with the application of the sealer. The sealer we chose for this installation was Tile Doctor Seal and Go which will protect the stone and allow for easy cleaning and maintenance for customer.

Flagstone Floor Glasgow West End After Restoration

One finished the floor looked much cleaner, the stains had gone, and the sealer added a nice subtle polished appearance to the flagstones. The owner of the property was very happy with transformation we had achieved and much relieved that the floor could be restored.

Flagstone Floor Glasgow West End After Restoration


Source: Flagstone Tile Cleaning and Polishing Service in Glasgow

Tuesday, January 8, 2019

Removing Stubborn Glue from Victorian Floor Tiles in South Yorkshire

Detailed below is the restoration of a beautiful Victorian tiled hallway that we completed for a ‘co-housing’ community who had purchased a large house in Nether Edge. Situated three miles south if Sheffield, Brincliffe House was built in 1850 and had been used as NHS offices since the end of the Second World War but had been empty since 2012. Built originally for Herbert Unwin who was the owner of Pond Street Brewery it was now subject to a three-million-pound conversion into fifteen apartments.

Victorian Tiled Hallway Before Restoration Brincliffe House Nether Edge

When we first visited the property to survey the floor, we were shown around the ground floor where they had discovered magnificent Victorian tiled floor. The new owners had no idea the floor was there as the NHS had covered it up decades earlier and glued carpet on top. Being a co-housing community, they were keen to do the restoration themselves however after several unsuccessful attempts to remove the strong carpet adhesive they thought better of it and called us in. We ran several tests and worked out the best way to remove the glue. The floor covered about 70 sqm in total so we knew we had our hands full.

Victorian Tiled Hallway Before Restoration Brincliffe House Nether Edge


Removing Carpet Glue from an Old Victorian Tiled Floor

I’d worked out that the best way to remove the carpet adhesive was a combination of coating remover products and abrasive burnishing pads, these are industrial diamond encrusted pads that are usually used to resurface stone however we find they work equally well on Victorian tiles as well.


Working in small sections the floor was treated with a Tile Doctor 200-grit 17 inch Diamond pad fitted to a rotary floor buffer using water as a lubricant. This stripped off a lot of surface dirt and glue which was then rinsed off with water and extracted with a wet vacuum. Next the floor was coated with a mixture of Tile Doctor Remove & Go and Wax Away, two powerful coating removers that are safe to use on Tile and Stone. The mixture was left to soak into the tiles for about twenty minutes before being scrubbed in with a black scrubbing pad which slowly released the glue and dirt from the pores of the tile. In some areas the glue was so thick we found it necessary to use hand scrapers as well. As before the soil was rinsed off with water and then extracted using a wet vacuum.

Victorian Tiled Hallway During Restoration Brincliffe House Nether Edge

Each section of flooring was inspected and retreated where necessary, then once happy with the result it was given a final rinse with water to remove any trace of cleaning product. After two days of hard work the results were truly amazing, and it was very satisfying to see the floor come back to life section by section.

Victorian Tiled Hallway During Restoration Brincliffe House Nether Edge


Sealing Victorian Hallway Tiles

The community were very happy with the results and thankful I had managed to achieve such an amazing transformation. They were however keen to do as much of the project as they could by themselves, so I advised them on the importance of protecting the tiles with a sealer and left that bit tot the community.

Victorian Tiled Hallway After Restoration Brincliffe House Nether Edge

With regards to sealing my recommendation was to apply a couple of coats of Tile Doctor Colour Grow as it would enhance the red and blue colours in the tiles even further. Also, being fully breathable it would be able to cope with any moisture issues which is important on these old floors which were laid without a damp proof membrane.

Victorian Tiled Hallway After Restoration Brincliffe House Nether Edge


Source: Victorian Tile Cleaning and Restoration Service in Sheffield, South Yorkshire

Wednesday, January 2, 2019

Renovating Indian Fossil Sandstone Pavers in Thirsk, North Yorkshire

The stone floor in the pictures is an Indian Fossil Sandstone which had been installed in the Kitchen of a house in the North Yorkshire market town of Thirsk. The Sandstone tiles had not been professionally cleaned and sealed for ten years so and was now overdue a deep clean. The customer had tried cleaning it but gave up and give me a call instead as no matter what she did nothing seemed to make a difference.

Indian Fossil Sandstone Floor Thirsk Before Cleaning

They had been using numerous household cleaners to maintain the floor which doesn’t help as many supermarket cleaning products are too strong for use on a sealed floor and will prematurely reduce the life of the sealer. Without the protection of a sealer dirt becomes ingrained in the stone making it very difficult to clean effectively. Another problem was that the Sandstone tiles were very uneven and rough in texture, so the dirt was getting caught in the bumps which didn't help.

Indian Fossil Sandstone Floor Thirsk Before Cleaning Indian Fossil Sandstone Floor Thirsk Before Cleaning

I went over to the property in Thirsk to survey the floor and conduct a test clean, so they could see how the stone would look on completion. The Sandstone responded well to treatment and we agreed a date for me to return and complete the floor.

Maintenance issues aside Sandstone pavers look great in a Kitchen where they give a rustic farmhouse appearance that brings the outside in. Imported from India, Indian Fossil Sandstone is full of character and with prices from around £19m2, very affordable. Due to the thickness of the stone we wouldn’t recommend using pavers with under floor heating.


Cleaning an Indian Fossil Sandstone Floor

To get the stone clean and remove what was left of the sealer I applied a strong dilution of Tile Doctor Pro-Clean and allowed it to soak into the tile for about ten minutes before scrubbing it in with a black pad fitted to a rotary floor buffer.

This removed a lot of the dirt and stains however floor pads struggle on uneven surfaces, so I found that to get the stone and grout really clean I had to rescrub most of them by hand. The soiled cleaning solution was then rinsed off with water and extracted with a wet vacuum. The floor was then inspected, and any stubborn areas retreated using the same process and more Tile Doctor Pro-Clean. The floor was then left to dry off overnight in preparation for it being sealed.


Sealing an Indian Fossil Sandstone Tiled Kitchen Floor

I returned the next day to finish the renovation. First, testing the floor with the moisture meter to ensure it was dry enough to take the sealant. I started by applying two coats of Tile Doctor Ultra Seal which will protect against ongoing dirt and stains. You can always tell when stone floor has had enough sealer applied by adding a droplet of water to the tile, if it forms a bubble on the surface then you know its sealed. I demonstrated this to the customer, so they would know in future and could give us a call when they needed to redo the floor.

Indian Fossil Sandstone Floor Thirsk After Cleaning Indian Fossil Sandstone Floor Thirsk After Cleaning

As before the Sandstone responded well to the treatment leaving it much cleaner and lighter in appearance. The floor had a lovely variety of colours and you could now clearly see the fossils trapped in the stone. Before leaving I recommended that they use a pH neutral cleaning product going forward such as Tile Doctor Neutral Tile Cleaner which is specifically designed for cleaning sealed floors and will help keep the floor maintain its appearance.

My customer was amazed at the transformation and left the following feedback for me.
“Floor has never been cleaner! Elizabeth R, Thirsk”

Indian Fossil Sandstone Floor Thirsk After Cleaning


Source: Sandstone Tile Cleaning and Sealing Service in Thirsk

Tuesday, January 1, 2019

How to Enhance Cork Flooring Durability

Cork flooring is appreciated for its durability, beauty and energy-efficient characteristics. Cork flooring is softer and more porous than hardwood flooring. Because of this, there are a number of simple steps that can be taken to protect it. Follow these instructions to enhance the durability of your cork flooring.

What You'll Need:
  • Felt strips or pads
  • Drapes/curtains/shades for windows
  • Floor mats (breathable)
  • Cleaner for hardwood flooring (pre-finished)
  • Dehumidifier (optional)
  • Damp and dry mops

Step 1 - Protect against Moisture

Cork is a porous wood that will soak up moisture in wet environments. Too much moisture absorbed into the cork will cause it to warp. Protect against moisture by wiping up liquid spills immediately. In moist climates, run a dehumidifier to remove moisture from the air. When using floor mats, place them in front of areas where water is likely to accumulate, like in front of a sink, bathtub or other entrance. Using a breathable mat will insure that the moisture isn’t trapped under the mat. When cleaning the floors, don’t soak them; use a damp mop and just enough water to do the job. Run over the damp floor with a dry mop after washing. If you have indoor plants, make sure your pots have a tray under them to collect water.

Step 2 - Protect Against Scratching

Although cork is more resistant to chipping and scratching than hardwood flooring, it is still susceptible. When moving furniture around, don’t drag them across the floor; lift them. Placing felt pads under the legs of tables, chairs and cabinets will also help to protect your cork flooring. Debris that is left on the floor will get pressed into the floor by feet; sweeping regularly to remove debris is another way to protect your floors. When your floor is visibly and considerably soiled, clean it with a mild detergent or cleaner designated for pre-finished hardwood flooring. Using a harsh, oil-based or ammonia-based cleaner will damage cork because of its porous nature.

Step 3 - Protect against the Sun

Too much direct sunlight on cork flooring will cause it to fade. Windows should be treated to reflect sunlight, or shades, curtains or drapes should be used to inhibit the amount of sunlight. Following these simple steps will enhance the durability of cork flooring, allowing you to benefit from them for many years.