Showing posts with label Efflorescence. Show all posts

Tuesday, October 20, 2020

How to Renovate a Terracotta Tiled Floor

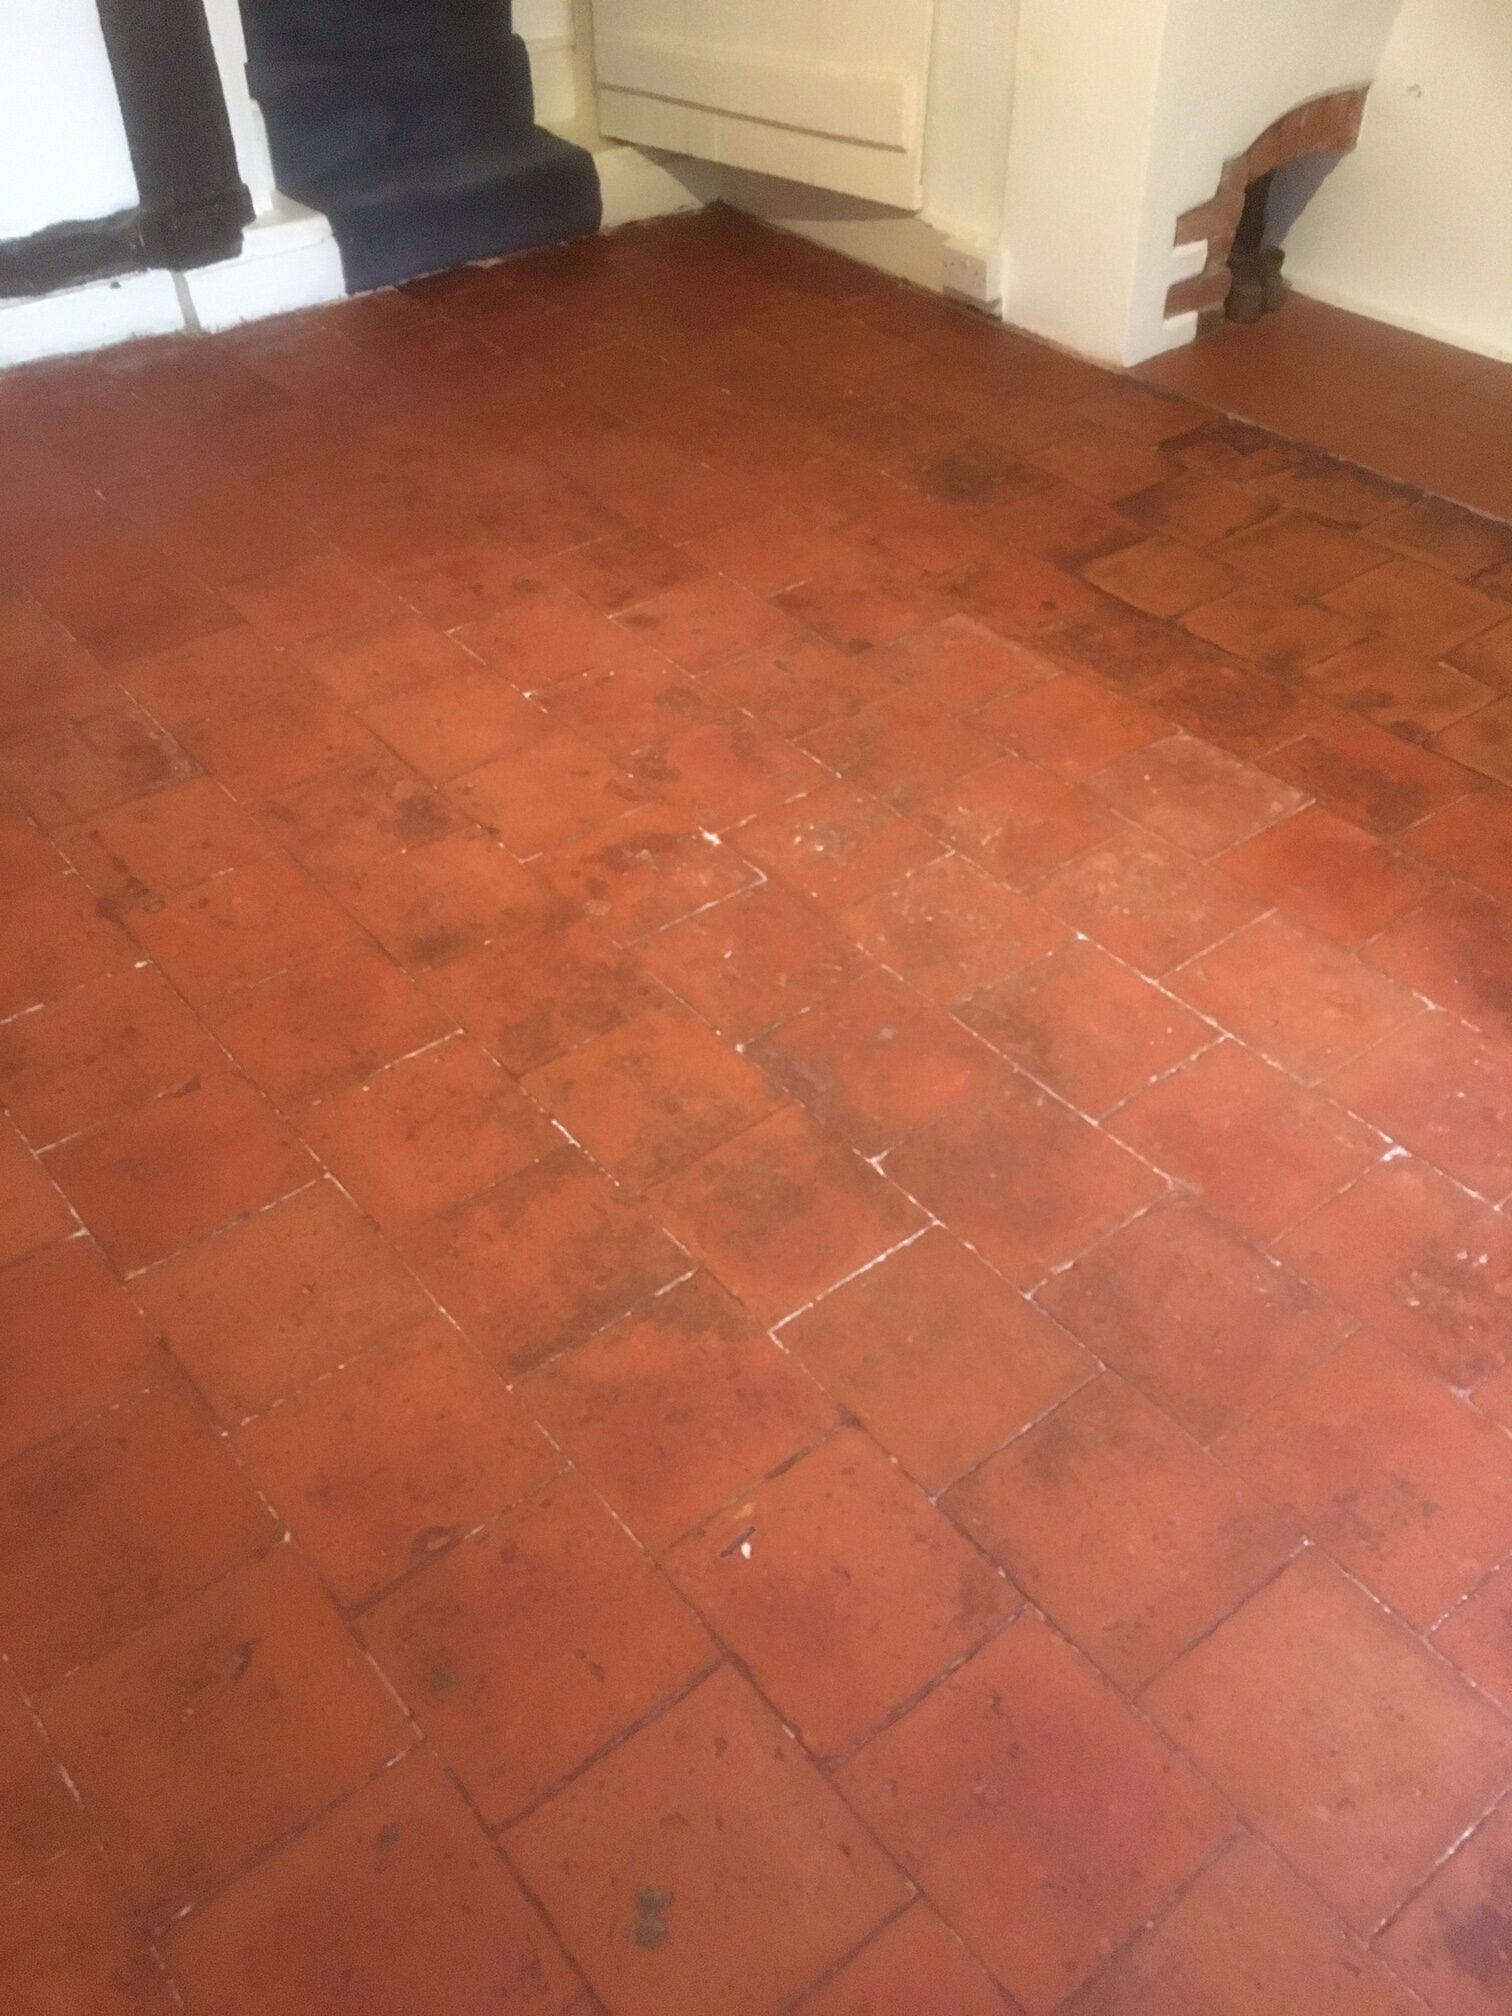
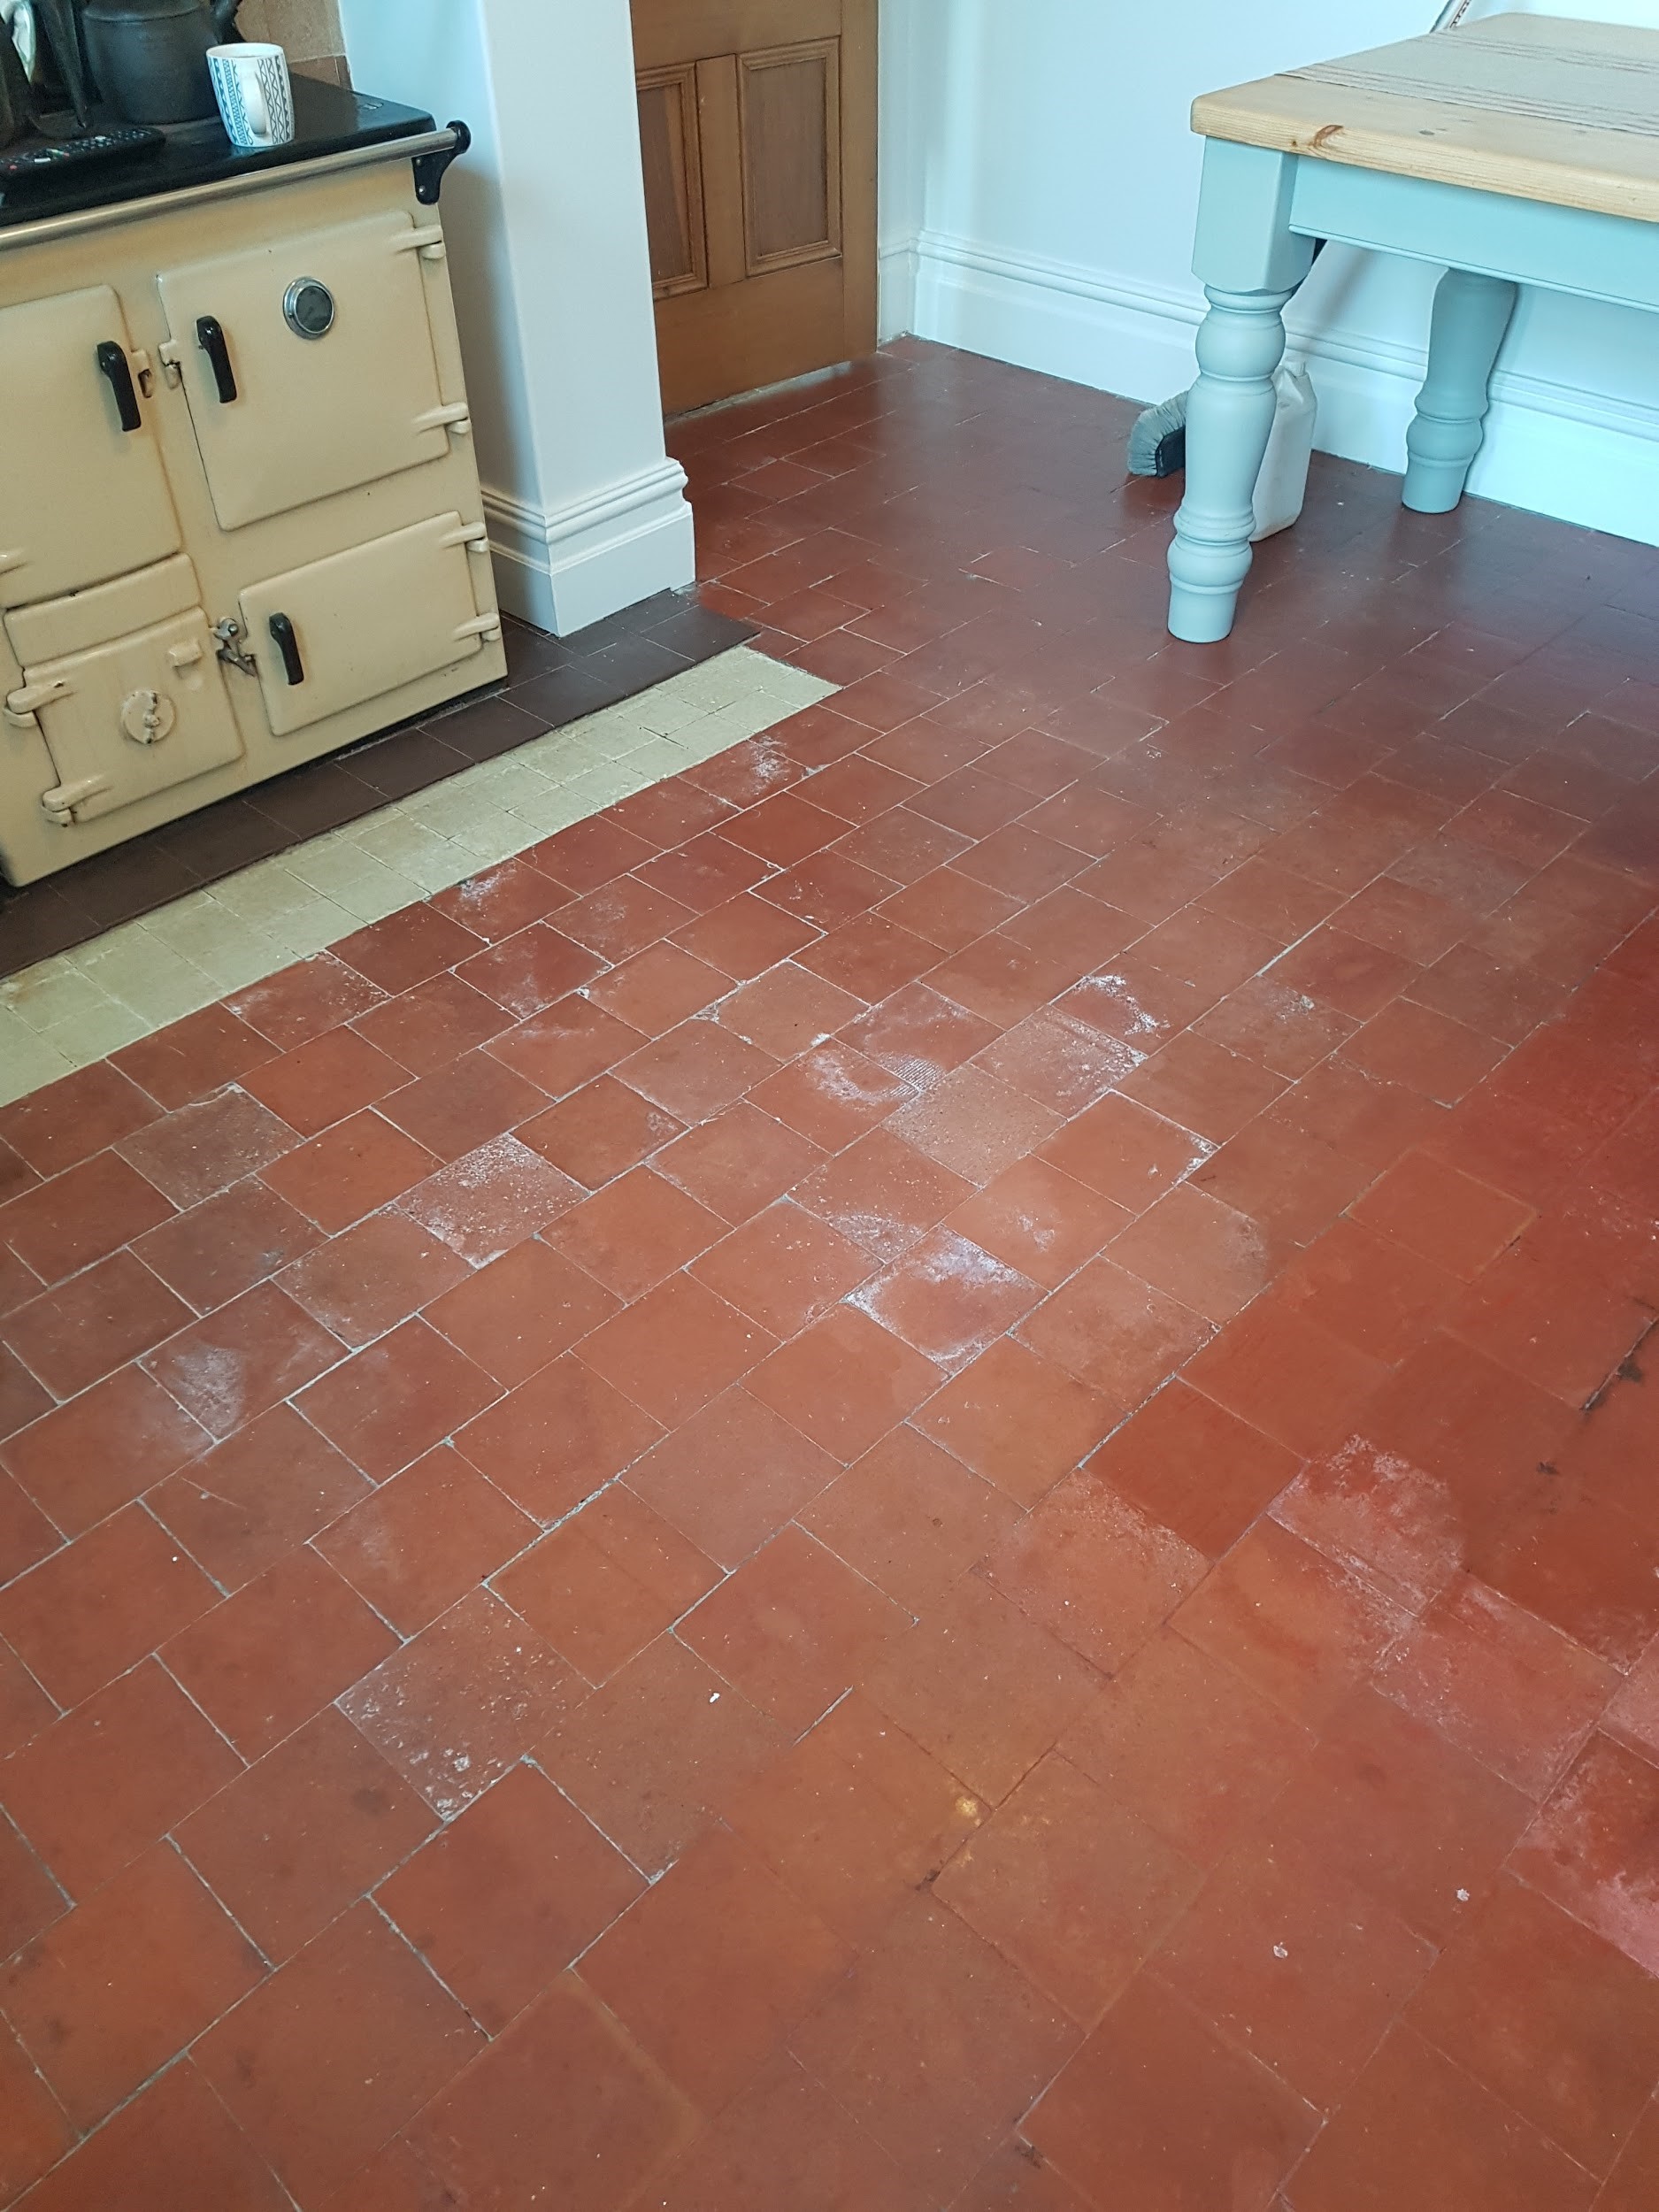
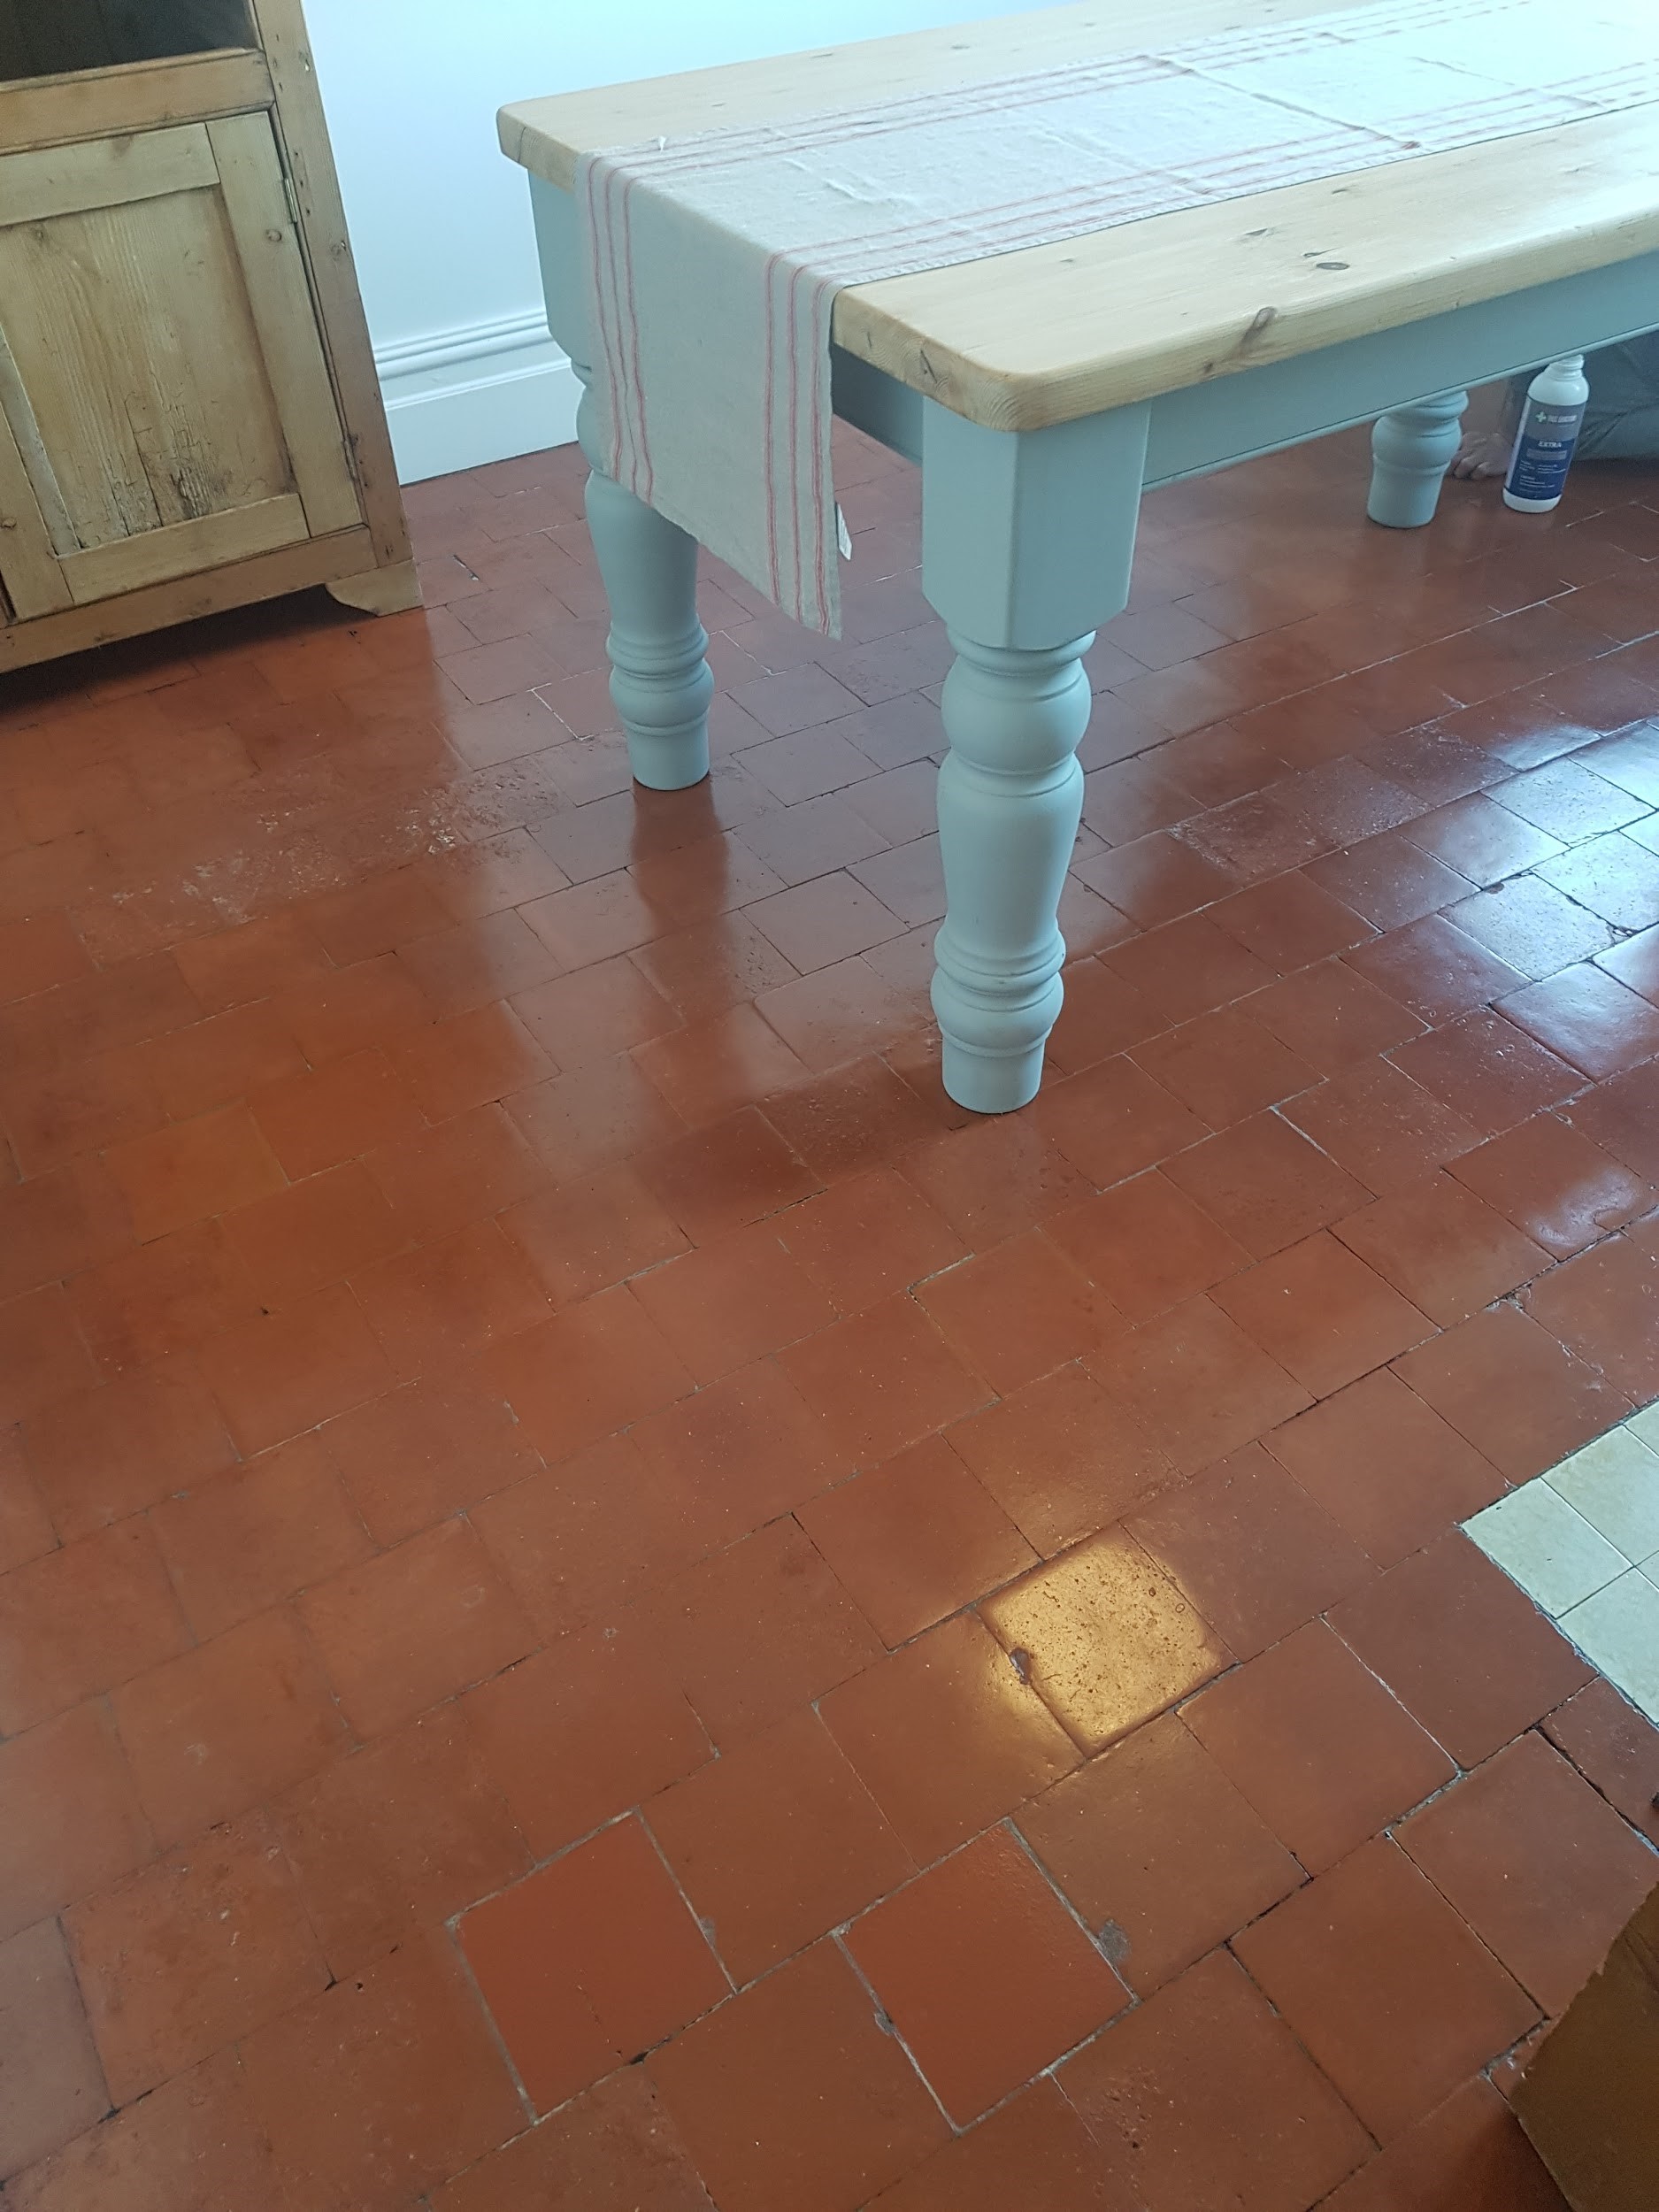
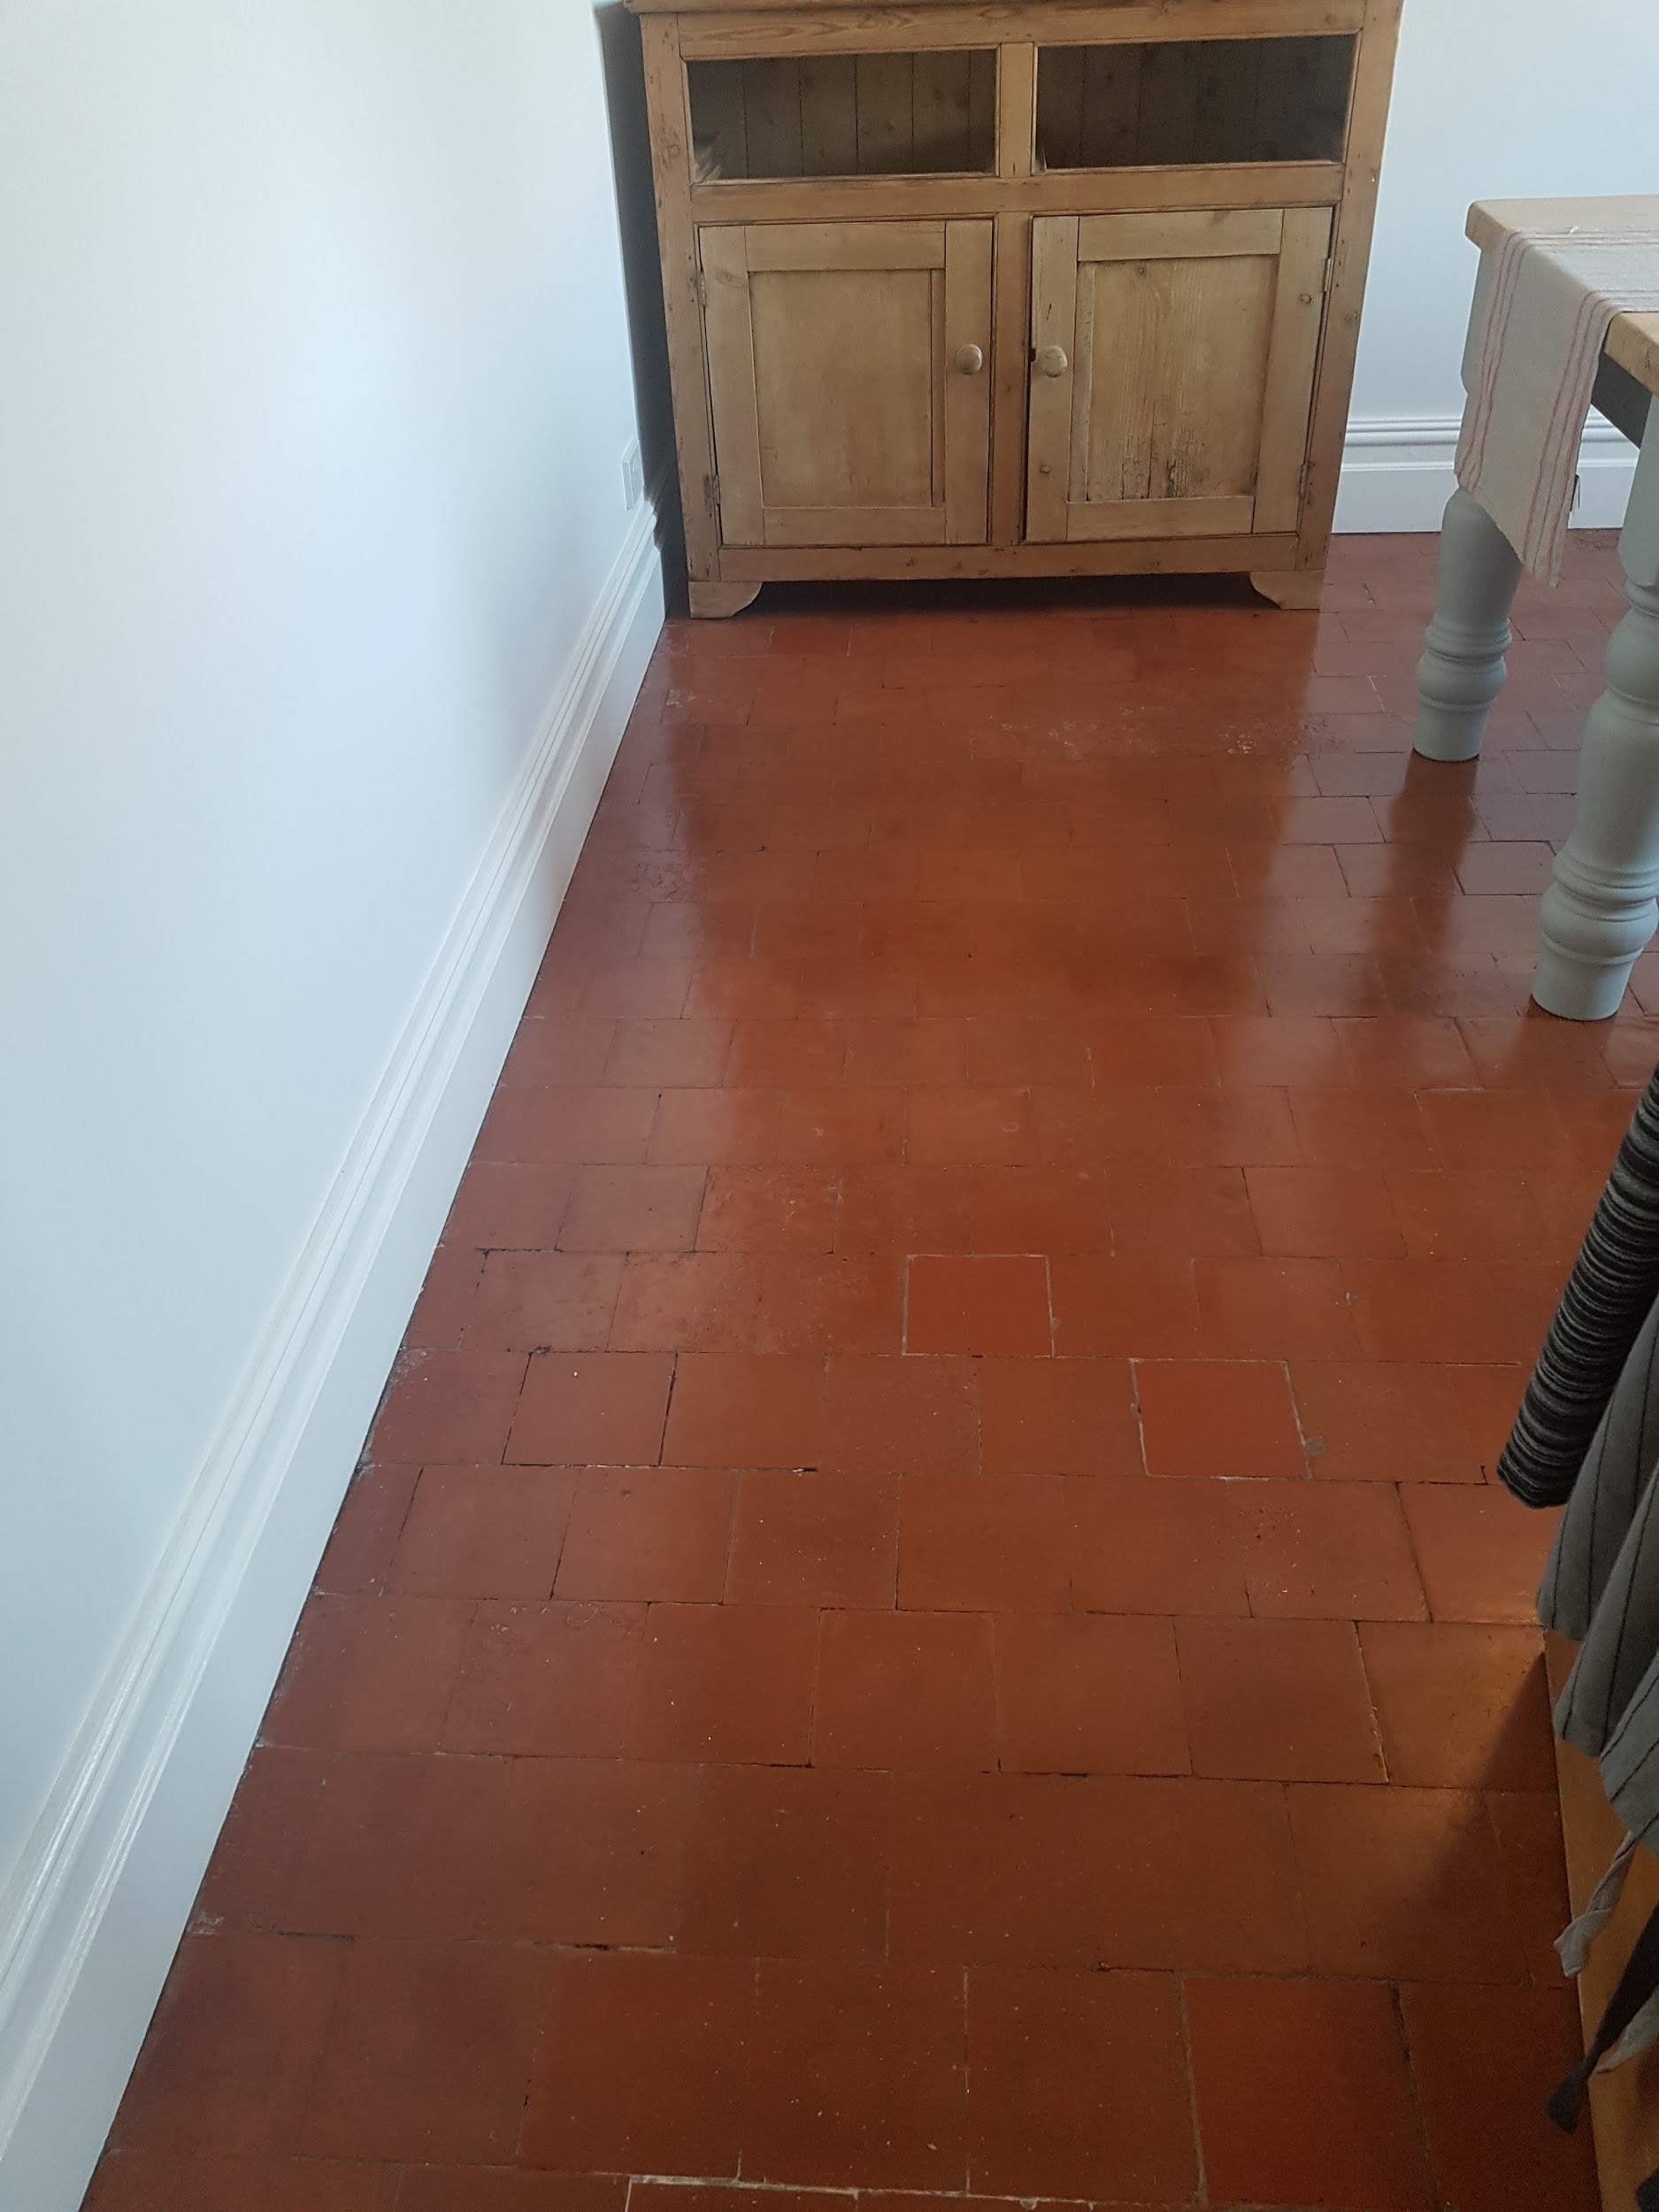
I was called in by a client from the Cotswolds market town of Witney who had lifted up a carpet to discover a Terracotta tiled floor underneath. Although the floor was in good physical condition the carpet and underlay had been trapping moisture from evaporating resulting. Old floors like this one were laid before damp proof membranes became standard so covering them up can cause damp issues. It is important to allow moisture from underneath tiled floors to evaporate unimpeded otherwise moisture can reach out to the walls resulting in rising damp.

 
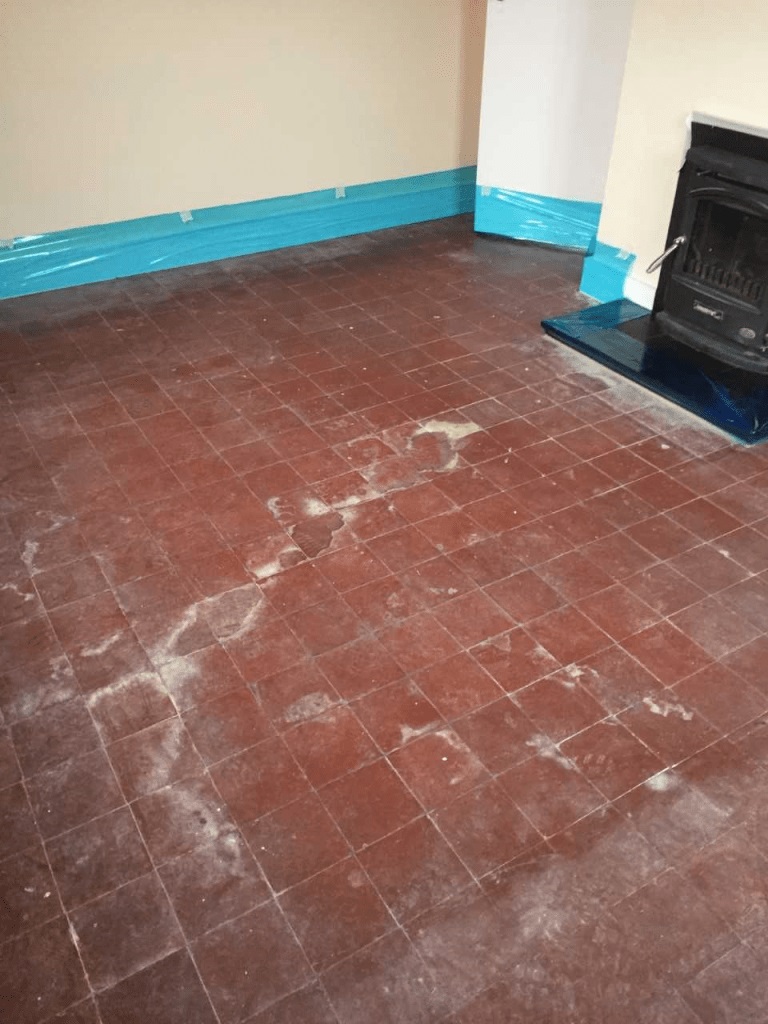
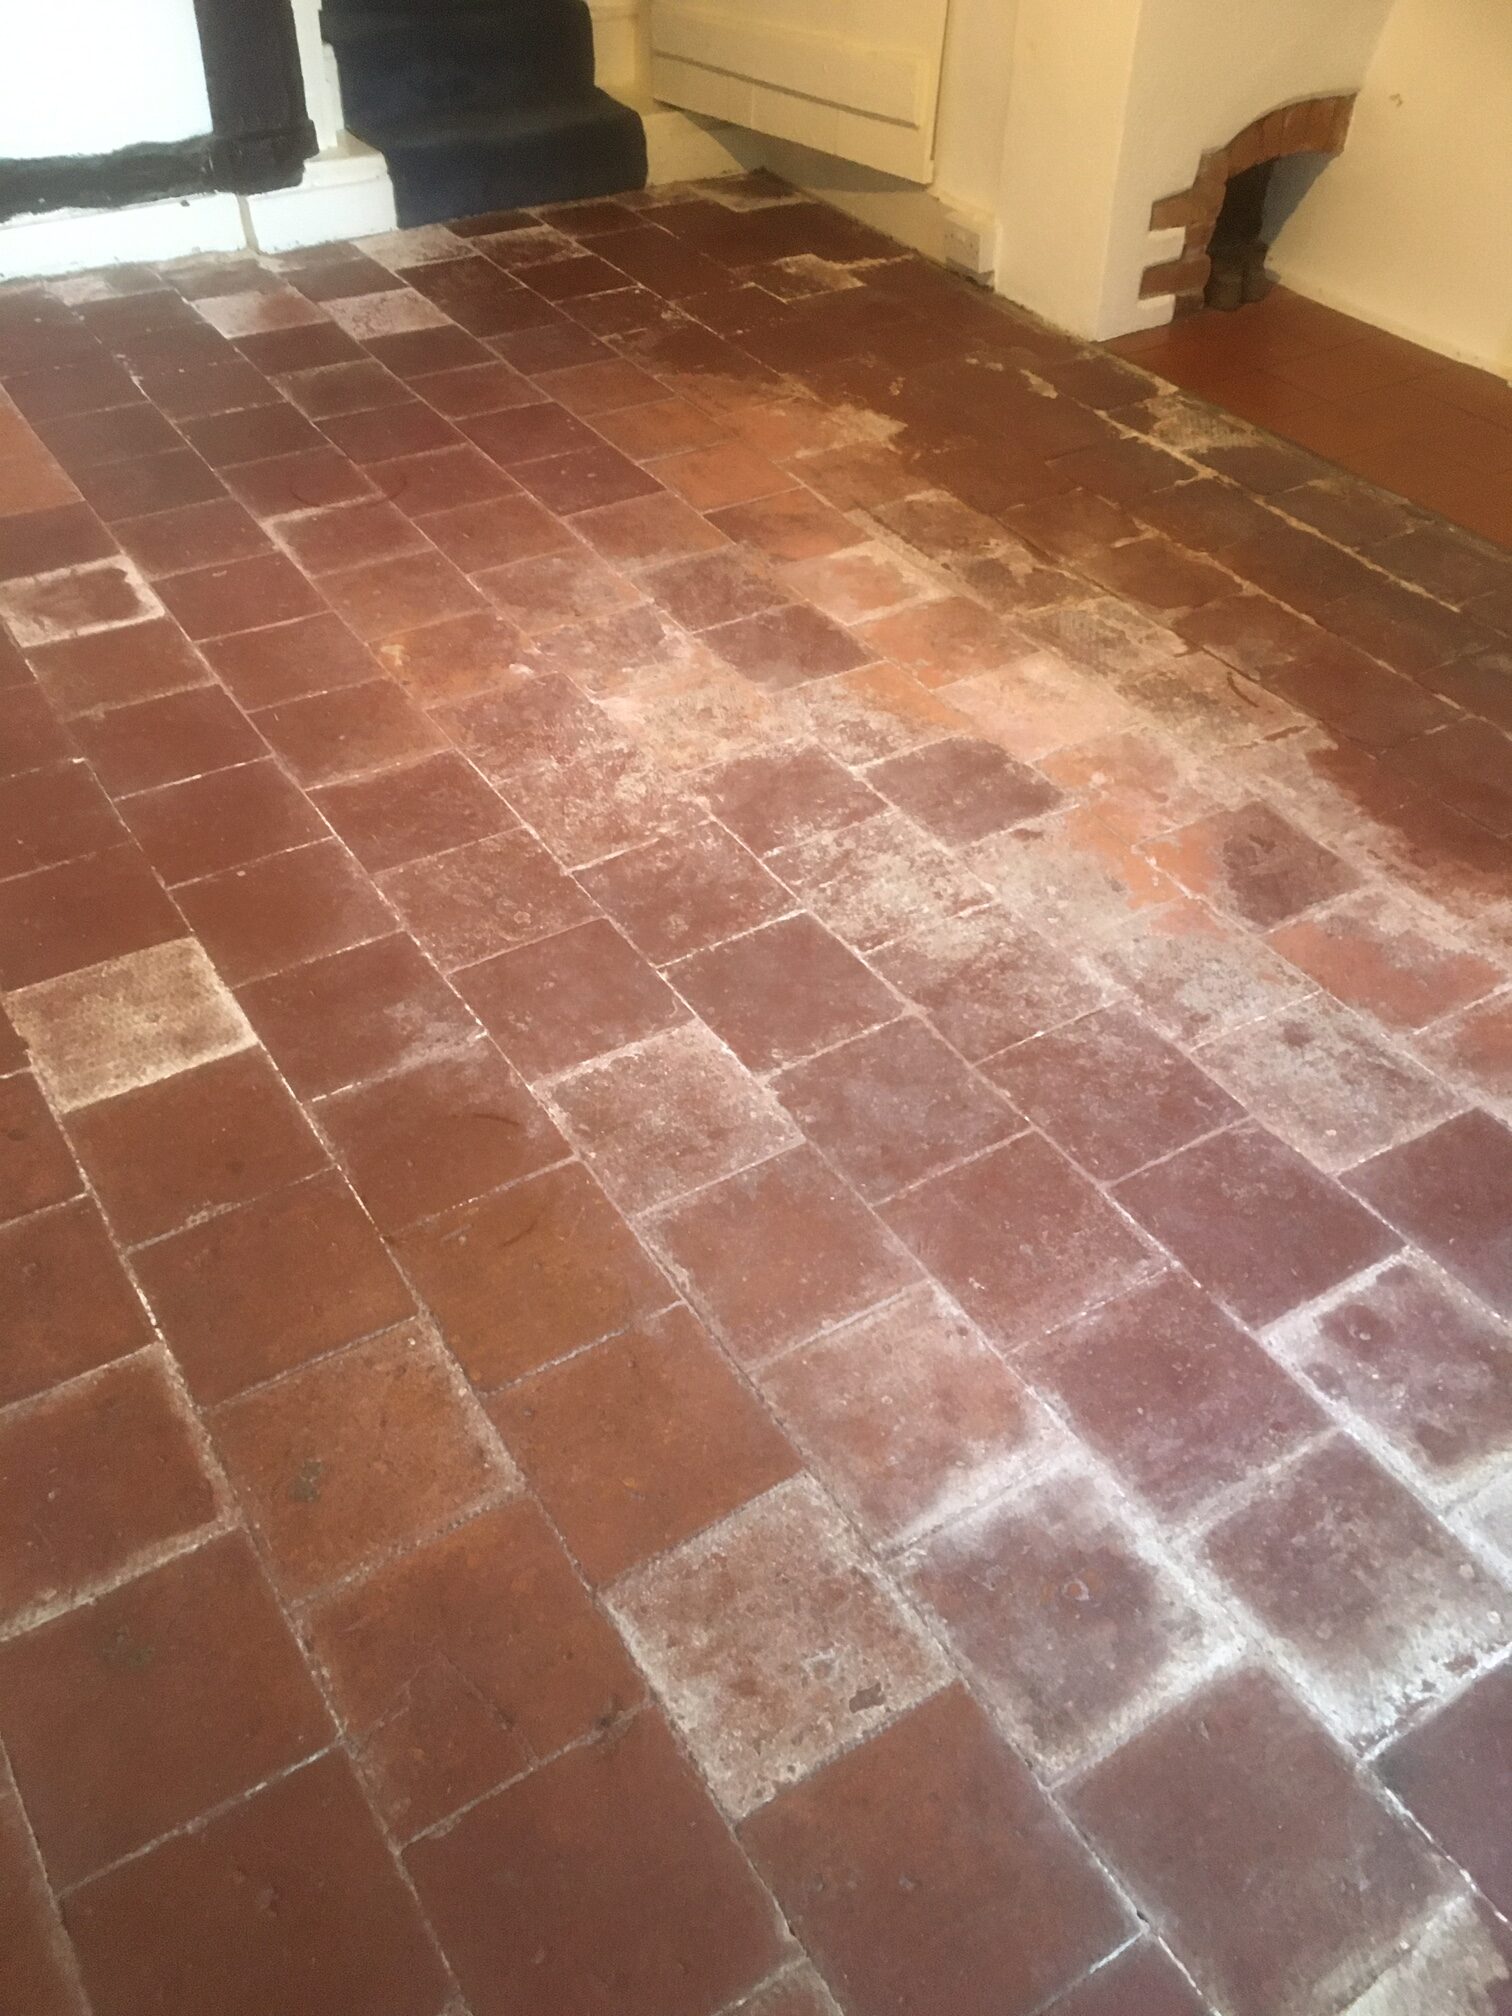
Terracotta Floor Before Cleaning Witney

Moisture can also penetrate the pores of the clay Terracotta tile potentially leading to its degradation over time and in this case resulted in the appearance of white efflorescent salts being deposited on the tile surface causing unsightly staining.


Cleaning Terracotta Tile

I started cleaning the Terracotta by doing applying strong dilution of Tile Doctor Pro-Clean which is an effective alkaline tile cleaner. For best results I spread the solution on the floor and then leave it to dwell and soak in for up to twenty minutes. This gives the product time to eat into the dirt and old coatings before being scrubbed in with a black pad fitted to a rotary floor machine. This worked very well on the floor and the cleaning solution was soon dirty with the released soil which was removed using a wet vacuum and more water to rinse it away and dry the floor as much as possible.

To remove the white efflorescent staining the floor was given an acid wash using Tile Doctor Grout Clean-up which is designed for removing grout and other mineral stains from tiling. This was brushed into the tile and grout by hand and left to fizz as it reacted with the efflorescence. After another rinse and extract with the wet vacuum the floor was left to dry out for a couple of days. The next step would be to seal the Terracotta and for best results the tile needs to be dry.


Sealing Terracotta Tile

On my return I checked the tiles were dry by taking a few moisture readings with a damp meter. The readings came back fine so I need not have been concerned however Terracotta tiles being made from clay are very porous so its always a good idea to check.

Given the previous issues with damp I knew I would need to use a fully breathable sealer, so I opted to use Tile Doctor Colour Grow. This product will cope well with the moisture and contains a colour enhancing formula that really brings out the red colour of the Terracotta.

 
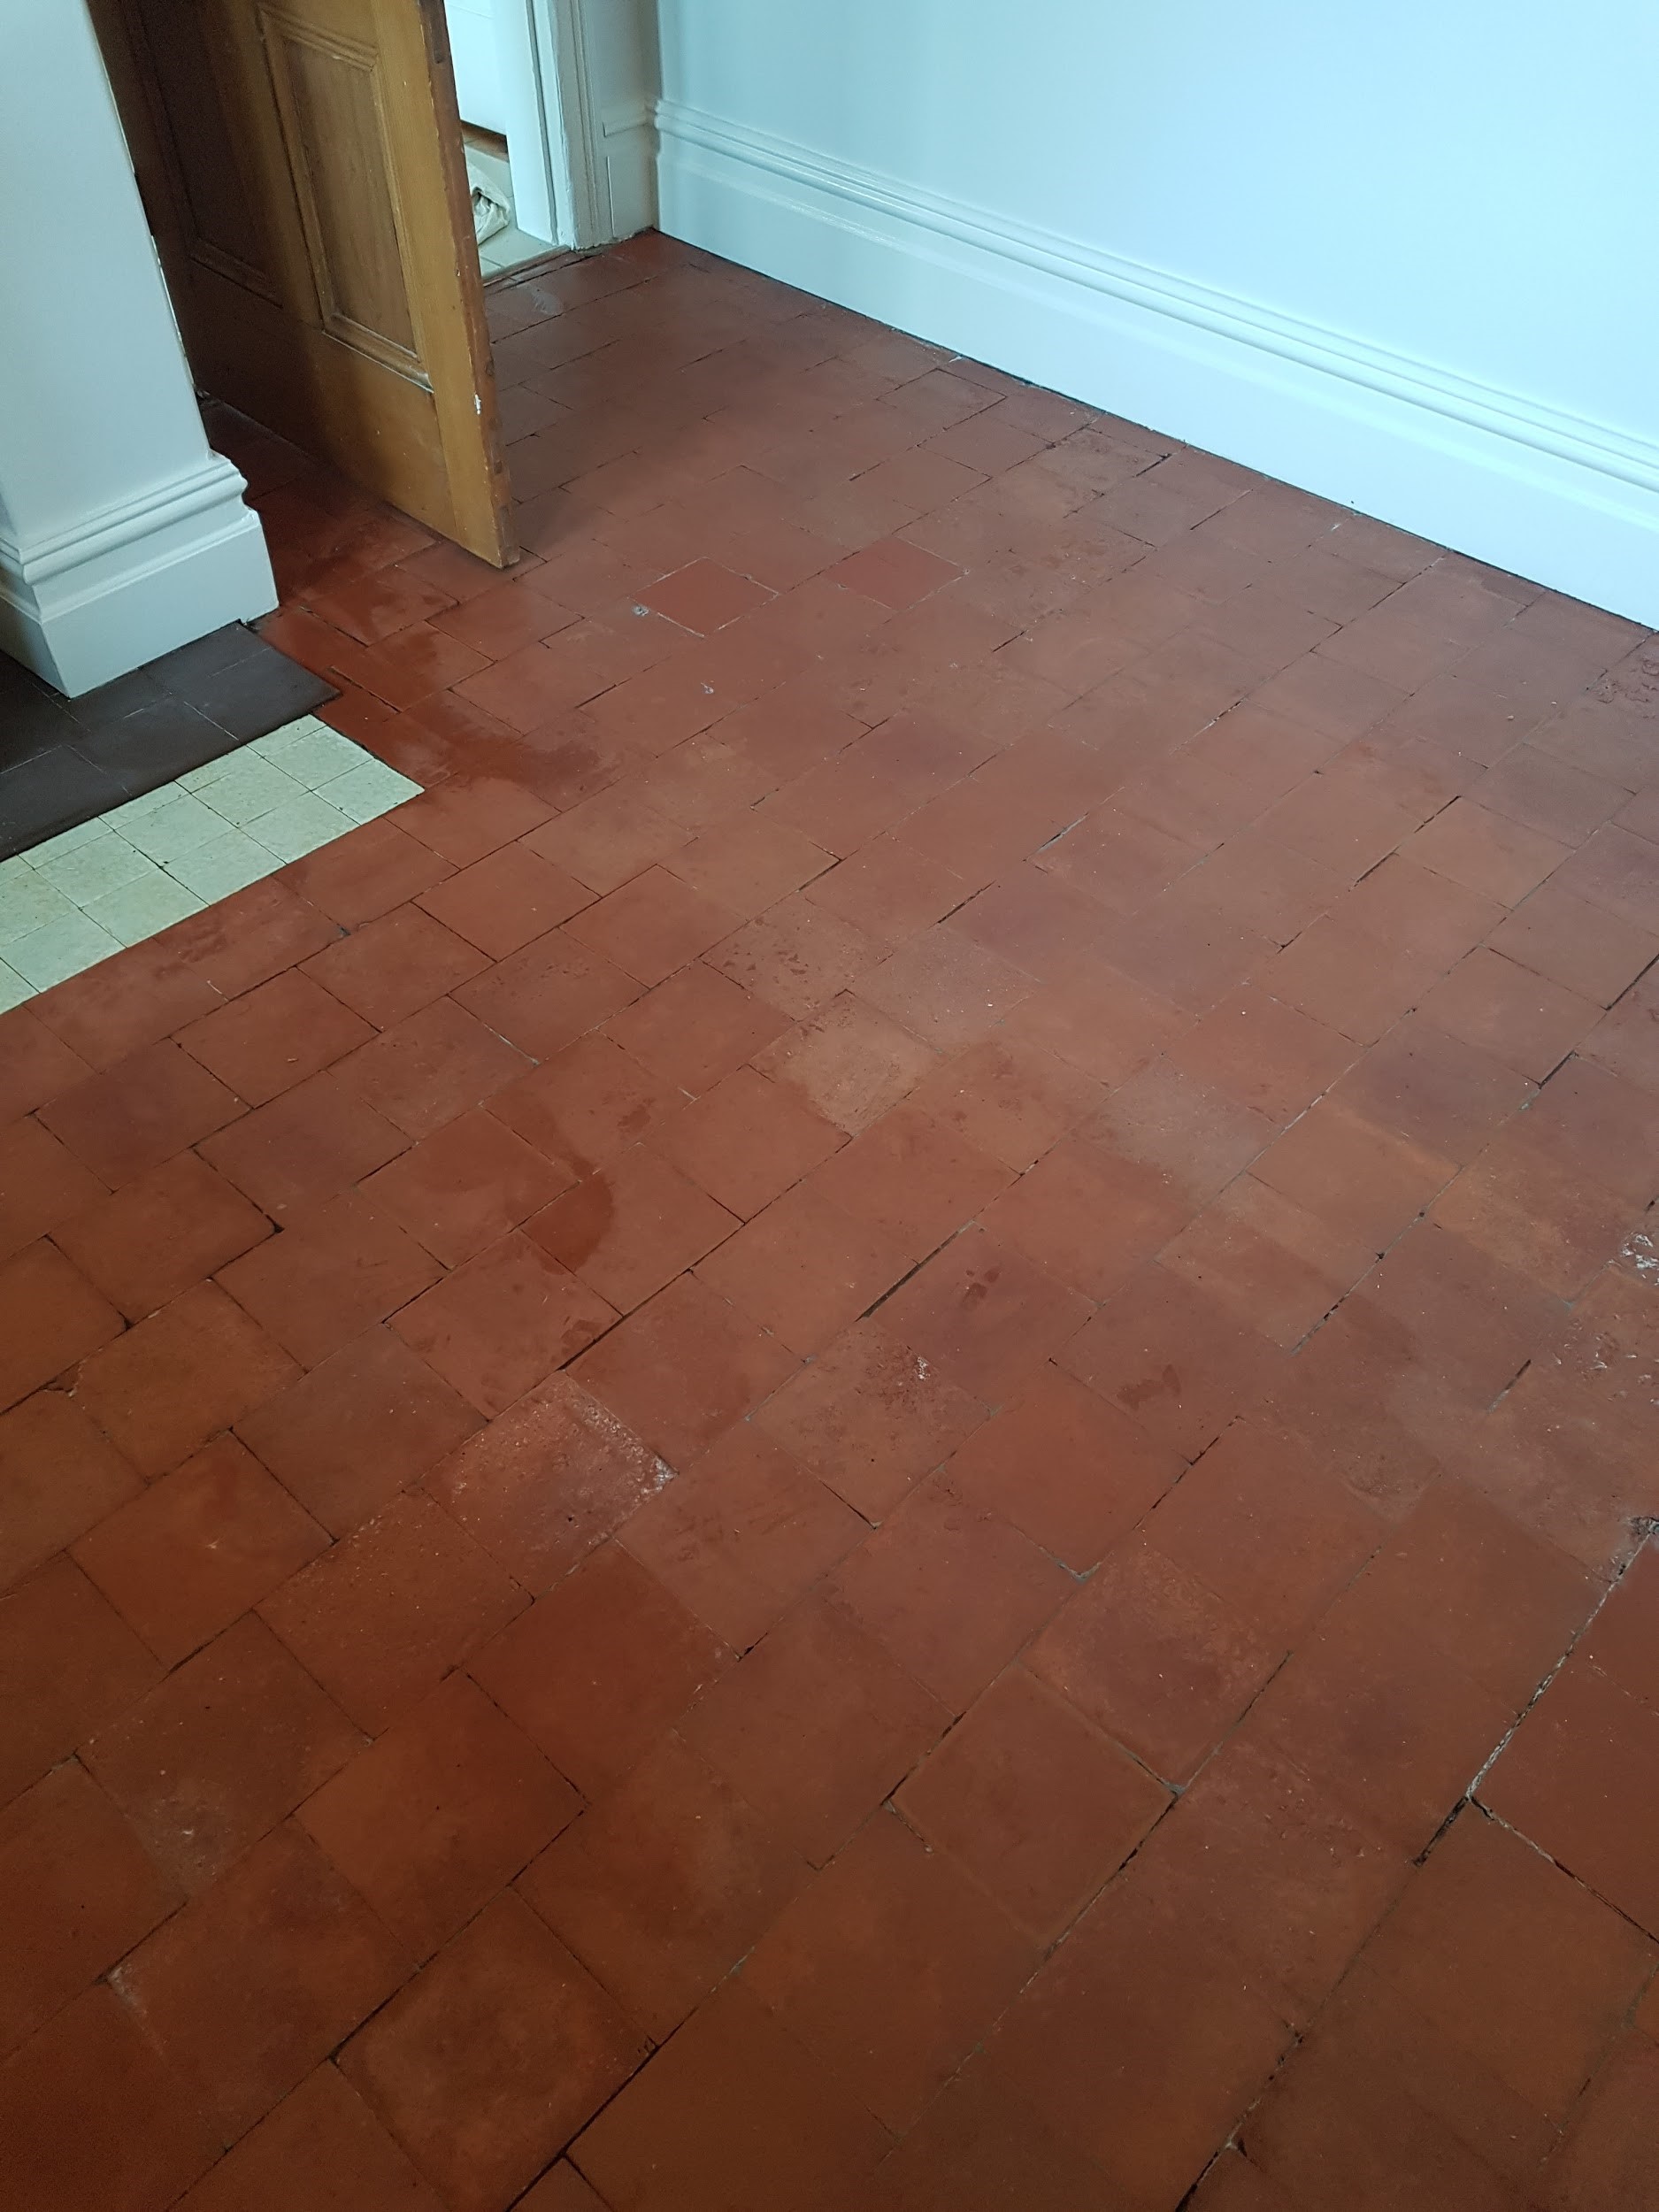
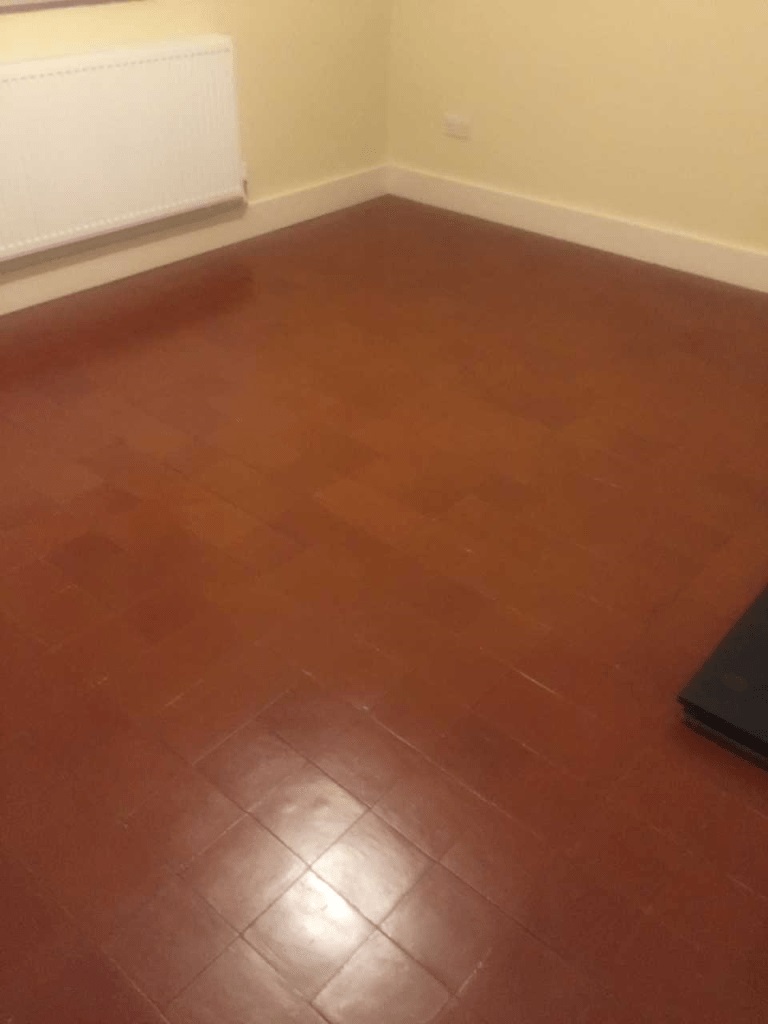
Terracotta Floor After Cleaning Witney

Except for a few deep efflorescent stains in the grout, the floor responded very well to the treatment and made a massive improvement to the overall appearance. My client was pleased with the transformation and the newly restored floor matched well with the character of the property.


Monday, August 12, 2019

How to Renovate a Victorian Tiled Hallway Floor

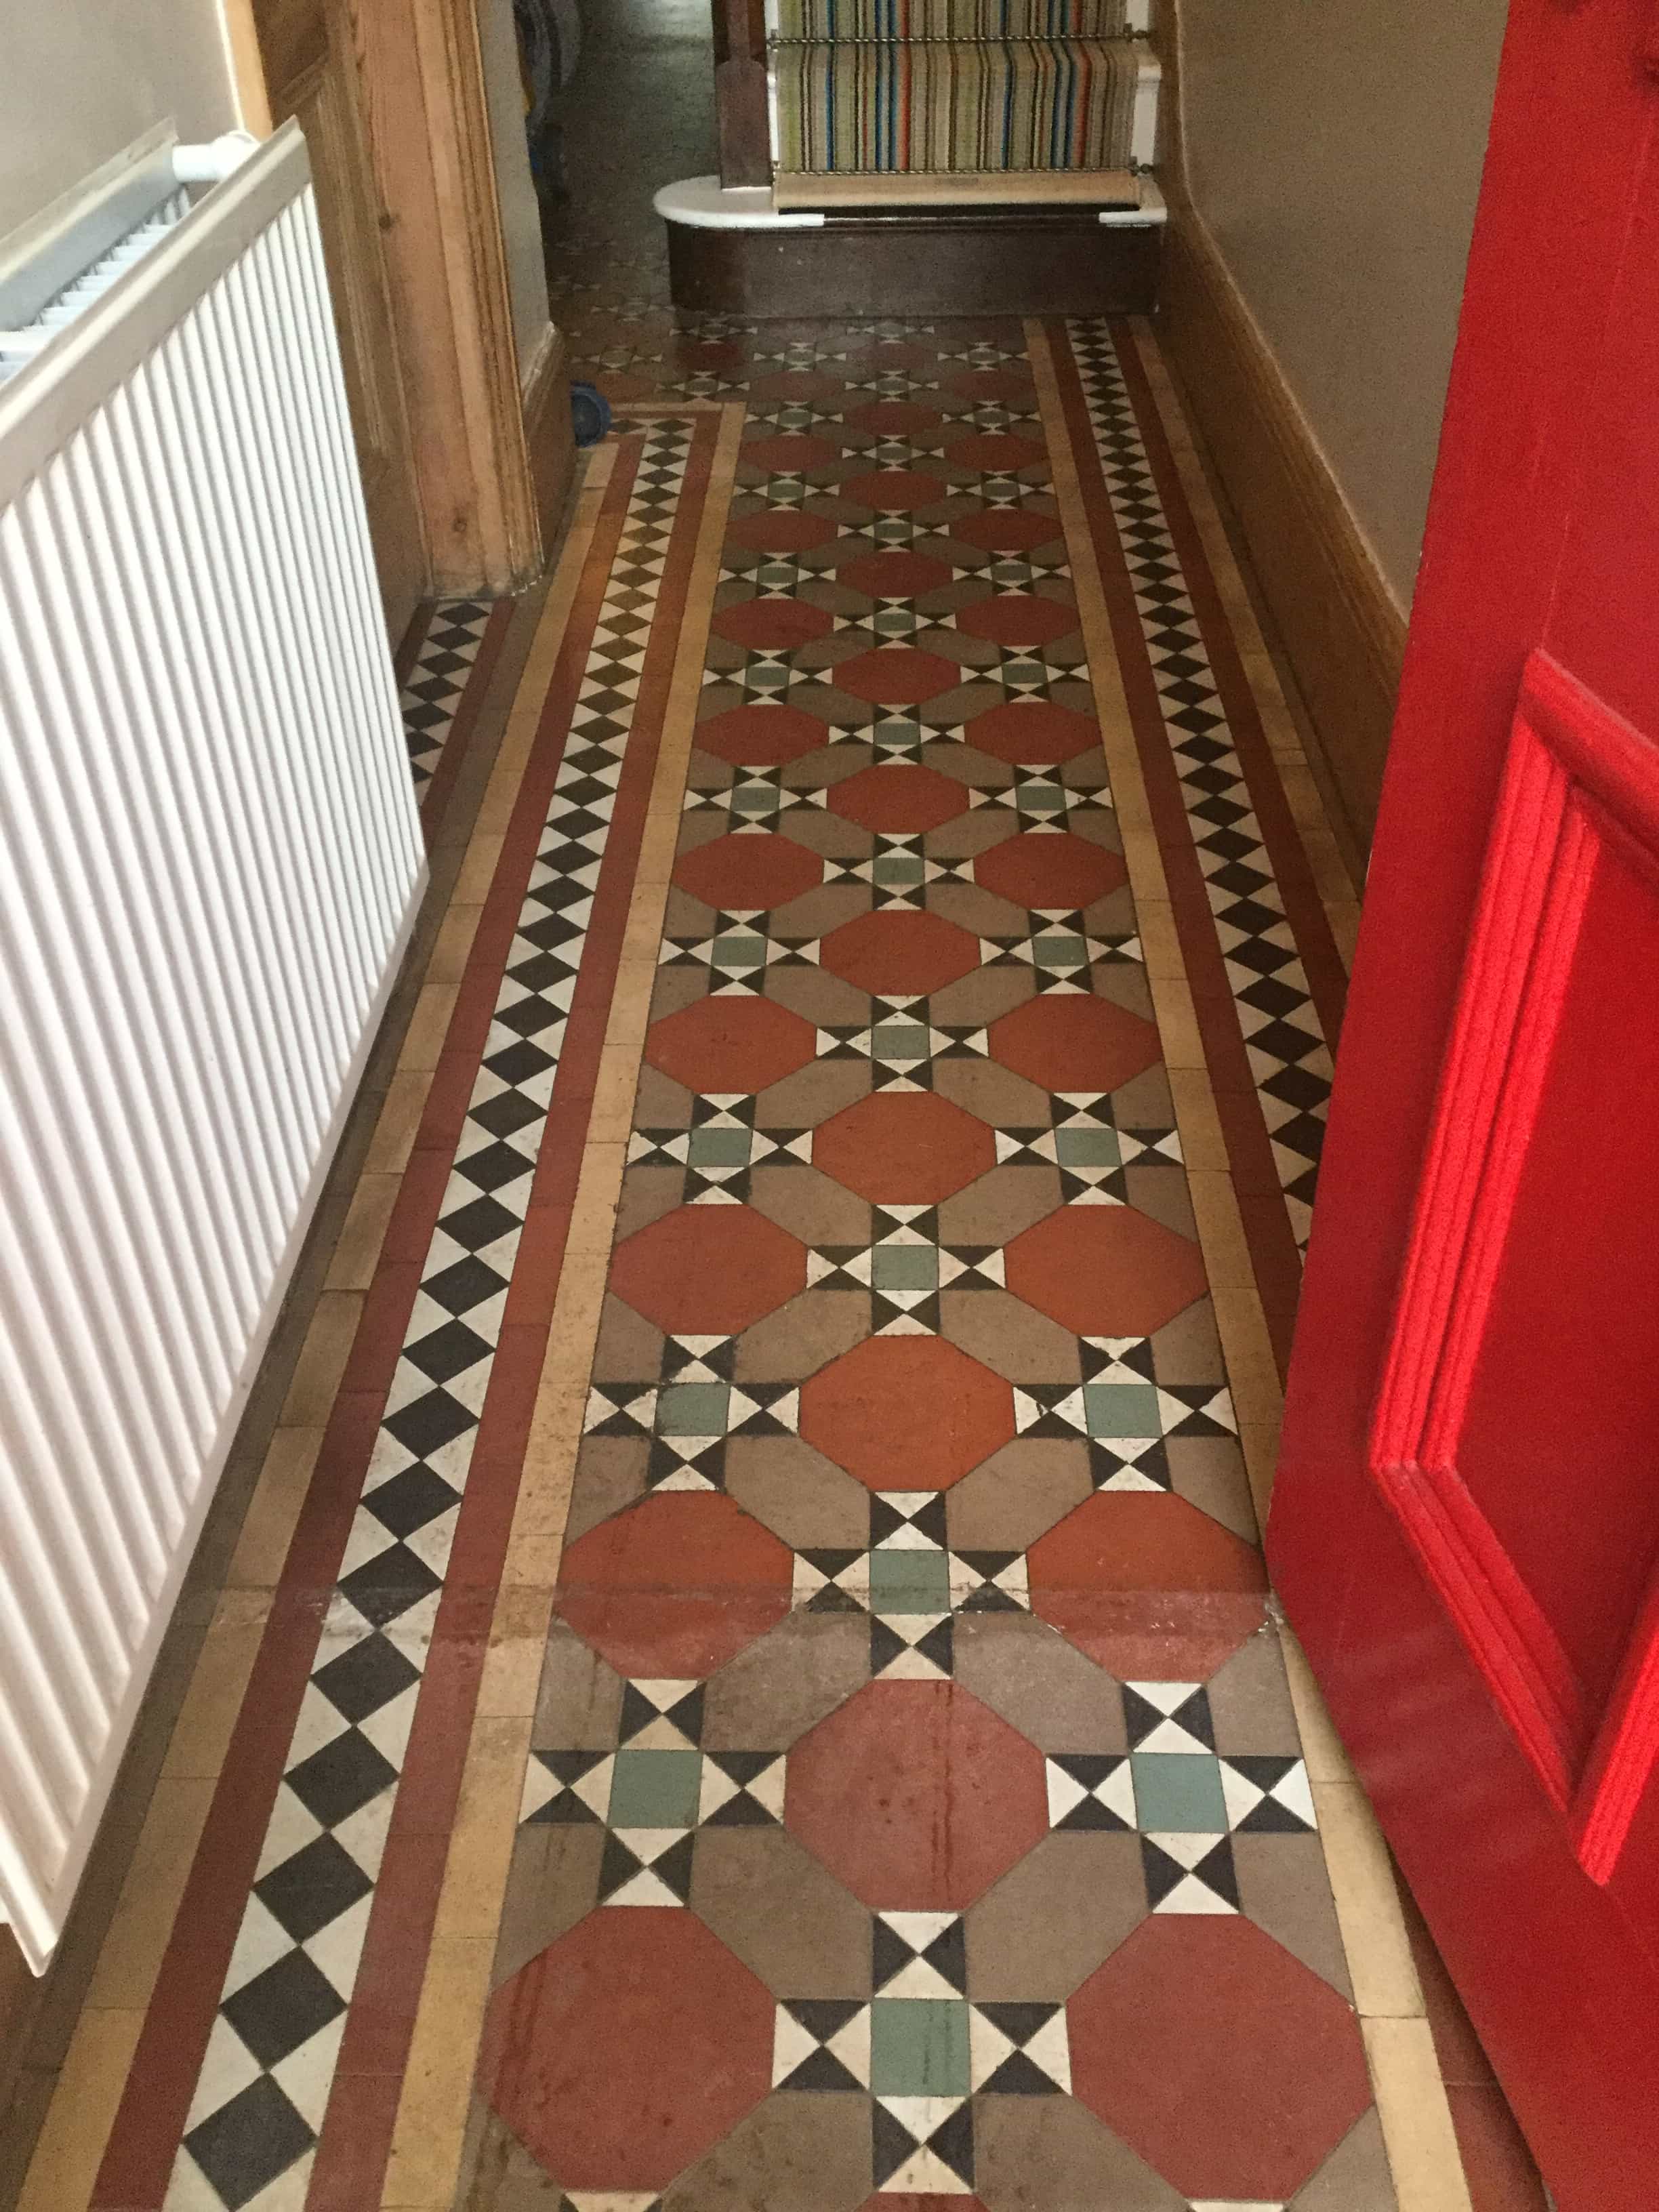
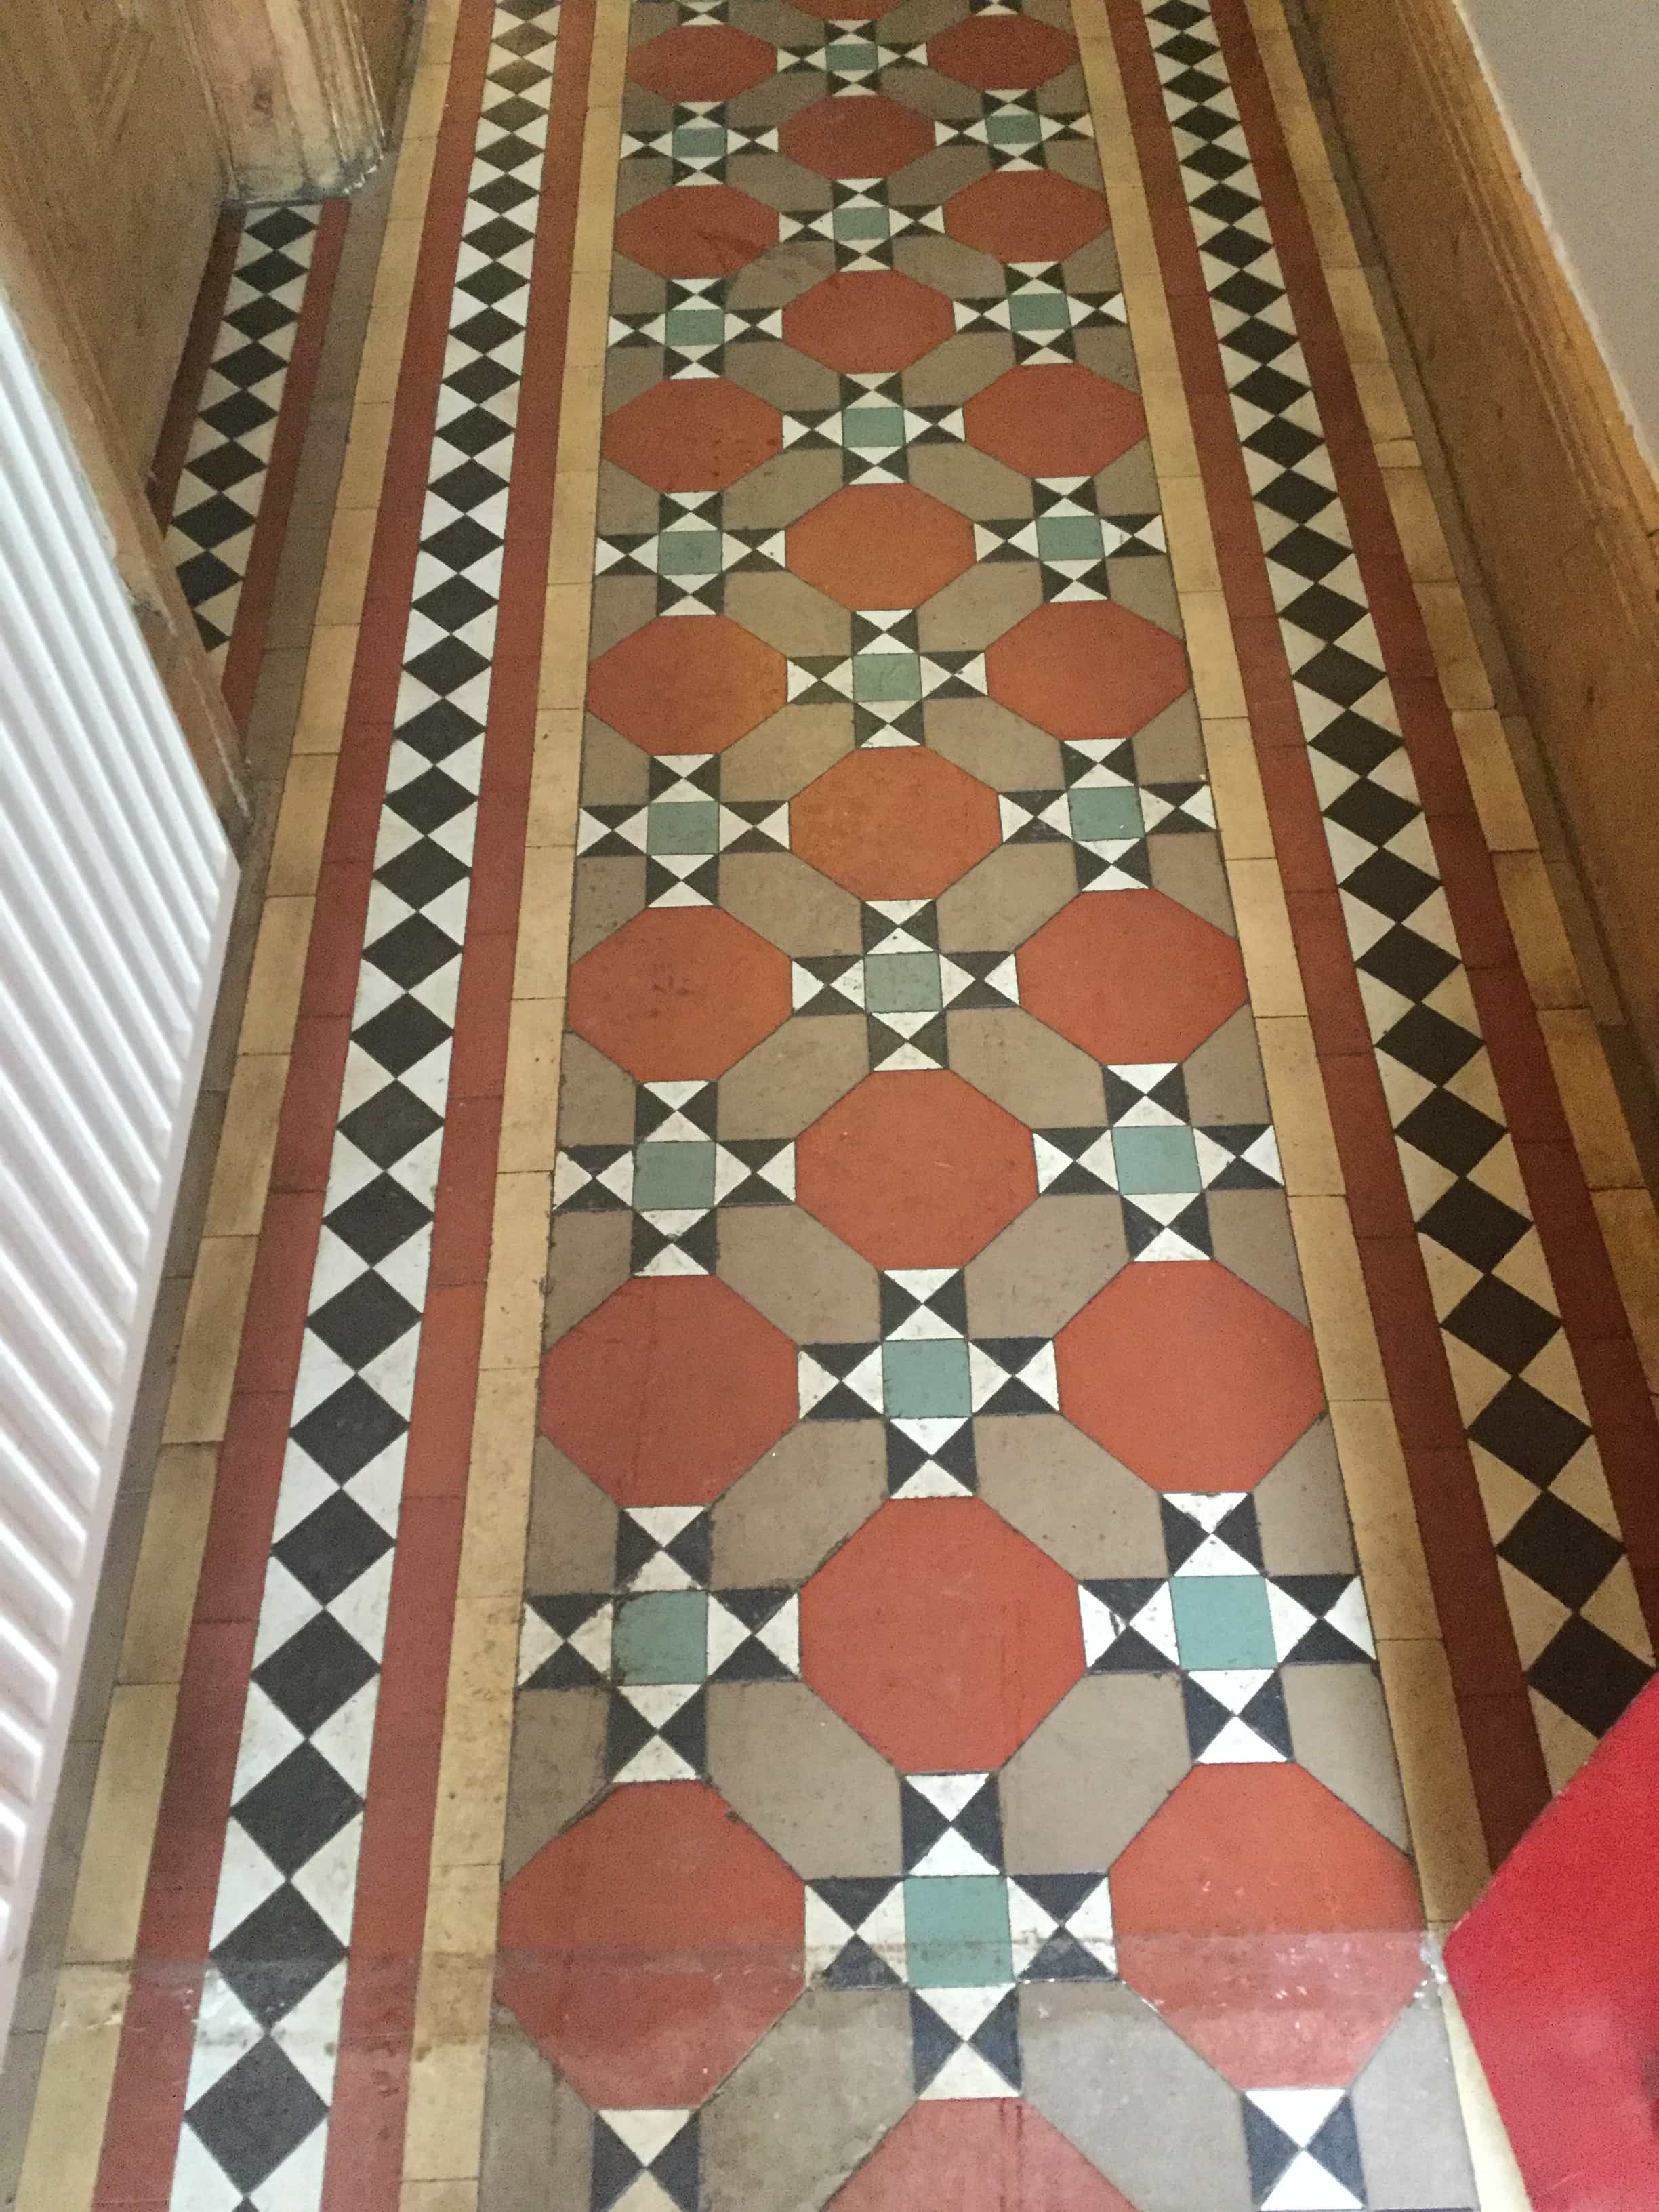
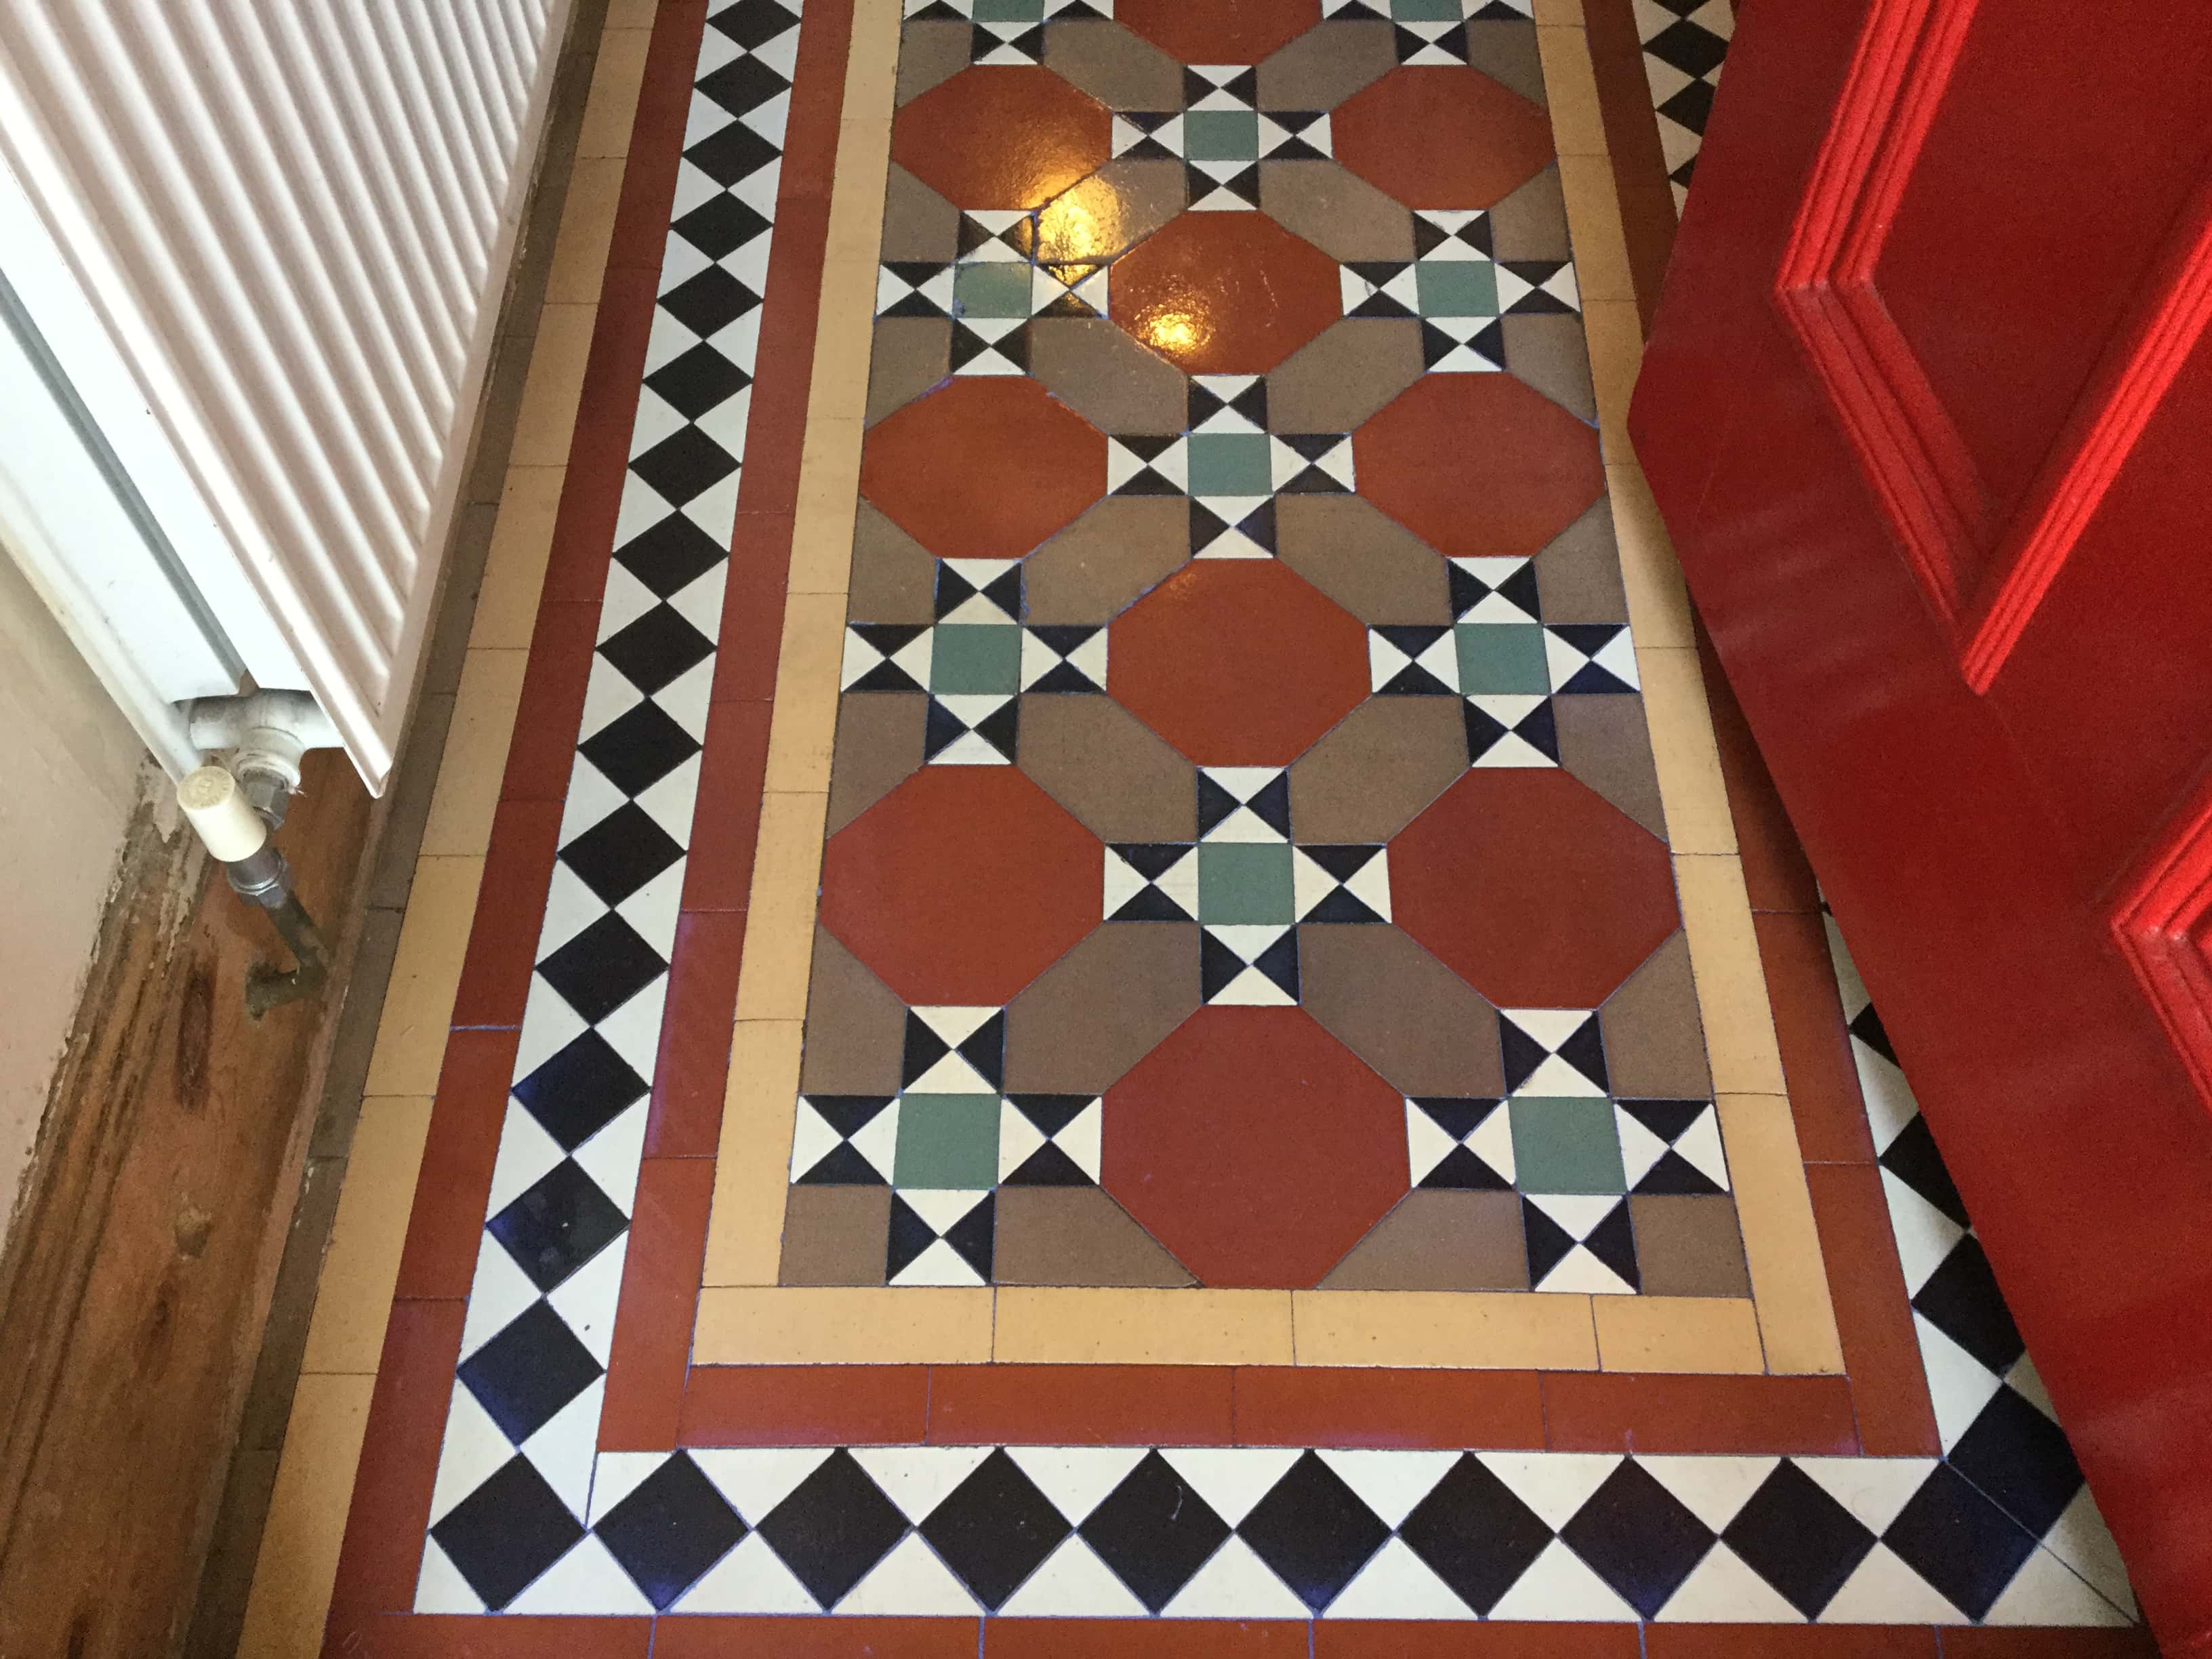
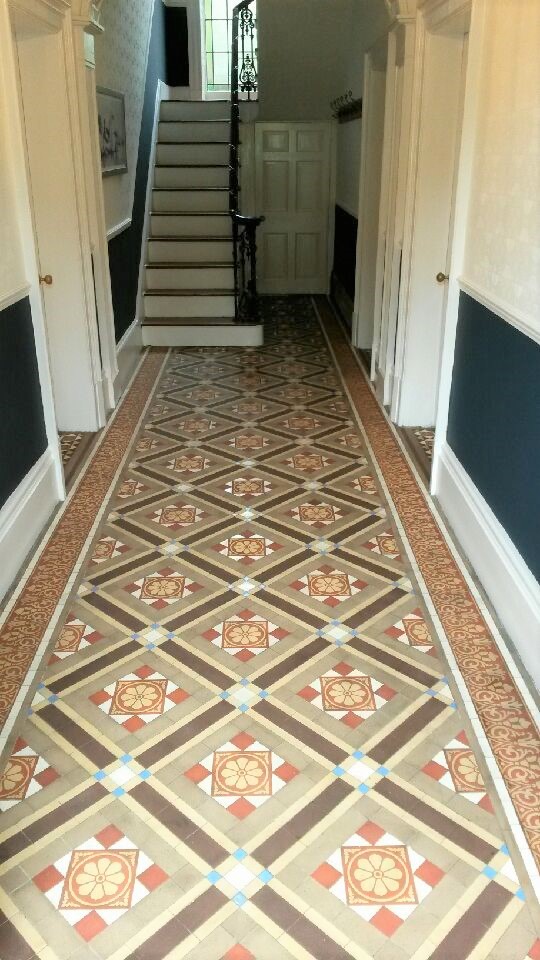
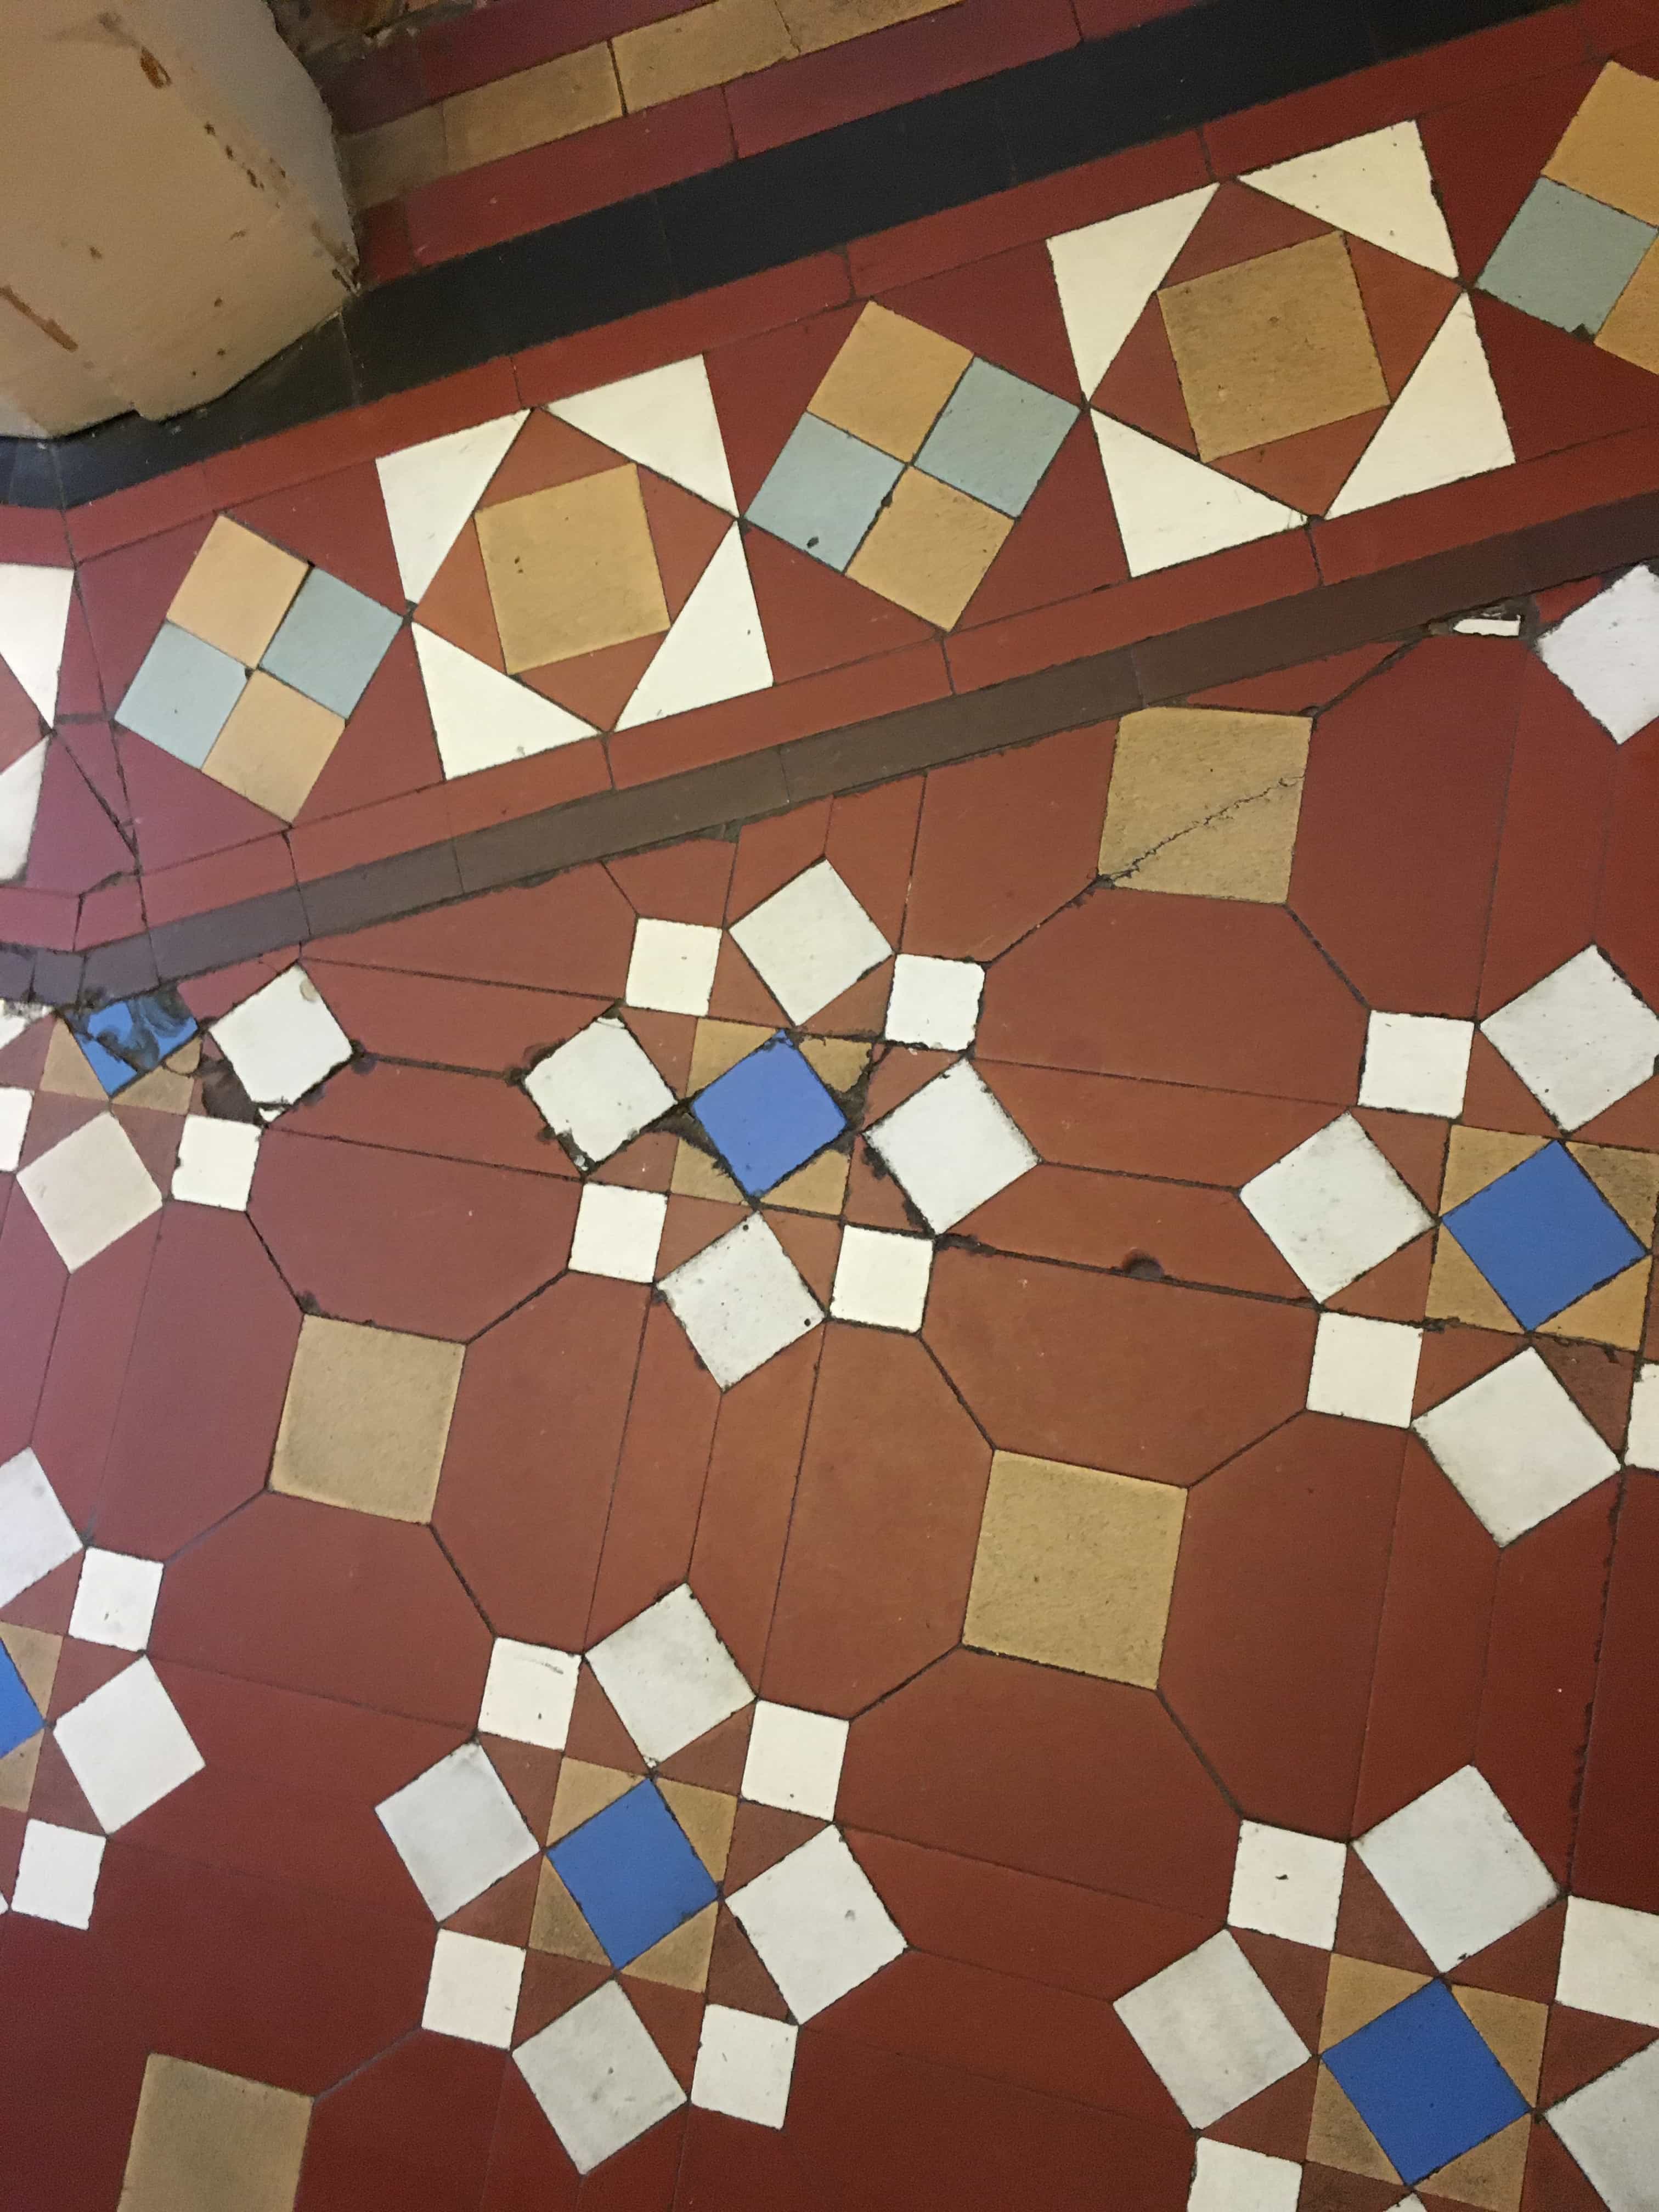
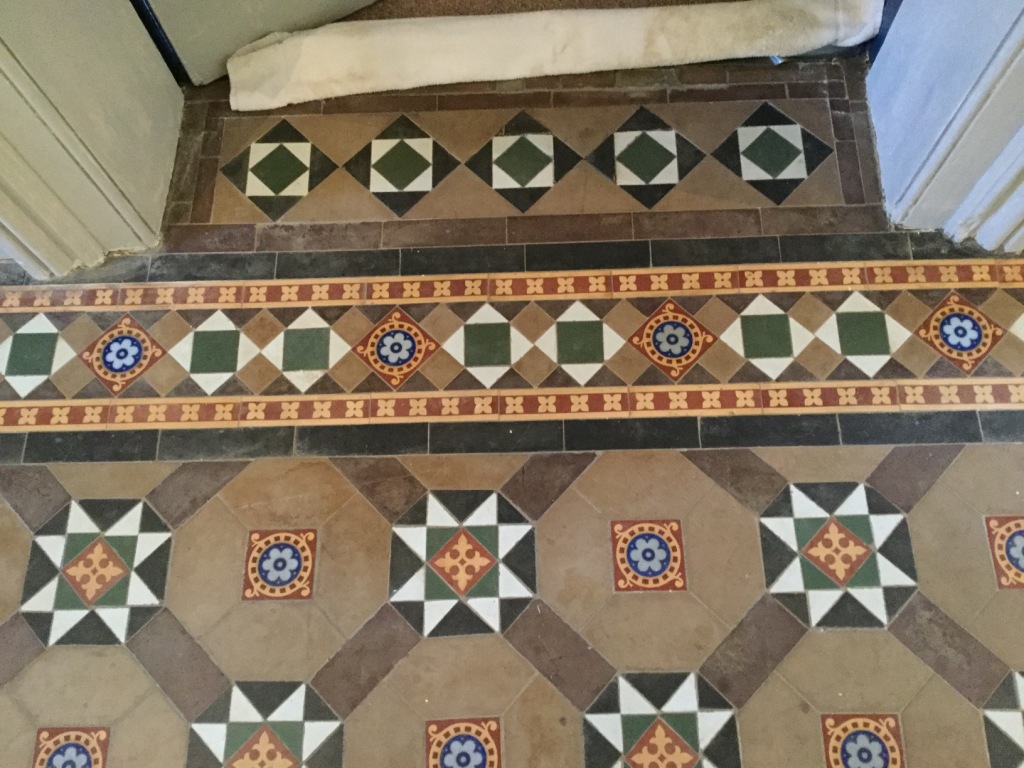
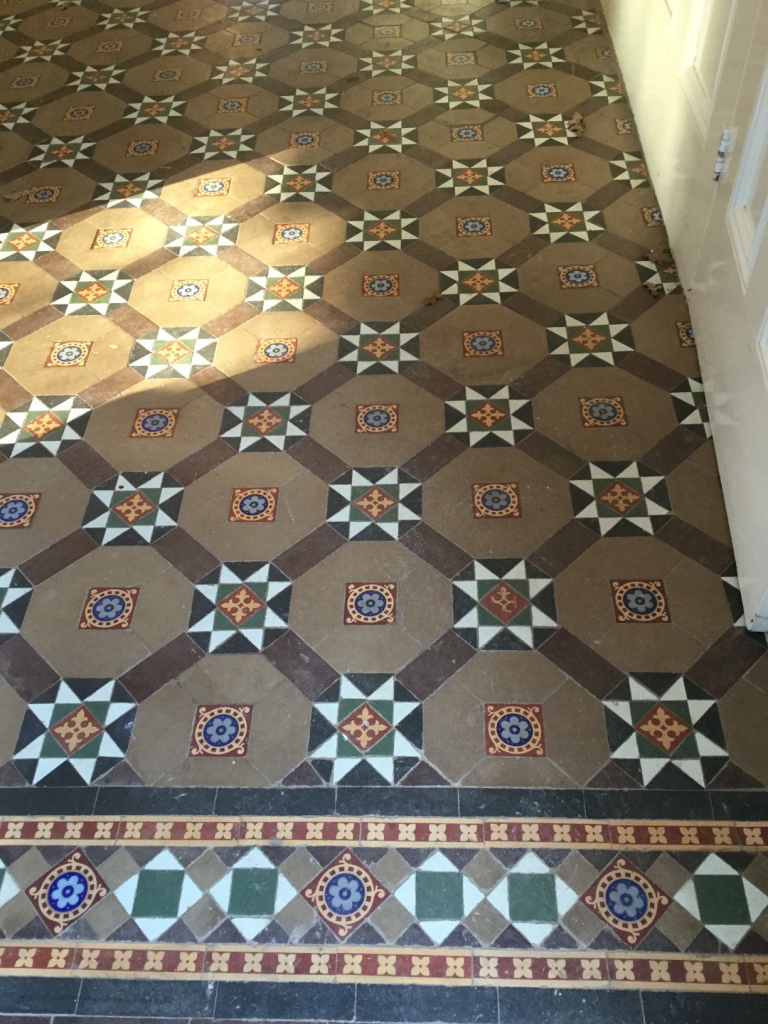
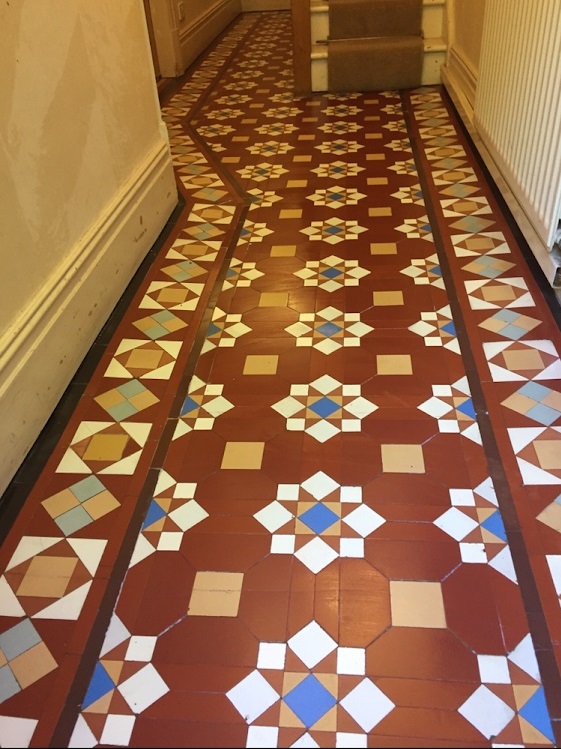
This beautiful Geometric Victorian Tiled Hallway at a property in the small Cumbrian town of Sedbergh had been covered by carpet and then Vinyl beneath the carpet. Far from causing an issue with the floor however it had protected the beautiful old tiles, but they needed a deep clean and seal. The client really wanted to make the most of the character features of the property and the hall floor was their first priority.

Geometric Victorian Tiled Hallway Before Cleaning Sedbergh

I discussed with the client the process of cleaning and we agreed a quote for the work, arranging a date for the work to be carried out later in the month. If you have never been Sedbergh is well worth a visit, it sits just within the Yorkshire Dales National Park at the foot of the Howgill Fells making it very popular with walkers.

Geometric Victorian Tiled Hallway Before Cleaning Sedbergh


Cleaning a Victorian Tiled Hallway Floor

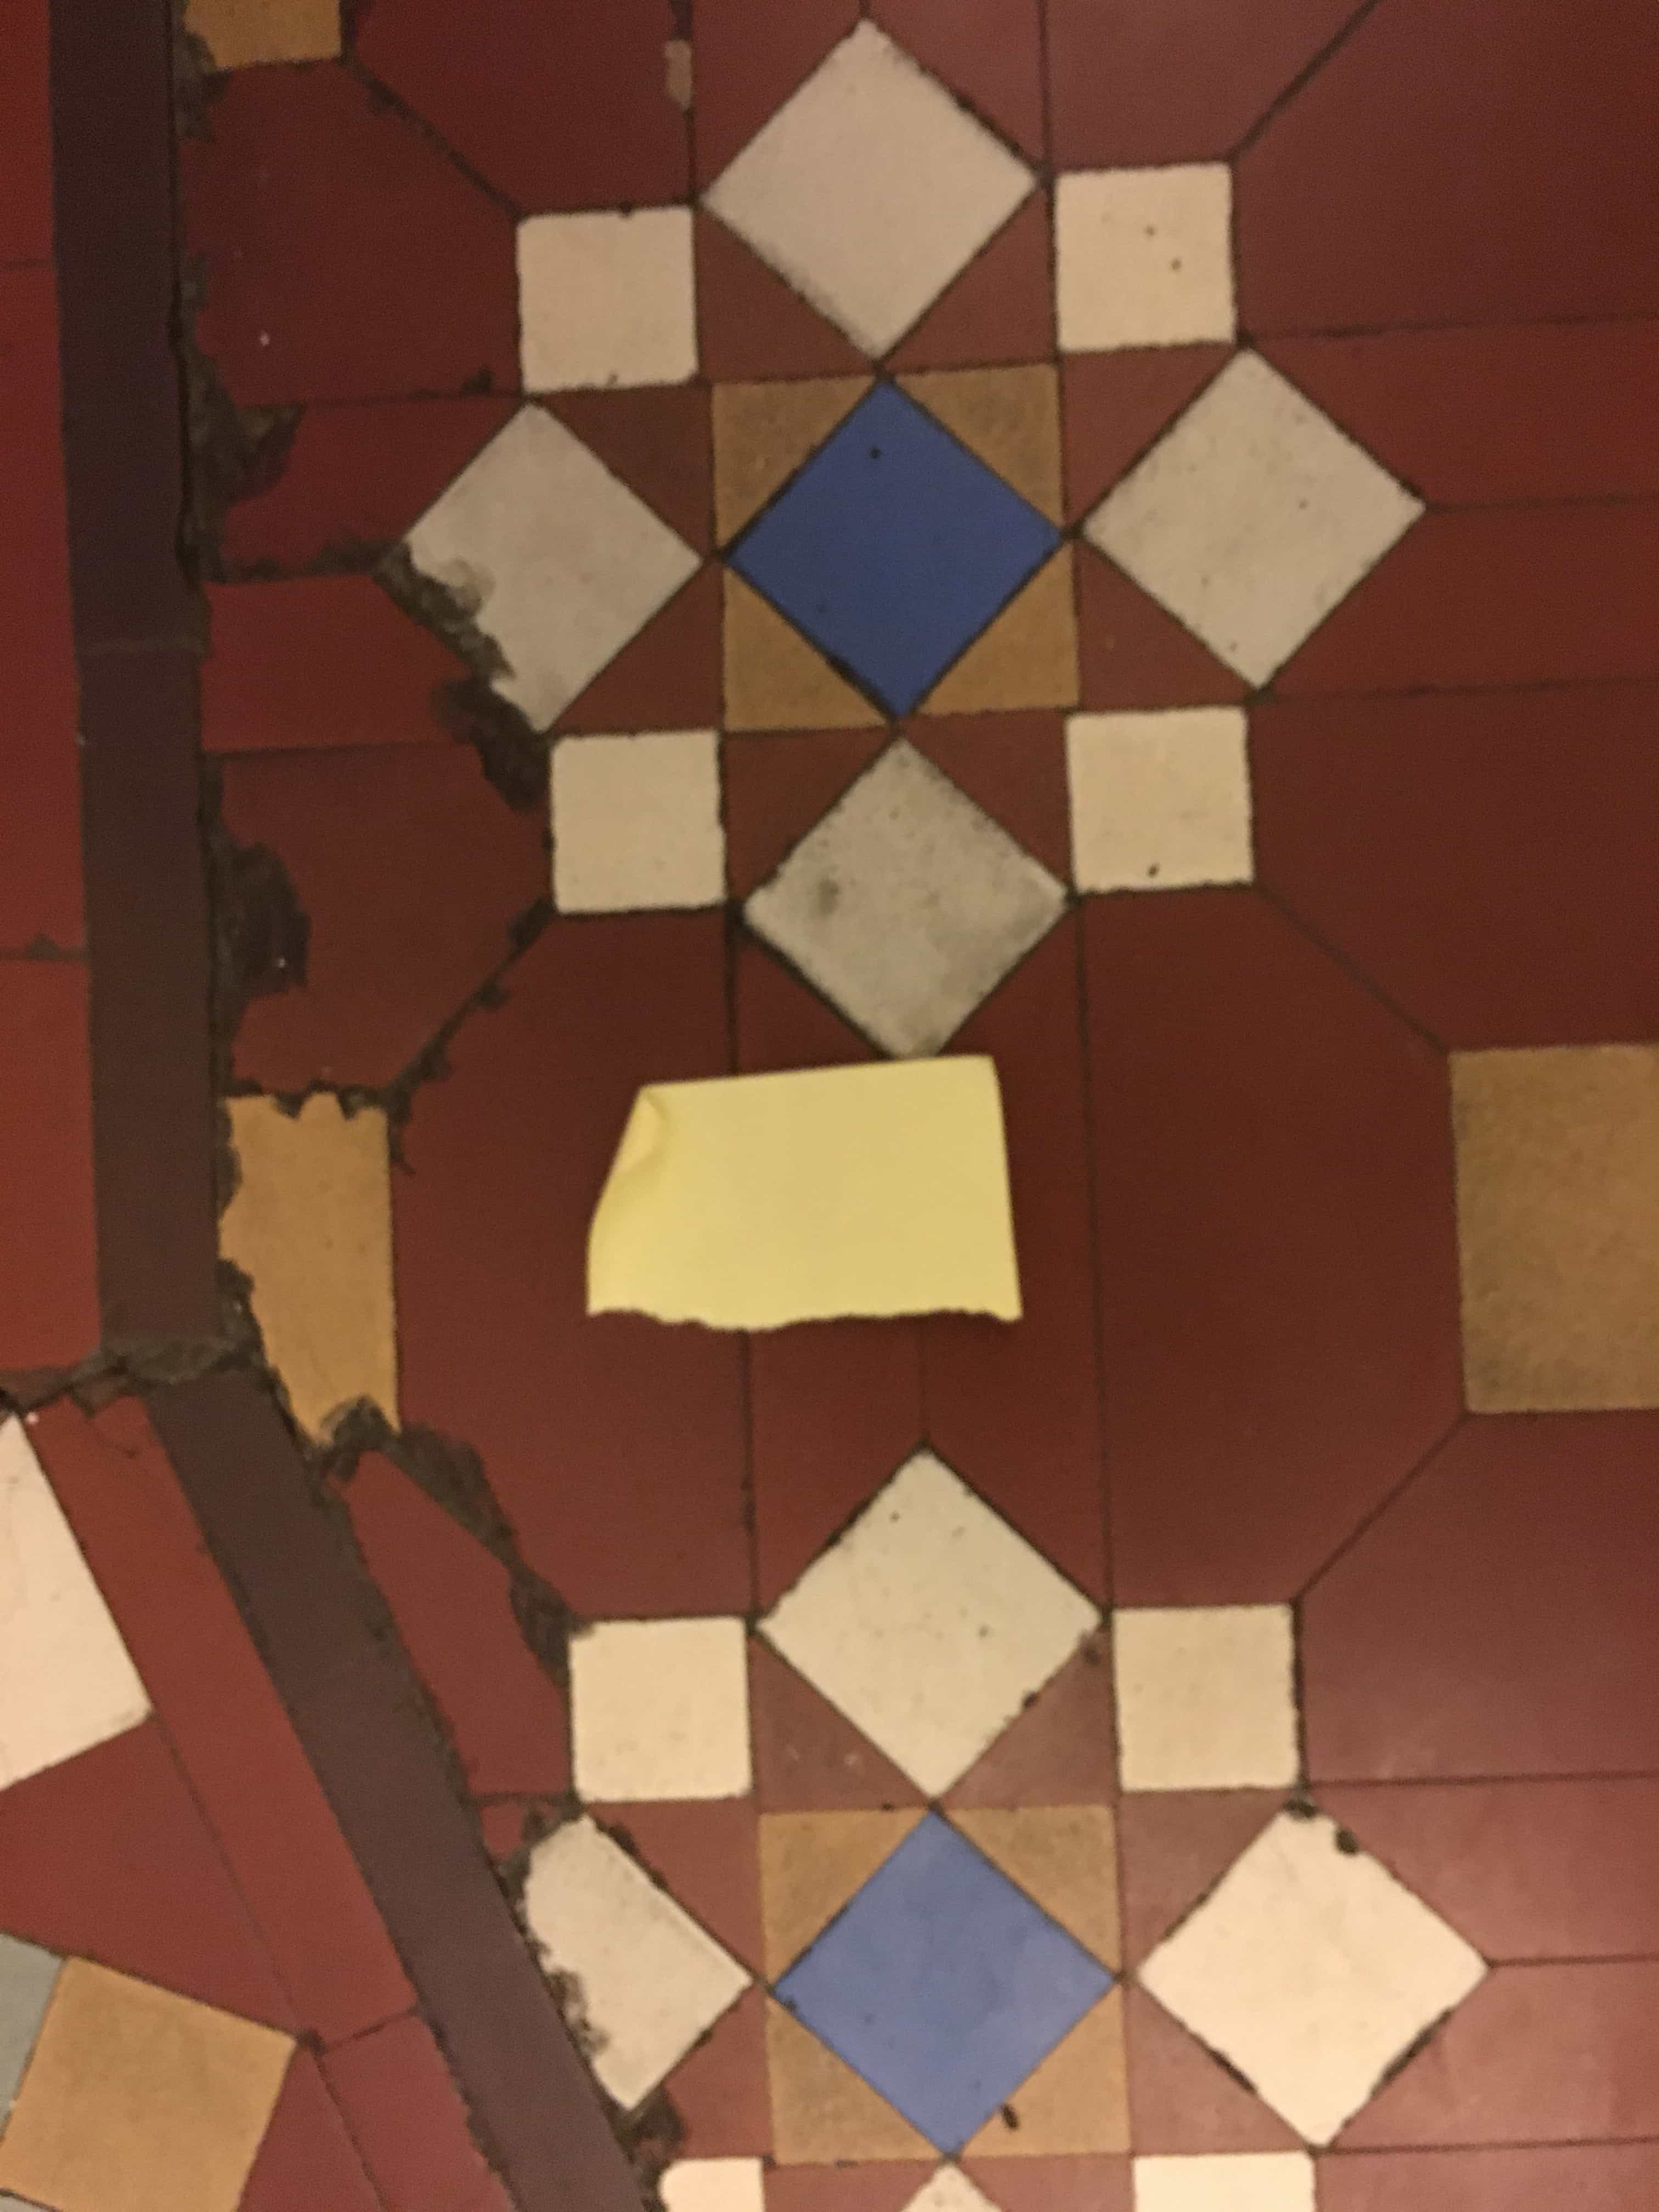
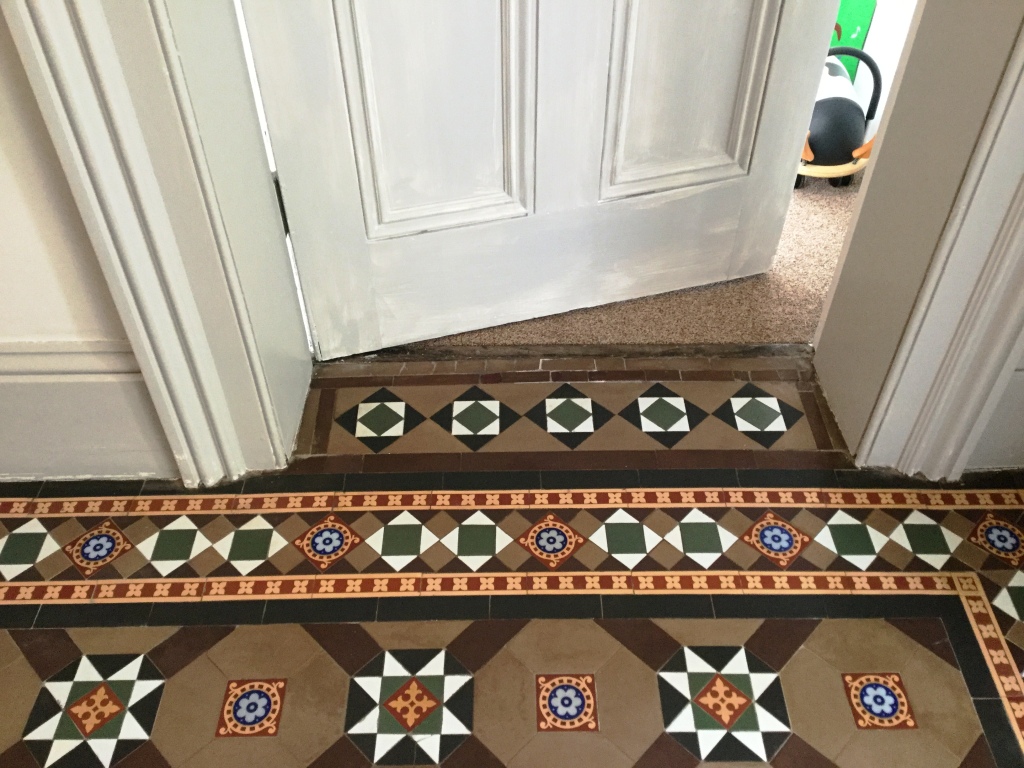
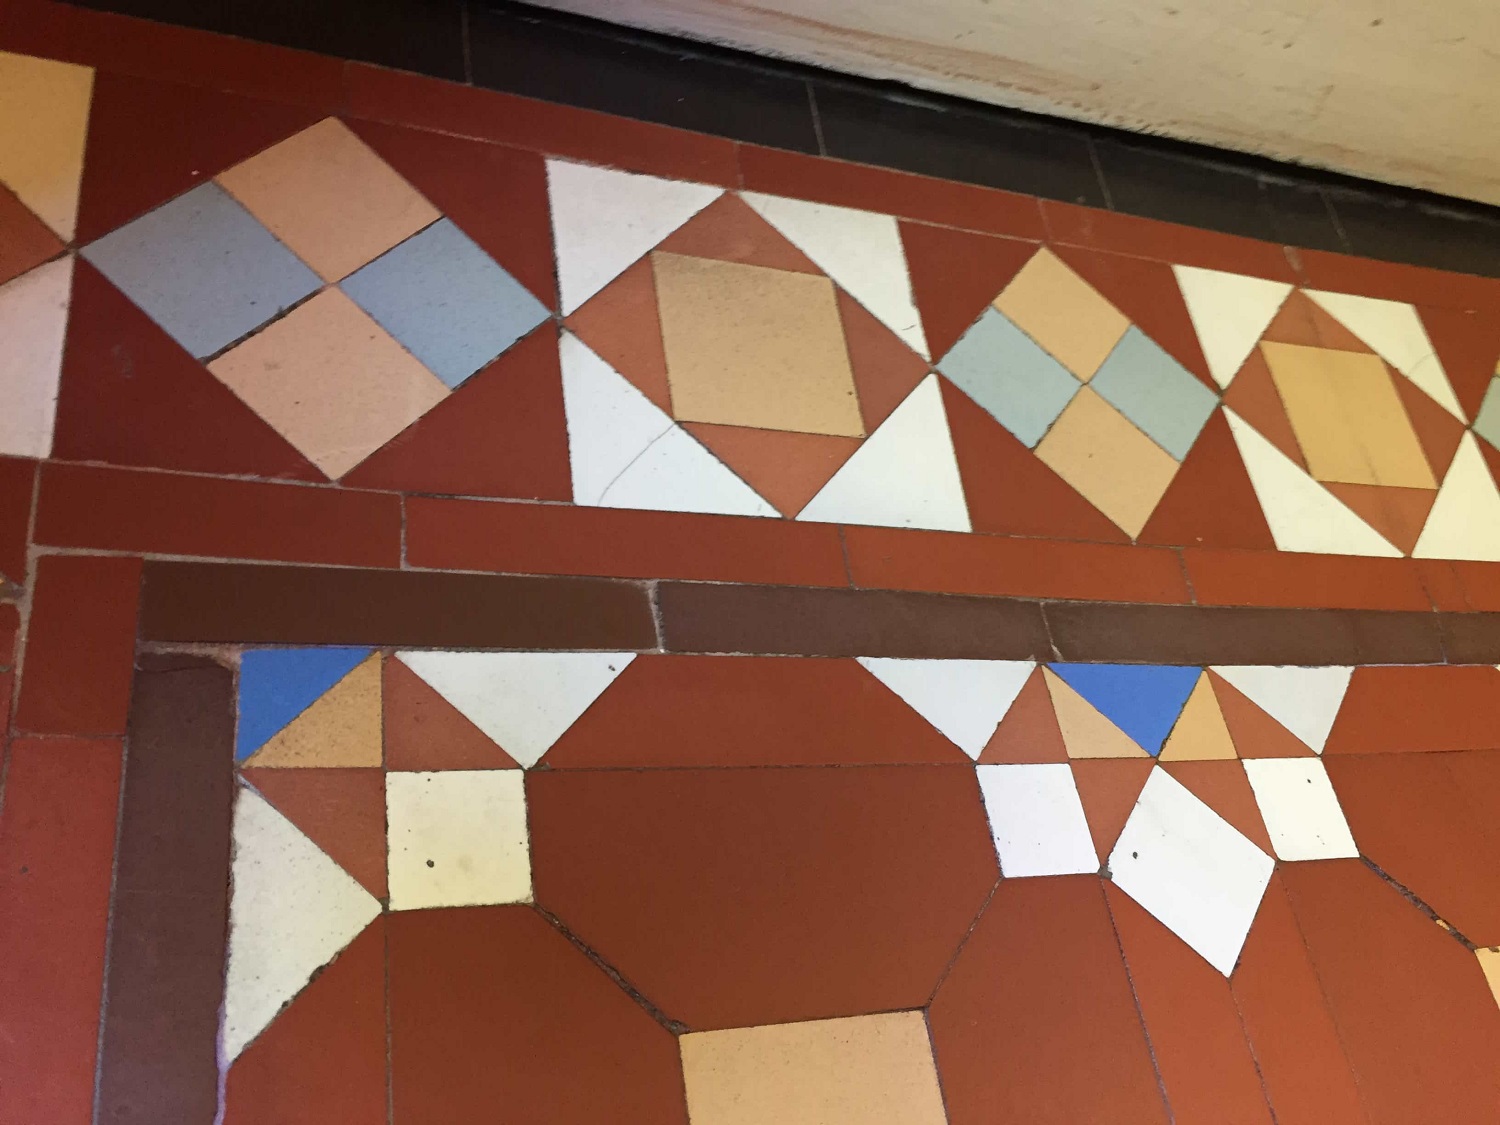
The floor had a lovely decorative tile border that ran along the perimeter of the hallway however some damage had occurred when fitting central heating pipers many years earlier. There were also small holes around the edges that I suspect were used to secure the carpet gripper. To resolve this my first task was to replace the damaged tiles and fill the small holes with grout in a matching colour. 

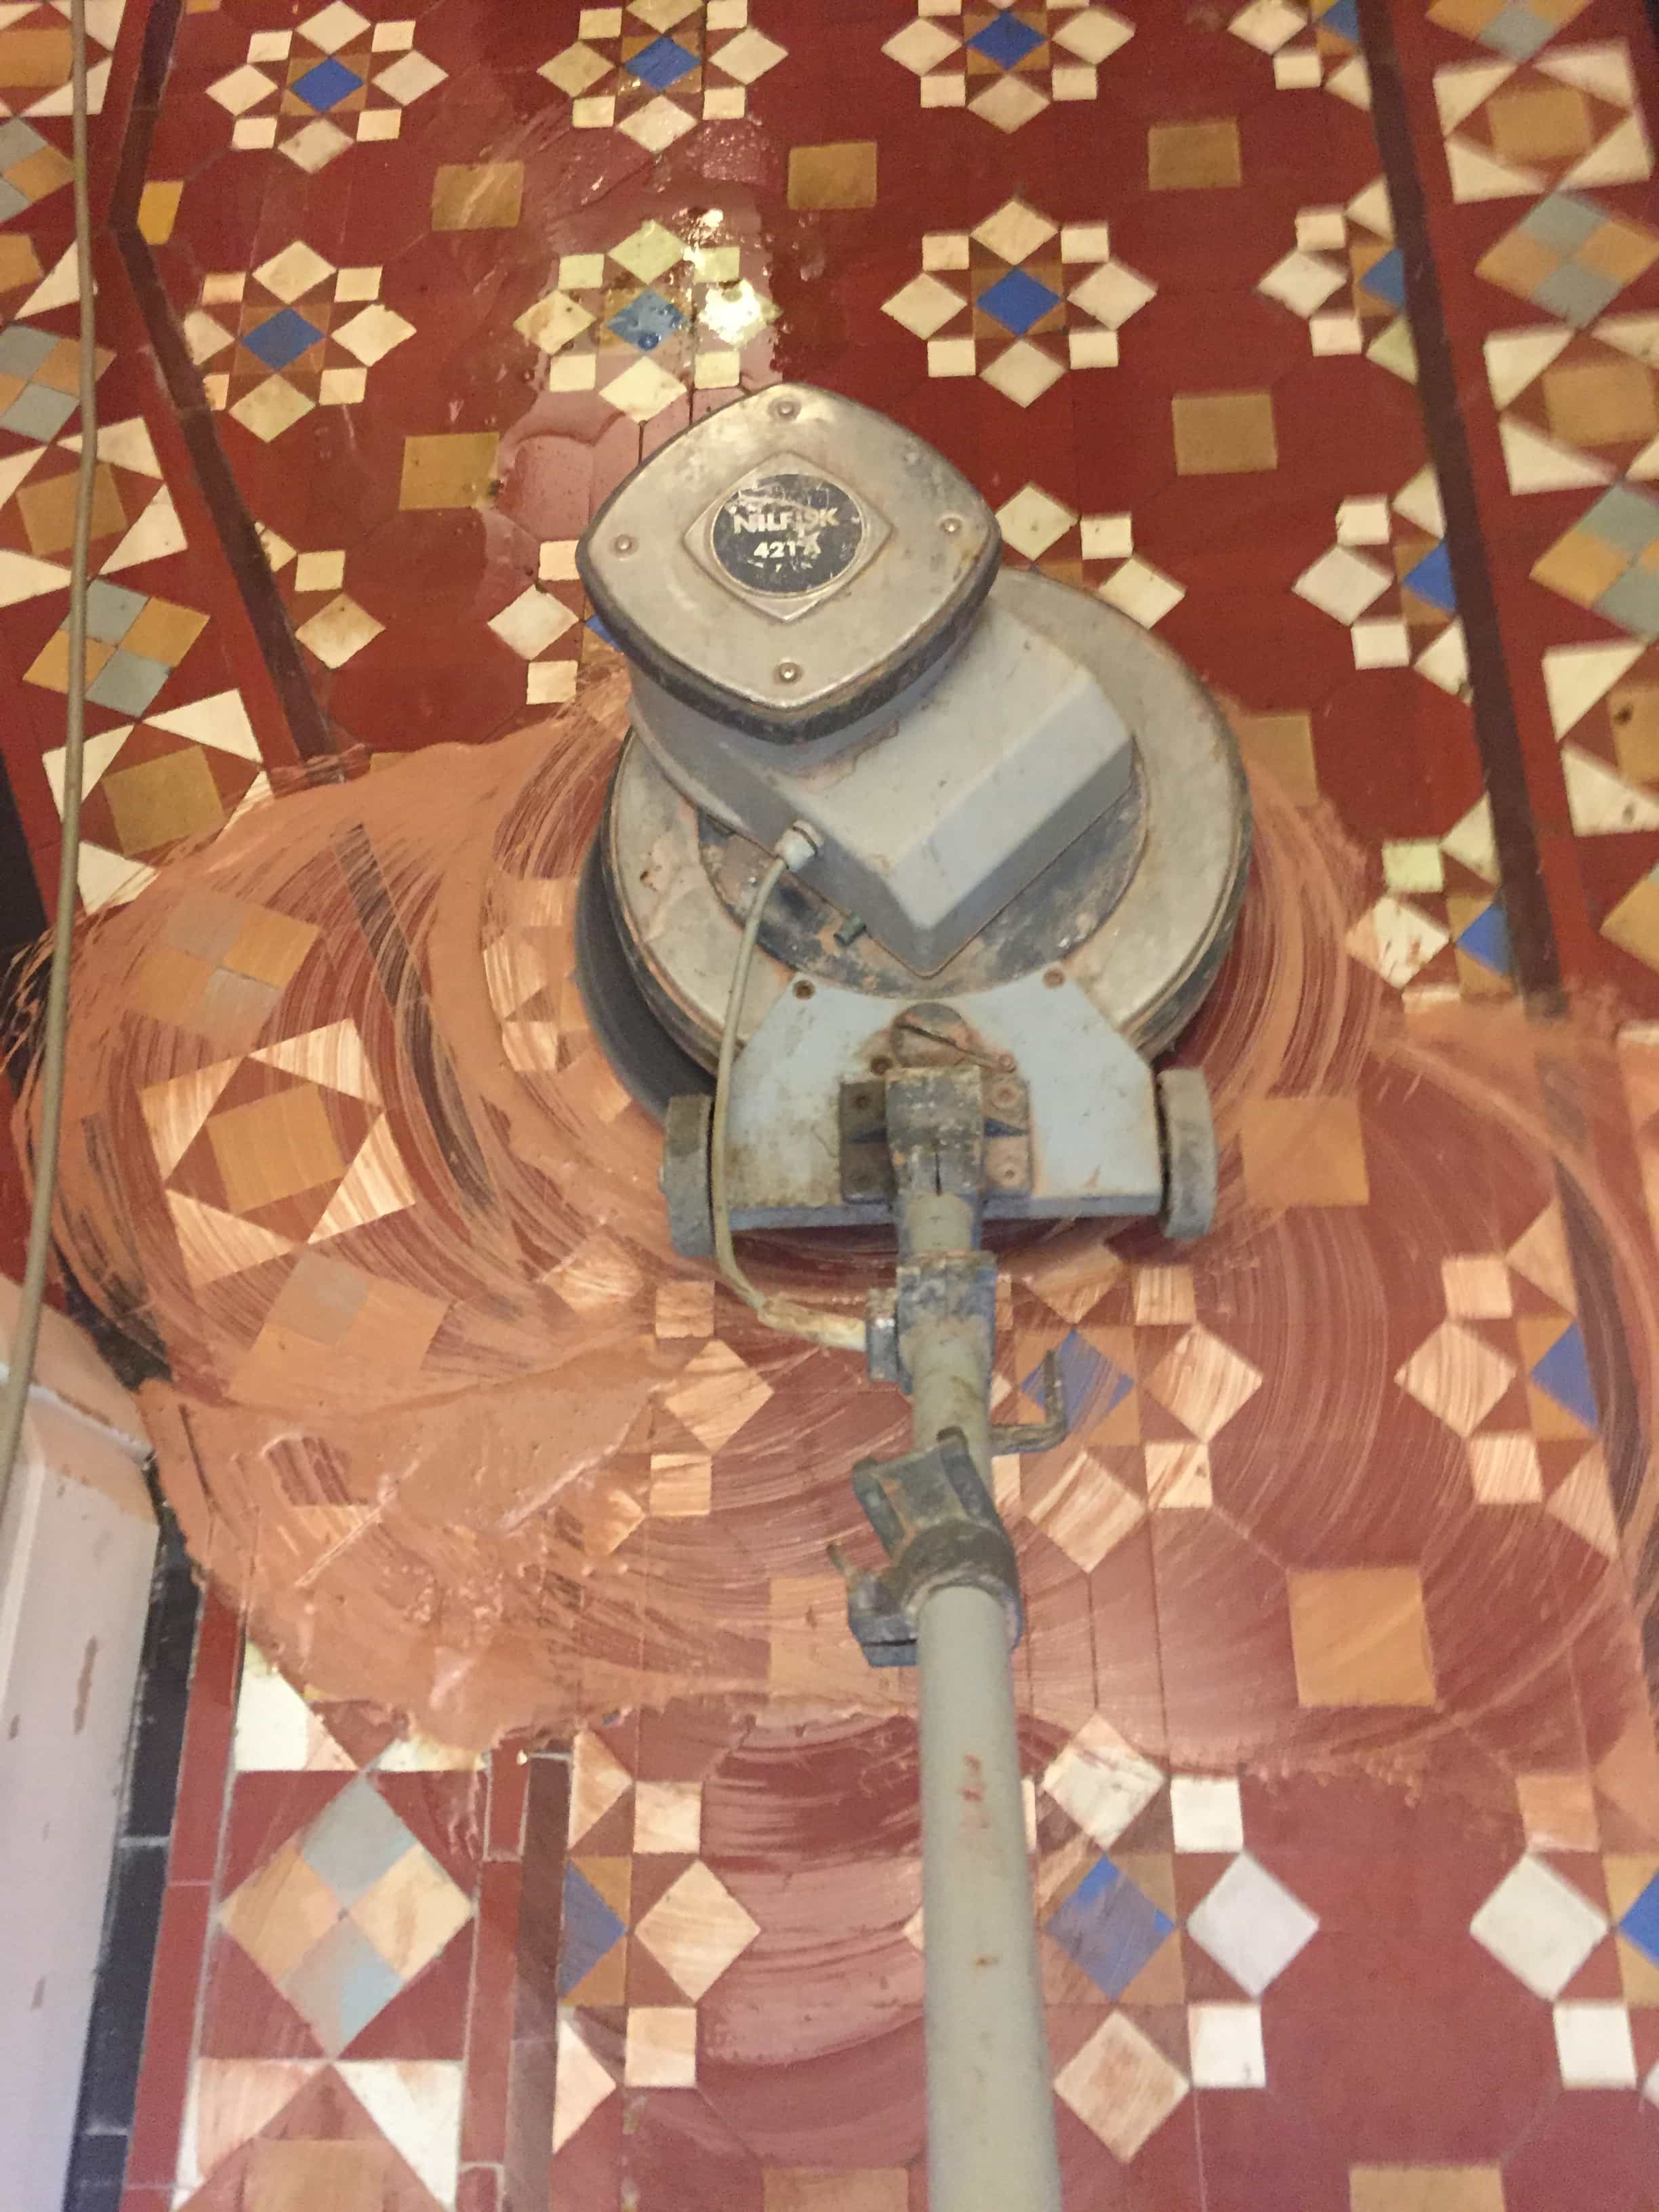
Once the repairs had set, I started the cleaning process with a coarse 200-grit Diamond pad followed by a 400-grit pad which were run over the floor using a weighed buffing machine. Only water is used during this process to add lubrication, no chemicals are needed and once done the floor is rinsed with water and the slurry removed with a wet vacuum.

The corners and edges which were are not accessible with the machine had to be done by hand, so we used small burnishing blocks for these. The Green block is great at getting the dirt off the tiles, but leaves the pores of the clay open, so this needs to be finished with the Black 100, Red 200 and Yellow 400 Diamond Block used in sequence which then matches the pores of the clay tiles in the rest of the floor.

We finished the clean, with a light acid rinse using Tile Doctor Grout Clean-up, left on the surface for no more than 5 minutes before rinsing and extracting. This process further cleans the floor and counters any potential efflorescence issues by neutralising alkaline salts in the floor. This is a common problem with old Victorian tiles which don't have a damp-proof membrane.


Sealing a Victorian Tiled Hallway Floor

The floor was left to dry out overnight and the next day I came back to inspect the floor and make sure it was dry so it could be sealed. Usually one night to dry is fine during the summer although in the winter sometimes it takes two or even three days. Sealers don’t cure well on damp floors resulting in a patchy appearance so before sealing we always check the floor is fully dry with a damp meter in several areas. Only once we are happy that the moisture readings in the floor are below a certain level do go ahead and apply a sealer.

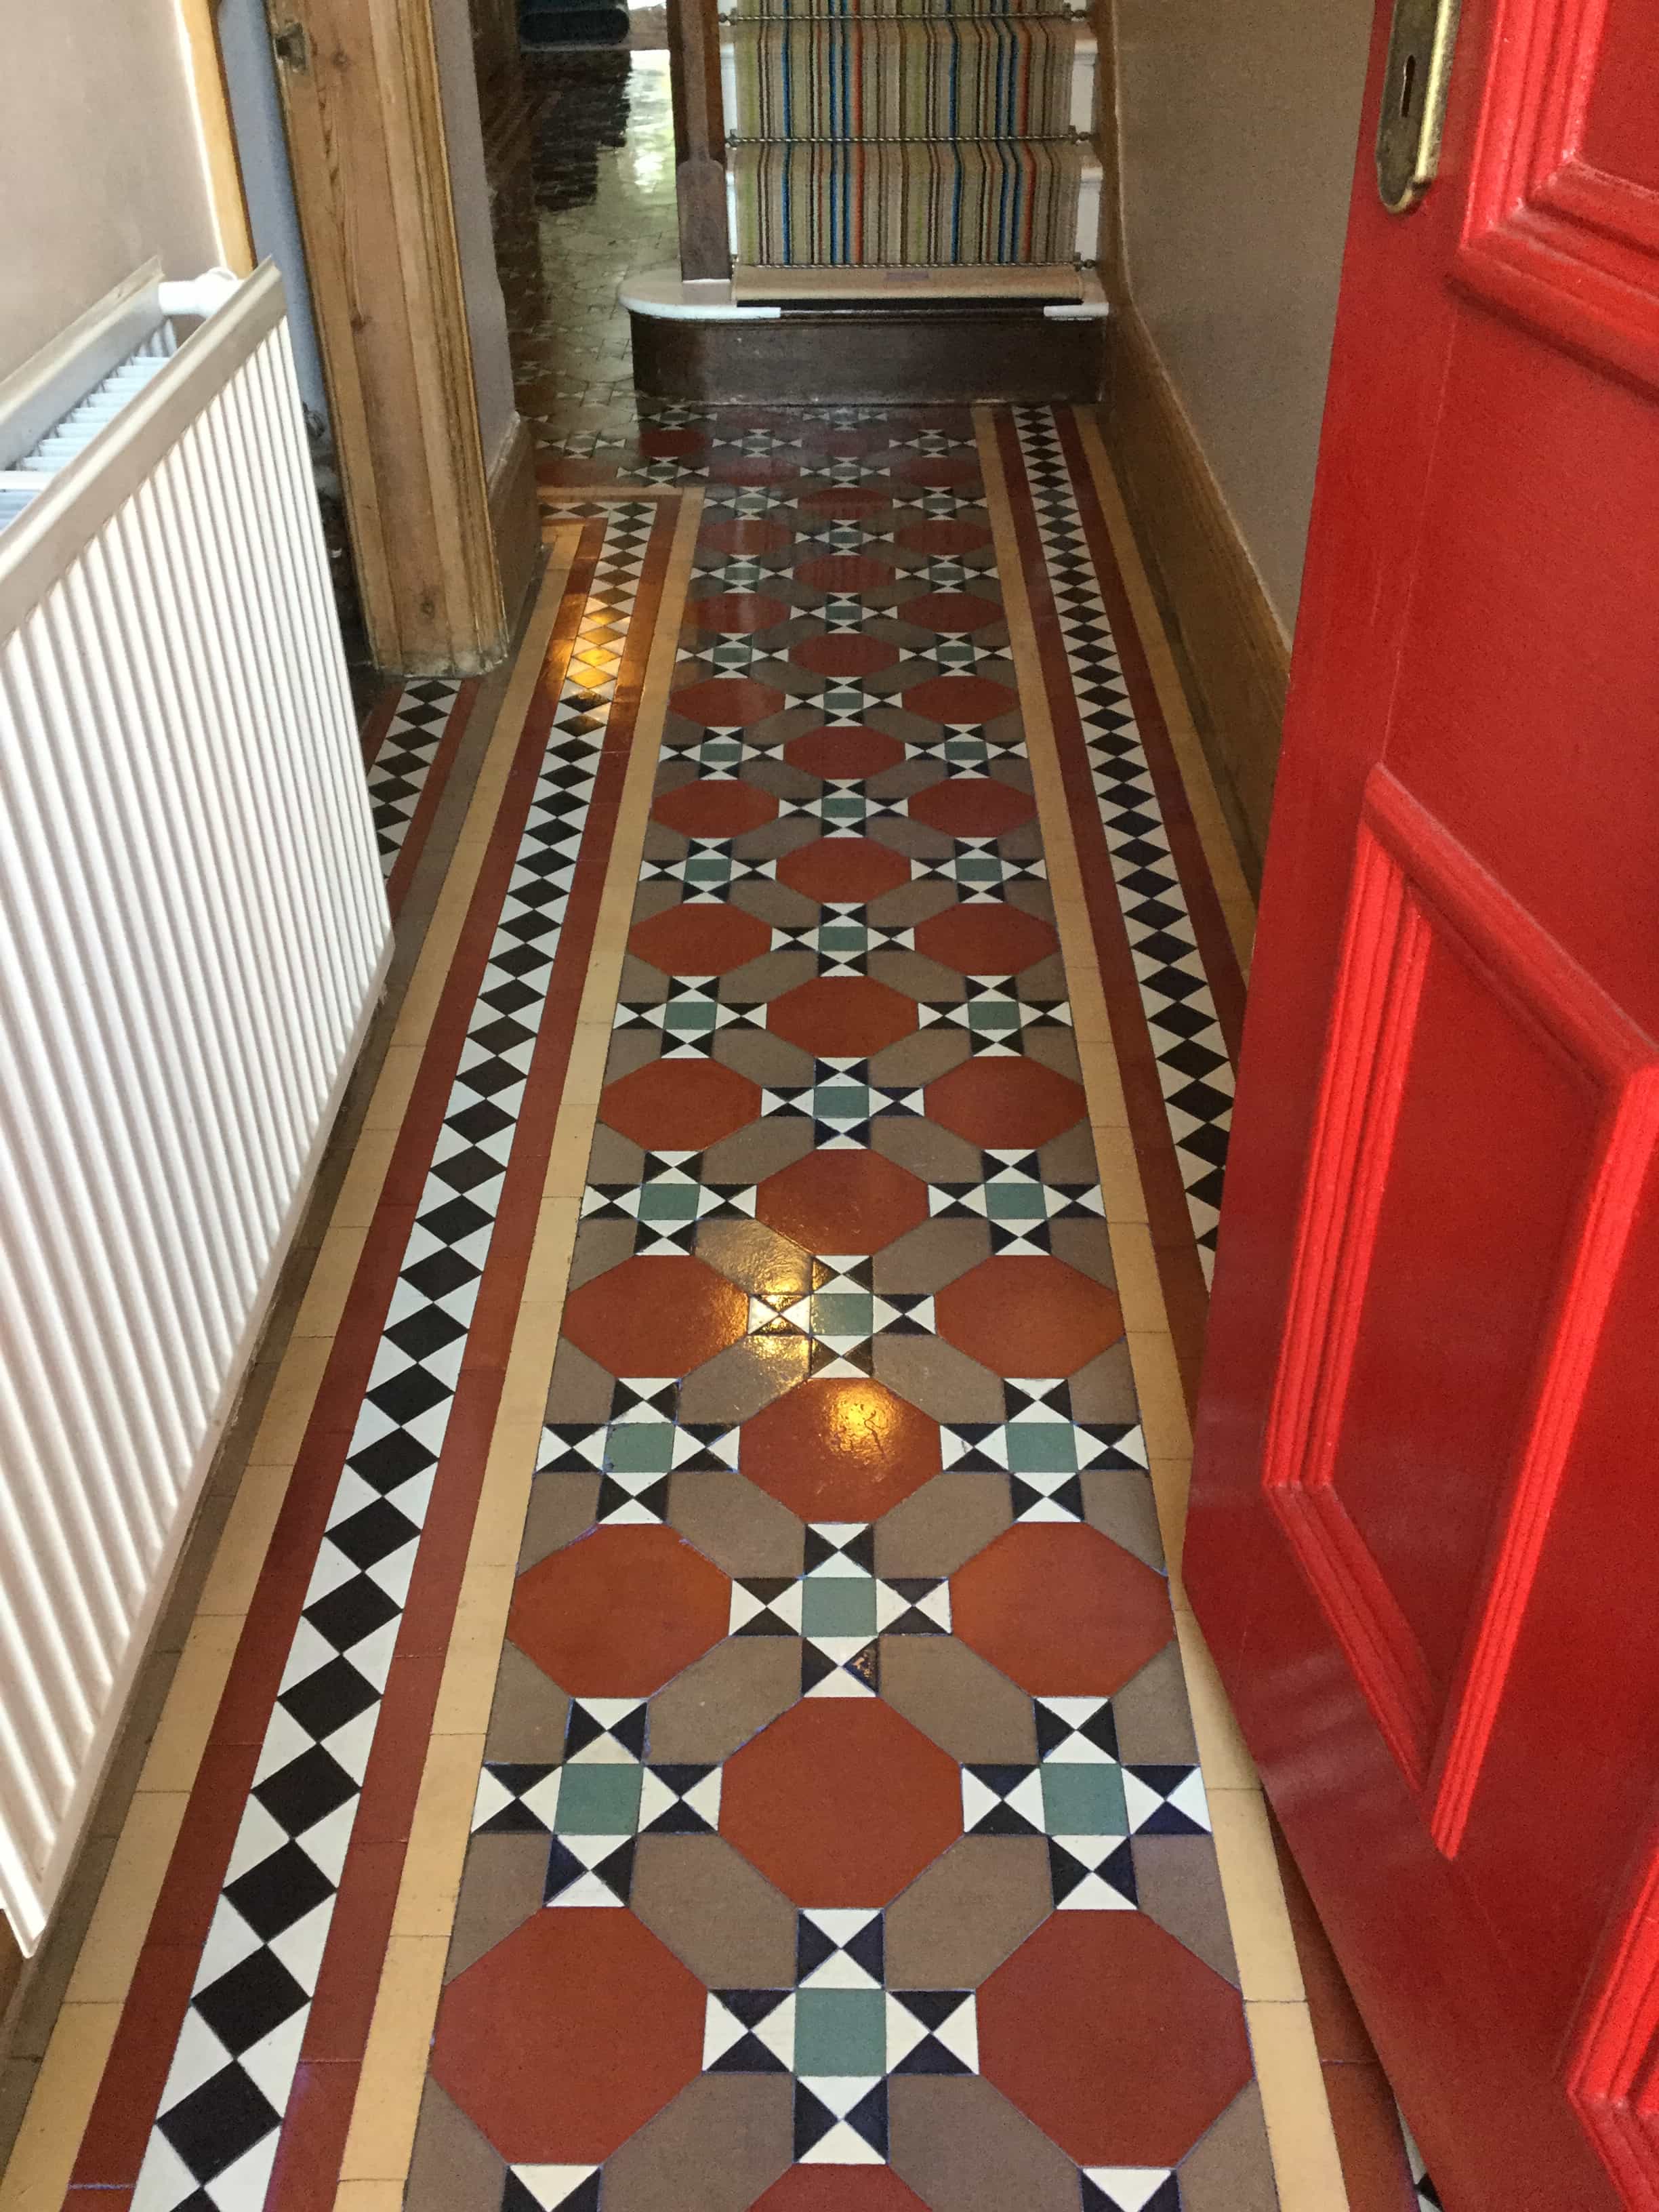
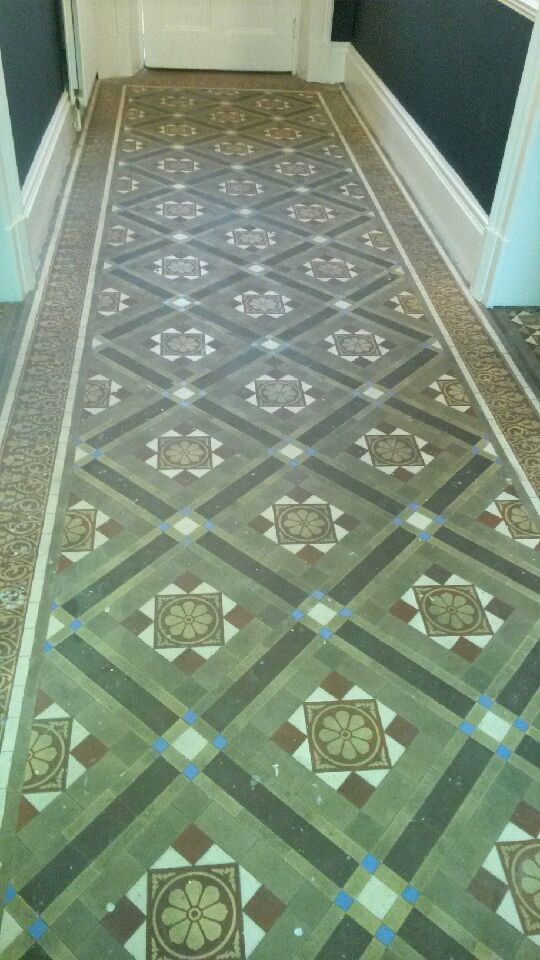
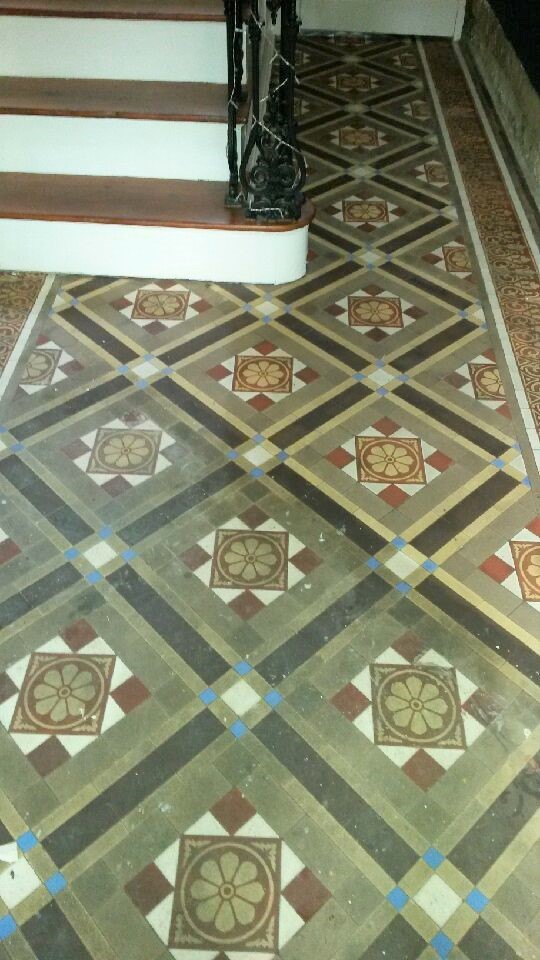
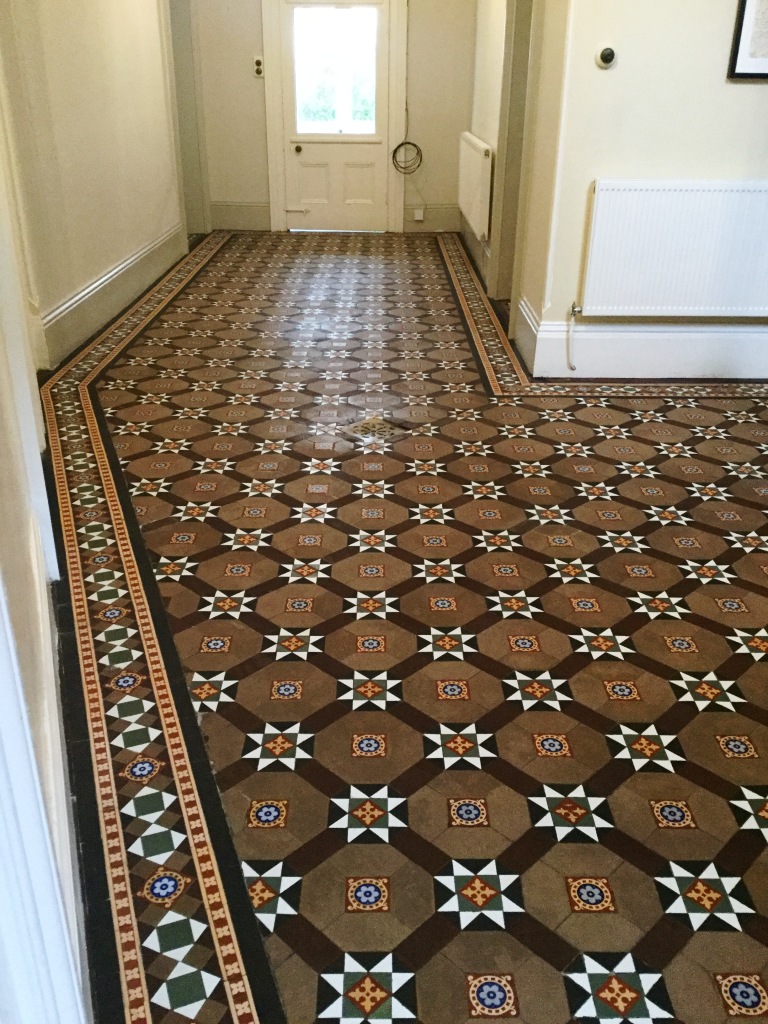
Geometric Victorian Tiled Hallway After Cleaning Sedbergh

To seal and protect the Victorian tile, a couple of coats of Tile Doctor Colour Grow were applied to the floor. Colour Grow is a fully breathable, colour enhancing sealer which ticks a lot of boxes for this type of floor as old floors don’t have a damp-proof membrane fitted. This is an important consideration as moisture will be also to rise through the tile from the subfloor and not get trapped underneath where it could spread to the walls. Other types of sealer such as acrylic, wax, polishes etc don’t last long if there is dampness in the floor. Tile Doctor Colour Grow copes well in these conditions and can be used in wet rooms, shower cubicles and external patio areas so its’s more than suitable for a slightly damp floor which is often the case with a Victorian base.

Geometric Victorian Tiled Hallway After Cleaning Sedbergh


Source: Victorian Tiled Floor Cleaning, Renovation and Sealing service in Cumbria
Thursday, May 23, 2019

Restoring the Beauty of a Victorian Tiled Hallway in Northamptonshire

I recently visited a property in Wellingborough to survey their Victorian Hallway floor and work out the best method and products to restore it. The tiles were extremely dirty as the sealant had worn off allowing dirt to become ingrained. They had not been maintained for many years and there was evidence of adhesive which was due to a carpet being stuck down at some point in the past.

Victorian Tiled Hallway Floor Wellingborough Before Restoration

To restore the Victorian floor, I would need to remove the glue and give the tiles a professional deep clean to extract the years of ground-in dirt and staining. Following this the tiles would need sealing in order to protect them going forward. After discussing the work in detail with the owner I sent over a quotation by email which was accepted, and a date arranged for work to commence.

Victorian Tiled Hallway Floor Wellingborough Before Restoration


Restorative Cleaning of Victorian Hallway Tiles

On my return I applied a cocktail of Tile Doctor Oxy-Gel and Tile Doctor Nano-Tech HBU to the tiles. This creates a strong cleaning/coatings remover that would soften the embedded soiling and glue making it easier to remove. I left this to dwell on the floor for about an hour so it could break down the soil and adhesive. I then fitted a coarse 100-grit diamond pad to a rotary floor buffer and scrubbed the floor vacuuming up the resulting residue as I went along working in small sections of 2/3 metres at a time. I then repeated the process using a 200-grit pad, rinsing and extracting afterwards with water to remove the fine slurry this process generates.

Old floors like these were laid before the invention of the damp proof membrane which can result in moisture rising through the floor as it evaporates potentially leaving alkaline salt deposits on the surface. This process is known as Efflorescence and although I minimised the use of water during the cleaning process, I was concerned that this may still present a problem later. To neutralise any alkaline salts in the floor that could cause this problem my last action for the day was give the floor an acid wash using Tile Doctor Acid Gel.

Once this was done and extracted from the floor, I followed up with a further clean using Tile Doctor pH Neutral Tile Cleaner which was applied with a microfibre cloth. I left the floor to dry off overnight so it could be sealed the next day.


Sealing Restored Victorian Hallway Tiles

On day two I used a damp meter to check the moisture levels in the floor to ensure it had dried overnight. The results were good, so I set about applying the sealer. For this floor I decided to go with three coats of Tile Doctor Colour Grow which is an impregnating sealer that as well as protecting the Victorian tiles form staining also enhances the colours in the tile. This sealer is also fully breathable so any moisture will be able to evaporate up through the tile and not get trapped under the floor where it could cause problems.

Victorian Tiled Hallway Floor Wellingborough After Restoration

Before leaving I also discussed maintenance cleaning with the customer and left them a bottle of Tile Doctor Neutral Tile Cleaner which is safe to use on sealed floors and will help keep the tiles looking at their best. It’s supplied in concentrated form so it should last them some time before they run out. The customer was very happy with the end results and has left positive comments on our website:

Very happy with the restoration of my Victorian tiled floor, cleaned, sealed and polished bringing it back to life. Phil was prompt to get back to me with any aftercare questions/queries/visits. Paula B, Wellingborough

Victorian Tiled Hallway Floor Wellingborough After Restoration


Source: Victorian Tile Cleaning, Restoration and Sealing Service in Northamptonshire

Wednesday, April 17, 2019

How to Remove Carpet Glue from Old Edwardian Floor Tiles

This customer bought an Edwardian property in Worcester and discovered a stained yet beautiful tiled period floor when removing the hallway carpet. They were delighted to find the tiles were in good physical condition but as you would expect the floor needed a thorough clean and then sealing to protect the tiles and improve the finish.

Edwardian Hallway Tiled Floor Before Clean and Seal

The property was well located, close to the city centre, River Severn and the stunning historic 12th century Worcester Cathedral. Neighbouring houses were of a similar age and it was lovely to see so many of them had retained their Edwardian tiled porchways. Naturally the new owners were keen to retain as many of the period features of the property as possible, and so over the moon to discover the original hallway.

Edwardian Hallway Tiled Floor Before Clean and Seal Edwardian Hallway Tiled Floor Before Clean and Seal

After popping round to survey the floor I discussed my plan for restoring the hallway and submitted a quote based on two days’ work. The quote was accepted, and the work was scheduled for later in the month.


Cleaning an Edwardian Tiled Hallway Floor

The first day was spent cleaning the floor, firstly removing the carpet glue which was quite heavy on the edges of the floor. I used Tile Doctor Remove and Go for this and ceramic hob scraper, sometimes the oddest tools are the best! I then sprayed more Tile Doctor Remove and Go on to the remaining tiles leaving it to dwell for ten minutes. Then working the solution into the tiles with a 200-grit diamond pad fitted to my rotary scrubber, I really started to make some progress.

The soil generated was extracted with a wet vacuum and I made a start on giving the floor an acid wash. For this I applied Tile Doctor Acid Gel and pasted it onto the floor again working the gel into the tiles. Tile Doctor Acid Gel is particularly useful for removing cement and grout smears. Also, there was some evidence of salt stains (Efflorescence), old floors like these don’t have a damp-proof membrane so it’s quite normal for moisture to rise through the tile.

I removed the slurry with a heavy duty wet and dry vacuum cleaner. Then as a final measure I used micro fibre cloths and some Tile Doctor Grout Clean-up to remove any remaining smears once the floor was clean. I left for the day allowing the floor to dry overnight and would return the following day to seal.


Sealing a Edwardian Tiled Hallway Floor

Returning the following morning, I first checked the floor with a moisture meter to ensure it had dried off fully overnight. The sealer I would use as agreed with the customer would be Tile Doctor Seal and Go Extra. This is a topical fully breathable semi-gloss sealer and would give a nice light sheen and allow the colours in the tile to shine through. This sealer is fully breathable and would cope well with the light efflorescence issues the floor had experienced in the past.

Edwardian Hallway Tiled Floor After Clean and Seal Edwardian Hallway Tiled Floor After Clean and Seal

The moisture readings were fine, so I started to apply the first coat of sealer using micro fibre cloths. After allowing the required drying time between coats I started on the second coat. Leaving the right amount of time between coats is especially important in winter when drying takes longer. The floor was treated to five coats of sealer in total and the customer was very satisfied with the finish.

Edwardian Hallway Tiled Floor After Clean and Seal


Source: Edwardian Tile Cleaning and Sealing Service in Worcester, Worcestershire

Friday, March 22, 2019

Dealing with Salt Damaged Kitchen Quarry Tiles in Droitwich-Spa, Worcestershire

I was contacted to inspect a quarry tiled floor in the kitchen of a property in Droitwich Spa which was in need of repair and also in need of a clean and seal. Having spoken to the customer previously, I was aware there were several damaged tiles that would need replacing so before visiting the property to survey the floor I sourced potential replacements from several manufacturers so I could find one that would be a good match to the originals.

Once that was done, I went over with the samples to inspect the floor and whilst I was there marked all the damaged tiles that would need lifting and replacing. The house was quite old and many of the tiles had been badly affected by salt damage at some point in the past. Given the age of the property it could have been from efflorescence or it is possible it was flood damage as the property was about 700m from the River Salwarpe which has a history of overflowing. In fact, Droitwich Spa is known for its salt deposits and became a Spa town when the salt industry started to dwindle towards the end of the 19th century.

I worked out a quote to repair the floor, then clean and seal it which was accepted, and the work scheduled.


Cleaning and Repairing a Quarry Tiled Kitchen Floor

The first job was to remove the damaged tiles from the floor using various tools to prise the tiles away from the substrate. I then used a self-leveller to level the screed. All the new tiles would need cutting so I used a Bridge Saw with a diamond blade and proceeded to cut all the tiles to shape. The replacement tiles were then fixed in place using flexible adhesive and left to dry and then grouted.

Quarry Tiled Kitchen Floor During Tile Replacement Droitwich Spa Quarry Tiled Kitchen Floor After Tile Replacement Droitwich Spa

The following day I moved onto cleaning the tiles. Tile Doctor Remove and Go was used to tackle any previous sealers. leaving the product to dwell for the required time and then working it into the floor with a rotary scrubbing machine. I then used Tile Doctor Acid Gel to remove old grout smears and combat any efflorescence the floor was encountering, before vacuuming the remaining slurry with a wet vacuum. Once I was happy the floor was as clean as it could be, I left the tiles to dry overnight so they could be sealed the following day.

Quarry Tiled Kitchen Floor During Cleaning Droitwich Spa Quarry Tiled Kitchen Floor After Repair and Cleaning Droitwich Spa


Sealing a Quarry Tiled Kitchen Floor

I returned the next day and began by using a moisture meter to ensure the floor was dry. All was well so I proceeded to seal the floor using Tile Doctor Seal and Go Extra, a semi-gloss breathable sealer that will allow moisture to rise through the tile unimpeded which was important considering its history. The floor required five coats of sealer to completely seal the floor and the customer was very pleased with the result as indicated in the feedback below:

"We are very happy with the work that Mark carried out for us. Mark was very professional and always responded quickly to any enquiries that we had. We have recommended Mark to our friends and family. Thank you. Lydia B, Droitwich Spa"
Quarry Tiled Kitchen Floor After Sealing Droitwich Spa

Source: Quarry Tile Cleaning and Repair Service in Droitwich-Spa, Worcestershire

Wednesday, February 27, 2019

Aga Cooker encouraging efflorescence problems in Goostrey, East-Cheshire

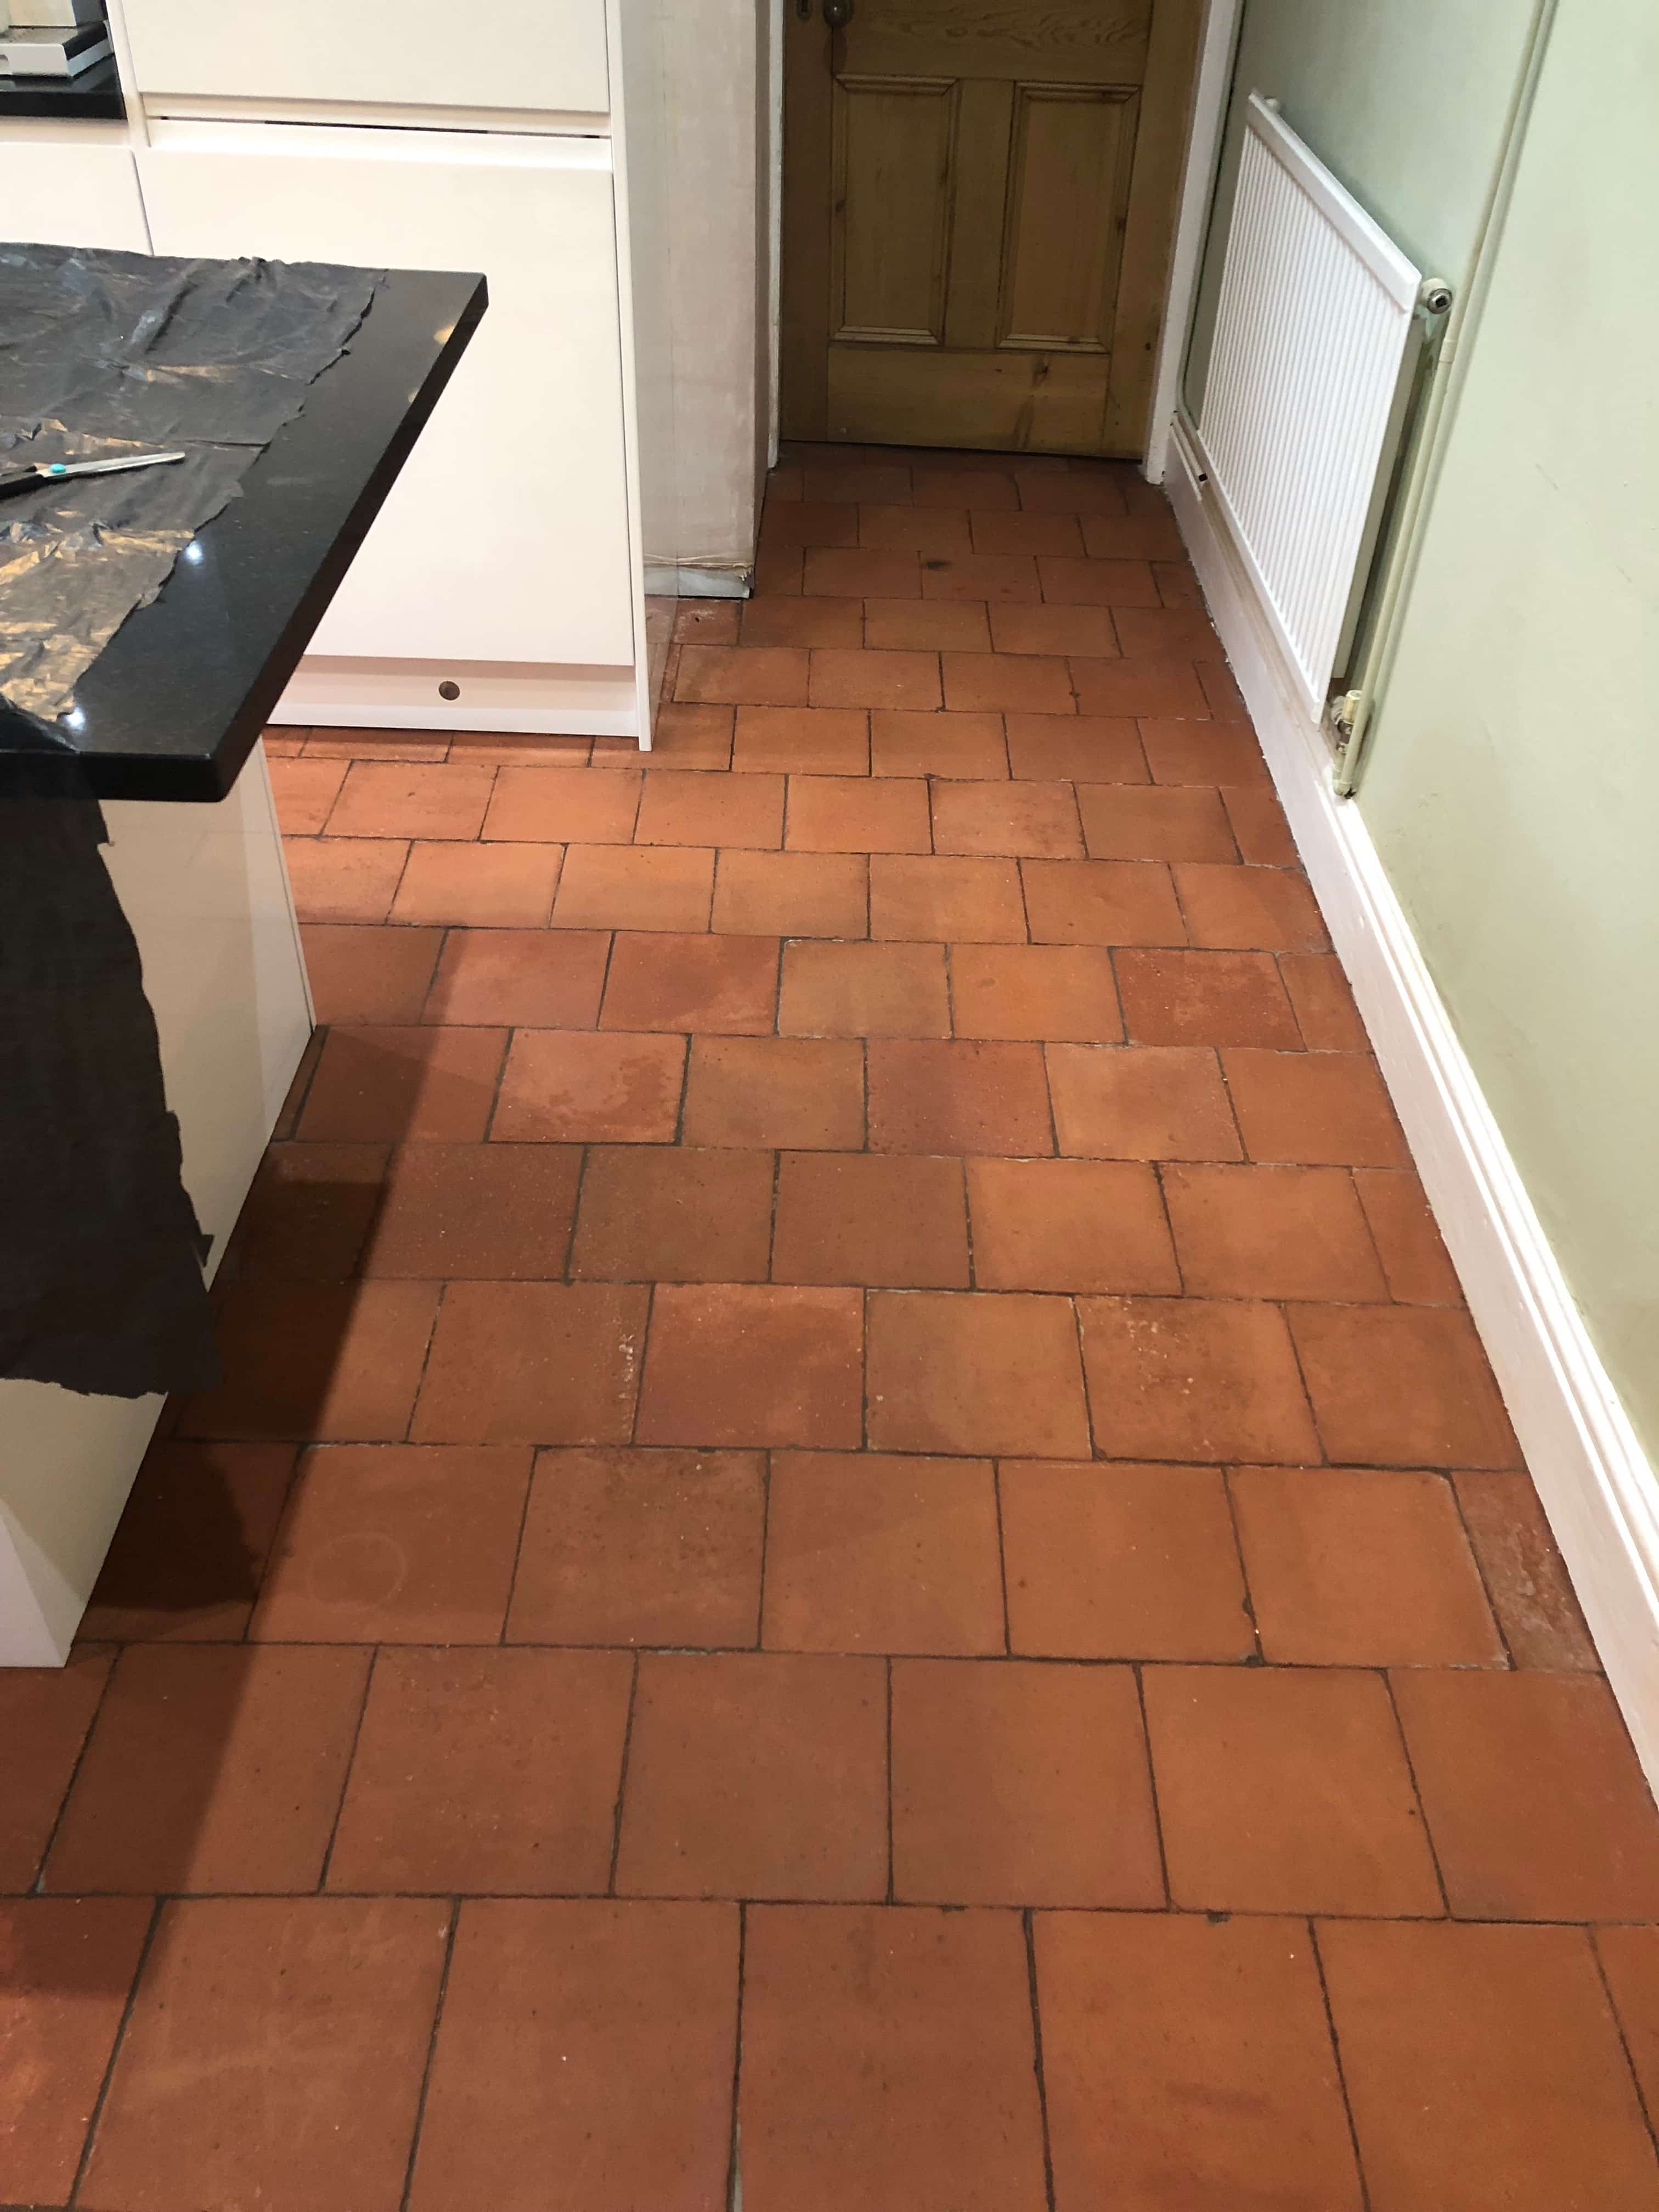
Pictured below is an old Quarry tiled floor in the Kitchen of a house in the small farming village of Goostrey. I went over to survey the floor at the request of the owner who felt it was overdue a deep clean and seal.

Quarry Tiled Kitchen Floor Before Cleaning Goostrey

It was a classic floor that suited the kitchen and its Aga well however I’m sure it could tell a story. There were patches of white efflorescent salts in front of the Aga itself and another section of floor where the tiles were a slightly darker shade. I assume some replacements were made in this section at some point in the past. Efflorescence occurs when damp in the subfloor rises through the tiles depositing white alkaline salts on the surface of the tile as the moisture evaporates. This is quite a common problem in older properties where no damp proof membrane is present under the floor and more so where you have a warm Aga heating the space and encouraging evaporation.

As per usual the floor was survey noting all the points above and then I carried out a test clean on a small part of the floor. This helps me understand what products and process I need to follow in order to renovate the floor and thereby product an accurate quote for the work. This went well and the owner was happy for us to process so we agreed a date to start the work which would take two days.


Cleaning a Quarry Tiled Floor

To clean the floor and strip off any remaining sealer I first created a strong dilution of Tile Doctor Remove and Go which was sprayed onto the tiles and then left to soak in. Remove and go is a powerful stripper and cleaner that is safe to use on tile and stone. The product is designed to loosen paint stains, adhesives and many types of urethane and wax coatings so they can be easily removed.

After thirty minutes the solution was scrubbed into the tile and grout using a weighted rotary machine fitted with a black scrubbing pad and running at a slow speed. The resulting cleaning slurry was rinsed off with water and then extracted from the floor using a wet vacuum. I repeated this process until I was confident the tiles were clean and free of old sealer.

The next step was to neutralise the alkaline salts in the floor which could later lead to efflorescence by treating it to an acid wash using Tile Doctor Acid Gel. The gel was left to soak in for five minutes before washing it off using the wet vacuum to get the floor as dry as possible.

Quarry Tiled Kitchen Floor During Cleaning Goostrey


Sealing a Quarry Tiled Floor

The floor was left to dry out overnight and the next morning I returned to the property and took some readings from the floor with a damp meter. It’s important to check the floor is dry before sealing because any excess moisture can cloud the sealer and prevent it from doing its job properly.

Once satisfied that the floor was dry, I applied a single coat of Tile Doctor Colour Grow which is a breathable impregnating sealer that enhances colour and protects from within. I left the floor to dry for one hour and then followed up with four coats of Tile Doctor Seal and Go which provides both a robust surface seal and a long-lasting low sheen finish. The new sealer transformed the tiles and gave the whole floor a uniform appearance.

Quarry Tiled Kitchen Floor After Cleaning Goostrey

The customer was very impressed with our work and asked if we can come back later to remove the white tiles in front of the Aga and replace with Quarry tiles to match the rest of the floor.

Quarry Tiled Kitchen Floor After Cleaning Goostrey


Source: Quarry Tile Cleaning and Sealing Service in Goostrey, East Cheshire

Thursday, January 24, 2019

Resurfacing a Flagstone Kitchen Floor in Broadbottom, Greater Manchester

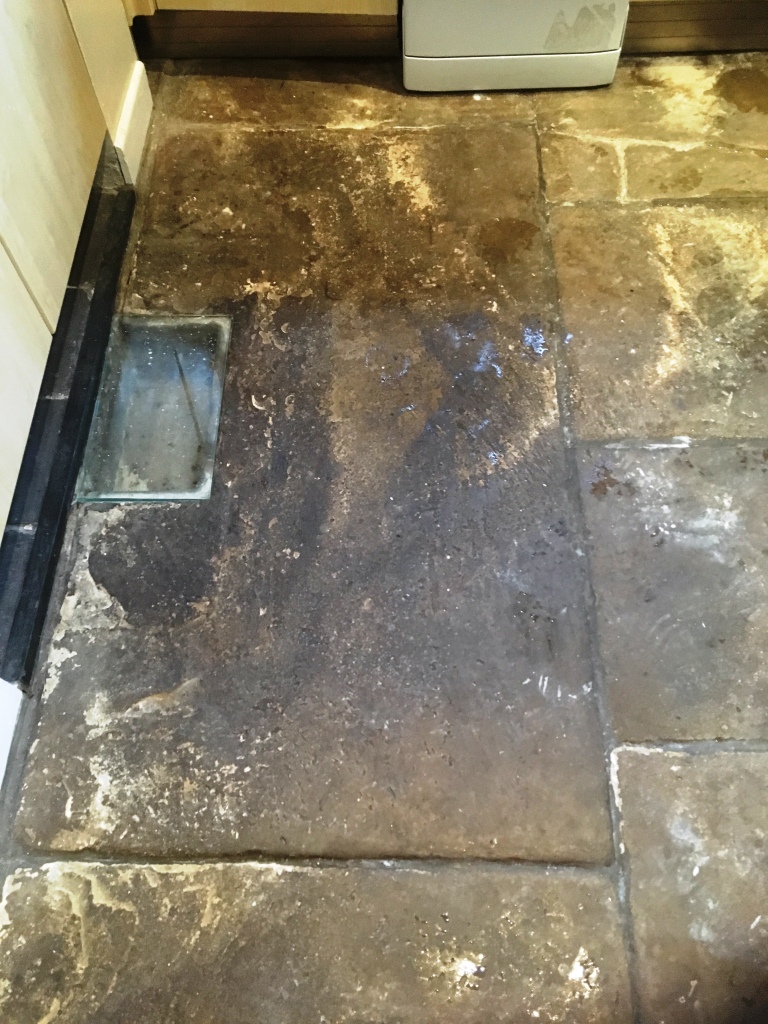
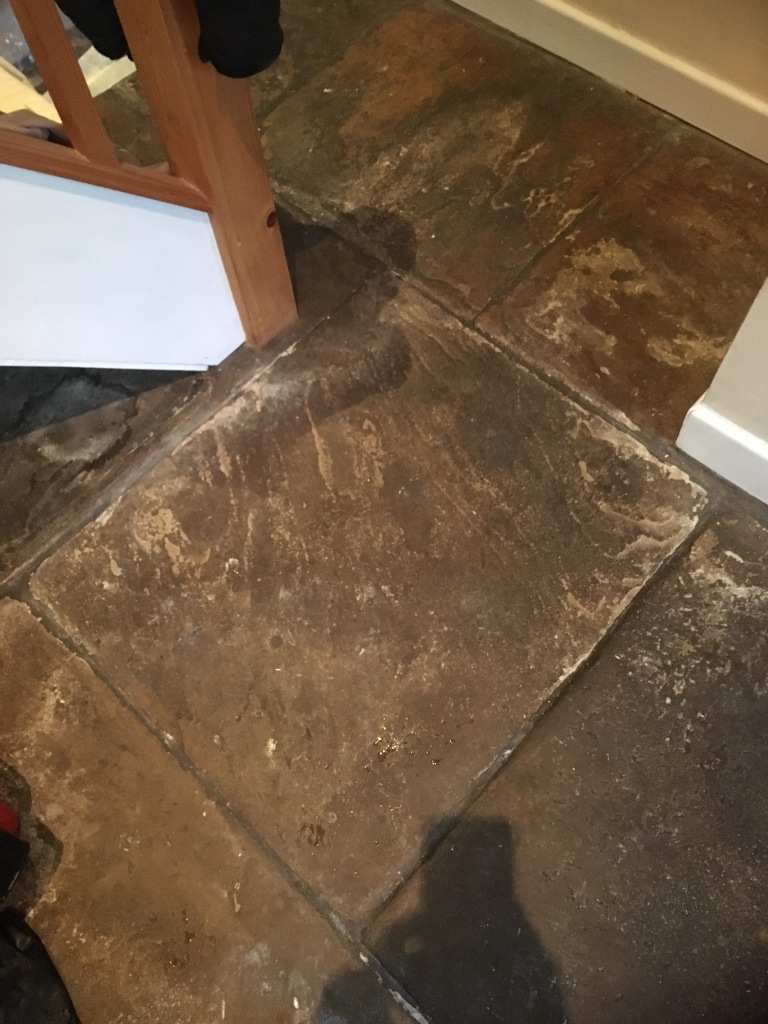
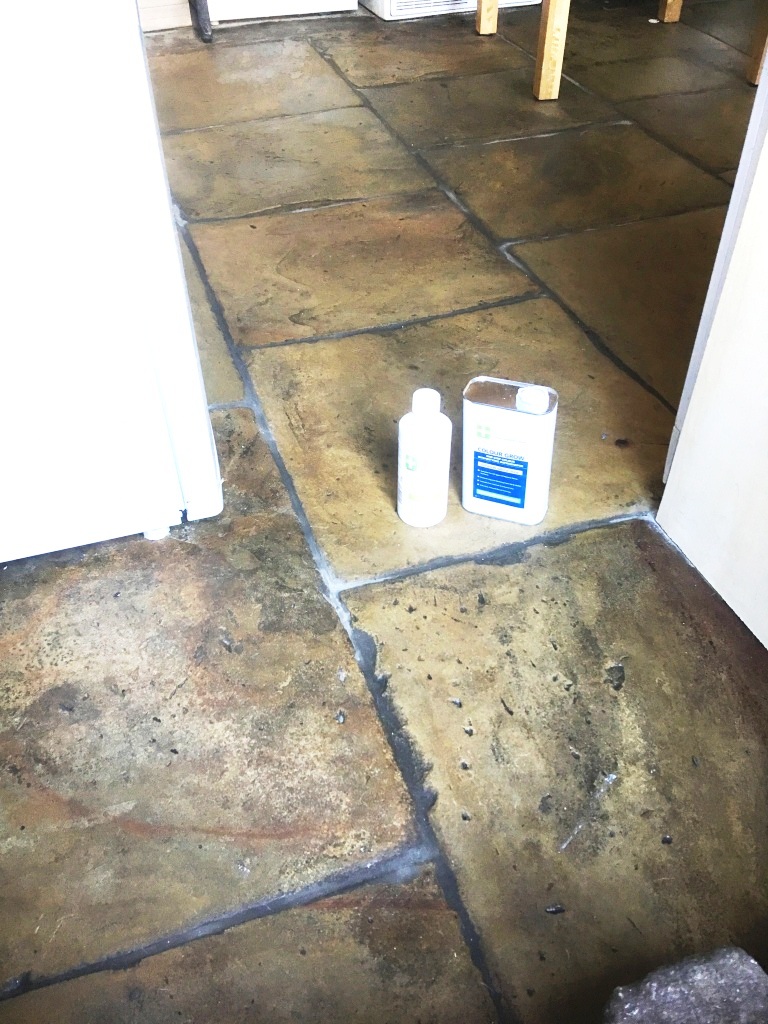
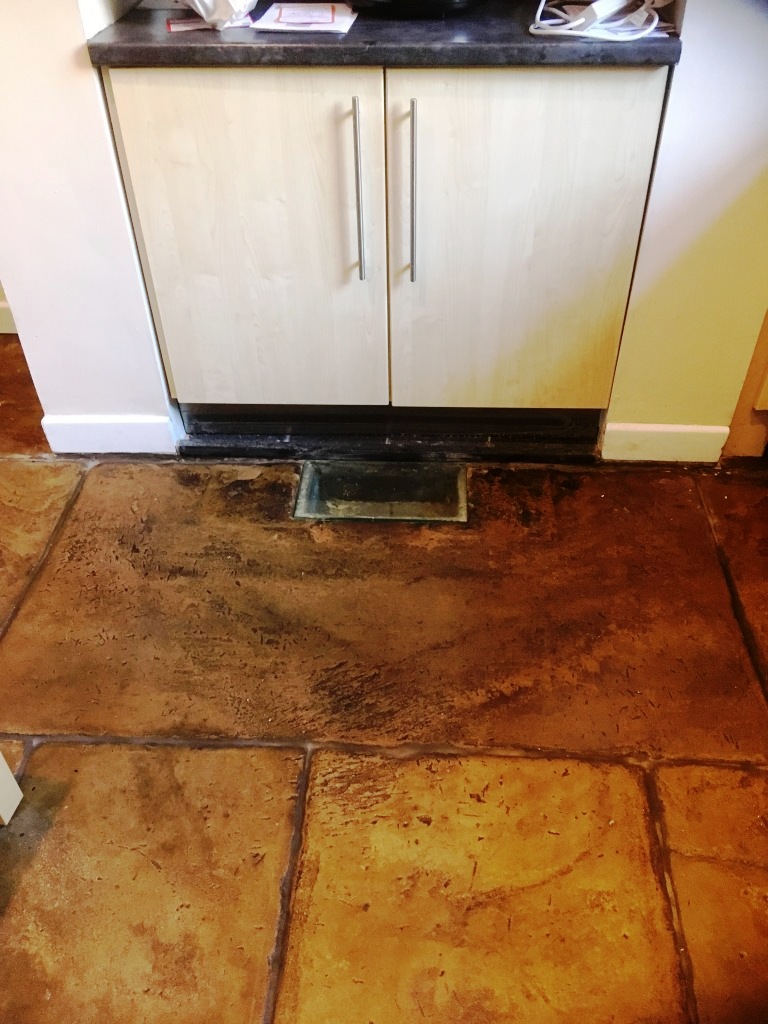
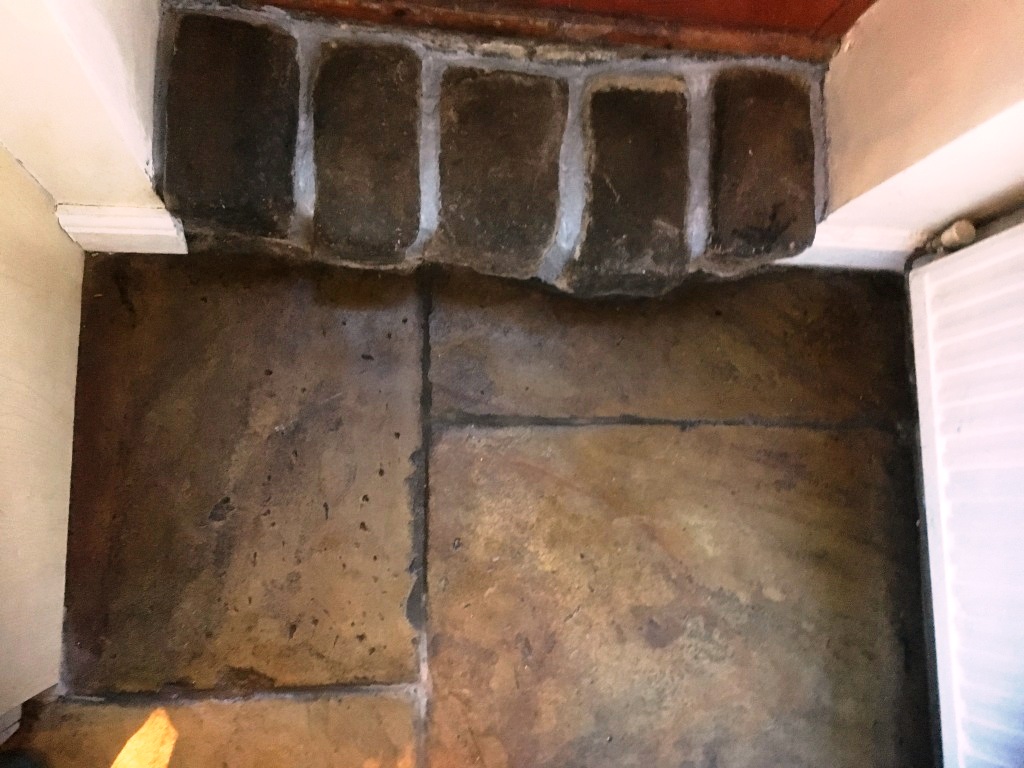
The new owners of this lovely terraced house in the village of Broadbottom that was built circa 1900, inherited with it a lovely old flagstone floor in the Kitchen which was now in a rather bad state with ingrained dirt and stains.

Old Flagstone Floor Before Cleaning Broadbottom

I suspected that the White staining was due to alkaline salts, a problem more commonly known as efflorescence. However, I took a moisture reading of the floor with a damp meter and the readings were normal, so it may have been a historic damp problem that cause it. We are always wary of efflorescence issues when it comes to older properties as damp proof membranes which resolve this problem are a relatively modern invention.

Old Flagstone Floor Before Cleaning Broadbottom

After explaining the process, I worked out a quote which was accepted and booked a date in the diary for the work to commence, which would take place over two days.


Cleaning and Grouting a Flagstone Kitchen Floor

First the floor was in a terrible state and needed to be resurfaced if it was going to live up to its potential. To do this I used a 100 followed by a 200-grit coarse Diamond milling pads to grind off the top layer of ground in dirt, resurface the stone and reveal the beautiful stone beneath. These abrasive pads are run over the floor with a weighted floor buffer running on a nice slow speed and lubricated with water. The floor is rinsed with more water after each pad and then the soil extracted using a wet vacuum.

As the floor had quite a few areas where the grout had cracked and crumbled, I decided to rake this out and replaced it with a flexible grout using a colour sympathetic to the original. This and the milling made an immediate improvement to the overall appearance of the floor. The floor was then left to dry off overnight and I came back the next day to apply a sealer.


Sealing a Flagstone Tiled Kitchen Floor

The next day I checked the floors moisture level before sealing, all was well, so I applied a couple of coats of Tile Doctor Colour Grow. This is an impregnating sealer that has a matt finish. Tile Doctor Colour Grow is also fully breathable so should cope well with any damp issues and allow moisture to rise through the stone and evaporate. This is important as otherwise moisture could become trapped under the floor where it could eventually cause problems in the walls.

Old Flagstone Floor After Sealing Broadbottom Old Flagstone Floor After Sealing Broadbottom

The customers were delighted with the outcome, the colour of the stone had really improved also Milling the surface of the floor makes it smoother so it would now be much easier for them to keep clean in future.

Old Flagstone Floor After Sealing Broadbottom

For aftercare I left them with a bottle of concentrated Tile Doctor Neutral Tile Cleaner which once diluted is a pH neutral product that will not erode the newly applied sealer. Many household cleaners are too strong for sealed floor and will prematurely erode the sealer over time.


Source: Flagstone Floor Cleaning and Sealing Service in Broadbottom, Greater Manchester

Sunday, December 16, 2018

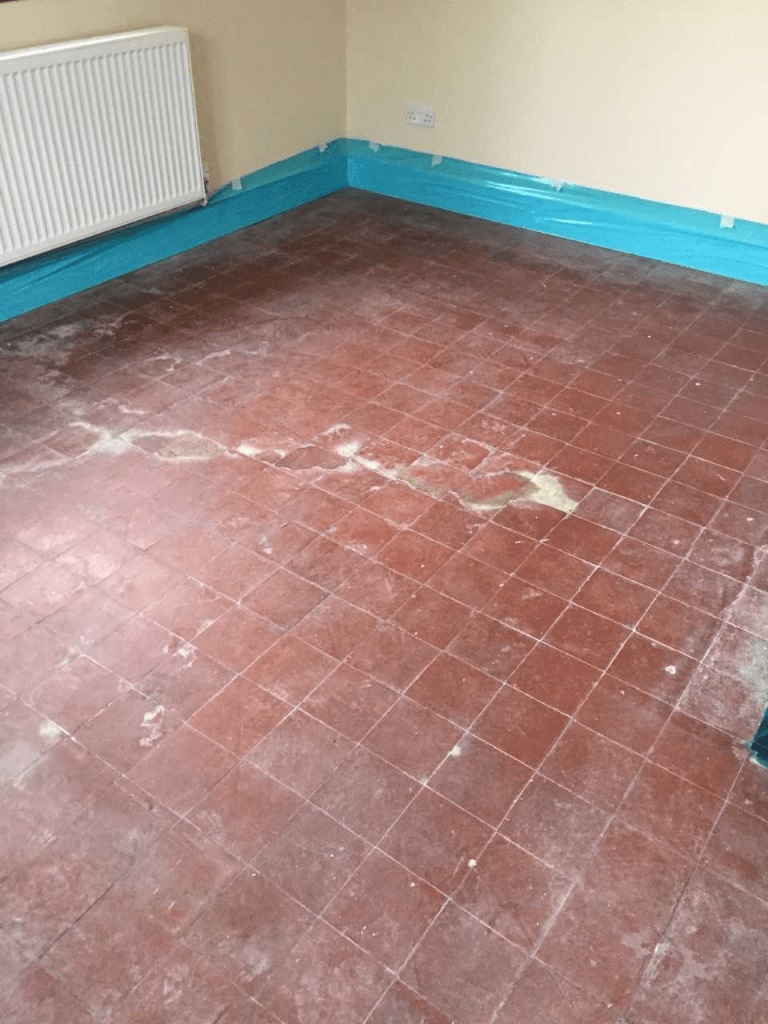
Renovating a Salt Stained Quarry Tiled Floor in Cambridgeshire

We were called out to quote for restoring this Quarry tiled living room & hallway for a building contractor in the local area of Wicken. This is a small village on the edge of The Fens near Soham in East Cambridgeshire.

The works needed to be completed at short notice as the property was due to be put up for rent, so I agreed to work over two evenings to make sure it was ready for the first tenant. We discussed the cost and the process, and the contractor was happy to go ahead. We can always be flexible with our diary to help out our clients.

Quarry Tiled Floor With Salt Staining Wicken Before Cleaning Quarry Tiled Floor With Salt Staining Wicken Before Cleaning

The floor had signs of alkaline salt efflorescence which had left white patches on the tiles, this problem is usually indicative of a damp issue but when I went over to survey the floor, I checked with a damp meter and couldn't find any evidence of dampness. Clearly something had happened in the past and as the floor dried out it left these white salt deposits on the surface.

Cleaning a Quarry Tiled Living Room and Hallway Floor

To remove the salt stains the floor was given an Acid Wash several times with Tile Doctor Grout Clean-Up worked in with a stiff brush pad fitted to a rotary machine. The acid in the product counters and removes the alkaline salts, it also cleans up the tiles of any other mineral deposits such as old grout smears. The floor was then rinsed with water to remove the now soiled solution and then extracted using a wet vacuum.

Once I was happy that the salts had been removed, we applied Tile Doctor Remove and Go to strip the quarry tiles of old sealers. This is a non-flammable, multi-purpose stripper which is safe to use on tiles and works best when left to soak into the tile for ten minutes first. This product also draws out ingrained stains and removes heavy grease build-up and any ingrained dirt. We used the rotary machine again fitted with the stiff brush as before to get the floor nice and clean. As before the floor was rinsed with water and the soils extracted using the wet vacuum.

The floor was then left to dry overnight in preparation for the sealant to be applied.

Sealing a Quarry Tiled Living Room and Hallway Floor

Upon arriving the following evening, the floor was checked again with the damp meter to make sure it was dry, all was well, so it was then sealed with multiple coats of Tile Doctor Seal & Go. This provides both a stain resistant surface seal and a durable low-sheen. The sealer brought back the deep colour in the tile and made a huge difference to the look of the floor. It would also make the floor much easier for the new tenant to maintain going forward.

You can see from the pictures the transformation that was achieved. The client was very happy with the completed work and was satisfied he would now be able to rent the property out to his next tenant.

Quarry Tiled Floor Wicken After Cleaning Quarry Tiled Floor Wicken After Cleaning


Source: Quarry Tile Cleaning and Renovation Service in Cambridgeshire

Wednesday, October 24, 2018

Renovating Old Victorian Hallway Tiles in Cleckheaton, West Yorkshire

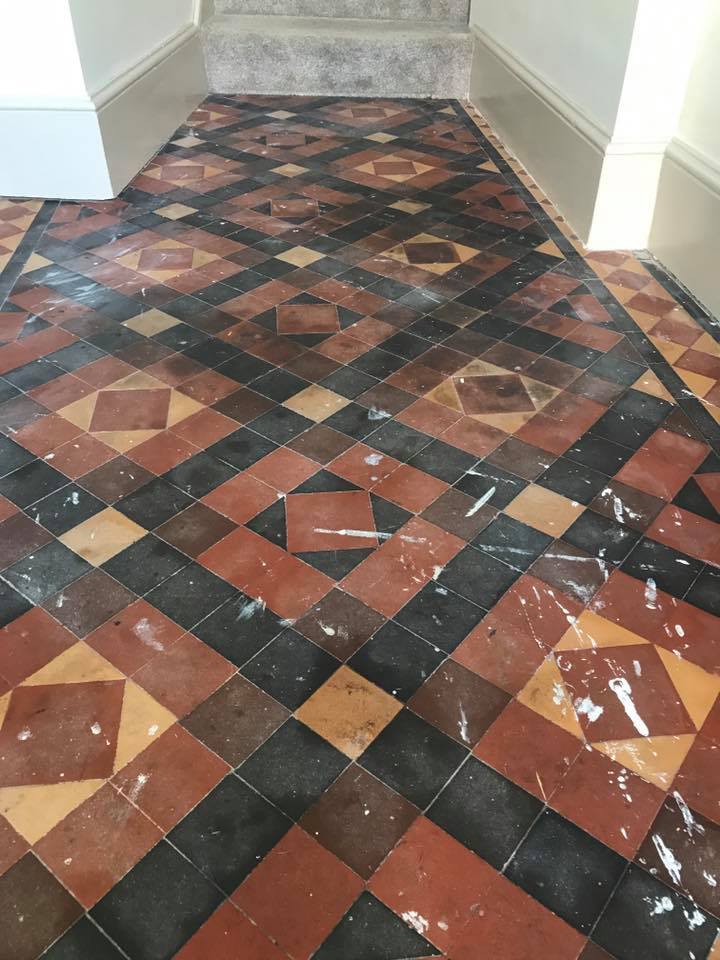
I was asked to visit an old house from the Victorian era in Cleckheaton which is part of the West Yorkshire district of Kirklees and only 14 miles from my base in Oxenhope. The owners had bought the house last year and had been renovating it ever since. The last job was to sort out the Victorian tiled hallway that they knew from the previous owners had been covered by carpet for over 50 years.

Leaving the floor restoration until last was a sensible decision as the last thing you need is for a decorator to drip paint over your recently renovated floor. I could see the floor was in good physical condition but had layers of dirt, old sealant and of course paint splashes on it but after doing a test clean I knew that we could bring it back to life and return it to something like its former glory.

Victorian Tiled Hallway Before Renovation Cleckheaton Kirklees

The test clean is an important part of our survey as it gives the customer confidence we know what we’re talking about and it gives me a chance to work out the best way of cleaning the floor, so I can provide a more accurate quotation (see below). The owner of the property was impressed with the results of the test clean and keen to have the full potential of the Victorian tiled floor revealed booked me in to do a full clean and seal.


Deep Cleaning a Very Dirty Victorian Tiled Hallway Floor

Normally, we would clean these floors using our rotary machines and chemicals to break down the layers of dirt but in this instance that was not going to be effective. I worked this out during the test clean where I discovered that the tiles were very porous so that any liquid that was put on the floor was immediately absorbed into it. This meant that any chemicals that I applied to the floor did not have time to work before they were absorbed into the floor. When these floors were originally laid there was no damp-proof membrane laid underneath which leaves them very susceptible to damp issues and salting from efflorescence.

After trying a couple of different methods, I decided that the only way to get this floor clean was to use handheld diamond blocks and a small amount of water to clean the floor in very small sections at a time and then immediately remove the residue before it dried back into the floor. This was obviously very time consuming but did remove the dirt very effectively, it also meant that I wouldn’t exacerbate any efflorescence issues which could happen when excessive amounts of water are used.

Victorian Tiled Hallway During Renovation Cleckheaton Kirklees

Once the whole floor was clean it was given an Acid Wash with Tile Doctor Acid Gel to neutralise any potential salting issues. The gel was then rinsed off with water and extracted using a wet vacuum to remove as much moisture as possible from the floor. The now clean floor was then left to dry off thoroughly, so it would be ready for sealing.


Sealing an Old Victorian Tiled Hallway Floor in

A couple of days later I returned and started by checking the moisture levels in a couple of areas to verify that the tiles were dry enough to be sealed. All was well and so I proceeded to seal the floor with a couple of coats of Tile Doctor Colour Grow which is an impregnating sealer that seeps into the pores of the tile protecting it from within. Colour Grow is also a colour enhancing sealer that improves the natural colours in the tile and most importantly it’s a breathable sealer that will allows any moisture rising through the tile to evaporate. Using a breathable sealer is highly recommended for floors with no damp-proof membrane as moisture can become trapped under the tile which over time can cause damp to rise through the walls and even tiles to become loose.

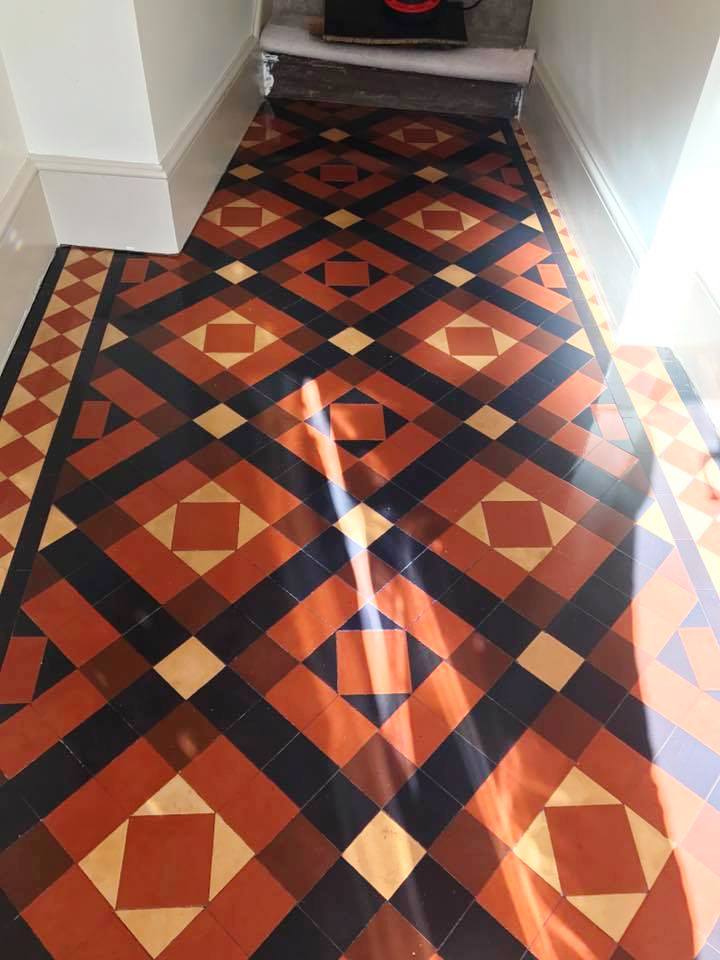
Victorian Tiled Hallway After Renovation Cleckheaton Kirklees

The Customers were very impressed by the transformation in their floor and hopefully you can see from the photos how much of a difference that has been made to the floor.


Source: Victorian Tile Cleaning and Renovation Service in Kirklees

Friday, July 20, 2018

Victorian Hallway Tiles Renovated in Warwickshire

I was very pleased to be contacted by this client, they lived on a lovely residential road near the centre of Rugby in Warwickshire and the house featured a beautiful Victorian tiled hallway floor. As you will see from the pictures the patterns are stunning.

Victorian Hallway Floor Before Restoration Rugby

Over the years it had been badly damaged along the edges and a few tiles were cracked. It's difficult to know the cause of the damage but we normally find problems like these can be caused by settlement in the floor and if heavy objects are dropped on the tiles. High traffic areas such as the hallway do get a lot of general wear and tear which takes its toll on the floor. The owner of the house felt embarrassed with the condition of the floor and had decided it was time to have it restored.

Victorian Hallway Floor Before Restoration Rugby


Cleaning and Restoring a Victorian Tiled Hallway Floor

I identified the colours used in the floor, so I could source replacements and went through the floor with the client to mark the tiles that needed changing. We left a few tiles with minor damage so that the new tiles did not stand out and kept the floor authentic.

I managed to source some replacement tiles and started the job by removing and replacing all the damaged and loose tiles. Many of the replacements had to be hand cut to size, especially in the corners. It took some time but eventually, all the damaged tiles were removed and replaced, and the loose tiles refitted. The floor was then left for a few days to set.

On my return, I started by giving the floor a deep clean by spraying the tiles with a strong dilution of Tile Doctor Remove and Go. This was left on the tiles to soak in and break up the bonding agent in the old coatings. After ten minutes I worked the solution into the tiles with a black scrubbing pad fitted to a rotary floor buffer and then rinsed the resulting soil off the floor with water and extracted it using a wet vacuum.

Victorian Hallway Floor During Cleaning Rugby

The next step was to give the floor an acid wash using Tile Doctor Acid Gel, we don’t normally use acidic products on tile or stone however they are particularly good at dealing with alkaline mineral salts and removing grout smears. Old floors like these are particularly vulnerable to a natural process called efflorescence which results in white mineral salt deposits being left on the surface of the tile as the floor fully dries out and can interfere with the sealer. To counter this, the floor was given an Acid Wash with Tile Doctor Acid Gel which being in Gel form makes it particularly easy to control. The acid in the gel works by neutralising the alkalinity in the floor. The solution was scrubbed into the floor using a coarse diamond encrusted burnishing pad to improve the finish of the tiles and then thoroughly rinsed with water and extracted with a wet vacuum to remove any trace of cleaning product.


Sealing a Victorian Tiled Hallway Floor

After leaving the floor to thoroughly dry out over a few days I returned to complete the sealing process. On my return, the floor was sealed with few coats of Tile Doctor Seal and Go Extra which leaves a nice satin finish and being a fully breathable sealer is ideal for old floors that have no damp proof membrane and needs moisture to rise through the tile, so it can evaporate.

Victorian Hallway Floor After Restoration Rugby

The vibrant colours of the tiles were brought back to life and the floor was transformed. The client was delighted and wondered why they had not called upon us sooner!

Victorian Hallway Floor After Restoration Rugby


Source: Victorian Tile Cleaning and Renovation Service in Warwickshire

Monday, February 12, 2018

Deep Cleaning a Victorian Tiled Hallway in Devon

I was contacted by the owners of an old Farmhouse in the East Devon village of Broadclyst to look at their Victorian Tiled Hallway floor which as you can see from the photograph below was heavily stained and had also been splashed with paint from decorating. Victorian tiles are very robust and can take a lot of punishment which you certainly get in a farmhouse, however once the sealer wears off dirt gets into the pores of the tile making it very difficult to clean.

I visited the property to take a closer look and to take some moisture readings because these old floors don’t have a Damp Proof Course and moisture levels too high can restrict when this type of work can be done due to the sealers needing the floor to be dry in order to cure. I also did a test piece to show the customers what level of cleaning could be achieved.

Victorian Tiled Hallway Broadclyst Farmhouse before cleaning


Cleaning a Victorian Tiled Hallway

With the customers happy with the quote I returned to complete the work starting by covered the skirting and bottom of the stairs to protect the paintwork and carpet. I then put a strong stripper/degreaser called Pro Clean on to the floor, ensuring even coverage and keeping and eye on the floor to make sure that it didn’t dry out.

After a short dwell time I set to work scrubbing the floor with a 400 grit diamond burnishing pad and using small hand blocks to get into the corners and any edges not reached by my machine. Once I was satisfied that the tiles were as good as they could be I rinsed the floor to remove the alkaline cleaner and soiled water.

This was followed by giving the floor an Acid rinse using Tile Doctor’s Acid Gel, this process counteracts any alkaline salts that can rise up through the tile as it dries out, a process which is more commonly known as efflorescence. This can be quite a problem on floors like this that don’t have a damp proof course (floors generally didn’t pre-1950s). I had to be careful not to leave the acid down for too long because these tiles are susceptible to acid damage.

Dealing with salt issues on these old floors (efflorescence) is essential because they can damage the sealer or become trapped under it, detracting from the beauty of the floor. Given the age of the farmhouse it’s difficult to know what the floor had been laid onto. Often it was compacted rubble and building works from the erection of the adjoining buildings; additionally some of the later Victorian floors were laid on a wet limecrete scree which contain a high salt-content.

Before I left for the day I left an air mover on the floor to aid in the drying of the tiles. If there are radiators in the area I also suggest that they are turned on overnight to further aid the drying process. Occasionally these types of floors need to be left for several days to dry but it is worth the wait and the floors can be used in the meantime provided indoor shoes and socks only are used and care is taken not to get the floor dirty.


Sealing an Old Victorian Tiled Hallway

Upon returning the next day I tested the moisture content of the floor and was pleased to find that it was well within acceptable levels for the application of the sealer that I was planning to use. I quickly checked the floor for areas that I felt may be able to be improved and once satisfied a single coat of matt-finish, colour-enhancing sealer called Colour Grow was applied before two coats of a Seal and Go sealer was used to give the floor a satin finish, which I think gives it a slight glaze and freshly mopped appearance.

Victorian Tiled Hallway Broadclyst Farmhouse before cleaning

The customers were thrilled and said that they wished they had brought me in sooner!


Source: Victorian Tile Cleaning and Sealing Service in Broadclyst, Devon

Saturday, June 17, 2017

Victorian Tiled Hallway Transformation in Cheshire

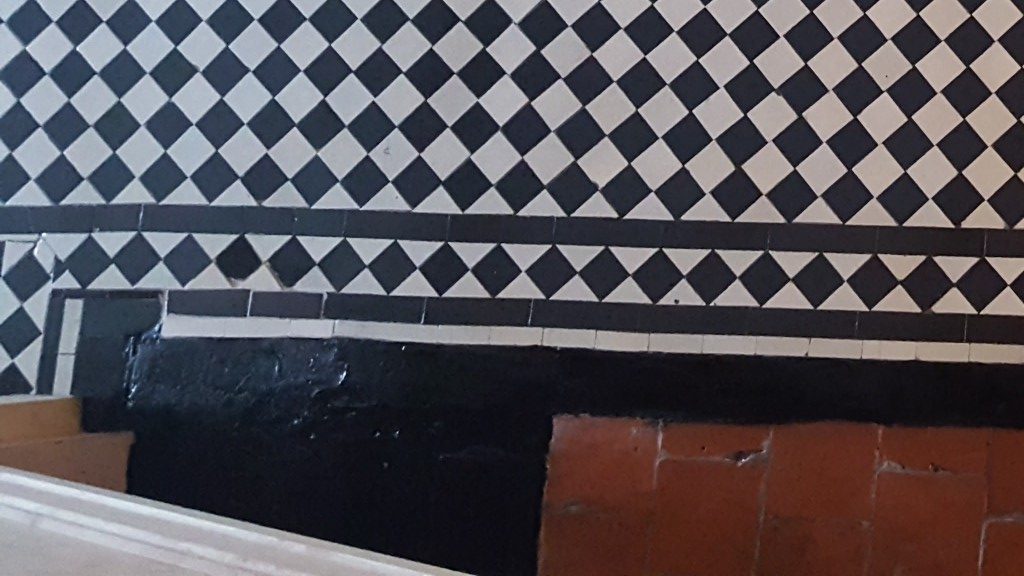
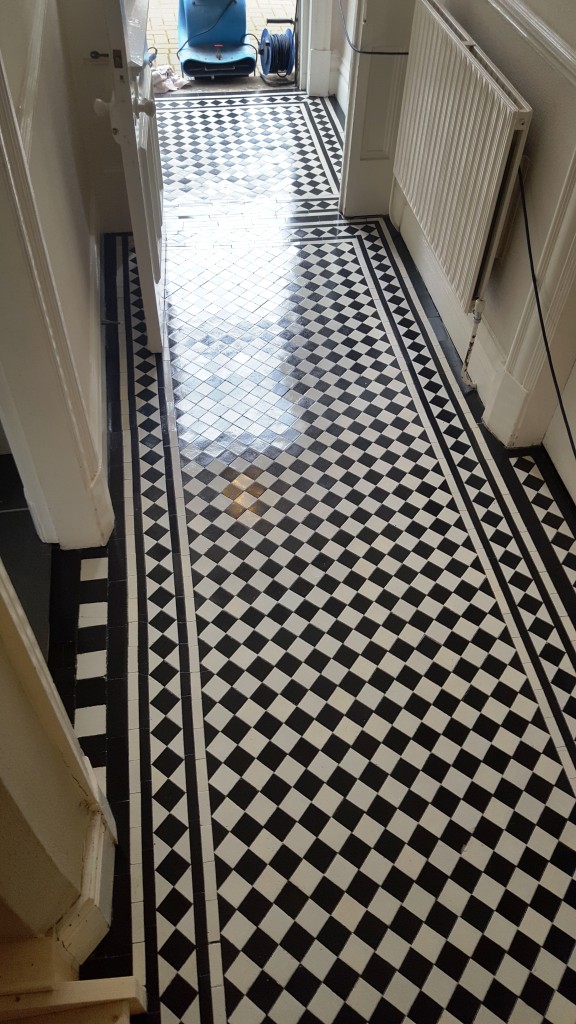
This fantastic chequered black and white Victorian Tiled Hallway was located at a house in the village of Prestbury north of Macclesfield in Cheshire. According to Wikipedia Presbury is part of the "Cheshire Golden Triangle" villages which include Wilmslow and Alderley Edge which are the most sought after and expensive places to live outside of London. It was a lovely building however a new stair case had been fitted which didn’t quite match the foot print of the original staircase leaving a gap in the hallway tiling. The owner of the property wanted matching tiles fitted and also to give the floor and good clean and seal so they would blend in.

Chequered Victorian Floor Prestbury Before Repair and Clean

Cleaning a Victorian Tiled Floor

To clean the floor and strip off any remaining sealer I first created a strong dilution of Tile Doctor Pro-Clean cleaning solution which is a versatile alkaline cleaner that’s designed for use on tile, stone and grout. reliably eradicates dirt on a wide variety of natural stone floors. The solution was applied liberally across the floor, and left to dwell for about ten minutes to allow time for it to soak into the Victorian tiles. It was then scrubbed into the tiles using a scrubbing pad fitted to a rotary cleaning machine. The resulting cleaning slurry was rinsed off with water and then extracted from the floor using a wet vacuum. I repeated this process until I was confident the tiles were clean and free of old sealer. The next step was to treat the floor to an acid wash using Acid Gel, this is especially important on old floors where there is no damp proof course to prevent damp rising through the tile leaving salt deposits on the surface. This problem is known as efflorescence and is neutralised by the acid. The gel was then removed and the floor given another rinse using the wet vacuum to get the floor as dry as possible. The last task of the day was to fix replacement tiles in the gap left by the original staircase. Fortunately, Tile Doctor keep a range of replacement tiles so I was able to source some that matched without too much problem. After grouting the hallway was left to dry off fully overnight so it could be ready for sealing the next day.

Chequered Victorian Floor Prestbury After Repair and Clean

Sealing a Victorian Tiled Floor

The next morning, I returned to the property and ran some damp tests. This is incredibly important to do before sealing any tiled floor because any excess moisture can cloud the sealer and prevent it from doing its job properly. Once satisfied that the floor was dry, I applied a single coat of Tile Doctor Colour Grow which is a breathable impregnating sealer that enhances colour and protects from within. I dusted off any excess sealer and then followed up with the application of four coats of Tile Doctor Seal and Go which provides both a robust surface seal and a long-lasting low sheen finish. I waited two hours for the sealer to dry and then the rotary machine fitted with a white buffing pad over the floor to makes sure everything was nice and tight.

Chequered Victorian Floor Prestbury After Repair and Clean Chequered Victorian Floor Prestbury After Repair and Clean


Source: Victorian Tile Cleaning and Restoration in Prestbury, Cheshire

Friday, March 31, 2017

Large Victorian Hallway Deep Cleaned and Sealed near Daventy

The pictures below were taken of a Victorian tiled hallway floor in a large property in the old village of West Haddon. The tiles were in good physical condition for its age but required attention as it was looking very dull and dirty due to not being sealed for many years allowing a build-up of Read more...

Thursday, March 30, 2017

Victorian Tiled Hallway Floor Deep Cleaned and Sealed in West Haddon

The pictures below were taken of a Victorian tiled hallway floor in a large property in the old village of West Haddon. The tiles were in good physical condition for its age but required attention as it was looking very dull and dirty due to not being sealed for many years allowing a build-up of soil to embed in the surface of the tiles making cleaning very difficult. Deep Cleaning a Victorian tiled hallway floor My first course of action was to vacuum the floor to remove light dust and Read more...

Restoring a Victorian Tiled Hallway in Northamptonshire

The pictures below were taken of a Victorian tiled hallway floor in a large property in the old village of West Haddon. The tiles were in good physical condition for its age but required attention as it was looking very dull and dirty due to not being sealed for many years allowing a build-up of soil to embed in the surface of the tiles making cleaning very difficult.

Victorian Tiled Floor Before Cleaning West Haddon Victorian Tiled Floor Before Cleaning West Haddon

Deep Cleaning a Victorian tiled hallway floor

My first course of action was to vacuum the floor to remove light dust and debris, this was followed by applying Tile Doctor Pro-Clean diluted with warm water spraying several metres at a time. The solution was allowed to soak in for a short while before being agitated with a rotary machine fitted to a rotary machine and a stiff grout brush which was run along the grout lines. The section of floor was then rinsed with water and then this was extracted with a wet pick up machine. This process was then repeated through the entire area. I then switched to a new cleaning process for Victorian tiles that was taught on a recent Tile Doctor training course. Basically it involves using a special diamond impregnated burnishing pad fitted to a rotary machine to resurface the tiles using just water. Again I worked in small sections until I had covered the entire area. A common issue with these old Victorian floors is they were usually laid without a damp proof course; as a result it’s not uncommon for white salt deposits (efflorescence) to appear a few days after cleaning. To counteract this I gave the floor an acid wash using Tile Doctor Acid Gel, leaving it to dwell before rinsing. This helps neutralise the tile and will combat any salts rising up through the floor later.

Sealing a Victorian tiled hallway floor

I returned the following day to carry out repairs and to re set a couple of loose tiles which is not unusual for a floor of this age. The floor was then left to dry for a further day with a dehumidifier on site before returning to seal the floor with a breathable sealer for which we used two coats of Tile Doctor Colour Grow. Colour Grow does a really good job protecting tiles as it soaks into the pores of the tile enhancing its colours whilst protecting from within however it leaves a matt finish and the customer wanted a sheen finish. This would not be a problem to achieve however it would require the application of another product and I was still concerned about potential efflorescence issues which would be more difficult to resolve with the application of a further sealer so I agreed to return several weeks later to finish the job, As agreed I returned a few weeks later which allowed the floor to dry and guard against any damp issues and on my return I was happy to confirm the floor had fully dried using my damp meter and further there were no signs of efflorescence. I then applied 5 coats of Tile Doctor Seal & Go to give the customer the required finish she was after.


Victorian Tiled Floor After Cleaning West Haddon

I also left the client a free sample of our cleaning solution Tile Doctor Neutral Clean together with written maintenance instructions to help keep the floor looking its best for years to come.

Victorian Tiled Floor After Cleaning West Haddon


Source: Tile Cleaning and Restoration in Northamptonshire