Thursday, May 30, 2019

How to Repair a Classic Victorian Tiled Hallway

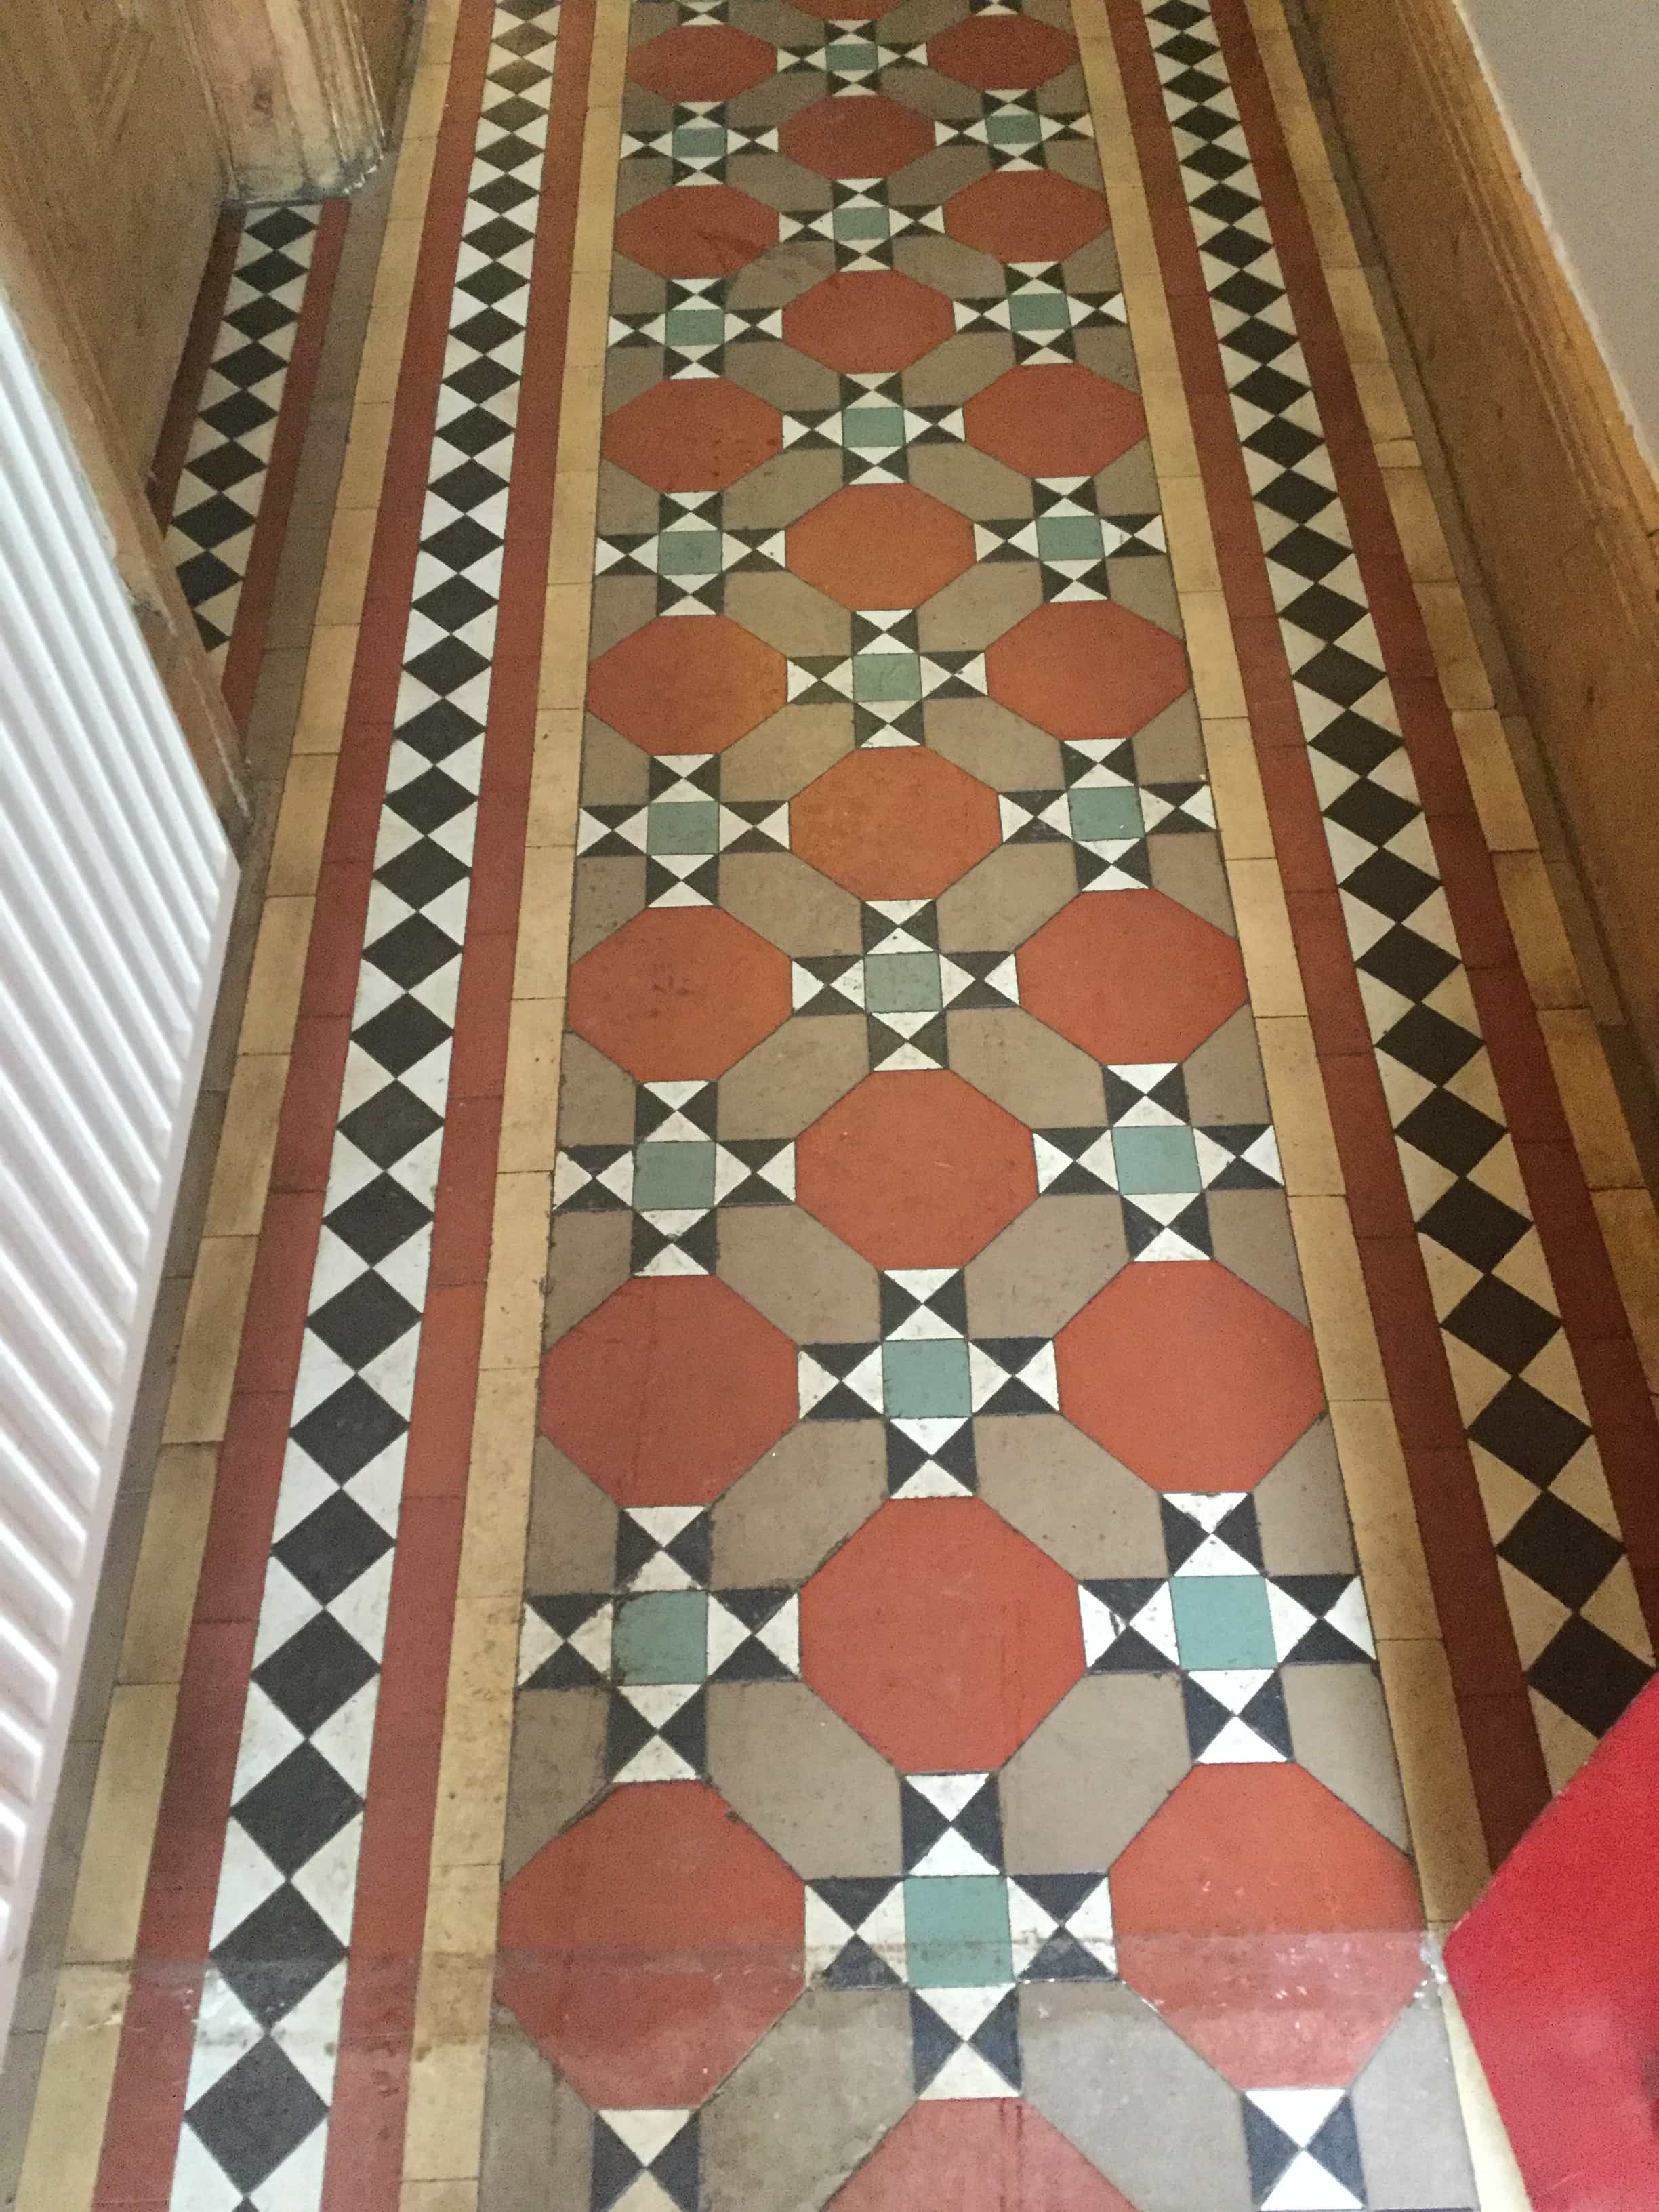
This property located near the pretty market town of Ulverston was built in 1874 as inscribed on the front of the building. The Victorian Tiled floor comprised of Cream and Black tiles was original from when the house was built so that made the tiles at least 145 years old, in fact this was one of the oldest Victorian tiled floors I have ever worked on.

Cream Black Victorian Hallway Floor Tiles Before Restoration Ulverston

The floor was in good condition for its age but had experienced problems with broken and loose tiles around two of the door thresholds which is a common problem with floors of this age. Unfortunately, those tiles had been lost over the years and now the customer wanted this part of the floor rebuilding as part of the restoration. Fortunately, these tiles are still popular so finding suitable replacements wasn’t a big of a challenge as you might think.
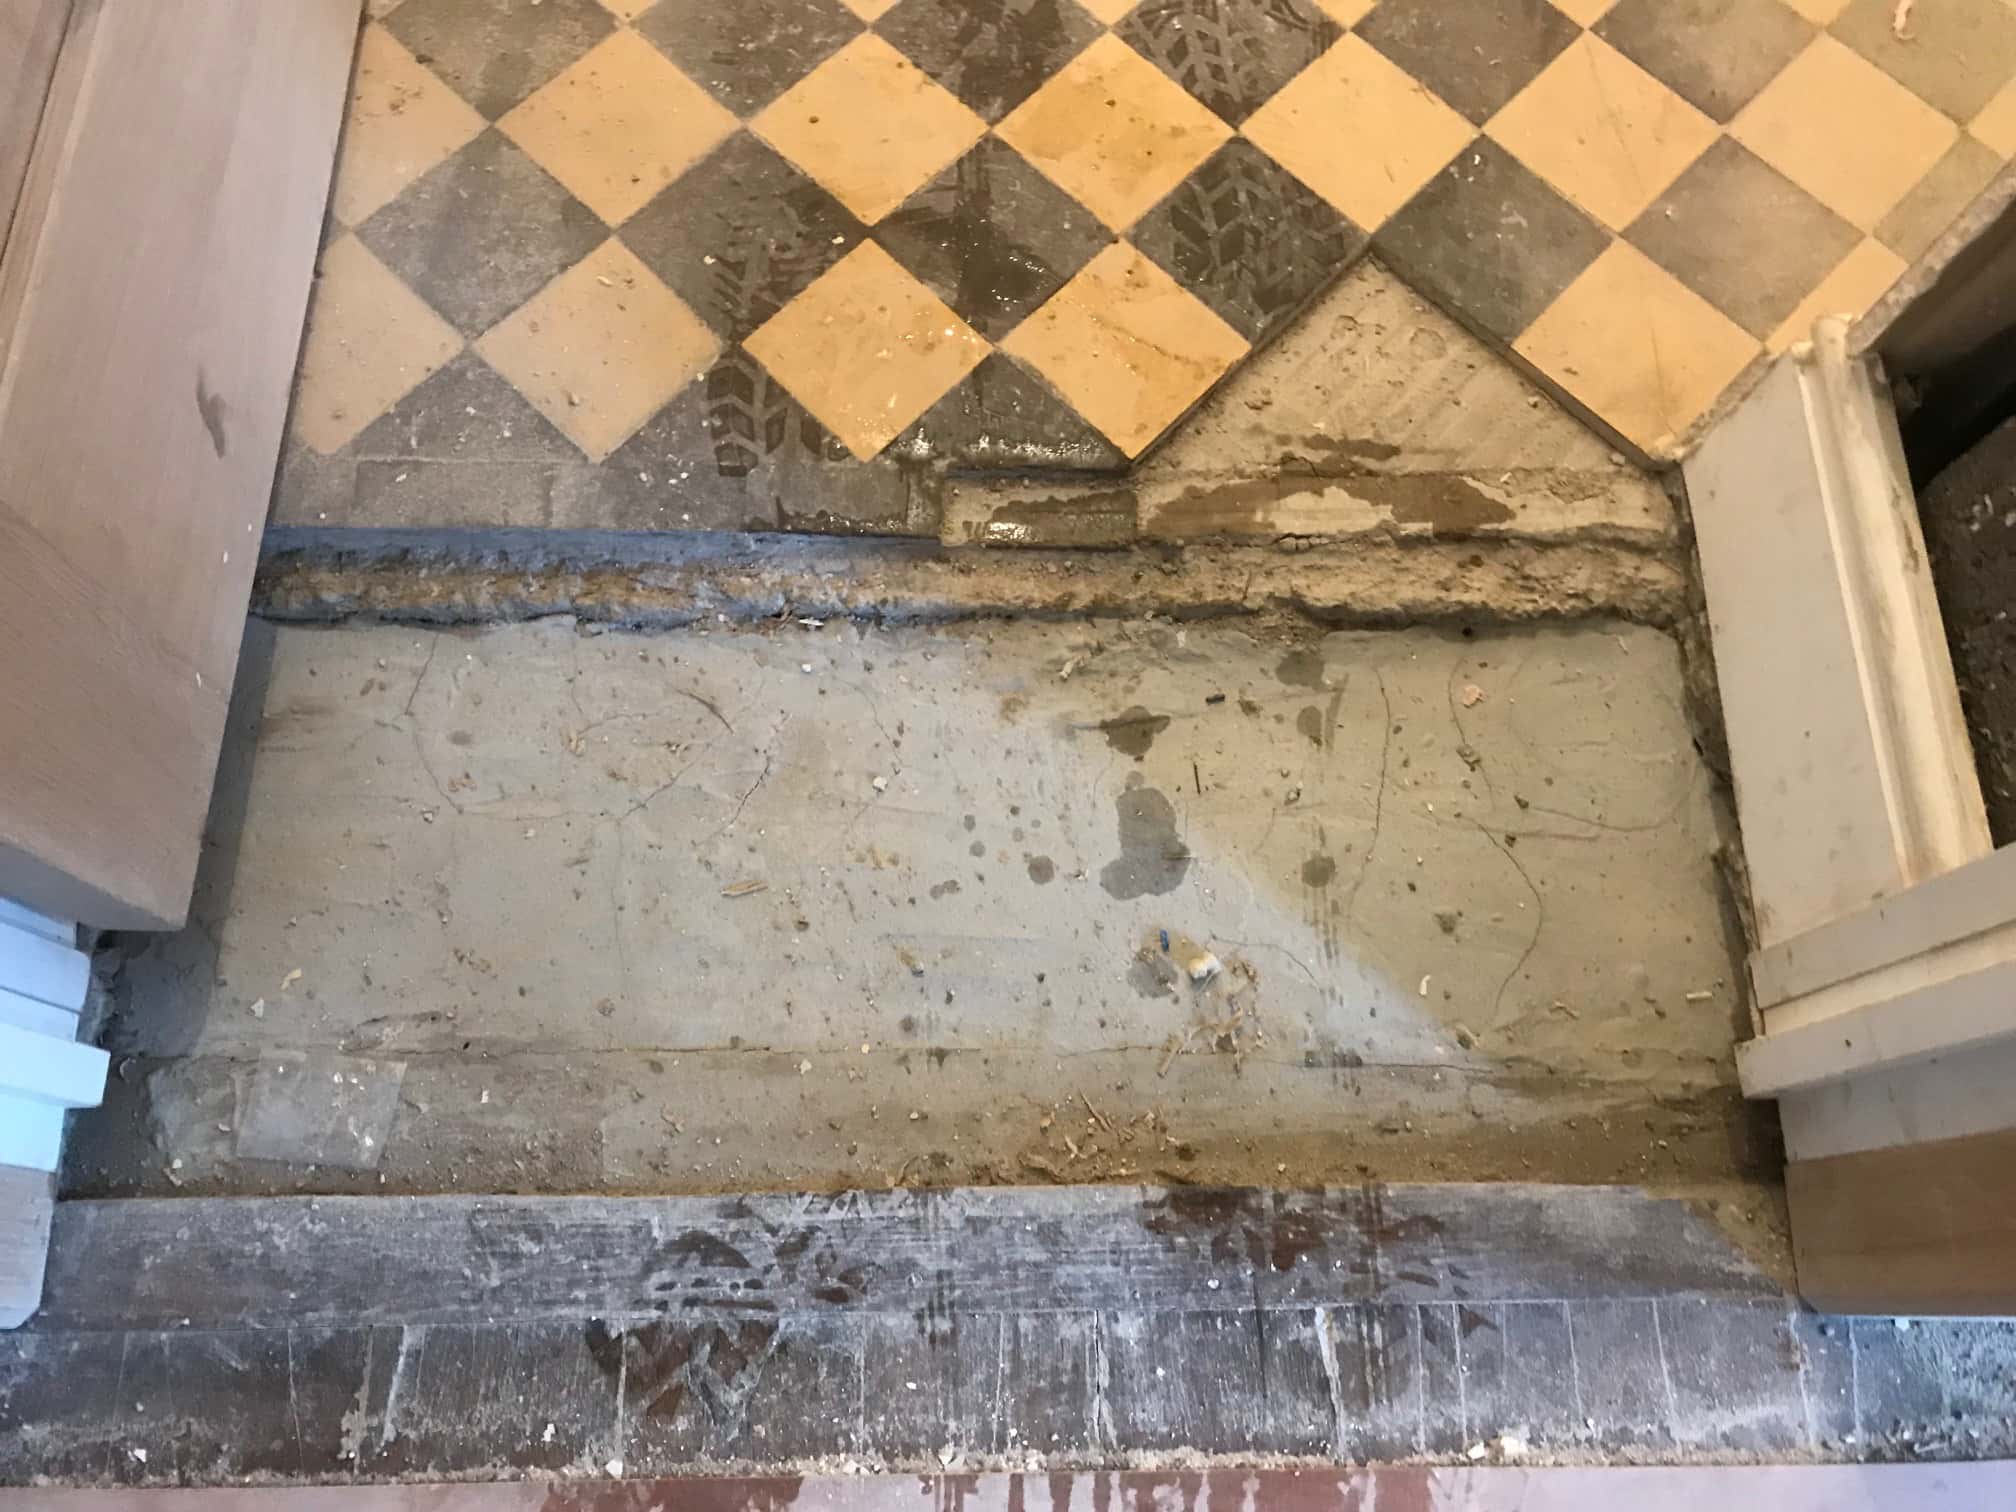
Cream Black Victorian Hallway Floor Tiles Before Restoration Ulverston

I discussed with the client what needed to be done and after finding a suitable supplier for the replacement tiles was able to produce a quote which was accepted, and we agreed a price for the work.


Repairing a Cream and Black Victorian Hallway Floor

My first task was to rebuild the areas of broken and missing tiles. For the larger areas I mapped out a suitable pattern and set about cutting the replacement tiles to fit. A thick bed of flexible rapid set floor adhesive was applied to the floor and the replacement tiles bedded into the old cement base. Once the adhesive had hardened the tiles were grouted, cleaned-up and left to dry.

Cream Black Victorian Hallway Floor Tiles Before Restoration Ulverston

There were several areas that needed this treatment, so the work took some time to complete.

Cream Black Victorian Hallway Floor Tiles Before Restoration Ulverston


Cleaning/Repairing a Victorian Tiled Hallway Floor

Returning the next day, I first checked that the replacement tiles had set and that there were no further problems that needed addressing. All was well so I began cleaning the floor using a 200-grit followed by a 400-grit Diamond pad fitted to a weighted buffing machine running at slow speed and lubricated with water. The floor was rinsed with water after each pad and then the soil extracted using a wet vacuum.

The floor was then given an acid wash using Tile Doctor Grout Clean-Up, which at this stage acts in two ways for these old floors:

1. The Tile Doctor Grout Clean-Up product is made from Phosphoric Acid (not a brick Acid, which is a lot cheaper, more widely available but too strong for use on tile.) The acid we use works with us not against us and gives us time to change the pH of the floor to a slightly acidic pH. This is important on old floors like these where no damp proof membrane has been installed and it’s important to counter any alkaline salts in the floor which could lead to efflorescence later.

2. The sealer will bond to the surface a lot better when it has had this treatment and as a result you get a sharper cleaner finish.
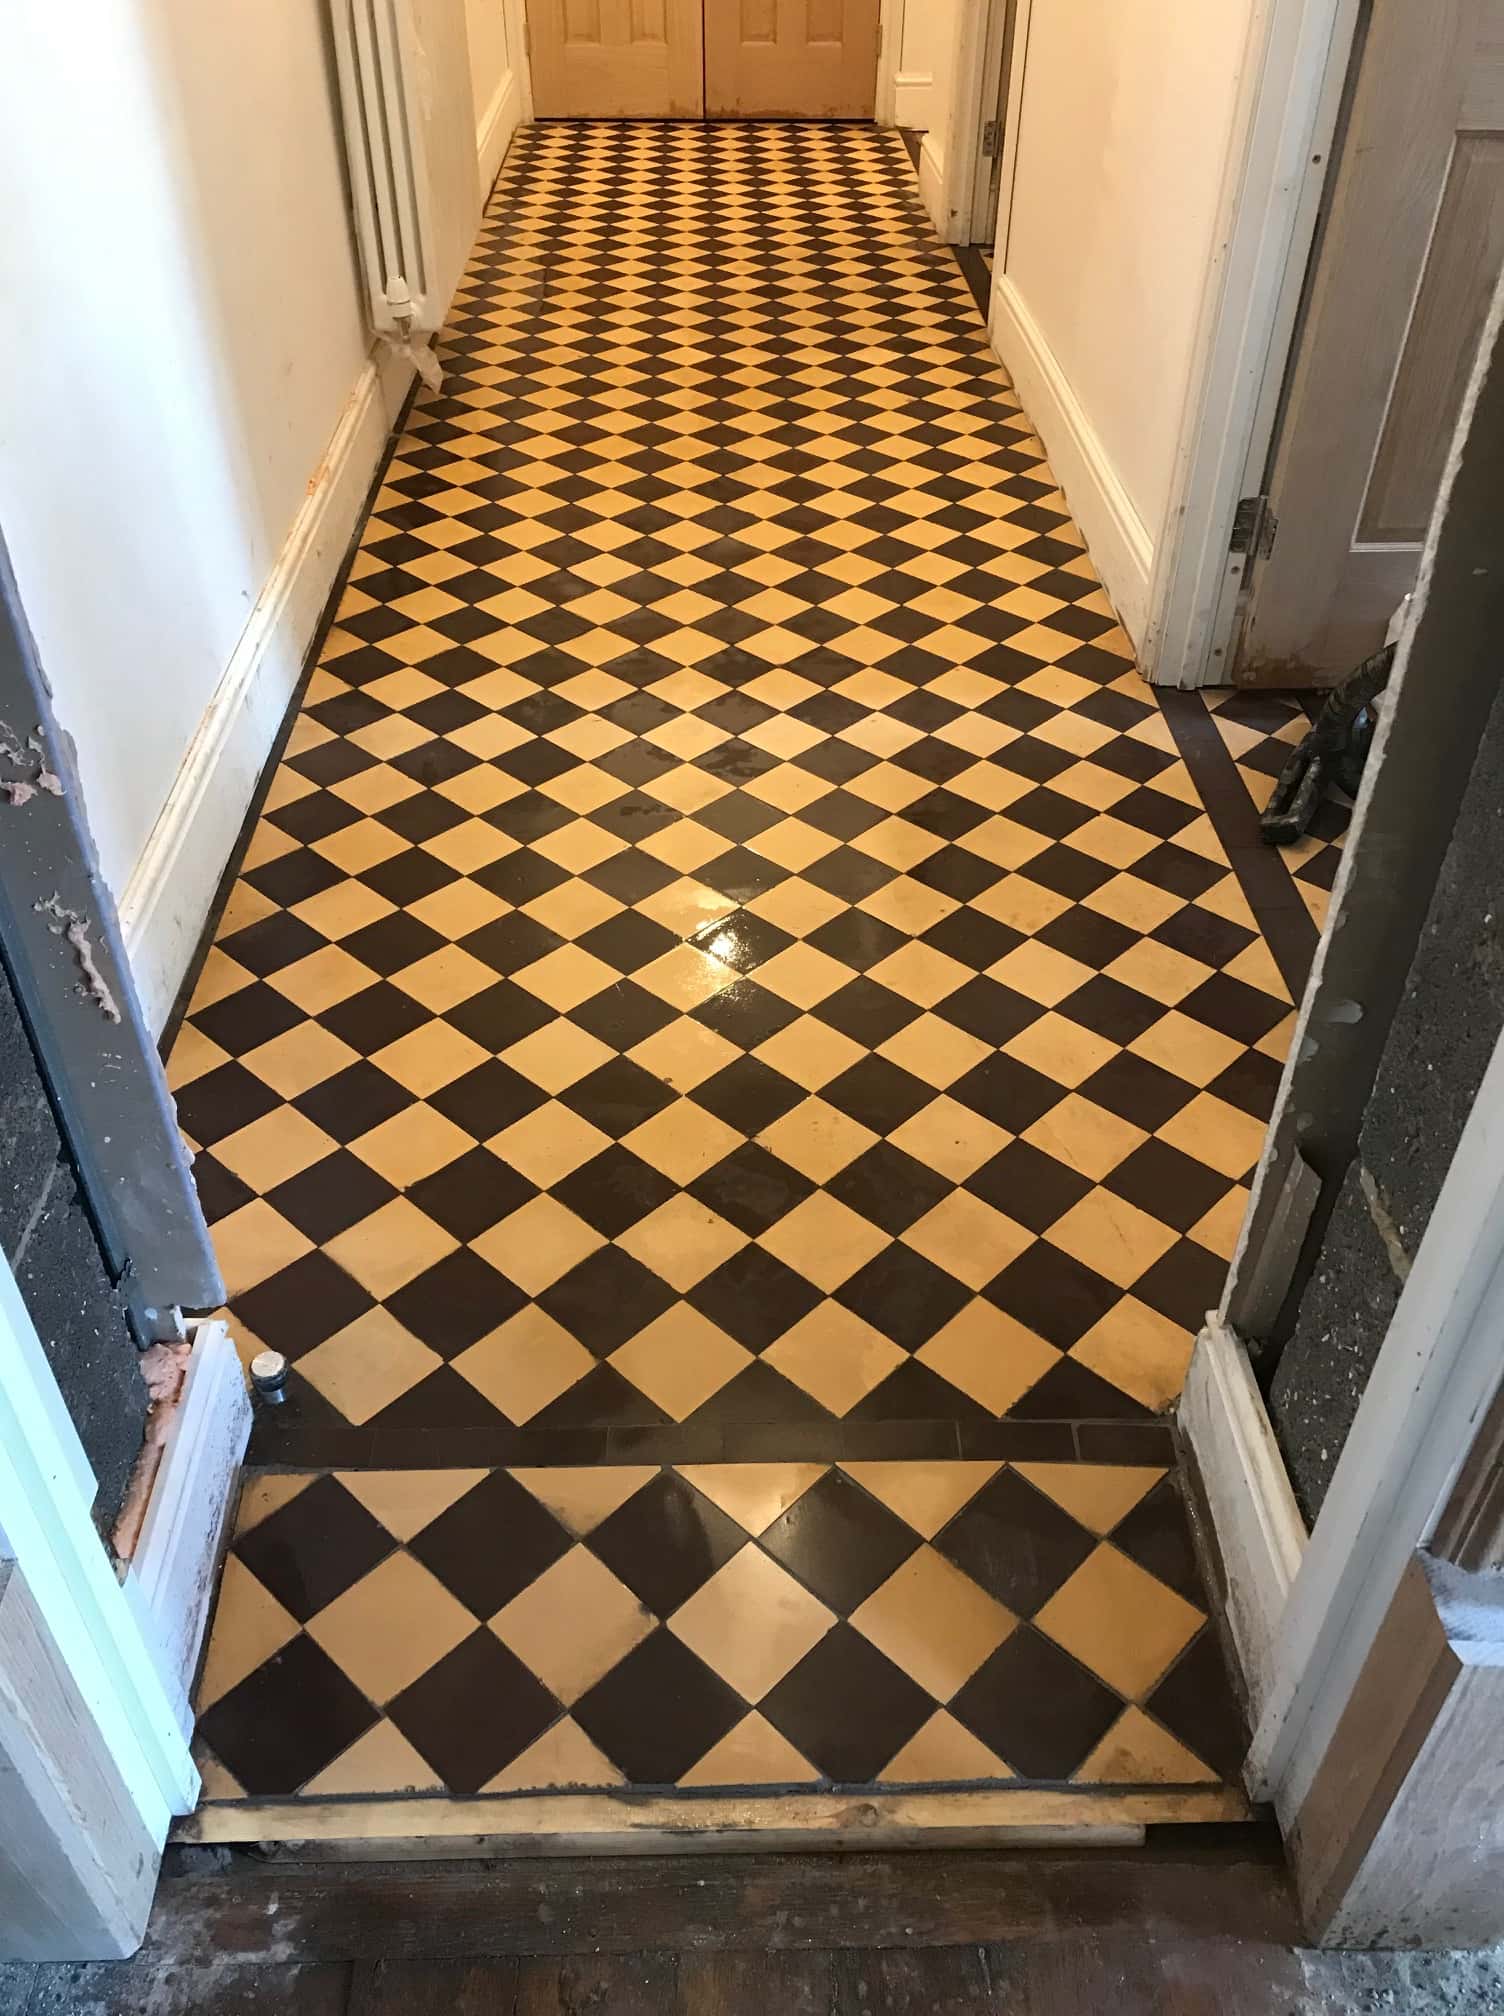
Cream Black Victorian Hallway Floor Tiles Before Restoration Ulverston

Once done the floor was given another rinse and extraction with water and the wet vacuum and then left to dry out for a few days,


Sealing a Victorian Tiled Hallway Floor

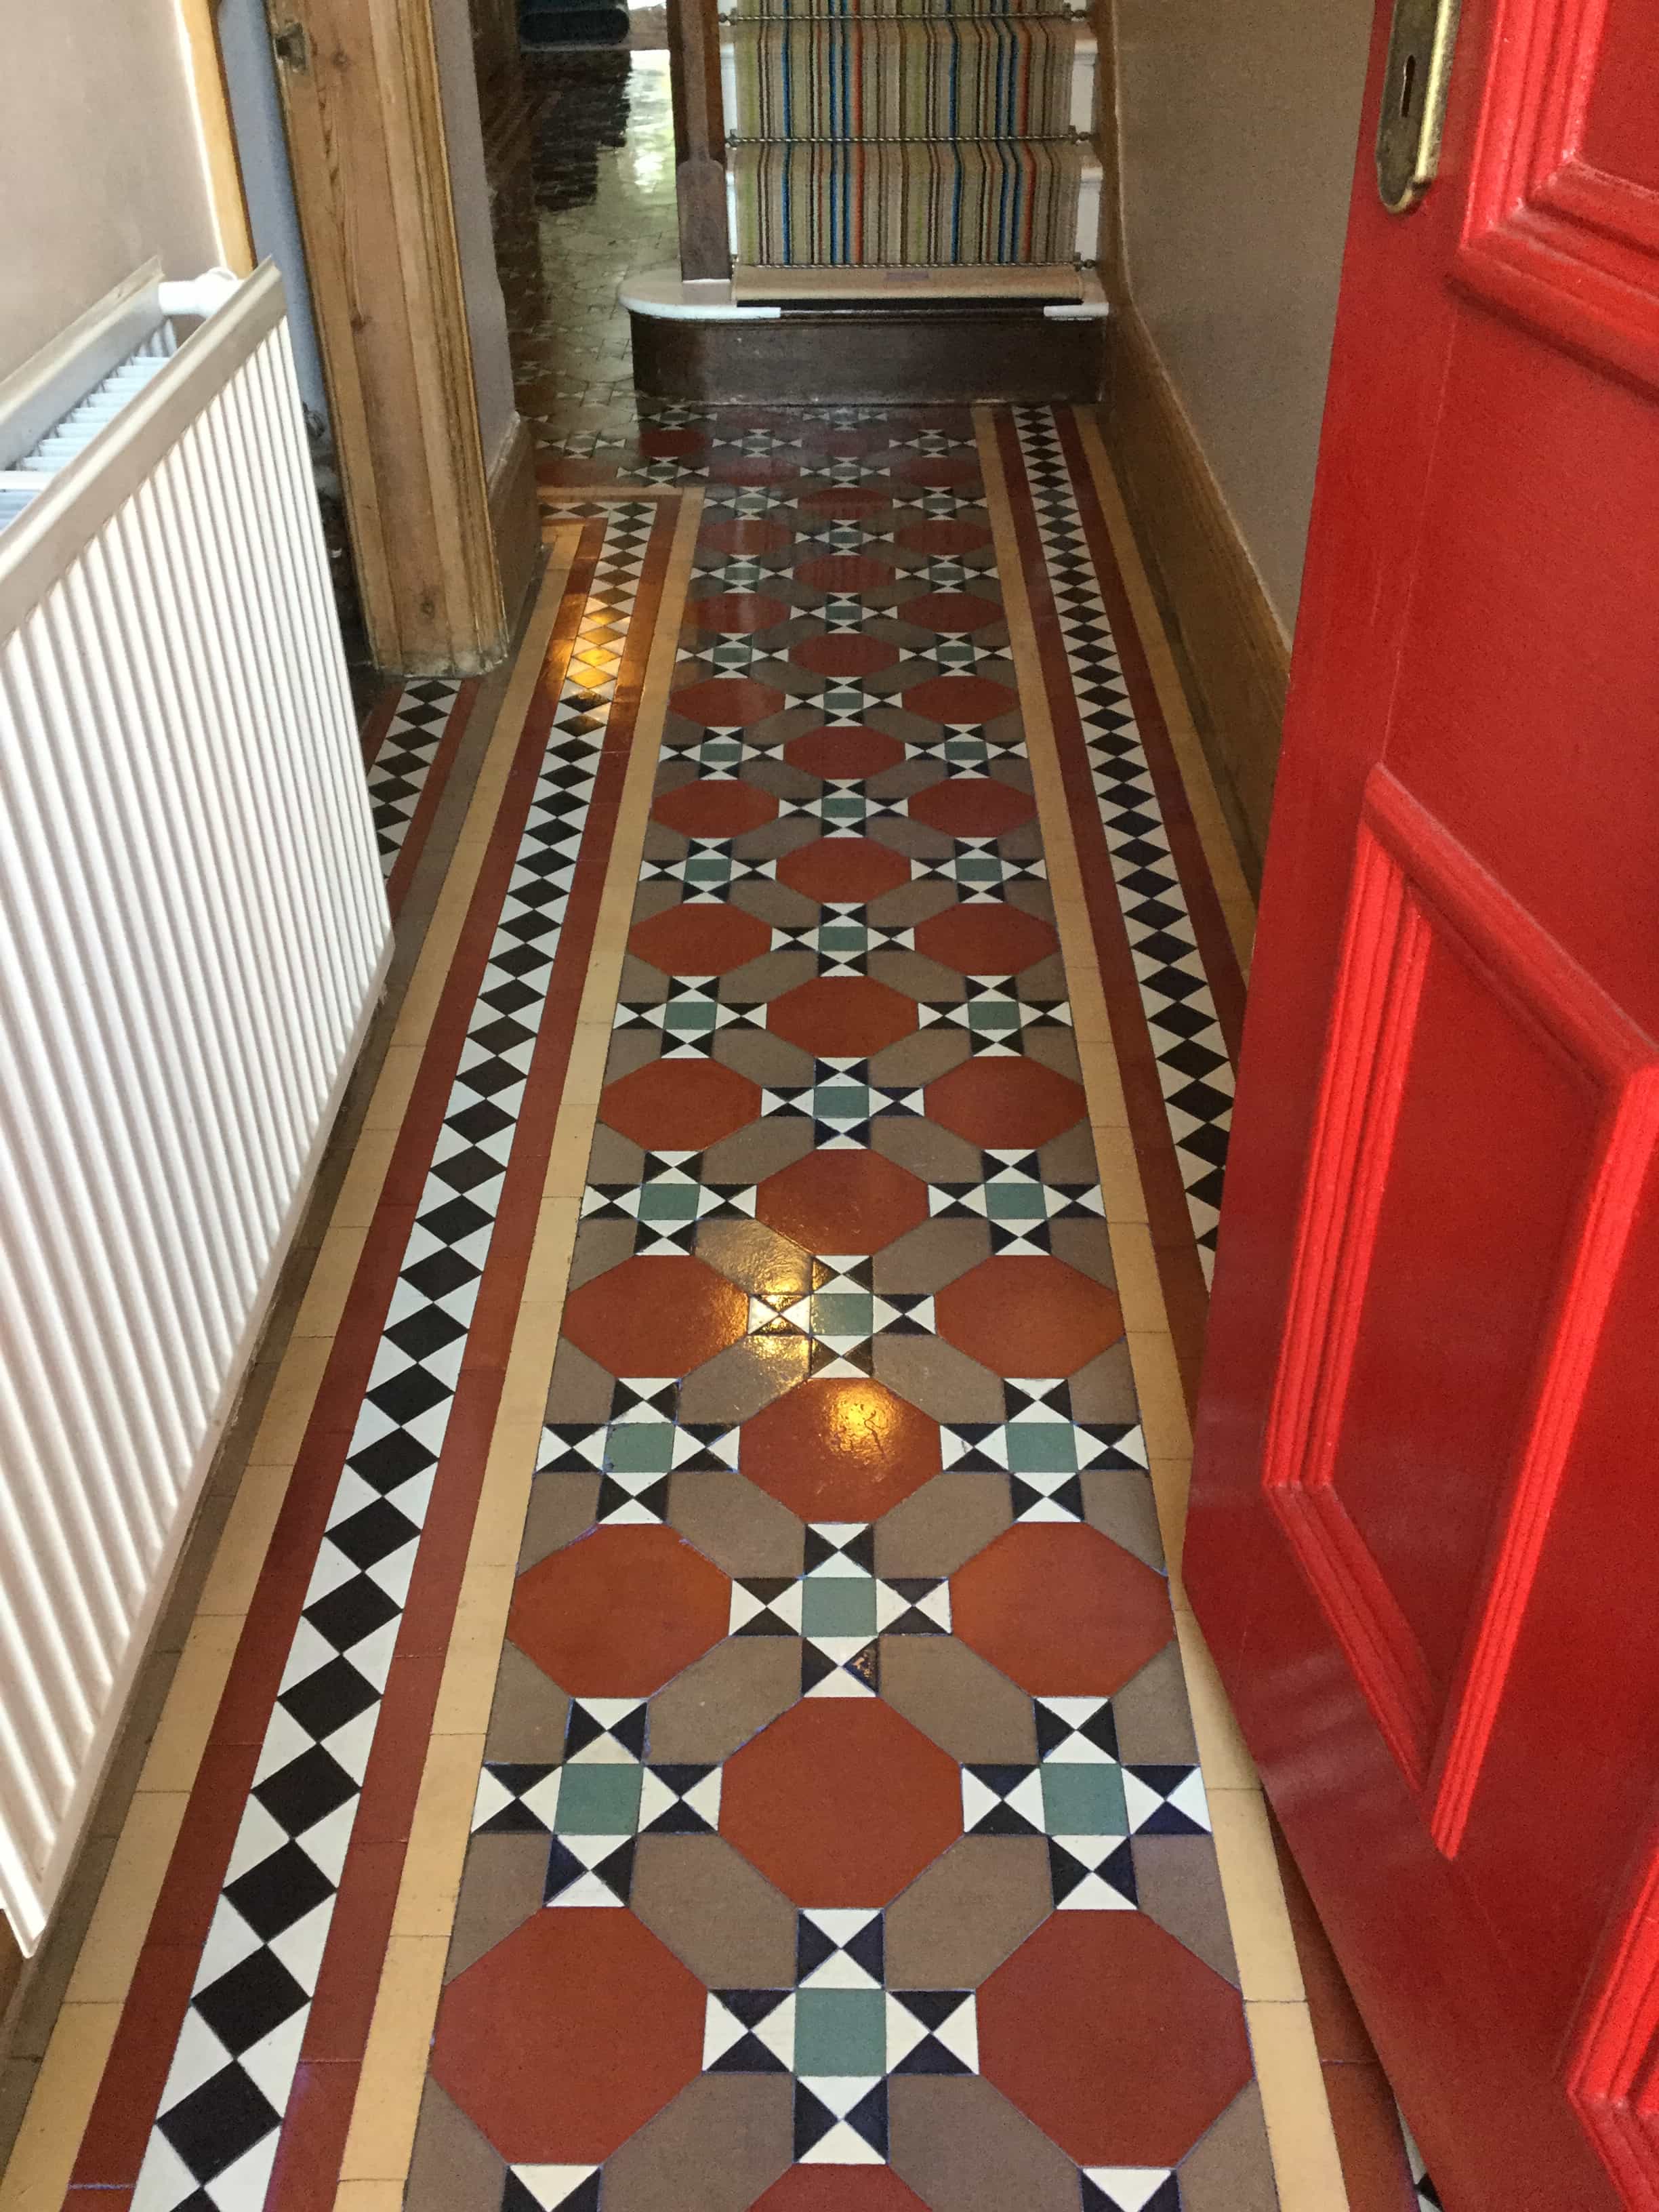
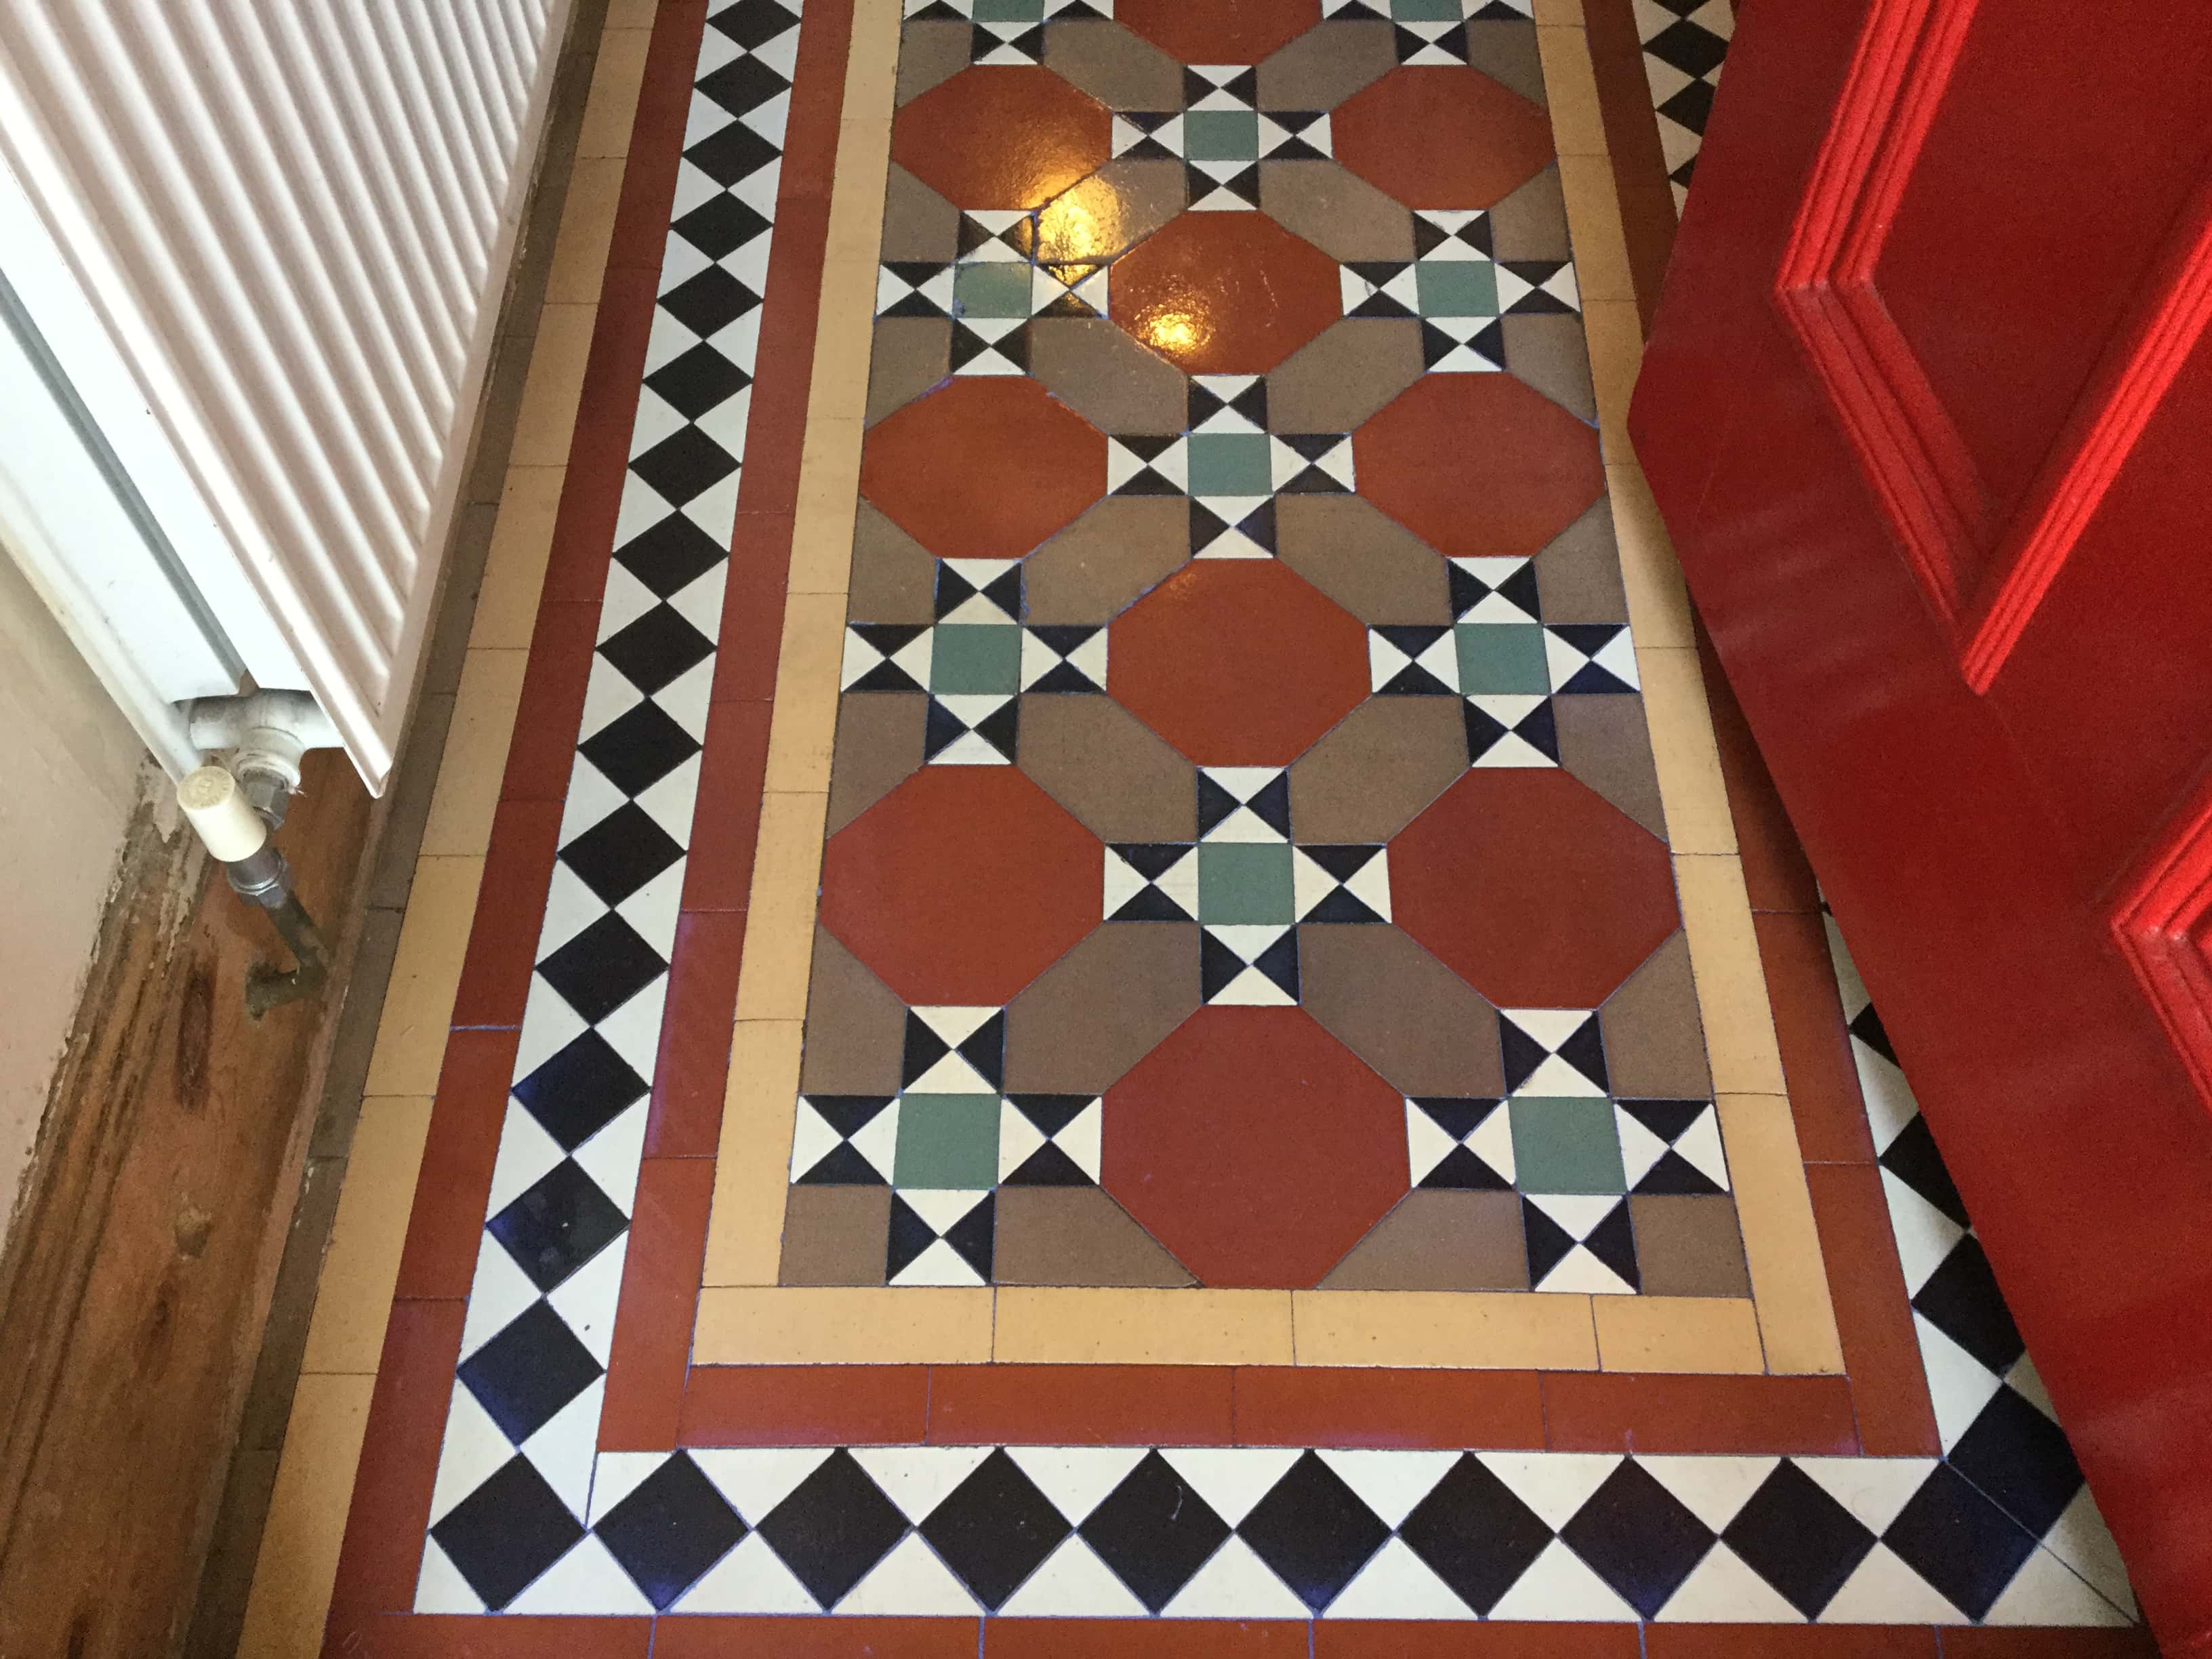
We returned as promised to seal the whole floor using a couple of coats of a breathable colour enhancing sealer called Tile Doctor Colour Grow. As you can see form the pictures this really brought the hallway floor to life. Colour Grow works from the inside by occupying the pores in the tile and will protect it from ingrained dirt staining going forward.
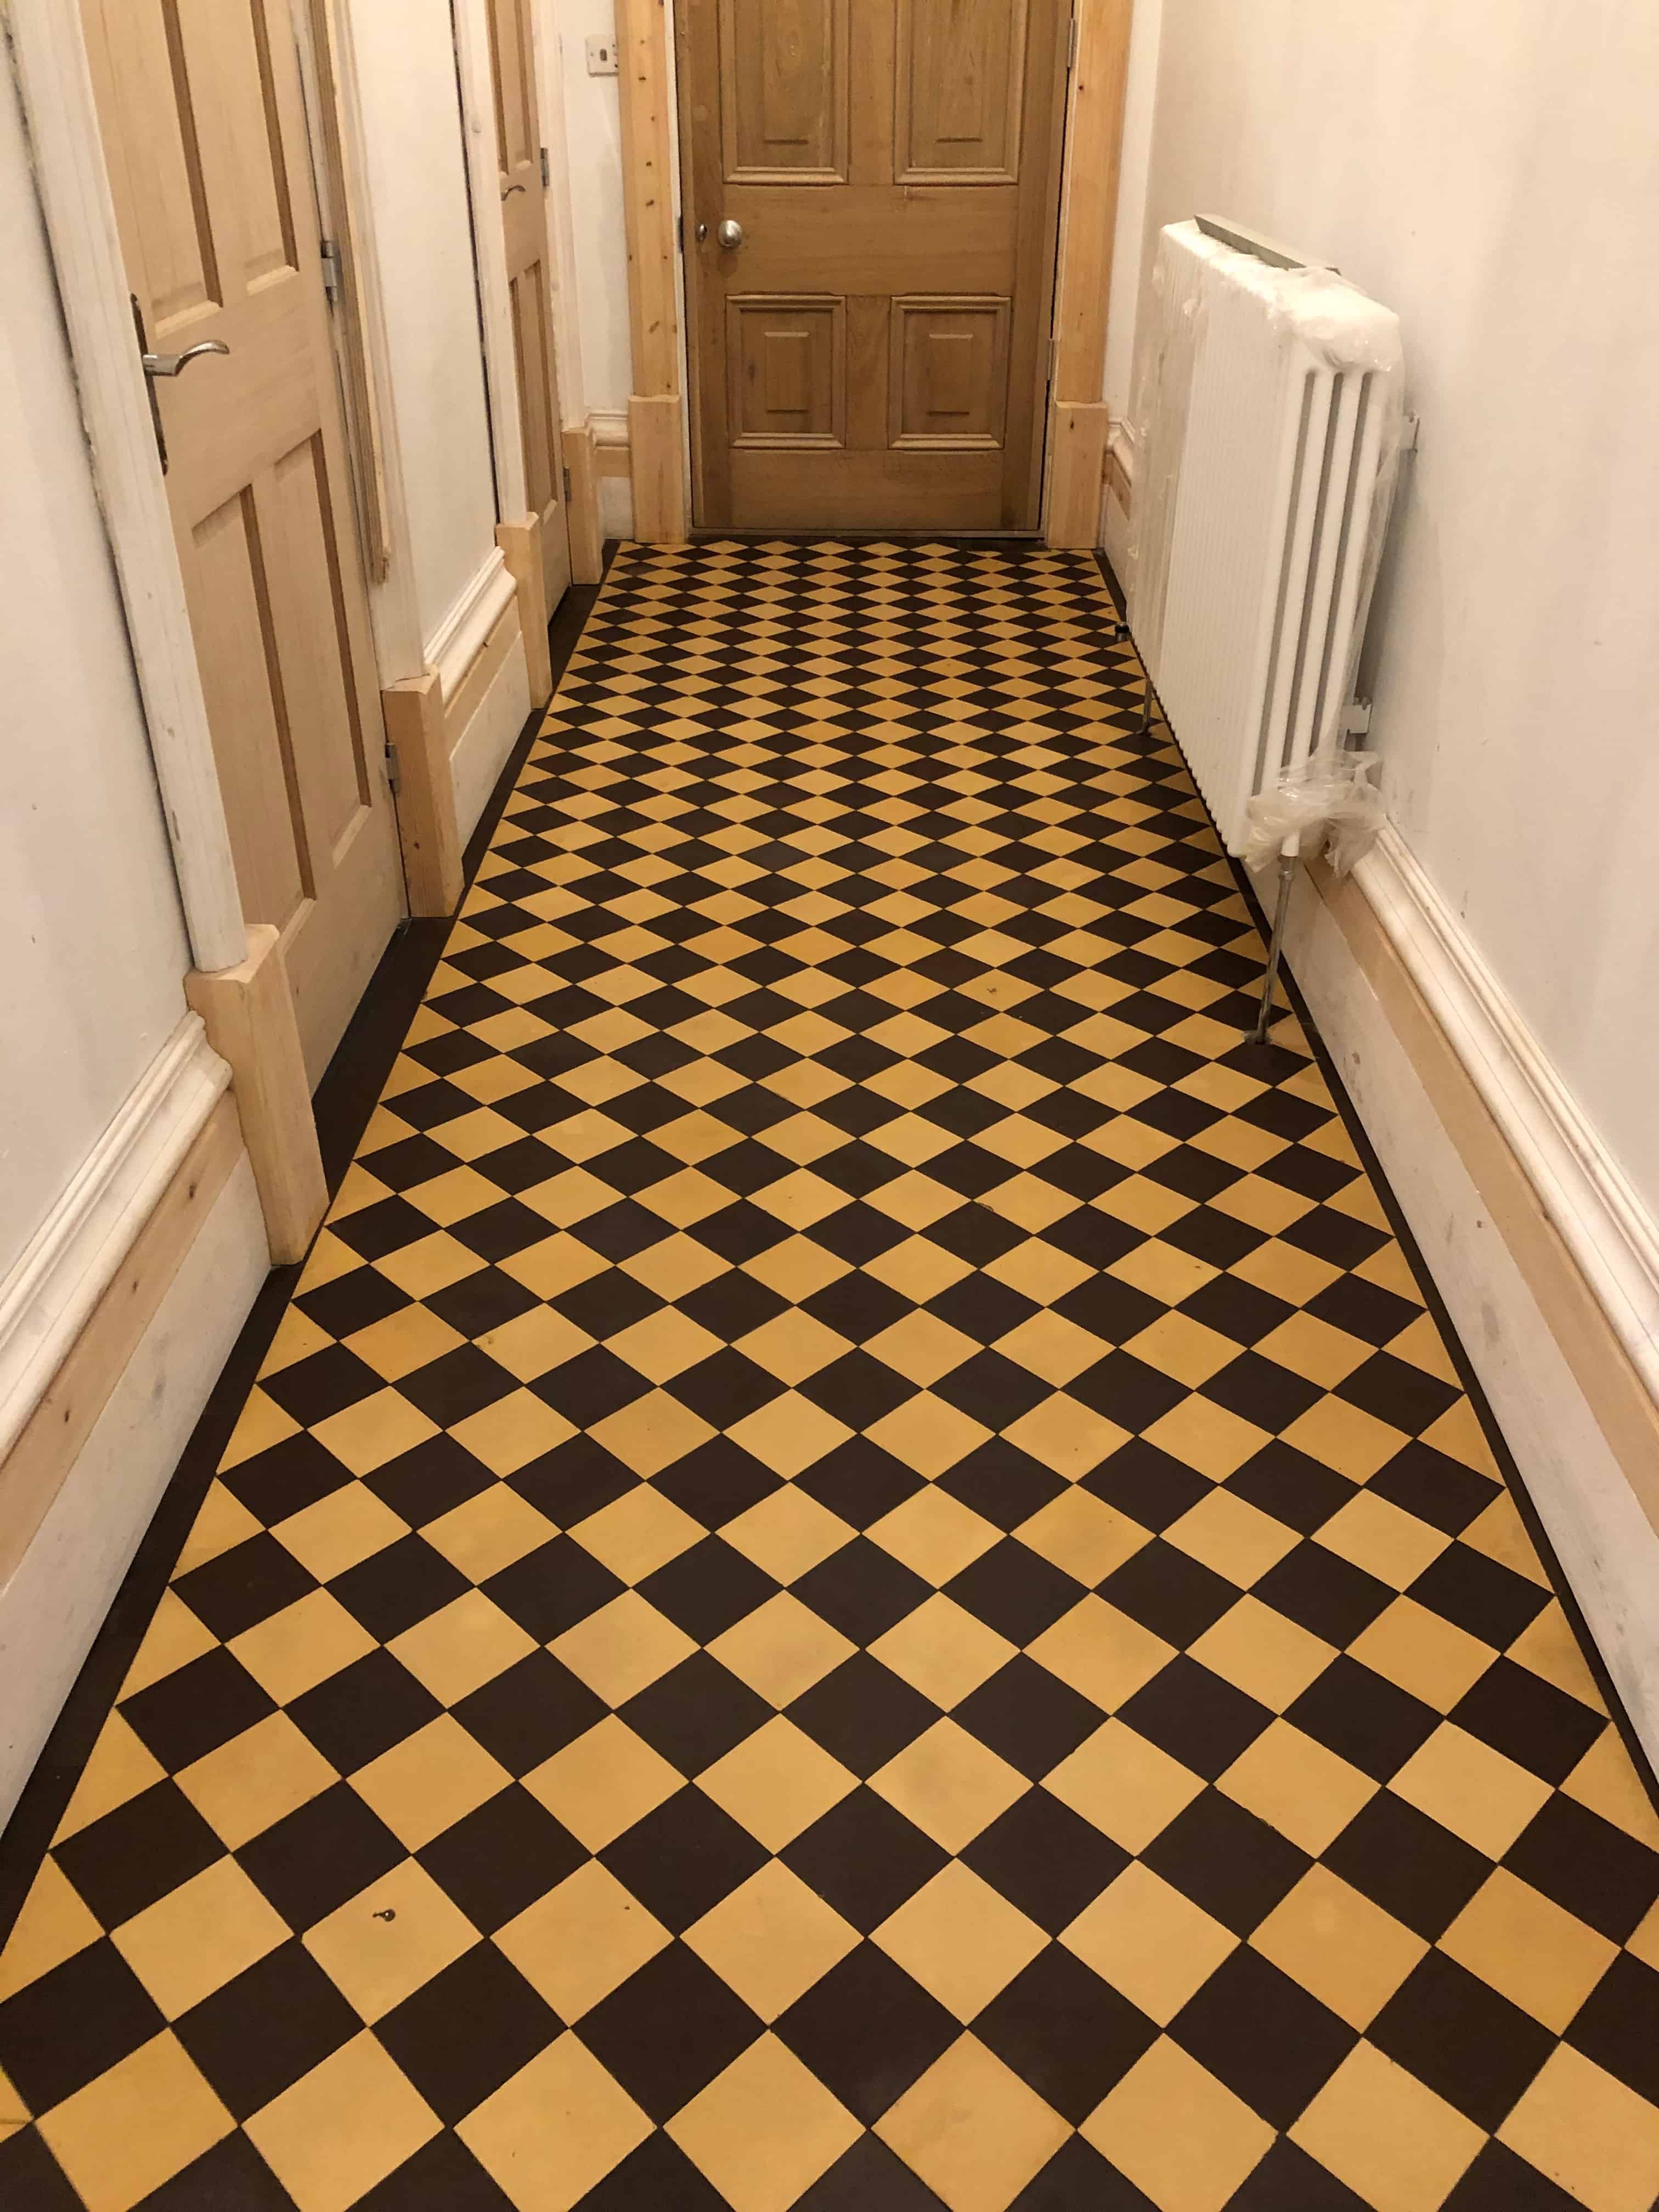
Cream Black Victorian Hallway Floor Tiles After Restoration Ulverston

It’s very important for a customer to use the correct cleaner after having there tiles cleaned and sealed professionally as using the wrong product can prematurely degrade the sealer. As a result, we recommend Tile Doctor Concentrated Neutral Tile Cleaner, its pH balanced and will not upset the sealer, thus getting maximum longevity out of the whole process.

Cream Black Victorian Hallway Floor Tiles After Restoration Ulverston


Source: Victorian Tile Cleaning, Restoration and Sealing Service in South Cumbria
Tuesday, May 28, 2019

How to Install a Travertine Tile Backsplash

Travertine stone is a warm-colored porous material related to limestone that is prized for its ability to instantly add a look of sophistication to any building project. Well suited for use in residential bathrooms and kitchens, travertine tiles are available beginning at only a few inches square to several feet across. A beautiful use of travertine is as a backsplash in the kitchen. This article will show you the installation of a travertine tile kitchen backsplash from start to finish. The mortared tiles must be allowed to rest overnight before the project can be completed, so it is best to leave this project until an uneventful weekend appears in your schedule. Adding travertine tiles can modernize any home, imparting a simple elegance.
Things You’ll Need
  • Safety glasses
  • Travertine tiles
  • Inlay tiles or design tiles (optional)
  • Measuring tape
  • Tile spacers
  • Wet tile saw
  • Thin set mortar
  • Notched trowel
  • Grout
Instructions
1
Lay your tile out on a flat surface or counter to determine your pattern. Make careful measurements and take note of them before you begin. If you are using inlays, include them in the plan of your designs. Remove all cover plates from electrical outlets and shut off the power that services them.
2
Put on your safety glasses and turn on the wet tile saw. Use the saw to carefully cut the tiles for your chosen pattern and border. Turn off the wet saw once all of the tiles have been cut to size. Mix the thin set mortar according to the manufacturer’s directions to the thickness of firm cream cheese or peanut butter.
3
Put a layer of mortar on the notched trowel. Hold the trowel at an acute (about 45 degrees) angle to the wall for the best application. Beginning at a corner, thinly apply the mortar to a section of wall.
4
Press the first tile against the wall, and slightly move it rapidly back and forth in place to create a vacuum seal.
5
Put tile spacers between the tiles to keep the spacing uniform. For this project, the bottom row/border was put into place first, before diagonally cut triangular shaped tiles were placed above. Full tiles were then used, turned at an angle for a diamond effect. Some of the tiles were cut to accommodate the planned inlays and to allow for electrical outlets. Remember to put in spacers as you work.
6
Finish your design and permit your tiles to set overnight for 24 hours. Remove the spacers and apply grout to the new travertine tile backsplash. Replace the electrical outlet covers, and restore power to the kitchen wall.
Tips & Warnings
  • Remove any excess mortar with a clean cloth to avoid staining the porous travertine tile. Travertine stone tiles can be slightly different sizes or uneven, but will appear uniform once grouted. Always put on your safety glasses first before operating the wet tile saw. Cut the tiles slowly, keeping your fingers well away from the blade.

  • Always measure twice (or more) and cut once whenever possible. Whenever you are in doubt about how much tile needs to be trimmed or cut, always cut conservatively. You can always cut more if necessary, but you cannot reattach a cut piece without ruining your design. Purchase three to five percent more tiles than you think you may need, in case you happen to break or damage some of them. Nothing is better than being prepared.

Source: www.Hunker.com

Thursday, May 23, 2019

Restoring the Beauty of a Victorian Tiled Hallway in Northamptonshire

I recently visited a property in Wellingborough to survey their Victorian Hallway floor and work out the best method and products to restore it. The tiles were extremely dirty as the sealant had worn off allowing dirt to become ingrained. They had not been maintained for many years and there was evidence of adhesive which was due to a carpet being stuck down at some point in the past.

Victorian Tiled Hallway Floor Wellingborough Before Restoration

To restore the Victorian floor, I would need to remove the glue and give the tiles a professional deep clean to extract the years of ground-in dirt and staining. Following this the tiles would need sealing in order to protect them going forward. After discussing the work in detail with the owner I sent over a quotation by email which was accepted, and a date arranged for work to commence.

Victorian Tiled Hallway Floor Wellingborough Before Restoration


Restorative Cleaning of Victorian Hallway Tiles

On my return I applied a cocktail of Tile Doctor Oxy-Gel and Tile Doctor Nano-Tech HBU to the tiles. This creates a strong cleaning/coatings remover that would soften the embedded soiling and glue making it easier to remove. I left this to dwell on the floor for about an hour so it could break down the soil and adhesive. I then fitted a coarse 100-grit diamond pad to a rotary floor buffer and scrubbed the floor vacuuming up the resulting residue as I went along working in small sections of 2/3 metres at a time. I then repeated the process using a 200-grit pad, rinsing and extracting afterwards with water to remove the fine slurry this process generates.

Old floors like these were laid before the invention of the damp proof membrane which can result in moisture rising through the floor as it evaporates potentially leaving alkaline salt deposits on the surface. This process is known as Efflorescence and although I minimised the use of water during the cleaning process, I was concerned that this may still present a problem later. To neutralise any alkaline salts in the floor that could cause this problem my last action for the day was give the floor an acid wash using Tile Doctor Acid Gel.

Once this was done and extracted from the floor, I followed up with a further clean using Tile Doctor pH Neutral Tile Cleaner which was applied with a microfibre cloth. I left the floor to dry off overnight so it could be sealed the next day.


Sealing Restored Victorian Hallway Tiles

On day two I used a damp meter to check the moisture levels in the floor to ensure it had dried overnight. The results were good, so I set about applying the sealer. For this floor I decided to go with three coats of Tile Doctor Colour Grow which is an impregnating sealer that as well as protecting the Victorian tiles form staining also enhances the colours in the tile. This sealer is also fully breathable so any moisture will be able to evaporate up through the tile and not get trapped under the floor where it could cause problems.

Victorian Tiled Hallway Floor Wellingborough After Restoration

Before leaving I also discussed maintenance cleaning with the customer and left them a bottle of Tile Doctor Neutral Tile Cleaner which is safe to use on sealed floors and will help keep the tiles looking at their best. It’s supplied in concentrated form so it should last them some time before they run out. The customer was very happy with the end results and has left positive comments on our website:

Very happy with the restoration of my Victorian tiled floor, cleaned, sealed and polished bringing it back to life. Phil was prompt to get back to me with any aftercare questions/queries/visits. Paula B, Wellingborough

Victorian Tiled Hallway Floor Wellingborough After Restoration


Source: Victorian Tile Cleaning, Restoration and Sealing Service in Northamptonshire

Tuesday, May 7, 2019

How to Drill Holes in a Tile Backsplash

Adding accessories to a tiled backsplash can be intimidating when the accessory requires screws to secure it to the wall. The difficulty drilling a hole through a tile backsplash comes from the high amount of friction created between the gritty texture of the tile and the drill bit. This increased friction causes heat at the point of drilling. When the heat builds up, the tip of the drill bit will begin to dull and eventually cause the bit to glow orange and fail. Reducing friction will reduce the stress caused when drilling holes through your tile backsplash.

Things You Will Need
  • Masking tape
  • Marker
  • Diamond-tipped drill bit
  • Variable-speed drill
  • Small plastic bowl
  • Cutting fluid
  • Rag

  1. Cover the portion of the tile requiring the hole with a masking tape X. Make sure the overlapping section of the X is sitting over the point requiring the hole.
  2. Mark the hole center on the overlapped section of the tape with a marker.
  3. Secure the required sized diamond-tipped drill bit in the chuck of a variable-speed drill. Fill a small plastic bowl with 1/4-inch of cutting fluid. Dip the tip of the drill bit in the fluid. Wipe the excess fluid from the drill bit with a rag.
  4. Place the drill bit on the hole center marked on the masking tape. Pull the trigger of the drill slowly until the drill bit turns roughly two revolutions-per-second. Do not apply pressure to the back of the drill. This could cause the bit to wander and damage the tile.
  5. Stop drilling after three to four seconds. Dip the drill bit in the cutting fluid. Leave the bit in the fluid for three to four seconds or until cool to the touch. Wipe excess fluid from the bit. Alternate drilling and cooling the drill bit until the hole is drilled through the tile.
Warning:
Protect your eyes when drilling backsplash tile.


Sunday, May 5, 2019

Choosing the Best Sealer for Rough Slate Flooring

This is a Semi Riven Black Slate floor which had been installed throughout much of the downstairs floor at a property in Bentham which is right on the Eastern edge of Lancashire. The Black slate and Grout had seen some wear and was now more Grey than black and having recently installed a new Kitchen the owner wanted the floor to look its best.

Rough stone can be especially hard to maintain if the wrong sealer has been applied. With rough or textured stone, it’s always best to use an Acrylic Sealer (aka " Topical sealer”) where possible. Unlike a Matt finish impregnating sealer a Topical Sealer is designed to sit on the surface of the Stone preventing dirt from getting caught in the nooks and crevices making it much easier to clean.

Rough Black Slate Floor Before Cleaning Bentham

After surveying the floor, I recommend burnishing the stone with a coarse pad to deep clean the stone and remove any remaining sealer, then seal with Tile Doctor Seal and Go which is a Topical sealer which we find always has provides good results on this type of floors. Happy with the price and keen to get the floor renovated we were given the go ahead and scheduled a date to return to do the work.

Rough Black Slate Floor Before Cleaning Bentham


Deep Cleaning a Semi Riven Black Slate floor in Bentham

The last thing we want to do is cause any damage to their beautiful new wooden kitchen. So before starting the cleaning process I applied clear silicone to the base of the new Kitchen units, this prevents water from the cleaning process seeping into the woodwork through capillary action.

Rough Black Slate Floor Applying Silicone Bentham

To get the tiles clean we burnished the stone floor with a coarse 200-grit Diamond pad fitted to a buffing machine running at slow speed and using water for lubrication. This gives a really deep clean and was followed up with the application of a black scrubbing pad to remove any excess resin released from the Slate which is quite common with Black stones due to the oil content. Once the Slate was clean, we turned our attention to the grout which was scrubbed with Tile Doctor Pro-clean. The floor was then rinsed with water and the soil extracted with a wet vacuum, once done the floor was left dry out.

Whilst at the property we managed to resolve a problem with a poorly laid slate tile in the hallway which the customer had often tripped over, so much so they had covered it with a rug, which was fine, but you couldn't see the Slate. Rather than lift and relay the tile I managed to cut back the surface of the stone with a hand held flex machine using several different diamond grits. You can see from the pictures how this looks before, during and after the seal. A further advantage of treating the stone in this way is that the slate takes on a more polished finish as the rough texture is cut back. The results speak for themselves and the customer certainly won’t be tripping over the tile from now. With no further need for the rug they can get the full benefit of the slate floor.

Rough Black Slate Tile Before During After Surface Correction Bentham


Sealing a Riven Black Slate Tiled Floor

The floor was left to dry off overnight and we returned the following day to apply a sealer first checking the floor was dry using a moisture meter. All was well, so we started to apply the first of several coats of Tile Doctor Seal and Go. It was a large area across multiple rooms, so it took some time before the job was complete.

Rough Black Slate Floor After Cleaning Bentham

The sealer added a lovely subtle sheen to the floor and restored the black colour in the Slate, the grout was also much cleaner and floor look transformed from the grey dull appearance we first experienced. As usual before leaving we talked about aftercare, using warm water (not hot or cold) with a mop and bucket and half a cap of Tile Doctor concentrated Neutral Tile Cleaner. Using the correct cleaning product will ensure they get maximum life out of the sealer.

Rough Black Slate Floor After Cleaning Bentham


Source: Slate Floor Cleaning and Sealing Service in Bentham, Lancashire

Friday, May 3, 2019

How to Clean Soot From a Stone Fireplace

Stone fireplaces accumulate soot just like any other fireplace surface. The stone, however, is a porous surface that requires bit of a deep cleaning to entirely remove the soot residue. Using harsh chemicals can sometimes damage the stone, and when you read the back of many commercial cleaning ingredients you will notice the "flammable" label. This means that when fire comes into contact with the cleaning residue, a fire could potentially start, making it dangerous to use this type of product to clean the stone fireplace.

Step 1 Fill a bucket with 1 gallon warm water, 1/4 cup dish soap and 1 cup oxygen bleach.

Step 2 Line the floor underneath the stone fireplace with dropcloths to prevent cleaning solution from seeping into your floor.

Step 3 Dip a cleaning brush into the bucket, and scrub the solution into the fireplace stone. Continue scrubbing, dipping the brush back into the solution as needed as you work your way across the fireplace.

Step 4 Rinse off the brush and rinse out the bucket. Refill the bucket with clean warm water.

Step 5 Drench a towel with the water and then wring the water out slightly. Wipe the towel over the whole stone fireplace to remove all of the cleaning residue, and let the stone air dry.


Source: www.Hunker.com