Tuesday, March 27, 2018

Renovating very old Quarry Tiles in Berkshire

These Yellow and Black Quarry tiles are though to be original feature of this Victorian house in Reading and the owner was keen to get them renovated. The tiles were in basement of the house and over the years the tiles had suffered from water damage due to various small floods, they were now heavily soiled and the most challenging task would be to remove a large build up of mortar and cement.

Yellow and Black Quarry Tiles Before Cleaning Reading Yellow and Black Quarry Tiles Before Cleaning Reading

I ran a test clean in a corner of the smallest room to demonstrate the cleaning process and although confident I could significantly improve the appearance of the Quarry tiles. I had to explain to my customer that due to the years of neglect the outcome would not be perfect, however the test clean went well and the customer was happy with the outcome so booked me in to do the work.

Yellow and Black Quarry Tiles Before Cleaning Reading


Soiled Quarry Tile Cleaning

The first issue to tackle was to remove the dirt and ingrain soil which I did by scrubbing in a strong mix of Tile Doctor Pro-Clean which is a strong tile and grout cleaner. The solution was left to soak in before ten minutes before being agitated with a black scrubbing pad fitted to a rotary machine. I then rinsed off the now soiled cleaning solution off using a hot water truck mounted extraction system.
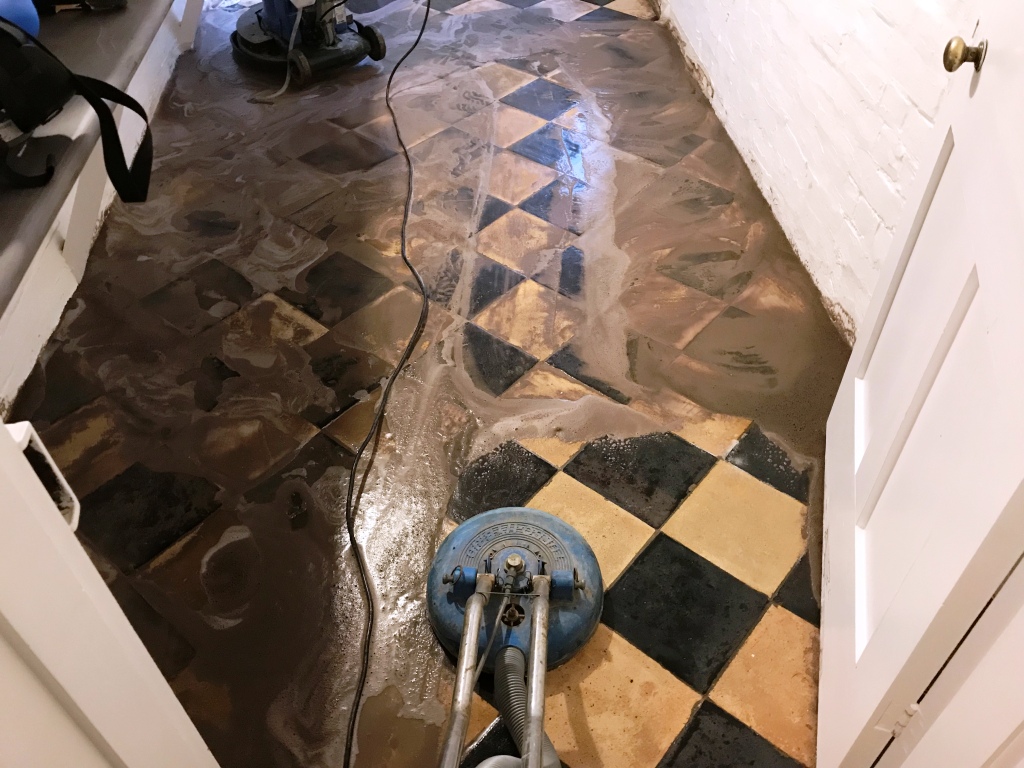
Yellow and Black Quarry Tiles During Cleaning Reading

Now the ingrained dirt was taken care of, the most difficult task was to remove the cement/mortar built up that was covering a high percentage of the tiles. I did this using a combination of Tile Doctor products including Grout Clean-Up, Acid Gel and 50,100 grit diamond pads. I started with Grout Clean-up but found that Acid Gel worked better on this occasion. To deal with stubborn areas I left the Acid Gel to dwell overnight covered with plastic sheeting so it wouldn’t dry out.

The Acid Gel worked wonders and I was able to complete the cleaning process when I came back the next day giving the floor another rinse with the hot water extraction system. With the quarry tiles now clear I able to do a final spot check and used hand held burnishing blocks and very coarse 50 grit milling pad followed by a 100 grit diamond pad and another rinse to finish it off.


Quarry Tile Sealing

After leaving the floor to dry out over the weekend it was ready to be sealed. We had agreed on giving the Quarry Tiles a matt finish so I used three coats of Tile Doctor Colour Grow which is a fully breathable colour enhancing sealer that works well on old clay tiles.

Yellow and Black Quarry Tiles After Cleaning Reading Yellow and Black Quarry Tiles After Cleaning Reading

I’m happy to say the floor turned out very well considering its condition, certainly my customer was very happy with the outcome and left the following feed back on the Tile Doctor Feedback system.

  “Fantastic job - completely revived our Victorian cellar tiles, the before and after photos accurately show the difference the work has made! Also impressed by Dennis's communication and responsiveness to our needs with the work”.


Yellow and Black Quarry Tiles After Cleaning Reading


Source: Quarry Tile Cleaning, Renovation and Maintenance Service in Reading, Berkshire
Monday, March 26, 2018

How to Prepare the Floor before Pouring Self Leveling Compound

A self leveling compound is applied to a floor prior to the laying of tile or wood planks. It provides you with a level surface to lay tiles on. Most any floor installer will tell you that you should never lay ceramic tile or wood directly on top of plywood subflooring. Self leveling compound will provide you with the necessary surface to lay the floor.

Clean the Subflooring

Preparing the floor before you pour the self leveling compound involves cleaning up any debris or dirt that has accumulated on the subflooring. This can be done with a shop vacuum or large shop broom. Once you have removed the debris from the subflooring, check the floor for any imperfections. These imperfections include nail or screw heads that may have forced their way upwards. Use a screwdriver or hammer to either remove the screws or nails or put them back in place. Replace any fasteners that you remove with new ones.

Test a Small Area of the Floor

Section off a small area of the floor in order to practice laying the self leveling compound. If you are working with the mixture for the first time, you should practice laying the compound in a small area, in order to get used to using it. Once the compound is mixed with water, you have a finite amount of time in which to work before the mixture becomes hard and unusable.

Wednesday, March 21, 2018

Screed Covered Quarry Tiled Floor Renovated in South London

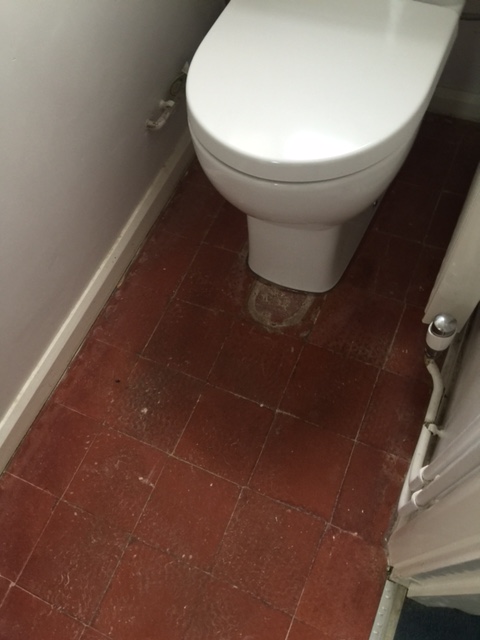
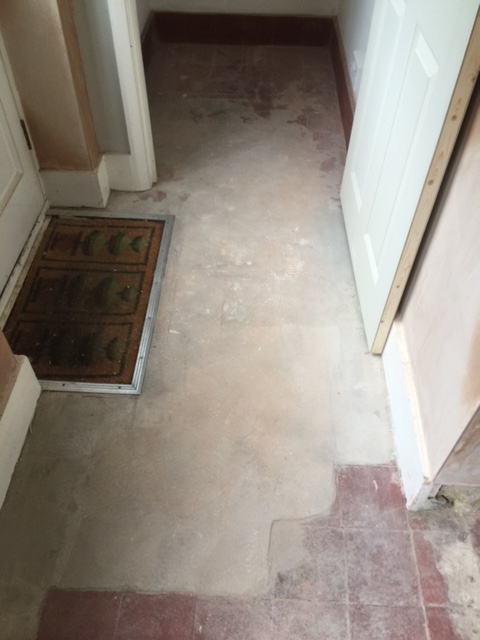
Pictures below of a Quarry Tiled floor that a customer had discovered when taking up the lino at her house in Coulsdon. Realising the floor was original and worth saving she contacted Tile Doctor and I popped round to take a look.

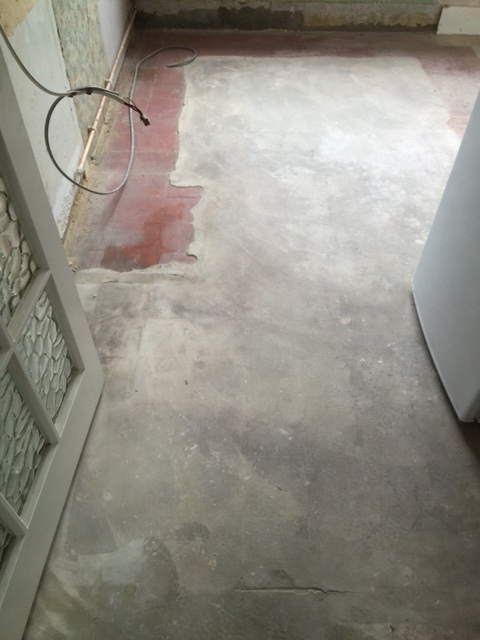
A lot of the tiles had been covered in a screed to provide a flat base for the Lino and that would need removing. In order to be sure what treatments would work to remove the screen and successfully restore the Quarry tiles without causing any damage I ran a couple of tests and everything seemed ok.

Quarry Tiled Floor Before Renovation Coulsdon Quarry Tiled Floor Before Renovation Coulsdon

We could both see the job wasn’t going to be easy and would take some days to complete so I worked out a price which was accepted and we agreed a date for the work to start.

Quarry Tiled Floor Before Renovation Coulsdon Quarry Tiled Floor Before Renovation Coulsdon


Removing Screed from Quarry Tiles

The Quarry tiles in the WC hadn’t been covered in Lino so they would just need a good clean and seal so the main work would be in the Hallway and Kitchen. Fortunately my customer was having a lot of other work done in the house and was in the middle of stripping the walls so I didn’t need to worry too much about protecting the skirting boards etc.

Working in sections I soaked the screed in water and then carefully chipped away at it until it came loose, it was slow work but I could see the process was working as expected and eventually all the Quarry tiles were revealed. There was still a lot of cement from the screed stuck to the surface of the tile so after sweeping up the chippings I set to work applying a strong solution of Tile Doctor Grout Clean-up to the tiles and leaving it to soak in for a short while. Grout Clean-Up is an acidic product that we normally use for removing grout smears from the surface of tiles. The solution was scrubbed in and then rinsed off with water and extracted with a wet vacuum.

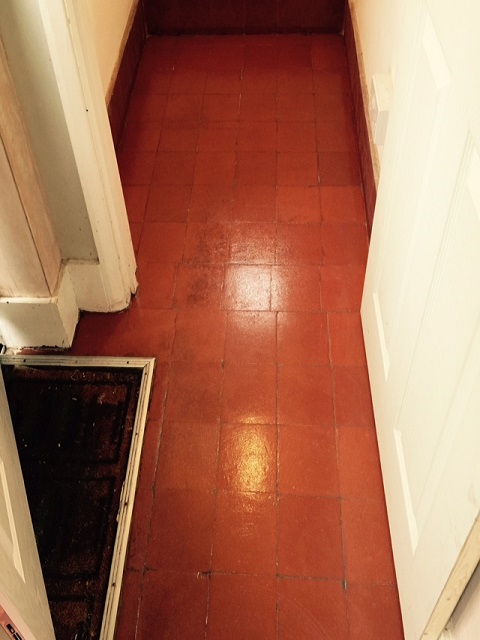
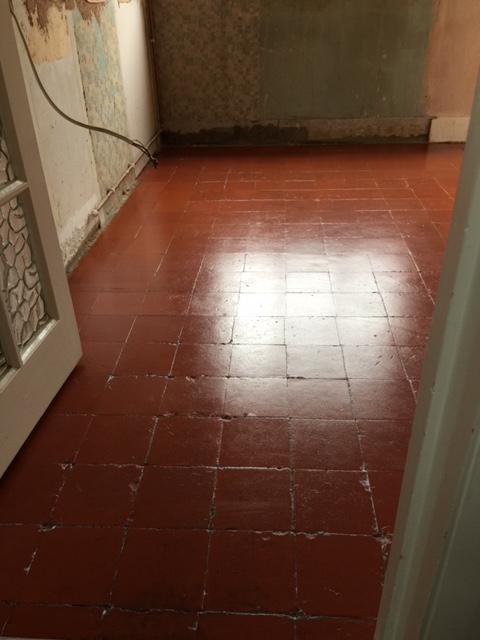
Quarry Tiled Floor After Renovation Coulsdon Quarry Tiled Floor After Renovation Coulsdon

To get the tiles in the toilet clean I gave them a good scrub with Tile Doctor Pro-Clean which is a reliable and effective Tile and Grout cleaner. Once clean they were rinsed with water and dried with the wet vacuum.


Sealing Quarry Tiles

I had timed my visit between working being carried out at the property so I was able to leave the floor for a few days so it could thoroughly dry out. I returned later to check the Quarry tiles were dry and completed the renovation by sealing the floor with Tile Doctor Seal and Go which is a water based sealer that works really well on Quarry tiles. Five coats of Seal and Go were needed to fully seal the tiles and the floor now looks transformed.

The owner was very satisfied with the improvements and before leaving I advised to cover the floor before starting the decorating work.


Source: Quarry Tile Cleaning and Sealing Service in South London

Friday, March 16, 2018

When to Use Double and Triple Joist Hangers

By providing vertical support to floor joists in a building frame, joist hangers enable a floor to support the sheer weight it is exposed to. Without them, joists would be forced to support the weight with only nails set at 45 degrees. Joist hangers provide a cradle for the joist to sit in. Special nails secure both the joist hanger to the beam or rim and the joist to the joist hanger. Most joist hangers used in residential construction are equipped to hold 2-by-6-inch joists. Sometimes, however, bigger joist hangers are required to doubled or tripled joists.

How Joist Hangers Work

Joist hangers attach to the structural beams of the frame. There are two, one at either end of each joist. They are machined out of metal and provide a lower edge or cradle in which the joist sits. Some joist hangers have an upper flange that hooks onto the beam. Most residential joist hangers do not. They come with pre-made holes so you can easily drive nails into them. Once the top of a joist is flush with the beam, you nail the joist hanger into place with weight-bearing tico nails. When both hangers are in place, you set the joist in and secure it with the same nails placed at 45 degrees.

Single Joist Hangers

Most joists used to make the flooring of a typical residential home or structure require single joist hangers. The distance the joists must span is not that great, and the load they must bear is shared by all of the floor joists in a given room. Most floor joists consist of 2-by-6-inch lumber, but they can use 2-by-8 or 2-by-10 as well, which will require longer joist hangers.
Double and Triple Joist Hangers

Double and triple joist hangers are wider to accommodate either a thicker piece of lumber or two or three joists placed side by side. In these cases, the joist hangers will be 4 by 6 inches, 6 by 6, or 6 by 8, depending on the dimensions of the joists. Rim joists are thicker lengths of lumber used at the edges of a home’s frame. They are at least 4 inches wide and require a double joist hanger.

In areas of a frame where joists are forced to span a wider distance, joists will be doubled or even tripled to provide more support.

Joist hangers enable the joists they support to, in turn, support a large amount of sheer weight. They are an integral part of a building frame. In some cases, it becomes necessary to place two or more joists side by side to add more vertical support or to support a large piece of horizontal lumber such as a rim joist. When this need arises, you will also need double or triple joist hangers. They are essentially the same as single joist hangers, just wider.


Wednesday, March 14, 2018

Cottage Floor Renovation at National Trust property in Cheshire

Quarry Bank Mill is an old textile mill just outside of Wilmslow in East Cheshire that dates back to the Industrial Revolution when it was used to produce cotton. The mill is now under the care of the National Trust who recently put together a £9.4 million project, supported by the Heritage Lottery Fund the further restoration of the mill and its gardens.

The 18th century mill is now a popular attraction and I was recently asked to clean and seal the Sandstone flooring in the Kitchen of the head gardeners cottage. The cottage is actually located in the formal gardens which were recently visited by HRH Price of Wales.

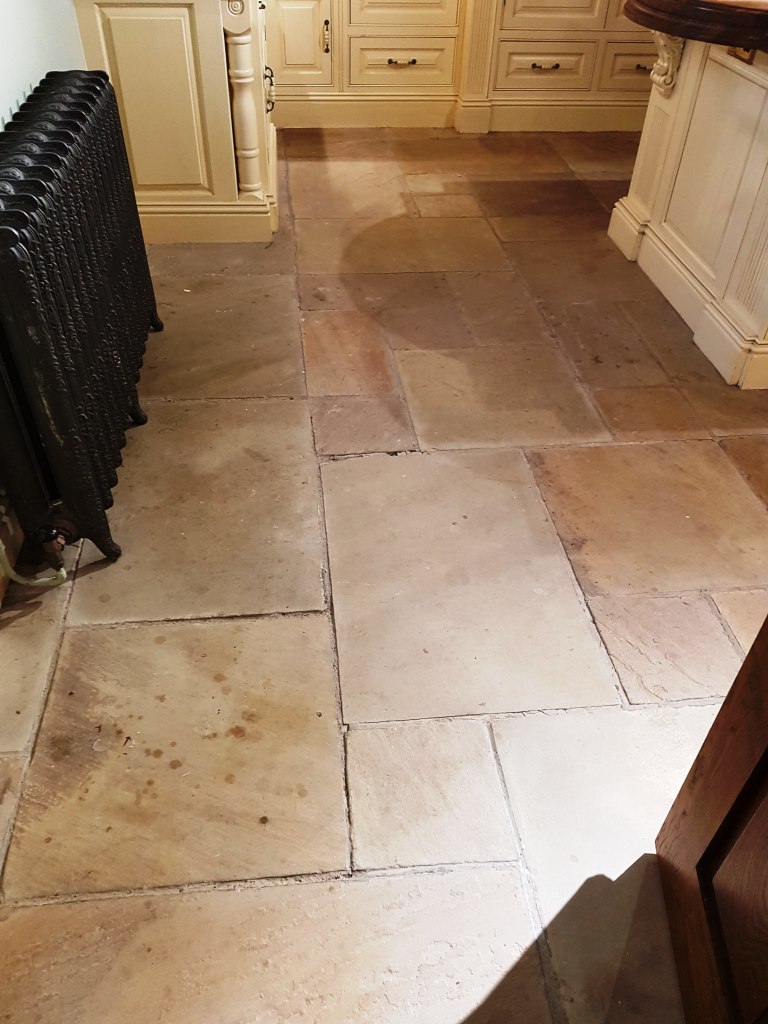
Sandstone Kitchen Floor Tile Before Cleaning Quarry Bank Mill Cottage

The Sandstone Kitchen floor was in good physical condition so unlikely to be the original however like any stone floor in constant use the sealer was wearing off and dirt was becoming ingrained in the pores of the stone detracting from its overall appearance.

Sandstone Kitchen Floor Tile Before Cleaning Quarry Bank Mill Cottage


Cleaning Dirty and Dull Sandstone Flagstones

Our first job was to protect the wooden kitchen units and other woodwork with tape. Next I set about cleaning the Sandstone and stripping any reaming sealer off in the process. To do this I applied a strong dilution of Tile Doctor Remove and Go, which is multi-purpose stripper and cleaner. The product strips away any old sealer on the tiles and draws out ingrained dirt, stains and heavy grease build-up.

I applied the product and left it to soak for roughly fifteen to twenty minutes to allow time to break down the old sealer and penetrate the pores of the stone to reach any embedded dirt. Next, I scrubbed the floor using a specialised buffing machine fitted with a black scrubbing pad swelled with water to get the stone clean. The resulting dirty cleaning slurry was quickly soaked up using a wet vacuum and after rinsing with water With the floor clear I was able to spot stubborn areas that need more work and repeated the process.

With the stone clean I turned my attention to the grout lines and scrubbed in a strong dilution of Tile Doctor Pro-Clean which was then rinsed off with water. I then completed another spot check of the floor whilst using the wet vacuum to get the floor as dry as possible. With the cleaning part of the job complete I left for the day to allowing the floor to dry off fully overnight.

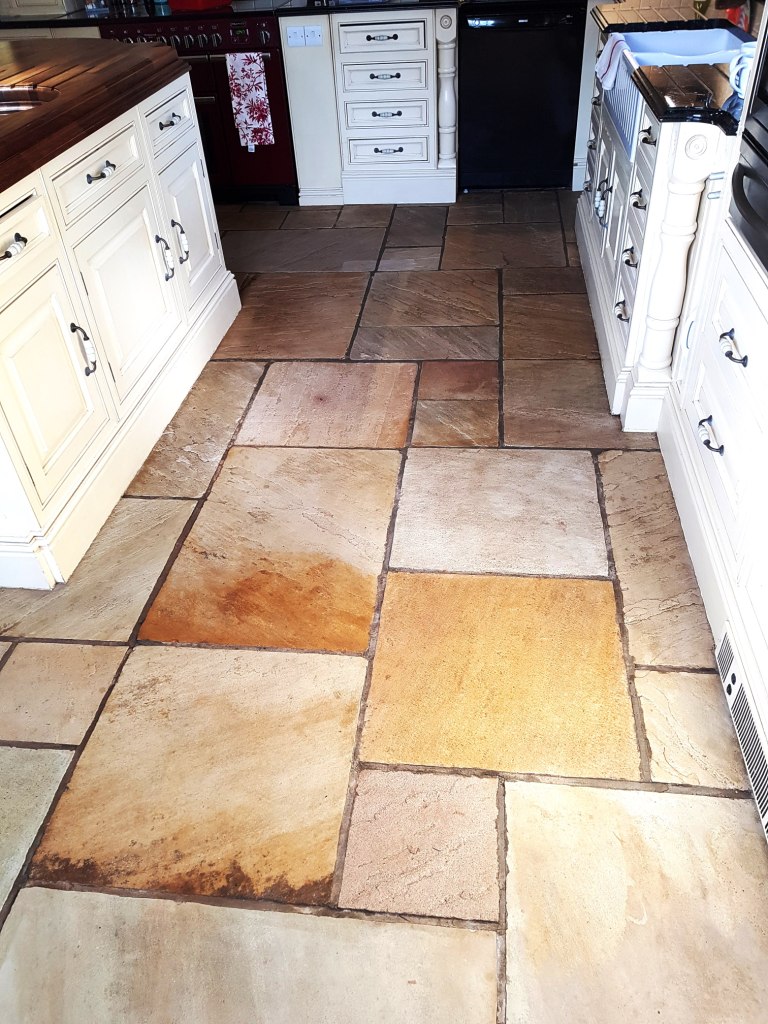
Sandstone Kitchen Floor Tile After Cleaning Quarry Bank Mill Cottage


Sealing Sandstone Kitchen Tiles

Upon returning to the property the following day, I tested the floor with a damp meter, checking for any excess moisture that could prevent me from sealing the stone. The floor proved dry and so I began to seal the Sandstone starting with a single coats of Tile Doctor Colour Grow. Colour Grow is an impregnating sealer that is designed to fill the pores of the stone blocking dirt from becoming ingrained there whilst enhancing the natural colours in the stone at the same time.

Once the Colour Grow was dry I followed with the application of five coats of Tile Doctor Seal and Go which is a compatible water-based acrylic sealer which provides both a stain resistant surface seal and a durable low-sheen finish.

Sandstone Kitchen Floor Tile After Cleaning Quarry Bank Mill Cottage

The floor now looks much healthier and the new sealer show keep it looking that way for some years to come.


Source: Sandstone Tile Cleaning and Sealing Service in East Cheshire

Wednesday, March 7, 2018

Renovating Old Victorian Hallway Tiles in Bedfordshire

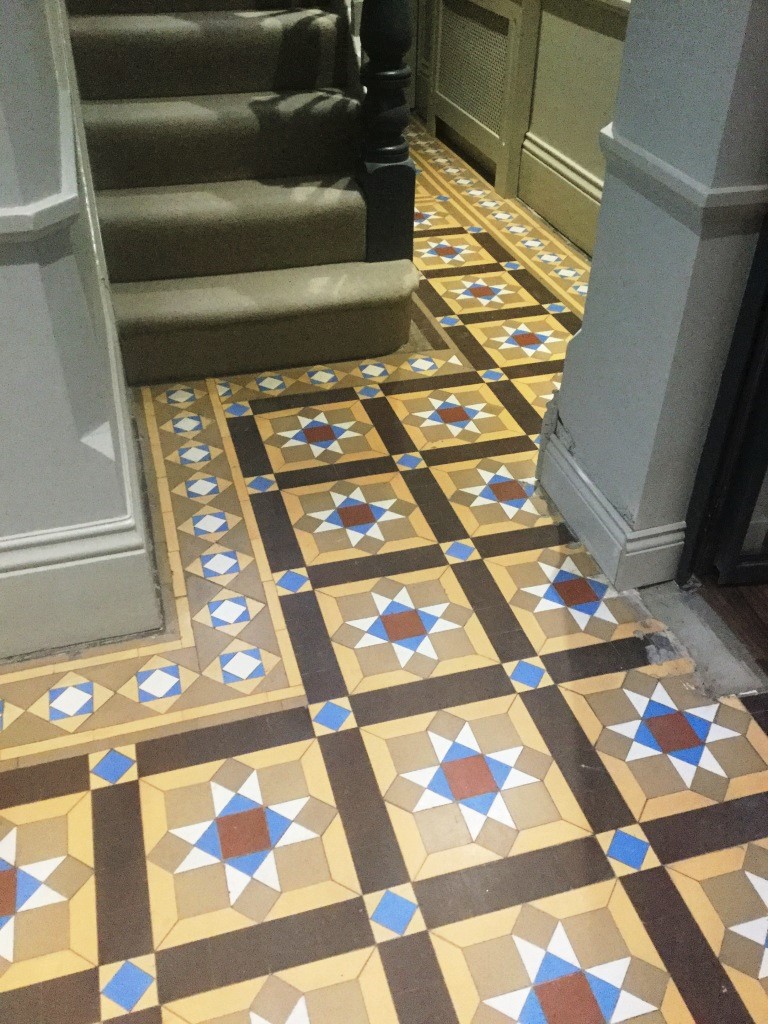
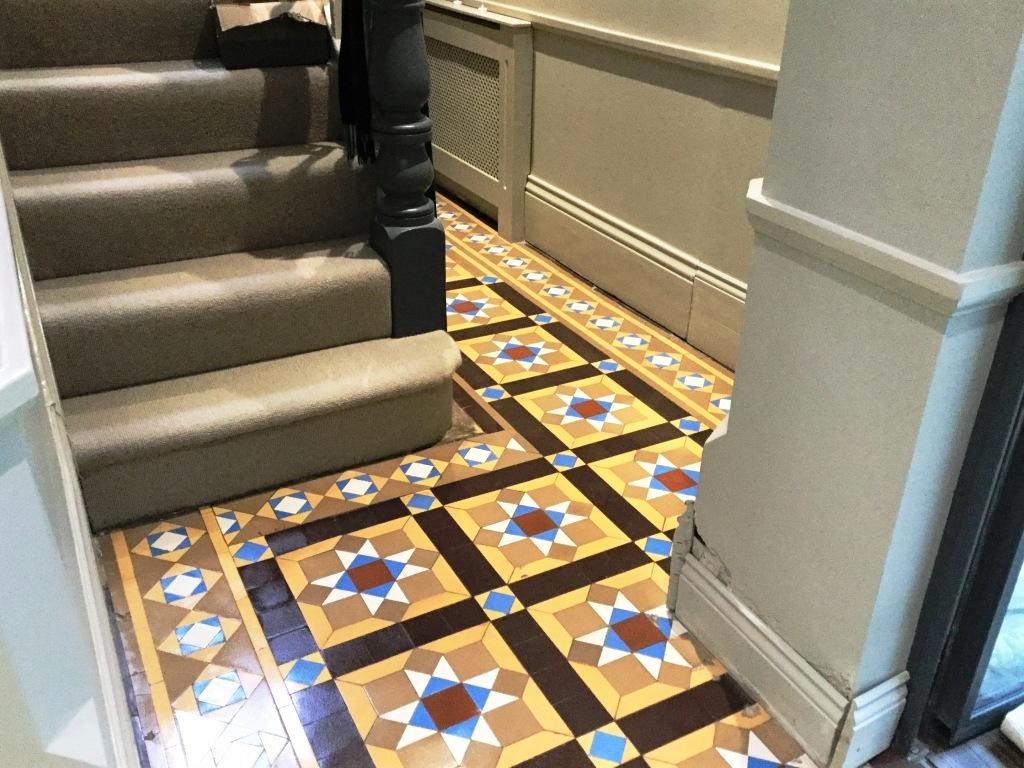
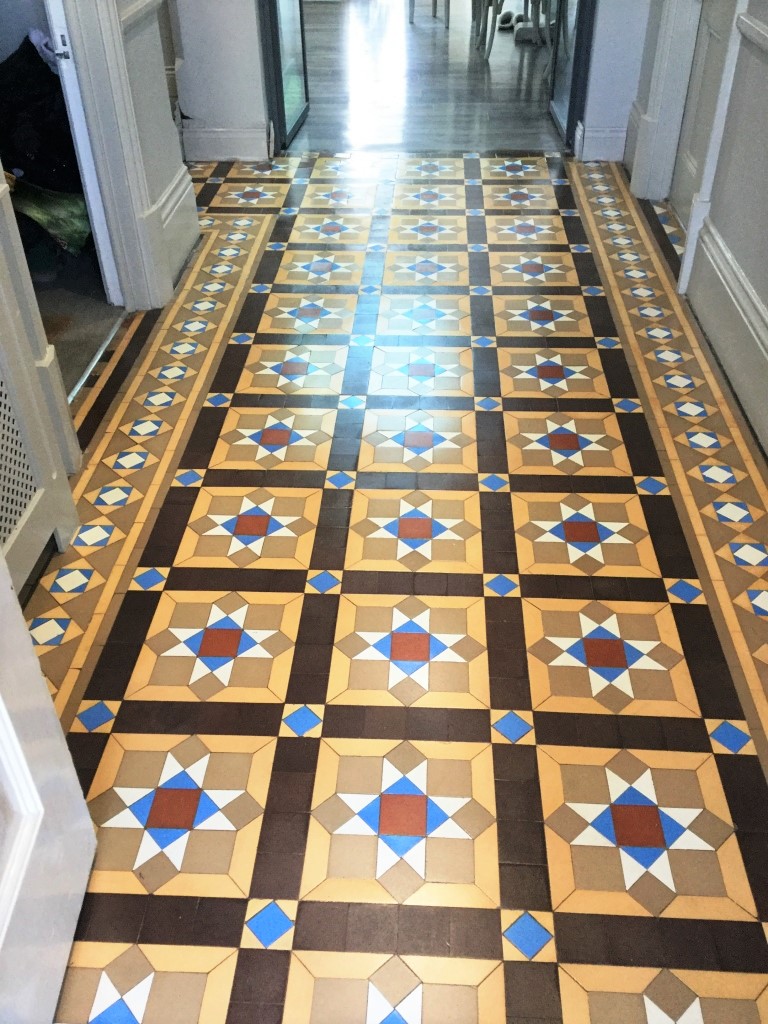
A homeowner in the Leighton Buzzard was having some renovation work done to their property and during the course of the work discovered an original Victorian tiled floor underneath the hallway carpet. The town dates all the way back to the 12th century so period features like this are quite common.

Keen to have the floor restored the owner got in touch to ask if I could survey the floor and quote for restoring it, so my colleague Phillip popped round to see what needed to be done. Surprisingly the tiles were generally in quite good condition for their age with just a few cracks and chips here and there. There were some missing tiles that needed replacing but I was able to help them source replacements which were fitted before the cleaning work commenced.

Victorian Tiled Floor Leighton Buzzard Before Cleaning Victorian Tiled Floor Leighton Buzzard Before Cleaning


Cleaning an Original Victorian Tiled Floor

I started the cleaning process by giving the tiles a deep machine clean with Pro-Clean which is a strong tile and grout cleaning product produced by Tile Doctor. A strong dilution was left to soak into the tiles before scrubbed in with a tile brush fitted to a rotary machine. This action lifted the surface soil and bits of plaster and paint which was then rinsed off and extracted using a wet vacuum.

With the soil and cleaning solution removed I then carried out a full inspection of the tiles in their natural state to see what other work would be required. As there was no apparent sealer present, I decided that the next step in the cleaning process would be to use a coarse 200 grit burnishing pad to clean and resurface the tiles, this was followed by a second rinse and wet vacuum. I then went around on hands and knees using Tile Doctor 100 grit diamond hand blocks to remove stubborn staining around the edges close to the newly painted skirting boards.


Sealing an Original Victorian Tiled Floor

The floor was allowed to fully dry for 2 days before I returned to apply Tile Doctor Colour Grow sealant which is an impregnating sealer that improves colour and is fully breathable, so it allows any damp from the sub floor to dissipate. Choosing a breathable sealer is important for these old floors which have no damp proof course and Colour Grow is normally my sealer of choice for Victorian floor tiles.

However Colour Grow dries to a matt finish and on this occasion the customer felt the finish still looked quite dull, although she was very happy with the results of the cleaning she asked if there was anything else I could do to brighten the finish, it was agreed that I would return a week later to carry out a damp test and if the results of this were favourable I would go ahead and apply several coats and apply Tile Doctor Seal & Go topical sealant which is water based and dries to a silk finish.

When I returned moisture, readings were taken which were acceptable, so as agreed I applied several coats of Seal and Go to give the tiles the desired appearance. With the work completed the customer was happy with the final results and even left the following feedback via the Tile Doctor feedback system.

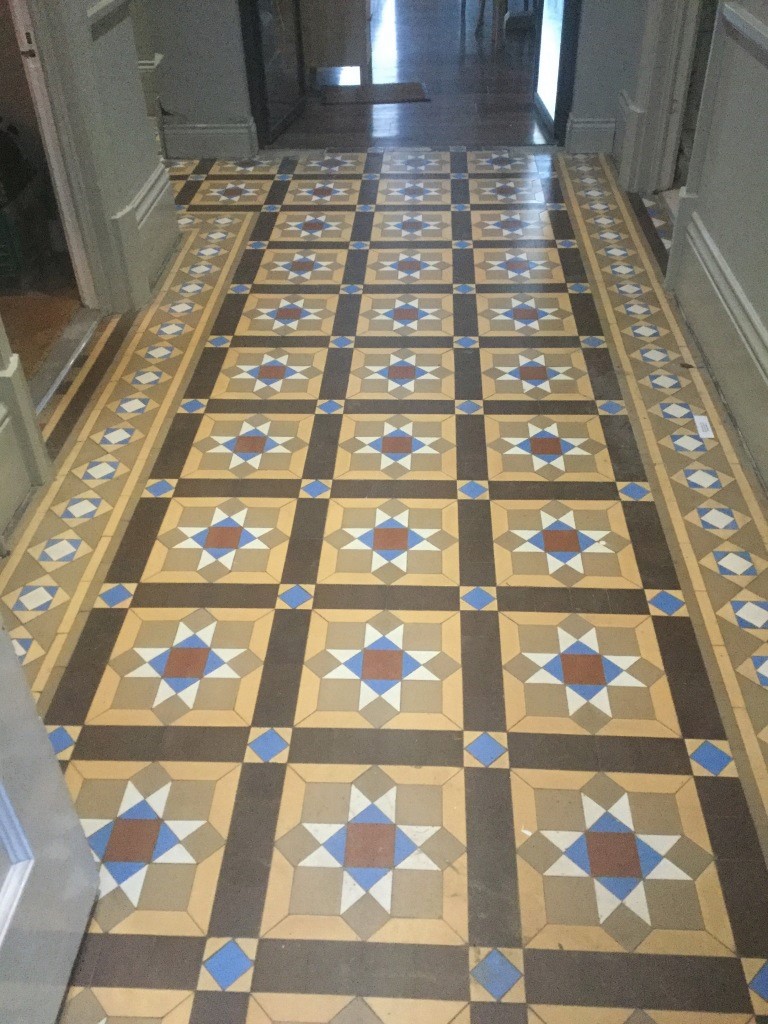
Phillip arrived on time, worked very hard to prepare the floor- about 6 hours. Returned after floor was properly dry- 2 days. Applied a mat finish - 2-3 coats. I was disappointed with this finish, the floor which looked very flat and washed out. Each floor has its own characteristic and absorbs the products used differently. Phillip didn't disagree, so applied two coats of a glossy finish which has brought out the beautiful colours of my Victorian floor. All of this was done without a quibble. Happy with the finish now. My advice is to discuss fully the finish you require and get a patch test done before so everyone is clear about the job in hand. Would use again. Ms. A Binger , Leighton Buzzard


Victorian Tiled Floor Leighton Buzzard After Cleaning Victorian Tiled Floor Leighton Buzzard After Cleaning


Source: Victorian Tile Cleaning and Restoration Service in Bedfordshire