Tuesday, June 25, 2019

How to Deep Clean Kitchen Wall Tile and Grout

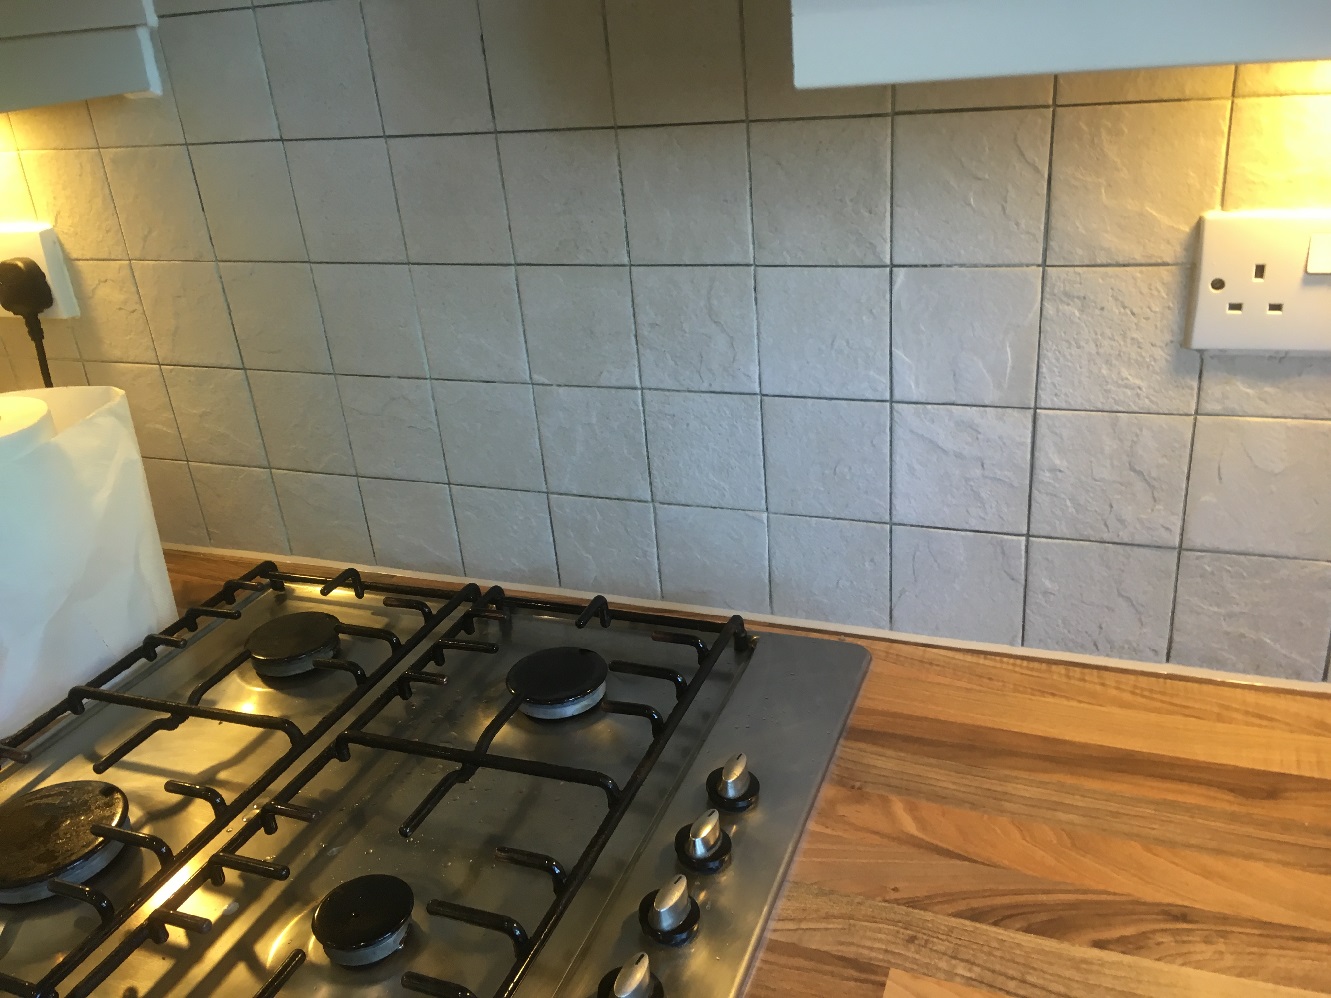
This customer from Chorley asked me to call round to clean-up their kitchen wall tiles. The tiles were ceramic and formed the backsplash behind the kitchen units, so they experienced a lot of splashing from the worktop. Those directly behind the sink and gas hob were subject to very heavy use and were quite badly soiled.

Ceramic Wall Tile Grout Before Cleaning Chorley

Rather than being glazed these Ceramic tiles had the sort of rough riven surface you find on slate which looked interesting but had the side effect of trapping dirt more easily. Installed with the kitchen over ten years ago my customer was now very unhappy with the state of the backsplash tiles and especially the grout which had darkened. They had tried everything to clean them up including lots of household cleaners, including Bleach and Flash to name a few, but nothing had helped. Grease and grime can be particularly difficult to remove especially from grout and most cleaners will not do the job.

I went to have a look at the problem myself and completed a test clean on a section of the tile and grout. By the time I had finished the grout looked white again the tiles much lighter in colour. Although I had only popped round to provide a quote for the work the customer was so happy with the result of the test clean it was agreed I complete the whole backsplash there and then.
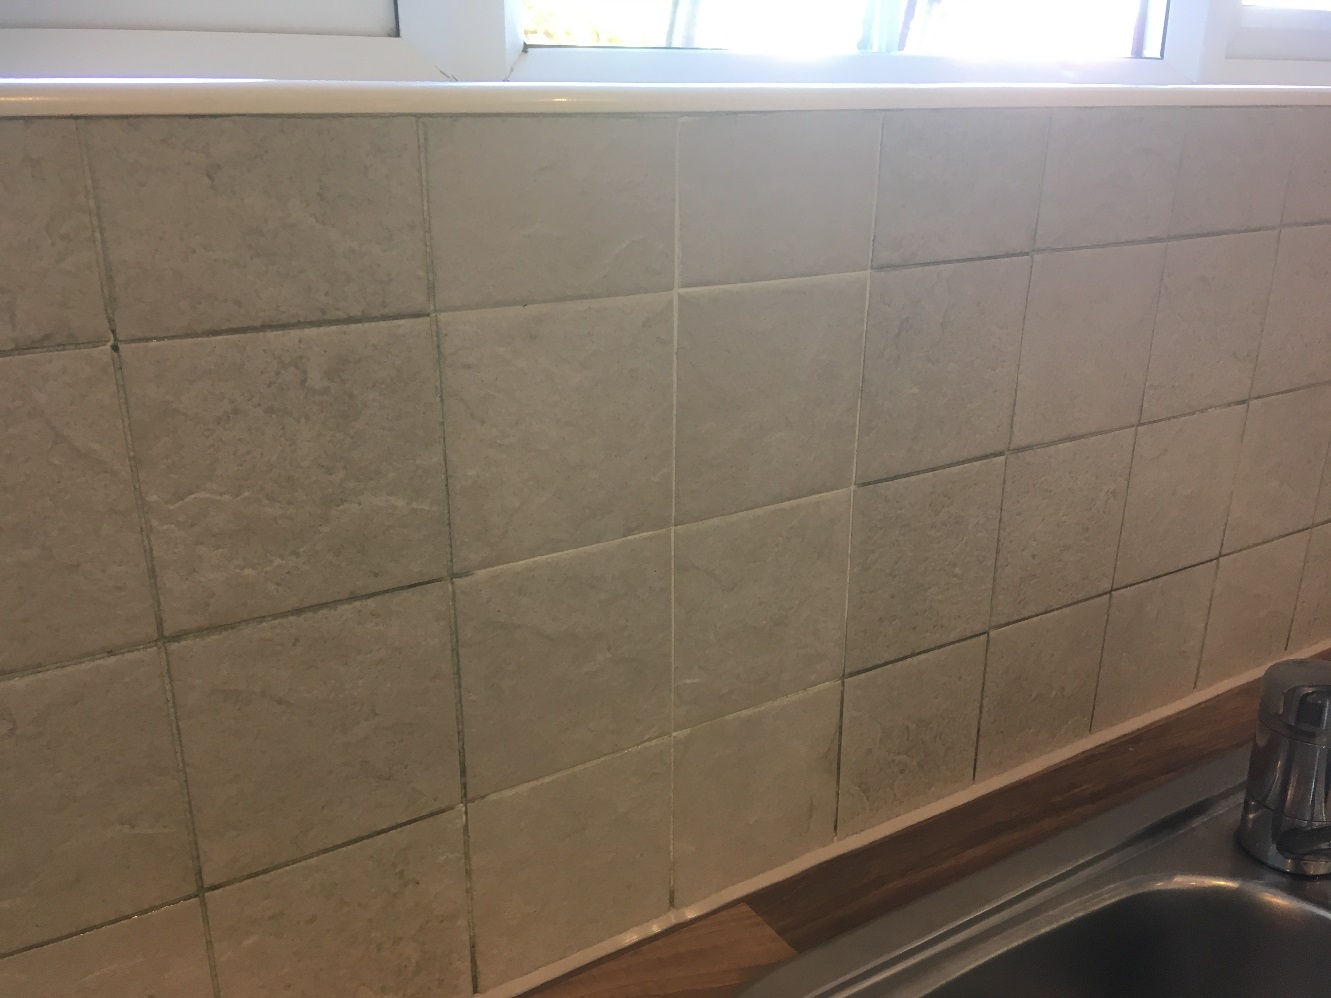
Ceramic Wall Tile Grout During Test Clean Chorley


 Cleaning a Ceramic Tiled Kitchen Splashback

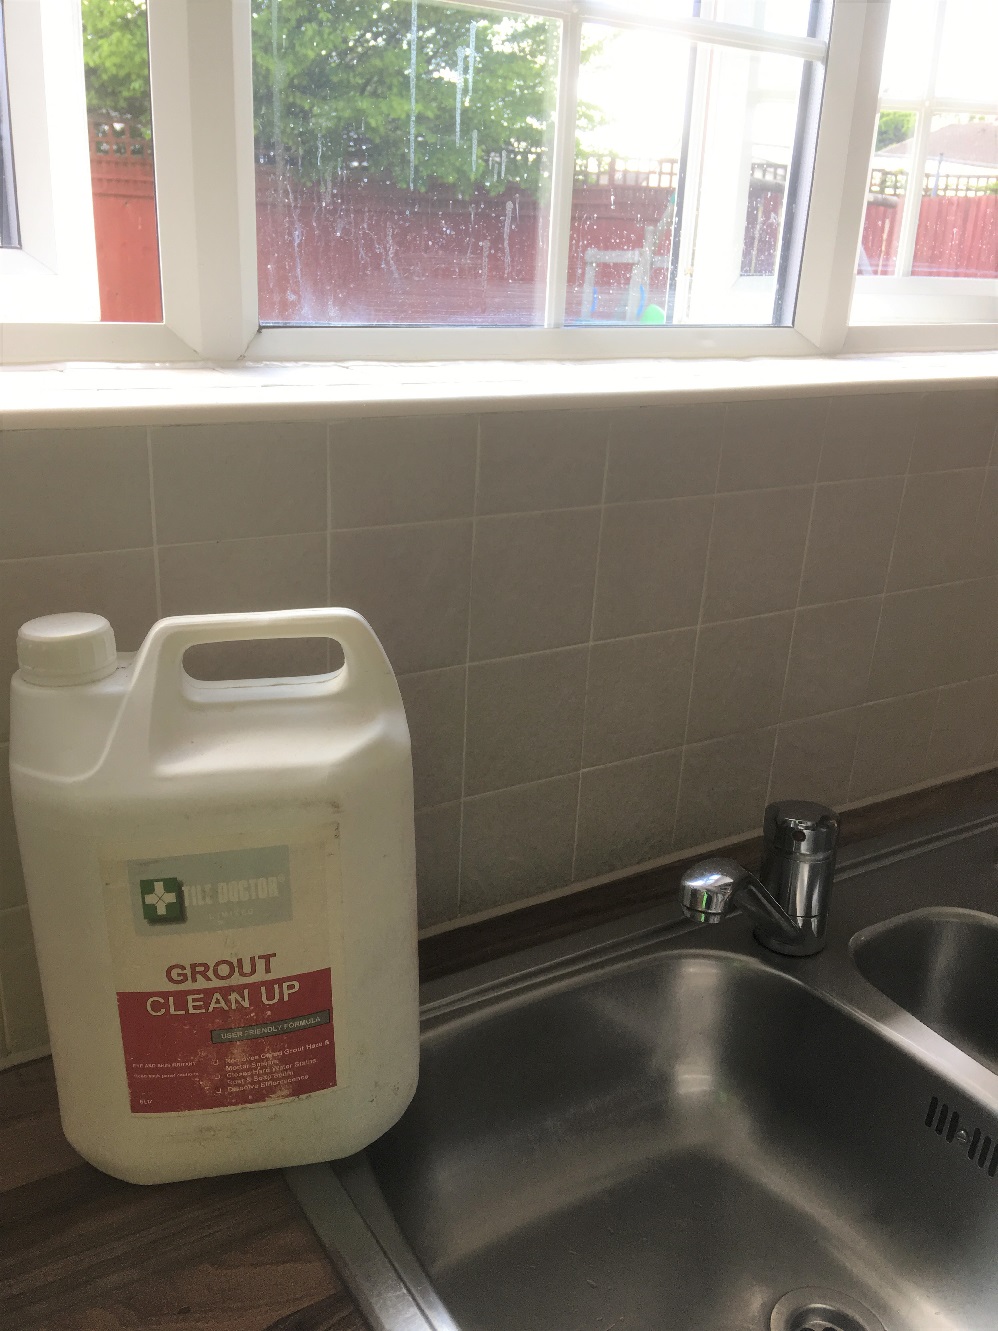
The method I used was to spray the tiles using neat Tile Doctor Remove and Go mixed with Tile Doctor Grout Clean-Up to create a very strong tile and grout cleaner. This was applied and allowed to soak in for a short while, then the tiles and grout were steam cleaned and hand scrubbed. I removed the now dirty cleaning residue with a wet vacuum and then wiped the tiles down. The effect was immediate. Ceramic tiles are sealed at the factory so there is no need to apply a sealant however its always worth sealing the grout which is easily done using a wall tile and grout aerosol sealer.
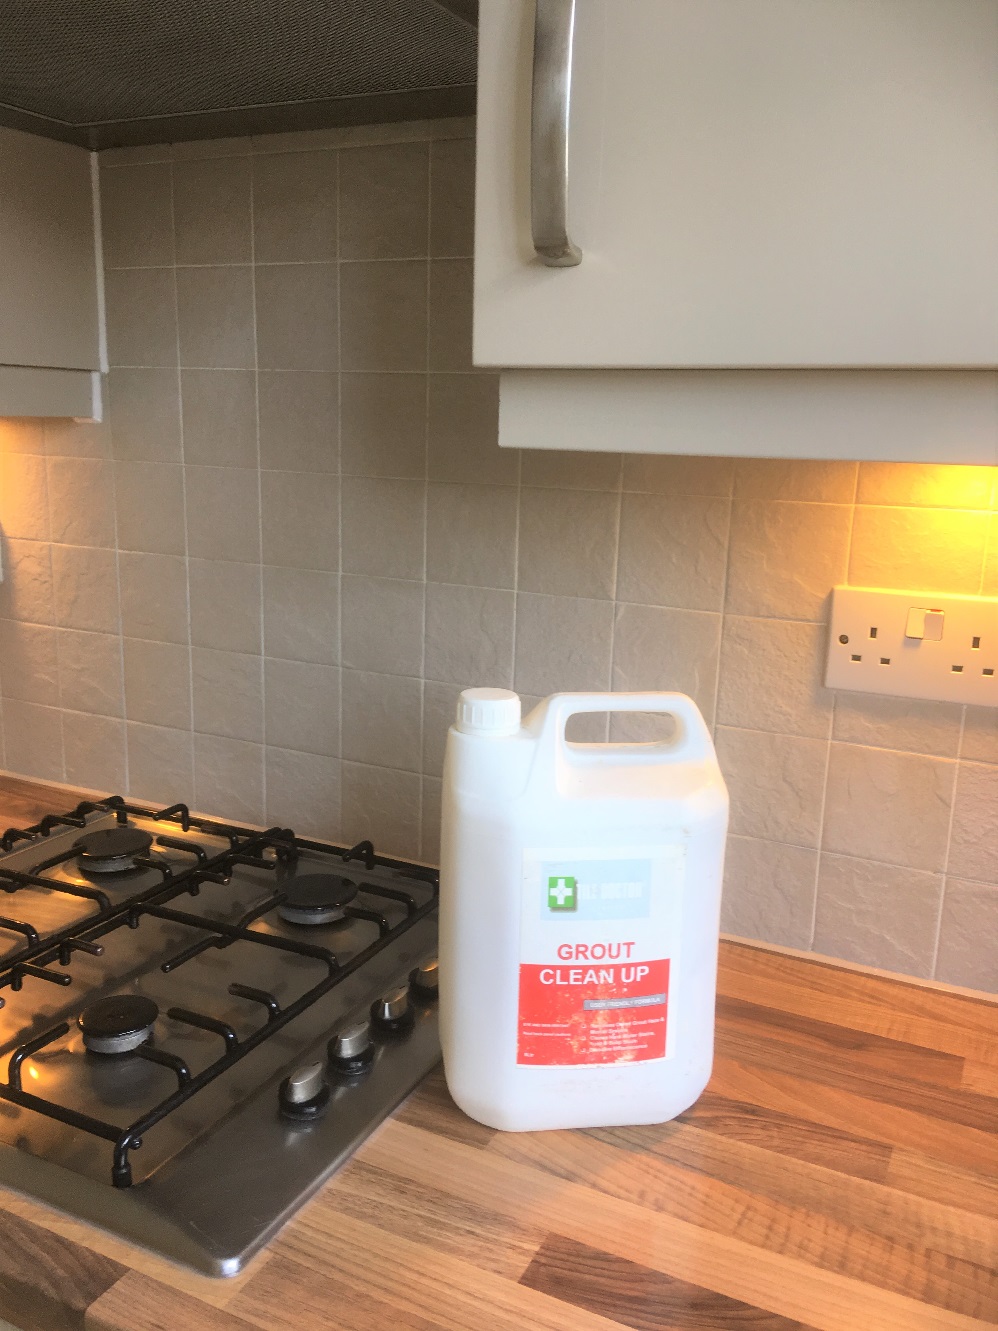
Ceramic Wall Tile Grout After Cleaning Chorley

The method worked well, the tiles were lovely and clean, and the grout looked new. We had a great result which the customer was really happy with and left the following feedback.

"Fantastic job! Tiles look as though they are new. I am so happy with it"

Moving forward I suggested they ensured that spills were cleaned up immediately and that they used the Tile Doctor Aqua-Pro Cleaner to keep on top of the tile and grout cleaning. Although primarily sold for bathroom tile cleaning it works equally as well in the kitchen. This will prevent the built up they had experienced, but of course they now know where to find us, so can always let us know when they next need a deep clean!
Ceramic Wall Tile Grout After Cleaning Chorley


Source: Ceramic Tile and Grout Cleaning Service in Lancashire
Monday, June 24, 2019

Install A Foam Floor In A Kids’ Room

A kids room will greatly benefit from having a foam floor. This flooring is not only comfortable and soft, but it also adds a new dimension for you to decorate your room.

Many home owners install their foam floors in playrooms and even on basement floors where the kids can have their own play area. These foam floors are incredibly durable, easy to clean, and spill proof. There is a wide variety of different shapes, sizes, and designs for the foam floor which makes it easy to match to any decor. Depending on what your child likes, you can have letters, designs, cars, dinosaurs, colors, and even sports teams as designs on the foam floors.

A Big Puzzle
For the most part, installing a foam floor is much like putting together a puzzle. Foam floors come with interlocking joints that make them much more stable, and less likely to come apart from use.

What You’ll Need

  • Foam flooring of your choice
  • Utility Knife
  • Carpet tape
  • Measuring Tape
  • Square


Step One
Clean the entire subfloor of the area you are going to be working in. You can install the foam floor on any type of hard surface, but it needs to be clean of any residue, oils, nails, or splinters.

Step Two
Take the time to lay out the foam floor tiles in the way you want them. Resist the temptation to begin laying them down permanently right at the beginning. You might see that they way you originally planned the floor does not look quite right.

Leave at least 18 inches all the way around the room for the border tiles. Position the floor in the middle so that there are equal amounts of a floor all the way around the room so the border tile installation will be much smoother.

This step is important so you will get the exact pattern that you want for the children’s play area.

Step Three
Measure the remaining floor space and transfer these measurements to the border tiles. Cut them down to size using the utility knife and a straight edge. Once these are cut to size, then install them along the entire outside edge of the room, or play area.

Step Four
When you are absolutely sure you have the right configuration you want for your foam floor, then begin to adhere them to the floor for a permanent fixture.

Pull up each border tile and place double sided carpet tape onto floor. Use tape for each corner of the tile and the middle area. Press the tile back into place and apply pressure to it to create a stronger bond. Repeat this process all the way around the room.

Do not adhere the middle tiles to the floor. This way you still have the option of changing them out or rearranging them for a new look.


Source: www.DoItYourself.com

Tuesday, June 18, 2019

How to Enhance the Appearance of Natural Slate Tiles

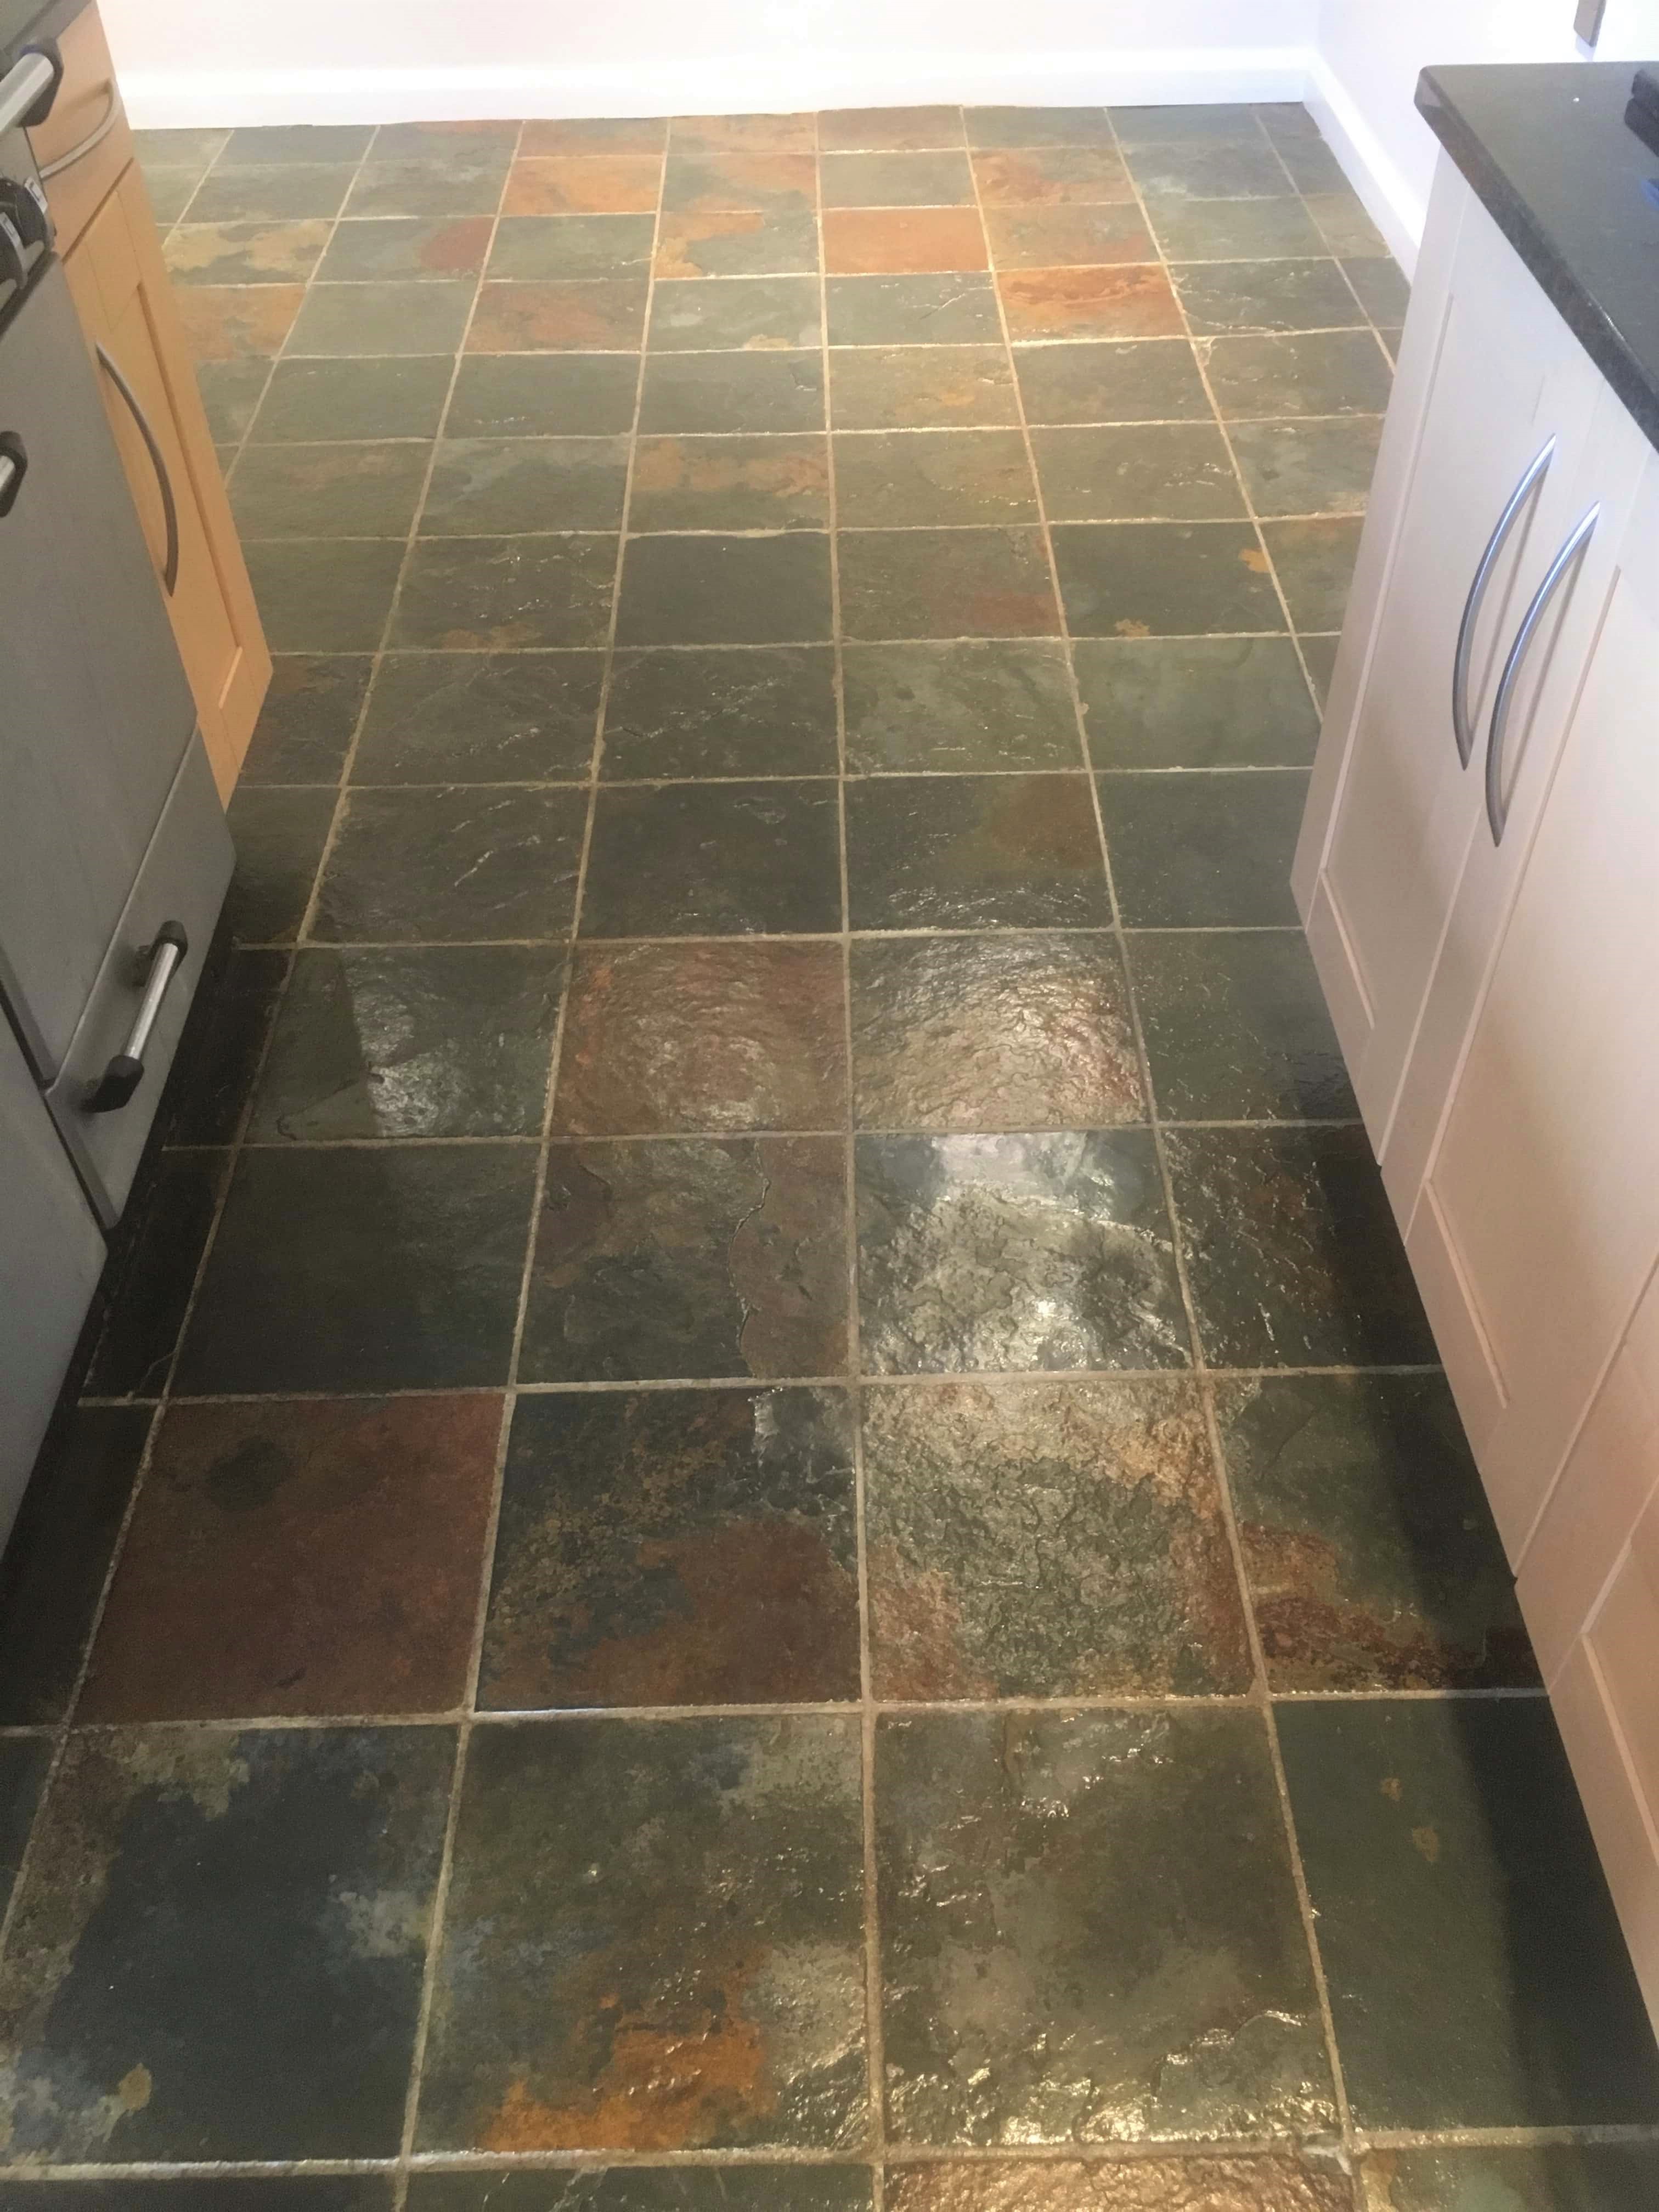
This customer had recently moved into a property in Abingdon and got in touch about having the coloured Slate floor tiles in the kitchen cleaned and sealed. There was a big variation in appearance from one end of the kitchen to the other and they had a hunch that the Slate had a lot more colours in it than they could see!

Coloured Slate Floor Tiles Before Cleaning Abingdon

I called in to survey the floor and could see that the main issue was the usual problem of the sealer wearing down in the high traffic areas allowing dirt to penetrate and build-up in the pores of the stone. I ran some tests on the tiles and carried out a test clean, the difference in the stone and grout was immediate, and the customer was happy to go ahead and have the whole floor done. We arranged to carry out the work later that month.


Cleaning a Coloured Slate Tiled Kitchen Floor

To clean the floor, I first spread a dilution of Tile Doctor Pro-Clean over a section of the slate tiles. It was then left to soak into the pores of the stone for ten minutes before working it into the slate with a mono rotary floor machine fitted with a black scrubbing pad. I find the pad works well on tiles but can struggle in the recesses of the grout line, so I followed this up by running a stiff brush along the grout lines to get them clean as possible.

After scrubbing the floor in this manner, the dirt was released from the pores of the stone into the cleaning solution and I was then able to extract the resulting slurry from the floor using a wet vacuum. I worked in sections like this until the whole floor was completed. It was surprising how much dirt had been lifted and the Slate floor was a different colour after I had finished.

I then rinsed the floor with water a couple of times and then followed up by scrubbing the floor with Tile Doctor Grout Clean-Up which is an acidic product which cleans the stone further and removes any mineral deposits including grout smears. Being an acidic product, it also counters the alkalinity of Tile Doctor Pro Clean effectively leaving the floor with a neutral pH. I rinsed the floor a couple of times with water and then mopped the floor with Tile Doctor Neutral Floor Cleaner.

That completed the first day, I left for the evening and the floor was left to dry overnight.


Sealing a Coloured Slate Tiled Kitchen Floor

I returned on day two and tested the floor using the moisture meter to make sure it was dry. The readings were good, and I was satisfied it was dry enough to take a sealer. To seal the floor, I applied Tile Doctor Seal & Go which leaves the floor with a sheen finish that the customer wanted. The Slate was quite porous, so it took seven coats to fully seal the floor which took some time and you have to allow for each coat to dry before applying the next.

Coloured Slate Floor Tiles After Cleaning Abingdon

The floor was transformed by the time I had finished, and you can see from the after picture how clean the grout is and how the lovely Copper tones in the stone were now evident; the natural variations in colour were now as they should be. Clearly their hunch had been right!

The customer was very happy and left the following feedback which is always gratefully received as much of our work comes from recommendations.

“Very happy with the service we received. Barry did an excellent job restoring our floor and we wouldn't hesitate to recommend him.”


Source: Slate Cleaning and Sealing Service in Oxfordshire

Monday, June 17, 2019

Marble Floors Explained

In the last few years marble floors have become increasingly popular in North America. Long a tradition in warmer European climates, North Americans are starting to recognize marble floors are both great looking and durable yet easy to maintain and take care of. Since marble is a totally natural product, marble also allows homeowners concerned with their environmental footprint to have a beautiful, long lasting floor and no concerns about negatively impacting the environment.

If you’re considering marble floors for your home, here’s some information on marble you might find interesting.

Marble’s Make-up
  • Marble is actually limestone that the natural pressure of the earth has compressed to form into a hard rock consisting of crystals with beautiful lines and colors running through it.
  • The color of a marble rock is entirely dependent on the natural elements in the soil where it was formed. It can vary all the way from white to black with highlights of virtually any color, including basic reds, browns and grays but in some cases actually including pinks and greens.
  • As a natural product, each piece of marble is unique in its appearance, with the veining and flecks adding character and beauty.

Marble Flooring
  • Marble flooring is most commonly installed as large tiles, usually 12” up to 24” square.
  • Since it’s stone, marble is extremely durable. Although more porous than granite (and as a result requires sealing after installation), once sealed, marble is both moisture and stain resistant as an added benefit is both allergen and bacteria resistant, (making it a fine choice for anyone with breathing problems).
  • Maintaining a marble floor is simplicity itself. A regular mopping with warm water then leaving it to dry is all that’s needed to keep it looking good. This easy maintenance makes marble extremely versatile and commonly used in many areas of a home, such as entranceways, kitchens and bathrooms.
  • Marble’s hard surface stays cool even in the hottest days of the summer, making it an attractive option for homes located in the South where the summers are long and hot. However, perhaps one of the best features of marble flooring is because of its beauty and durability, marble will add significant value to your home, now and at resale.

Marble does have some disadvantages
  • As a natural stone product marble is quite heavy and difficult to work with. As well, because of its weight and dense structure installing marble requires specialized tools (wet saws) for cutting and shaping it making hand tools are virtually useless.
  • Marble is also brittle so the potential for breaking or cracking marble tiles during installation is always present. So, while installation isn’t beyond the capability of a skilled DIY’er, in most cases installing a marble floor is a job for an experienced professional.

As well marble needs to be resealed on a regular basis to prevent staining. Depending on where in a home the marble is located, professionals recommend it be sealed immediately after installation and then resealed every 9 to 12 months in a kitchen or bathroom or every 12 to 18 months in an entranceway.


Saturday, June 15, 2019

How to restore a damaged Quarry tiled floor

The pictures below are taken from a property in Lancaster which had two areas of tiled flooring that needed work, one Quarry tiled and the other an original Victorian tiled hallway which was over 100 years old.

We often get called out to restore broken tiles, missing pieces and then do a clean and seal afterwards to make it all look as good as possible. Tile Doctor covers both areas and our aim is to restore a tiled floor to its best possible condition, ideally making it look new or at least as close to new as is feasible with an old floor.

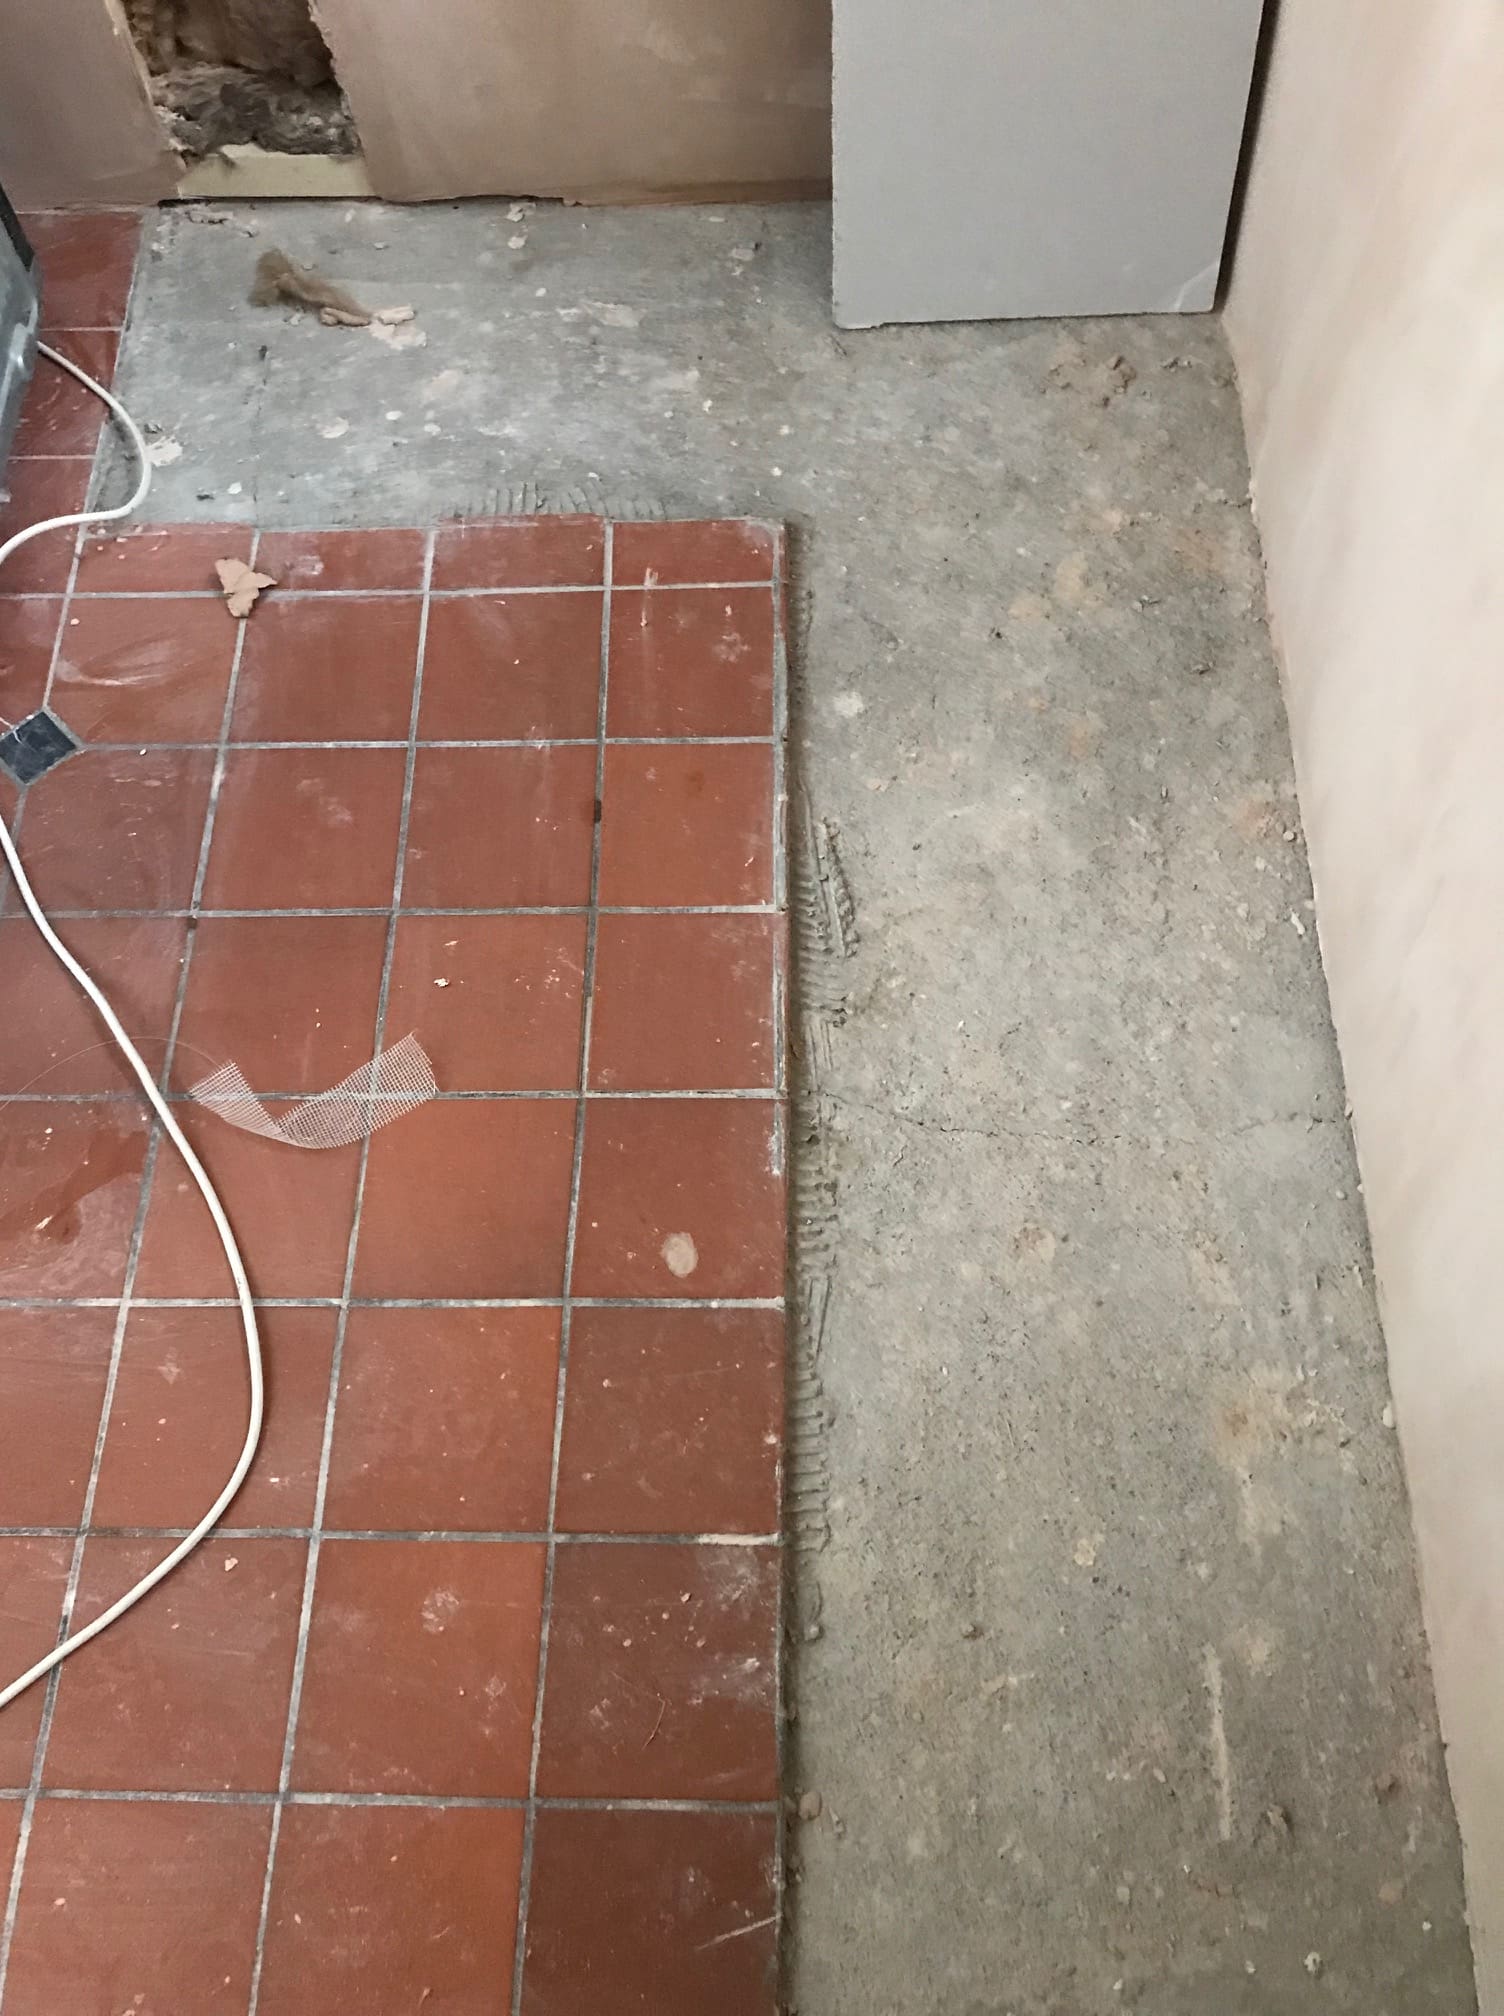
Quarry Tiled Floor Lancaster Before Repair


Repairing a Quarry Tiled Floor in Lancaster

The focus of this article will be the renovation of the Quarry tiled floor which required a lot of tiling work due to cracked and missing tiling. This presents a problem as it can be difficult to find exact match replacements, especially when the floor has been down for some time. There are a few companies that specialise in reproduction Victorian tiles however Quarry tiles don’t have a dedicated store or website where we can get matching tiles. In this case the client had scoured the internet and hunted down replacements which came close to matching the original.

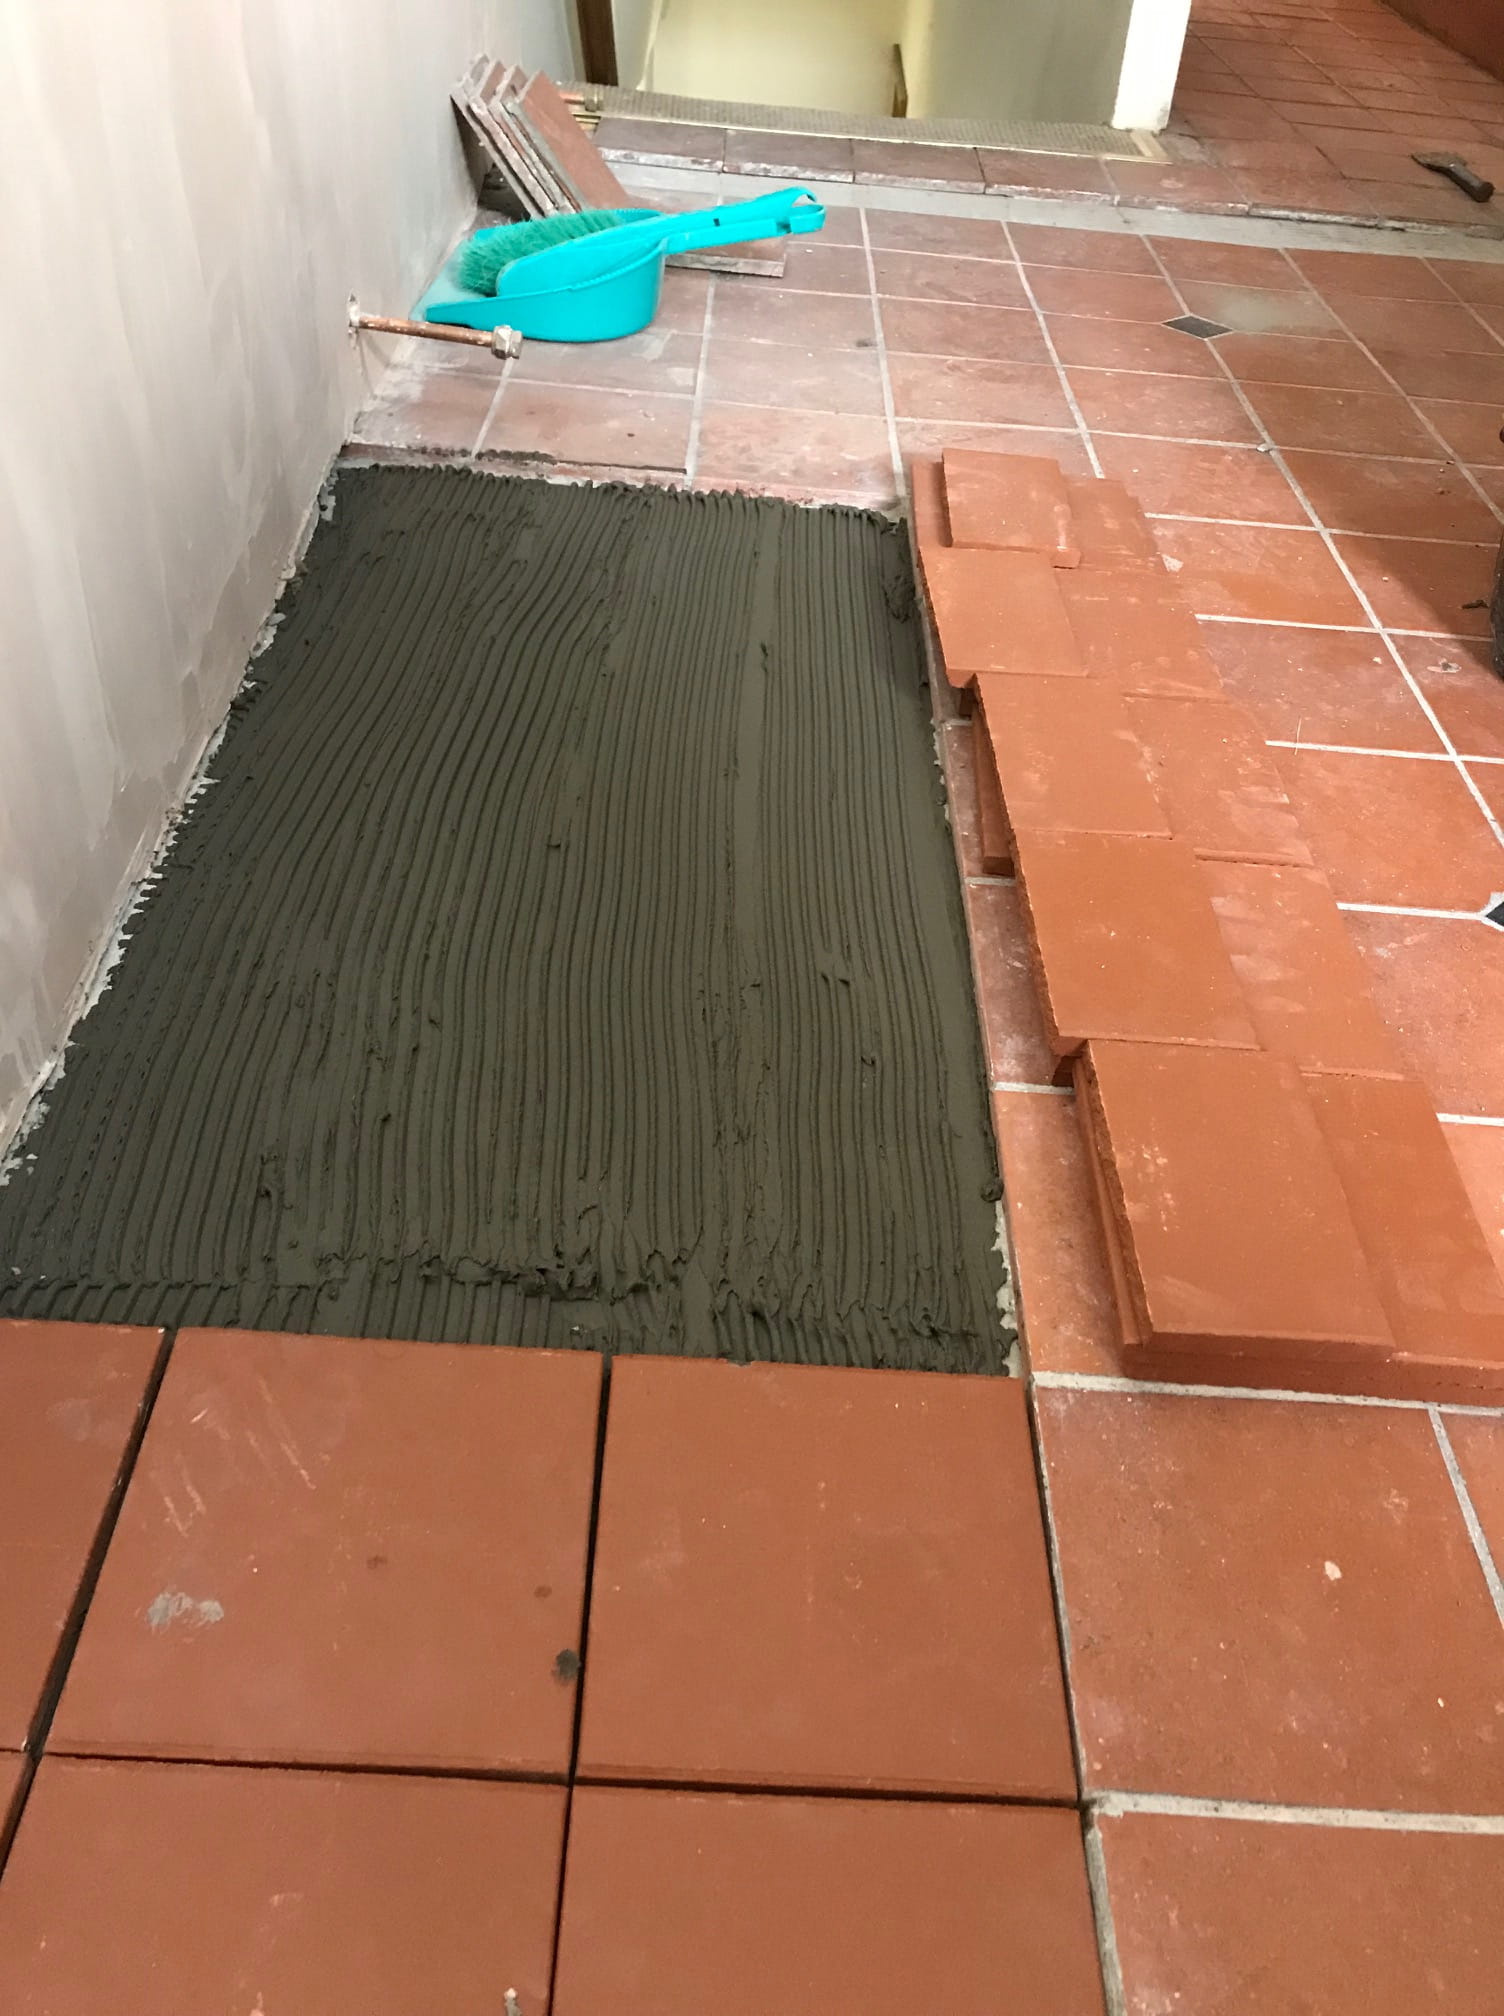
Quarry Tiled Floor Lancaster During Repair

The first step in repairing a tiled floor is to carefully remove any damaged tiles and, in this case, there were quite a few. The exposed area is the cleaned of old adhesive and grout and the subbase is made good where required. Next the replacement tiles are laid onto a base of new rapid set flexible floor adhesive, I prefer to use a flexible adhesive as it will allow for any further moment in the floor. Once the adhesive had set the tiles were grouted in and we then left floor to fully set overnight.


Deep Cleaning a Quarry Tiled Floor in Lancaster

I came back the next day with our cleaning equipment and products to get the floor clean which should help blend the new tile in with the original.

I started by applying a strong dilution of Tile Doctor Pro-Clean to the Quarry tiles and then scrubbed it in with a rotary floor machine fitted with a black scrubbing pad. Pro-Clean is a strong and effective alkaline cleaner which is safe to use on Tile and Stone and unlike acid wont damage the clay. The cleaning solution soon turned black with the dirt that had been released from the old Quarry Tiles, so I gave the floor a rinse with water and extracted the soil with a wet vacuum.

The last job was to give the tiles a light acid rinse using Tile Doctor Grout Clean-Up, this isn't a strong acid like the brick acid you find in DIY stores so it’s safe to use on most surfaces if it isn’t left for too long. The Grout Clean-up removes any old grout and minerals such as efflorescent salts from the Quarry tiles and is then rinsed off with water and extracted with the wet vacuum. The other advantage of giving the floor an acid rinse is it counters the alkaline cleaning products used earlier effectively neutralising the pH level of the tiles. Lastly the acid slightly etches the clay tile ensuring a much stronger bond with the sealer.


Sealing a Quarry Tiled Floor in Lancaster

The Quarry tiled floor was then sealed with Tile Doctor Colour Grow which is a matt sealer that impregnates the pores of the clay enhancing colour in the process and effectively adding protection to the tile from within.

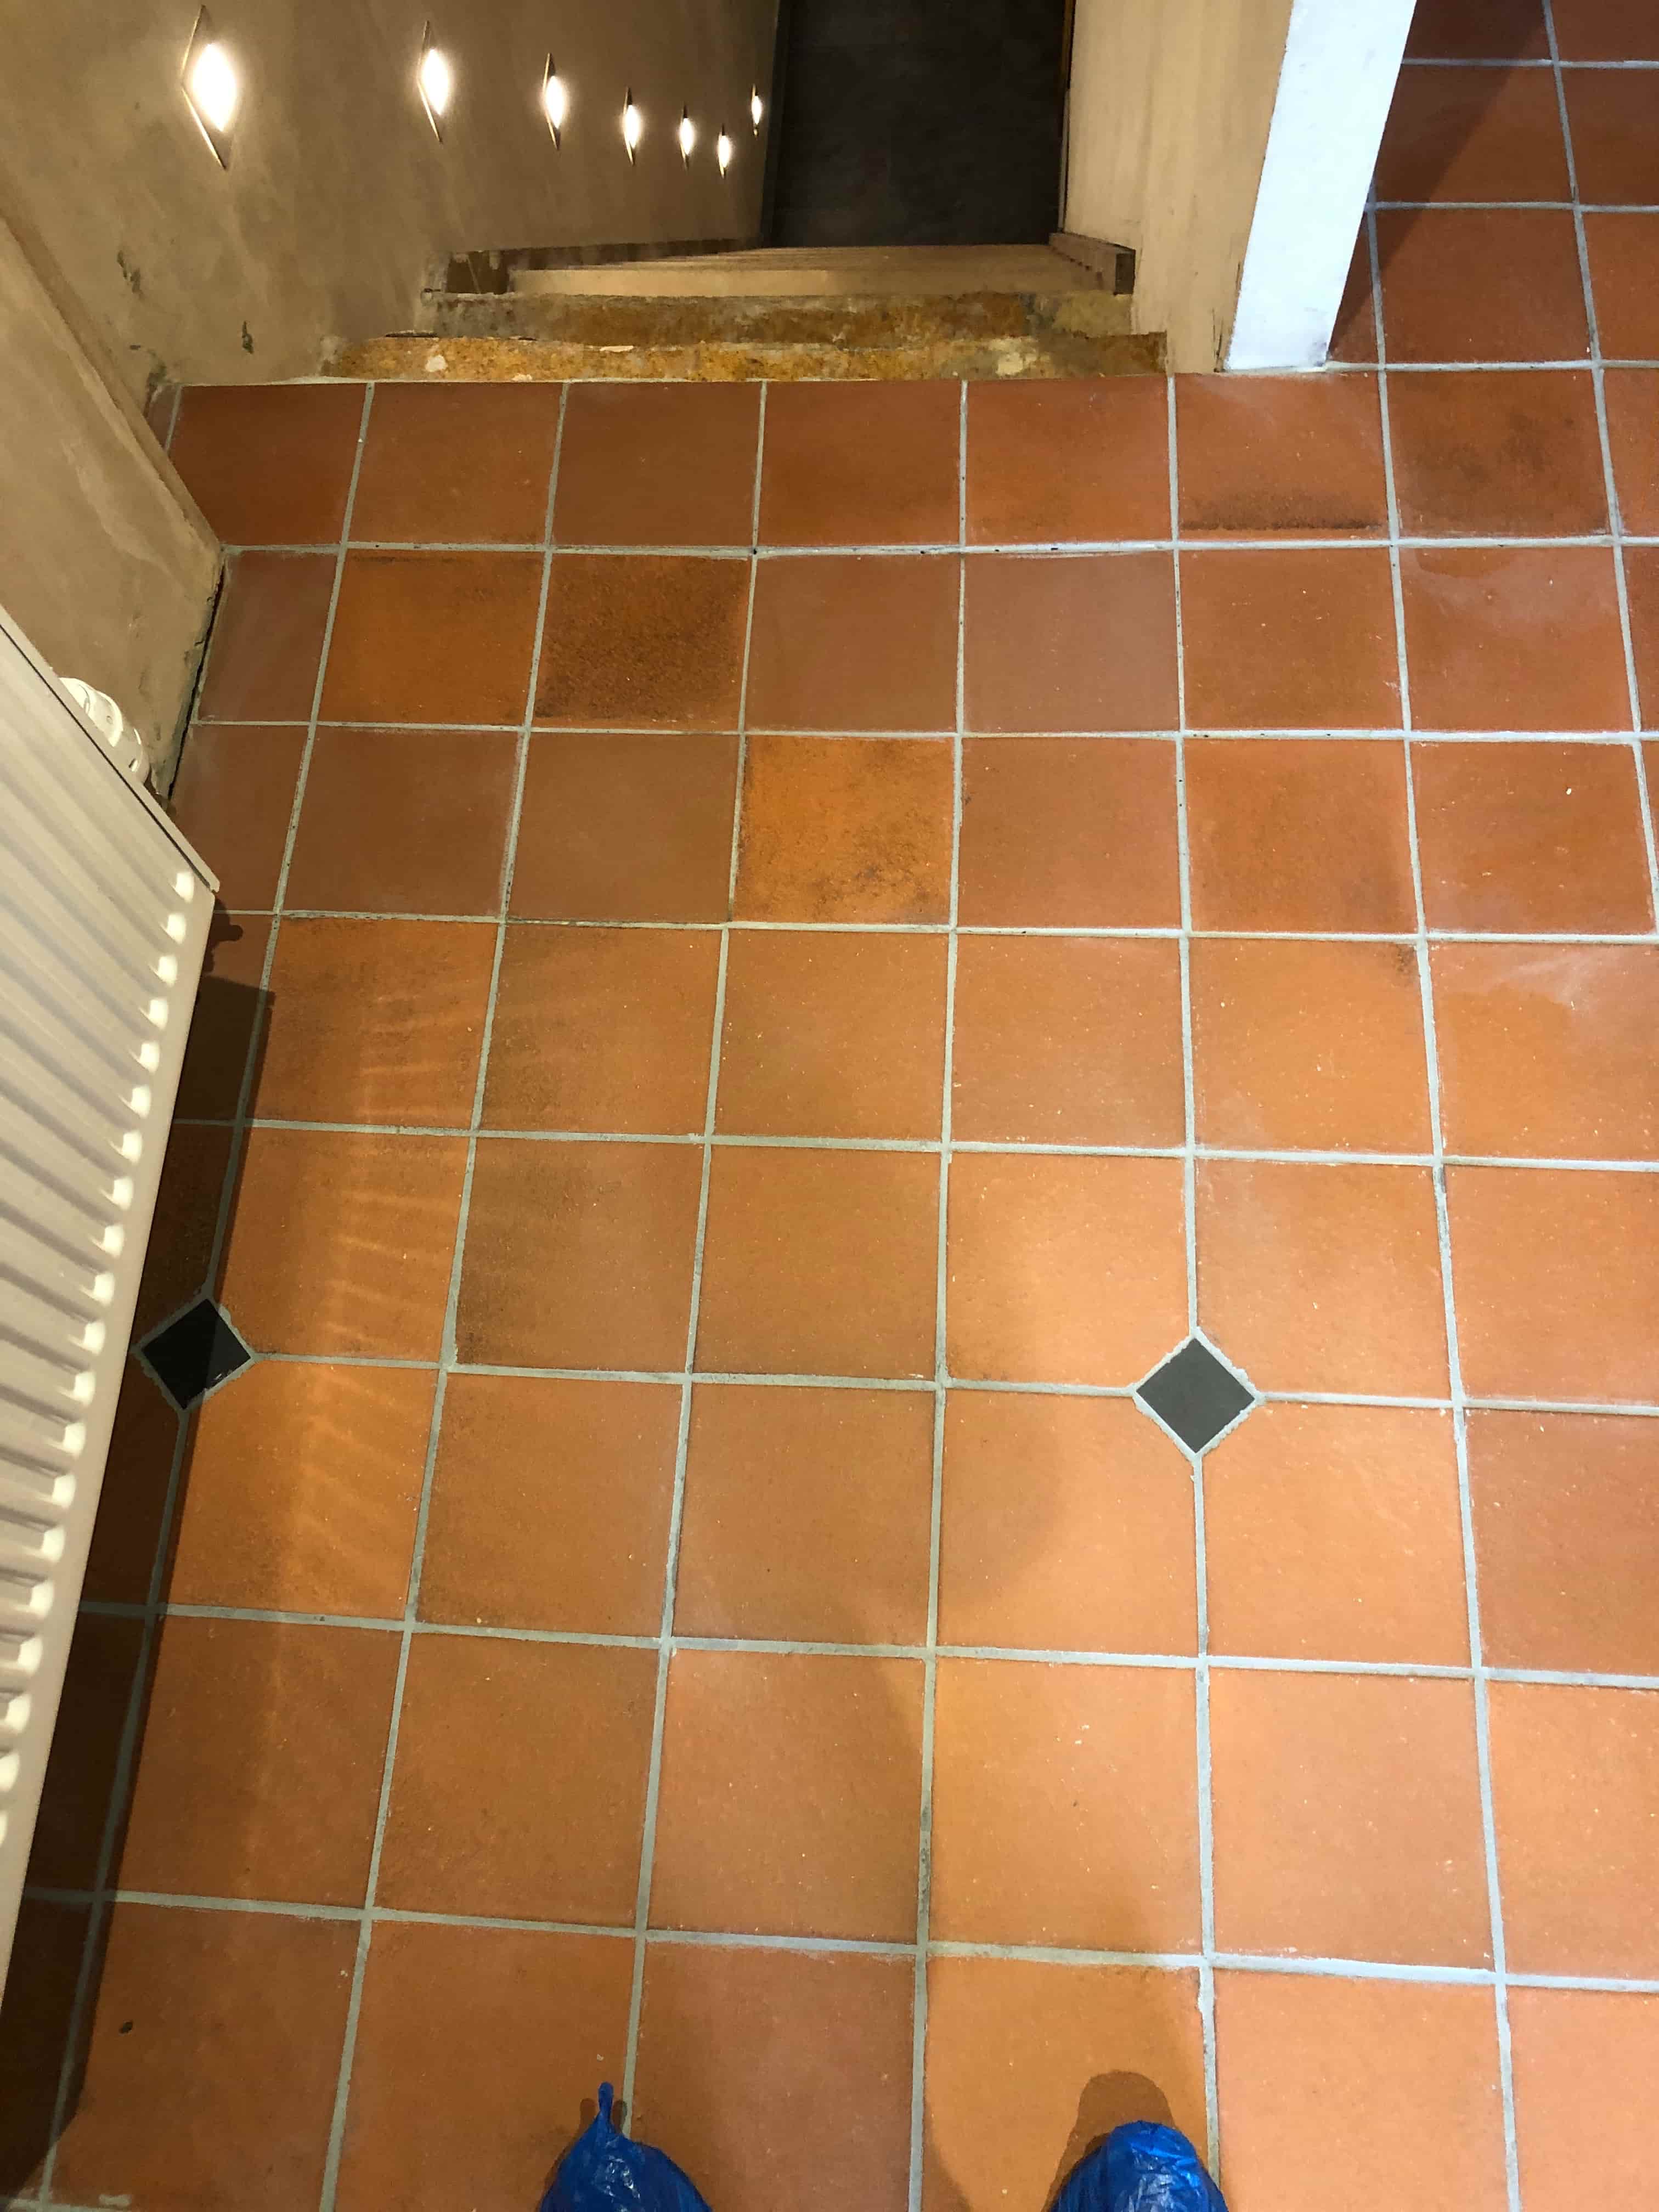
Quarry Tiled Floor Lancaster After Repair

The quarry tiled floor looked much cleaner and fresher following the work, the cracked tiles were gone, and our customer was pleased with transformation we had managed to achieve.


Source: Quarry Tile Repair, Cleaning and Sealing Service in Lancaster, Lancashire

Wednesday, June 12, 2019

How to Clean and Seal Travertine Tile and Grout

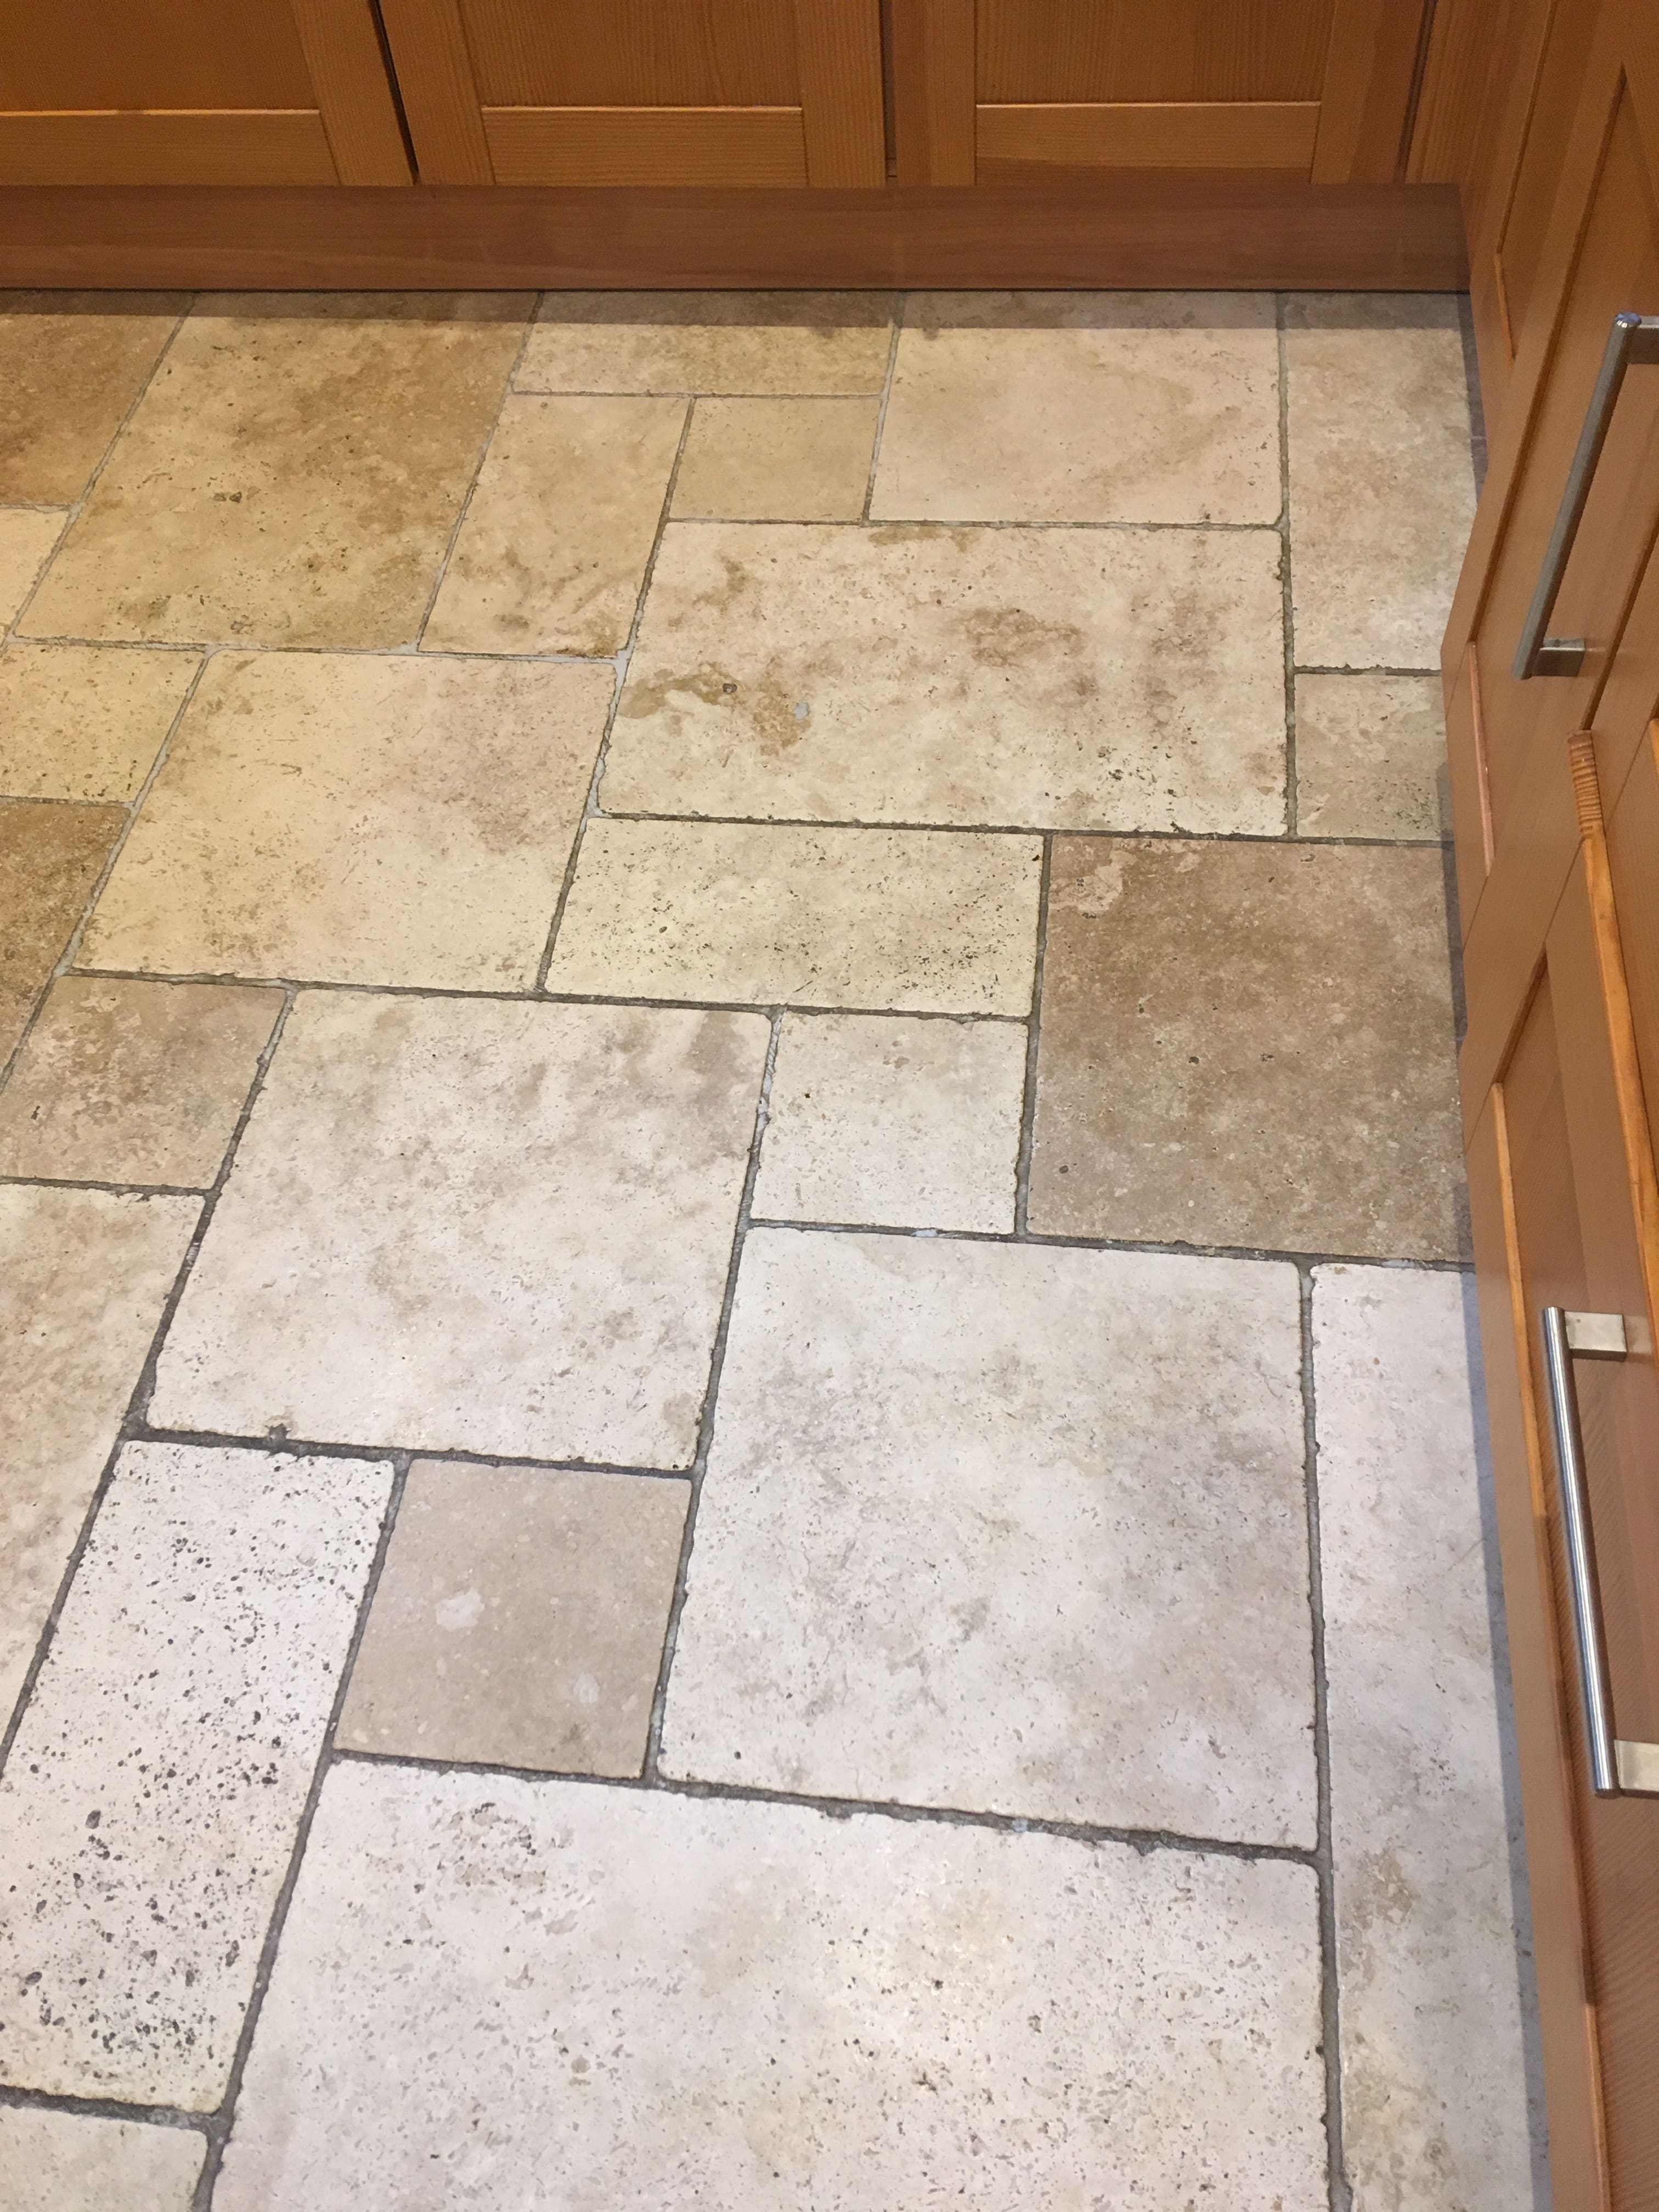
This client got in touch about cleaning their Travertine Tiled floor which they were struggling to get clean. They had been using all the usual household floor cleaners, but nothing was having the desired effect. The property was in the lovely village of Sunbury On Thames within the borough of Spelthorne. I’m based in nearby Shepperton and so it wasn’t long before I was able to pop over and take a look at the problematic floor.

Travertine Tiled Floor Before Cleaning Sunbury-on-Thames

It turns out the Travertine floor which was installed throughout the hallway and kitchen had not been professionally cleaned since its’ installation twelve years prior. As you can see from the pictures, the old sealer that was protecting the Travertine had long since worn off and this in turn had allowed soils and spillages to penetrate deep into the pores of the stone and grout. The sealers demise may have been accelerated with the use of overly strong cleaning products but given it not been professionally cleaned for twelve years it was well overdue a deep clean and reseal.

I discussed with the client what we could do to clean the floor and demonstrated my proposed cleaning process on part of the floor. They were very satisfied with the demonstration and were happy to go ahead with my quote. The work would take two days to complete, one day for cleaning and a second day for sealing.

Travertine Tiled Floor Before Cleaning Sunbury-on-Thames


Deep Cleaning a Travertine Tiled Floor in Sunbury-on-Thames

Working in sections I started by spraying a strong dilution of Tile Doctor Pro-Clean on the floor and left if to soak in while I set up a floor buffing machine with a black scrubbing pad. After about ten minutes I ran the buffing machine over the working area, the machine was set to run at slow speed to reduce splashing. This action broke down the soils and helped lift the marks and stains out of the stone.

Tile Doctor Pro-Clean is a concentrated, multi-purpose high-alkaline cleaner, stripper and degreaser. The strong dilution of one-part cleaner to two parts water would ensure it would clean the floor and strip off any old sealers present on the tiles. Once the Travertine had been cleaned in this way, I ran a narrow brush along the grout lines to ensure they were also scrubbed clean.

Travertine Tiled Floor During Cleaning Sunbury-on-Thames

After scrubbing a low-pressure rinsing machine was used to rinse the floor with water and extract all the dirt and cleaning products off the floor. After a final inspection the floor was then left to dry out overnight to leave the stone ready to receive a new seal the following day.


Sealing a Travertine Tiled Floor in Sunbury-on-Thames

I returned the next morning and tested the floor with a moisture meter to ensure the Travertine was dry. The results were good, so we set about applying two coats of Tile Doctor Colour Grow which is a colour enhancing sealer that soaks into the pores of the stone thus preventing dirt from becoming ingrained there. The sealer really brought put the contrast back into the stone by enhancing the colour whilst giving it the protection it needed to prevent future spillages staining the tiles.

Travertine Tiled Floor After Cleaning Sunbury-on-Thames

The client was very happy with the result, the finished floor looked much lighter and 100% cleaner, the beauty of the natural stone was really apparent, and the grout which was once dark and was now white again.

For aftercare I recommended they avoid purchasing supermarket floor cleaners, the majority of which are too strong for sealed stone and let them with a bottle of Tile Doctor Neutral Tile Cleaner. This is a pH neutral solution that will not prematurely erode the sealer and is highly concentrated, so a small bottle lasts a long time.

Travertine Tiled Floor After Cleaning Sunbury-on-Thames


Source: Travertine Tile & Grout Cleaning Service in Sunbury, Middlesex

Tuesday, June 11, 2019

Design Ideas for Kitchen Floor Tiles

When you step into a kitchen, it is not just the wall paint and gadgets that call for attention but also the kitchen floor tiles under your feet. They can transform the space and add to the kitchen’s appeal.

Luckily, if you are planning to give your kitchen a makeover or if you are designing a brand new kitchen, there are plenty of design ideas to help you.

The Ideal Kitchen Tile
  • Before selecting floor tiles for kitchen, consider its durability
  • The ideal kitchen floor tile is low maintenance, sturdy, non-porous and stain resistant
  • Make sure it has a good grip and is not too slippery
  • Cleaning it should be an uncomplicated affair
  • It should be easy to install and replace
Variety
  • There are plenty of kitchen tile ideas to play with as there are a variety of tiles available in the market like ceramic, glass, porcelain, metal and stone.
  • You can experiment with the textures. The tiles can be of glazed and unglazed finish. Glazed tiles are slippery and that is a drawback.
  • Glass kitchen tiles are not practical to use as kitchen floor tiles but can be used as accents.
  • Ceramic kitchen tiles are popular as they have many designs and styles from which to choose. They are also affordable and easy to maintain. The size of the tiles varies from twelve to eighteen inches. Using a tile of a smaller size gives the room a more spacious look.
  • Mosaic kitchen tiles are also a favourite. Not only are they available in many designs, they don’t absorb moisture which makes it ideal for use in the kitchen.
  • Quarry tiles look attractive but they are hard to clean once they fall victim to stains.
  • Porcelain tiles score points for their durability. You don’t have to worry too much about the scrapes showing.
  • Bamboo tiles are perfect for you if you are an eco warrior. They give the kitchen a trendy feel.
  • Granite tiles are heat resistant, water resistant, and strong and can handle spills which are a regular feature in kitchens. Sweeping the floor daily and using warm water to mop it will keep it looking its best.
  • To give your kitchen a rustic ambience, use slate tiles. They come in many colors and stains can’t get them.
  • If you want a distinctive look for your kitchen, you can go for hand painted tiles and opt for a one of a kind design.

Colors
  • The color of the kitchen floor tiles needs to be taken into consideration to achieve an appealing effect.
  • Instead of trying to match the color of the tile to those of the walls and cabinets, the use of contrasts is more effective.
  • To achieve a spacious feel, use tiles of darker shades on the floor.
  • The grout that is used to keep the tiles together while installing must be close to the color of the tile to avoid a shoddy look.

Wednesday, June 5, 2019

How to Add Shine to Hardwood Floors

Hardwood floors need regular maintenance to protect the showroom shine you first fell in love with. Basic precautions and a regular cleaning schedule should keep hardwood floors in excellent condition for decades. However, if your hardwood floors have scratches, ingrained dirt or dull areas, you will need to deep-clean them, recoat them or resand them, depending on the extent of the damage. These are heavy-duty cleaning projects, which require training, experience and expensive machinery, so it pays to keep a good maintenance schedule to avoid them altogether.

Things You Will Need
  • Soft broom
  • Vacuum cleaner with felt head
  • Microfiber cloths
  • Hardwood floor cleaner
  • Professional floor cleaner

Maintenance

1 Sweep your hardwood floors regularly. If you use a vacuum, attach a felt head to avoid damaging your floor. Built-up grit damages hardwood floors and makes them look dull. Regular sweeping and dusting is the easiest and cheapest way to keep your floors with the shine you love.

2 Clean spills on your floor quickly with a soft cloth. If spills are not cleaned at once, they can damage the fiber in the wood and require expensive treatments to fix.

3 Dust mop your hardwood floors with a microfiber cloth dampened in hardwood cleaner. According to the National Wood Flooring Association, standing water and other liquids will dull the finish and damage your hardwood floors. Use wood cleaners recommended or sold by hardwood floor manufacturers.


Floor Repairs to Add Shine

1 Treat your hardwood floor to an intensive clean. You will need a professional wooden floor cleaning machine. Scrub the floor with an intensive hardwood floor cleaner recommended by the manufacturer. Scrub again with a commercial floor cleaner and polish with a microfiber cloth.

2 Recoat your floor before it wears down to bare wood. First clean it thoroughly with a wooden-floor intensive cleaner recommended by your hardwood floor manufacturer. Apply regular floor cleaner and scrub with a professional cleaning machine. Apply a new coat of finish and repolish with a cleaning machine.

3 Resand your hardwood floors when they are worn down to bare wood. Use a professional floor sanding machine. Clean with a wooden-floor intensive cleaner and apply a new coat of finish. This is an extreme fix for severely damaged floors; you should never have to do this if you take good care of your hardwood floors.

Tips
  • Avoid wax- or silicone-based cleaners. Instead of making your hardwood floors shine, it will make them harder to clean and damage the floor's finish.
  • Keep your pet's nails short. Avoid using high heels inside the house, and place rubber mats under furniture.