Sunday, April 29, 2018

Getting the Best From Multi-Coloured Slate in Yorkshire

The owner of this house in Silkstone, which is a village situated in the foothills of the Pennines a few miles West of Barnsley, had inherited this Kitchen Slate floor from the previous owner of the house and in the years, they'd lived at the house they hadn't done anything with the floor. Slate tiles are beautiful but like any natural stone you really need to maintain the sealer if you want them to stay that way, once the sealer wears off dirt can penetrate the pores of the stone resulting in a floor that always looks dull and dirty.

Slate Tiled Kitchen Barnsley Before Cleaning

In this case of this Slate floor the sealer had worn off many years prior and a thick layer of grime had built up on top of what was once an amazing looking floor. Stone floors never come with a care guide and the process of degradation happens so slowly, so you can understand how this could happen over time.

Slate Tiled Kitchen Barnsley Before Cleaning


Cleaning Dirty Slate Kitchen Tiles

Before starting I protected the wooden kitchen units from splashing using plastic sheeting. Next step was to soak the tiles in a strong dilution of Tile Doctor Remove and Go and Pro-Clean combined into a strong cleaning and stripping cocktail. The solution was left to dwell for ten minutes before being scrubbed in using a black scrubbing pad fitted to a rotary floor machine running at slow speed to break through the grime and the sealers and oils that the previous owner had used on the slate. The pad is good at scrubbing the tiles but struggles to get into the grout so after the tiles were scrubbed I followed by running a stiff brush along the grout lines to give them a thorough clean. The soiled cleaning solution was rinsed off the tiles with water and then extracted off the floor using a wet vacuum. With the floor clear it was inspected, and problem areas re-treated using the same process. Once I was satisfied that the Slate and the Grout was clean and clear of old sealers I gave the whole floor a final rinse to remove any trace of cleaning products and then dried as much as possible using the wet vacuum. The floor was then left to dry out fully overnight.


Sealing Kitchen Slate Tiles

Returning to the property the next day, I ran some quick damp tests to check for any excess moisture that might have prevented me from sealing the floor. We will always do this as excess moisture can affect the sealer curing. Our client had previously decided that they liked the look of our High Shine Sealer due to how it brings the stunning colours of the Slate out. High Shine Sealer is a specially formulated water-based blend of acrylic polymers that provides both a stain resistant surface seal and a durable high-sheen finish. Four coats of sealer were applied and when the customer arrived home later that day they were totally blown away by the floor and how amazing it looked.

Slate Tiled Kitchen Barnsley After Cleaning Slate Tiled Kitchen Barnsley After Cleaning


Source: Slate Tile Cleaning and Restoration Service in Yorkshire

Friday, April 27, 2018

What Causes Uneven Floors?

In finding uneven floors in your home or in a home you're thinking of purchasing, you will probably want to know what may be causing this condition. With this information you can better determine whether to expect more sagging and whether it might be possible to prevent it from worsening. Review the information below to help you determine what might be causing your uneven floors.

Foundation

Check the degree of sagging by examining your floor. A floor that slopes from one side all the way to the other side indicates that a sagging foundation may have caused the sagging. To level your floor, in this case, you will need the help of a contractor.

Sub-Flooring

A floor that is uneven in spots but does not have an even slope across the entire floor, is likely to be caused by bulging or loose plywood that has been used for your sub-flooring. You may need to rip up and replace existing plywood, or simply tack the existing plywood down more securely.

Joists

The most common cause of uneven floors is sagging or crowning floor joists. To remedy this problems you can either use a self-leveling product, or use shims between the joists and your plywood sub-flooring.


Friday, April 20, 2018

Renovating Dull Encaustic Hallway Tiles in Hertfordshire

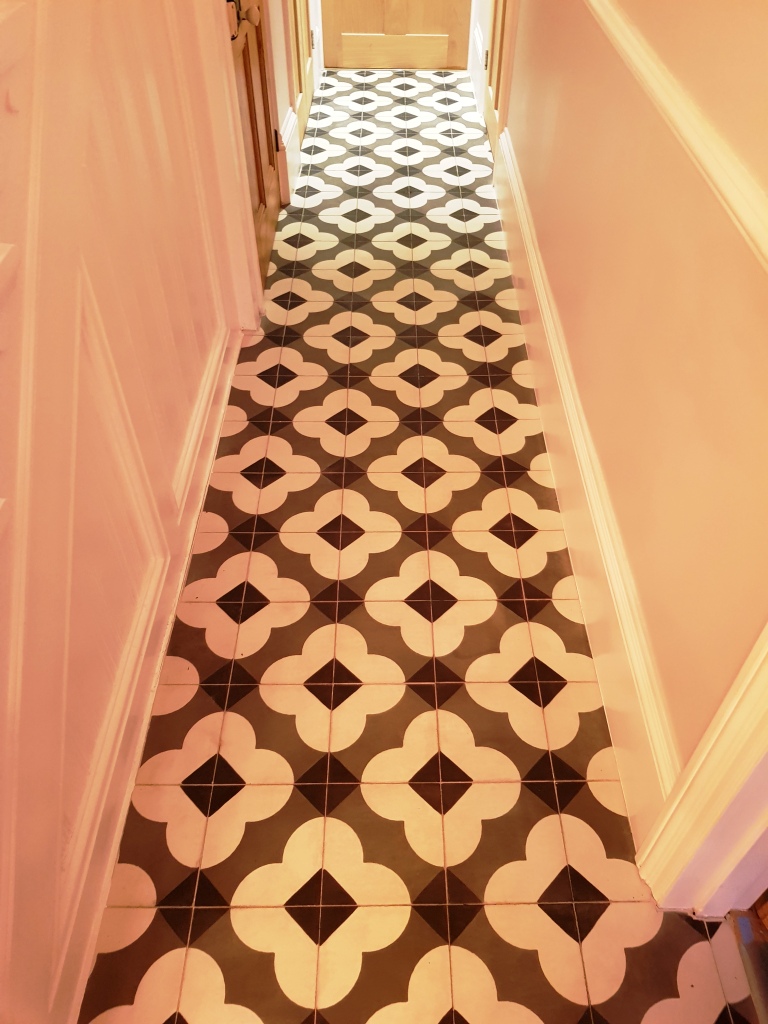
I had an enquiry from a client in the London commuter town of Berkhamsted who had a beautiful Encaustic tiled floor in their hallway which was in need of cleaning. Encaustic tiles are made from layers of cement that are hydraulically compressed to make a very hardwearing surface that can then be decorated. The result is an easy to clean hardwearing surface that is ideal for high traffic areas such as hallways.

Encaustic Tiled Hallway Before Cleaning Berkhamstead

Encaustic tiles however are micro-porous so do need to be sealed to prevent dirt from becoming ingrained in the tiny holes. The tiles at this property in Berkhamsted had been sealed at some point in the past but over the years the sealer had worn down lettering dirt enter the pores making it difficult to clean effectively. The floor now required a deep clean and seal to bring back the life into this artistic floor pattern.


Encaustic Tiled Floor Cleaning

We first removed what was left of the old sealer and ground in dirt using a coarse 400 grit Red burnishing pad attached to a rotary floor buffer. The burnishing pads we use are encrusted with industrial diamond and are applied using water for lubrication, once the pad has been run over all the tiles the floor is rinsed with more water which is then extracted with a wet vacuum to remove the slurry that is generated. The coarse pad was the followed by a medium 800 grit burnishing pad which is the first step in restoring the appearance of the tiles and is applied and rinsed off using the same process as the 400 grit. The 800 grit pads is followed by the 1500 grit pad which is the second step In restoring the appearance of the tile. Again, the pad is applied with water to lubricate and the floor given a good rinse afterwards. The next step was to get the grout clean which was done by applying Tile Doctor Pro-Clean which was left for ten minutes before being scrubbed in by hand with a narrow stiff brush. The floor was then given yet another rinse and then dried with the wet vacuum to remove the dirt that was generated from the grout. The last step in the cleaning process was to run over the floor with a very fine 3000 grit pad, this last pad is the final step in restoring the appearance of the tile and is applied dry with only a little water that is sprayed on using a technique we like to call spray burnishing.


Encaustic Tiled Floor Sealing

Once the floor was dry it was sealed using two coats of Tile Doctor Colour Grow which is an impregnating sealer that seeps into the pores of the tile protecting it from within. This sealer has the added advantage of enhancing the existing colours in the tile improving its overall appearance. The overall process worked incredibly well and made a huge difference to the floor as you can see in the final photograph.

Encaustic Tiled Hallway After Cleaning Berkhamstead

To keep Encaustic floor tiles in first class condition I recommend the use of the Tile Doctor Neutral Tile cleaner which being pH neutral does not reduce the life of the sealer and is ideal for the cleaning of all types of sealed floors. The product comes in a concentrated form, so I recommend it’s used in a mild 1-30 dilution spray applied and wiped over with a microfibre flat mop, then buffed dry.


Source: Encaustic Tile Cleaning and Sealing Service in Hertfordshire

Thursday, April 19, 2018

Covering over Linoleum Tile

It is possible to cover your linoleum tile without removing the old linoleum. Depending on what you plan to lay over the old linoleum you may or may not need to put down what is called an “underlayment” over the old linoleum. Not only is it possible to cover linoleum tile without removing the old tile, it's often preferable, particularly in older homes where the linoleum may contain asbestos.

Understanding Underlayment
Underlayment is not a subfloor, although some do-it-yourselfer's often mistake it for that. It can be anything from particle board, hardboard, OSB (Oriented Strand Board), or plywood. Underlayment is the level in-between the sub-floor, which is the structural level of the floor, and the actual flooring material, which may be carpet, tile or wood. It's important to select the correct type of underlayment for the type of flooring you plan to install. Different floorings, such as tile and wood, need a different underlayment than carpet or linoleum.

Things to Consider when Covering over Linoleum Tile

Although underlayment is thin, by the time you add your new linoleum, tile or wood floor you may actually raise the level of your floor as much as 3/4 inch to 1 inch. This won't matter unless you have kitchen appliances, storage bins or other items that may be affected by raising the floor level.
  • If you have a linoleum floor installed before 1978 you will be encapsulating what is most likely linoleum with asbestos in it. This is a good thing.
  • Using underlayment will make your new linoleum floor smoother than simply laying new linoleum over the old.
  • It is less expensive to lay a new floor over existing linoleum rather than to remove it.
  • It is possible to lay carpet, wood, ceramic or stone tile, rubber or paint over an existing linoleum floor.
What You Can Lay over Existing Linoleum

  • Carpet - Carpet and carpet pads can be laid over existing linoleum by doing nothing more than cleaning the linoleum before installing the pad and carpet.
  • Wood Floors - Wood flooring is nailed directly into the sub-floor or linoleum so no removal is necessary. Simply clean and install the padding if installing a floating floor, or just nail the flooring directly into the linoleum.
  • Linoleum - If you plan to install another linoleum floor over the existing floor, it's better to install an underlayment in order to keep “ghosting” of the old linoleum bumps, nicks and edges from imprinting on the new linoleum.
  • Tile - If laying ceramic tile, slate or stone you'll need to clean, then sand or scratch up the old linoleum to provide a surface the mortar for the tile will adhere to. Not only that, the floor must be perfectly level or the tile will crack when it is walked on. To ensure a level floor put down underlayment when laying a tile floor over linoleum.
  • Paint - If painting linoleum tile to cover it up you will need to clean it, sand it and prime it before applying an oil-based primer and exterior floor and porch paint.


Tuesday, April 17, 2018

Repairing Victorian Hallway Tiles in Worcestershire

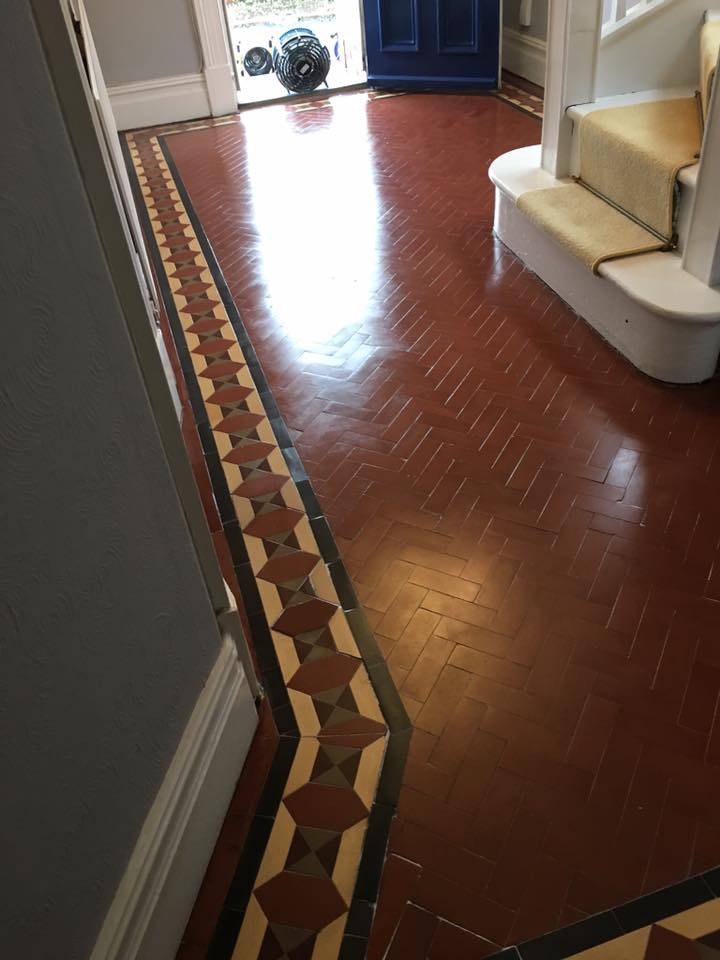
The young couple who owned this house was in Kidderminster were expecting their first baby and wanted the original hallway floor repaired and restored in keeping with the Victorian house. Before contacting us, they had spoken with a builder who had said it was beyond repair and recommended ripping it up and laying a new floor. They were aware of the value that original features like floors can add to a property so undeterred they kept looking for a solution and found Tile Doctor.

Victorian Tiled Floor Before Restoration Kidderminster

I am the local agent for Tile Doctor in Worcestershire and specialise in the restoration of old tiled floors so after popping round to take a look I was able to confirm that their builder was wrong and there was no reason why the floor couldn’t be restored. Relieved the floor could be restored they happily asked me to do the work and we arranged a date, it also turned out that he was also a fellow Mod and scooter rider, so we had plenty to talk about.

Victorian Tiled Floor Before Restoration Kidderminster Victorian Tiled Floor Before Restoration Kidderminster


Repairing a Victorian Tiled Hallway Floor

I returned to the property a few weeks later with my tiler and we began the work of carefully inspecting the floor to identify, remove and refit loose tiles. This was followed by repairs to the screed base and then cutting new matching tiles to replace those that were missing. Having worked on old Victorian and Edwardian tiles for some years now I have built up a collection of re-claimed tiles and often scan eBay for them as I know they will come in handy at some point in the future. The repair process took three days to complete as naturally each tile needs to set in place and can only be grouted in once the adhesive has gone off. It’s also delicate work as anything out of place in the pattern of the floor would be conspicuous obvious.


Cleaning a Victorian Tiled Hallway Floor

On the fourth day the tiling work was complete, and I set about giving the floor a thorough clean starting with the application of Tile Doctor Remove and Go to remove any remnants of sealer, paint splashes from decorating and other marks. The solution was left to soak into the tile and grout for ten minutes before being worked in with a scrubbing pad fitted to a rotary floor buffer running on slow speed. The soiled cleaning solution was rinsed off with water and extracted with a wet vacuum, any stubborn areas were then spot treated until I was happy the floor was clear. Using the same process, the floor was then treated to an acid wash using Tile Doctor Acid Gel. This served two purposes, first and acid wash will remove any fine grout smears and second the acid will neutralise any efflorescent salts that had built up in the tiles and could cause issue later. This is a common problem with old floors as they don’t have the protection of a damp proof membrane. The floor was then carefully rinsed down with water applied using micro fibre cloths, so it wouldn't get too damp and then left overnight to dry off fully assisted with a couple of air movers I had left in place.


Sealing a Victorian Tiled Hallway Floor

I returned the next day to seal the tiles checking first that the floor was dry by taking a few moisture readings with a damp tester. The air movers had done the job and I was able to crack on applying numerous coats of sealer which will protect the tile going forward and also enhance its appearance. My choice of sealer was Tile Doctor Seal and Go Extra which is a fully breathable sealer that can cope with moisture rising through the tiles, it also adds a nice sheen to the tile and works extremely well on clay-based tiles such as these. Over the course of the five days the floor was transformed, and my customer was over the moon and I was happy to have saved yet another floor.

Victorian Tiled Floor After Restoration Kidderminster Victorian Tiled Floor After Restoration Kidderminster


Source: Victorian Tile Cleaning and Restoration Service in Worcestershire

Sunday, April 15, 2018

Floor Joist Repair: How to Sister Floor Joists

If you live in an older home, you may encounter the need for floor joist repair. Older buildings often develop floor problems due to constant foot traffice. Newer homes which were rapidly constructed may also sometimes experience joist weakening or damage. Rather than reinstall your joists, you can create second, or sister, joists alongside the first.

What You'll Need:
  • Wood similar in length to the pre-existing joist
  • Construction glue
  • Screwdriver
  • Screws
  • Drill and bit
Step 1 - Evaluate Your Situation

Before you begin floor joist repair, you should examine and evaluate your current situation. Consider how weakened or damaged the joists are, and also whether a weight above them could be causing the joists to fail. If you have installed a large bathtub, for example, this may be causing the strain.

However, if you conclude that the culprit is probably age or damaged wood, you can go ahead and support your joists by installing a second pair. While evaluating, consider how you will install the other wood. Electric cables, heating ducts and plumbing can all get in the way of your floor joist repair.

Step 2 - Build the Sister Joist

When building the sister joist, remember that it will work better when you screw it directly into the existing post. If cables and other utilities may get in the way, you can install a slightly shorter joist to help support the existing one. Cut the lumber to the right length for your installation and drill a hole in the top of the joist. You'll use this hole to screw it into the pole. Because you must also screw the bottom of the joist into position, you should make a hole there too.

Step 3 - Install the Sister Joist

You will need two rows of screws at each end of the joist, around 1/4 inch from the top and bottom edges. Before you screw these into place, add a layer of construction glue to the sister joist. Press it into the pole of the pre-existing wood support. Tighten the screws into place with your screwdriver.

Attach the bottom of the joist to the wall. (Use a block of wood or a pre-existing bar above the floor.) Glue the new piece into place and screw it down, as you did for the top. Wipe away any construction glue which squeezes out before you leave your floor joist repair job to dry.


Wednesday, April 11, 2018

Renovating Terracotta Tile and Grout Found Under Carpet in Cheshire

I was contacted by a home owner in Appleton near Warrington who had a Terracotta tiled floor in their dining Room. The floor had previously been covered in carpet and they were keen to have the whole floor restored.

To complicate things further the Carpet had been stuck down with a strong adhesive and a local builder had advised them to remove the glue using brick acid. Although this was successful it had the side effect of discolouring the grout lines and no amount of rinsing with the floor with water to dilute and wash off the acid would resolve the problem.

Carpet Covered Terracotta Tiled Floor Before Restortion in Appleton

Happy for me to resolve the problem, my client informed me they were going on holiday and would like me to do the work whilst they were away. This was a great idea as it would guard against unwanted foot traffic during the cleaning and sealing process and it would also mean they would have a nice surprise waiting for them on their return.


Deep Cleaning a Terracotta Tiled Kitchen Floor

After protecting the Kitchen units and skirting boards with plastic sheeting my first job was to strip any remaining sealer off the Terracotta tiles using a strong dilution of Tile Doctor Pro-Clean. The solution was spread across the floor and then left to dwell for twenty minutes before scrubbing it in with a black scrubbing pad attached to a rotary floor buffer. I then used a wet vacuum to remove the now dirty cleaning solution from the floor.

The grout was also given a good scrub using more Tile Doctor Pro-Clean but this time it was scrubbed in with a narrow stiff brush until I was satisfied it was as clean as it could be. The floor given a good rinse and I then inspected the floor tile and grout to ensure it was clean and free of sealers, any areas that needed ore work were retreated and the floor given a final rinse and dry with the wet vacuum before being left to dry off fully overnight.


Sealing a Terracotta Tiled Kitchen Floor

I returned the next morning and tested the tiles with a damp meter to ensure they were dry before beginning applying the sealer. All was well, so I started by applying a single coat of Tile Doctor Colour Grow. Colour Grow is an impregnating sealer that seeps into the pores of the tile protecting it from within and enhancing the natural red colour of the Terracotta in the process.

Once the first coat had dried I followed up with two coats of Tile Doctor Seal and Go which is a compatible water-based sealer that works really well on clay tiles and adds a lovely sheen finish to the floor.

The last step was to resolve the problem with the discoloured grout lines by applying a white grout colourant to the grout. This gave the grout a fresh and consistent appearance throughout and also has the benefit of sealing the grout which will protect it from staining and also make it much easier to clean.

Last step was to finish the sealing of the floor by topping up the sealer with another three coats of Seal and Go to ensure the floor was fully sealed.

Carpet Covered Terracotta Tiled Floor Before Restortion in Appleton

The result was a huge improvement and now looked like a recently installed Terracotta floor. When my customer returned from holiday they were more than happy with the floor and the work I had done.


Source: Terracotta Tile Cleaning, Renovation and Maintenance Service in Cheshire

Tuesday, April 10, 2018

What Are the Advantages of Using a Self Leveling Compound

A self leveling compound is primarily utilized for smoothing out and setting up the floor surface for carpet, wood, stone, tiles and other final coverings; it is used to repair cracks and steamroll concrete surfaces.

There are variety self leveling compounds which have specific uses for a number of situations. The more common types of these compounds are water based and acrylic based. The water based self leveling compound is usually mixed with a specified amount of cold and clean water, the amount of which can be modified depending on the temperature and the floor’s absorption. On the other hand, an acrylic-based self leveling compound is meant to be combined with the equivalent liquid polymer. Aside from these, the manufacturers are continuously expanding their own specialized brand types to meet the different surface needs.

These self leveling compounds are ideal for either the outdoor or indoor facade. It ranges from .04 to .4 inches in thickness and is particularly designed for installation via mixer pump or by hand. Here are some of the advantages of using a self leveling compound.

Easy Application

Self leveling compound comes in a ready to use mixture and is relatively easy to apply. You can effortlessly apply it to a surface in 10 to 25 minutes, depending on the brand used and the area to be covered; it must be in a temperature between 41 degrees to 95 degrees Fahrenheit. Do not combine cement, lime or gypsum to the self leveling compound mixture. Also, when the mixture begins to set, do not add more water. You will be amazed that there is no need for special equipment or an unusual tool to apply it.

Fast Drying

Ideally, the surface can be used after 24 hours after its application. However, the drying time of the self leveling compound may vary with different temperatures.
Offers a Smooth Surface

After applying the self leveling compound, you will find that unevenness is a thing of the past. A number of these products are polymer modified product which makes it flexible and resistant to moisture when installed. It allows the bubbles to rise above the surface rather than remaining trapped in the compound, which would lead to a bumpy surface; this makes it smooth without further surface finishing needed. As such, it diminishes the appearance of the bubbles and makes the floor ever flat.
High Compressive Strengths

Self leveling compounds are not intended as a final floor surface. The materials which made up the compound are not for frequent walking or other foot traffic. Self leveling compounds are intended for the sub floors, to be covered by carpet, ceramic tiles, wood or vinyl. If your home has under the floor heaters, it is highly advisable to make sure that the self leveling compound product selected is suited to the heat exposure. Do ask your hardware store personnel about this.
Savings

With its easy to use directions, self leveling compound can save you money from the additional cost of hiring somebody to do the installation.


Source: www.DoItYourself.com

Thursday, April 5, 2018

Deep Cleaning and Restoring Old Pamment Tiles in South Yorkshire

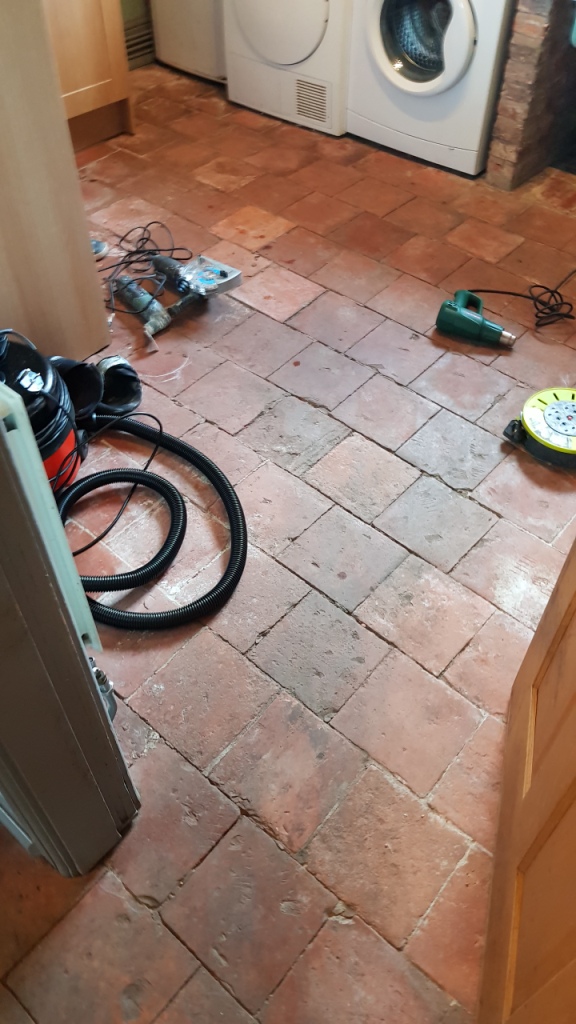
The owner of this house in the village of Silkstone near Barnsley had discovered this clay Pamment floor when they had a tiler come in to tile the floor. The tiler stripped off the Vinyl floor covering and removed an inch of Bitumen that it had been stuck onto. With the Bitumen removed it became clear that there was wonderful Pamment tiled floor already there. They had a go at restoring the floor themselves but eventually decided to call in the experts.

Pamment Tiled Floor Before Restoration in Silkstone

Having been buried under Bitumen for such a long time the floor had a number of serious issues that would need addressing during the restoration. The grout/cement between the tiles was crumbling and there was a thick layer of dirt ingrained in the clay, there was also evidence of inherent salt efflorescence issues which manifests as white staining.

Pamment Tiled Floor Before Restoration in Silkstone

Pamment tiles are very similar to Terracotta in that they are made from clay and like Terracotta are very porous and need to be sealed to protect dirt getting into the pores. You don’t normally see them in use in Yorkshire, but are quite a common in Norfolk and Suffolk where they are still made by Norfolk Pamments. Silkstone dates back to the Doomsday Book of 1086 and there are some very old houses in the village so you never know what your going to find.

Pamment Tiled Floor Before Restoration in Silkstone


Deep Cleaning a Pamment tiled floor

We removed what was left of the grout/cement from between the tiles using a special tool and replaced with a grout specifically made for wide joints.

Pamment Tiled Floor During Grout Removal in Silkstone Pamment Tiled Floor During Grout Removal in Silkstone

The next day once the grout had fully cured we came back to do the deep clean starting by applying Tile Doctor Pro-Clean to the Pamments and letting it soak in for ten minutes. Then the tiles were scrubbed with a floor buffer fitted with a black scrubbing pad and running at slow speed.

Pamment Tiled Floor During Restoration in Silkstone

The floor was then rinsed with water and the slurry extracted using a wet vacuum. With the floor clear we could see that the process removed had most of the grime but there were areas that needed a bit more attention. To tackle the stubborn stains and neutralise the effloresce salts that were in the tiles Tile Doctor Acid Gel was applied and scrubbed in.

After a final rinse to remove any trace of cleaning product the floor was left to dry out for a few days.


Sealing an Old Pamment Tiled Floor

Due to the age of these tiles, the inherent efflorescence issues and the lack of damp proof membrane we sealed the floor in a fully breathable sealer 'Seal and Go Extra'. This provides a beautiful satin finish and allows the floor to breath and any moisture to escape.

Pamment Tiled Floor During Sealing in Silkstone

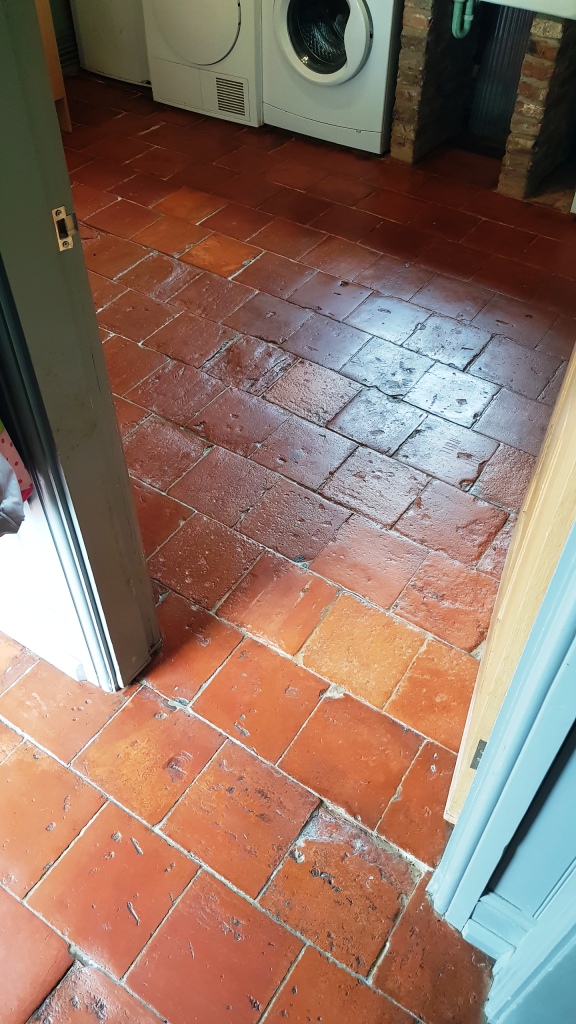
Our customer was delighted with the results and was so happy to restore another original feature of the house.

Pamment Tiled Floor After Restoration in Silkstone Pamment Tiled Floor After Restoration in Silkstone


Source: Pamment Tile Cleaning, Renovation and Maintenance Service in Silkstone, South Yorkshire

Wednesday, April 4, 2018

When is the Best Time to Use a Self Leveling Compound

 A self leveling compound is a concrete type floor underlayment that is applied to subflooring prior to the installation of tile or wood. Using a self leveling compound is easier than other types of subfloor compounds because it will fill in low spots to make sure that a more complete coverage of the floor takes place. The best time to use a self leveling compound is in conditions that are not too humid or cold in order to allow the compound to set up properly and work as designed.

What Is Self Leveling Compound? 

The self leveling compound is a type of quick setting concrete. It is mixed with water into a compound that has a watery consistency. Unlike concrete that is mixed to a consistency of toothpaste or peanut butter, self leveling compound has a consistency that is more like pea soup. This consistency allows you to pour it on the floor and apply it with little work or intervention once the mixture has been prepared.

Working in Too Hot a Room

If the temperature in the room where the self leveling compound is being poured is too hot, it may not properly cure. This may result in a soupy mess on the floor that does not properly level and may need to be cleaned up and poured again. This can be avoided by waiting until the temperatures in the room are less humid or cooler. You may consider using floor fans as a way to bring the temperature down and make the room easier to work in.

Working in Too Cold a Room

If the temperature in the room where the self leveling compound is being poured is too cold, the compound may freeze during the application. This will prevent it from reaching the lower areas of the floor and creating the self leveling effect that you desire. The resulting floor will not be level and you will again find yourself having to remove the material and starting over to achieve a more even or level pour. You can consider using floor heaters and turning up the heat in the room as a way to raise the temperature to a more moderate temperature climate.

How to Best Use Self Leveling Compound

When you purchase the self leveling compound for use on the subfloor prior to the laying of a new tile or wood floor, you should check with the manufacturer for any hints or directions on how best to use the material. Following the manufacturer's advice will yield the best results when working with their brand of self leveling compound. Each manufacturer may have specific instructions or directions that should be followed in order to properly use their self leveling compound. Following this advice will help you avoid having to pour the floor again or waste any of the compound because of improper use.
If necessary, ask for advice when purchasing the self leveling compound from the retailer.