Thursday, May 16, 2024

Ways to Soften the Look of Cement Flooring

 Cement flooring has earned a good reputation for strength, durability, cost-effectiveness, and even style—thanks to the recent advances in construction and design. Over the years, basements have become famous for being utility and stock rooms. Now, they are also typically used as living spaces, entertainment rooms, and bed rooms. Transforming basements into living spaces is often much practical than building another room or floor. Below are some of the simple and economical do-it-yourself tips on how to soften the look of your basement’s cement flooring.


Stain and Polish

Cement flooring can be enhanced by staining and polishing, making the concrete floor simulate marble, wood, leather, or even natural stones. Before applying the desired stain to the concrete floor, make sure that your floor has been thoroughly cleaned and prepared. Check if there are cracks and old stains. Prepare the cracks with concrete glue, and then fill the cracks with anchoring cement.

Once the cement is completely dry, sand the floor down to evenly level the texture. Wash the cement floor with a mild soap and scrub the floor with a nylon brush to sweep away dust, grease and adhesives. Before applying the stain, make sure you protect the lower parts of the wall with painters tape, paper, or plastic.

Shake the stain container well before applying to the concrete floor. After the last coat, you can spray a mixture of water and baking soda to neutralize the acid. After allowing it to dry for five minutes, rinse the concrete floor thoroughly with clean water. Finally for finishing touches, apply a sealer to protect the stain.


Ceramic Tile

Cement flooring is the ideal base for tiles, particularly the ceramic. Ceramic tiles are long-lasting and flexible in design. You can choose from a wide selection of colors, patterns and texture that will suit the ambience that you desire.

Prepare the thinset mortar by following the instruction provided on the container. Start applying a good layer of thinset to the center. Fix the tile with even and firm pressure using both hands. Put tile spacers between ceramics. Repeat the process until the entire cement floor is covered. Let the thinset under the tile dry for 24 hours. Once dry, remove the tile spacers and apply the grout over all the joints with a float. Let the grout dry for 24 hours. Remove the excess from the surface using a dampened smooth cloth.


Rubber Mats/Foams

Cement flooring can also be furnished with rubber mats or foams to dampen sounds and insulate noise coming from the basement. Rubber mats and foams are ideal for basements turned entertainment room or studio. Same with the preparation for ceramic tiles, measure the square area of the basement to know how many rubber tiles you have to buy. Rubber mats are easy to install. Just lay it on the floor.

Another good thing about rubber mats is you can replace it piece by piece. There are different colors and textures of rubber mats available, some even have the texture of a thin carpet. Unlike carpet, rubber mats are water-proof and don’t host molds.

Source: www.DoItYourself.com
Monday, May 13, 2024

How to Deep Clean Norfolk Pamment Tiles

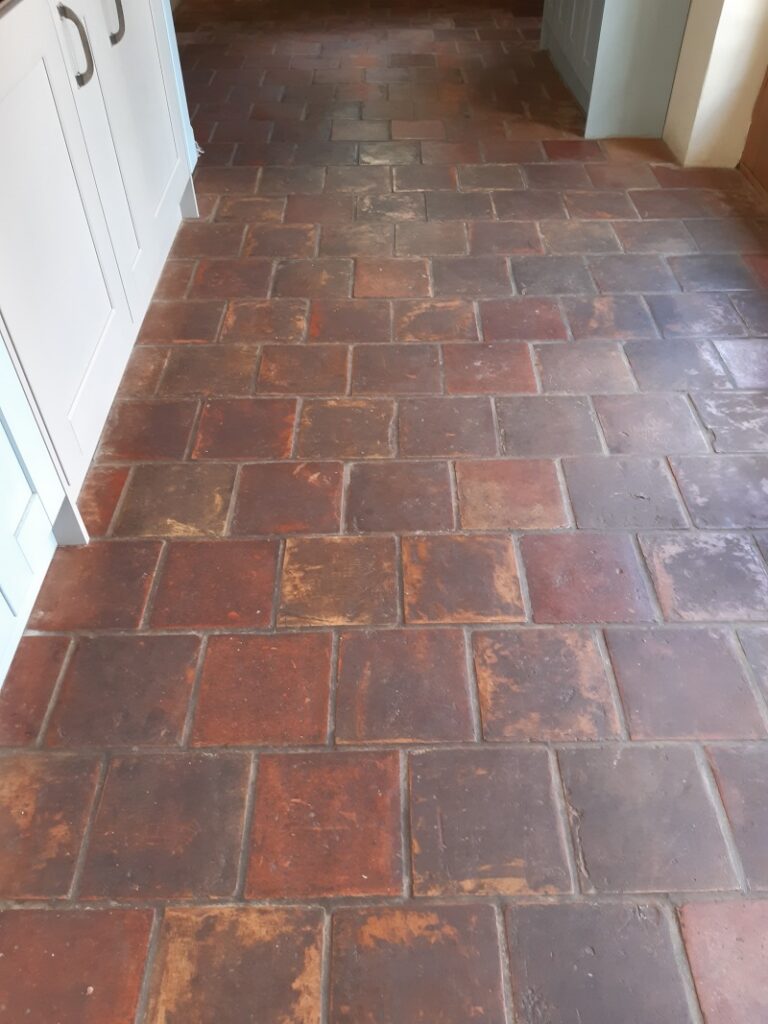
I was contacted by clients with a Pamment Tiled Flooring who were living in Gissing, a small village in the centre of South Norfolk which has a long history dating back to Saxon times. The Pamments were reclaimed suffering from heavy soiling and in need of considerable expert attention. All the old protective coatings had pretty much worn completely off the surface of the tiles which had then allowed many years of dirt to become ingrained in the pores of the clay, making it almost impossible to clean for the homeowner using ordinary methods.

  Reclaimed Pamment Floor Before Cleaning Gissing 

 Pamment tiles were very popular in older Norfolk homes; they are made from locally sourced clay and, like terracotta, are extremely porous and therefore need to be thoroughly sealed against fluids and general soiling. When correctly cleaned and sealed, they are quite versatile and can be used for internal floors as well as external areas such as patios and pathways.


Cleaning a Pamment tiled floor

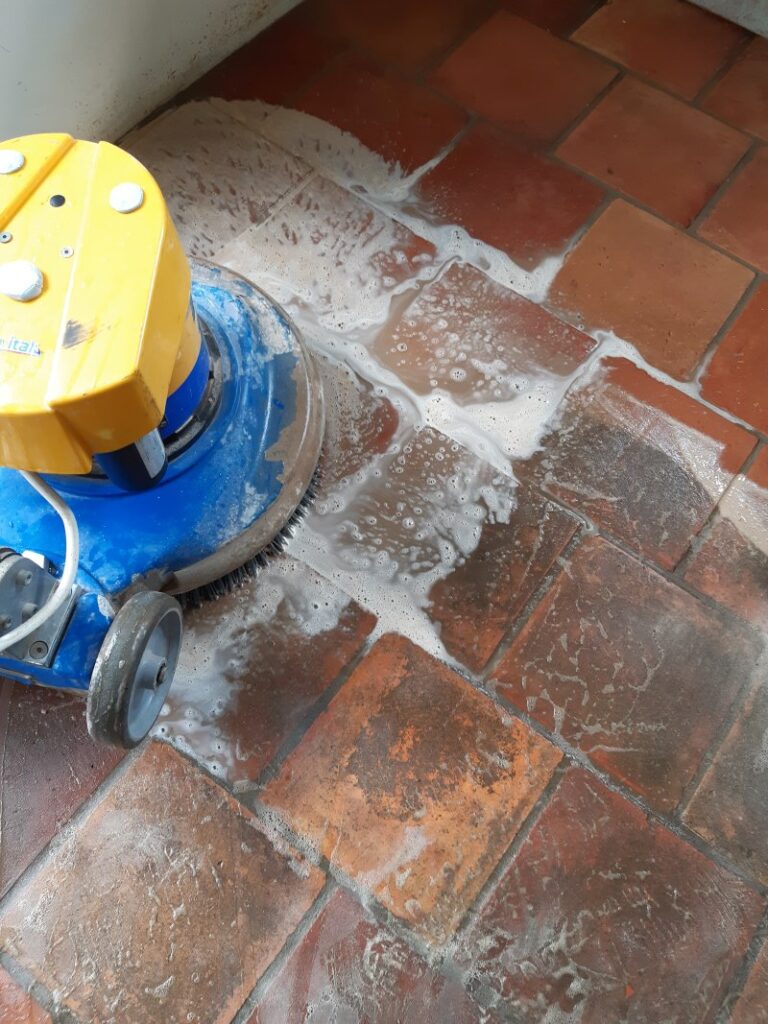
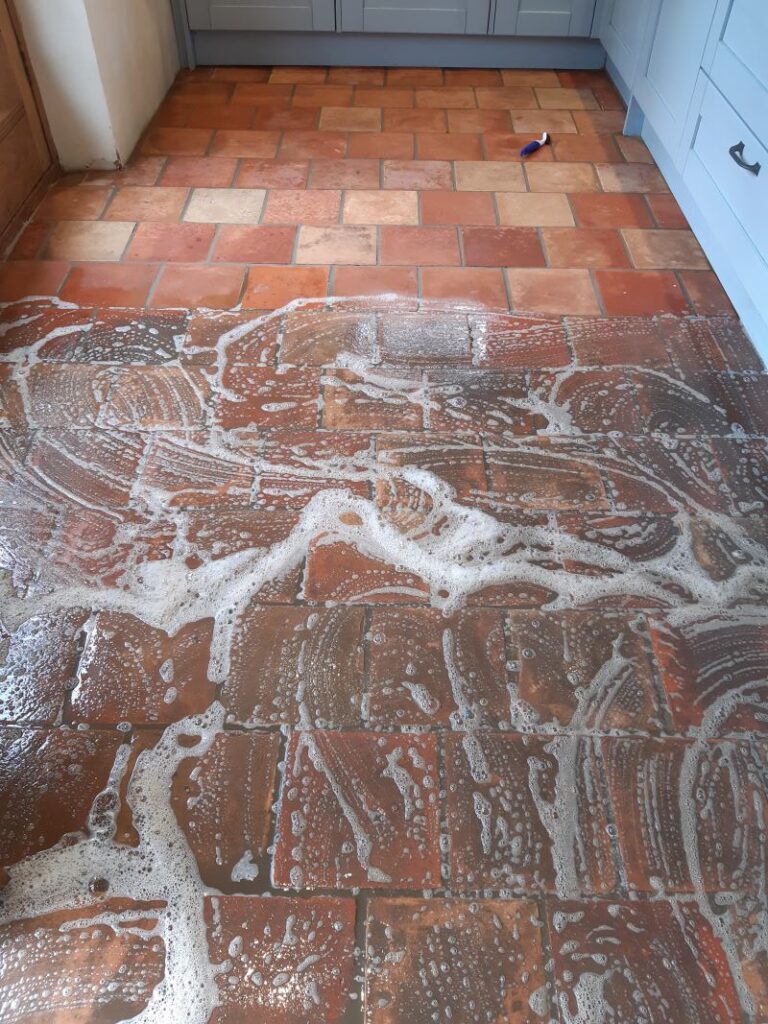
To remove all traces of the old sealers and clean the tiles I decided to apply Tile Doctor Remove & Go, which was diluted with water to form a medium strength solution. I applied a generous coat of this solution to the floor, leaving it to soak into the pores of the tiles for approximately ten minutes. The solution was then worked into the Pamments using a Black nylon scrubbing pad fitted to a 17" rotary machine. Remove & Go is a powerful and versatile cleaner which is safe to use on natural stone floors, kiln-fired tiles and all types of grout.
Reclaimed Pamment Floor During Cleaning Gissing Reclaimed Pamment Floor During Cleaning Gissing
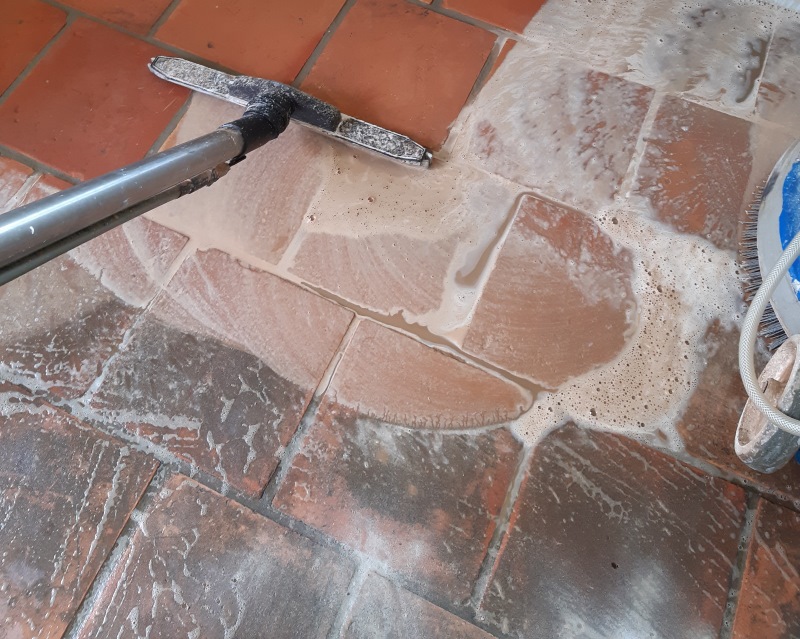
I rinsed the solution off the floor with clean water once it had worked its magic and extracted the resulting dirty residue with a wet-vacuum machine. In order to tackle some particularly stubborn stains, I repeated this process until I was satisfied that the floor had been cleaned to the highest standard possible.

Reclaimed Pamment Floor During Cleaning Gissing
  
  The whole area was then given an acid wash using a dilution of Tile Doctor Grout Clean-Up. This further cleans the tiles to remove old grout stains and neutralises the pH level of the floor following the use of alkaline cleaning products, lastly it also ensures optimal adhesion of the new sealer.

The floor was then left to dry overnight before returning the next day to complete the seal. I left a dehumidifier running overnight to assist the drying process and ensure that the floor would be completely dry on the following day. It’s imperative that a tiled floor is completely dry before sealing as any excess moisture left in the floor can potentially adversely affect the overall performance of the sealer as it evaporates.


Sealing a Pamment tiled floor

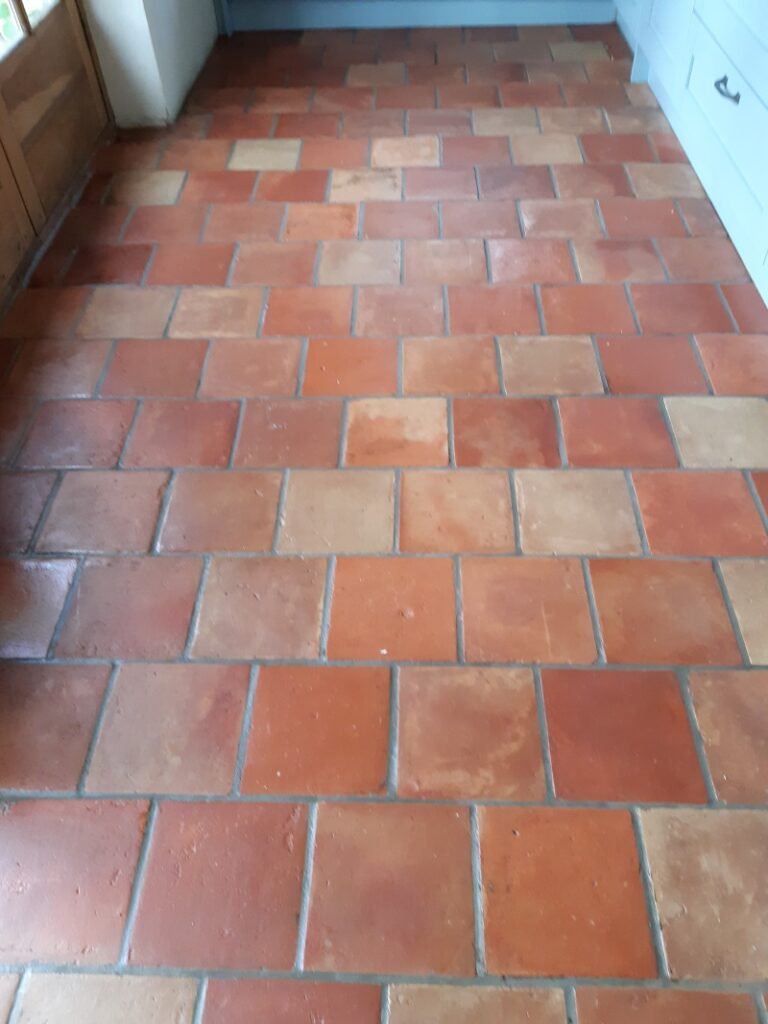
To seal and protect the Pamment tiles I applied a total of five coats of Tile Doctor Seal & Go, which provided a robust, durable surface seal along with an aesthetically pleasing, mid-sheen finish (as you can see from the photos). Seal & Go is the go-to sealer for internal, unsealed porous surfaces such as Terracotta, Sandstone or Slate.

  Reclaimed Pamment Floor During Sealing Gissing

The clients had left us to work our magic over the two days, returning at the end of the sealing day and were absolutely staggered at the results we had achieved with a floor they had thought beyond help.

  Reclaimed Pamment Floor After Renovation Gissing

For aftercare cleaning I recommended the use of Tile Doctor Neutral Tile Cleaner, it’s a gentle yet effective product that won’t upset the sealer which can be the problem with many of the stronger products you find in supermarkets.

Thursday, May 9, 2024

How to Make Reference Lines for Ceramic Tile Installation

Ceramic tile looks wonderful when it’s properly installed on a floor, and can add to the beauty of a room. However, there’s a great deal of preparation involved before they’re down on the floor. To ensure the ceramic tile sits properly and that you don’t end up with awkward small pieces at the edges, you need to create reference lines. It’s more work, but the results will make it al worthwhile.

What You'll Need:

  • Chalk
  •  Tape measure
  •  Carpenter square


Step 1 - Square Walls


If laying ceramic tile in a room that’s square, the job is a great deal easier. If the room isn’t a simple square or rectangle, you can still create reference lines for the ceramic tile. The first thing to find is two walls opposite each other that are square to each other. Measure along each of the walls to find the center and make a mark there on each wall.


Step 2 - Create a Square


Using chalk and a straight edge, join the two marks with a line (you can also snap a chalk line between the two points). Now look at the other walls in the room. Measure along the other 2 walls to discover the center point in each and then join them with a chalk line using a straight edge. Where the two lines cross will be the middle of the room, and the angles formed should each by 90 degrees. You should check these with a carpenter square.


Step 3 - More Reference Points


Those who aren’t used to laying ceramic tile can benefit from having more reference points. Measure from the edge of one wall to the center mark and make a mark halfway between the two. Repeat on the opposite wall and join the marks. Do the same in the other half of the room. When this is complete, do the same on the opposite walls so that you end up with a grid of 16 squares. These markings will make it much easier to ensure the laying of the ceramic tile remains straight throughout the entire room.


Step 4 - Using Reference Points


By measuring from the center point in the room to the walls you’ll be able to calculate how many tiles you need to reach the wall, and also whether, and by how much, you’ll need to cut the tile to create and even edge. This knowledge makes it easier to plan for laying the ceramic tile.


Step 5 - Laying Tile


Start at the center of the room and work outward when laying ceramic tile. This is why the reference points are so important as they give you lines to follow and ensure that the tiles are straight. By working one small grid at a time out from the center you’ll be able to see the development of the floor and be certain that everything is even and square. Be careful not to obscure the chalk reference points before you tile over them. Taking time to have the reference points exact and square will result in great looking ceramic tile.

Wednesday, May 8, 2024

How To Restore Heavily Soiled Stone Tabletops by Berkshire Renovation Expert

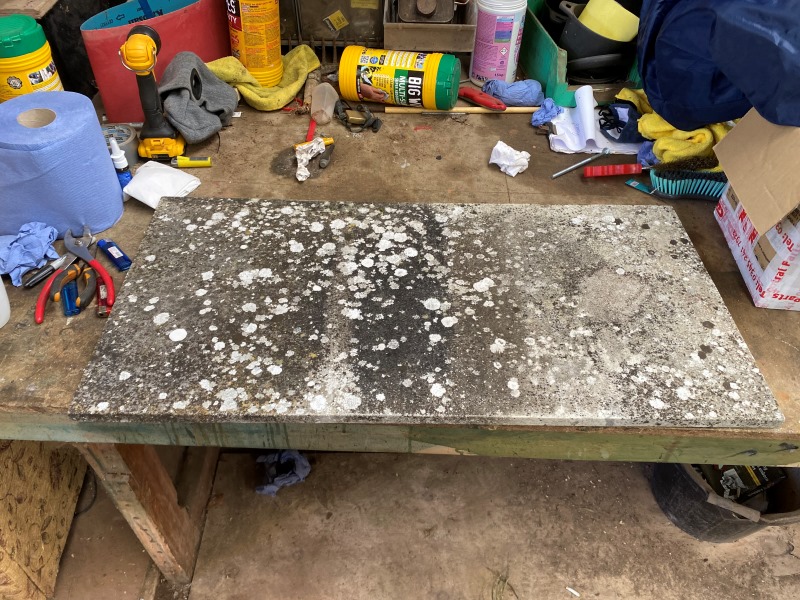
I received an enquiry from a customer in Pangbourne regarding a heavy soiled Marble stone table. The customer was downsizing and thought the marble tabletop would make a great addition to the balcony at the new property. However, as you can see from the photographs below it was in a very bad condition, in fact the customer described the tabletop as “not fit enough for the skip let alone the garden”.

Marble Tabletop Before Restoration Pangbourne

The tabletop was in such dire condition I wasn’t even sure it was Marble. However, after taking a more detailed look, I was able to confirm It was indeed marble and therefore confident it could be renovated to a good standard.

Time was of the essence as the customer was due to move in the following weekend so I quickly worked out a quote for doing the work, which was agreed, and I took the table home so it could be worked on in the evenings.


Repairing and Cleaning a Marble Stone Table

The outside elements had taken its toll on this tabletop and it was covered in algae, black spot and lichens. Tile Doctor have a wide variety of products that help us tackle various issues with stone however I figured a good start would be to use their Patio & Driveway Cleaner.

This product is seriously strong and designed specially to remove algae, lichens and black spot. It’s not what I would usually use on Marble however due to the severity of contamination it was my best option. Returning the next morning the results were incredible, about 80% of the contaminant’s had been removed but I knew if we repeated the process, we could achieve an even better result. I continued with the same method as before and left it to work overnight again. Happy with results I could continue with the next stage.

The next stage was to polish the Marble using a series of pads from Tile Doctors inventory of 6-inch diamond burnishing pads. The first pad in the set to be applied was a coarse 100-grit pad followed by a 200-grit. The pads are applied with water to help lubricate the process and are designed to repair damage left behind as a result of removing the algae and lichens.

The process was then repeated with a coarse 400-grit and fine 1500-grit pads which gradually closed the pores and return the shine. This is a messy process which generates a slurry which is removed with after each pad with the wet vacuum.


Sealing a Marble Stone Table

With the Marble surface restored the last step was to protect the stone with a sealer which will keep any dirt or contaminates on the surface where they can be easily wiped away. So once the table was dry, I applied a thin coat of Tile Doctor Ultra-Seal which is an almost invisible impregnator that soaks into the Marble occupying its fine pores and thereby preventing dirt from becoming lodged there.
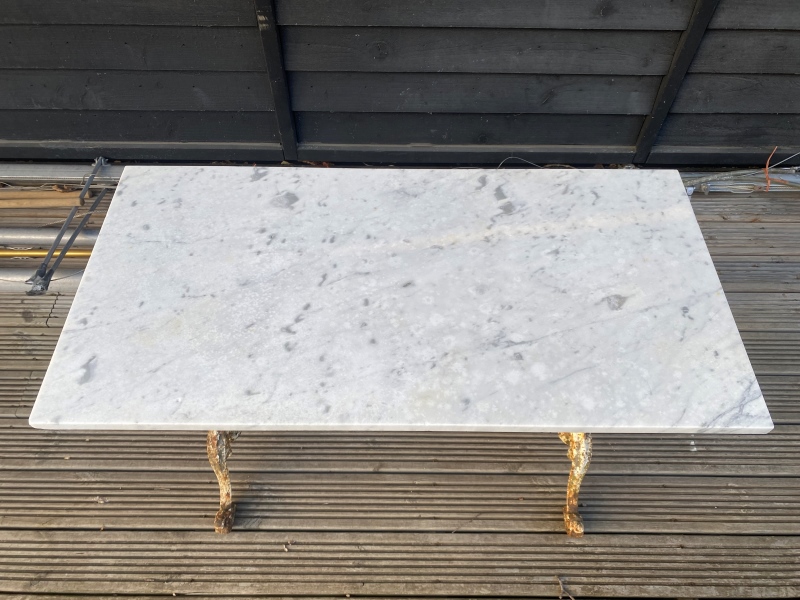
  Marble Tabletop After Restoration Pangbourne 

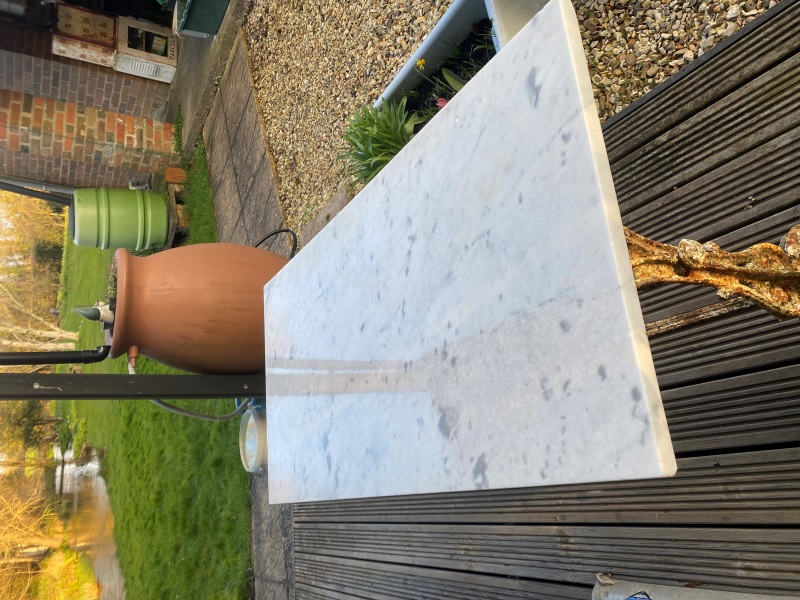
The transformation was incredible, and both the customer and I were astonished by the outcome. My clients her husband even joked that I must have ‘swapped it out with a new one!’

  Marble Tabletop After Restoration Pangbourne

For aftercare of polished stone worktops and tabletops I recommend the use of Tile Doctor Stone Patina Spray. Its a spray-and-buff cleaner that is designed to enhance the natural beauty and lustre of polished stone as it cleans.