Wednesday, October 31, 2018

Original 1901 Mosaic Floor Restored in Warrington, Cheshire

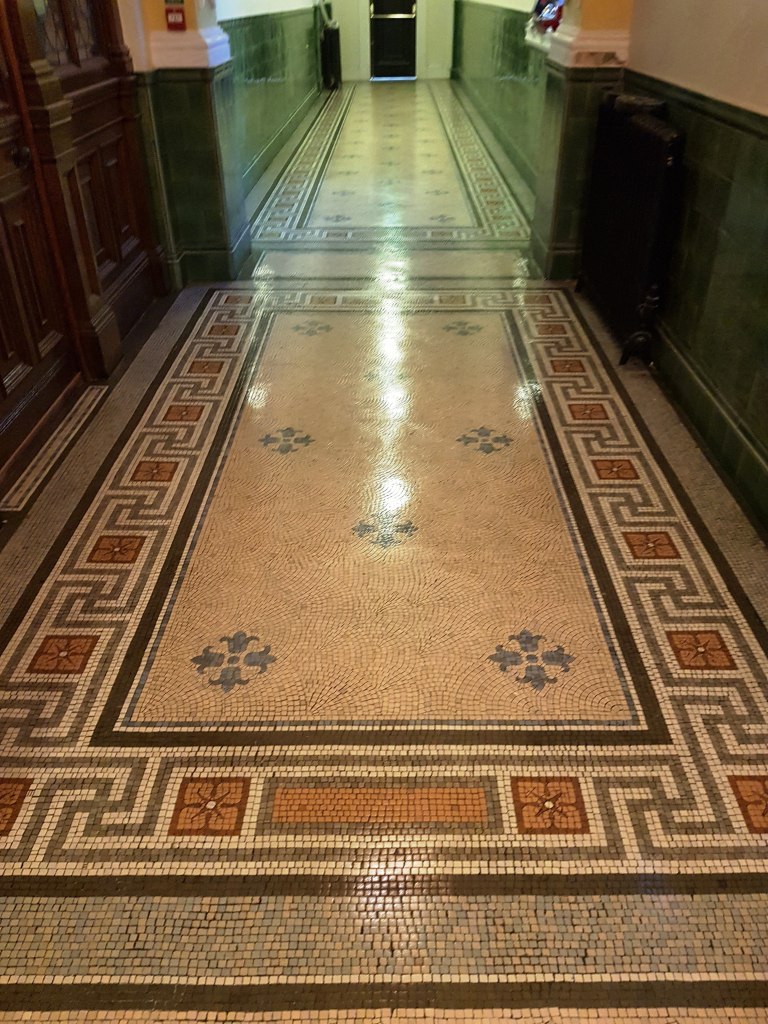
Around five years ago Tile Doctor was asked to quote for restoring the Mosaic tiled floors in the former Warrington Technical College which is a Grade II listed building that was built in 1901. Tile Doctor are the biggest restorative tile network in the UK and we often get asked to quote for restoring old floors like these. Although we quoted for the work, nothing happened, and it now appears the local borough council had put the work on hold until they could come up with a fully costed plan to fully restore it.

It took some time, but I’m pleased to report that a plan did evolve and a joint venture between the council and a developer has now restored the building to its former glory and is now home to several restaurants and bars spread across its three floors.

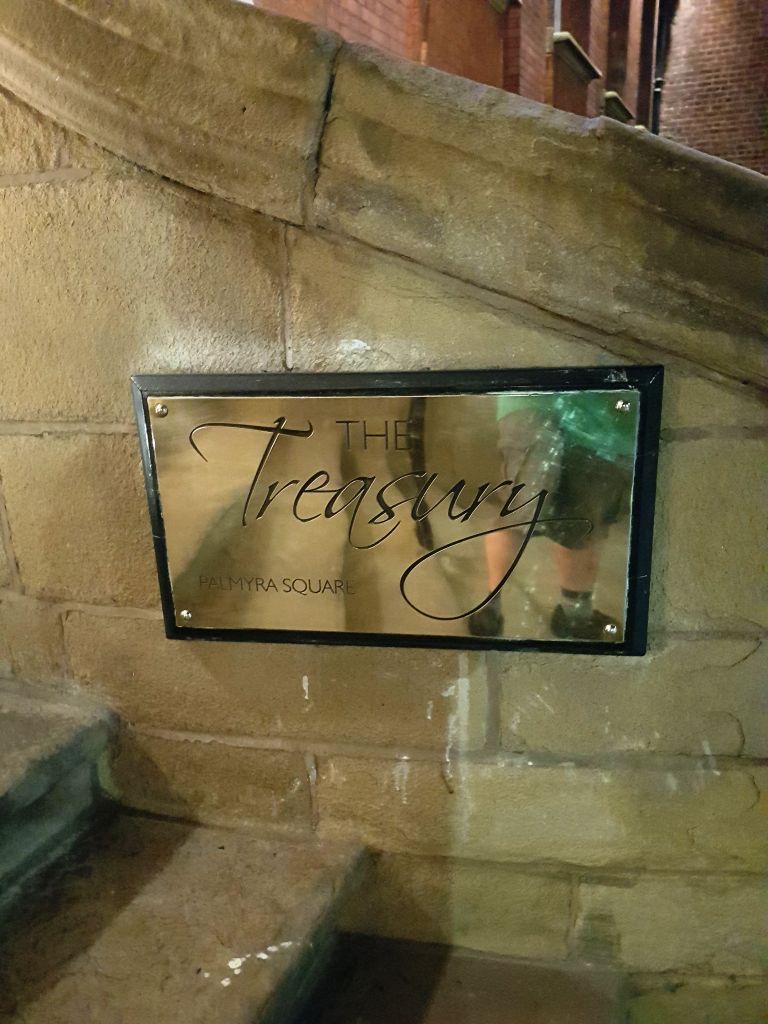
The Treasury Building Palymra Square The Treasury Building Palymra Square

The restoration plan included preserving the main stair enclosure along with the original features which includes oak panelling and thankfully the beautiful Mosaic floor tiles. Having previously quoted for the latter and with the main building works complete we were asked to return and restore the floors ASAP at what has since been renamed as “The Treasury Building of Palymra Square”.

On the first day I was given a large vase full of mosaic tile pieces which the developers had collected during the building works and figured would come in handy later.
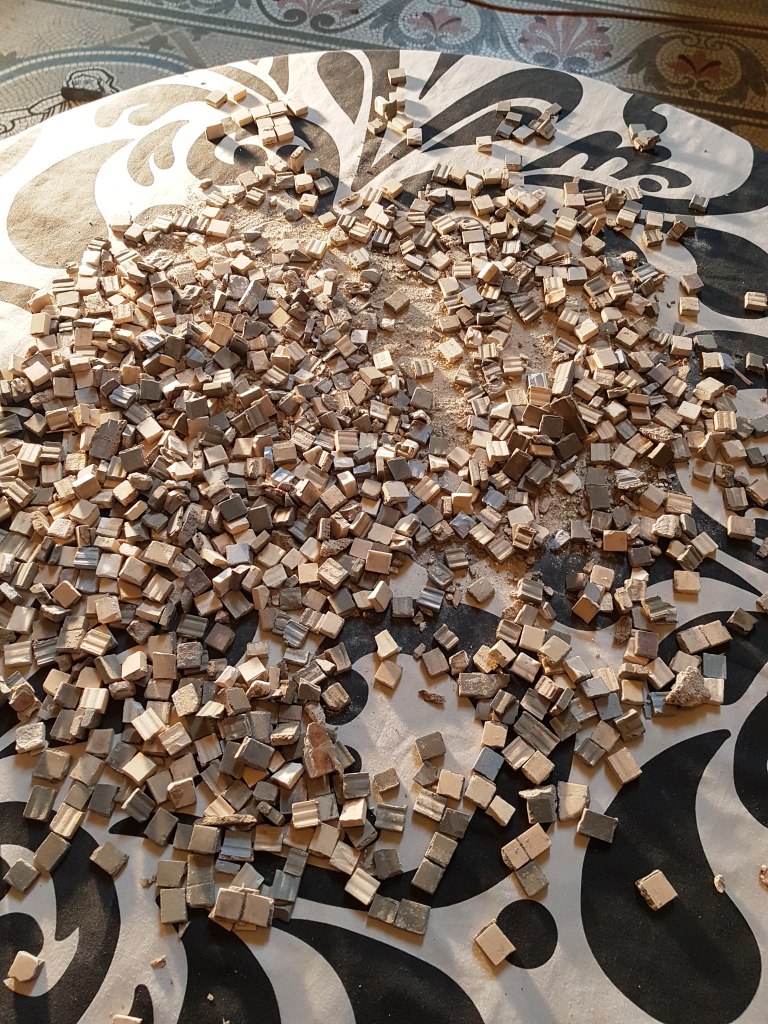
Mosaic Tile Collection


Day 1 – Preparing and Cleaning the Mosaic Flooring

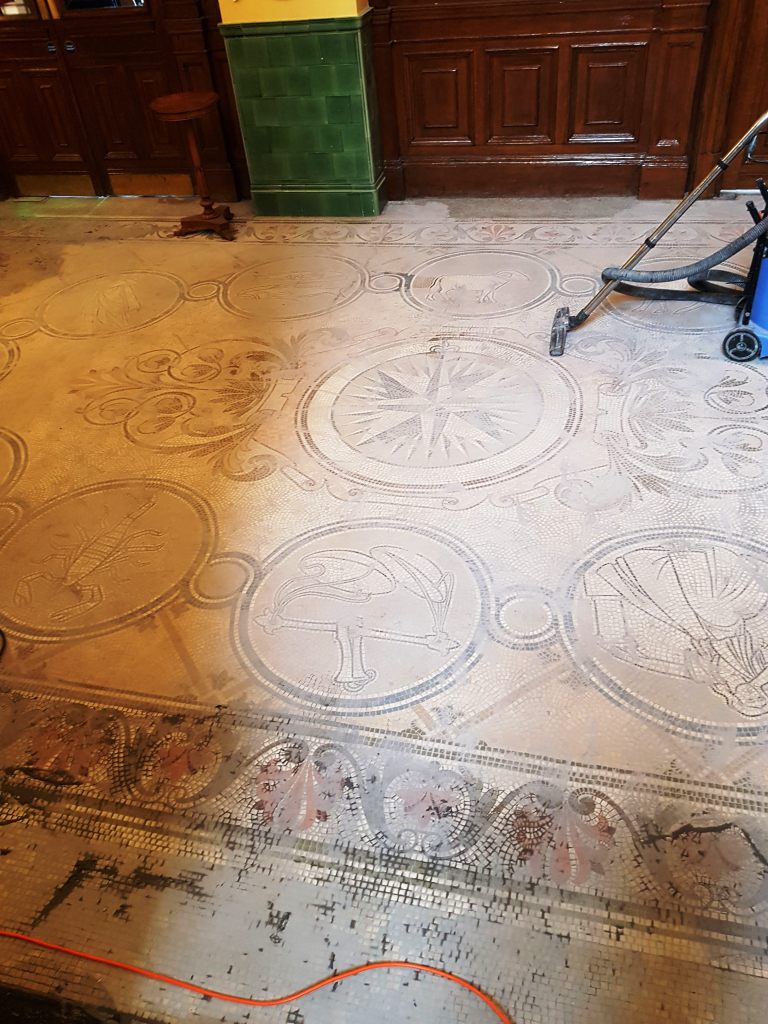
Starting at the top of the building my first job was to remove the builders rubbish and sweep both floors. I then washed both Mosaic floors with Tile Doctor Pro-Clean using a strong 1:3 dilution with water. After leaving the cleaning solution to soak in for a few minutes it was scrubbed in using a black scrubbing pad fitted to a weighted buffing machine.
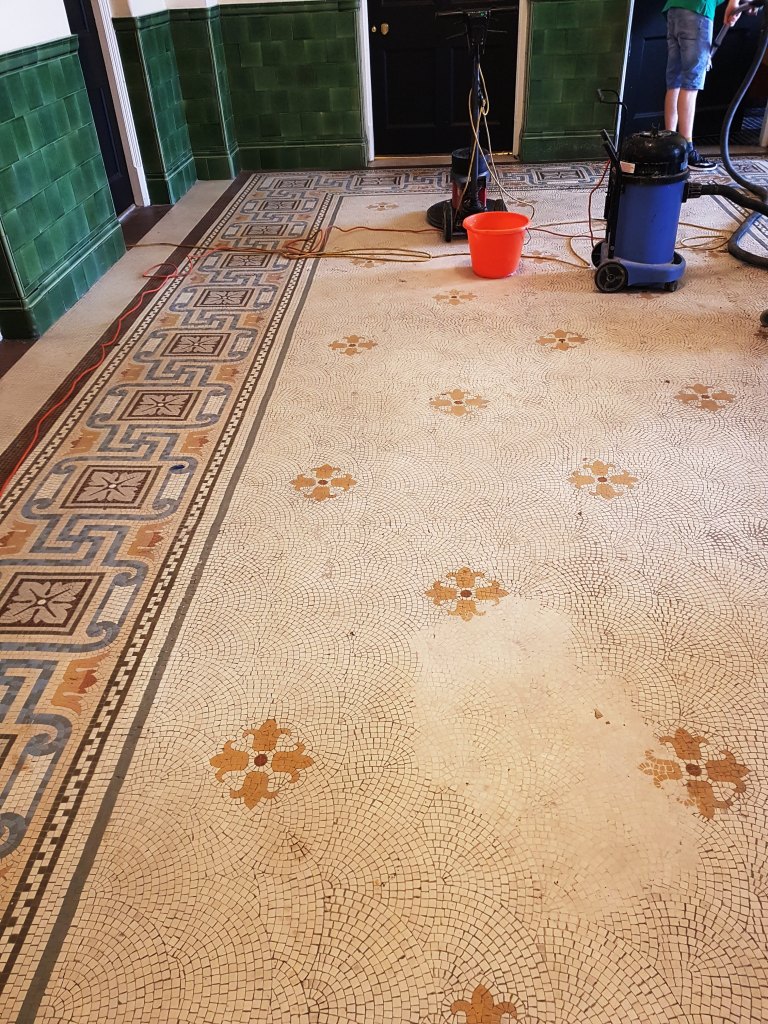
Cleaning Mosaic Flooring Warrington Treasury Building Cleaning Mosaic Flooring Warrington Treasury Building

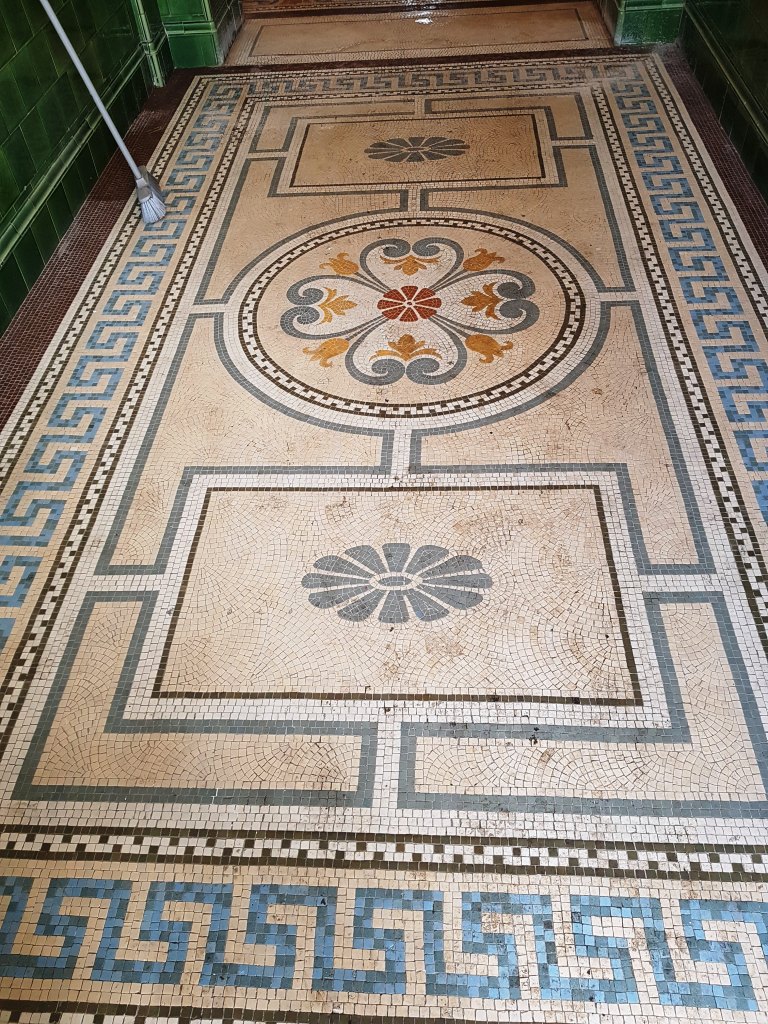
This process brought out the dirt and dust that had been ingrained in the tiles turning the cleaning solution into a grey slurry which was then removed with a wet vacuum. It was a large floor and I had to repeat the cleaning process a couple of times to remove the layers of dirt, but the result was worth it and by the end of the first day the colours and design of the floor was really standing out.
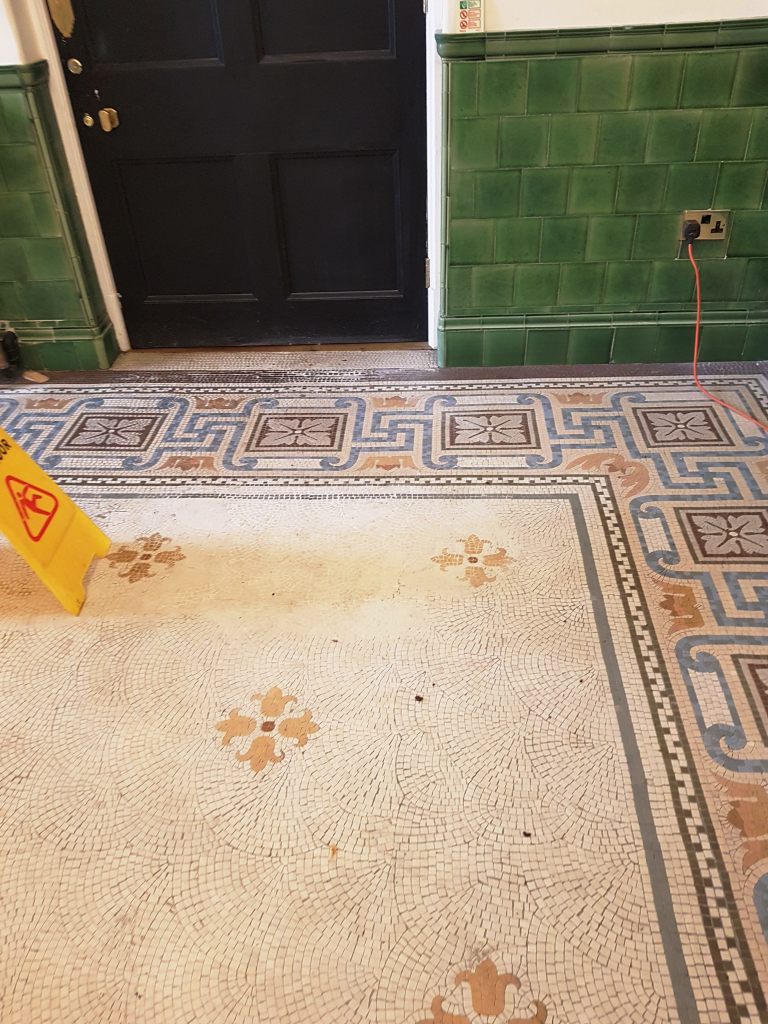
Cleaning Mosaic Flooring Warrington Treasury Building Cleaning Mosaic Flooring Warrington Treasury Building


Day 2 – Replacing Missing Mosaic Tiles on the Top Floor

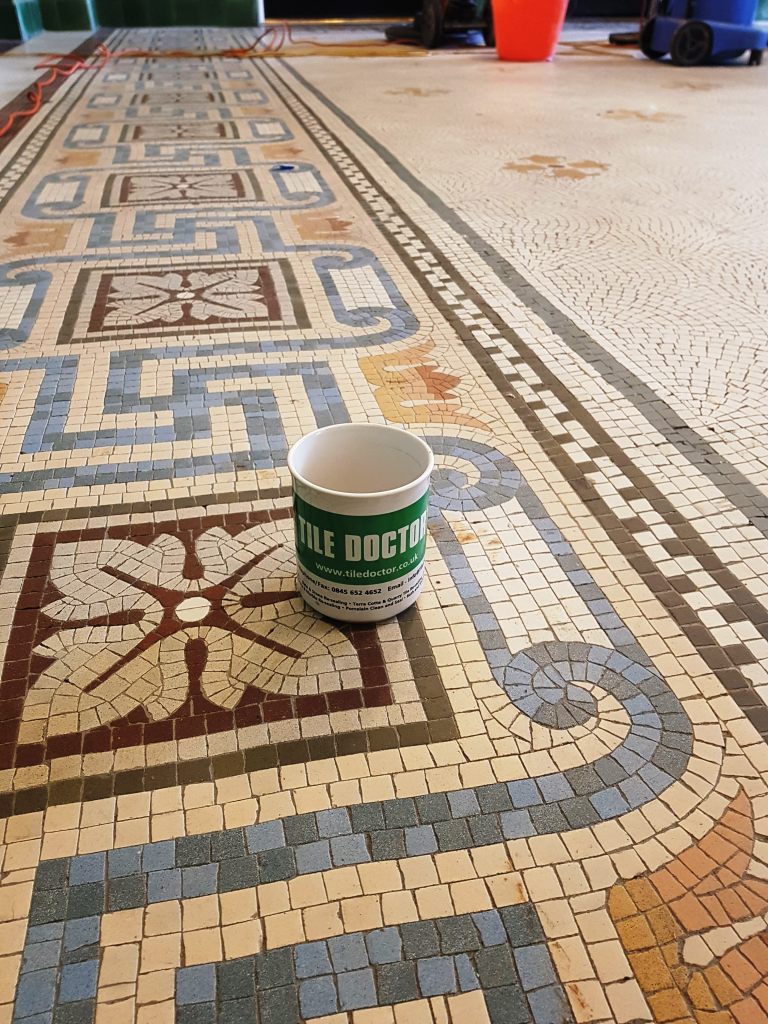
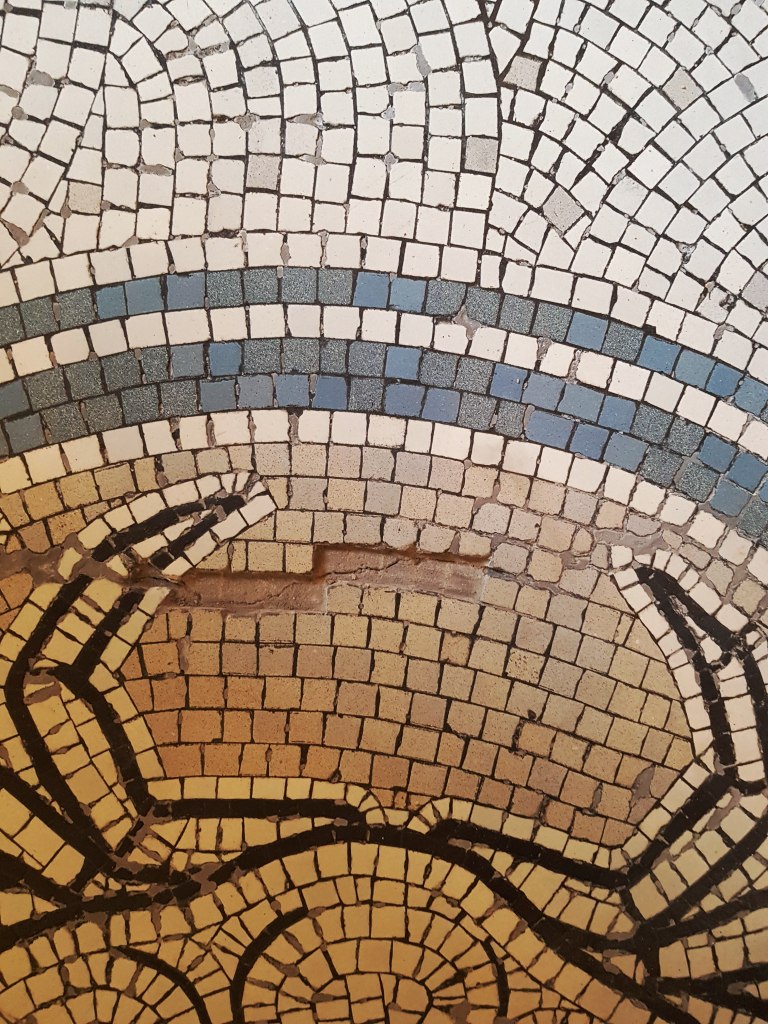
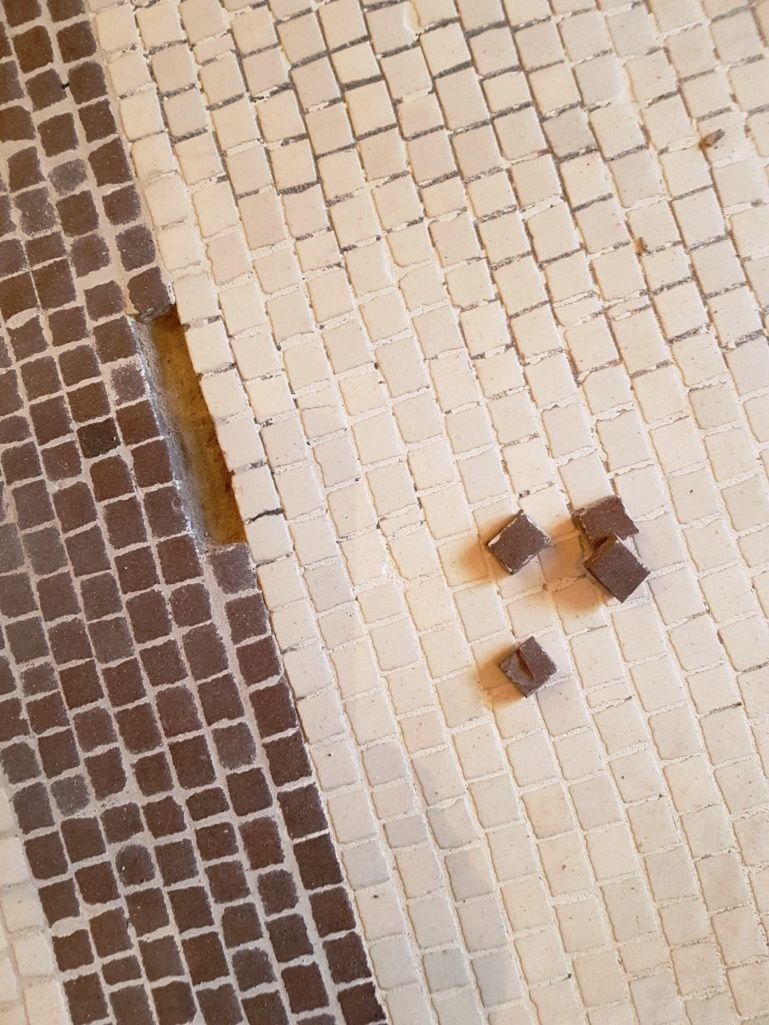
On day two I started work to repair the floor where the mosaic pieces were missing using the collection of mosaic tiles the builders had kindly left me at the start of the restoration. It was quite a jigsaw that involved looking through the hundreds of pieces that had been collected, finding a suitable piece and if necessary shaping it with a grinder so it could fit in the pattern. I used a flexible tile adhesive and then left them to set overnight.
Repairing Mosaic Flooring Warrington Treasury Building Repairing Mosaic Flooring Warrington Treasury Building
Replacing the missing mosaics on the first floor was a slow process which ended up taking up much of the second day.


Day 3 – Replacing Missing Mosaic Tiles on the Top Floor

My plan on day 3 was to continue the restoration work on the top floor and ensure the repaired areas were level with the rest of the floor. I attempted to use a 50-grit milling pad fitted to weighted floor buffing machine for this but found the segments on the pad would catch the edge of the replaced pieces and knock them out of place. Clearly this was not going to work so I changed tack and smoothed them down using a set of graded hand-held Diamond burnishing blocks. Again, there was lot to do so this work took up much of the day; some might say I could have worked around this but I’m a bit of a perfectionist and I like to ensure a job is done right.


Day 4 – Burnishing Mosaic Tiles on the Top Floor

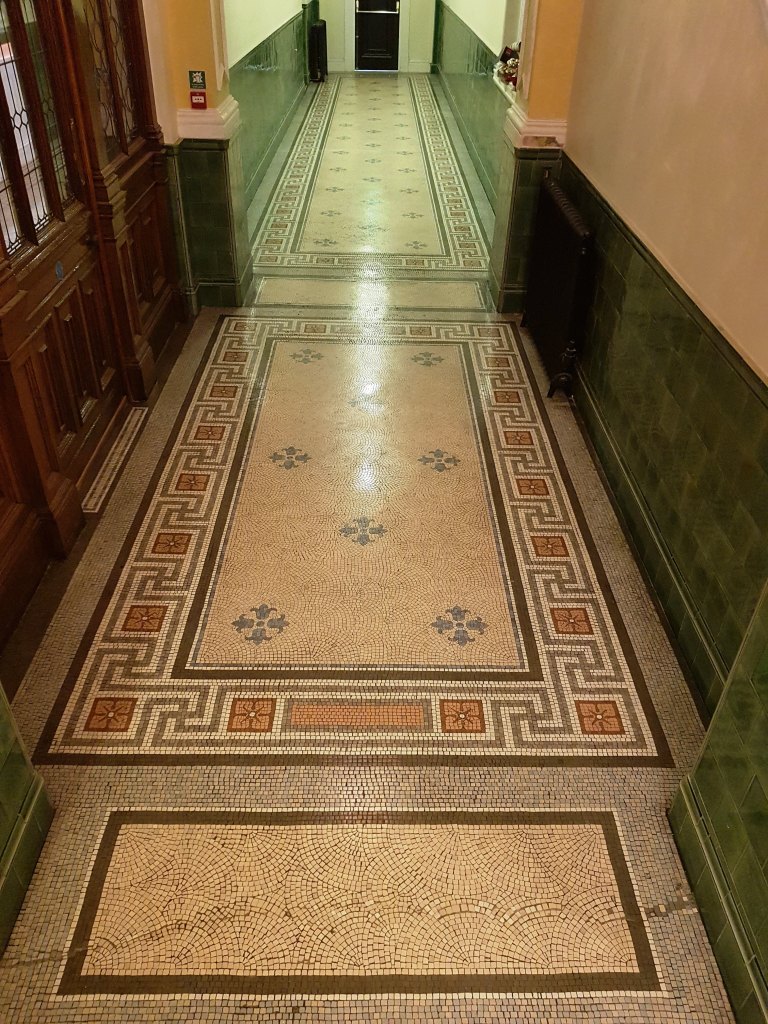
The next step was to use a set of Tile Doctor Burnishing Pads to clean and restore the finish of the mosaics. The pads which are encrusted with industrial diamonds are applied with a rotary floor buffer in sequence from coarse to extra fine. The first pad is a coarse 400-grit and is applied with only water for lubrication, it removes minor scratches, sealers, and the top surface dirt.
Cleaning Mosaic Flooring Warrington Treasury Building Cleaning Mosaic Flooring Warrington Treasury Building

Working in sections, I applied the pad across the floor, rinsing with water in between and picking up the soiled solution with the wet vacuum. I then repeated this same procedure with the medium 800-grit pad which is the first stage polishing pad again rinsing with water after use. The next two pads are a fine 1500-grit and extra fine 3000-grit which really build up a high-quality polish on the stone. This last pad is applied at the very end of the process when the floor is dry and is run over the floor using a small amount of water which is sprayed onto the floor.


Day 5 – Restoring Mosaic Flooring on the Ground Floor

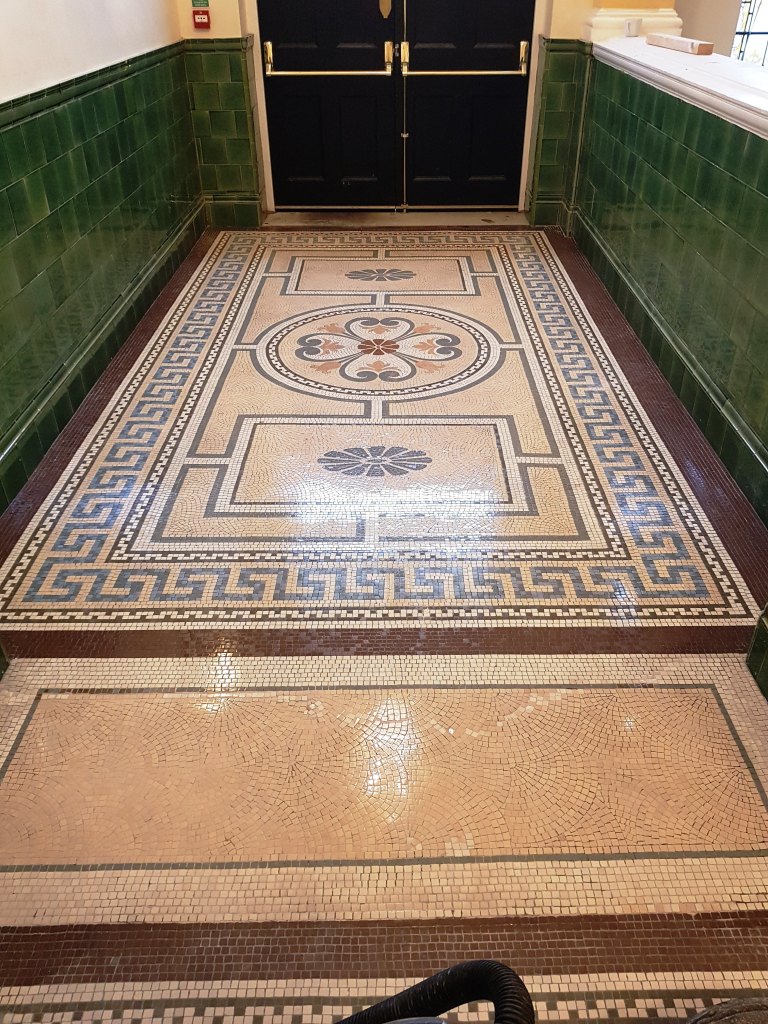
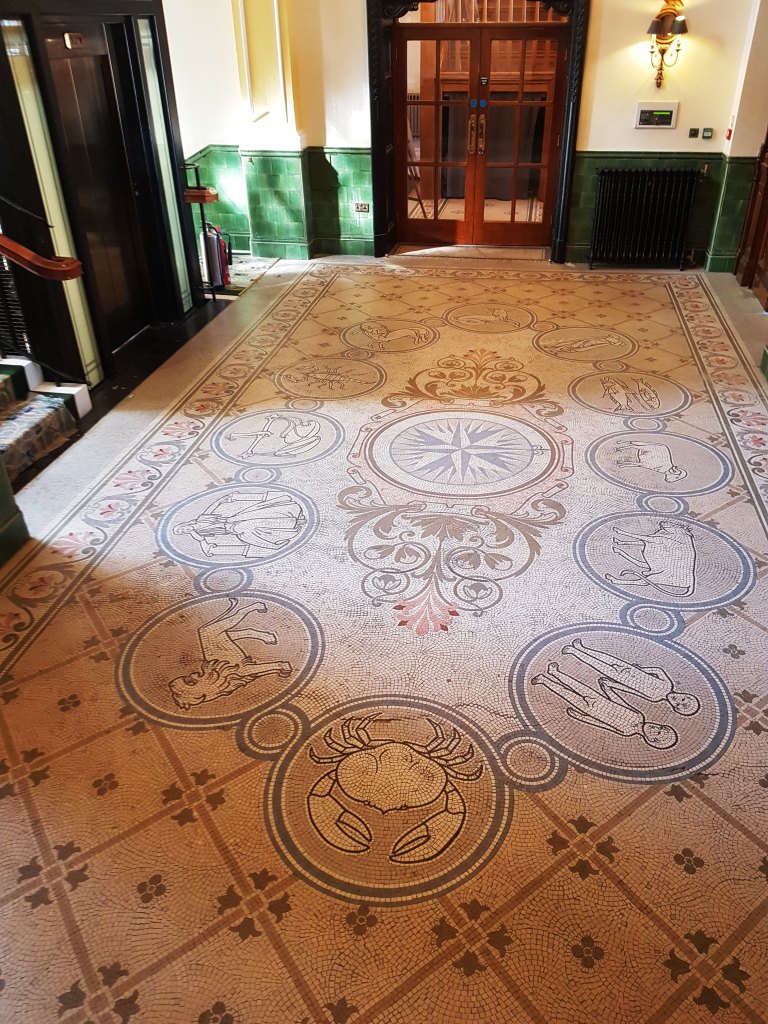
The next day we started on the ground floor which consisted of a large main lobby and hallway running off it. The mosaic pattern in the lobby featured an impressive oval zodiac design with two restaurants looking on to it behind wood and glass panelling. It must have taken a long time to lay back in 1901 and we were quite often stopped by people that worked there saying how nice it was seeing the wonderful floor being restored to its former glory.
Cleaning Mosaic Flooring Warrington Treasury Building Repairing Mosaic Flooring Warrington Treasury Building

The ground floor Mosaics had the same issues as the first floor however the experience gained restoring the first floor meant I was able to crack on quite quickly and completed the repairs in a single day.


Day 6 – Burnishing Mosaic Tiles on the Ground Floor

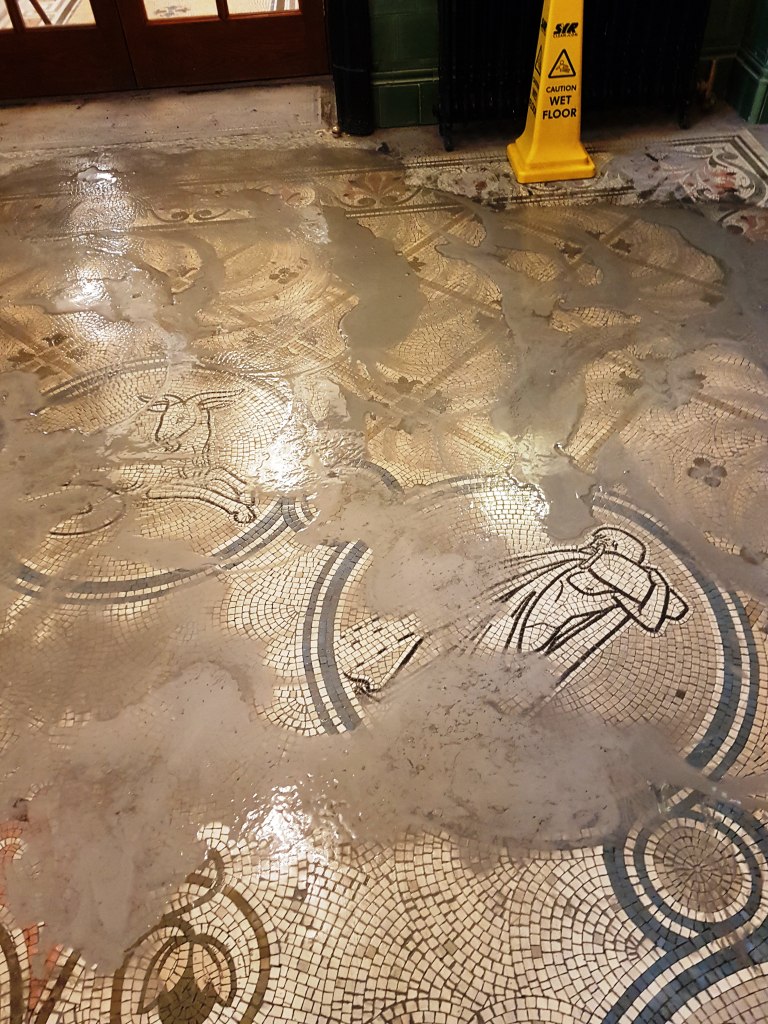
On the sixth day I proceeded to burnish the Mosaic flooring on the ground floor and hall using the same system as before
Burnishing Mosaic Flooring Warrington Treasury Building Cleaning Mosaic Flooring Warrington Treasury Building

With two large areas to cover I found the burnishing of the ground floor and hall using the 400, 800 and 1500-grit pads as before took up the whole day. After finishing the floor was given a final rinse to remove the slurry and then left to dry out overnight.


Day 7 – Sealing Mosaic Flooring

I returned early the next day to complete the polishing process using the 3000-grit burnishing pad which further builds the polished appearance of the floor. Once this was done the floor was sealed using two coats of Tile Doctor Colour Grow which is an impregnating sealer that adds stain protection to the floor and enhances colour. With two floors to do I was able to work on one floor as the sealer on the other dried.
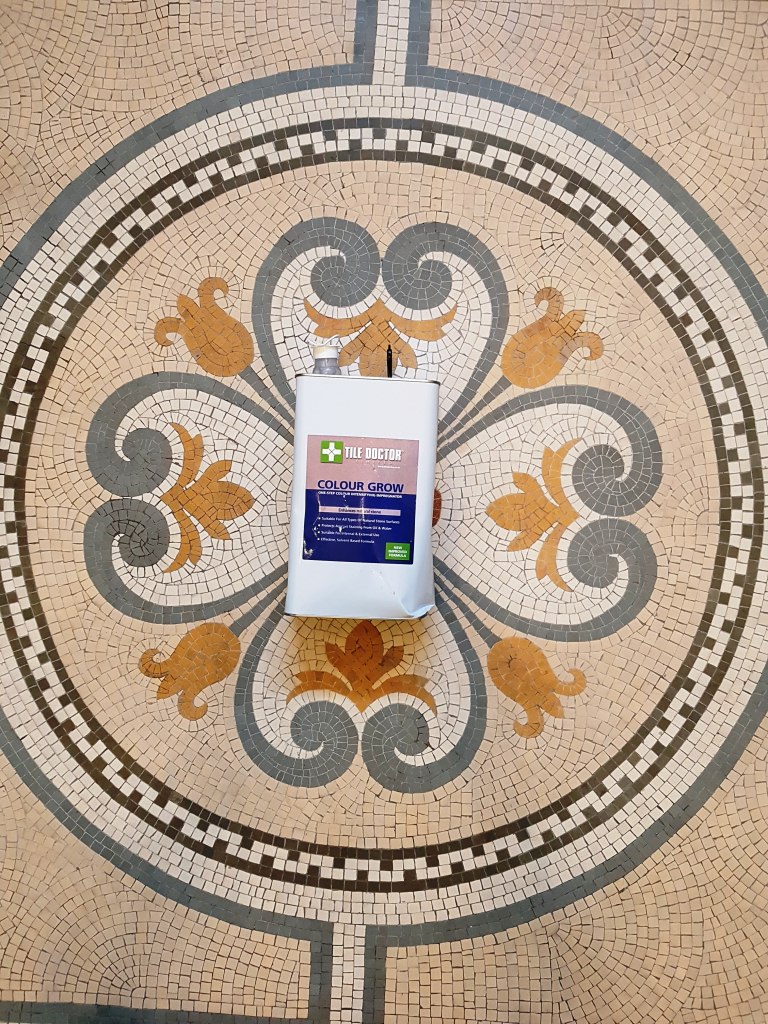
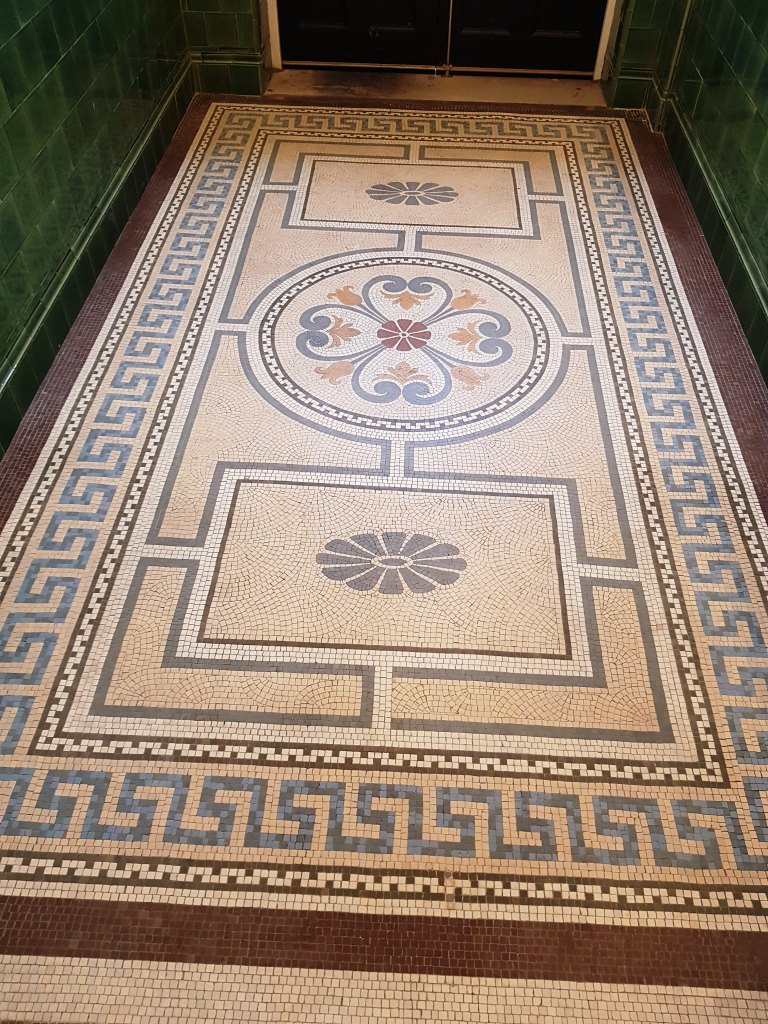
Sealing Mosaic Flooring Warrington Treasury Building Sealing Mosaic Flooring Warrington Treasury Building

The owners were very pleased with the work we did and have asked us if we can come back every two months to maintain the floor and keep it in tip top condition. Having a maintenance plan in place for busy tiled areas like these are a good idea if you want to keep your floor looking its best.
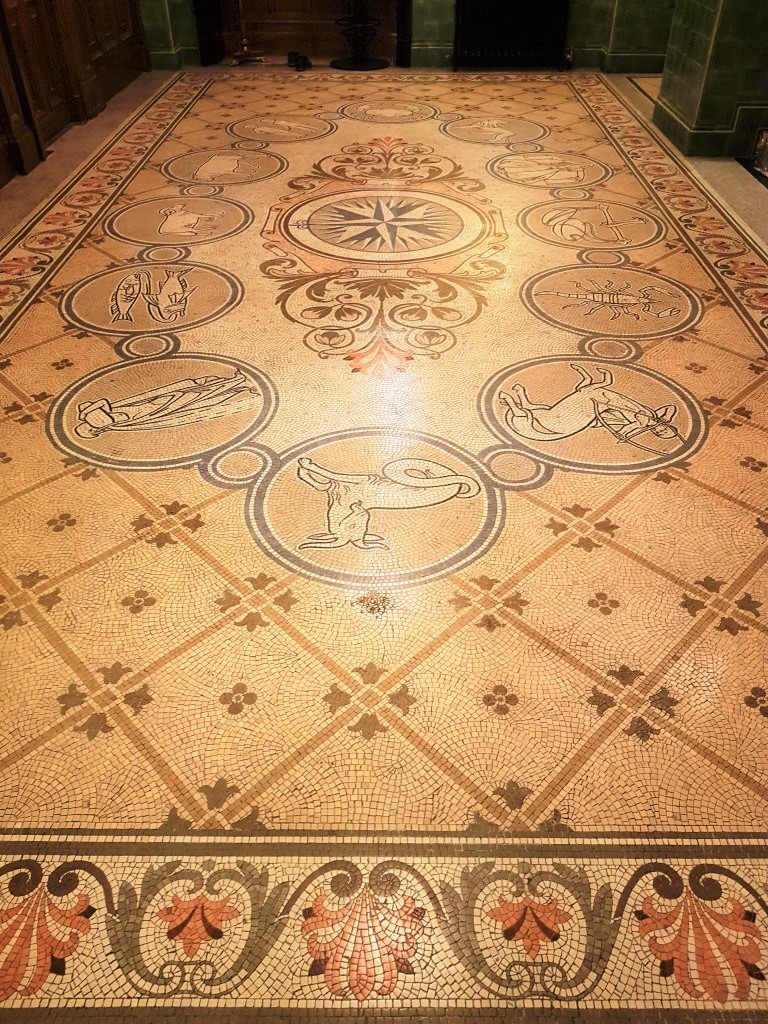
Polishing Mosaic Flooring Warrington Treasury Building Polishing Mosaic Flooring Warrington Treasury Building


Source: Mosaic Tile Cleaning and Restoration Service in Cheshire

Tuesday, October 30, 2018

Install A Foam Floor In A Kids' Room

A kids room will greatly benefit from having a foam floor. This flooring is not only comfortable and soft, but it also adds a new dimension for you to decorate your room.

Many home owners install their foam floors in playrooms and even on basement floors where the kids can have their own play area. These foam floors are incredibly durable, easy to clean, and spill proof. There is a wide variety of different shapes, sizes, and designs for the foam floor which makes it easy to match to any decor. Depending on what your child likes, you can have letters, designs, cars, dinosaurs, colors, and even sports teams as designs on the foam floors.

What You'll Need:
  • Foam flooring of your choice
  • Utility Knife
  • Carpet tape
  • Measuring Tape
  • Square

A Big Puzzle

For the most part, installing a foam floor is much like putting together a puzzle. Foam floors come with interlocking joints that make them much more stable, and less likely to come apart from use.

Step One

Clean the entire subfloor of the area you are going to be working in. You can install the foam floor on any type of hard surface, but it needs to be clean of any residue, oils, nails, or splinters.

Step Two

Take the time to lay out the foam floor tiles in the way you want them. Resist the temptation to begin laying them down permanently right at the beginning. You might see that they way you originally planned the floor does not look quite right.

Leave at least 18 inches all the way around the room for the border tiles. Position the floor in the middle so that there are equal amounts of a floor all the way around the room so the border tile installation will be much smoother.

This step is important so you will get the exact pattern that you want for the children's play area.
Step Three

Measure the remaining floor space and transfer these measurements to the border tiles. Cut them down to size using the utility knife and a straight edge. Once these are cut to size, then install them along the entire outside edge of the room, or play area.
Step Four

When you are absolutely sure you have the right configuration you want for your foam floor, then begin to adhere them to the floor for a permanent fixture.

Pull up each border tile and place double sided carpet tape onto floor. Use tape for each corner of the tile and the middle area. Press the tile back into place and apply pressure to it to create a stronger bond. Repeat this process all the way around the room.

Do not adhere the middle tiles to the floor. This way you still have the option of changing them out or rearranging them for a new look.


Friday, October 26, 2018

Cleaning and Polishing Marble Tiled Flooring in Reigate, East Surrey

The photographs below are of a Marbled Tiled floor that was installed over much of the ground floor of a cottage that formed part of a large county estate near Reigate.

Marble Tiled Floor Before Polishing Reigate Marble Tiled Floor Before Polishing Reigate

The Marble floor tiles were lovely however the polish and sealer had worn off some time ago and the were now looking much worse for wear, additionally the once white grout had turned dark with dirt and I`m not sure even the owner realised its full potential. I provided a quote for cleaning and applying a deep polishing to the floor which was agreed and set a date to do the work.


Marble Tile and Grout Cleaning in Reigate

After protecting the wooden skirting with tape, I started the cleaning process by applying a medium dilution of Tile Doctor Pro-Clean which was scrubbed into the tiles using a stiff brush to remove any loose dirt and debris from the floor but primarily along the grout lines. The soiled cleaning solution was then rinsed off with water and then extracted with a wet vacuum.

Next step was to deep clean the tiles and bring back the polish using a set of four Tile Doctor diamond encrusted honing pads which fit a weighted rotary floor buffer and are applied in sequence starting with the 400-grit pad lubricated with water. This is followed with the 800-grit and then the 1500-grit pads rinsing with water after each pad and removing the soil generated by the burnishing process with the wet vacuum as before.

This work took much of the day so after applying the 1500-grit pad and rinsing I left the floor to dry out overnight.


Sealing and Polishing Marble Tiles with Shine Powder

The next day I started by applying the 3000-grit pad which is the final pad in the polishing process and really helps bring up the polished appearance of the Marble. The pad is applied to the floor dry using a little water sprayed onto the floor using a process we call a spray burnish.

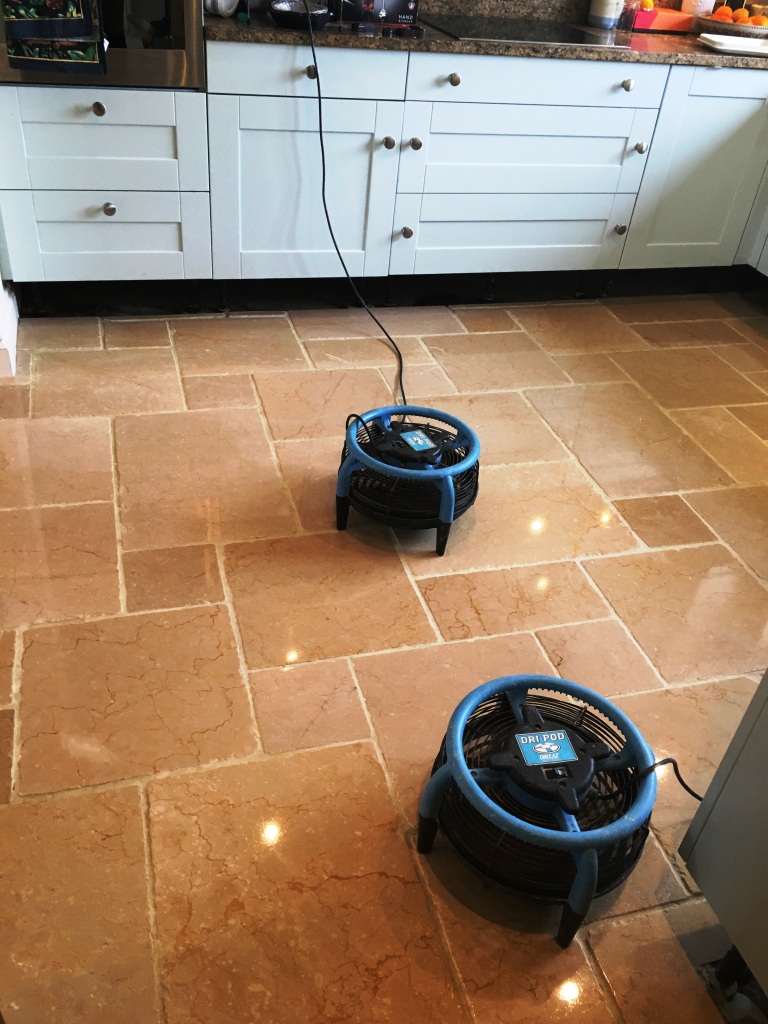
The last step was to seal the Marble tiles and build the polish even further by applying Tile Doctor Shine Powder which is diluted with water and buffed into the Marble tiles using a white buffing pad. The shine powder did an excellent job of building the shine on the floor and provides a tough durable finish that should last.
 
Marble Tiled Floor After Polishing Reigate Marble Tiled Floor After Polishing Reigate

After two days work the Marble tiled floor looked transformed and I was especially pleased with the deep level of shine and restored white grout that I had managed to achieve.


Source: Marble Tile Cleaning and Polishing Service in East Surrey

Thursday, October 25, 2018

How To Choose Playroom Flooring

Your playroom flooring choice will play a big role in how much your children enjoy their playroom. There are many different types of kid-friendly flooring options.

Foam Tiles

Foam tiles are great for playrooms. They are soft and won’t cause carpet burns if your children play on the floor. They are also easy to clean and replace should one be stained or torn. Foam tiles are available in variety of colors, from bright primary colors to laminate that looks like wood. Some even have numbers and letters of the alphabet on each panel.

This flooring is lightweight, made of interlocking pieces that can be installed over existing flooring with very little effort. Best of all, foam tile flooring is very cheap!

Carpet Tiles

If your children are a little older, carpet tiles may be a better choice. They can make a room seem more mature, but they are still simple to replace in case of spills. The tiles are fairly inexpensive and can be placed over any hard surface.

The downside to the carpet tiles is the actual material. If your kids spend a lot of time on the floor, the carpet can become irritating to their skin.
Linoleum

Linoleum flooring is easy to clean, but can be hard on your kids. If your kids are older, or they have interests in art, then linoleum may be a good option. Though it is difficult to replace, it is cheap to install and very easy to clean, especially compared to more absorbent or fabric materials.

You should not use any kind of slick surface for kids just learning to walk or toddlers who are still wobbly. It should also not be used if your kids have a habit of running around. Linoleum is really best for rooms used by kids older than 8.

Low Nap Carpet
If you like the look of carpet and want to keep it consistent throughout your home, look for low nap carpet options for your playroom. They are easier on your children if they spend time on the floor.

Low nap carpets aren’t completely stain-resistant, but are much easier to clean if something spills. They are usually made to be water-resistant. You can vacuum them as you would any other carpets.
Throw Rugs

If you don't want to install a whole new floor in an established room, consider using some inexpensive throw rugs instead. Put them over non-slip mats, and remember that kids can be messy. Choose machine washable rugs or very inexpensive styles that can be easily replaced.


Wednesday, October 24, 2018

Renovating Old Victorian Hallway Tiles in Cleckheaton, West Yorkshire

I was asked to visit an old house from the Victorian era in Cleckheaton which is part of the West Yorkshire district of Kirklees and only 14 miles from my base in Oxenhope. The owners had bought the house last year and had been renovating it ever since. The last job was to sort out the Victorian tiled hallway that they knew from the previous owners had been covered by carpet for over 50 years.

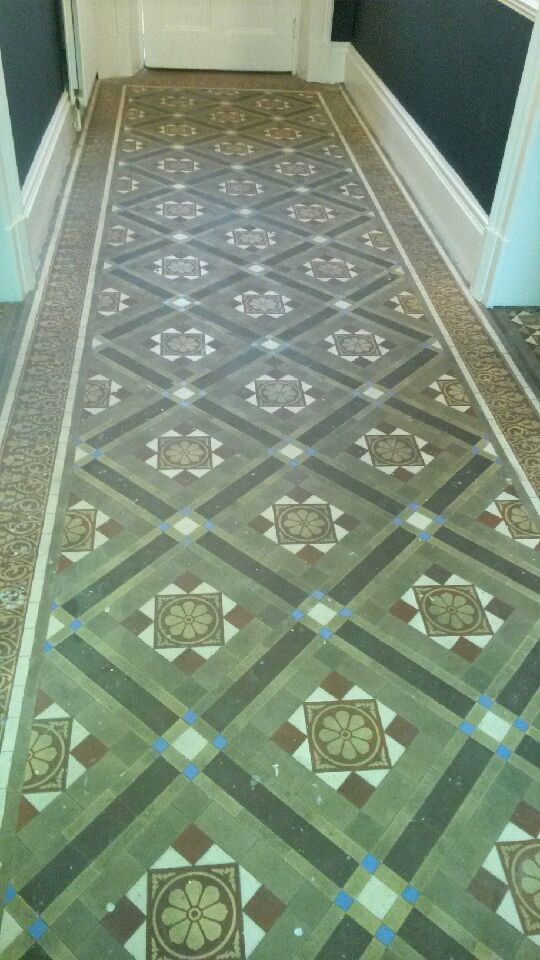
Leaving the floor restoration until last was a sensible decision as the last thing you need is for a decorator to drip paint over your recently renovated floor. I could see the floor was in good physical condition but had layers of dirt, old sealant and of course paint splashes on it but after doing a test clean I knew that we could bring it back to life and return it to something like its former glory.

Victorian Tiled Hallway Before Renovation Cleckheaton Kirklees

The test clean is an important part of our survey as it gives the customer confidence we know what we’re talking about and it gives me a chance to work out the best way of cleaning the floor, so I can provide a more accurate quotation (see below). The owner of the property was impressed with the results of the test clean and keen to have the full potential of the Victorian tiled floor revealed booked me in to do a full clean and seal.


Deep Cleaning a Very Dirty Victorian Tiled Hallway Floor

Normally, we would clean these floors using our rotary machines and chemicals to break down the layers of dirt but in this instance that was not going to be effective. I worked this out during the test clean where I discovered that the tiles were very porous so that any liquid that was put on the floor was immediately absorbed into it. This meant that any chemicals that I applied to the floor did not have time to work before they were absorbed into the floor. When these floors were originally laid there was no damp-proof membrane laid underneath which leaves them very susceptible to damp issues and salting from efflorescence.

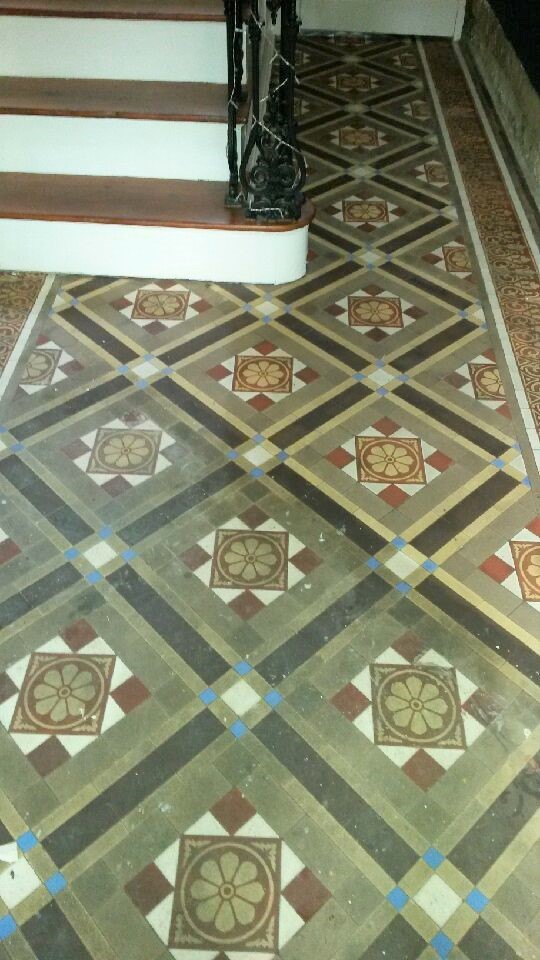
After trying a couple of different methods, I decided that the only way to get this floor clean was to use handheld diamond blocks and a small amount of water to clean the floor in very small sections at a time and then immediately remove the residue before it dried back into the floor. This was obviously very time consuming but did remove the dirt very effectively, it also meant that I wouldn’t exacerbate any efflorescence issues which could happen when excessive amounts of water are used.

Victorian Tiled Hallway During Renovation Cleckheaton Kirklees

Once the whole floor was clean it was given an Acid Wash with Tile Doctor Acid Gel to neutralise any potential salting issues. The gel was then rinsed off with water and extracted using a wet vacuum to remove as much moisture as possible from the floor. The now clean floor was then left to dry off thoroughly, so it would be ready for sealing.


Sealing an Old Victorian Tiled Hallway Floor in

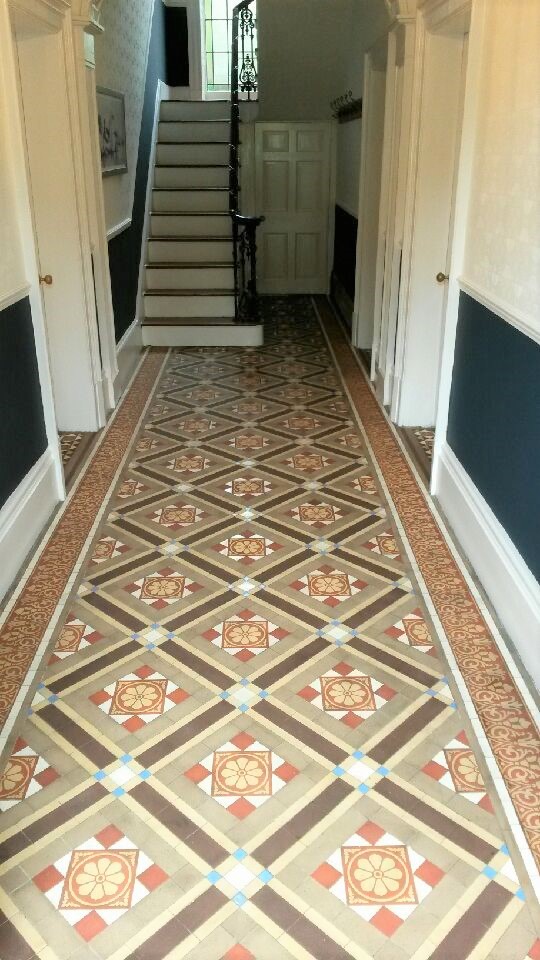
A couple of days later I returned and started by checking the moisture levels in a couple of areas to verify that the tiles were dry enough to be sealed. All was well and so I proceeded to seal the floor with a couple of coats of Tile Doctor Colour Grow which is an impregnating sealer that seeps into the pores of the tile protecting it from within. Colour Grow is also a colour enhancing sealer that improves the natural colours in the tile and most importantly it’s a breathable sealer that will allows any moisture rising through the tile to evaporate. Using a breathable sealer is highly recommended for floors with no damp-proof membrane as moisture can become trapped under the tile which over time can cause damp to rise through the walls and even tiles to become loose.

Victorian Tiled Hallway After Renovation Cleckheaton Kirklees

The Customers were very impressed by the transformation in their floor and hopefully you can see from the photos how much of a difference that has been made to the floor.


Source: Victorian Tile Cleaning and Renovation Service in Kirklees

Tuesday, October 23, 2018

How Do You Calculate Room Area?

Calculating room area requires that you know the basic formula for area. To calculate an area, you simply multiply the length of the room times the width of the room or Area equals Length times Width. This is a basic math problem you saw when you were in the 6th grade and requires a tape measure, a pencil and a piece of paper.

Measure the Room’s Length and Width
Take the tape measure and measure the length of the room from wall to wall. After recording this measurement on a piece of paper in feet and inches, take a measurement of the room’s width. Write this measurement down on the piece of paper.

If you have a room with an irregular shape, you can cut the room into boxes using a piece of household string. Record the length and width measurements for the separate boxes on a piece of paper.

Perform an Area Calculation
You can calculate the area by taking the rooms length and multiplying it by width. To make it easier, convert your measurement into inches, so that a measurement of 6-feet, 11-inches becomes 83 inches. If your length measurement were 7-feet 5-inches and your width measurement were 5-feet 6-inches, your calculation would be 89 inches times 66 inches, which equals 5,874 inches or around 41 square feet.


Friday, October 19, 2018

Including Grout Lines In Self-Stick Tile Installation

Innovative self-stick tiles with grout lines are an inexpensive and easy-to-install flooring option. These tiles can look like ceramic, slate stone or parquet squares. For installation, simply measure the size of your desired floor and purchase enough materials to cover the entire area. Remove the peel-off backing and position the tiles as you like.

Grout
You can complete the look of self-stick tiles by applying grout. Regular grout does not work because the spaces between the tiles are too shallow, which causes the grout to dry, crack and pop out of the grooves.

Instead regular grout, you can use sanded caulk to create the same look. This method creates a strong seal between the tiles along with the appearance of caulk that would be found between real ceramic or stone tiles.

Step 1 - Prepare

Measure out the area of the floor where you want to install the self-stick tiles. Since this type of tile will reveal any pits, unevenness or problems with level in your floor, use a leveling compound to even your floor.

Apply a self-stick adhesive strengthener to the floor, following the manufacturer's instructions.

Step 2 - Arrange and Stick

For the grout illusion to look professional, you need to leave some space between each of the tiles. Use spacers that you would use for a regular ceramic or other type of tile. As you install each adhesive tile to the floor, place a spacer between the new tile and the next tile. This way you will ensure that the spaces are even and consistent.
Step 3 - Remove Bubbles

Let the adhesive set and then remove all of the spacers from between the tiles. Roll the floor with a 50-lb. roller to remove any bubbles from underneath the tiles.
Step 4 - Tape

Apply blue painter's tape to the floor in one direction along the grout lines between the tiles. Be extremely careful and precise with the tape since this will be your guide for applying the grout.
Step 5 - Apply Caulk

Cut a 45 degree angle on the tip of the caulk tube and begin applying the caulk along the grout line. Pull the grout tube toward you, placing the edge of the grout tip along the edge of the tile to fill the grout line fully. Use a caulk smoother to create a smooth surface along your grout line.
Step 6 - Remove Tape

Once the caulk is dry, slowly pull off the tape at a 90 degree angle, taking care not to pull up the caulk line of your new grouting.
Step 7 - Repeat

Repeat taping with blue painters tape in the opposite direction and repeat the caulking process with the new taped lines.


Wednesday, October 17, 2018

Renovating Textured Ceramic Tiles in Essex

“Our Porcelain tiles are unclean-able, please help”
We are always happy to help someone in distress, and this was the opening sentence of a conversation between ourselves and a very distressed home owner in Chelmsford. Chelmsford is a London commuter town situated approximately 30 miles from London.

The tile in question was a Porcelain textured tile, the owners had tried to clean and maintain their floor but due to the nature of the tile, which was very textured and coupled with incorrect maintenance it had left the floor looking very dirty and unloved.

We visited the property to see how we could help. The floor was across a large area in a kitchen diner so was subject to heavy usage, it had been down for some time and the new owners had inherited it from the previous owners who apparently had also had no joy in getting it clean. The floor looked very tired and in need of some attention. We discussed with the client what could be done and agreed a price for the work, booking a date for the following week.


Cleaning a Porcelain Tiled Kitchen Floor

Fortunately, dirt and grease are no match for the power of Tile Doctor Pro-Clean, it’s a multi-purpose high-alkaline cleaner, stripper and degreaser that’s a very effective tile and grout cleaner. On this occasion I applied a strong dilution using two parts water and left it to soak into the tiles first.

Working in areas of around 2 to 3 square meters at a time the solution was scrubbed into the floor using a rotary buffing machine fitted with a black scrubbing pad. We then rinsed the floor thoroughly with water and used a wet pick up vacuum to extract not only the dirt but also any product residue leaving the tiles clean and fresh.

Textured Porcelain Tile Cleaning in Chelmsford

Apologies on only taking one photo, I usually take more but it slipped my mind on this occasion, however if you look closely it clearly shows the difference the cleaning process was making. The client was very satisfied with the work carried out, they knew the floor should have looked a lot better than it had and now it finally looked clean!

Before leaving we explained how to maintain the floor and left a bottle of Tile Doctor Neutral Cleaner to keep the floor looking fresh. Tile Doctor concentrated Neutral Tile and Stone cleaner has been especially formulated for the regular cleaning of Tile and Grout.


Source: Textured Ceramic Tile Cleaning and Renovation Service in Essex

Monday, October 15, 2018

How to: Peel and Stick Flooring

As their name suggests, peel and stick flooring is made of small tiles that adhere directly to a floor surface. Not only are they very inexpensive, but they can be installed by almost anyone—even children. Contemporary peel and stick flooring can imitate many types of standard flooring, including ceramic tiles, stone, wood, parquet and even abstract patterns. You can also create visually interesting patterns by mixing different tile patterns together in a large flooring area.

Although this type of flooring is easy to install and inexpensive, there are also some disadvantages. Compared to other types of floors, especially in a side-by-side comparison, peel and stick tiles can have a cheap or fake appearance. Likewise, this type of flooring is not known to be particularly durable, particularly when compared to other types of flooring like ceramic tile, stone or hardwood floors.

What You'll Need:
  • Measuring Tape
  • Crowbar
  • Peel and Stick Tiles
  • Cleaning Supplies
  • Razor
  • Box Cutter
  • Sealer
  • Cloth


Step 1

Measure the length and width of the area where you will be installing the flooring. Multiply the width by the length to find the square footage area, which will determine how much flooring you need. Add 10 percent to this number to account for overage in case you need extra material or to replace squares.

Step 2

Use a level to check that your flooring is straight. If the floor is level and you have linoleum or vinyl currently installed, you can install the new flooring tiles directly over the existing floor.

However, if you have ceramic tiles, parquet or other flooring installed, you should remove this flooring material. Use a crowbar to pry up the old materials and then use a solvent to remove the old adhesive.

Step 3

Clean the entire floor area. If you will be installing the new flooring over existing vinyl or linoleum, clean the floor thoroughly before you begin to install the new floor tiles.
Step 4

Use the length and width measurements to find the center of the room. Place four peel and stick tiles at this place in the floor, all four corners aligned together at the center spot.

Begin to work outward from these four tiles, placing tiles around to enlarge the square. This will keep your tiles aligned, but you should regularly check the alignment with a tape measure.

Step 5

When you reach the walls, you will probably need to cut the tile squares so that they fit accurately in place. Measure the width from the wall to the last tile you placed. Take a tile and cut it to the measurement using a razor or box cutter.
Step 6

Apply a colored sealer to any cracks or places where the tiles do not align correctly. Wipe away any excess sealant with a clean dry cloth. Let the sealant dry completely before using the floor.