Wednesday, February 27, 2019

Aga Cooker encouraging efflorescence problems in Goostrey, East-Cheshire

Pictured below is an old Quarry tiled floor in the Kitchen of a house in the small farming village of Goostrey. I went over to survey the floor at the request of the owner who felt it was overdue a deep clean and seal.

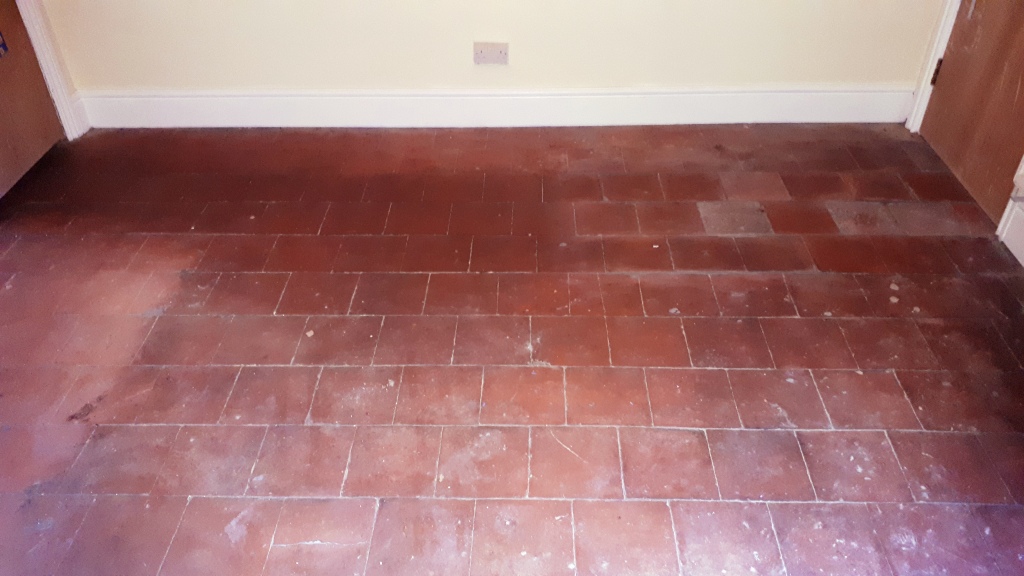
Quarry Tiled Kitchen Floor Before Cleaning Goostrey

It was a classic floor that suited the kitchen and its Aga well however I’m sure it could tell a story. There were patches of white efflorescent salts in front of the Aga itself and another section of floor where the tiles were a slightly darker shade. I assume some replacements were made in this section at some point in the past. Efflorescence occurs when damp in the subfloor rises through the tiles depositing white alkaline salts on the surface of the tile as the moisture evaporates. This is quite a common problem in older properties where no damp proof membrane is present under the floor and more so where you have a warm Aga heating the space and encouraging evaporation.

As per usual the floor was survey noting all the points above and then I carried out a test clean on a small part of the floor. This helps me understand what products and process I need to follow in order to renovate the floor and thereby product an accurate quote for the work. This went well and the owner was happy for us to process so we agreed a date to start the work which would take two days.


Cleaning a Quarry Tiled Floor

To clean the floor and strip off any remaining sealer I first created a strong dilution of Tile Doctor Remove and Go which was sprayed onto the tiles and then left to soak in. Remove and go is a powerful stripper and cleaner that is safe to use on tile and stone. The product is designed to loosen paint stains, adhesives and many types of urethane and wax coatings so they can be easily removed.

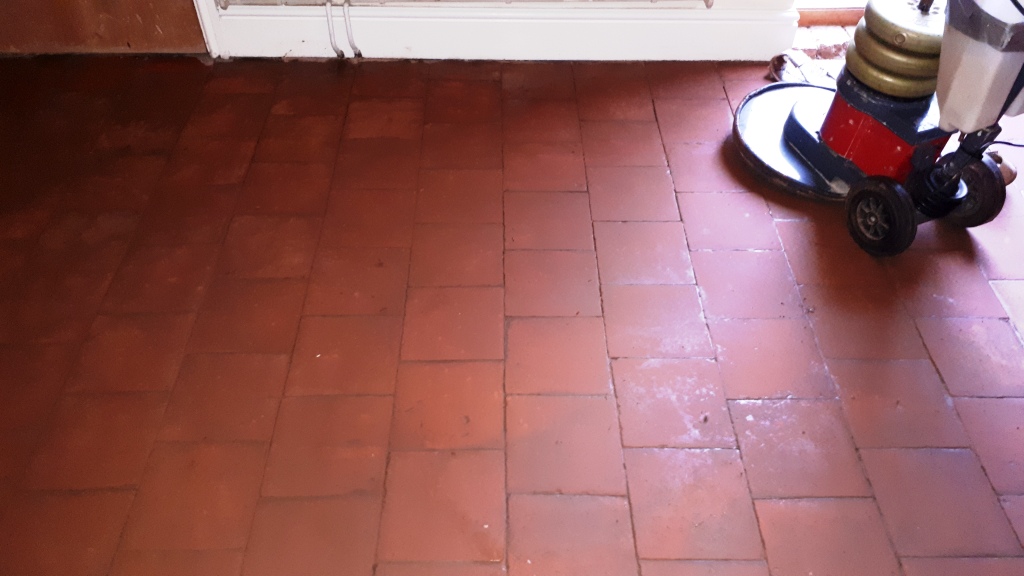
After thirty minutes the solution was scrubbed into the tile and grout using a weighted rotary machine fitted with a black scrubbing pad and running at a slow speed. The resulting cleaning slurry was rinsed off with water and then extracted from the floor using a wet vacuum. I repeated this process until I was confident the tiles were clean and free of old sealer.

The next step was to neutralise the alkaline salts in the floor which could later lead to efflorescence by treating it to an acid wash using Tile Doctor Acid Gel. The gel was left to soak in for five minutes before washing it off using the wet vacuum to get the floor as dry as possible.
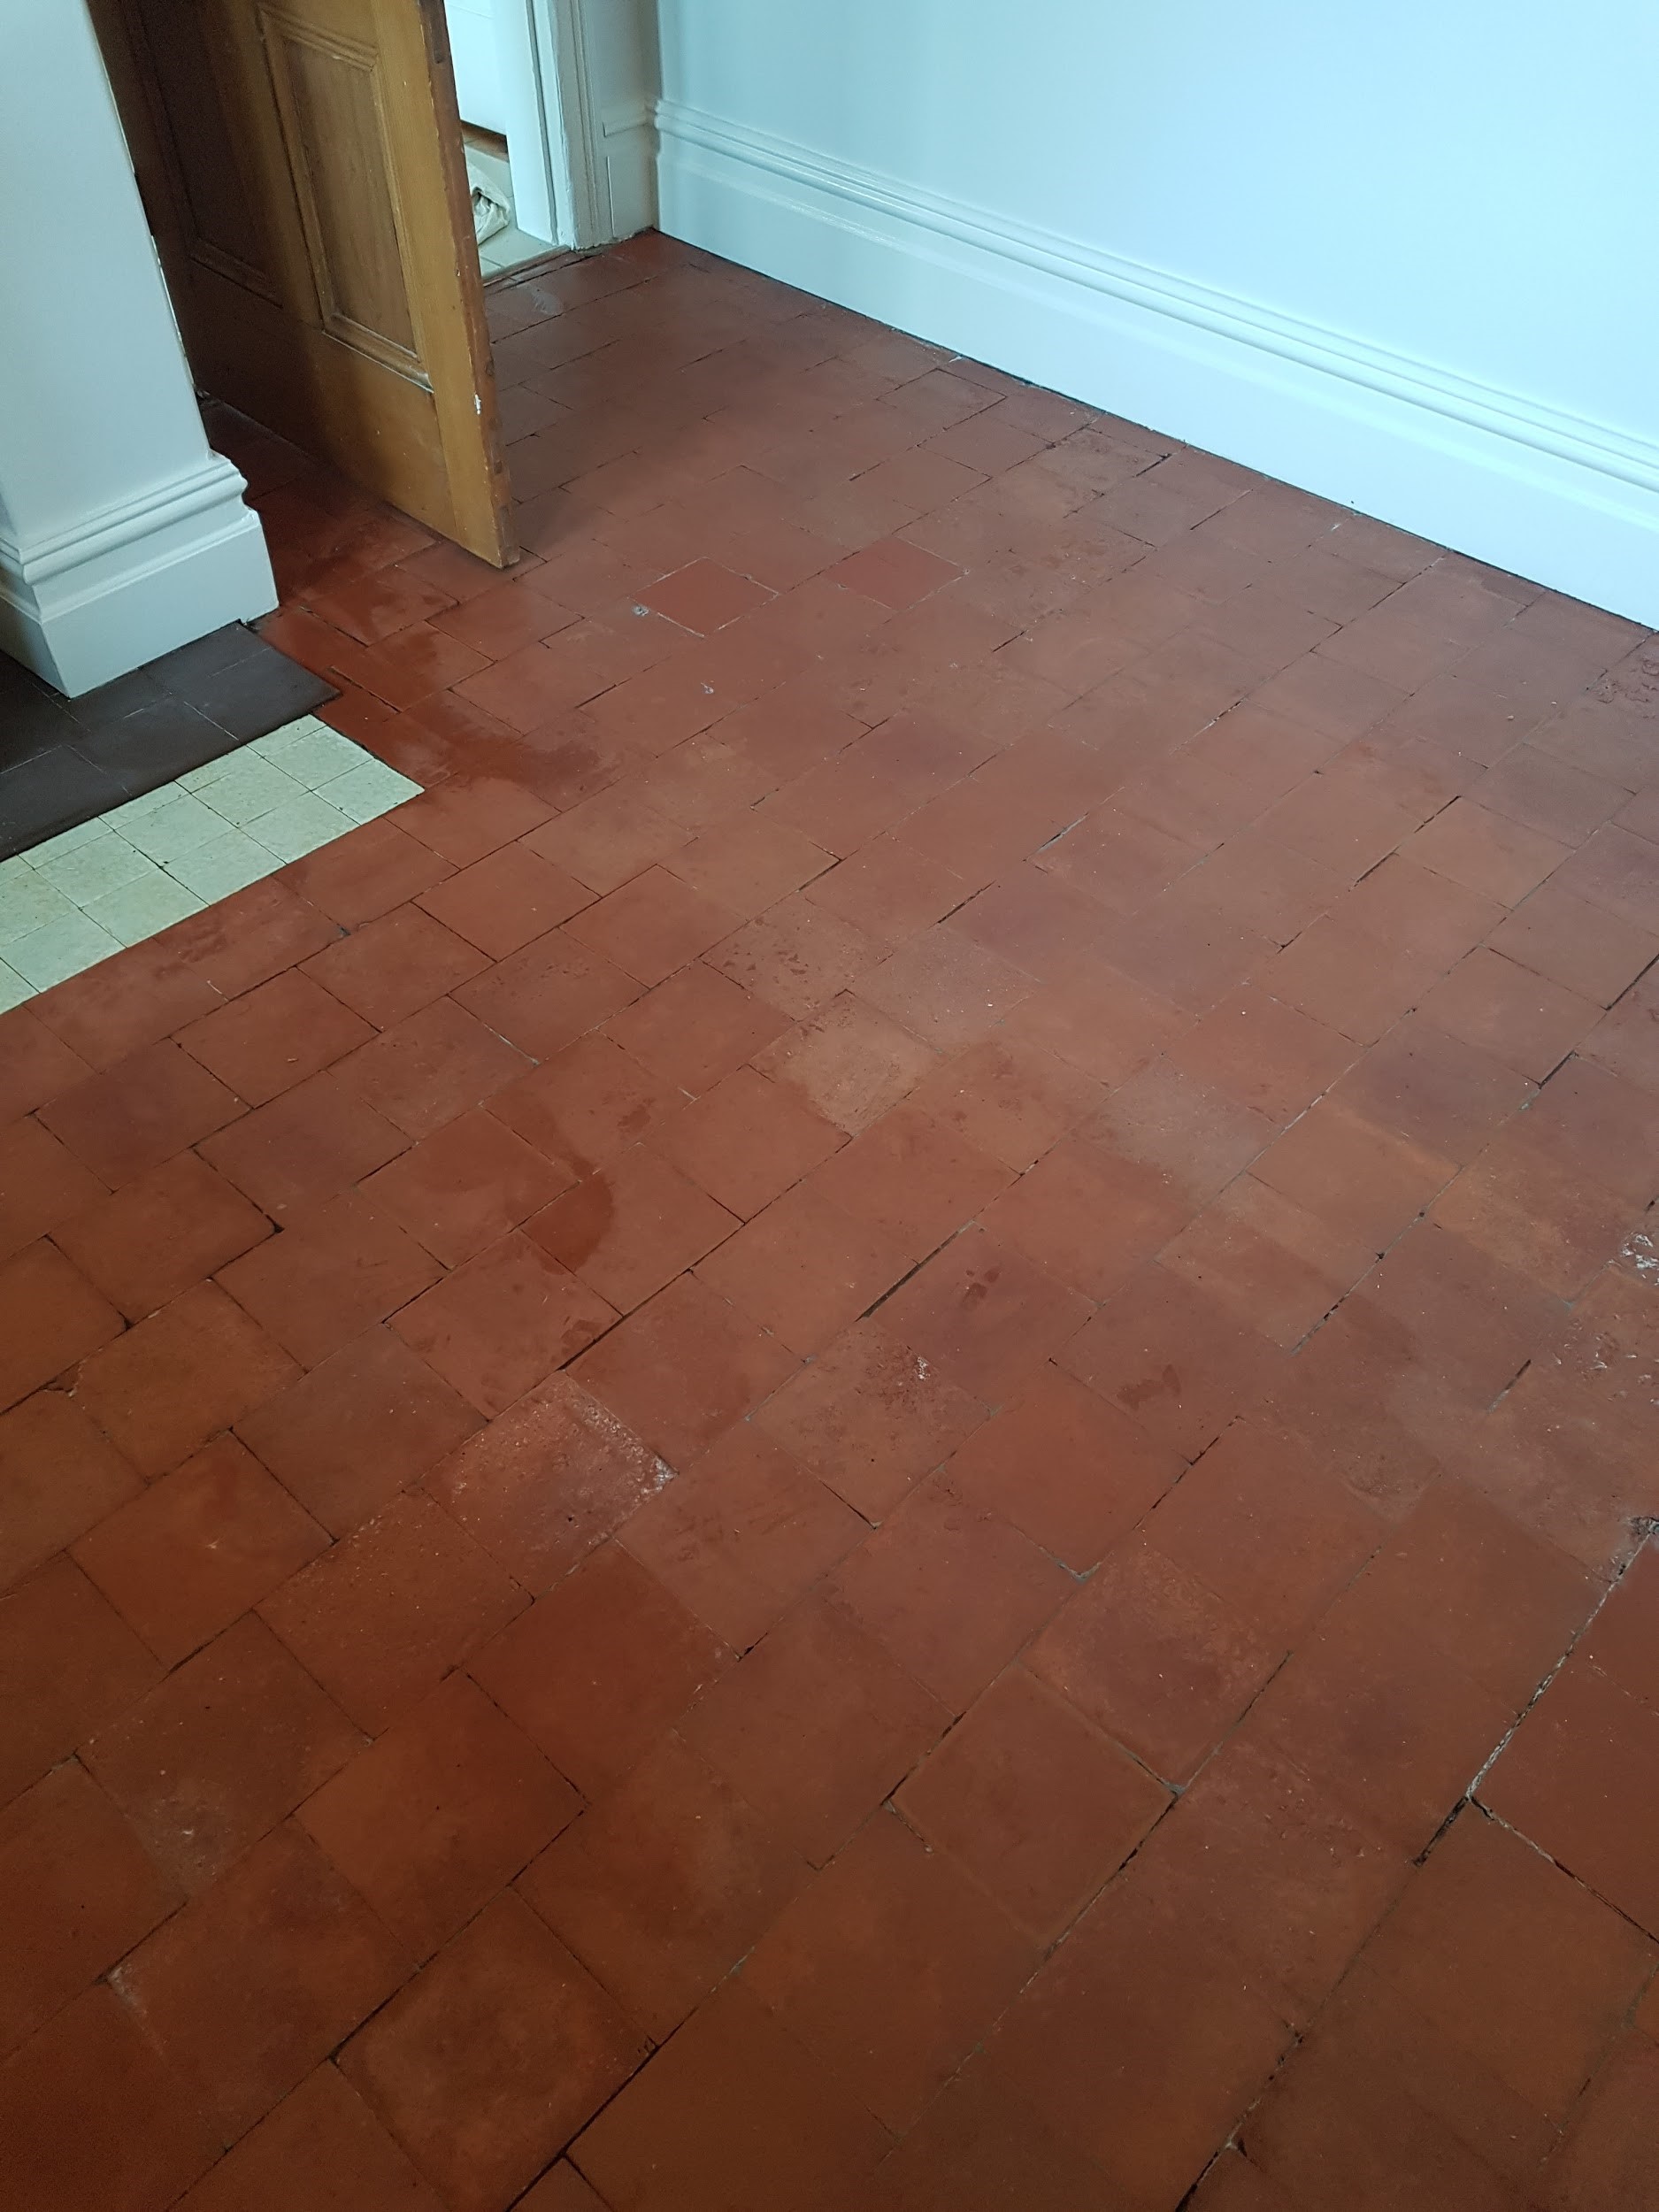
Quarry Tiled Kitchen Floor During Cleaning Goostrey


Sealing a Quarry Tiled Floor

The floor was left to dry out overnight and the next morning I returned to the property and took some readings from the floor with a damp meter. It’s important to check the floor is dry before sealing because any excess moisture can cloud the sealer and prevent it from doing its job properly.

Once satisfied that the floor was dry, I applied a single coat of Tile Doctor Colour Grow which is a breathable impregnating sealer that enhances colour and protects from within. I left the floor to dry for one hour and then followed up with four coats of Tile Doctor Seal and Go which provides both a robust surface seal and a long-lasting low sheen finish. The new sealer transformed the tiles and gave the whole floor a uniform appearance.
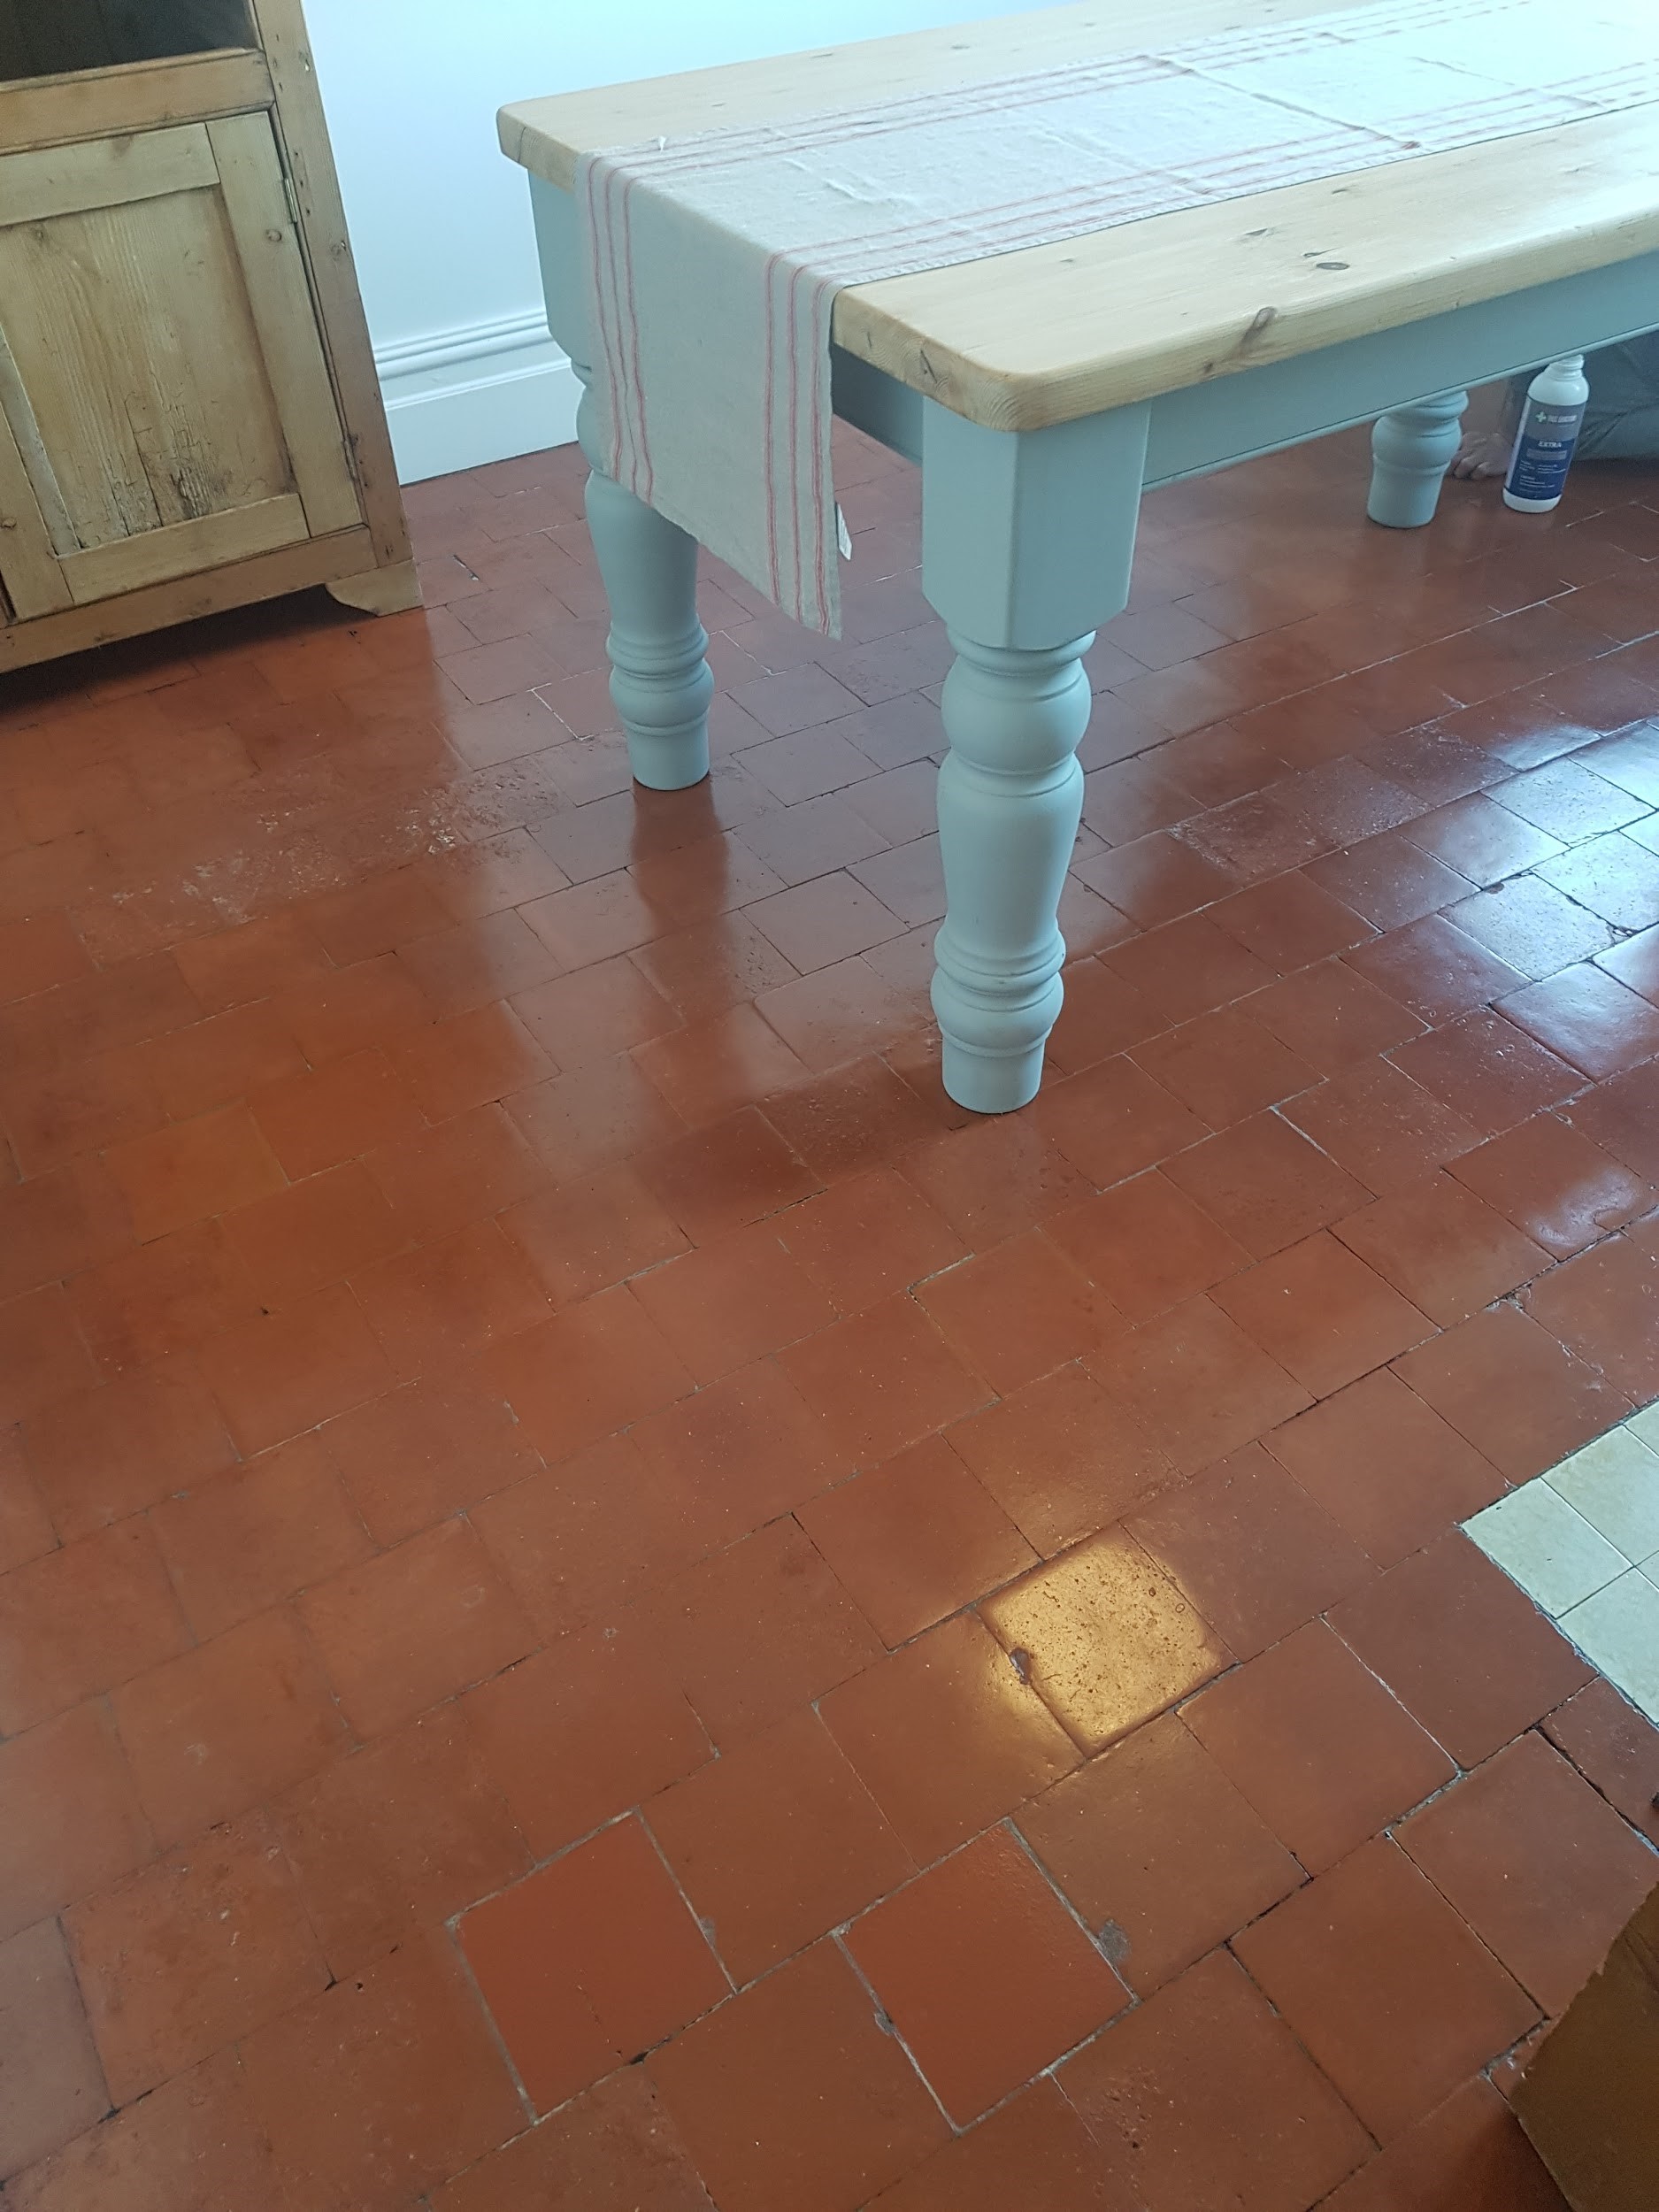
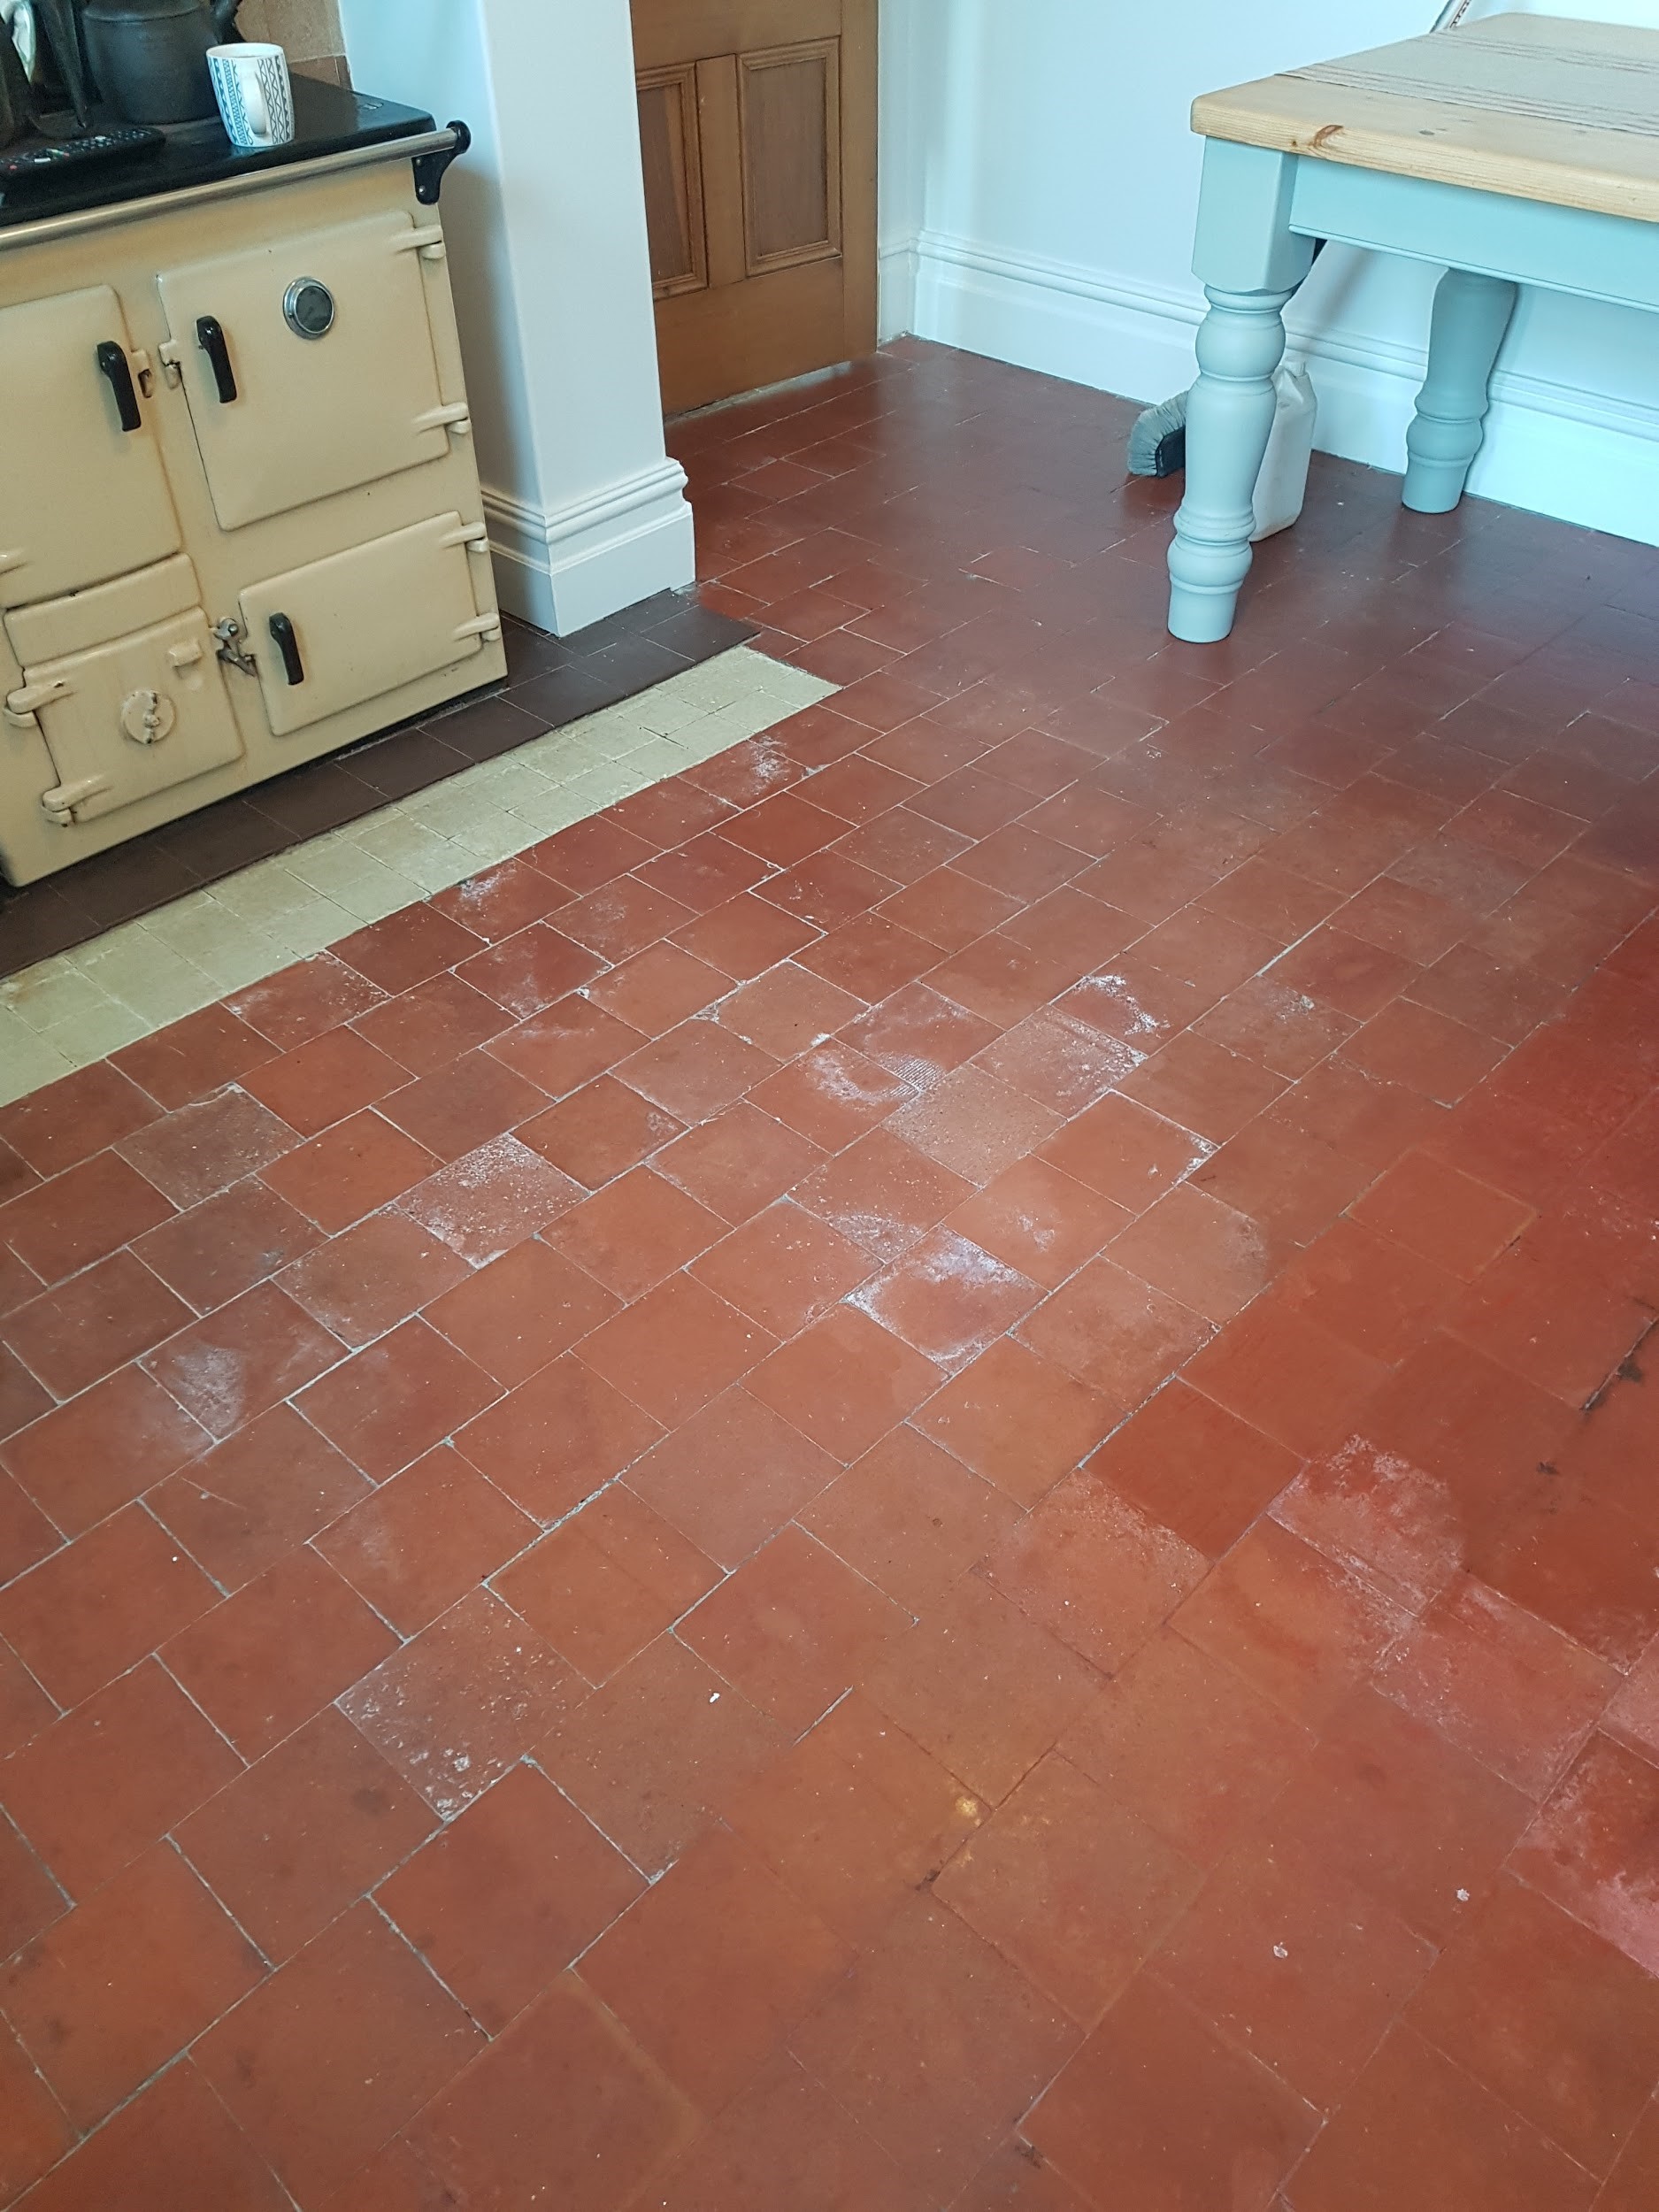
Quarry Tiled Kitchen Floor After Cleaning Goostrey

The customer was very impressed with our work and asked if we can come back later to remove the white tiles in front of the Aga and replace with Quarry tiles to match the rest of the floor.
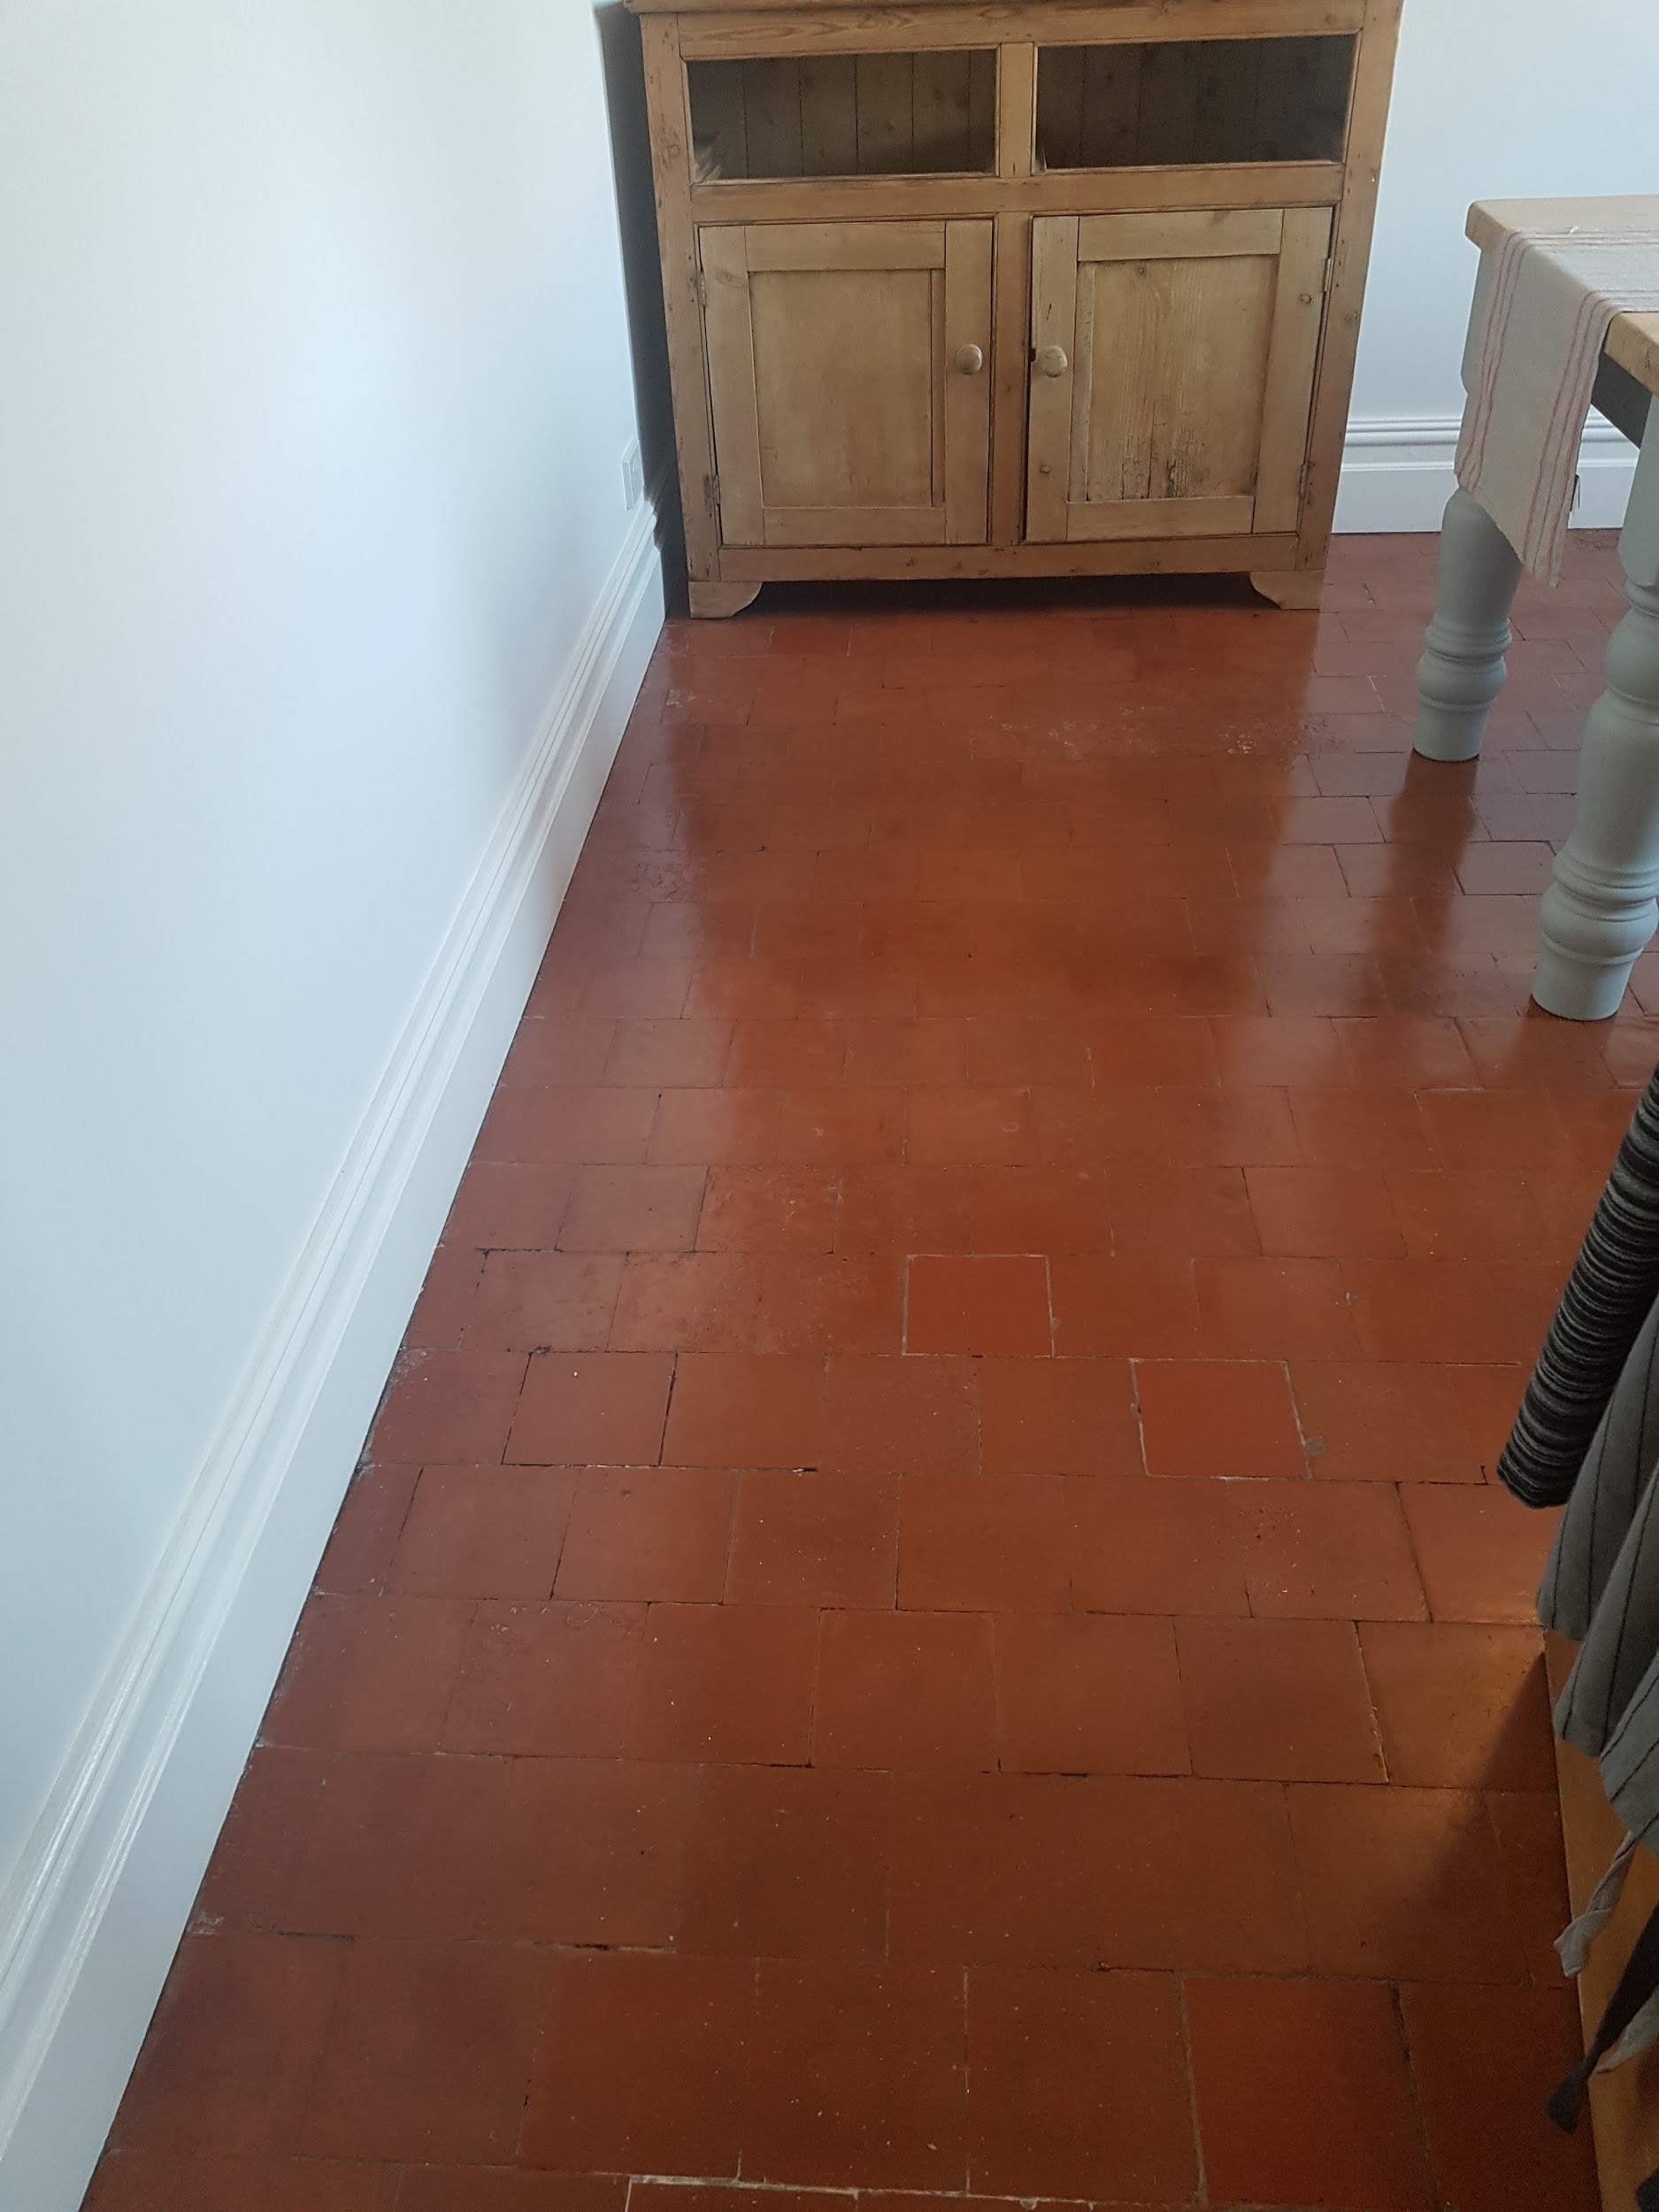
Quarry Tiled Kitchen Floor After Cleaning Goostrey


Source: Quarry Tile Cleaning and Sealing Service in Goostrey, East Cheshire
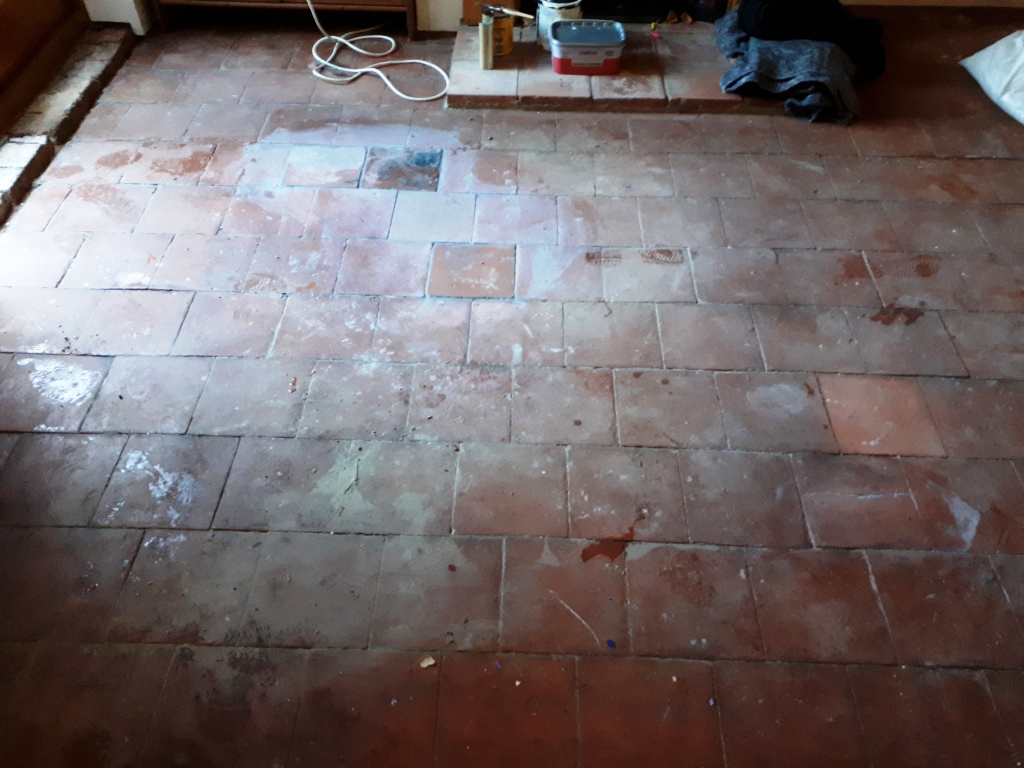
How to Clean Cooking Grease From Ceramic Tile

If your kitchen or washroom is decorated with ceramic tiles, then chances are you're going to get grease on them. It may be cooking grease, or grease from an item that someone left on your countertops. No matter where the grease comes from, you are going to want to remove it as soon as possible. Removing grease from ceramic tiles is an easy process that takes only a few items that you most likely already have in your home.

Step 1

Wad a few paper towels into the palm of your hand and remove any large pieces of grease from the ceramic tiles. Place the paper towel at one end of the tile and pull toward you. Continue to do this until you have removed any large pieces of grease.

Step 2

Add a cup of vinegar into your squirt bottle. You may need more or less depending on the amount and size of the ceramic tiles you are cleaning.

Step 3

Spray the vinegar directly onto your ceramic tiles and allow to sit for a few minutes.

Step 4

Wipe away the grease with your sponge. You may need to rinse your sponge after each pass, to make sure that you keep your sponge clean.

Step 5

Squirt the vinegar directly onto your ceramic tiles once more after the grease is removed and wipe away. This will leave a nice shine on your ceramic tiles.


Monday, February 25, 2019

Repairing a Flood Damaged Quarry Tiled Floor in Bearwood, Birmingham

My client contacted me regarding their quarry tiled floor which hadn't been in a good condition for some time. A recent flood in the house, caused by a ruptured pipe in an upstairs boiler had only added to the problem. As you can see from the before pictures, the floor was in a sorry state. On the plus side the flood had led to an insurance claim which would cover the cost of the restoration.

I visited the property and did a test clean on a section of Quarry tiles which came up well. The client was happy the result and agreed to go ahead, my quote was agreed, and the job booked in. The property was in Bearwood which is in the southern part of the Birmingham suburb of Smethwick.

Flood Damaged Quarry Tiled Floor Before Cleaning Bearwood


Cleaning and Repairing a Quarry Tiled Kitchen Floor

The client also needed some Quarry tiles replacing due to them being broken and damaged. So before returning my first task was to source some replacement quarry tiles that would be a good match for the existing. Fortunately Quarry tiles are still popular and I was able to find a set of reclaimed tiles that would make good replacements.

I was able to get the replacements delivered in time for the job starting which was just as well as my first task would be to repair the floor. Fitting the replacements was tricky work as some of the tiles were up to two inches thick and came in various sizes and so had to be cut to size with a wet tile cutter. The tiles were a good match though and they were set in place. Later that day I was able to grout them in using a matching grout along with some other areas that needed re-grouting. By the end of the first day the floor was already looking much improved.

Flood Damaged Quarry Tiled Floor During Repair Bearwood Flood Damaged Quarry Tiled Floor During Repair Bearwood

The next day the floor was cleaned with a strong solution of Tile Doctor Pro-Clean. The solution is left on the tiles to dwell for about ten minutes so it can start to soak into the deep-seated dirt and break it down. The tiles were then scrubbed with a black pad fitted to a weighted rotary machine. The grout was also cleaned at this point using more Pro-Clean and a hand-help scrubbing brush.

There was also a fireplace hearth that needed cleaned, this also had to be cleaned by hand as the machine was too large. The floor was then rinsed with water and the resultant slurry extracted with a wet vacuum.

Flood Damaged Quarry Tiled Floor Before Cleaning Bearwood

The last part of the cleaning process was to give the tiles and acid-wash using a dilution of Tile Doctor Grout Clean-Up. This is an acidic product that can remove mineral staining and will also counter any alkaline salt deposits in the pores of the tile that could surface as the floor dries later. The floor was rinsed again and allowed to dry out for two days before I returned.


Sealing a Quarry Tiled Hallway Floor

On the final day I first confirmed the Quarry tiles had dried out were ready for sealing. I then sealed the tiles using Tile Doctor Colour Grow which is a fully breathable sealer that would protect whilst allowing moisture in the floor to rise through the tile. This sealer will also enhance the strong natural colour of the quarry tiles. The tiles were quite porous so four coats of sealer were needed, then after drying the floor was buffed with a white pad.

Flood Damaged Quarry Tiled Floor After Restoration Bearwood

The work transformed the floor and my customer was over the moon with the end result.

Flood Damaged Quarry Tiled Floor After Restoration Bearwood

For after-care I left the customer with a complimentary bottle of Tile Doctor Neutral Tile Cleaner. This is a pH neutral product that is safe to use on sealed surfaces and won’t prematurely erode the sealer.


Source: Quarry Tile Cleaning and Sealing Service in Bearwood, Birmingham

Saturday, February 23, 2019

How to Clean Tile and Grouted Countertops

Tile countertops may look really great when they are clean, but they can be really difficult to keep that way. Getting rid of dirt in the grout between your countertop tiles can be a chore, but mixing baking soda and vinegar to clean the grout can work wonders.

Step 1

Pour a little baking soda on the grout, then a little bit of vinegar. Watch it make a little volcano as the baking soda and vinegar mix together. Combining these products will get the dirty grout nice and clean.

Step 2

Scrub the grout stains with a used fabric softener sheet. You will see it clean immediately or after a few minutes, depending on how dirty your grout is.

Step 3

Rinse it out well with water. Repeat scrubbing with the dryer sheet if necessary.

Step 4

Let the area dry well before you place anything on your countertop again.


Sunday, February 17, 2019

Black Limestone Floor Ruined when Descaling a Coffee Machine

I really felt for this customer who was mortified after accidentally spilling limescale descaling solution on their beautiful Black Limestone floor in Stratford upon Avon. The problem started when attempting to descale a coffee making machine in the kitchen, unfortunately the bottle fell out of his hands and onto the Black Limestone floor, the subsequent attempt to mop it up spread the problem across the floor.

Acid Damaged Limestone Kitchen Floor Tile Before Restoration Stratford Upon Avon Acid Damaged Limestone Kitchen Floor Tile Before Restoration Stratford Upon Avon

Descaling solutions contain strong acids that dissolve the minerals in limescale so they can be easily removed. Limestone being of a similar structure is equally effected however in this case the product was removed quickly and didn’t have time to etch the stone. Unfortunately, the descaler did have time to upset the factory polish leaving a right mess and ruining the appearance of the stone.

I went over to survey the floor and reassured my customer the floor could be restored. There are several products and methods that can be applied to resurface and polish stone floors, so I knew the problem was repairable, it was just a question of finding the best solution for the customer.


Stripping Sealer from Black Limestone Flooring

I reasoned that the underlying stone was not etched by the acid, it was the wax-based factory finish that had been upset so the best course of action would be to strip back the entire floor to the bare stone and then reapply a new sealer that would provide a similar appearance.

To do this I started with the application of Tile Doctor Remove and Go across the whole floor. This product is a coatings remover that is specially designed for use on Tile and Stone, it was sprayed onto the floor and after ten minutes scrubbed in using a rotary machine fitted with a scrubbing pad. The resultant slurry was then rinsed off with water and extracted using a wet vacuum. This process was repeated until I was confident that the factory polish had been removed.

Next step was to strip the stone of the black dry added by the factory by giving it an acid wash using Tile Doctor Acid Gel. This was necessary to re-balance the appearance of the stone across the entire floor and would result in a consistent appearance one resealed. The Acid Gel was scrubbed into the Limestone, then rinsed off and extracted using the same procedure as before.

After a final rinse the floor was left to dry off overnight.


Sealing Black Limestone Floor Tiles

The next day I first checked the floor was dry using a damp meter, there were no excess moisture issues so I able to go ahead and seal the stone using a product that would bring back the colour and add protection against dirt and staining.

The best product for this was Tile Doctor Colour Grow which is an impregnating sealer that seeps into the pores of the stone protecting it from within and enhancing natural colour at the same time. The only disadvantage of this product is it leaves a matt finish whereas my customer wanted the shiny, easy to clean appearance of the original tile. To resolve I recommended we leave the floor to settle for a while and if no issues develop, I would add a couple of coats of Tile Doctor Seal and Go which is compatible with Colour Grow and would give the desired finish.

Acid Damaged Limestone Kitchen Floor Tile After Restoration Stratford Upon Avon Acid Damaged Limestone Kitchen Floor Tile After Restoration Stratford Upon Avon

Due to various commitments on both our parts it was six weeks until I was able to return and top up the sealer with Seal and Go. It was worth waiting for and much to the relief of the owner his Black Limestone floor has been transformed to new again.

Acid Damaged Limestone Kitchen Floor Tile After Restoration Stratford Upon Avon


Source: Limestone Tile Cleaning and Restoration Service in Stratford upon Avon, Warwickshire

Friday, February 15, 2019

Applying Mud And Setting Tile Flooring

Applying a mud base and installing tile flooring is a labor intensive, messy job that can be tough on your knees and back. It takes good deal of patience and a sharp eye if you want to end up with professional results. However, there’s no need to panic about the cost of hiring a contractor. With a few rental tools and the right knowledge, you can tackle this project yourself.

What you’ll need
  • Latex Gloves
  • Knee Pads
  • Tile Spacers
  • Wet Saw (available at your local tool rental supplier)
  • ¼ " notched trowel
  • Thinset mortar
  • Mixing bit for power drill

Step 1 – Prepping the Floor

In order to properly lay the mud base you need to make sure you have a clean sub-floor whether it’s wood or concrete. You can use a heavy duty vacuum to remove all of the dirt and debris from the floor. Dirt and dust in the mud base will cause an improper bond between the mud and tile.

Step 2 – Laying the Mud Base

This is probably the most important part of installing tile flooring since a properly installed mud base will ensure a long lasting floor. To mix the mud base you’ll need a 5 gallon bucket and a water supply along with your drill and mixing bit. You’ll need to mix the water and mortar until you get a consistency of thick mud. Before you begin laying the base, it’s important to layout the tile to ensure a symmetrical pattern with even cuts on both sides of the room. You can do this by finding the center point of the room and laying out your tile from there. It helps to lay the tile out before you apply the mud base so you can visually check the layout. Now you can begin spreading the mud base with the ¼ inch trowel. Start in one corner and work your way from the back of the room to the front. Make sure that you only lay a small section of mud at a time since it dries out very quickly.

Step 3 – Installing Tile Flooring

As you’re installing the mud base you can also begin the install of the tile flooring. Begin in the area that you just installed the mud base in and firmly press the tile into the mud. Pay particularly close attention to the corners of the tile. You’ll want to make sure the corners are secured in the mud base to prevent the tiles from popping loose in the future. Use the tile spacers to ensure that the grout lines between the tiles are even. After you’ve installed a few tiles, place a straight edge across the top to ensure the floor tiles are level and even. Repeat the process as you work your way to the front of the room.

Step 4 – Making the Cuts

Once you get started installing the tile flooring, you’ll eventually need to cut the tile to complete the installation. To make sure you keep the grout lines consistent you’ll need to take into account the width of the grout line. For example, for cuts along the wall you’ll need to take the measurement from the wall to the edge of the tile. If the dimension is 9 inches, then subtract the width of the grout line you’ve chosen. Common gout line sizes are 1/8 inch or ¼ inch. If you’ve selected a 1/8 inch grout line, then the tile should be cut at 8 7/8 inches to allow for a tight fit while still maintaining the grout line. You can use the wet saw to ensure straight and even cuts.

Installing tile flooring can be hard work but with a little confidence and the right tools, you can lay a tile floor like a seasoned veteran.


Tuesday, February 12, 2019

How to Remove Epoxy Grout from Porcelain Tiles

Detailed below is a great example of why Tile Doctor uses the slogan:

"We Love the Jobs Tilers Hate"

First of all, apologies for the photographs, at this time of year it is tricky to get good pictures when the natural light is poor. If you look closely however you should recognise what is essentially a new installation of Cream Porcelain floor tiles. The work was done at a house in Banbury which is a market town in Oxfordshire. Banbury is a significant commercial and retail centre for the surrounding area of north Oxfordshire and southern rural parts of Warwickshire and Northamptonshire.

Epoxy Grout Before Removal From Porcelain Tiles Banbury

The tiler who laid the floor had used an epoxy grout and unfortunately had not polished off the grout quickly enough after grouting and it was now ruining the appearance of the floor. He now found it impossible to remove the excess residue and was unable to offer a solution leaving the problem to the customer to sort out. Fortunately, the client found Tile Doctor and having visited the property to survey the floor and assess the correct procedure required to renovate the tiles. Epoxy grout is a superior product to cement based grout and very resistant to staining however it is trickier to work with and often causes problems. We have come across this problem before however so I knew how to treat it and assured the client it could be resolved.


Removing Epoxy Grout from Porcelain Tiles

The first process was to apply a specialist epoxy grout remover then mix in Tile Doctor Acid Gel, I then scrubbed the resulting solution with a black pad fitted to a rotary machine running at a very slow speed to reduce splashing. The Tile Doctor Acid Gel has a unique pH1 blend of Phosphoric and Hydrochloric acids in a gel form and is perfect for treating grout haze.

The floor was then rinsed with water to remove the soil which was then extracted with a wet vacuum. It was a slow process and I worked in sections until the whole floor was clear. There was still some residue in the grout, so I washed the floor with a medium dilution of Tile Doctor Pro-Clean and scrubbed it into the floor using a medium brush fitted on my rotary machine.

Last step was to give the whole floor a thorough rinse with water, again using the wet vacuum to remove the water and get the floor as dry as possible. The process took about six hours and when I was finished the Porcelain tiles looked much better. There was no need to add any sealant to this floor as this particular make of Porcelain are not porous and won’t accept it.

Epoxy Grout Removed From Porcelain Tiles Banbury

The client was very relieved to see the floor looking as good as new, it was how the floor should have looked following installation.


Source: Porcelain Tile Cleaning and Restoration Service in Banbury, Oxfordshire

5 Benefits of a Chipboard Sub-Floor

Chipboard or particle board is an engineered wood composed of pressed fibers like paper, course sawdust and resin. It has many uses from notepad backings, business form holders, scrapbook embellishments and as sub-flooring material. Sub-flooring is essential because this it is where the decorative loft flooring such as carpets are laid. Read on to learn about the advantages and disadvantages of chipboard as a sub-floor material.

3 Types of Particle Board

The 3 main types of particle board consist of Medium Density Fibreboard (MDF), Oriented Strand Board (OSB) and the basic particle board. MDF is a material used for furniture making, speaker boxes and artificial panels and is characterized as heavy, even brown color and novisible fibers. Meanwhile, OSB is composed of larger wood strips while the basic particle board has smaller visible fibers. Basic particle board is usually installed as sub-floor material.

5 Benefits of Chipboard Explained

  1. Practical – Chipboard is easy to use, simple and fast to install, and ideal to use to any flooring including tiles, slate, carpet and vinyl.
  2. Economical This type of material is reasonably priced and provides another alternative to solid wood. As compared to a corrugated cardboard, chipboard are lesser priced for shipping and packing. Also, this type of sub-floor material functions as treatment for termites and fungus which is perfect for homes located in humid areas.
  3. Durable – It is made of sturdy material that can endure pressure and even protects shipping items. When used as a furniture material, the furniture product is secure and seamless.
  4. Looks Like Wood – Chipboard is aesthetically designed with its different finishes, wood-like features, superior class and without any kind of flaws on it.
  5. Environmentally Friendly – It is made from recycled materials such as wood chips, wood particles, sawmill or sawdust shavings and it comprises 70 percent of it. If the people choose to use chipboard instead of solid wood or corrugated there will also be lesser damage done to the forests.

Disadvantage

If you plan to purchase chipboard, make sure to check that it is properly sealed and away from wet areas.  This type of sub-floor is vulnerable to damage and deformation when exposed to wet areas or to water. Once it is wet the particle board loses its strength and can be easily damaged. The reason behind this is that is has no natural shape because it is made of collective recycled wood pieces and do not hold well. It tends to split on joints and screws that come off also damages the board. Adhesives can also ruin the board.

Tips to Prevent Damage

When installing chipboard, place plywood over it before installing the decorative flooring (e.g. carpet) this will serve as an underlayment and will add thickness to the flooring.  It will effectively protect the sub-floor for a longer-lasting and water resistant home material for your home or building. Remember never to use glue or adhesives when installing chipboard, use staples instead and you will have a guaranteed sturdier sub-floor.

Thursday, February 7, 2019

Tile Installer Trade Secrets You Can Use

Tile installers have a number of great insider secrets. They are consummate professionals, so they’ve developed systems and even shortcuts that work well. Often, they’ll try to keep their tricks to themselves but nothing can truly stay secret for long. Knowing some of those secrets can make your tiling job a lot easier. You might imagine that most tillers will have superb secrets regarding the laying of the tile itself. In fact, their greatest secret is in the preparation they do before a single tile is laid.
Secret 1: Preparation
The biggest key to making a job go smoothly is good preparation. In the case of large jobs this can mean days of preparation. Check the rooms to see how square the walls are, how even and smooth the edges appear and how level the surface is that you’ll be covering with your tiles.
Once you’ve established this, begin work your preparation methods out. If necessary, build up floors a little, using mortar rather than self-leveling compound. Where walls are being tiled, especially if they have concave bows, use thinset to level them out. With convex bows, remove the board and use a plane on the wall studs before replacing.
This can take longer than the actual tiling but it’s definitely worthwhile. Not only will the tiling process go smoothly, but you’ll have a much outcome. Starting with a level floor spares you having to deal with a problem called lippage, which effectively means the tiles aren’t quite even.
Secret 2: Layout
You’ll save a lot of time later if you establish lines parallel and square to the longest wall in the room. Next, lay out a run of tiles about 6 feet long, including spacers. This will let you know if you’ll end up with slivers around the room edges. If that’s the case, you can make adjustments so it doesn’t happen.
Lay out tiles from the center of the room, going in all directions to ensure the perimeters will all be the same. When you’ve done that, re-check everything thoroughly to avoid mistakes later.
Secret 3: Installation
To avoid boxing yourself into a corner and having to wait while the mortar dries, move from the field which is classed as the center of the room and work outwards to the perimeter of the room. Set the tile in the thinset then take the time to level it in all directions. This ensures you’ll have a perfectly level floor.
If you’re tiling more than the floor, complete the other surfaces such as countertops and walls first. This means that you’ll never be stuck for a surface to work on.
Some tiles, such as ceramic, porcelain and terra cotta, will require grout. However, you should still take the time to make sure they’re flat and even rather than relying the grout to make things look good. It’s a matter of pride and craftsmanship.
Secret 4: Grouting
When you’ve grouted the tiles, use clean water and thick sponges to clean up and do so thoroughly. When you caulk areas with splashbacks or where two different surfaces join, use latex caulk that’s matched in color to the grout. To get a good bead, work the caulk into the join carefully and firmly.

Monday, February 4, 2019

Removing Carpet Adhesive from Victorian Hallway Tiles in Glasgow's West End

I thought you might be interested in these pictures of a tile restoration that we carried out in the hallway of a victorian property in the West End of Glasgow. Glasgow is actually the most populated city in Scotland and the third biggest by population in the whole of the UK so naturally a busy location for us.

The floor had been previously covered in carpet and as a result was stained with adhesive and paint splashes. We popped in to do a site visit, so we could survey the floor and see for ourselves the condition of the floor. Although not in great shape, I was happy that the overall floor was in good physical condition and could be restored with the help the products and methods.

Victorian Hallway Floor Before Cleaning Glasgow West End

I discussed with the client the process involved and the costs to put it right. They were happy to accept my quote and we booked the job in for later in the month. The job would take two days to complete, one day to clean and a further day to seal the floor.


Victorian Hallway Floor Before Cleaning Glasgow West End


Cleaning a Victorian Tiled Hallway Floor

The first job was to clear the floor of the wooden carpet gripper by carefully chipping it off the floor. This took a bit of time and we had to be careful not to damage the floor further.

Next, we started on deep cleaning the floor by applying Tile Doctor Oxy-Gel. This is a strong alkaline based cleaner and degreaser in gel form, its great for when a long dwell time is required to break down dirt, grime, acrylic sealers, stains and oil-based products and waxes.

We left the Oxy-Gel to dwell for twenty to thirty minutes to ensure it got to work on breaking down the layers. It was then worked into the tile using a black scrubbing pad fitted to a rotary machine with the slurry rinsed off the floor and extracted with a wet vacuum. This process was carried out a few times to get the floor as clean as possible could before we gave a final scrub and rinse with Tile Doctor Acid Gel to combat any efflorescence issues that can occur on these old floors that do not have a damp proof membrane.


Sealing a Victorian Tiled Hallway Floor

I returned the following day to seal the floor checking first that it had dried using a damp meter. Once I was satisfied, four coats of Tile Doctor Seal and Go Extra were applied to the tiles to give the sheen finish asked for by the client. This process takes longer that you might think as you have to wait for the first coat to dry before applying the next and naturally this can vary depending on the conditions. 

I chose Seal and Go Extra as these Victorian properties were built before the invention of damp-proof membranes so you need to use a fully breathable sealer that will allow dampness to rise through the tile and evaporate. Use of a non-breathable sealer can lead to damp becoming trapped under the floor which can spread into the walls leading to rising damp. The sealer will protect the tiles and make it much easier to clean going forward, additionally it enhances the appearance of the tile leaving a sheen finish which allows the vivid colours to shine through.

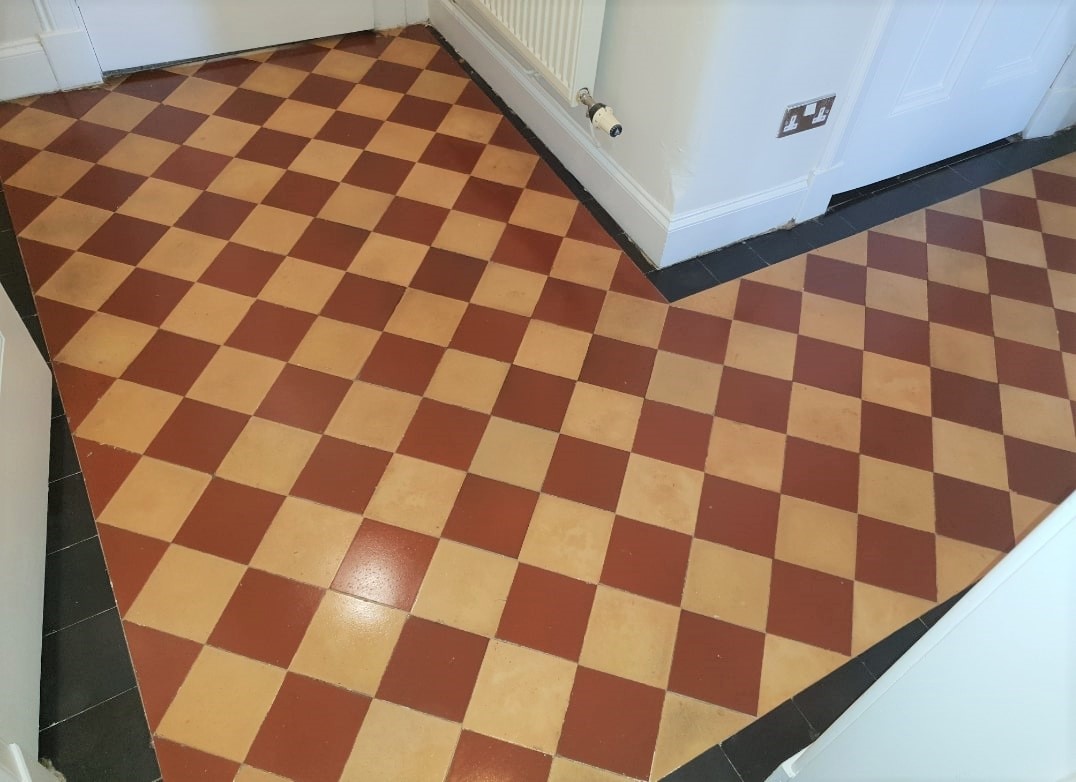
Victorian Hallway Floor After Sealing Glasgow West End

The client was very happy with the floor and quite amazed with the before and after shots, they had not expected the results to be as good. They would now be able to easily keep the floor clean and looking good for any visitors.

Victorian Hallway Floor After Cleaning Glasgow West End


Source: Victorian Floor Cleaning and Sealing Service in Glasgow

Saturday, February 2, 2019

4 Cobblestone Flooring Installation Tips

If you want to improve the interior of your home with a stone floor, then why not select cobblestone flooring? This type of flooring gives a European feel to your kitchen or dining room, and can help to make the gap between the inside and outside of your home seem less wide. Cobblestone flooring is also more environmentally friendly than other types of flooring, as you can get reclaimed stone, or find some local stone which can be adapted to your floor. You could also use cobblestones designed for outside in order to ensure that your home improvement doesn’t cost too much. However you choose to find your cobblestones, using a few simple installation tips will help you to get the best from your installation.

1 – Purchase Good Stone

The first step when purchasing cobblestone flooring is to find the right kind of stone for your needs. Cobblestones are usually light-to-medium brown in color, slightly curved, and small enough not to stick out too far. Think of a chestnut-colored stone, round, about the size of a man’s fist. This should be a suitable type of cobblestone for your needs. Measure the room you want to lay the cobblestones in to get the right quantity, plus a small amount extra in case of mistakes. You should also ensure that the stone you purchase comes from a suitable location, and is not cracked or damaged in any way.

2 – Lay the Stones Out

Once your stones have arrived, lay them out on the floor where they will be installed. If you are removing any furniture or old flooring, do this before laying out the stones. Arrange your cobblestone flooring to a pattern that you like, and then take a concrete mix, and pour it around the cobblestones. Don’t allow the concrete to cover the stones, instead they should just poke out above the concrete. You need to have enough concrete to keep the stones firm, and create a suitable walking area, but not so much that it ruins the effect.

3 – Clean the Stones
Once the concrete has dried, go along the stones and remove any splashes of concrete, and any debris which has gathered on the surface of the stones. Give them a good sweep to get rid of dust, and then ensure that all of the holes are filled with caulk or mastic. Remove and replace any stones which have become cracked or damaged. Leave any of these changes to dry and then sweep the floor again.

4 – Add a Sealant

Once your cobblestone floor is set, you should add a sealant over the surface. This will help you to keep your cobblestones clean. Stone floor sealants can be purchased at any local home improvements store. Leave this sealant to dry, and then add a second coat. You should reapply this second coat regularly, using a wax or similar product which can just be placed on the floor and then polished to a shine.


Source: www.DoItYourself.com