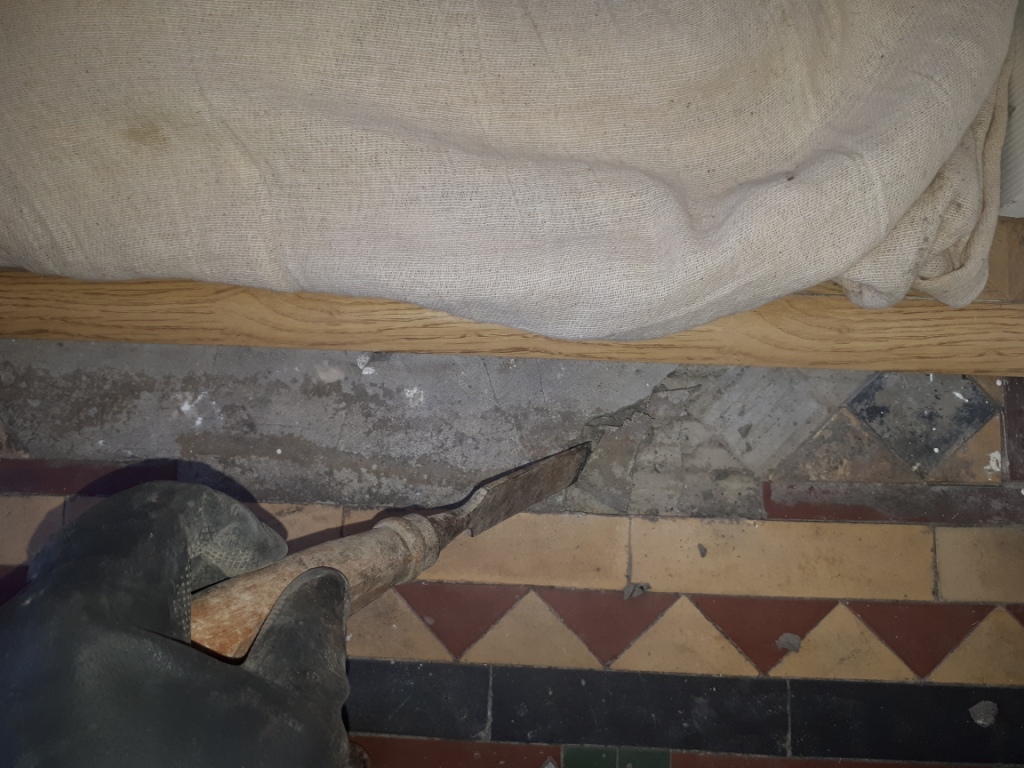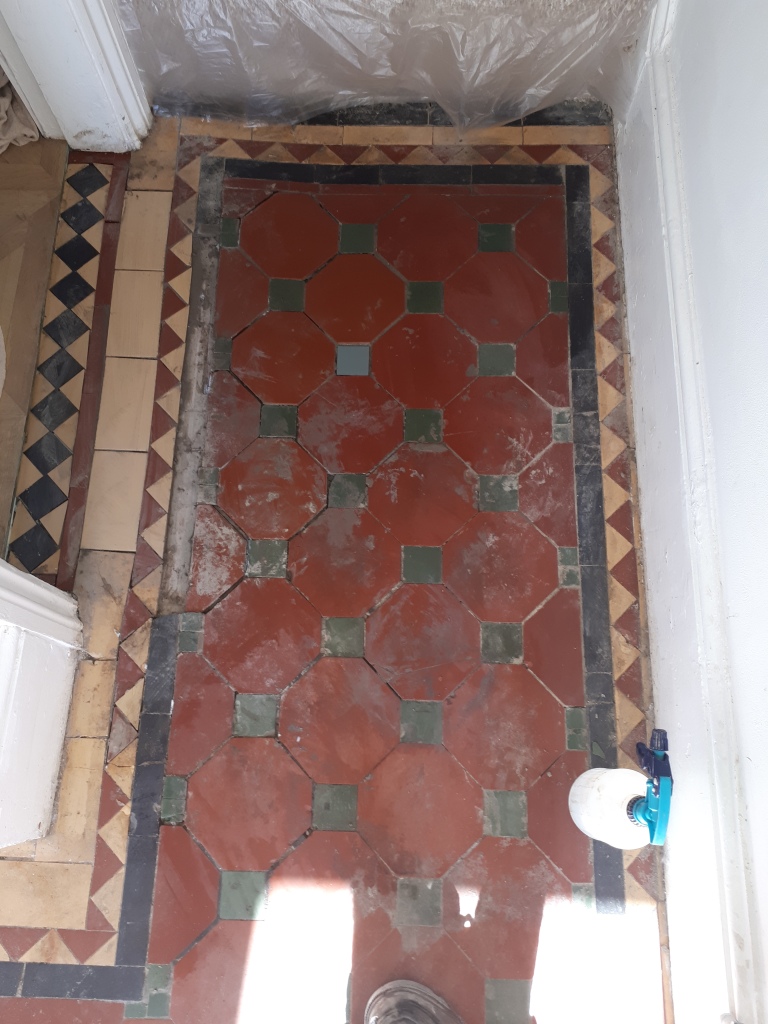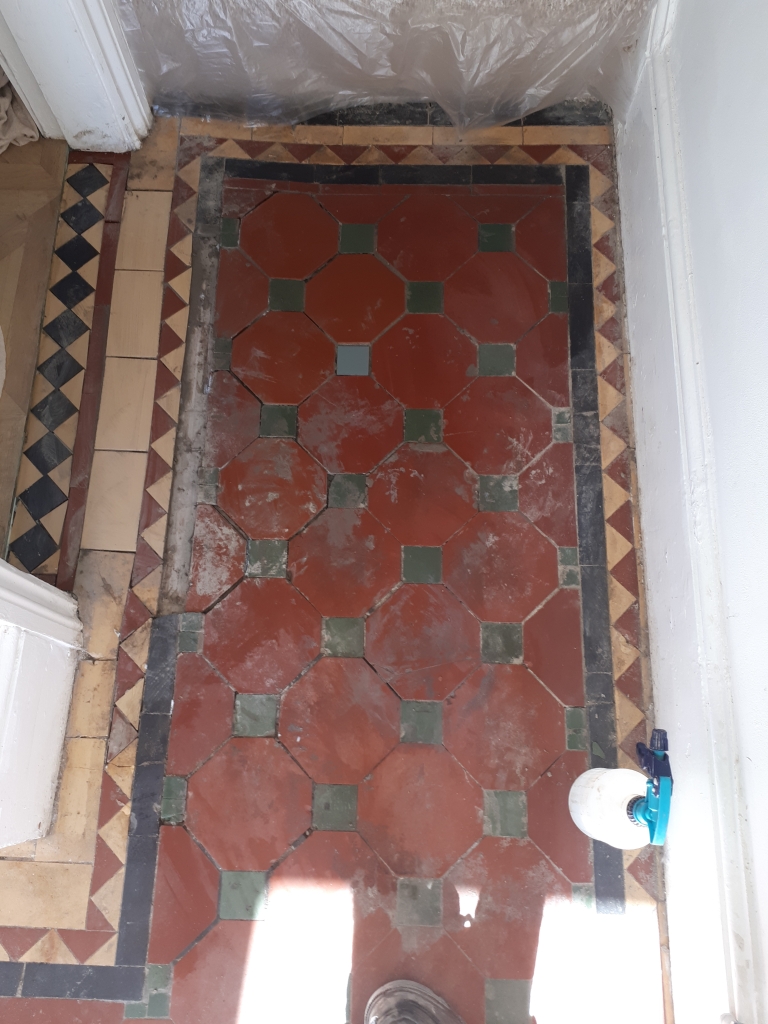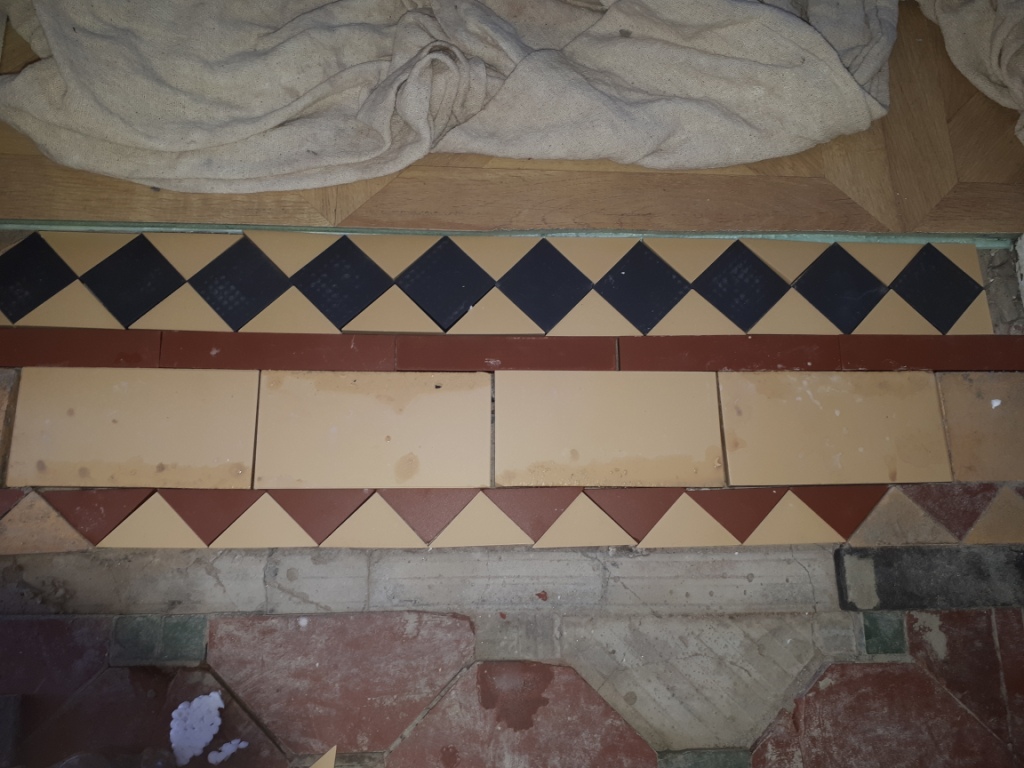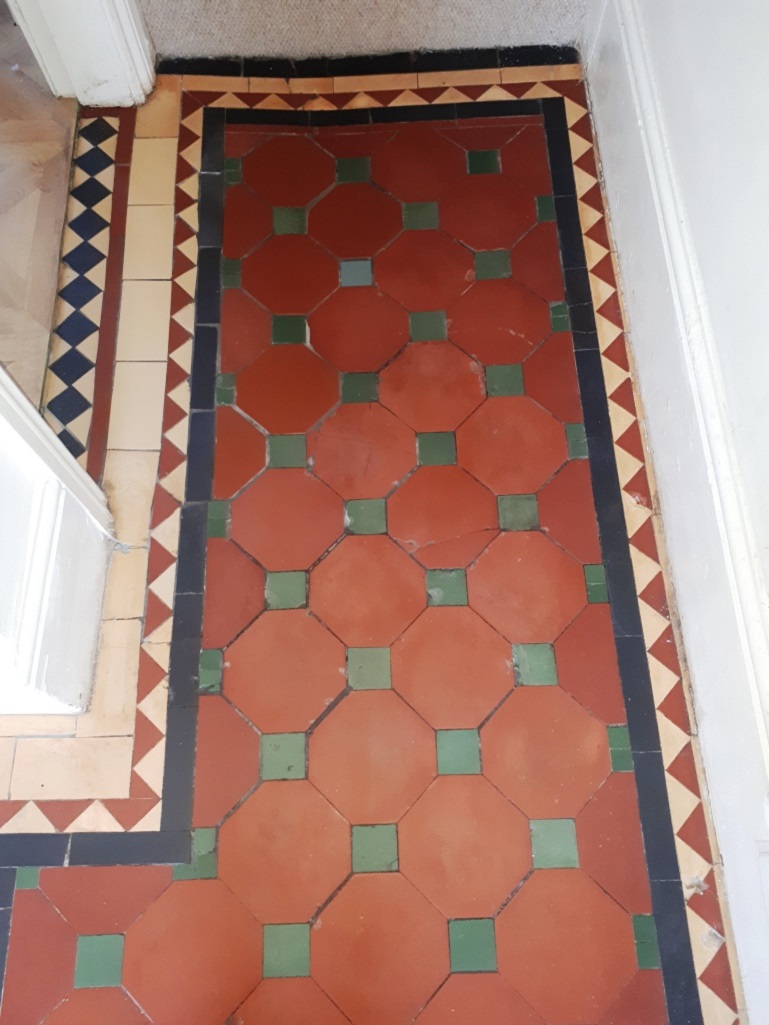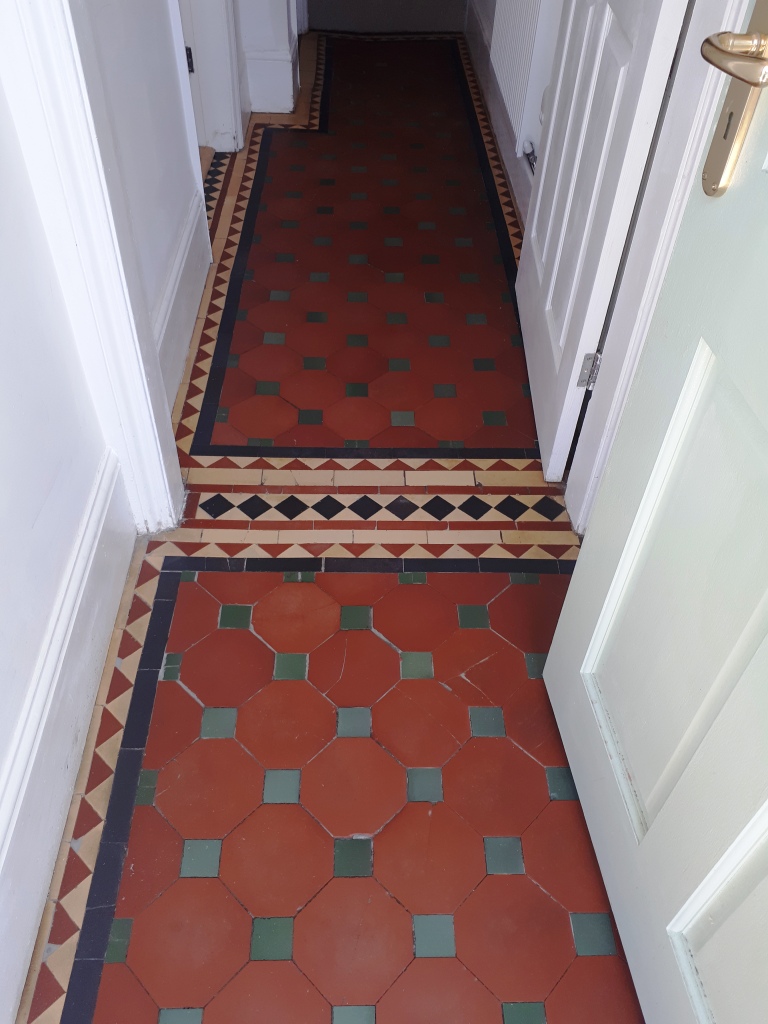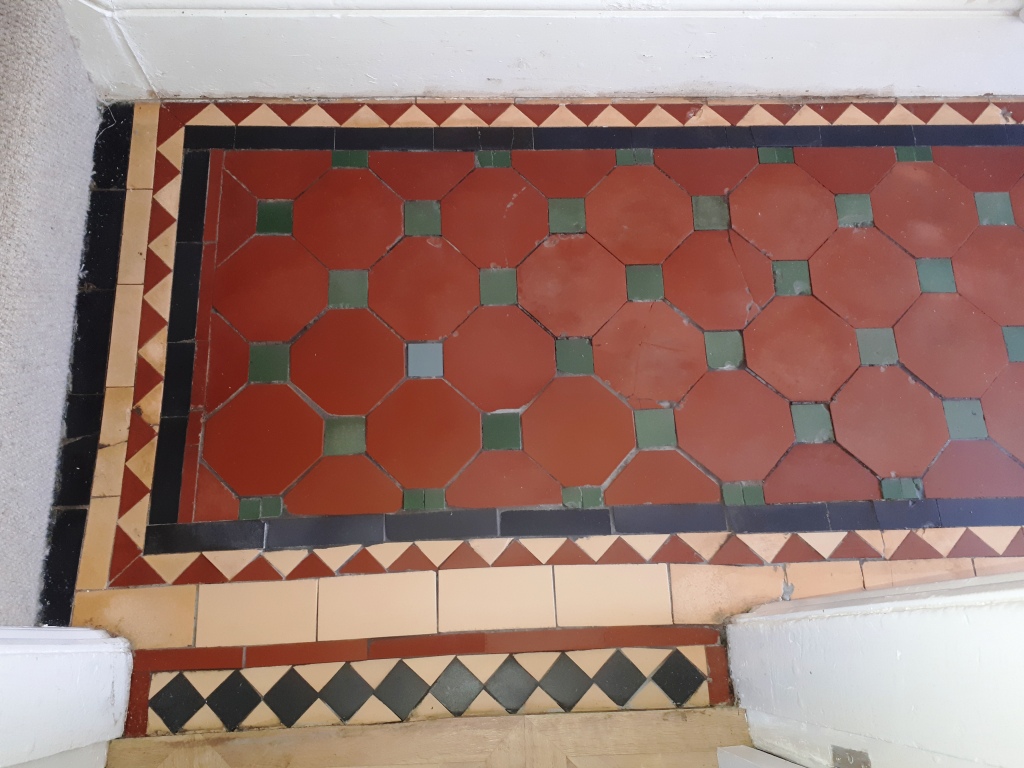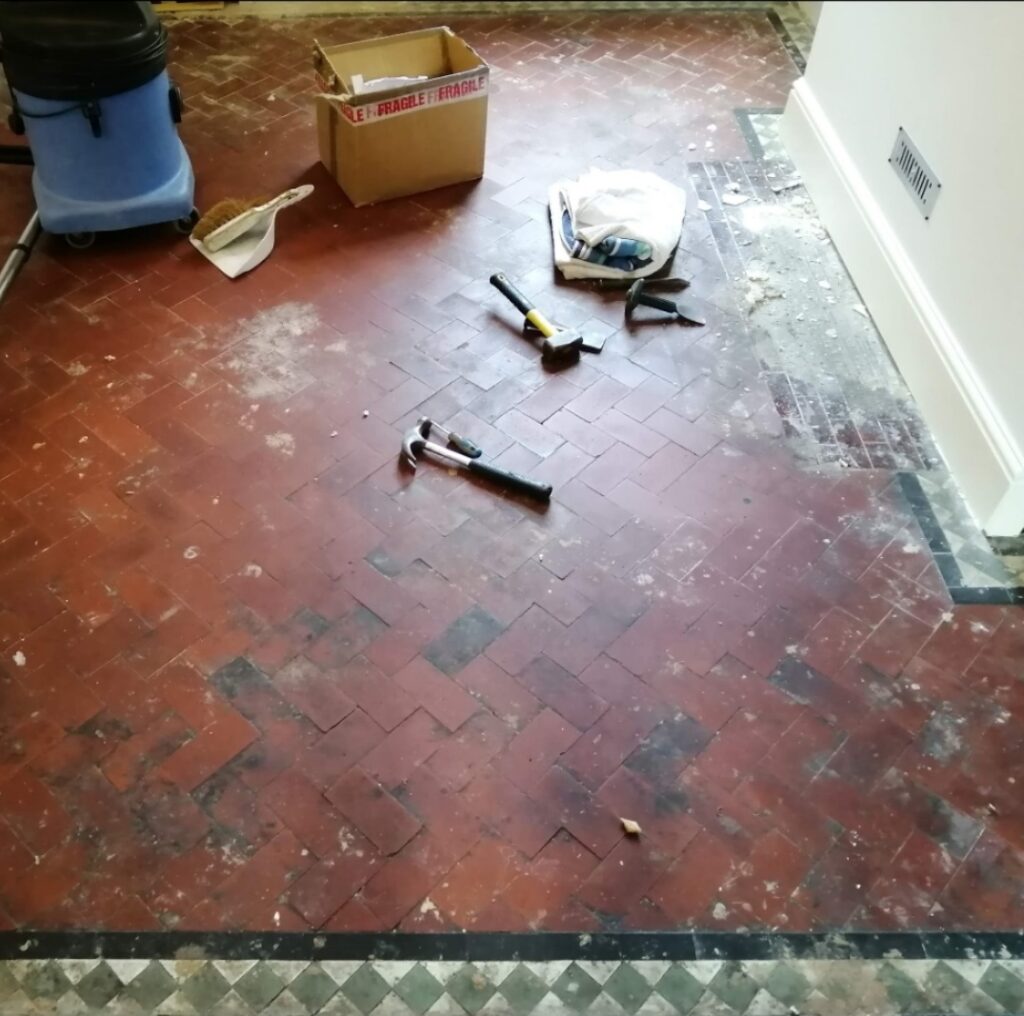
Showing posts with label tile replacement. Show all posts

Wednesday, November 13, 2024

Cardiff Tile Doctor Details the Restoration of a Quarry Tiled Floor in Penarth

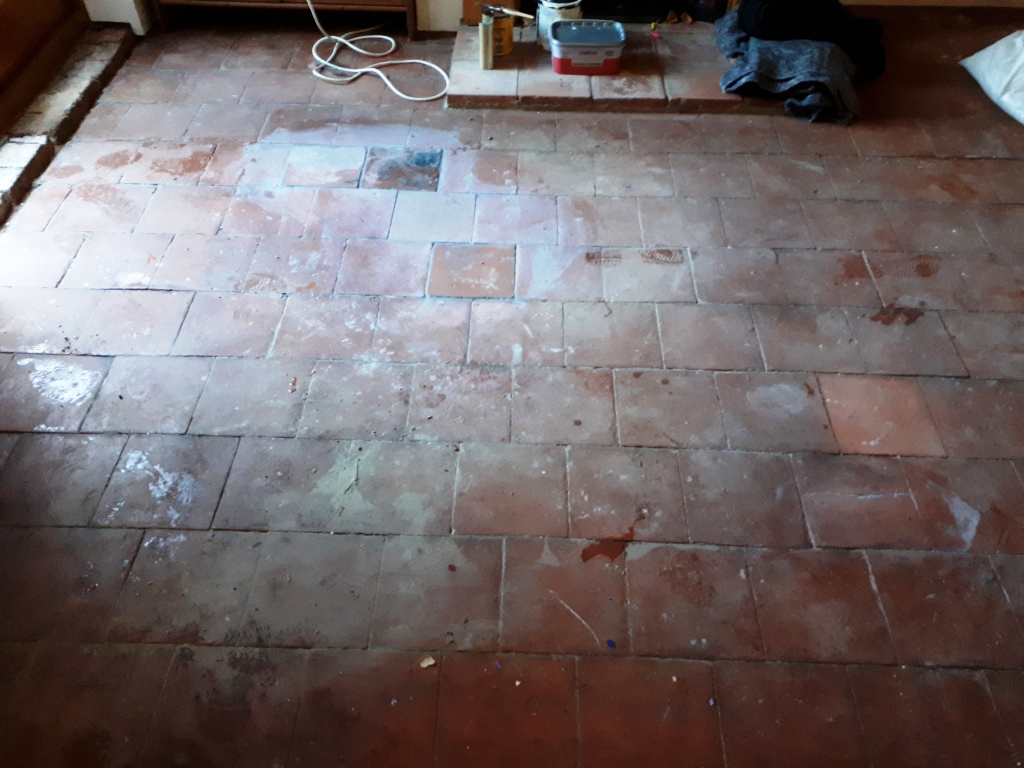
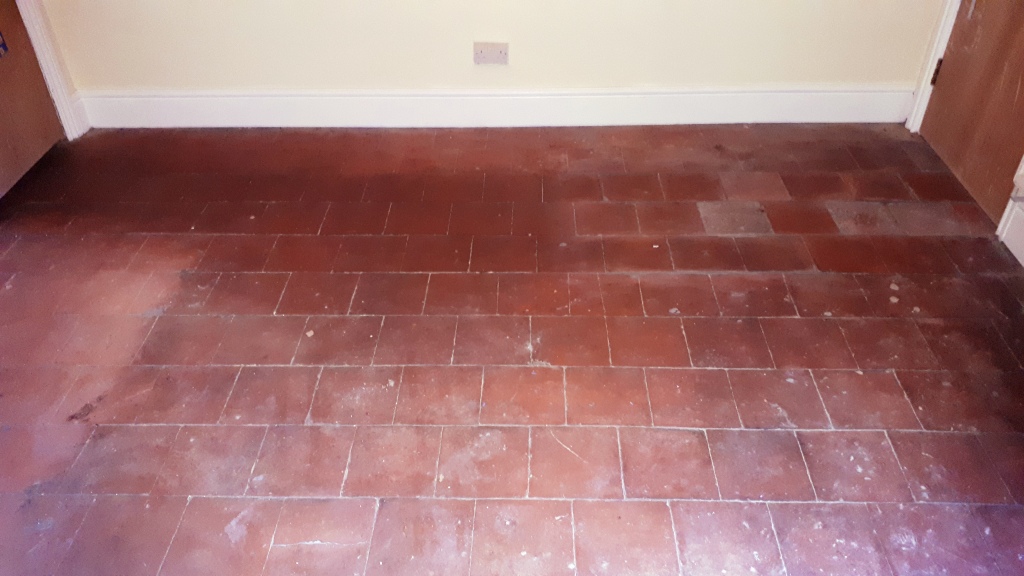
This client from Penarth contacted Tile Doctor to see if their 100-year-old Quarry tiled floor which had broken and missing tiles could be salvaged. The property dated back to 1890 and had experienced many years of wear and tear and it certainly showed. One of the biggest problems however would be to renovate the area in front of the old fireplace where a hearth was once situated.

Quarry Tiled Floor During Restoration Penarth

It was clear the area in front of the fireplace would need to be rebuilt using matching replacement quarry tiles more of which would be needed for the other repairs that needed doing. Once that was done the floor would then need a deep clean and a fresh sealer applied to give the whole floor a consistent appearance.

I worked out a comprehensive quote which included the repairs and renovation work. This was accepted by the client and a date set for the work to start.
   

Cleaning and Repairing a Quarry Tiled Room

Work started with the tile repairs which involved breaking out the damaged tiles and those in front of the old fireplace and then cleaning up the floor ready for the replacement tiles to be installed.
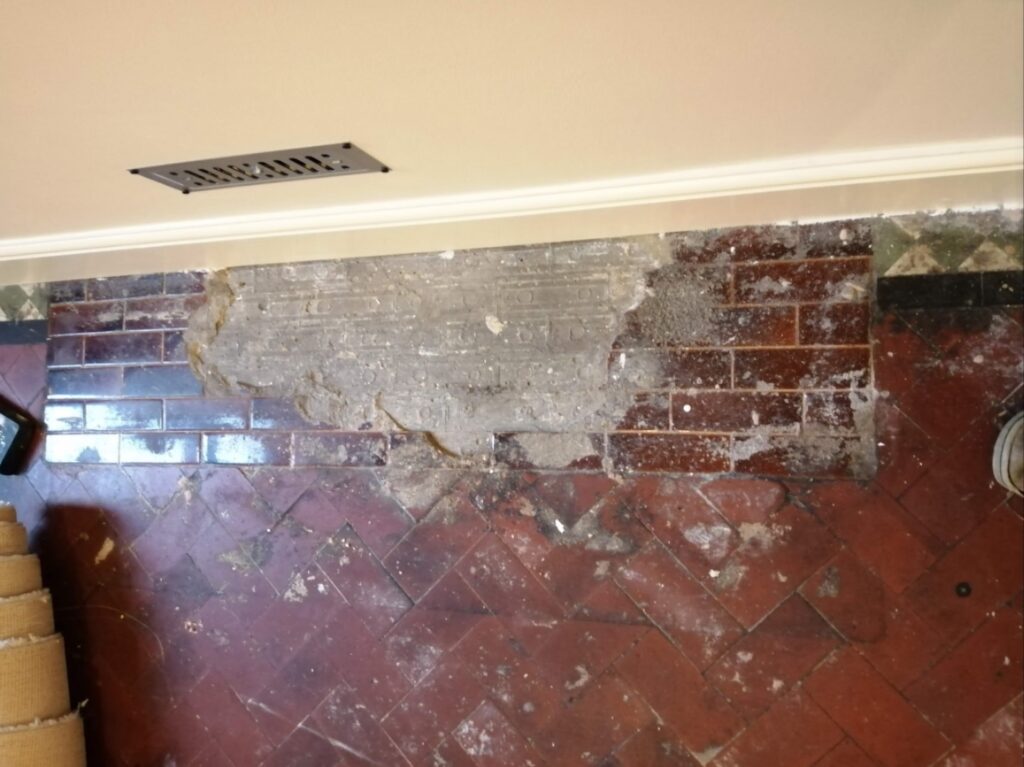
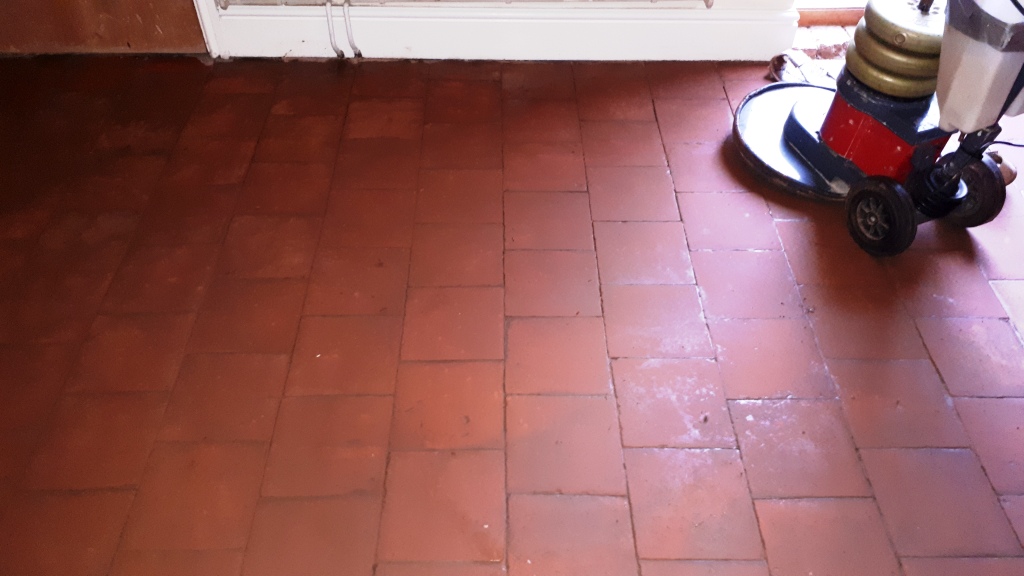
Quarry Tiled Floor During Restoration Penarth 

Quarry tiles are still very popular, so it wasn't a problem finding matching replacements which I had manage to source before work commenced. The replacements were then laid in-line with the existing tiles using rapid set adhesive and grouted in.

Once the tiles had set, I was able to start the cleaning process which started with scraping off as much cement, paint, and plaster residue off the floor as possible. This was then followed up with a deep clean of the tile and grout using a mixture of Tile Doctor Pro-Clean combined 50:50 with with Tile Doctor Nanotech HBU Cleaner.

After leaving these products to soak in for ten minutes I worked by hand scrubbing in 1m2 sections at a time, cleaning and rinsing with water and vacuuming up the waste with a wet vacuum as I progressed. Doing it this way ensures maximum attention to detail and ensures the floor is as clean as possible. 

Once done, the floor was given an acid rinse using Tile Doctor Grout Clean-up which was brushed onto the floor and extracted with the wet vacuum as before. Old floors like this don't have a damp proof membrane and are susceptible to efflorescence, giving the floor an acid rinse like this counters salts and helps further clean the tiles.

After another rinse and extraction with the wet vacuum the floor was left overnight to dry.
   

Sealing a Quarry Tiled Floor in Penarth

The next morning the floor was tested for moisture with a damp meter and the readings confirmed it had dried sufficiently to accept a sealer. I don’t recommend sealing a damp floor as it impacts the sealers’ ability to cure and leads to a patchy finish.

Sealing started with the application of a single coat of Tile Doctor Colour Grow which is a very durable and breathable sealer which being an impregnator provides an excellent base. The customer wanted a shiny finish so this was followed up with a couple of coats of Tile Doctor Seal and Go. This product further protects the floor and adds a subtle shine which together with the Colour Grow really brought out the colours in the Quarry tiles. As you can see the red colour of the floor looks vibrant and stunning after the two different sealers were applied.

Quarry Tiled Floor After Restoration Penarth

My client was delighted with the result and offered to recommended Tile Doctor to their family and friends which was nice. For aftercare I recommended the use of Tile Doctor Neutral Tile Cleaner which is a gentle but effective tile cleaner that's ideal for cleaning sealed floors.
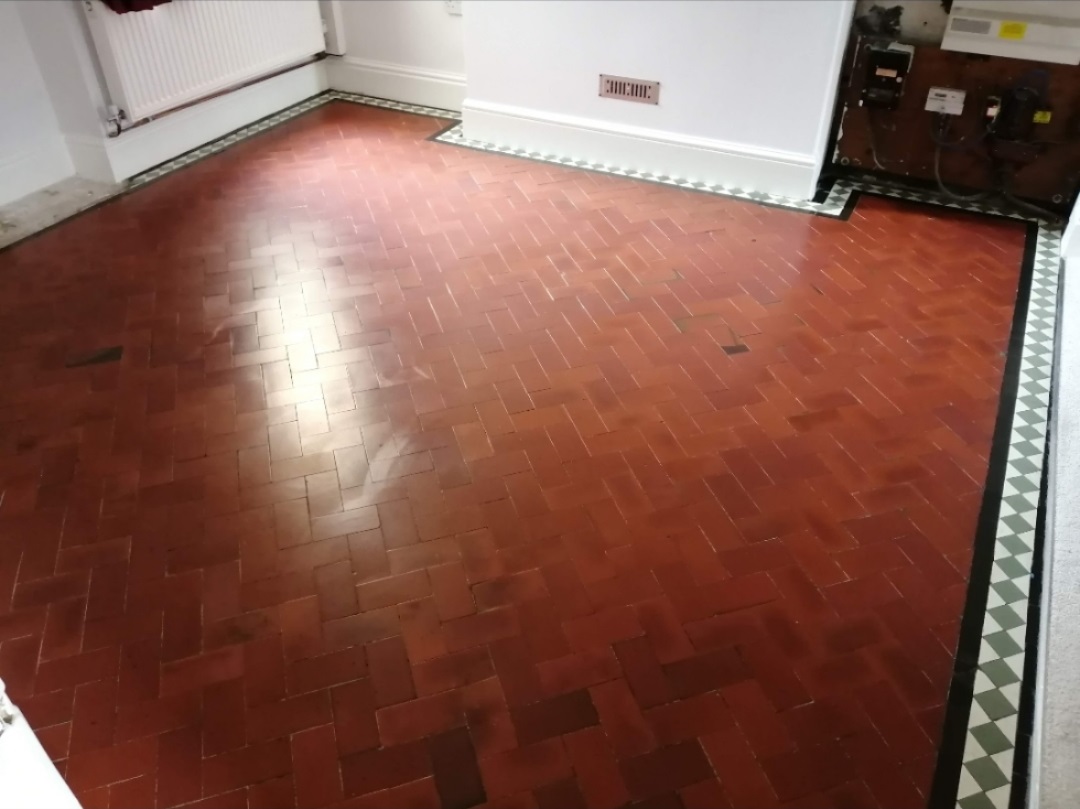
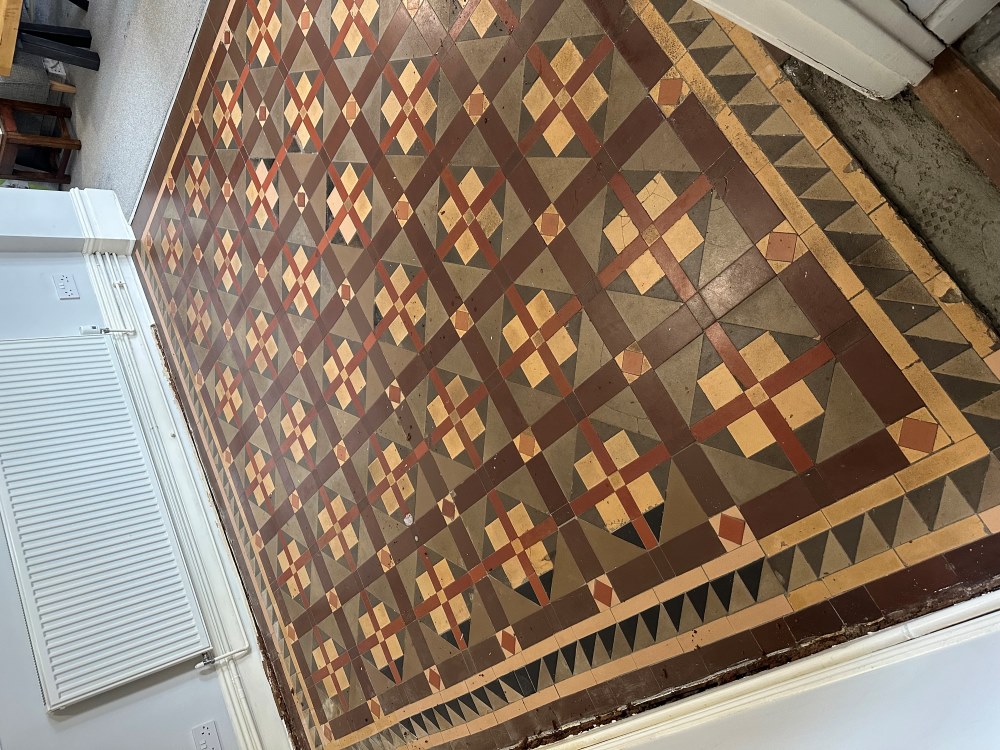
Quarry Tiled Floor After Restoration Penarth

Wednesday, August 28, 2024

Newport Tile Doctor Details the Restoration of Victorian Floor Tiling

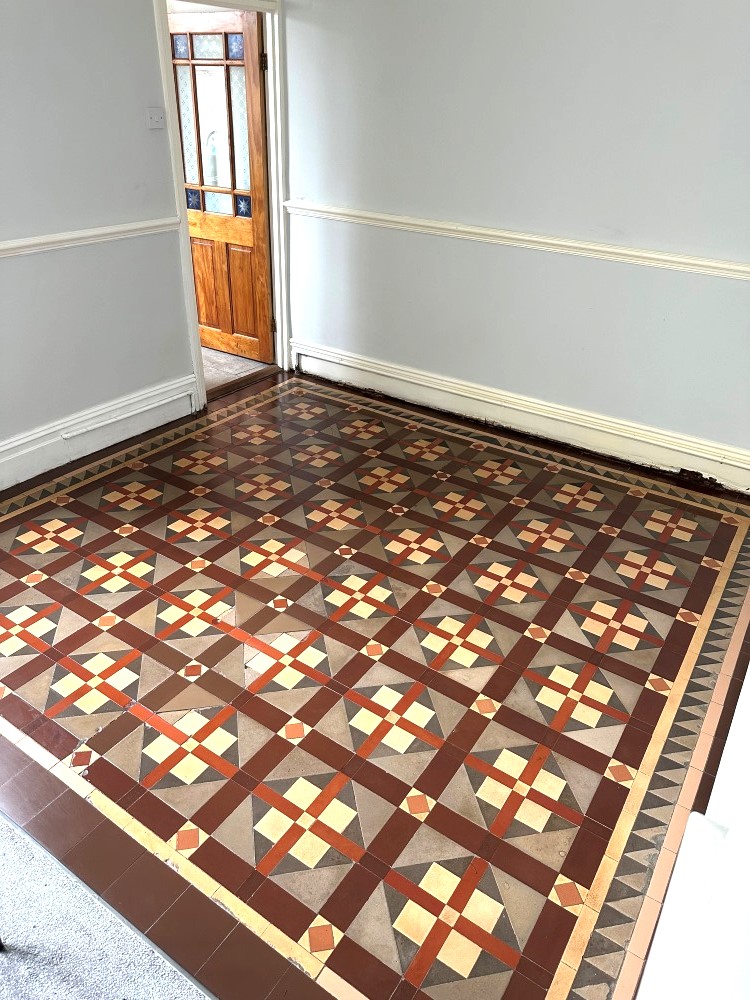
The client had lived at this property in Newport for a few years and decided that it was finally time to sort out the Victorian tiled floor in the dining room. Some repairs were needed in a few areas and the sealer was fading and due for replacement.

Victorian Tiled Dining Room Floor Before Renovation Newport

I went over to the property to survey the floor and advised that with repairs, cleaning and sealing the process would take two and a half days. Having worked on many many floors like these before I was very confident that we could repair the floor where needed and restore its appearance.

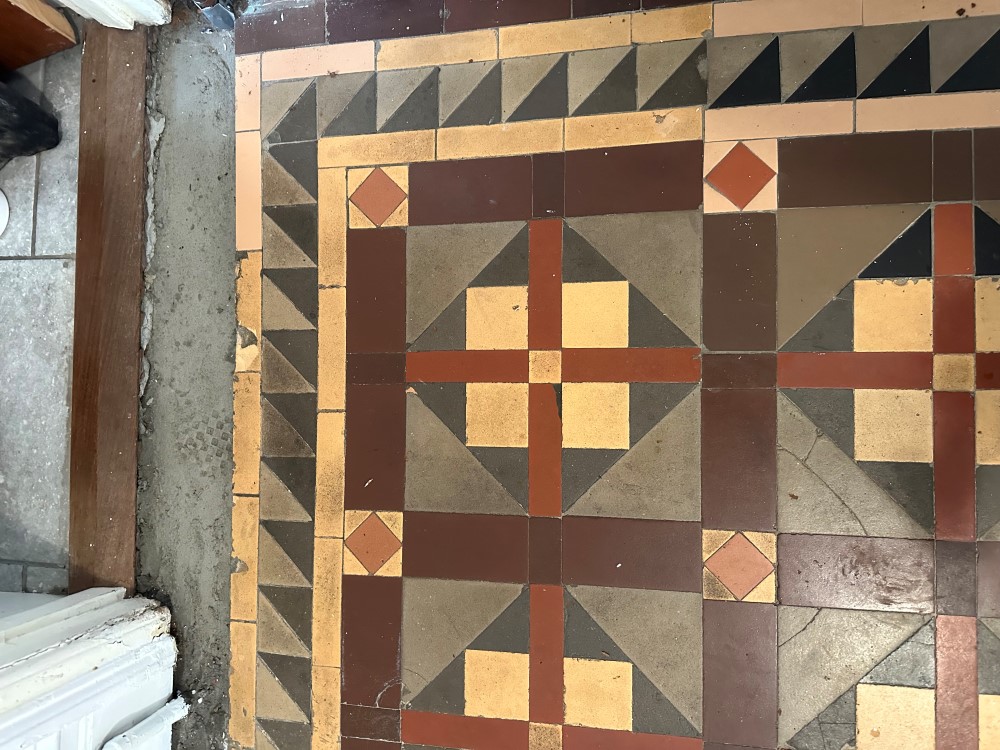
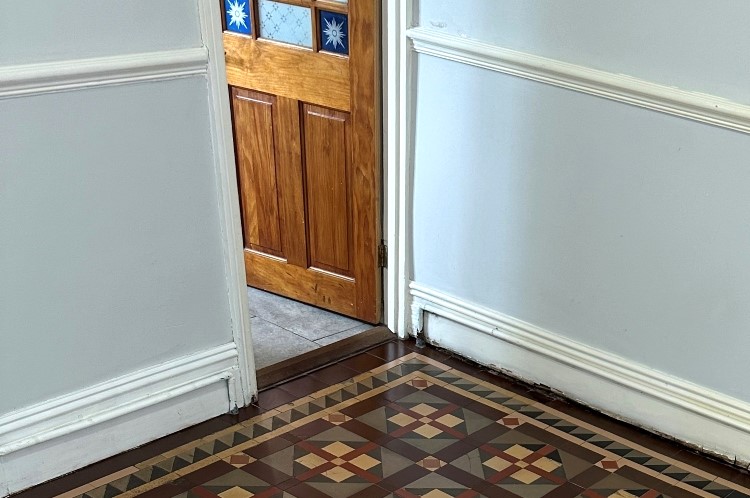
During the visit I noticed that at the door threshold leading into the kitchen, some of the tiles had been taken up for a gas pipe repair and back filled with cement, I suggested I could repair this section using matching tiles, so I included it in the quote. The quote to renovate and repair the floor was accepted and the job was booked in.

Victorian Tiled Dining Room Floor Before Renovation Newport


Cleaning and Repairing a Victorian Tiled Dining Room Floor

I began by addressing the tiling issues so my first course of action was to set matching tiles along the doorway border leading to the kitchen, as the previous tiles had already been removed by the gas company it was fairly straight forward job of carefully knocking out the cement. The tiles I had sourced were from a nearby reclamation yard and needed to be carefully cut to size to ensure a good fit with the original. After setting the tiles and grouting I left them to dry overnight.

The following day I began cleaning, using a combination of Tile Doctor Remove and Go and Pro-Clean, leaving the solution to dwell after being brushed into the floor. After around ten minutes the floor was scrubbed by hand with a stiff brush to release the dirt from the tiles. The resultant slurry was then vacuum away and with the floor cleaner I was able to get a better idea of which areas needed more attention.

I restored the perimeter of the floor with a 200-grit diamond block and this was followed up with a 200-grit diamond pad fitted to a rotary machine. These coarse pads cut into the tile surface removing years of grime and giving them a new lease of life. After another rinse and extraction with the wet vacuum the whole floor had a much brighter appearance. The process was then repeated with a 400-grit diamond pad to close the pores of the tiles.

The floor was then washed by hand with water and a sponge to make sure there wasn’t any areas missed, also to ensure there was no residue from the cleaning products left on the floor which could potentially disrupt the sealing process. The floor was then left to dry overnight ready for sealing the following day.


Sealing a Victorian Tiled Dining Room

To assist with drying I asked the client to leave a couple of air movers running during the evening and to put them back on in the morning. This worked well and by the next day I was able to confirm the floor was dry and ready for sealing with a moisture meter.

The client had requested a satin finish and so the sealer chosen was Tile Doctor Seal and Go, four coats were applied to the tiles a permanent wet look and gorgeous lustre. Another advantage of Seal and Go is that it’s a water-based sealer so it doesn’t give off a smell as it dries.

Victorian Tiled Dining Room Floor After Renovation Newport

For aftercare I left the client a bottle of Tile Doctor pH Neutral Tile Cleaner to help maintain the appearance of the floor. This is a gentle tile cleaning product that won’t harm the sealer, many of the products you find in supermarkets are simply too strong for a sealed floor.

Victorian Tiled Dining Room Floor After Renovation Newport 


Sunday, December 19, 2021

Damaged Classic Tiled Hallway Floor Fully Restored in Lancashire

Cleaning and Repairing a Victorian Tiled Hallway Floor

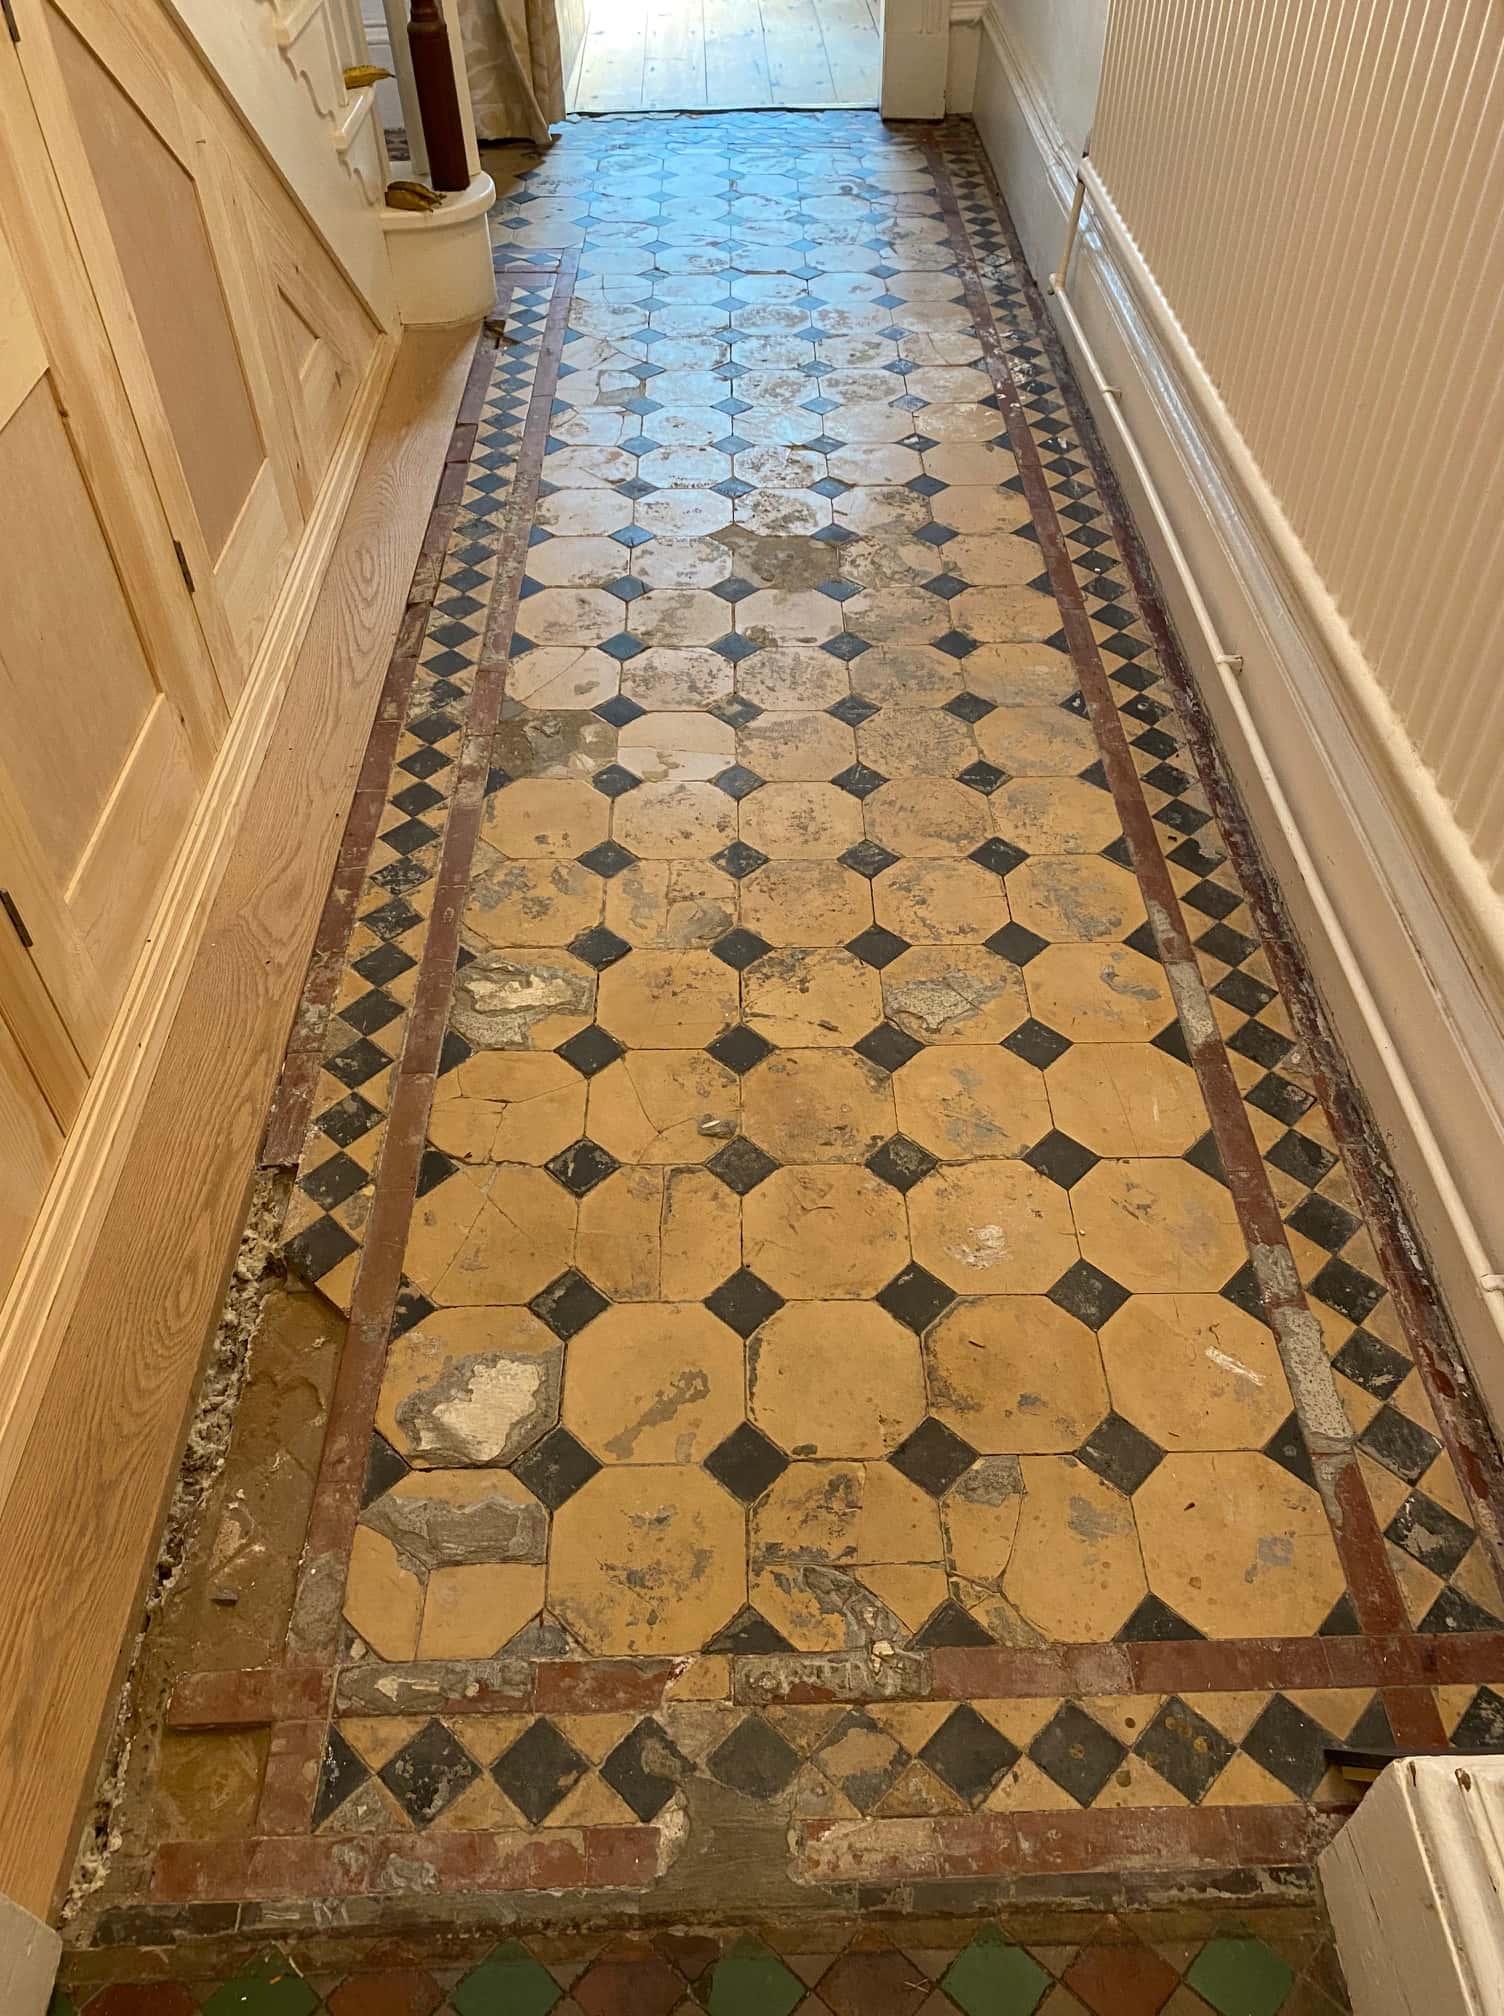
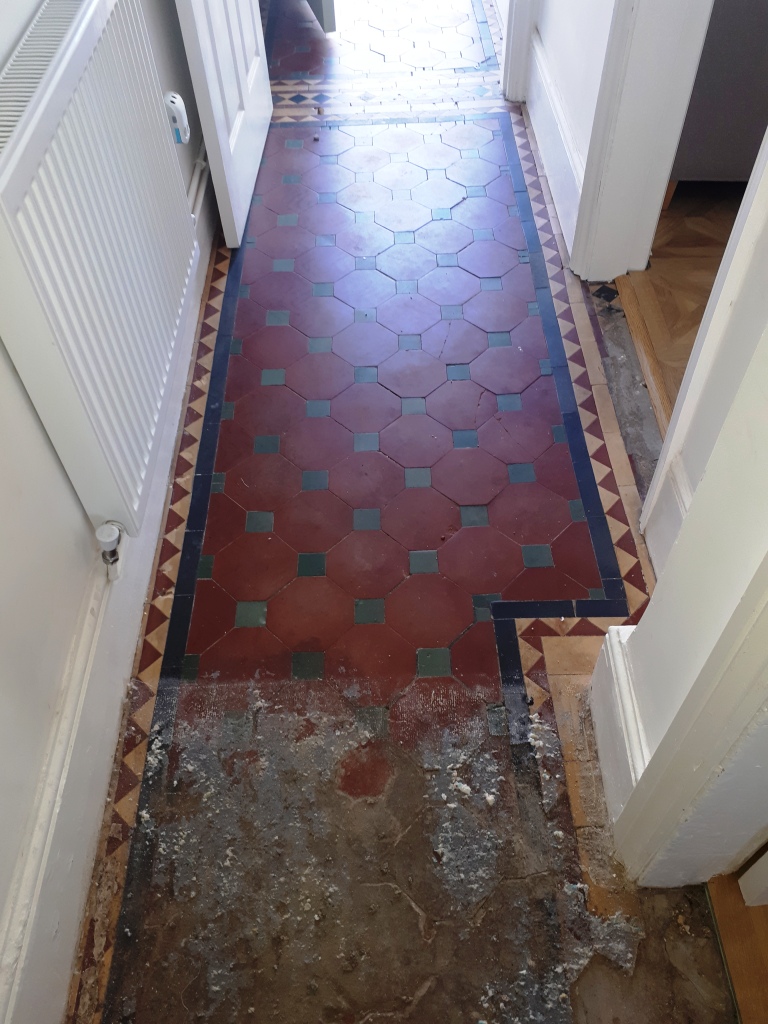
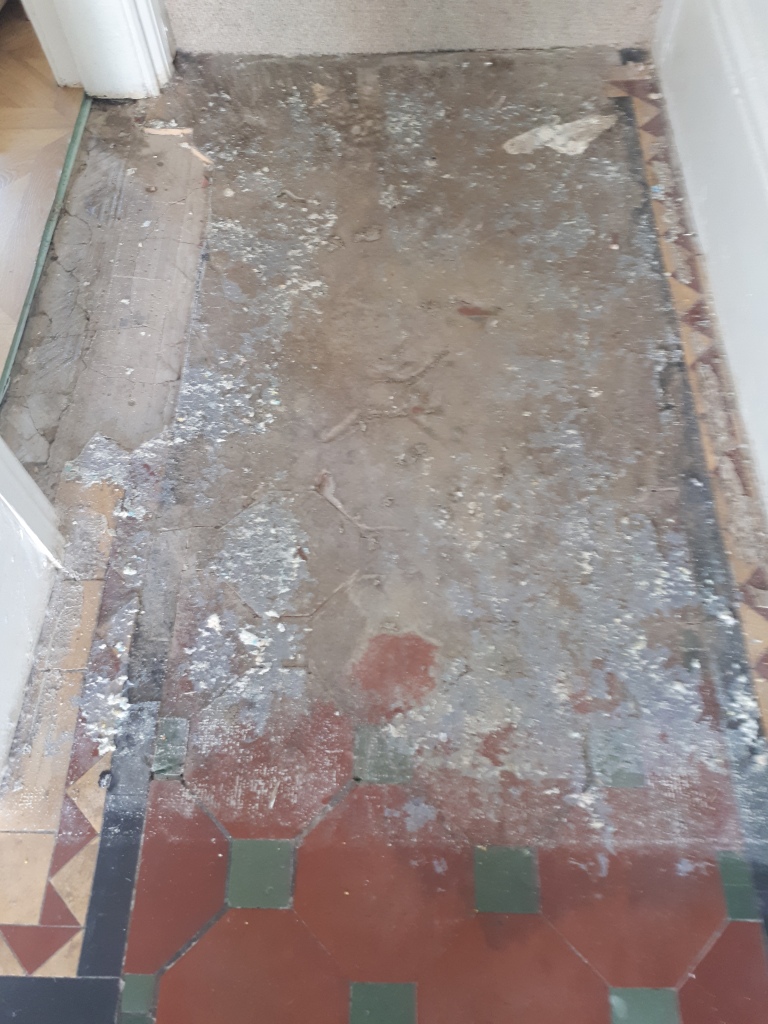
Detailed below is the restoration of a Victorian tiled hallway floor that we started back in June in Preston. Although we started in June there was so much damage to the subfloor and the tiles it took some time to complete, additionally, the client did not like the colour samples of the replacement tiles we had brought along and so decided to source their own which took some time.

 
Damaged Victorian Tiled Hallway Floor Before Restoration Preston


Deep Cleaning a Victorian Tiled Hallway

Three months later with replacement tiles now sourced we were given the go ahead to start the restoration. The first day’s focus was cleaning the original floor using very coarse 100-grit and 200-grit Diamond pads fitted to a rotary buffer machine and applied to the floor using a strong dilution of Tile Doctor Remove and Go to add extra cleaning power. Tile edges were given special attention using a flex machine fitted with small diamond grit pads.

 
Damaged Victorian Tiled Hallway Floor Before Restoration Preston

The floor was rinsed with water to remove the soil generated and this was followed up with an acid rinse using a 1:3 dilution of Tile Doctor Grout Clean Up. This last step in the cleaning process is especially recommend for old floors like this which don’t have a damp proof membrane and can suffer from efflorescence issues.


Replacing Damaged Victorian Tiles

The next stage focused on repairing the floor and started by carefully knocking out all the broken and chipped tiles. We had previously estimated over 30 tiles needed replacing and so the client had bought two boxes, meaning I had plenty of spares to work with.

Before tiling however, the subfloor had suffered over the years and needed attention first. To deal with this the damaged areas were raked out, cleaned up and then back filled with rapid setting self-levelling screed from Mapie adhesives. Once the sub-base was fixed then we put the new tiles back in, they were not an exact match, about 5mm too short and lighter in tone, but the colour was pretty close.

Tiling an old Victorian floor like this can be a bit like dominoes as you move one out of place 2 decent ones come loose and then they also need refixing. Some of the tiles had hair line cracks in them and once they were loose, they just cracked in half. As such the 20 spare tiles that I thought were spare came into good use and I actually ended up using all of them. I could have done with a few more so it was decided to reset the last four broken tiles and grout them in. Luckily for me the client was very understanding about the nature of tile restoration and had accepted that there would be some imperfections and they were not expecting a new floor.

The Tiles were fixed down using Ultralite Rapid Flex (another product from Mapie) and then grouted using the same adhesive (not a grout, as they did not have grout back in the day, just cement and screed).

The floor was left this to cure overnight, and we came back the next day to finish the clean using a 200-grit diamond pad fitted to a buffing machine and lubricated with water, then one last acid rinse to get the tiles as clean as possible and remove any lingering grout haze. This last clean helps to blend the new tiles in with the original.


Sealing a Victorian Tiled Hallway Floor

Before applying a protective sealer, the floor was left to dry for a couple of days, the tiles need to be thoroughly dry before sealing or you can end up with a patchy appearance.

For this floor with no damp proof membrane, it was important to use a fully breathable sealer that will allow moisture to rise through the tile and evaporate at the surface, so Tile Doctor Colour Grow was chosen. This is a good choice for old floors like this as its fully breathable, head wearing, and it contains a colour enhancer that improves the overall appearance of the tile.

 
Damaged Victorian Tiled Hallway Floor After Restoration Preston

Three coats of Tile Doctor Colour Grow which is a fully breathable, colour enhancing sealer hat works by soaking into the pores of the tile protecting it from within. It has a matt finish, and it works really well with all clay tiles and is ideal for these types of floors.

 
Damaged Victorian Tiled Hallway Floor After Restoration Preston

You can probably spot the lighter coloured tiles in the after photos on this page, however it’s a very subtle difference and I think they have blended in quite well with the original. Certainly, my client was very pleased with the newly restored floor, its completely transformed from when we first visited the client, and the floor has now gained character and history. For aftercare we recommend Tile Doctor Neutral Cleaner, its an effective pH neutral product that is compatible with the new sealer.


Wednesday, September 8, 2021

South East London Tiler Demonstrates how to Restore a Damaged Victorian Steps

This client in Chislehurst wanted to create a better first impression as their front Victorian tiled step looked tired and had been damaged by long term settlement in the sub floor. They ideally wanted to keep the original tiling but thought it would have to be replaced. The problem was that one section of the base had dropped and the tiling had cracked either side of this.

 
Victorian Tiled step Before Repair and Restoration Chislehurst

After visiting the property, I told the client that it could be repaired with matching reproduction tiles and fully restored. My client was happy with this suggestion, and they agreed to go ahead with my quote on that basis.
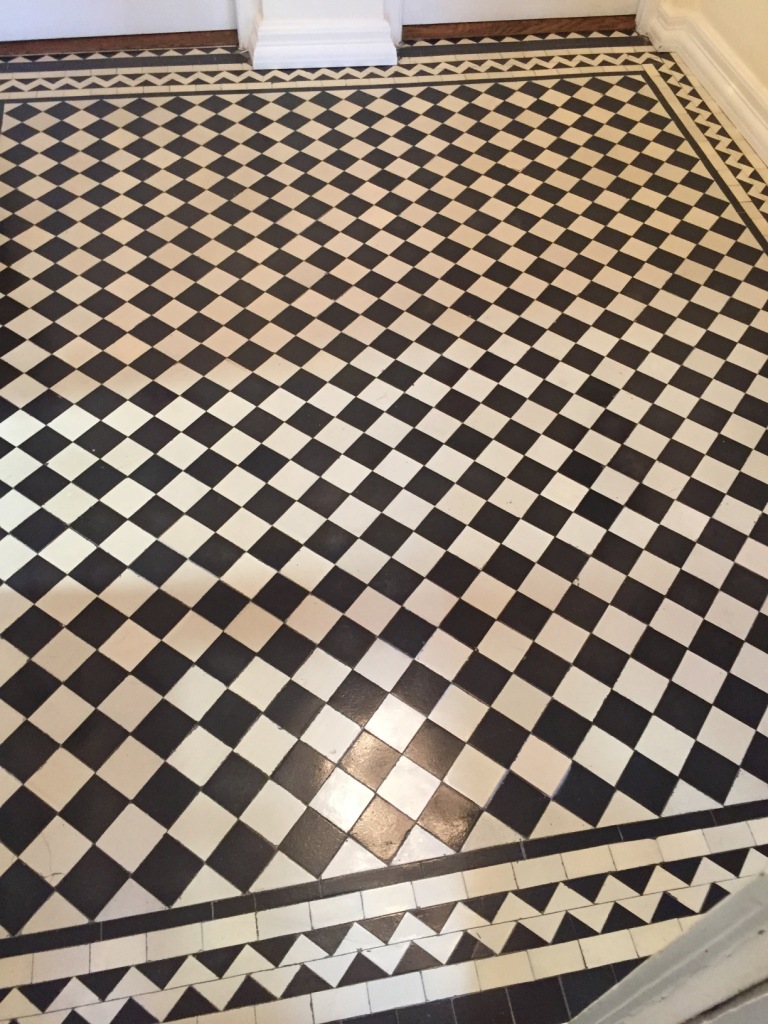
 
Victorian Tiled step Before Repair and Restoration Chislehurst


Repairing a Victorian Tiled Path and Step

Our workload has been busy this year so I returned as soon as I could and started by carefully lifting the tiles from the dropped section and all the cracked tiles that had been affected. Before retiling I had to underpin the original base and raise the level with new concrete. Once this was done, I left the property for a few days so the new concrete base could cure fully. When I returned to the job, I set about fixing the replacement reproduction tiles in place laying them down in the same pattern as before, again these needed time for the adhesive to set so I left the property once completed.

 
Victorian Tiled step During Repair and Restoration Chislehurst


Restorative Cleaning of Victorian Tiles

I returned again a few days later to clean and seal the tiles. I first used Tile Doctor Remove and Go to remove any ground in dirt and old sealers that may be on the original tiles. As these tiles were outside and open to the elements, I needed to remove some blackening from the tiles and used Tile Doctor Patio and Brick Driveway Cleaner to get that off. I put this on the tiles and let it dwell for a while, adding water to it to keep the tiles wet. It was a small area so to help lift the dirt out of the tile I scrubbed the tiles by hand. Once done the whole area was rinsed with more water and the soil extracted with a wet vacuum. The next step was to bring up the appearance of the tiles and remove further dirt with the application of a 100 and then 200-grit milling pad. These pads are applied with water for lubrication and do a great job of deep cleaning the tiles and hone up the face of the tile to ease the sealing process. It was a small area, and the weather was good so it wasn't too long before I could move onto sealing.


Sealing a Victorian Tiled Path and Step

When the tiles were dry, I applied two coats of Tile Doctor Colour Grow and then once this had dried, I applied a coat of Tile Doctor Stone oil. Both these sealers are impregnators, which soak into the pores of the tile to enhance the appearance and natural colours of the tiles.

 
Victorian Tiled step After Repair and Restoration Chislehurst

It took a half few days to fully restore the path, fortunately Chislehurst is very close to my base in Bromley and so I was able to do some other work in between. The step looked new afterwards and my client was very impressed with the completed job.


Thursday, February 27, 2020

How to Rebuild and Restore a Victorian Tile Floor

The photos below are of a 1.7 metre by 3 metre Victorian tiled floor at the entrance to a property in Prizet, south of Kendal. As you can see the hallway and porch was in a poor state due to old age and neglect. Some tiles were cracked, missing and stained with cement, and what I suspect was carpet adhesive. One of the tiles had a four-inch hole down to the cellar where a soil pipe was installed previously when the room was used as a downstairs W.C. The client was doubtful that we would be able to restore the floor but thought it would be worth contacting us just in case.

Victorian Tiled Entrance Floor Before Rebuild Prizet Kendal Victorian Tiled Entrance Floor Before Rebuild Prizet Kendal

I visited the property to take a proper look and found their description of the floor was accurate and clearly overdue some serious attention. I also noticed that some point in the past cracked tiles had been removed and replaced with cement. However, I was confident the floor could be restored and gave them a price for the restoration which they were happy to proceed with.

Victorian Tiled Entrance Floor Before Rebuild Prizet Kendal


Repairing a Victorian Tiled Hallway Floor

Work started by rebuilding the worst part of the floor which would require the services of my partner Russell. This involved removing the existing tiles, then preparing the concrete base which needed to be level and smooth before we started tiling.

Victorian Tiled Entrance Floor During Rebuild Prizet Kendal

We had previously managed to source very similar tiles which would be needed to replace those that were missing or damaged. Once the floor was prepped, the replacements were cut to fit taking care to ensure they matched the original pattern. Once cut they were fixed in place with flexible adhesive. We recommend the use of flexible floor adhesive on old floors due to the potential movement and the flexible floor adhesive doubles up as a grout as well. The floor was then left overnight to dry.

Victorian Tiled Entrance Floor During Rebuild Prizet Kendal


Deep Cleaning a Victorian Tiled Hallway Floor

On day two the floor was deep cleaned using a 100-grit resurfacing pad followed by a 200-grit pad and then a 400-grit burnishing pad. The pads are attached to a rotary machine and the floor is rinsed with water and the soil extracted with a wet vacuum in-between.

We then finished the clean with an acid rinse using Tile Doctor Grout Clean Up. This is needed to remove the cement stains from the surface of the Victorian tiles and neutralise any potential efflorescent salt issues in the tiles. Another advantage is the acid slightly etches the tiles making a better bond with the sealer.

The floor was given another rinse with water and then the wet vacuum was pressed into surface again to extract the fluids and get the floor as dry as possible before leaving for the day.


Sealing a Victorian Tiled Hallway Floor

We returned on the third day and first checked the floor was fully dry using a moisture meter. Four coats of Tile Doctor Colour Grow were applied to achieve a strong enduring seal that will cope well with the traffic coming through the entrance.

Colour Grow is a colour intensifying sealer that provides durable surface protection to the tiles, but at the same time allows the surface to breath which is important in a floor such as this where no damp proof membrane is present. The results speak for themselves I was particularly happy with the area where we had repaired the hole, it was barely noticeable.

Victorian Tiled Entrance Floor After Rebuild Prizet Kendal

Many thanks to my customer for sending over the before photos and for leaving the following testimonial.

“Great restoration job done on our Victorian hall and porch tiles including replacing broken tiles and cleaning. Now looking better than ever. Russell was very professional and knowledgeable. Nicola F. Kendal”


Source: Victorian Tiled Floor Cleaning and Restoration Service in Cumbria

Thursday, February 20, 2020

How to Remove Bitumen from old Victorian Floor Tiles

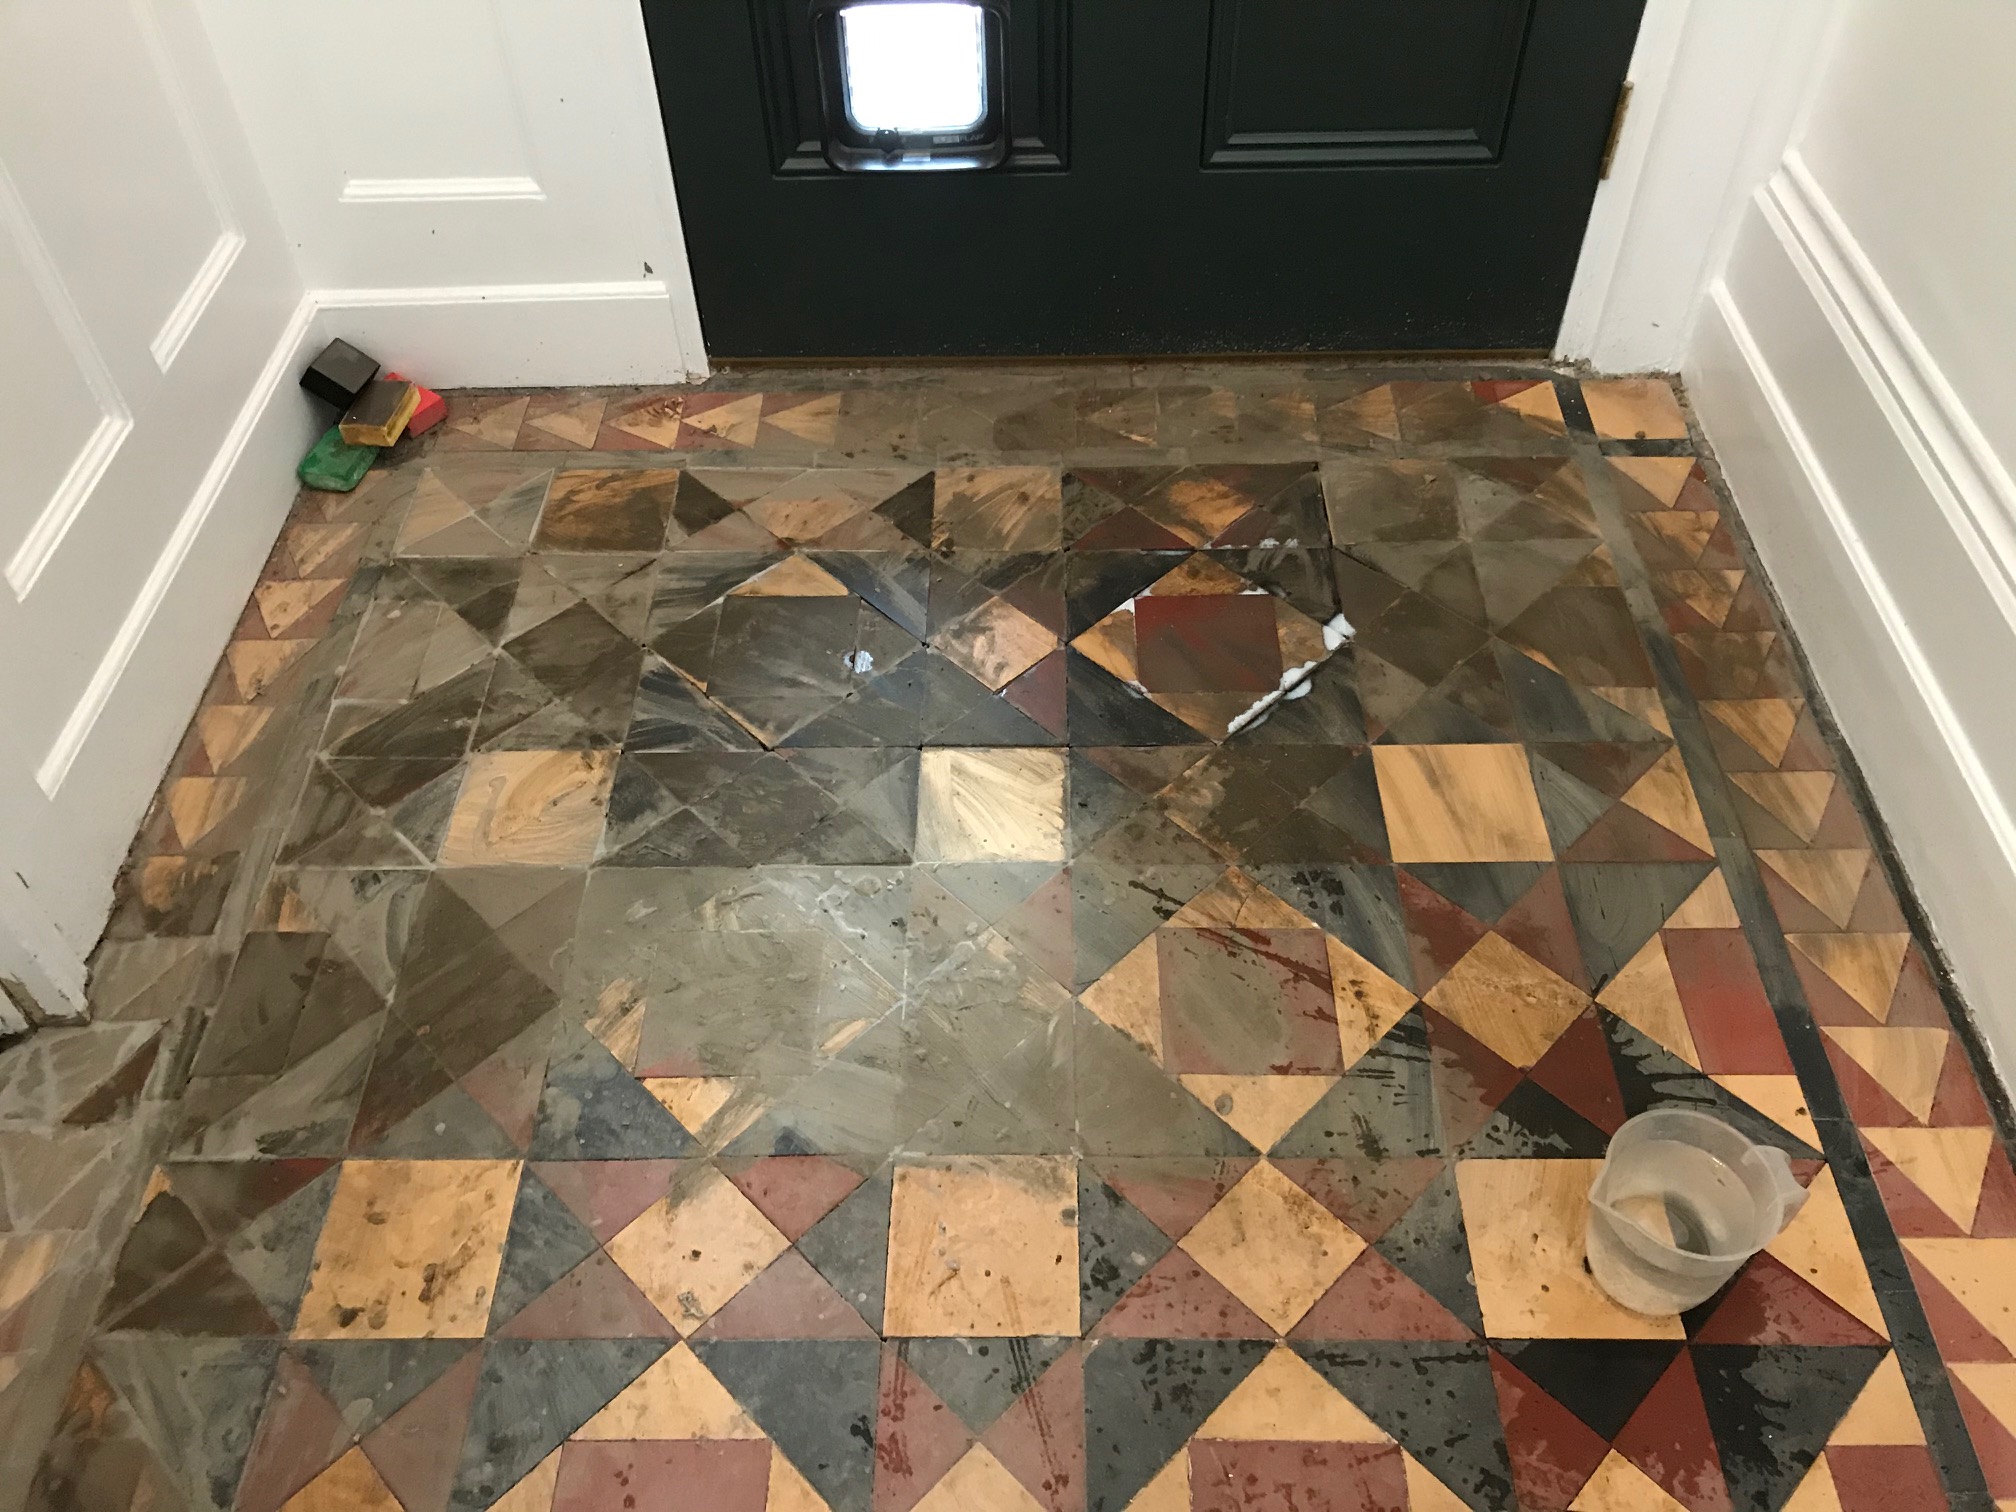
I was contacted by a client who recently bought a house in Leyton E10 and found an original Edwardian floor in the hallway under old lino. The house was built in 1908 making it well over 100 years old and from the Edwardian era.

The customer had decided to remove the linoleum, but it had been fixed down with bitumen which he struggled to remove as it is such a sticky substance. As well as the bitumen the floor was dirty with ground in dirt, I can only deduce the previous occupants must have decided just to cover it up with the lino rather than clean it. Also, there was some damage to the tiling in front of the stairs that needed repairing. It was clearly going to be more work and more involved than the new owner had initially thought so I was asked to take over the restoration.

Edwardian Floor Covered in Bitumen Before Restoration in Leyton E10 Edwardian Floor Covered in Bitumen Before Restoration in Leyton E10

After visiting the property for a site visit, I had a good idea of what would be needed and managed to find suitable replacement tiles from Original Style Tiles. They were keen to get the floor restored so they agreed my quote and I went ahead and purchased the replacement tiles on their behalf.

Edwardian Floor Covered in Bitumen Before Restoration in Leyton E10


Removing Bitumen and Repairing an Edwardian Tiled Floor

I used a combination of floor buffers, coarse 200-grit pads, hand scrapers and lots of Tile Doctor Nanotech HBU Remover to get the floor clean and clear of the bitumen. Rather a lot of elbow grease was required too! It was a long process which took up all of day one and continued into much of day two. The day ended by removing the damaged floor tiles and replacing with the newly sourced replacements. The floor was left overnight to dry and the new tile adhesive to cure before we could return to seal the floor.

Edwardian Floor Covered in Bitumen During Restoration in Leyton E10 Edwardian Floor Covered in Bitumen During Restoration in Leyton E10


Sealing an Edwardian Tiled Hallway Floor

I returned on Day 3 to seal the floor using a couple of coats of Tile Doctor Colour Grow. Old floors like these have no damp proof membrane and being fully breathable Tile Doctor Colour Grow will allow any moisture to rise through the tiles and not get trapped underneath where it could cause problems later. The sealer also gave the floor a nice natural sheen without being too shiny. Most importantly the new sealer would protect the floor going forward which is particularly necessary in a high traffic area such as the hallway.

Edwardian Floor Covered in Bitumen After Restoration in Leyton E10 Edwardian Floor Covered in Bitumen After Restoration in Leyton E10

My client was glad to see the floor restored back to its original state which I'm sure will add a lot of value to the property as original features are very sought after these days.

For aftercare I recommend they use Tile Doctor Neutral Tile Cleaner to clean the floor. It’s a pH neutral product so it will ensure that the newly applied seal stays in place and keep the new floor restoration looking good.

Edwardian Floor Covered in Bitumen After Restoration in Leyton E10


Source: Victorian Tile and Grout Cleaning and Renovation Service in East London

Thursday, August 15, 2019

How To Repair and Restore an Old Victorian Tiled Floor

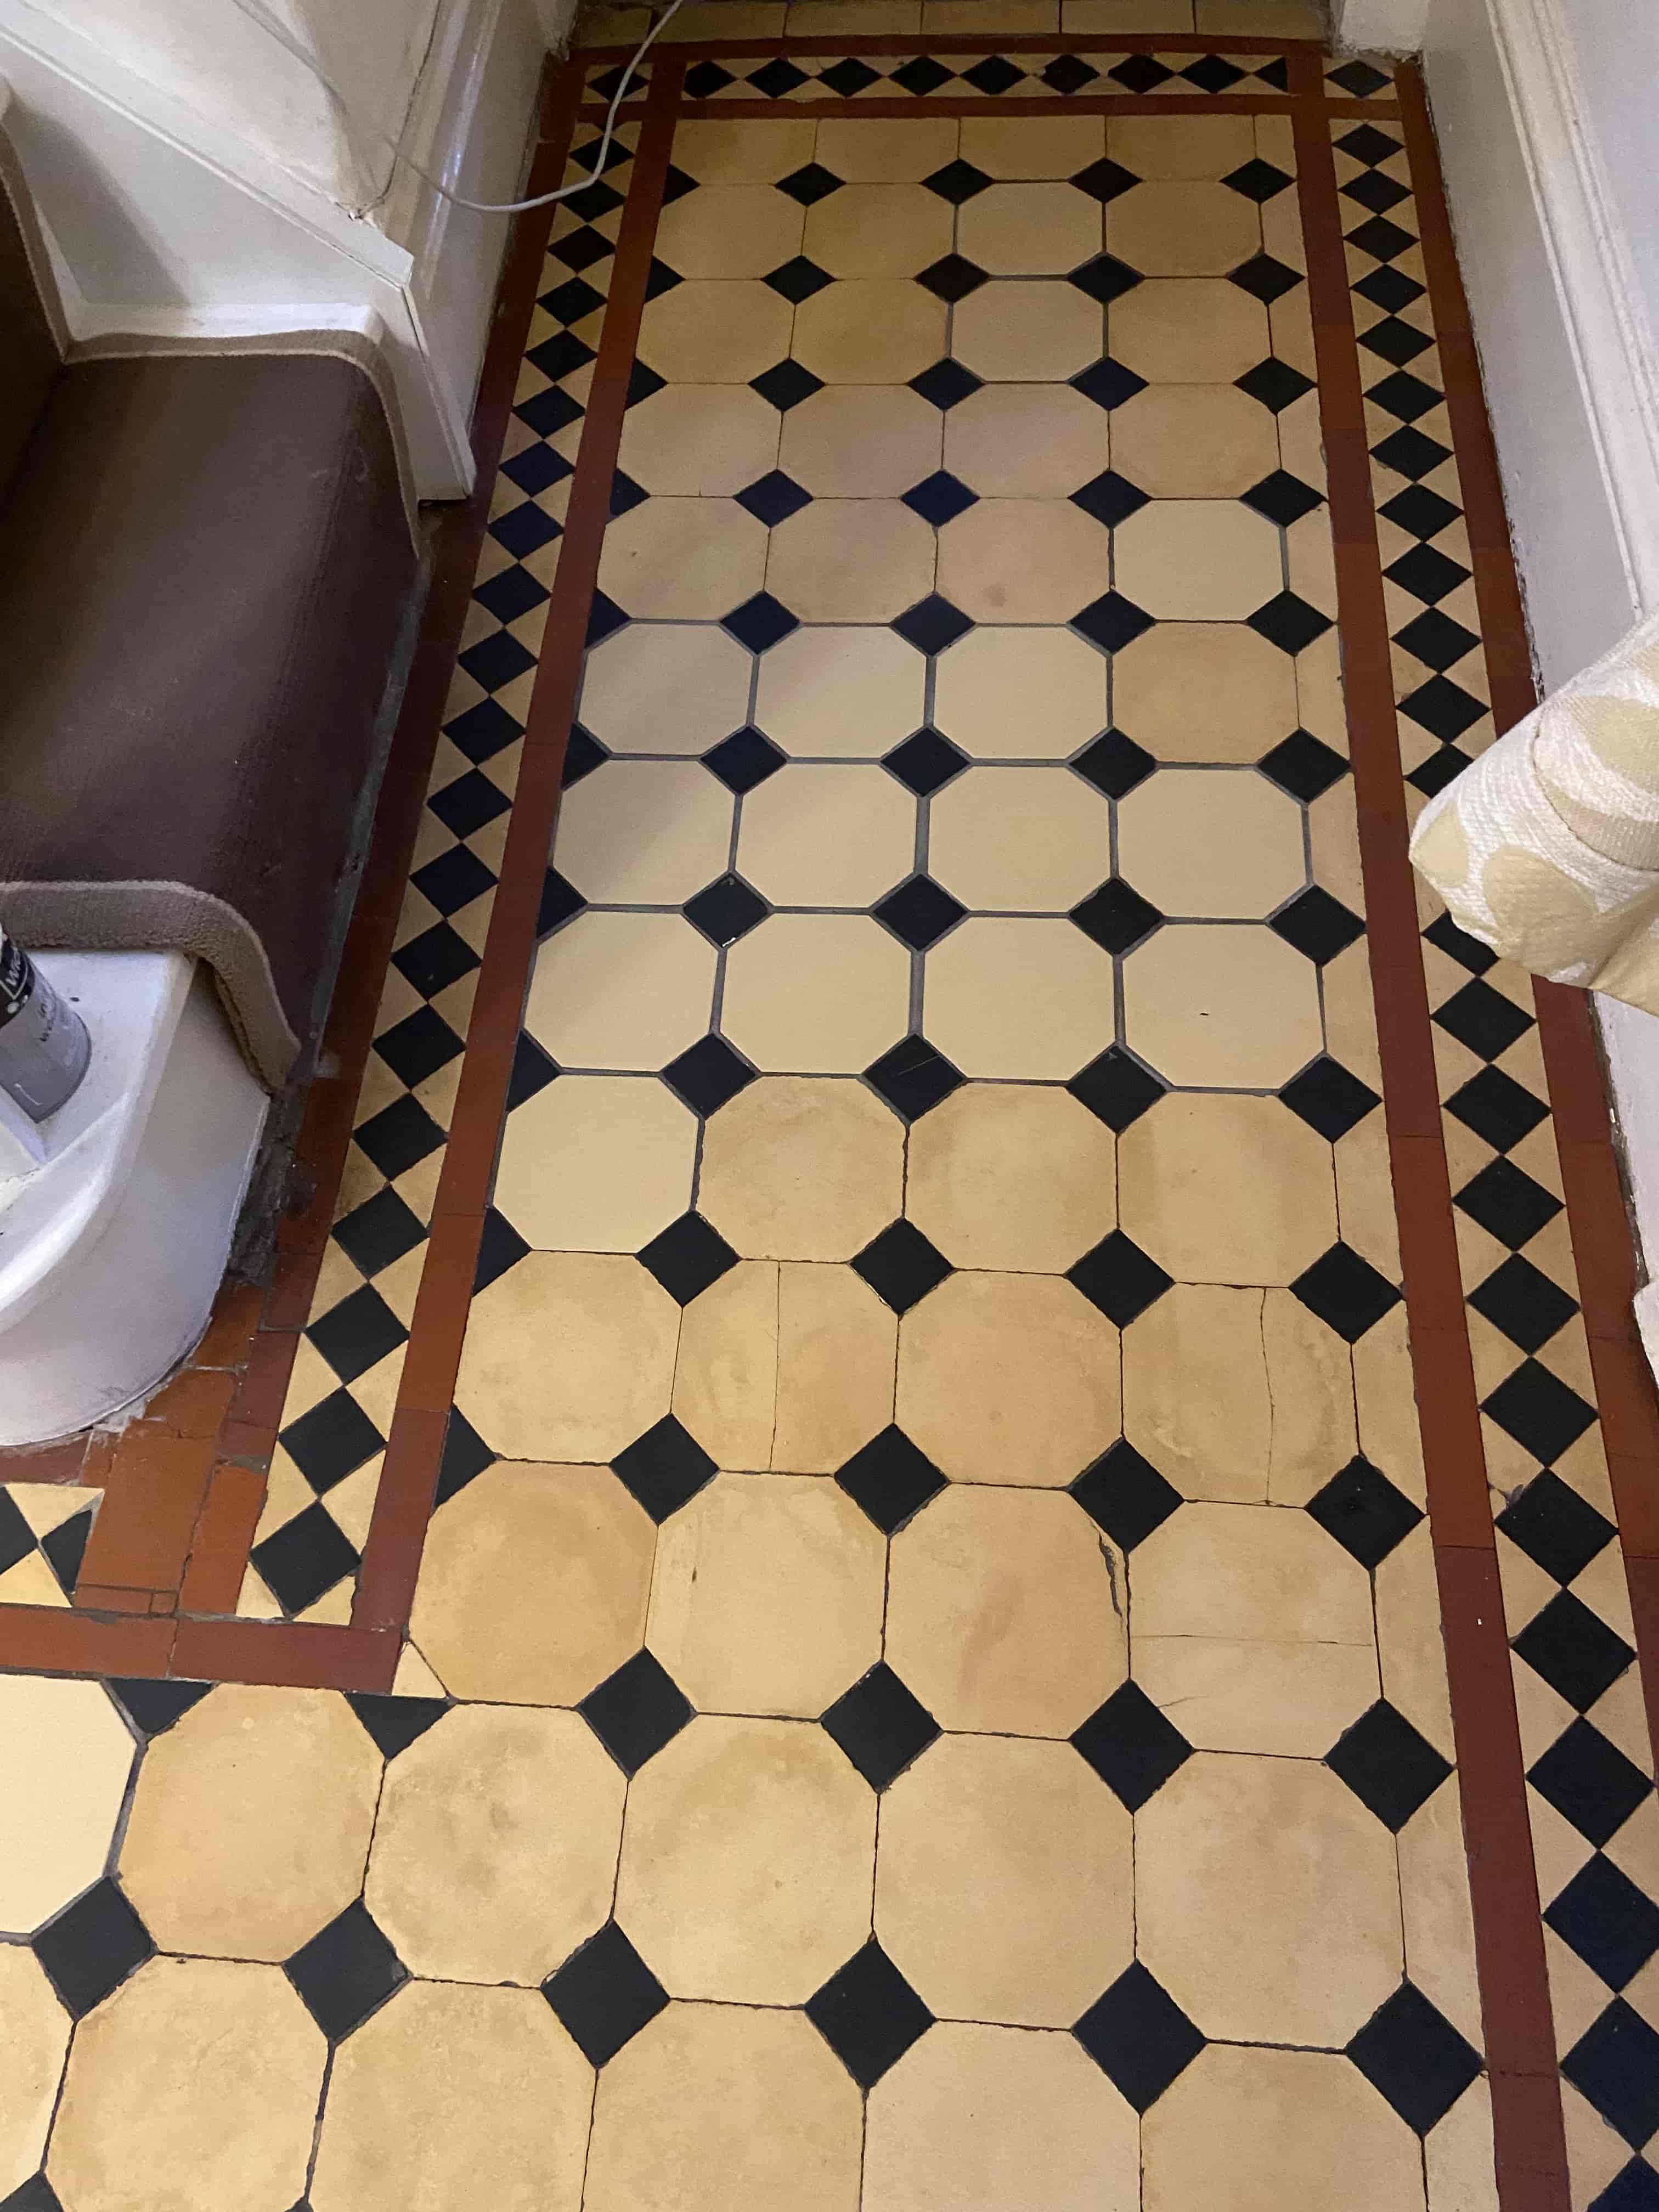
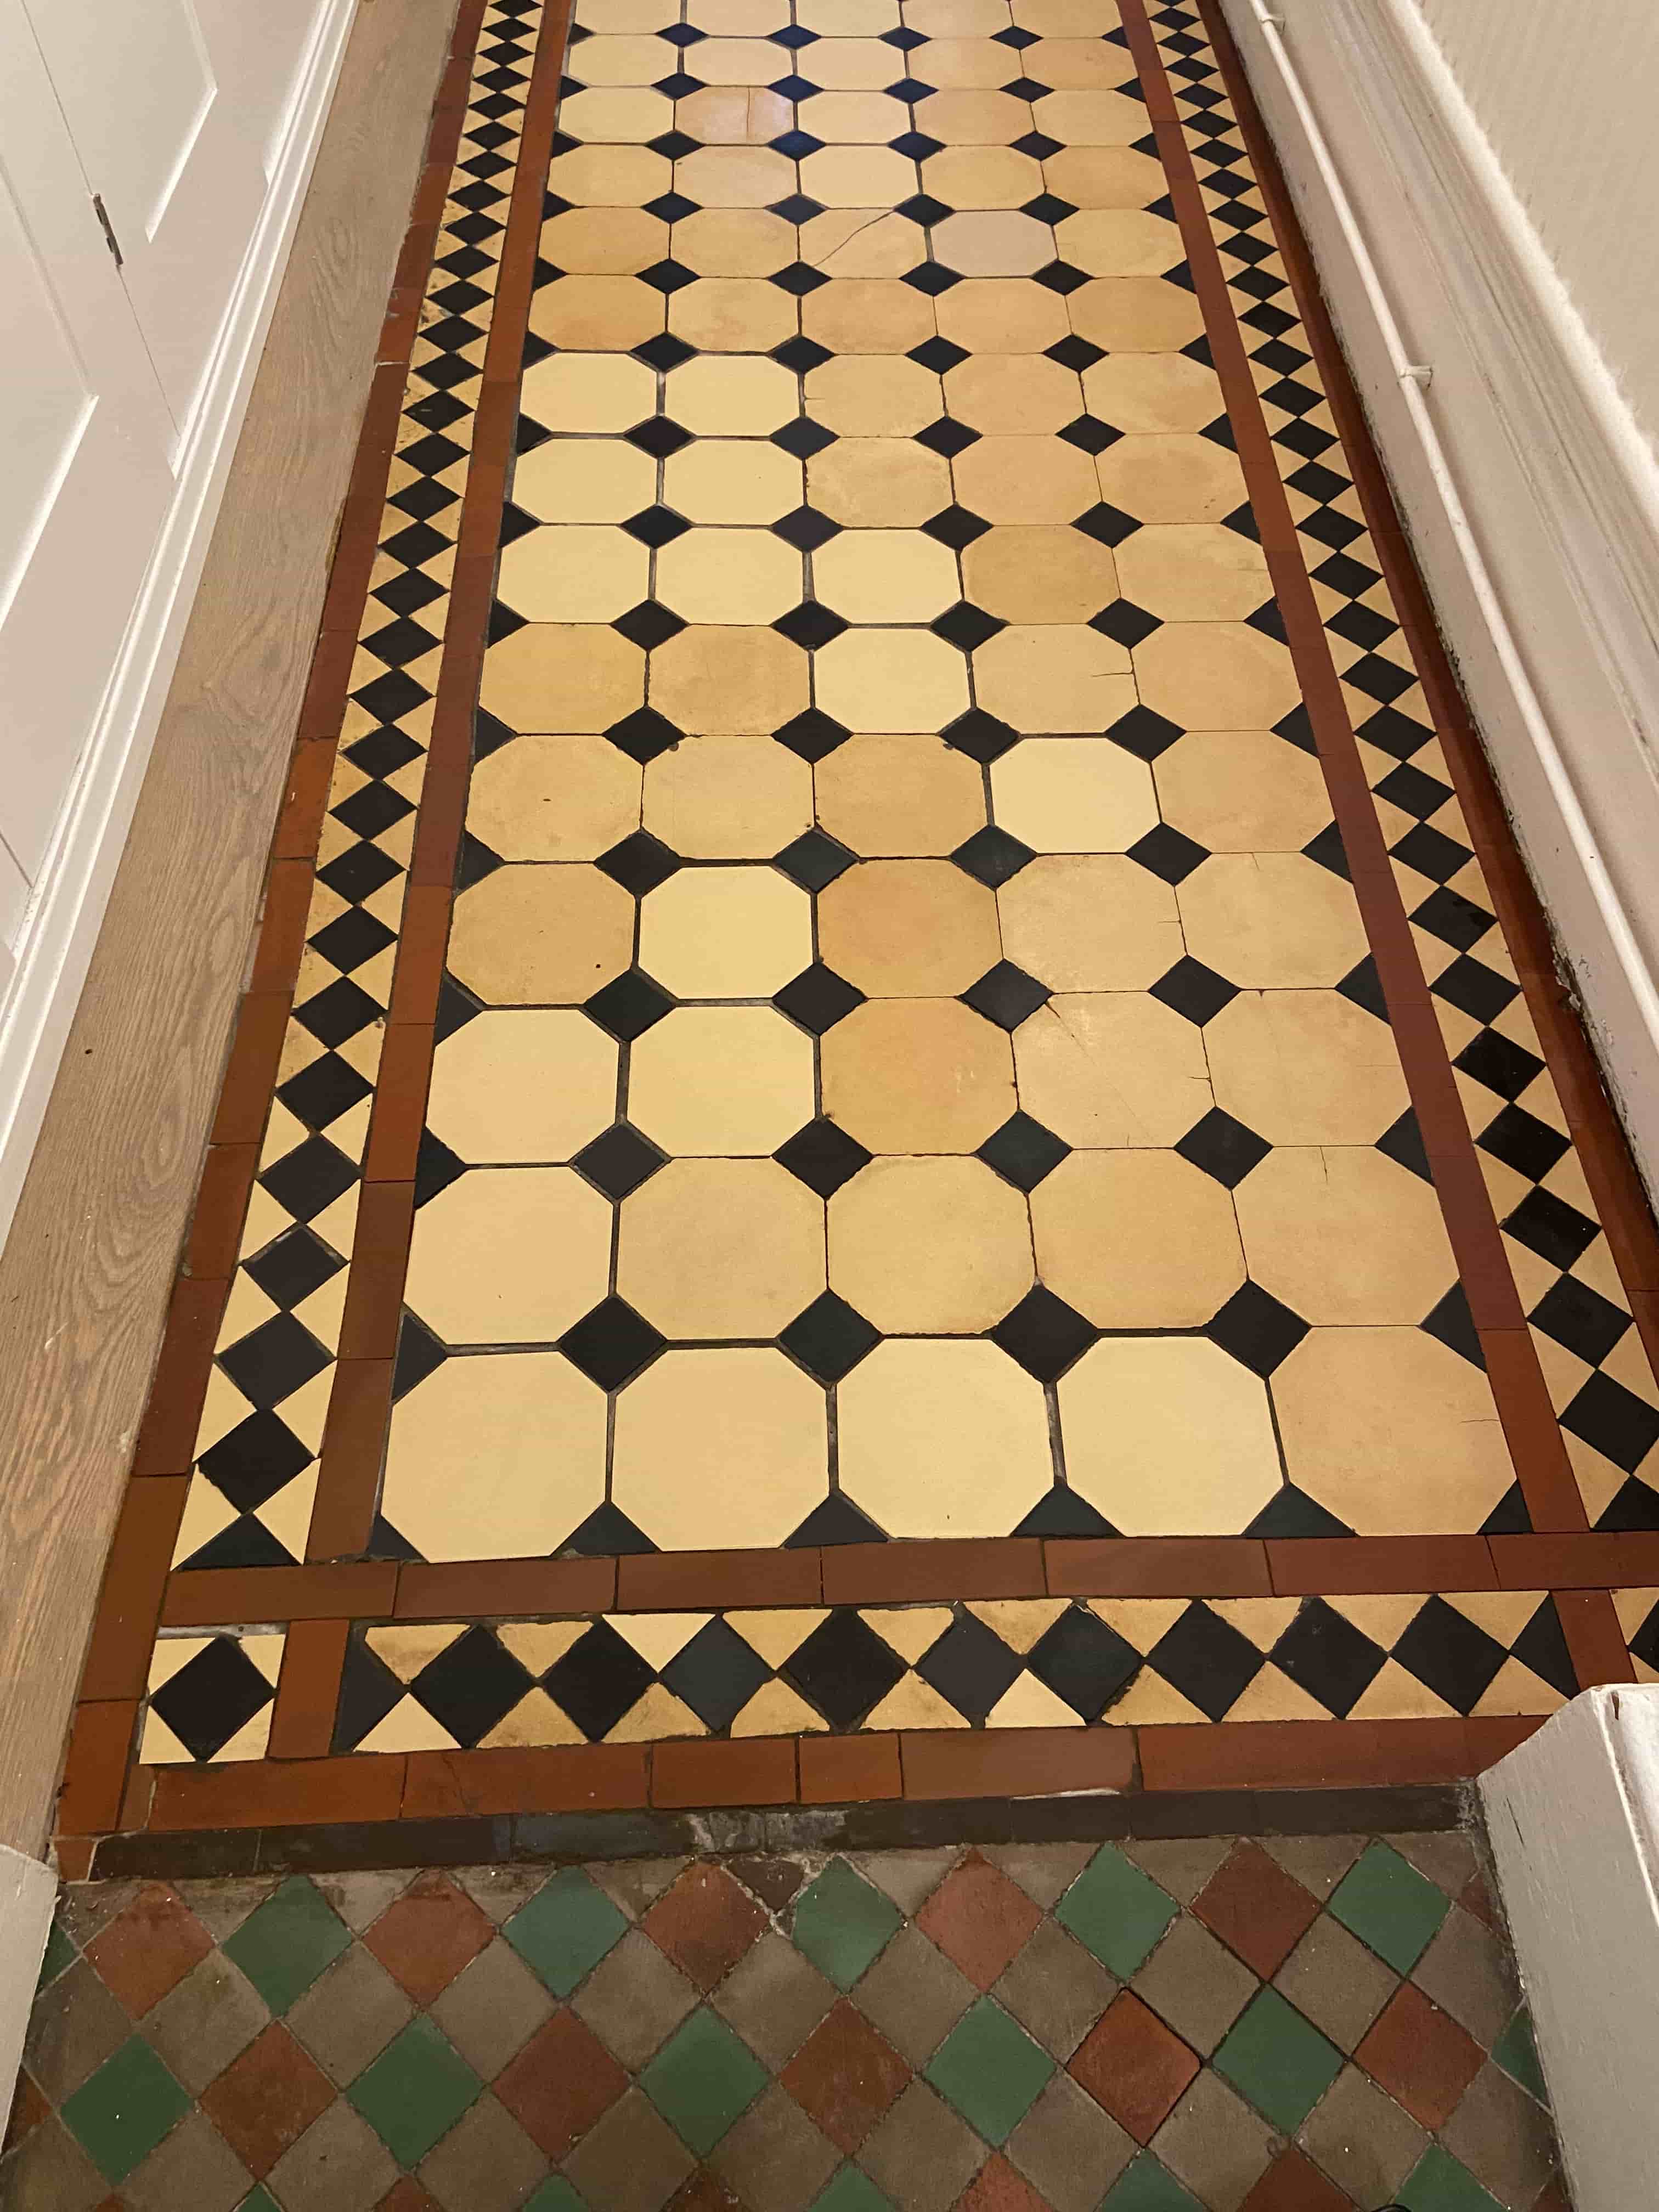
This detailed Victorian tiled hallway at a property in Camden was overdue some much-needed repair and maintenance. The owners of the property appreciated that original period features like this add a lot of value to a property and asked me to visit the property to quote for renovating it. The property was in a terrace of similar properties most of which appeared to have retained their Victorian character.

Victorian Hallway Floor Tile Before Restoration Camden

I inspected the floor and found there were a couple of loose, cracked, worn and broken tiles that needed to be replaced. In addition, the floor tiles needed a deep clean and then seal to bring back the wow factor. I was confident we could renovate the floor but at that point unsure if we would be able to find exact match replacements for the damaged tiles. Fortunately, Victorian tiles are still in demand and I knew of several companies I could check with so I was confident they could be found.

Victorian Hallway Floor Tile Before Restoration Camden

We discussed how long the work would take and assuming I could source the replacements agreed a price for the full restoration of the floor. After doing some research I managed to find suitable replacements with a company called Original Style and the work was scheduled for the following month.


Cleaning/Repairing a Victorian Tiled Hallway Floor

Firstly, we prepared all areas with protective tapes to threshold edges and skirting. This was followed by spaying the tiles with a strong dilution of Tile Doctor Remove & Go which is product designed to remove old sealers and coatings. After about ten minutes the tiles were scrubbed with black scrubbing pads and scrubbing brushes. Fresh water was used to rinse the floor and the slurry was extracted using a wet vacuum.

The floor was inspected and then a second clean carried out, this time using Tile Doctor Pro-Clean which is a Tile and Grout cleaning agent. The same process of application was used and after rinsing and extracting the dirt the tiles were given a steam clean. This ensured all the dirt was lifted out of the pores of the tile and the floor was now as clean as it possible could be.

The next step was the remove the loose and cracked tiles using the reclaimed tiles we had sourced earlier. Some cuts were necessary to get the replacements to match the originals but overall the plan worked. A quick drying adhesive was used to secure the tiles so we could apply the grout shortly after. The whole floor was then re-grouted and cleaned off to ensure a good match. The floor was left to dry off overnight, and you could already see it was now looking considerably improved.


Sealing a Victorian Tiled Hallway Floor

Returning the next morning we checked the floor was dry using a moisture meter, this is important as to apply a sealer to damp tiles will lead to a patchy experience. All was well so we were ready to apply the sealer.

To start a single base coat of Tile Doctor Colour Grow sealer was applied to the floor and left to dry. This sealer is an impregnator that protects from within by occupying the pores in the clay tile improving colour in the process. This sealer does leave a matt finish however and the client wanted a subtle shine so one dry it was followed by four coats of Tile Doctor Seal & Go. The combination of the two sealers works really well to add long lasting protection to the tiles and provide the desired finish to the floor.

Victorian Hallway Floor Tile After Restoration Camden

The floor was much improved, and the client was delighted. The detailed pattern and colours were now much more prominent, and the hallway looked much more inviting for both the owner and their guests. For the aftercare of Victorian tiles, I recommended the use of Tile Doctor Neutral Cleaner which is pH neutral and won’t prematurely erode the life of the sealer.


Source Victorian Tile Cleaning and Restoration Service in North London

Monday, February 25, 2019

Repairing a Flood Damaged Quarry Tiled Floor in Bearwood, Birmingham

My client contacted me regarding their quarry tiled floor which hadn't been in a good condition for some time. A recent flood in the house, caused by a ruptured pipe in an upstairs boiler had only added to the problem. As you can see from the before pictures, the floor was in a sorry state. On the plus side the flood had led to an insurance claim which would cover the cost of the restoration.

I visited the property and did a test clean on a section of Quarry tiles which came up well. The client was happy the result and agreed to go ahead, my quote was agreed, and the job booked in. The property was in Bearwood which is in the southern part of the Birmingham suburb of Smethwick.

Flood Damaged Quarry Tiled Floor Before Cleaning Bearwood


Cleaning and Repairing a Quarry Tiled Kitchen Floor

The client also needed some Quarry tiles replacing due to them being broken and damaged. So before returning my first task was to source some replacement quarry tiles that would be a good match for the existing. Fortunately Quarry tiles are still popular and I was able to find a set of reclaimed tiles that would make good replacements.

I was able to get the replacements delivered in time for the job starting which was just as well as my first task would be to repair the floor. Fitting the replacements was tricky work as some of the tiles were up to two inches thick and came in various sizes and so had to be cut to size with a wet tile cutter. The tiles were a good match though and they were set in place. Later that day I was able to grout them in using a matching grout along with some other areas that needed re-grouting. By the end of the first day the floor was already looking much improved.

Flood Damaged Quarry Tiled Floor During Repair Bearwood Flood Damaged Quarry Tiled Floor During Repair Bearwood

The next day the floor was cleaned with a strong solution of Tile Doctor Pro-Clean. The solution is left on the tiles to dwell for about ten minutes so it can start to soak into the deep-seated dirt and break it down. The tiles were then scrubbed with a black pad fitted to a weighted rotary machine. The grout was also cleaned at this point using more Pro-Clean and a hand-help scrubbing brush.

There was also a fireplace hearth that needed cleaned, this also had to be cleaned by hand as the machine was too large. The floor was then rinsed with water and the resultant slurry extracted with a wet vacuum.

Flood Damaged Quarry Tiled Floor Before Cleaning Bearwood

The last part of the cleaning process was to give the tiles and acid-wash using a dilution of Tile Doctor Grout Clean-Up. This is an acidic product that can remove mineral staining and will also counter any alkaline salt deposits in the pores of the tile that could surface as the floor dries later. The floor was rinsed again and allowed to dry out for two days before I returned.


Sealing a Quarry Tiled Hallway Floor

On the final day I first confirmed the Quarry tiles had dried out were ready for sealing. I then sealed the tiles using Tile Doctor Colour Grow which is a fully breathable sealer that would protect whilst allowing moisture in the floor to rise through the tile. This sealer will also enhance the strong natural colour of the quarry tiles. The tiles were quite porous so four coats of sealer were needed, then after drying the floor was buffed with a white pad.

Flood Damaged Quarry Tiled Floor After Restoration Bearwood

The work transformed the floor and my customer was over the moon with the end result.

Flood Damaged Quarry Tiled Floor After Restoration Bearwood

For after-care I left the customer with a complimentary bottle of Tile Doctor Neutral Tile Cleaner. This is a pH neutral product that is safe to use on sealed surfaces and won’t prematurely erode the sealer.


Source: Quarry Tile Cleaning and Sealing Service in Bearwood, Birmingham

Tuesday, August 21, 2018

Renovating a Classic Victorian Tiled Hallway Floor in North London

This 1930’s North London property in Mill Hill had a classic tiled hallway floor laid with black and white tiles in a diamond pattern and reminiscent of the Victorian era some thirty years earlier but still popular at the time the house was built. Mill Hill was first recorded as Myllehill in 1547 and appears to be named after a "hill with a windmill”. Over the years it’s merged with the surrounding towns and is now a desirable suburb in the North London Borough of Barnet.

I first spoke to the owner of the property over the phone to get an idea of what was required and work out a convenient time to take a look at the floor; we often get customers looking for a quote over the phone but this is not always easy to do as you never know what problems you might find with an older floor until you get there.

On inspection I could see there were in fact a large number of loose tiles in the central part of the floor which would need to be reset and grouted, the floor would also need to be deep cleaned and re-sealed with a suitable sealer to get it back to its former glory. I was confident we could soon get the floor looking how it should and after discussing the process, agreed a price and a timescale for the project. The owner was keen to get the job completed as soon as possible.

Cleaning/Repairing a Victorian Tiled Hallway Floor

Firstly, we prepared the area with protective polythene tapes to thresholds, carpets, and door fronts to ensure the surrounding areas were protected. To clean the floor a strong dilution of Tile Doctor Pro-Clean was applied, this is a concentrated, multi-purpose high-alkaline cleaner, stripper and degreaser and is highly recommended for use on natural stone, tile and grout. The tiles were scrubbed with both floor pads and brushes, it is easier to use brushes in the more intricate areas.

Victorian Tiled Hallway Restoration During Cleaning Mill Hill

After the scrubbing we rinsed, and steam cleaned the floor, removing the slurry generated during the cleaning process with a wet vacuum. It was now nicely prepared ready for carrying out the repairs and the cleaning process was useful in identifying those tiles which needed extra attention.

The repairs involved resetting 50 to 60 loose tiles, the process requires carefully removing the tile, scraping out the old adhesive and grout and then replacing with new. The area is cleaned and then when the adhesive has set the tiles are re grouted in a grout chosen to best match the original. Luckily there were no damaged tiles on this floor which made the job easier. Although, we can usually track down replacements when they are needed!

Sealing a Victorian Tiled Hallway Floor

We then left the hallway to dry off overnight, returning the next day we used a moisture meter to check the floor was dry and suitable for sealing. Old floors like these have no damp proof membrane fitted under the floor so can take time to dry out, fortunately we completed this work during warm weather, so all the readings were good.

Victorian style tiles are quite porous, so we found we need to apply give coats of sealer before they were fully sealed. We selected Tile Doctor Seal & Go to seal the tiles, it’s a specially formulated water-based blend of acrylic polymers that adds a durable stain resistant surface and leaves an appealing low-sheen finish. Being water based it doesn’t leave a smell as it dries, and it also a breathable sealer that can cope with the lack of a damp proof membrane ensuring moisture doesn’t become trapped under the floor.

Victorian Tiled Hallway Restoration After Cleaning Mill Hill

The client was very happy with the completed job, the work took a day and half to complete. Considering how many tiles had been loose the job had turned out very well. The floor is now much more manageable for her and the hallway tiles life has now been prolonged.

Victorian Tiled Hallway Restoration After Cleaning Mill Hill


Source: Victorian Tile Cleaning and Polishing Service in London

Friday, August 10, 2018

Cement Screed Covered Victorian Floor Restored in Birmingham

This customer got in touch with me to see if there was anything I could do to restore a Victorian tiled floor they had discovered under carpet in their hallway. Interestingly they had been told previously that the floor was beyond repair and had been quoted thousands of pounds to have it completely ripped up and replaced.

Victorian Hallway Before Restoration Bearwood Victorian Hallway Before Restoration Bearwood

I visited the property in Bearwood near Smethwick, to take a look and could see that there was a section under a cement screed. The floor was in a truly sorry state, so I could see why the other company were not keen on restoring it. Undeterred I did a test clean to see if I could remove the screed which was encouraging however without removing all the screed it would not be possible to see what condition the tiles underneath were in. I agreed with the customer to order some replacement tiles which were needed along with extra ones just in case. The job would take a few days to allow for cleaning, repairing, drying out and sealing. The client wasn’t too optimistic, but I reassured them we could definitely get a good result.

Victorian Hallway During Restoration Bearwood

Cleaning and Repairing a Victorian Tiled Hallway

The first day was spent removing the cement screed which was quite thick in parts, so I went down the route of steaming it first to help soften the covering and then carefully scraping it off. This was quite labour intensive, but it did the job. Once the cement was removed I was left with some tiles that were ok but quite a few needed to be replaced.

Victorian Hallway During Restoration Bearwood Victorian Hallway During Restoration Bearwood

There were also two doorways, one that needed completely relaying and one needed part relaying. Some of the tiles needed to be cut to size, there were many tiles that needed resetting and re-grouting along with grout being applied to the new tiles.

Victorian Hallway During Restoration Bearwood

The next day the tiles were deep cleaned with a 50:50 combination of Tile Doctor Pro-Clean mixed with Nanotech HBU which stands for Heavy Build-Up Remover, which was quite appropriate in this case. This cocktail of tile cleaning products was left to dwell on the tiles for a while then worked in with a black scrubbing pad fitted to a weighted rotary machine. The floor was then rinsed off with water and then the soil extracted with a wet vacuum.

My next step was to give the floor and acid wash to remove any old grout smears and neutralise other mineral contaminates such as salts that can get deposited on the surface of the tiles as moisture evaporates as the floor dries. This is always a risk with old floors where no damp proof membrane exists. To do this I applied a dilution of Tile Doctor Grout Clean-Up which is scrubbed into the tiles with a deck brush and then rinsed off the floor with water and a wet vacuum. The floor was then left to dry out for a couple of days.

Sealing a Victorian Tiled Hallway Floor

I returned to seal the floor and after check it had dried sufficiently applied three coats of Tile Doctor Colour Grow sealer. This sealer seeps into the pores of the tile enhancing the colours and leaves a matt finish which the customer had previously specified. The floor was then buffed with a white pad and the customer left with a bottle of Tile Doctor Neutral Tile Cleaner to clean the floor with moving forward.

Victorian Hallway After Restoration Bearwood Victorian Hallway After Restoration Bearwood

The customer was delighted with the results and left the following feedback on the Tile Doctor feedback system.

"Kieron has done a fantastic job of our Victorian hallway tiles. We had been quoted several really high prices by other companies, but Kieron’s quote was a fraction of these. I initially wondered whether this meant the job wouldn't be as good but after 3 days of solid work the results are fantastic! He managed to transform it to its former glory, a hallway that was partly cemented over, had missing and loose tiles all over the place and was filthy. He definitely does a lot more than just cleaning! We couldn't be happier with the results!"


Victorian Hallway After Restoration Bearwood


Source: Victorian Tile Cleaning and Restoration Service in Birmingham