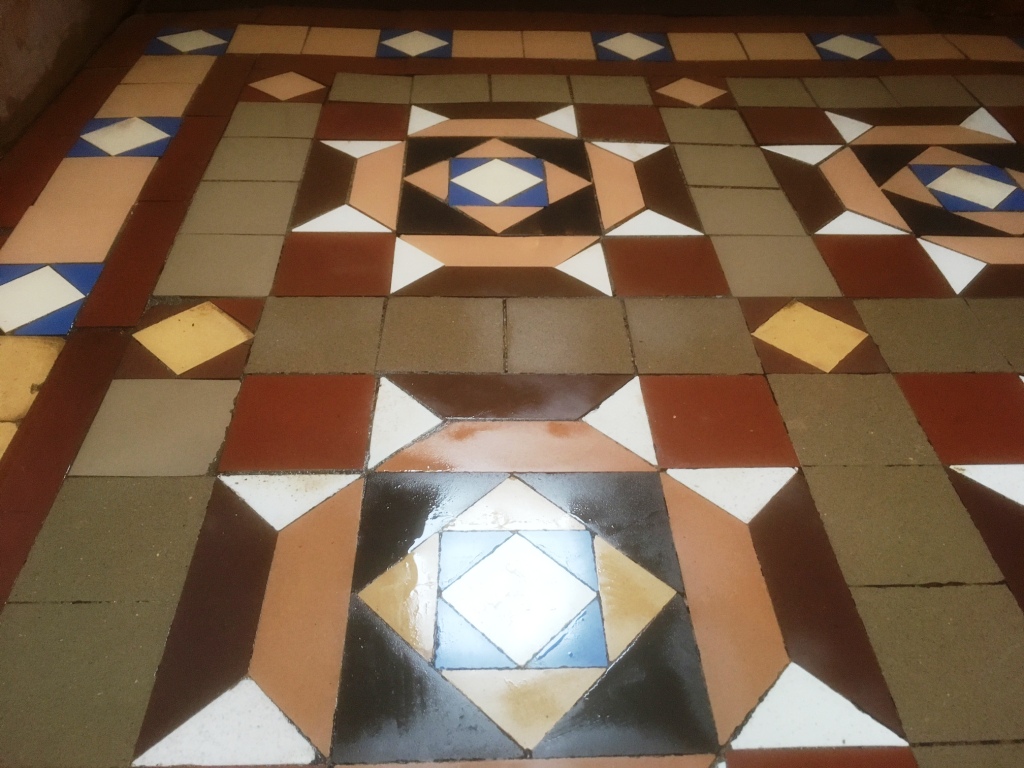
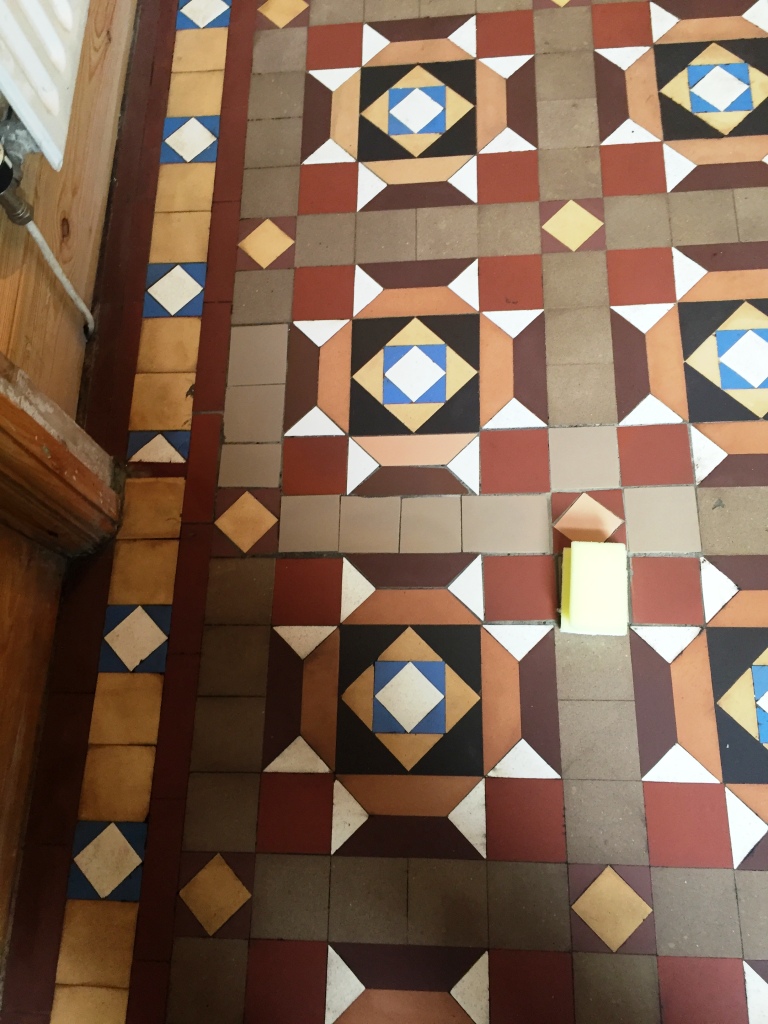
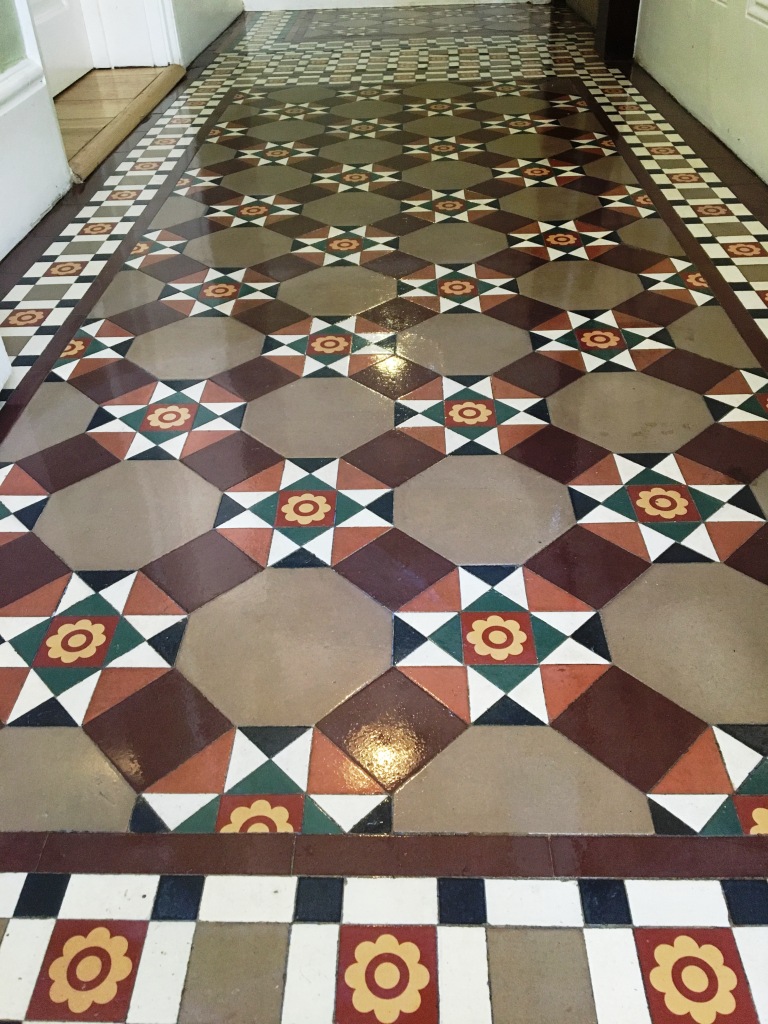
Wednesday, September 27, 2017

How to Cut Vinyl Flooring Tiles

Whenever you lay vinyl flooring in your kitchen or bathroom, you will always need to cut some tiles to fit around cabinets, pillars or doorways. Learn some ways to make cutting vinyl floor tiles easier, neater and safer for yourself.

Vinyl Composition Tile Cutter
If you are tiling the floor of a large kitchen or basement recreation area, rent a special cutter for vinyl tile. It has an L-shaped platform and measuring guides for accurate cuts. The sharp sliding cutter will slice through 9- or 12-inch tiles, and also cuts tiles diagonally.

Utility Knife
Practice using a straight-edged metal ruler and a utility knife before you start the job. Warm the tile with a heat gun before cutting till it is flexible in your two hands, then lay it down on a warm flat surface and cut with firm, steady pressure on the utility knife. Change the utility knife's blade frequently to keep from snagging or shredding the tile.

Minimize the Amount of Tile Cutting
Plan your tile layout on paper before you start placing tile on the floor. A well-planned layout starting in one corner helps you use mostly full-sized tiles. You may have to cut just a few near a doorway or against the lower cupboard base.


Monday, September 25, 2017

Restoring a Faded Victorian Tiled Porch in Scotland

Edinburgh became an increasingly important city in the UK during the Victorian period. Although overtaken by Glasgow as Scotland’s largest city in the early 19th century, Edinburgh experienced expansion and industrialisation, and many areas which had been populated by Georgian architecture were rebuilt with Victorian buildings. Of course, this included many Victorian residential properties, many of which are still inhabited, and still have original Victorian tiled flooring. A lot of property owners choose to keep the original tiles rather than strip them out, and we specialise in restoring and maintaining them. I recently visited a property in Edinburgh to provide a deep clean and fresh seal for some Victorian porch tiles that were looking a bit worse for wear. The job was carried out over the space of two days.

Victorian Porch Entrance Before Cleaning Edinburgh

Cleaning Original Victorian Tiles

On the first day of work, I arrived at the property and immediately began by stripping the floor of any old sealant. Sealers don’t last forever and are worn away over time requiring them to be routinely topped up with a fresh application, however in this case the sealer had worn off completely in most places allowing dirt to become ingrained in the pores of the tile, so the only course of action would be to strip off what was left, clean the floor and reseal. The old sealant was removed using a strong solution of our natural stone cleaner and stripper, known as Tile Doctor Pro-Clean, and our heavy-duty sealer and coating remover, known as Tile Doctor Remove and Go. This combination of products was applied and scrubbed into the stone using a black buffing pad fitted to a rotary machine. The floor was then rinsed to remove any excess chemical residue and the moisture was soaked up. Next, the floor was then burnished using a coarse diamond-encrusted burnishing pad to grind off tough stains and rinsed again with fresh water. Tile Doctor Neutral Tile Cleaner, which is an excellent pH-neutral cleaner for routine maintenance, was then used to complete the cleaning process and the tiles were left to dry completely overnight.

Sealing Original Victorian Tiles

On the second day of work, the tiles had dried off nicely overnight and I was able to return to the property to seal the tiles using five coats of Tile Doctor Seal and Go. This is a topical sealer which provides a high-quality low-sheen finish and protection against ingrained dirt and stains. In this case, the customer had opted for a sheen finish as opposed to a natural-look, matte finish. Comparing the before and after photos, it’s clear how significant a difference routine maintenance can make to the appearance and condition of these original Victorian tiles. The customer was very pleased with the outcome and I recommended the use of our Neutral Tile Cleaner for frequent cleaning in the future. Being PH neutral it won’t prematurely erode the sealer like many acidic supermarket products.

Victorian Porch Entrance After Cleaning Edinburgh


Source: Victorian Tiled Floor Cleaning and Restoration Service in Edinburgh

Saturday, September 23, 2017

Remove Mold and Mildew from Vinyl Flooring

While vinyl flooring is affordable, sturdy, resilient, and durable, mildew can damage this type of flooring, causing unpleasant odors, and even damage to your home foundation if it is not kept in check. Therefore, cleaning your vinyl floors frequently is important.

As you clean your floor, make sure that your body does not come into contact with mold. Wear long pants, long sleeves, a face mask and goggles to protect your skin and lungs. It is also important that you select a cleaning agent that is non-toxic and safe for your skin. White vinegar is a good alternatives to bleach or commercial cleaners because it produces an environment that is too acidic for mold to survive. Another alternative is boric acid, although boric acid is toxic if swallowed. If you go with boric acid or vinegar, mix your cleaning solution with one part vinegar or boric acid to four parts water.

What You'll Need:
  • Broom
  • Dust Pan
  • Garbage Pail
  • Bucket
  • Strong Bristle Scrub Brush
  • Rubber Gloves
  • Small Scrub Brush or Toothbrush
  • Water
  • Bleach or another Oxygenated Cleaner
  • Paper Towels or ClothTowels
  • Super Absorbent Cloth
  • Clean Scrub Brush
  • Spray Bottle Filled With Mildew Stain Remover
  • Sponge Mop
  • Clean Sponge
Step 1 - Clear the Floor
Remove furniture, carpet mats, and other such items from your floor. Sweep the floor and empty the contents from your dust pan into a garbage pail.

Step 2 - Mix Your Cleaning Solution
Fill your bucket with 1 part household cleaning detergent and 5 parts water. A good alternative to use is bleach. If you are not comfortable with bleach, you can also try a commercial oxygenated cleaner.

Step 3 - Start Scrubbing
Rub the floor vigorously with a strong-bristle scrub brush. Immerse the scrub brush several times into the solution and continue scrubbing. Use a small brush or a toothbrush to scrub mold that may be hiding in nooks, crannies, and corners.

Step 4 - Soak Up the Water
Use paper towels or cloth towels to soak up all of the excess water. Discard your paper towels or wash your towels in the washing machine. Be sure to wash them separately so that the bleach or cleaning solution does not come into contact with anything else. 

Step 5 - Scrub Some More
Using a clean scrub brush, scrub the floor completely again, but this time use only clean water. Work in sections and wipe up the moisture with a super absorbent cloth or towel.

Step 6 - Allow Your Floor To Dry
Leave the floor exposed to the air to dry completely.

Step 7 - Spray with Mildew Stain Remover Or Bleach
Use a spray bottle to spray the floor with a mildew stain remover. Let it sit for 2 to 3 minutes to activate. Rub the floor with a sponge mop to spread the stain remover evenly. Let it dry.

Step 8 - Rinse Your Floor
Use clean water and a sponge to rinse off the mildew stain remover. Cover the floor section by section, until you have treated the entire floor. 

Step 9 - Let Your Floor Dry

Allow your floor to dry completely before putting anything back on it.
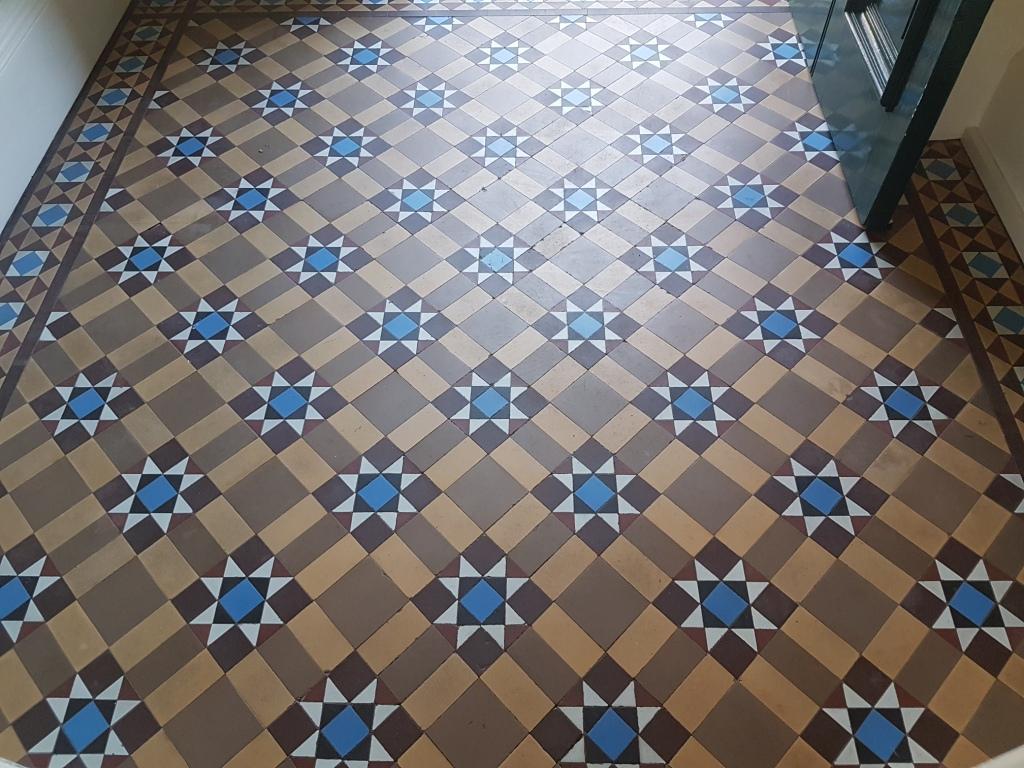

Tuesday, September 19, 2017

Dealing with Multiple Tile Problems at a Leeds Property

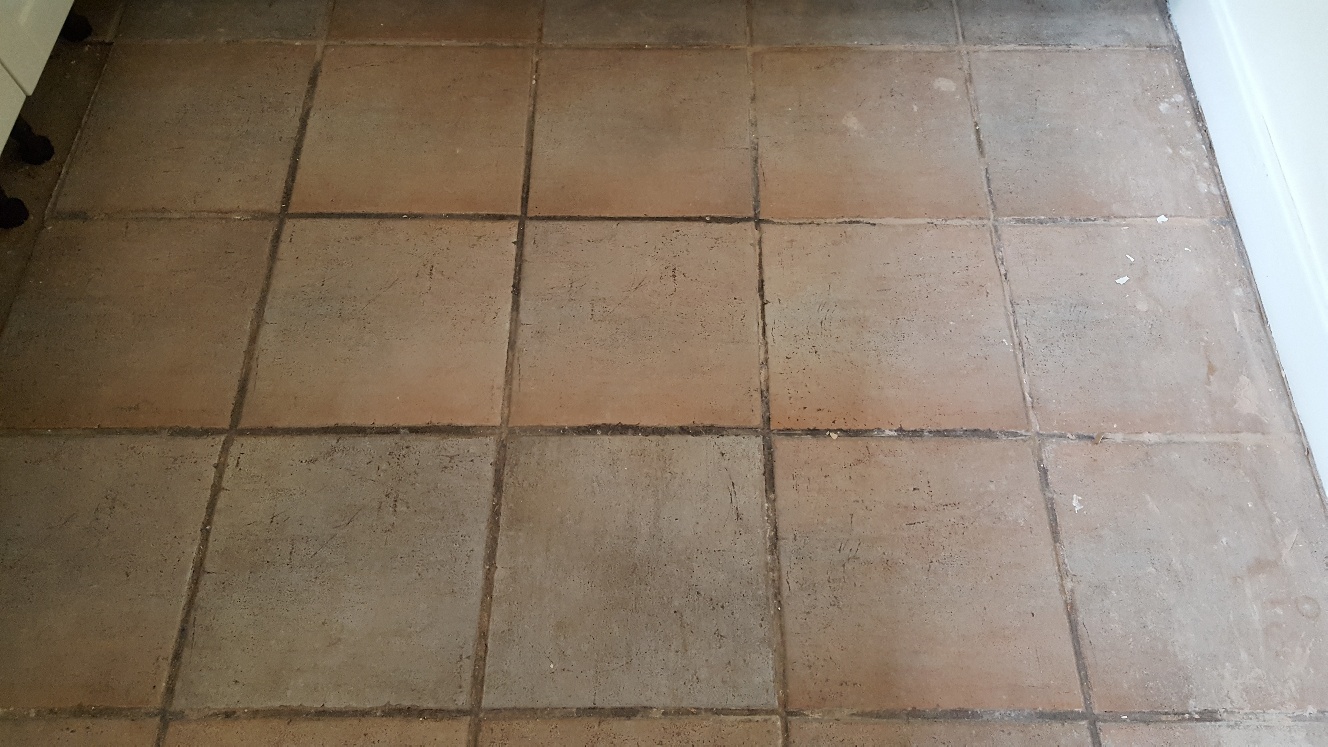
At Tile Doctor, we have completed a wide variety of restoration jobs, from very large floors in hotels and restaurants to smaller floors in kitchens and bathrooms. We also often work on different surface types, including shower cubicles and stone or tiled window sills. I recently visited the small village of Sherburn-in-Elmet in Leeds to complete two small, but very different, jobs for a customer. The first was the restoration of a Ceramic tiled kitchen floor that was really looking worse for wear. The grout lines had accumulated a lot of dirt over the years and the tiles themselves had been stained by what appeared to be plaster dust.

Ceramic Floor Tiles Before Cleaning in Sherburn in Elmet Kitchen

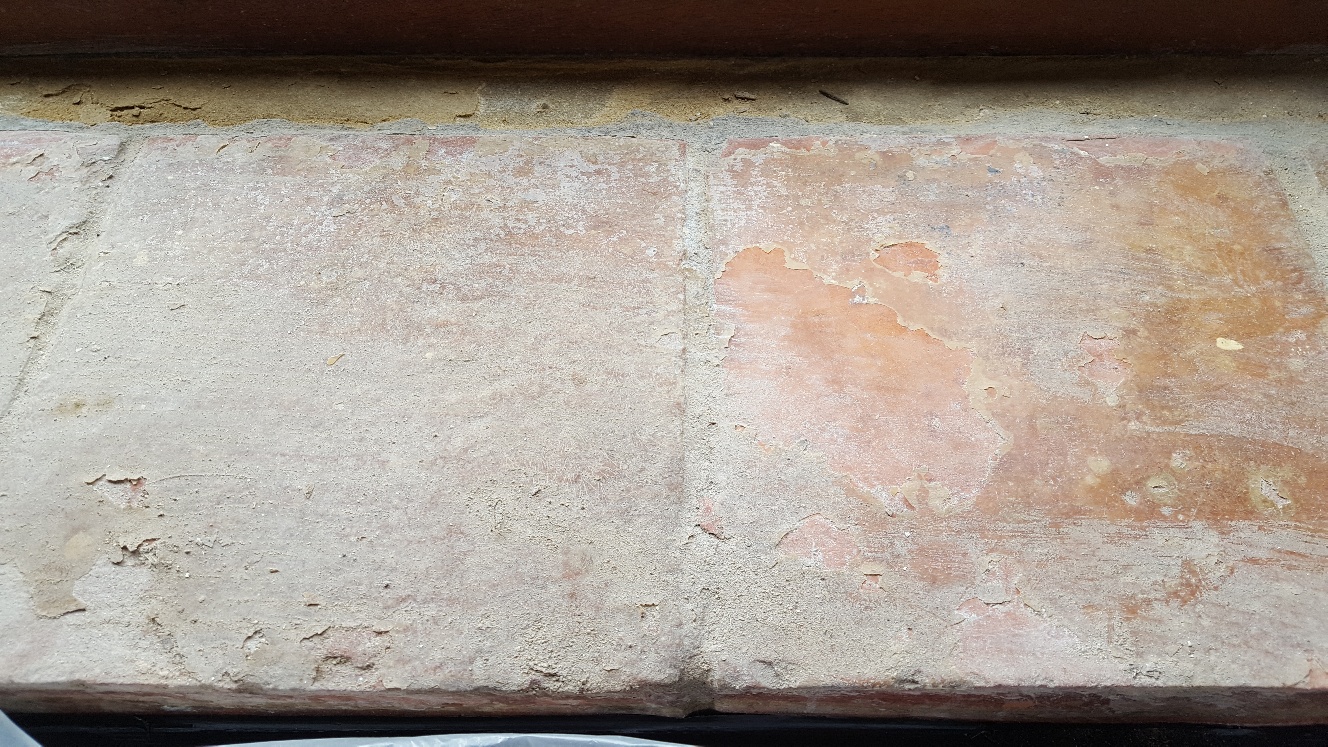
The second was the restoration of several window sills made from Catalan-style Terracotta. The stone had originally been covered in four to six coats of Yacht Varnish, which had left an unsightly white crusted covering. Naturally, the customer was keen to see the sills restored to their original, natural look.

Catalan Terracotta Window Sill Sherburn in Elmet Before Cleaning

Cleaning a Ceramic Tiled Kitchen Floor

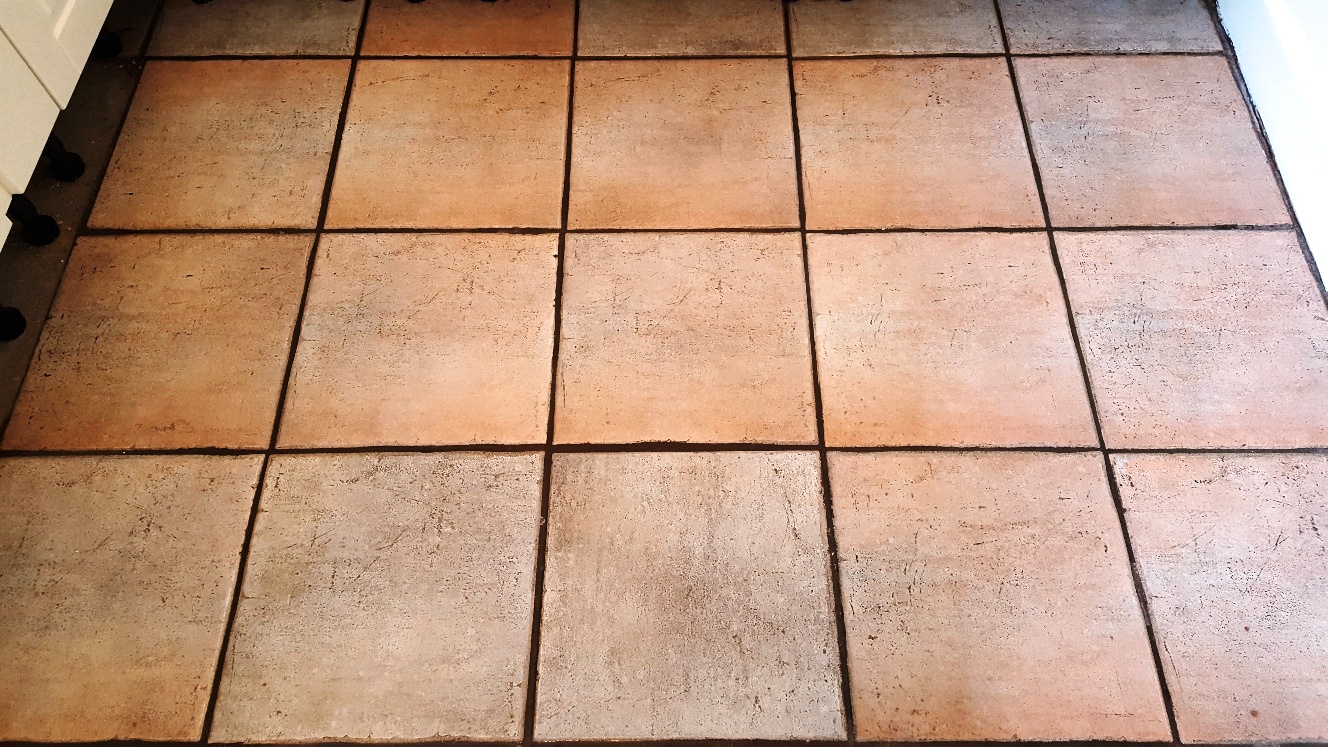
After removing the kickboards from underneath the kitchen units, I used a handheld scrapper and a wire brush to manually remove most of the plaster dust. Next, I applied a solution of Tile Doctor Pro-Clean, which is a high alkaline tile and grout cleaner, across the floor. By scrubbing the Pro-Clean into the tiles and grout I removed all the dirt and staining. As the tiles were fully glazed Ceramic, they did not need to be sealed.

Ceramic Floor Tiles After Cleaning in Sherburn in Elmet Kitchen

Cleaning and Sealing Terracotta Window Sills

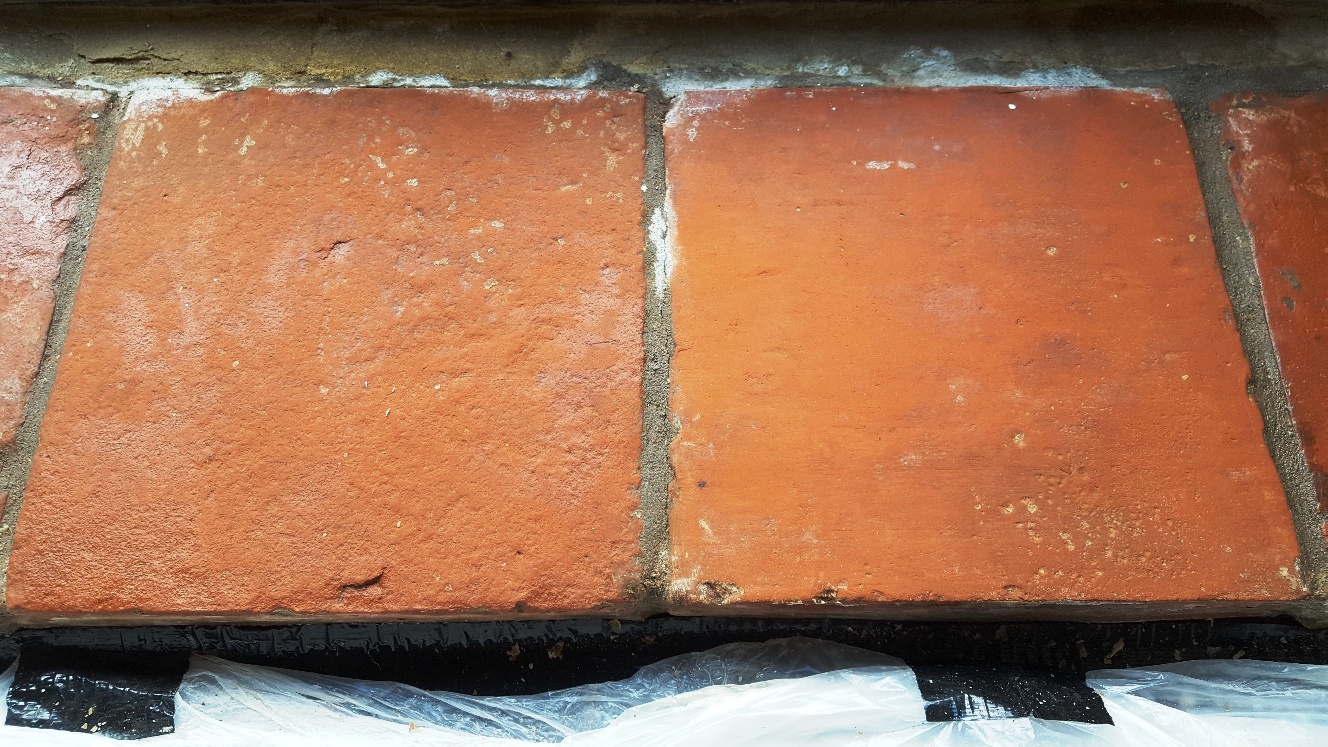
The white crusted powder covering the Catalan Terracotta window sills was caused by Yacht Varnish, which would need to be removed before I could properly clean the stone below. I removed it using a combination of Tile Doctor Remove and Go, which is a heavy-duty stripper, and Tile Doctor NanoTech HBU, a powerful cleaner which uses nano-sized particles penetrates difficult-to-reach areas. Together they make a powerful stripper/cleaning solution. This solution was left to work its magic for two hours, before I applied a handheld scrapper and wire brush to remove the white coating. Next, I rinsed the sills with water and then deep cleaned them again with Tile Doctor Pro-Clean. The window sills were subsequently left to dry off completely overnight. I popped back to the property the next day to seal them with two coats of Tile Doctor Colour Grow, an impregnating sealer which intensified the natural shades in the stone and provided a natural-looking matte finish.

Catalan Terracotta Window Sill Sherburn in Elmet After Cleaning

Two quick jobs completed to a high standard and one very satisfied customer.


Source: Terracotta Tiled Floor Cleaning and Restoration Service in Yorkshire

Thursday, September 14, 2017

Restoring Stained Victorian Hallway Tiles in Lancashire

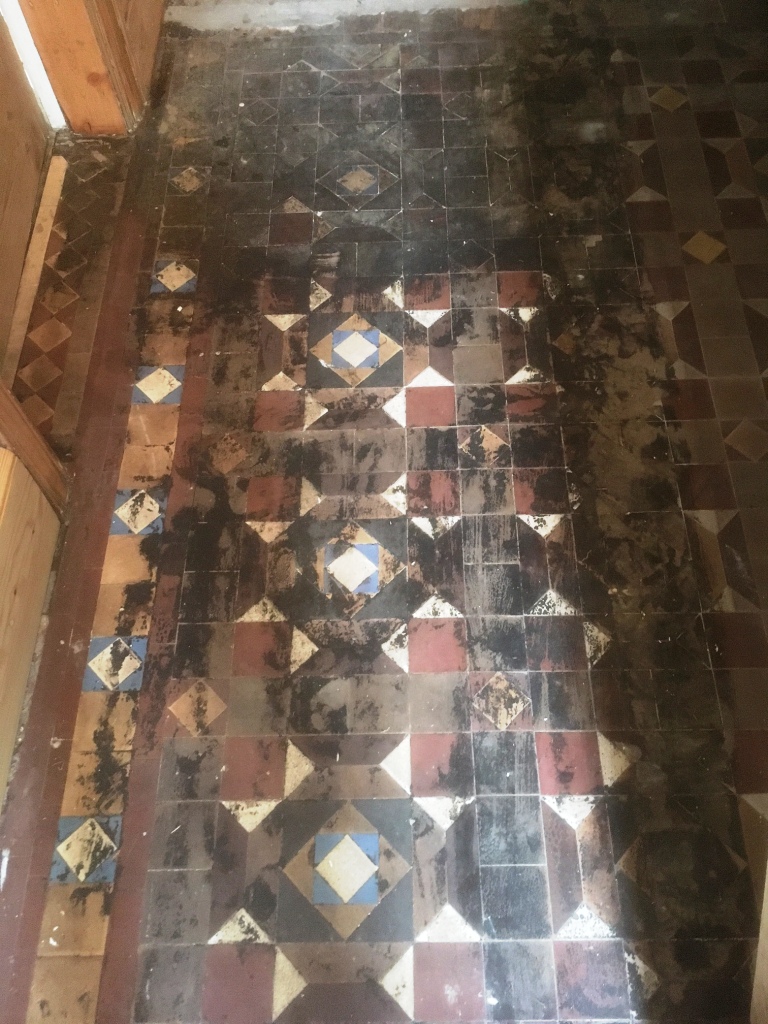
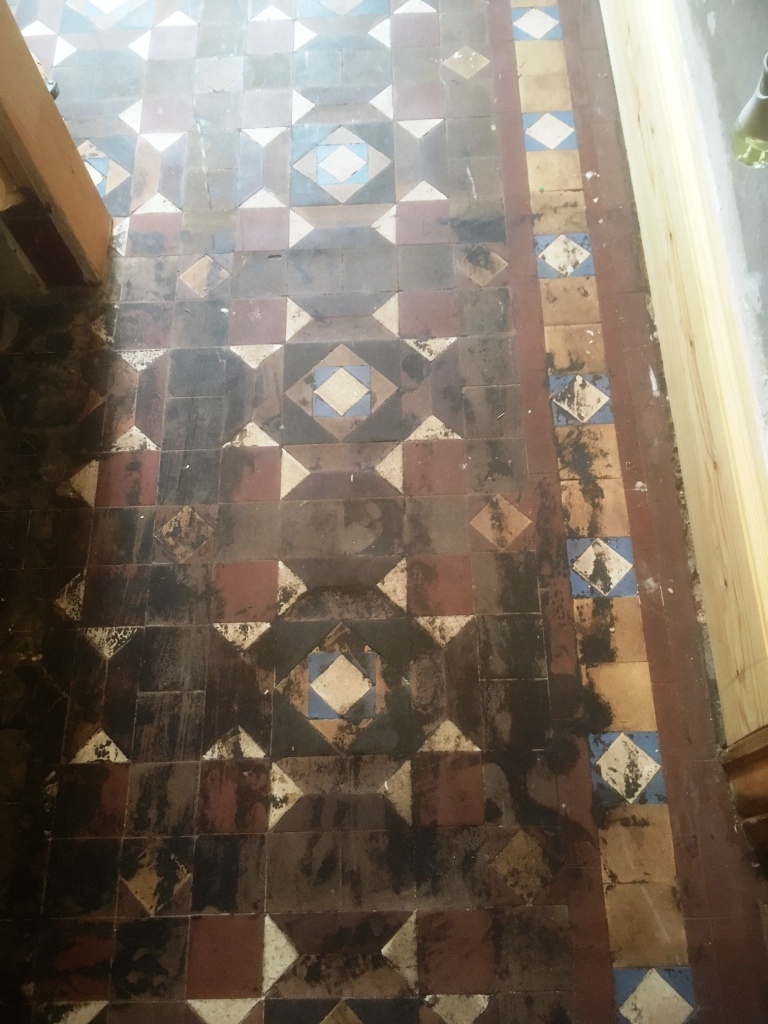
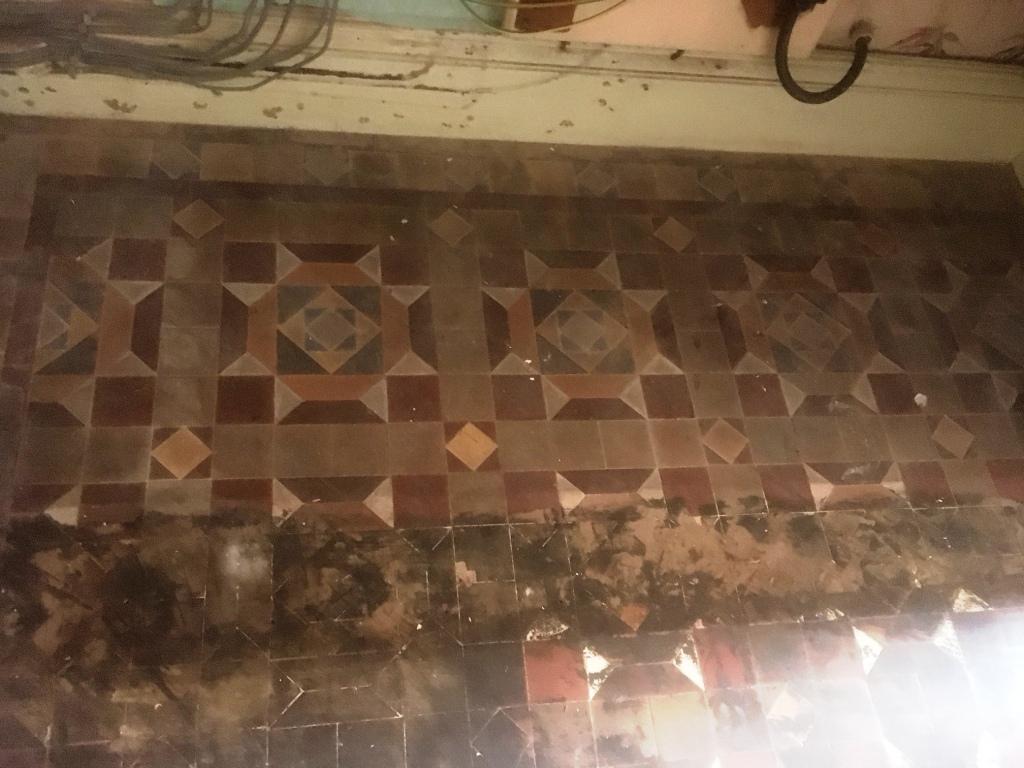
This old Victorian tiled Hallway floor, laid in a geometric pattern, at a house in Barrow in Furness was a challenging project. The tiles were extremely dirty and also stained with Black Bitumen which has been used as an adhesive, however we have come across these sorts of problems before and so I was confident it could be resolved.

Geometric floor before Restoration Barrow in Furness Geometric floor before Restoration Barrow in Furness

Deep Cleaning an Old Victorian Tiled Floor

I roped in Heidi and my son Lewis who spent a whole day cleaning with chemicals, steam, buffing pads and unfortunately the results were far from satisfactory; the customer wasn't happy and Heidi wasn't happy with it either. It was clear that the black bitumen had penetrated deep into the pores of the clay and becoming so embedded that no chemical or technique we were using would shift it fully.

Geometric floor before Restoration Barrow in Furness

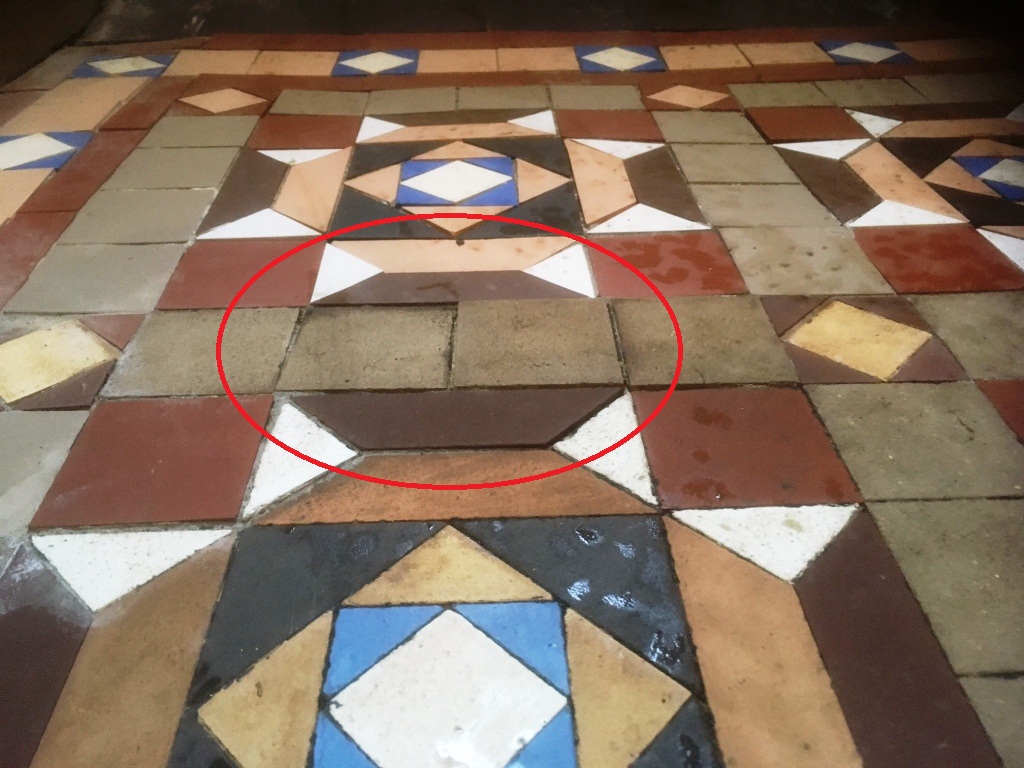
To top it off I had gone out earlier to tile the old mat well with matching tiles before we started the cleaning but due to the depth of the floor matt. The matt well was at least 35mm so it was clear I couldn't use standard floor adhesive. I opted instead for a sand cement mix, similar to what the Victorians would have used originally. This filled up the depth and allowed me to tile and grout the same day, however overnight there was a bit of shrinkage and some of the new tiles settled unevenly.

Geometric floor before Milling Barrow in Furness

I racked my head for a solution to both issues and decided the best course of action would be to Mill the clay tiles to remove the Bitumen and smooth down the uneven effect of my tiling. This is not something we would normally do on a clay tile as this system can leave scratches which potentially would look worse that the dirt. After I had milled the Tiles down with a course pad fitted to a heavy buffing machine and removed all the issues I then counteracted any scratches left over using a higher grit milling pad. This solution fully resolved both issues leaving it ready for the final step of sealing.

Geometric floor After Milling Barrow in Furness

Sealing an Original Victorian Tiled Floor

The floor was left to dry off overnight and we returned the next day to seal the tiles using Tile Doctor Colour Grow, which is a matt finish, fully breathable and colour enhancing sealer which really lifts the colour of the stone or in this case clay tile. Colour Grow is impregnating – meaning that it penetrates the pores of the stone to fill them and prevent trapped dirt and stains. We recommend Colour Grow for both internal and external applications and especially for areas where no damp proof membrane is evident, since the sealer allows for the floor to breathe moisture.

Geometric floor After Restoration Barrow in Furness Geometric floor After Restoration Barrow in Furness

There were plenty of problems to overcome and It took a lot of work but I’m pleased to say the floor was transformed by our efforts and now looks fantastic and I’m sure has added a lot of value to this period property.


Source: Victorian Floor Tile Cleaning and Renovation Service in Lancashire

Wednesday, September 13, 2017

Installing a Vinyl Cove Base Step-by-Step

A vinyl cove base is an easy to install option for those who have installed vinyl flooring. They resist scuffs, look great, and are very easy to clean. Installing them is simple providing you have the right tools and a little patience. Here’s what you need to do.

Materials Needed:
  • Utility Knife (A new blade is recommended)
  • Cove Base
  • Adhesive
  • Marker
  • Framing Square

Step 1- Choosing the Cove Base


You need to choose your vinyl cove base first. Many people will choose to use a complimentary color for the base, others will want it the same color as the wall. The choice is yours. You will be able to find cove base in just about every color under the sun.

Step 2- Proper Measurements

Measure to find how much molding you will need to install. Start in the corner when measuring and work your way out. The molding will need to be installed first, so this is important.

Step 3- Start Laying It Out

Lay a piece of the base down on it’s face on top of a piece of wood. Measure this to match the molding you measured earlier. Use the framing square to mark a line.

Step 4- Cut the Cove

With the base cove still lying on the flat wood, cut through it. Press down firmly on the framing square to ensure your cut is even. You may have to make several passes at it to cut it all the way through.

Step 5- Glue It Up

Use the adhesive you purchased made specifically for vinyl and apply it to the wall. Press the cove firmly against the wall to make sure you have an even bond.

Step 6- Work with Second Strip

Now you can start to measure for your next strip. Attach the second strip next to the first one. Hopefully you’ve made perfectly straight cuts. A straight cut will eliminate noticeable seams and you won’t be able to see where the two pieces butt against each other.

Step 7- Working with Inside Corners


Use the inside corner of the wall to carve a curved portion. You want this to be seamless so it won’t look off. Once you have a curve cut out you can adhere it to the wall using the same glue.

Step 8- Outside Corners

Use your marker to place a mark on the back of a piece of cove. This is the piece that will be placed on the outside corner. Bend the two ends together to form a slight seam to make it easier to apply.

Step 9- Glue the Corners

You will want to slice a little less than half of the bend piece to make it easier to install. Don’t slice all the way through, just slightly on the back side. Adhere this piece to the wall.

Step 10- Finish the Room
Continue this process all around the room until you have your vinyl cove base installed completely.

You will want to wait to clean the new cove base until the adhesive completely dries. It may feel secure long before it has cured. Follow the directions on the glue to find this amount of time.

A cove base is a great way to add a distinctive touch to any wall. With the ease of installation, this is a good project for anyone to try.


Friday, September 8, 2017

Guide To Replacing Linoleum Tile

Linoleum tile is an inexpensive vinyl flooring material that is commonly used in kitchens, bathrooms, laundry rooms, and mud rooms. The tile is quite durable and cleans easily.

There are times, however, when you will have to replace a tile, or whole sections of tile, because of water damage, cuts or just general wear and tear. Replacing these linoleum tiles is a project that can be done within a few hours with basic tools.

Materials Needed


There is not a lot of specialized machinery involved in replacing a linoleum tile except for the vinyl tile cutter. You can use a utility knife, but a vinyl tile cutter works quicker and makes straighter cuts. They can be rented or bought at your local home center.

  • Replacement tile
  • Vinyl tile cutter
  • Utility knife
  • Vinyl tile adhesive
  • Vinyl roller
  • Scraper
  • Sponge
  • Bucket of warm water
Replacement Tiles

If your linoleum tile has been on the floor for several years, there might be a good chance that the tile you need is no longer being manufactured. If this does happen you might have to replace all the tile in that room or area. It might be that the home center does not have them in stock, but can order them from the manufacturer.

Remove Damaged Tiles

Once you have all your tools and replacement tiles gathered you can then remove the old, damaged tiles. If there is a section already missing from the tile that you can insert the scraper under, then begin prying the rest of the tile up. If not, then use your utility knife to score the tile, along the seam, until you get to the underlayment. Insert the scraper and begin to pry up the damaged tile.

Clean Floor

One the damaged linoleum tile, or tiles, are removed then you begin to remove the remaining adhesive, glue residue or pieces of tile that didn't come up. Wet the sponge and scrub the area to loosen up the adhesive and residue. Then, using the scraper, go over the area to remove the debris until the surface is flat and smooth. Vacuum up the particles.

Lay New Tiles


Once the surface is free from any dirt, or tile particles, you can then spread out the new adhesive with a notched trowel. Spread out evenly over the entire surface keeping a uniform level. If you are using the peel-and-stick variety, you can simply press the tile into place.

Lay the new tile onto the adhesive and press firmly. Use a small, heavy roller to get rid of any air bubbles, and roll until flat. Check to make sure the seams are together and use seam adhesive to keep them from curling up and to form a barrier for protection from water.

Clean and Enjoy

Immediately clean any adhesive that escapes from under the tile while you are pressing it with the sponge and warm water. Let it set for a day and then mop, or use a sponge, to wash the entire area.


Sunday, September 3, 2017

Renovating an original Victorian Tiled Hallway in Surrey

Esher is a small suburb in Surrey, situated just outside London. It was a fashionable area to live in amongst royalty and the aristocracy in the Victorian period, and during this time many buildings were built. One such building has since been turned into a block of separate flats, and some of the flats still contain the original Victorian tiles in the hallway. I was contacted by one of these flat owners about restoring their tiles back to the best possible condition. Interestingly this customer’s tiles were part of a larger floor that had been divided between two flats.

Victorian Floor Tile Before Cleaning Esher

Cleaning Original Victorian Tiles

I began the restoration by spreading Tile Doctor Remove and Go across the entire set of tiles. Remove and Go is a heavy-duty stripper that helped to loosen and remove old glue deposits where carpet had been laid over the tile, it will also strip off old sealers and release ingrained muck. The Remove and Go was worked into the tile and grout with a stiff brush and then the soiled solution rinsed off and extracted using a wet vacuum. I followed by this applying a coarse 200-grit diamond encrusted burnishing pad, fitted to a handheld buffer, to grind away the particularly stubborn dirt and stains to restore the appearance of the stone. Afterwards, I rinsed the tiles again with water and soaked up the resultant slurry with a wet vacuum. I noticed that there remained several ingrained stains dotted across the floor, so to remove these I aggressively burnished the affected areas with a very coarse 50-grit handheld diamond block. This essentially removed the very top layer of the stone, taking with it the ingrained marks. Next, I dried the area with a large blower and heat gun. Under normal circumstances, 48 hours needs to pass before the tiles can be sealed, but as this was a small area I was able to dry it very quickly. After carrying out a damp test, I determined the tiles were ready to be sealed.

Sealing Original Victorian Tiles

To seal the Victorian Tiles, I applied six coats of Tile Doctor Seal and Go sealer, which provides a high-quality sheen finish, as well as plenty of protection for the future. Tile Doctor have a range of suitable sealers available including Colour Grow which provides a matte finish – it’s just a matter of personal choice for the customer.

Victorian Floor Tile After Cleaning Esher

The outcome of the restoration was fantastic and the customer was very pleased, leaving the following testimonial. "Promptly organised, delivered when promised. Good looking job when complete. Well done."


Source: Victorian Tile Cleaning and Renovation Service in Surrey

Friday, September 1, 2017

How To Fix Water Damaged Linoleum Tile

Water damage to your linoleum tile is a common occurrence in areas such as a bathroom, entry way, or even in the kitchen. Spills, water leaks or just walking on them with wet shoes can cause water to be trapped under the tile and cause the adhesive to give way or cause stains.

Repairing the linoleum tile that has been damaged by water is a easy, straightforward process. The key to making the repair a success is the initial preparation.

Materials Needed

There are a few basic tools needed for repairing your linoleum tiles.
  • Matching Vinyl Tiles 
  • Vinyl Tile Cutter or Utility Knife 
  • Straight Edge 
  • Scraper 
  • Tile Adhesive 
  • Tile Roller 
  • Warm Water and Sponge 
Remove Damaged Tile

Begin your linoleum tile repair by lifting out the water damaged tile. Using your utility knife, make a few passes with it to score the damaged tile. Using your scraper edge, pry underneath and lift the tile up. You may have to remove several pieces rather than just 1 full tile.

Matching the Tiles

The good thing about linoleum tile is that you can match it by taking a piece into the hardware store once you have it removed from the area. The tile may have to be ordered from the manufacturer if the home center doesn't have in stock.

Prepare Floor

Once you have the matching linoleum tile, then get the floor ready for the new tile.

  1. Check the underlayment of the floor for more water damage. If the underlayment is also damaged you will have to do a more extensive repair. 
  2. Scrape off old adhesive and debris until the floor is clean. 
  3. Use warm water and sponge to wash the surface down and clean it any type of remaining dirt. If after the warm water wash, there is still more adhesive residue left, then continue scraping, and washing, until it is fully removed. 
  4. Vacuum the floor to remove any left over clumps of tile or adhesive. 
Install New Tile

There are 2 types of linoleum tile that you can be using at this point. The first is a peel-and-stick type of linoleum tile. The second type will have to be installed with the use of an adhesive that must be spread out like mortar.

  1. Apply adhesive to floor. 
  2. Using notched trowel spread out the adhesive for a complete covering. Make sure that the entire area is uniformly covered. 
  3. Clean up any adhesive that gets on any other tiles immediately. You can do this with a sponge and warm water. 
  4. Lay down new tile and press firmly into place. Use a roller to make ensure there are no air bubbles under the tile and to make a firm contact with the tile and the adhesive. 
Clean and Let Sit

Once you have the tile installed, clean off any adhesive that came through the seams with a sponge and warm water. Then let the tile sit for a day to ensure a firm bond.


Source: www.DoItYourself.com