Thursday, October 27, 2016

Renovating Dirty Quarry Floor Tiles

This customer had just bought a house in the small Shropshire village of Nesscliffe. Like many new property owners, she was keen to make some changes to the interior decoration, deciding to pull up the carpet they she didn't like that covered almost the entire ground floor of the house. Upon doing so she and her partner discovered a large area of original Quarry tiles.

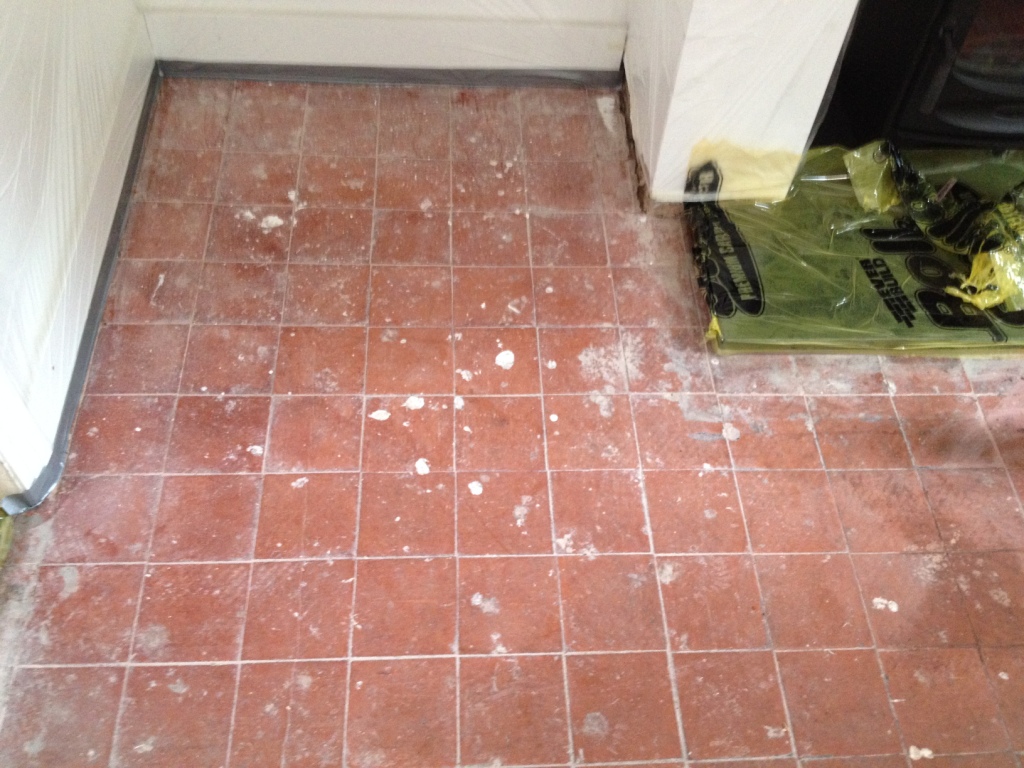
Modern quarry tiled floor in Nesscliffe before cleaning

They decided that instead of replacing the carpet with a new one, they would keep the original floor and attempt to restore its condition. However, their efforts to restore the tiles by themselves proved ineffective - many of the cheaper, supermarket cleaning products were not suited for the job of removing years' worth of dirt and stains.
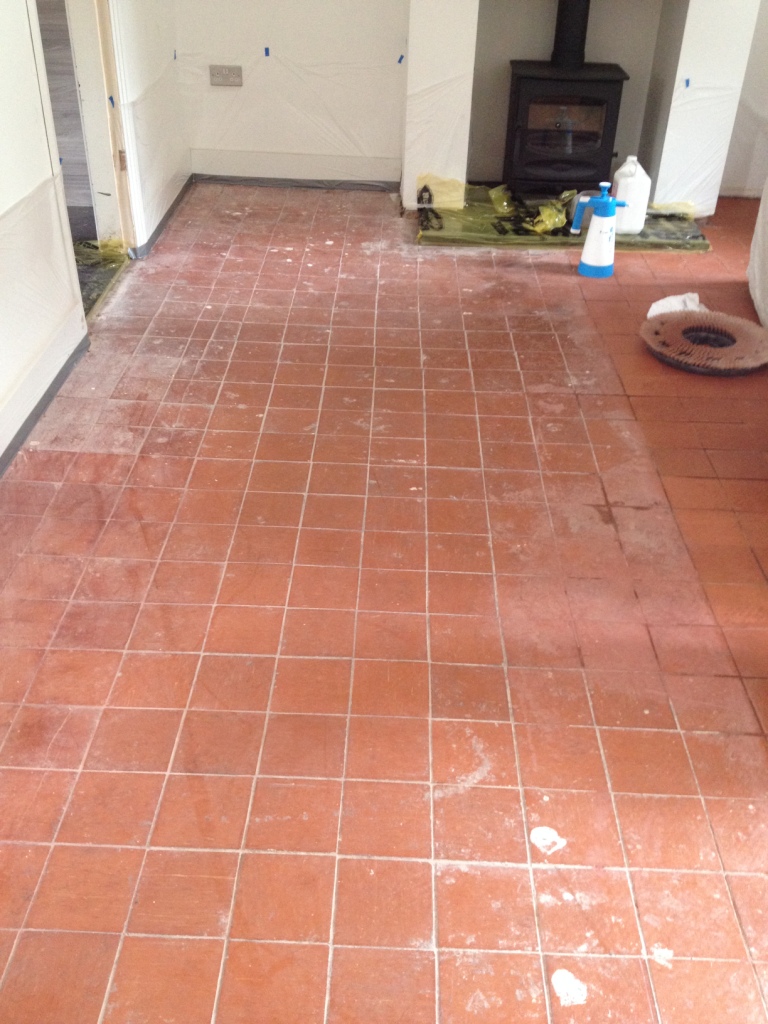
Modern quarry tiled floor in Nesscliffe before cleaning

At that point they decided to call me. I visited the property and ran a test clean to see what could be achieved. The customer was more than happy with the initial results and booked me in to undertake the full restoration.

Cleaning Dirty and Stained Quarry Tiles

The most noticeable problem with the tiles was a series of paint splashes and plaster deposits covering almost the entirety of the floor, the result of previous decoration work and the installation of carpet. I removed these by applying a strong dilution of Tile Doctor Pro Clean and working it into the tiles using a scrubbing brush fitted to a rotary machine, with the alkaline cleaner reliably breaking down the stubborn paint splashes. I then worked the product into the grout lines too using a grout brush. To tackle the plaster and cement-based residue I used Tile Doctor Grout Clean Up, a phosphoric acid cleaner which removes heavy stains. Following the cleaning, I left the floor to dry for a week to allow for any excess moisture to evaporate.

Sealing Quarry Tiles

On my return to the property I immediately checked whether the floor was dry enough to be sealed. We always do this as excess moisture can very easily effect the performance of the sealer. Thankfully the floor was completely dry and I was able to seal the tiles using five coats of Tile Doctor Seal & Go. Seal & Go is a topical sealer, meaning it builds up a layer of protection again dirt and stains on the surface of the stone. We recommend it for tiles such as Quarry, Victorian and Slate. While offering surface protection it also provides a pleasing low-sheen finish.

Modern quarry tiled floor in Nesscliffe after cleaning

The customer was really pleased with the result. Within a week the newly discovered Quarry tiled floor had been transformed from an apparent lost cause to a real asset to the home of the new property owners.
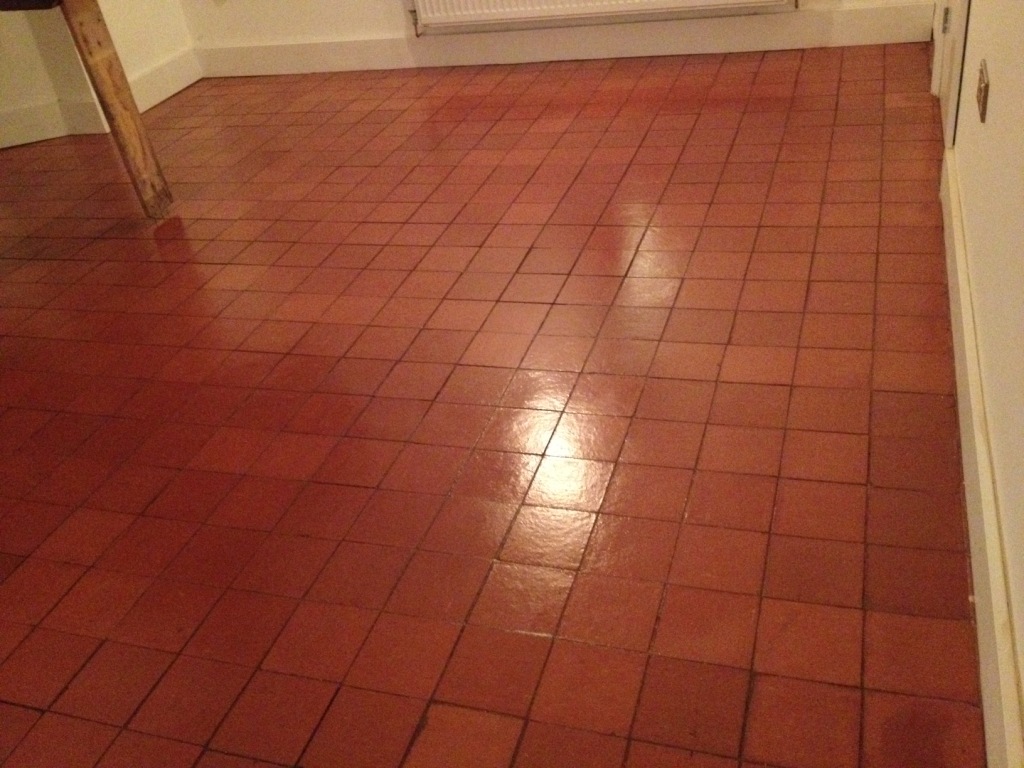
Modern quarry tiled floor in Nesscliffe after cleaning


Source: Quarry Tiled Floor Cleaning and Restroation Service in Shropshire

Wednesday, October 26, 2016

How to Repair Marble Floor Etching

You can repair a marble floor if you have accidentally etched the surface. Many assume it's difficult to do but is actually simple. A marble floor is very expensive and you want to not only protect your investment but also preserve the beauty of your home. Marble is softer than granite and concrete which means etching it is easier. When you repair a marble floor you have to take great care I doing so because of its soft properties as you could easily damage it more. It is important to not panic when you find that the marble floor is etched as they are fairly superficial. The article that follows will show you how to repair a marble floor that is etched.

What You'll Need
  • 120-grit sandpaper
  • Radial sander
  • Tack cloth
  • Liquid wax
  • Polyurethane sealer
  • Two-part clear epoxy
  • Plastic spoon
  • Putty knife
  • Bucket
  • Water
  • Rag

Step 1 – Surface Preparation

In order to remove etching from a marble floor you have to first prepare the area. This is especially important if you are not going to be working in a localized area of the marble floor. Soak a rag in ordinary water and squeeze out the excess then wipe the floor down. Doing this not only cleans the surface of the marble floor but also highlight etches.

Step 2 – Remove the Finish

A marble floor is sealed with polyurethane, which protects the surface from damage while maintaining a brilliant surface. Etches in the marble floor are often on the surface of the finish and not directly on the marble. It is important to remove the finish slowly because you may repair the marble floor inadvertently in this Step. Attach a piece of 120-grit sandpaper to the radial sander and use medium pressure as you gently sand away the finish. Continually run your hands over the area to check to see etches are still there. The finish will be removed from the marble floor when it appears dull and somewhat milky white. Use the tack cloth to wipe down the marble floor to remove the dust. This will help you tell that etches are gone or if they remain and the finish is gone.

Step 3 – Remove Etches

Removing etches in marble is fairly simple because it is a softer material than granite or concrete. Use a fresh piece of 120-grit sandpaper attached to the radial sander. Instead of using medium pressure you will want to press firmly directly on the etch. Never stop moving the sander because if you leave it in one place the sander will further damage the marble floor. Use a tack cloth to remove the particles of dust and wipe it down with a damp rag. This will show you if you need to sand the floor more or if you can finish the repair.

Step 4 – Finishing

You can complete the repair of a marble floor by applying a thin layer of wax and buffing it until it shines. You will then paint on at least two layers of polyurethane. Wait for it to dry prior to using the marble floor.

Tuesday, October 25, 2016

Repairing Scratches in Polished Travertine

Travertine, a form of Limestone, is a highly coveted stone that had been in use as a building and flooring material for hundreds of years. In fact, the Romans used Travertine to build the famous Colosseum, the largest building in the world that was built primarily from the material. It is understandable, then, that anyone who owns a Travertine tiled floor would want to ensure its regular cleaning and maintenance, especially given that Travertine is a relatively soft stone in comparison with other stone, is easily damaged and is naturally pitted. This customer, who lives in the town of Hunt in Berkshire, was keen to have her Travertine tiles deep cleaned, several deep scratched removed and for the pitted holes to be filled.

Scratched travertine tiled floor before cleaning in Hunt

Burnishing and Cleaning a Scratched Travertine Tiled Floor

To clean the Travertine floor, I firstly used a hot clean and capture system, which essentially involves the application of hot water to the floor under high pressure. The system then captures the dirty water and transports it back to a tank on our van. It's a highly efficient method for cleaning large areas in a short space of time, with great results. Next, I treated the pitted holes in the Travertine were filled with a coloured matched resin. Pitting is a form of corrosion that occurs naturally in this type of stone, and can be quite unsightly if not treated. Additionally, it’s not unusual for pitting to be made worse by the constant use of weak acid cleaning products which can actually erode the calcium in the stone. As mentioned, the tiles also suffered from deep scratches in parts, and these were removed using a process we call burnishing, which involves the application of diamond encrusted pads to polish the stone. The scratches were polished out using Coarse 100 and 200 grit diamond pads.

Scratched travertine tiled floor repaired in Hunt

The whole floor was then burnished using the four pad Tile Doctor burnishing system, starting with a Coarse pad and working through Medium, Fine and Extra Fine pads, with rinsing in between each pad and a final rinse at the end of the process. I left the floor to dry off fully and retuned later to enhance the polish further using Tile Doctor Shine Powder, a crystallising powder product which provides a very durable and deep shine on the Travertine.

Sealing a Travertine Tiled Floor

Having successfully dealt with all the problems affecting the Travertine, my last job was to seal the whole floor using Tile Doctor Colour Grow. Colour Grow is an impregnating, colour enhancing sealer that we recommend highly on quality stone such as Travertine, Limestone, and Marble due to the fact that it provides excellent protection and emphasises the wonderful natural shades in the stone.

Scratched travertine tiled floor after restoration in Hunt

The customer was extremely happy with the results and sent over the following feedback for Dennis who worked on the floor: "Dennis was brilliant - very professional and conscientious - he worked so hard and in 30+ degree temperatures! He has rejuvenated our Travertine flooring to a beautiful, almost mirror like effect - it is now more amazing than it was when it was first laid down."

Scratched travertine tiled floor after restoration in Hunt


Source: Travertine Floor Cleaning and Polishing Service in Berkshire

Monday, October 24, 2016

How to Install Terrazzo Floor Tiles

terrazzo floor provides a unique look that is unmatched with any other type of flooring. Even though this type of flooring is commonly associated with a site-finished solid piece of flooring, it is now becoming more common in tiles today. Follow the simple steps below to effectively install terrazzo floor tiles.

What You'll Need
  • Terrazzo tiles
  • Thinset
  • Trowel
  • Grout
  • Grout float
  • Tile spacers
  • Wet saw
  • Bucket
  • Water
  • Sponge
  • Tape measure
  • Chalk line
  • Concrete board
  • Screws or nails
  • Drill or hammer


Step 1 - Measure

Start out by measuring the length of the room and multiply it by the width to get the exact square footage of the room. Then add 10 percent to that figure so that you will get enough tile for waste.

Step 2 - Prepare the Floor

If you are installing on concrete subfloor, you can attach the tile directly to it. If you have a wood subfloor, you need to first install concrete board. Put thinset under the concrete board when you put it down. Then attach the concrete board by nailing it or screwing it down into the subfloor.

Step 3 - Starting Point

You should start laying the tile in the middle of the room so that it will be centered. In order to determine where to start, you need to snap a chalk line across the center point of the room in both directions. When you start laying, start in the corner of the intersection and work out.

Step 4 - Laying the Terrazzo Tile

You are now ready to start installing the terrazzo tile. Use your trowel to apply some of the thinset to the floor. Lay out about three or four square feet of the thinset at a time. Make sure that it is even and smooth on the surface of the floor. Then press one of the terrazzo tiles down into the thinset at the intersection of the chalk lines.

Place tile spacers on the corners of the first tile. Then place another terrazzo tile directly up against the spacers from the first tile. Put tile spacers around the corners of the second tile. Continue laying tiles in this manner until you get to the wall.

Step 5 - Cutting the Terrazzo Tile

Once you get to the side of the room, you need to cut the terrazzo tile so that it will fit in the gap. Use your tape measure to measure the appropriate size that you need. Then place the tile on your wet saw and cut it to the correct size. Then you can take this cut piece and put it in the opening.

Step 6 - Grouting

After you have allowed the thinset to set up overnight, you should be able to grout the floor. You should apply the grout to the grout joints with a grout float. Fill up the grout joints with the grout. Then you need to use a wet sponge to wipe down the tile and the grout joints. This will smooth out the joints and help you remove the grout off of the tops of the tiles.


Tuesday, October 18, 2016

Restoring the Appearance of a Polished Travertine Tiles

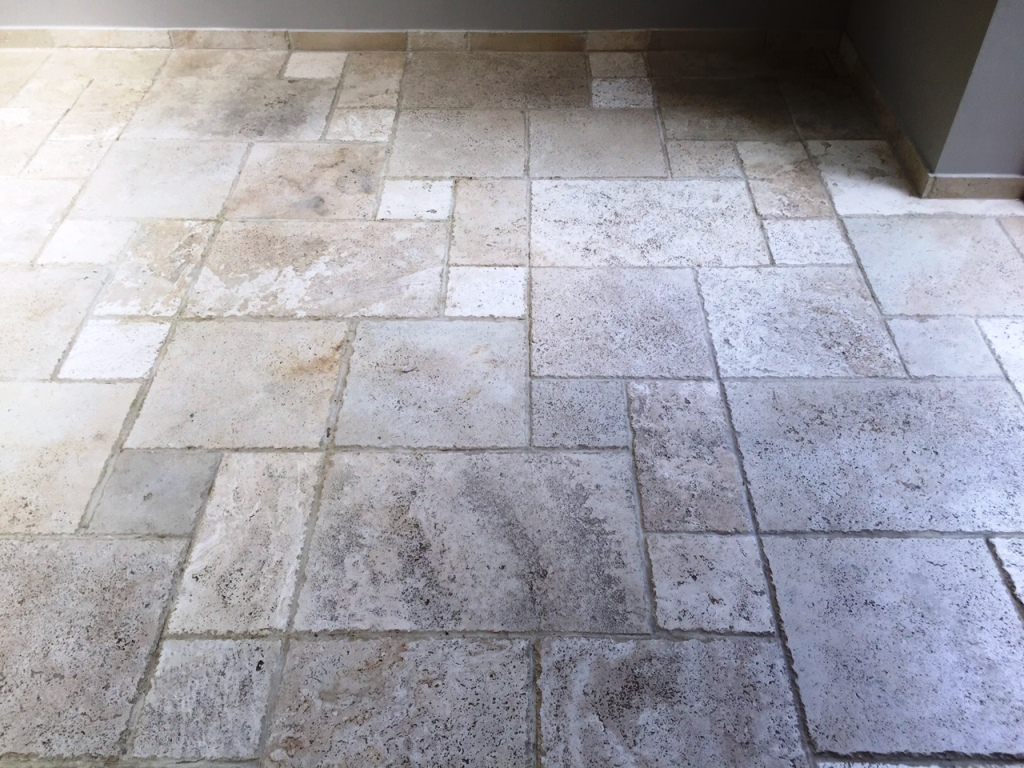
To restore high quality, polished stone such as Travertine, Marble, and Limestone, we find that the most effective method is to use a process known as burnishing. It involves the application of specialist diamond encrusted pads of different grits in sequence. The pads with coarser grits grind down out soil buildup, while the subsequent application of finer grit pads gradually hones an aesthetic polish on the surface of the tiles. Tile Doctor's system consists of four burnishing pads: Coarse, Medium, Fine and Very Fine. We use burnishing in these types of floor because we find that liquid cleaning products alone do not always achieve the best results. In fact, some household cleaning products can be damaging it not used correctly. One customer of ours, who lives in Andover which is west of Basingstoke, was having a particularly difficult time keeping her pitted Travertine tiled floor clean, leaving them looking exceptionally dirty and dull and we were asked to restore their appearance.

Pitted travertine floor tiles before cleaning in Andover

Burnishing a Dirty Pitted Travertine Tiled Floor

As mentioned, to restore travertine we find the best method to be burnishing which has the added advantage of tightening up the pores in the stone, creating a natural sheen before any sealer is even applied. To undertake the burnishing, I used our four pad system, polishing the Travertine with each pad in sequence - starting with the Coarse pad and ending with the Very Fine pad. This achieved a nice, even satin finish, which was ideal because the customer did not want a high shine gloss. With the stone tiles cleaned and polished, I turned my attention to the grout, which was similarly dirty. To clean this, I opted for a liquid product in the form of Tile Doctor's high alkaline cleaner, Pro Clean. I applied and scrubbed the product into the grout to eliminate ingrained dirt and stains, before rinsing the whole floor, using a wet-vac machine to remove the dirty cleaning residue, and leaving it to dry.

Sealing a Pitted Travertine Tiles Floor

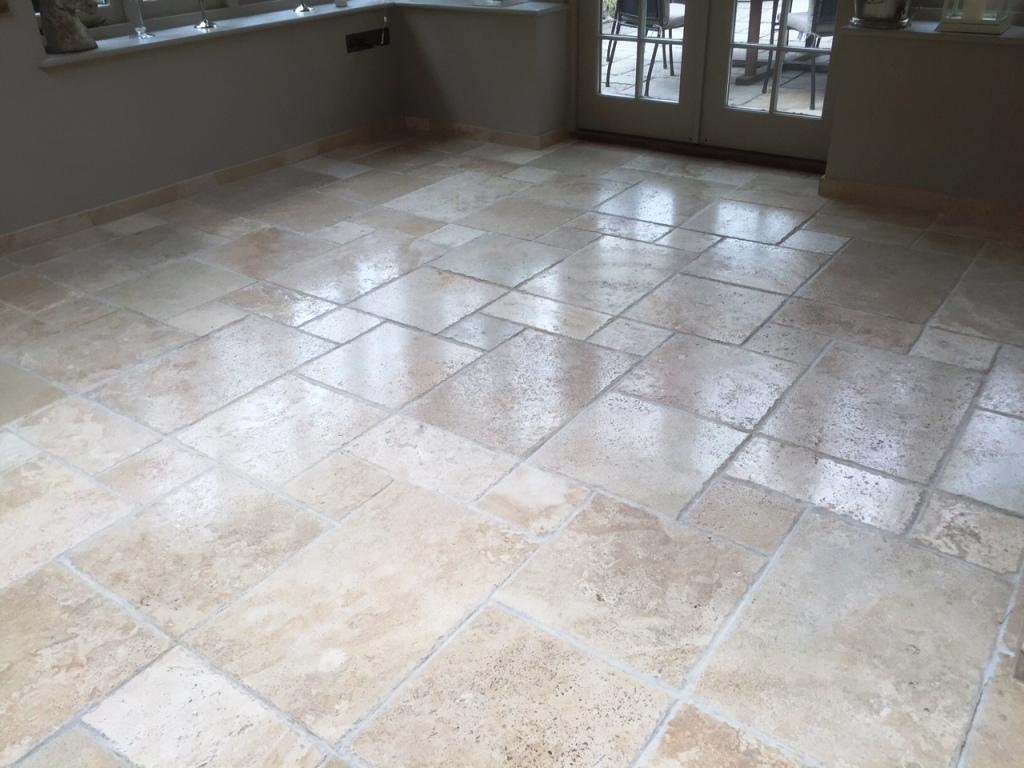
Once the Travertine tiles were dry, I gave them a final polish in preparation for sealing. My choice of sealer was Tile Doctor Colour Grow - our impregnating, colour enhancing sealer for Travertine, Marble and Limestone. As you can see from the photo below, the sealer really lifted the natural shades in the stone. Both myself and the customer were really pleased with the overall result.

Pitted travertine floor tiles after burnishing in Andover

A bottle of Tile Doctor Stone Soap was left with my very happy customer along with instructions for aftercare. We recommend Stone Soap for the regular cleaning of polished Travertine as it enhances the natural patina in polished stone.


Source: Travertine Tile Polishing and Cleaning Service in Hampshire

Tuesday, October 11, 2016

Installing Travertine Tile Flooring: 3 Tips

When installing travertine, it is important to have a plan formulated in advance. By doing this, the installation of your tiles will go much more smoothly.

Plan The Room's Appearance

Not only should you figure out all of the materials you need, but you should also have a plan for the aesthetics of your floor for the best looking results. You should decide on color, size, shape, and whether you want to have a complex pattern or a consistent color. You should also take color choice into consideration when choosing grout, as it comes in many colors.

Grouting Tile

When grouting your travertine tiles, you should always use sanded grout. Follow the manufacturer's instructions on mixing and applying, and be sure to clean off any grout that gets on your tiles as you go. While it is possible to remove dried grout from tiles, it is much more difficult than doing it while the grout is still wet and soft.

Sealing the Tiles

Sealing travertine is a very important step. Without a good seal, travertine is vulnerable to stains and etching from acid. Because of this, you should always pick a sealer designed specifically for travertine and use it appropriately. Expect to apply multiple coats, though this may vary depending on the brand you choose.

Sunday, October 9, 2016

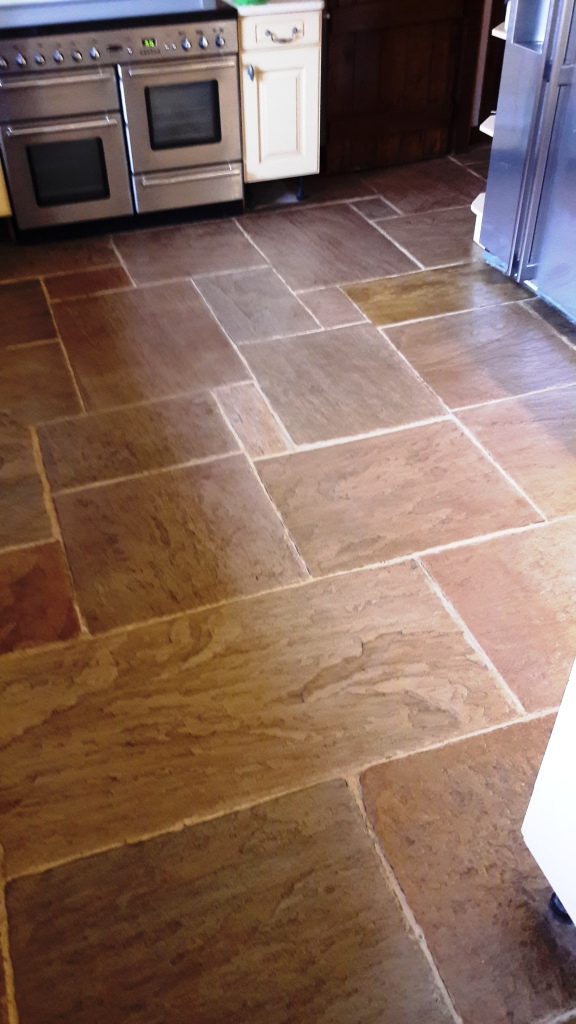
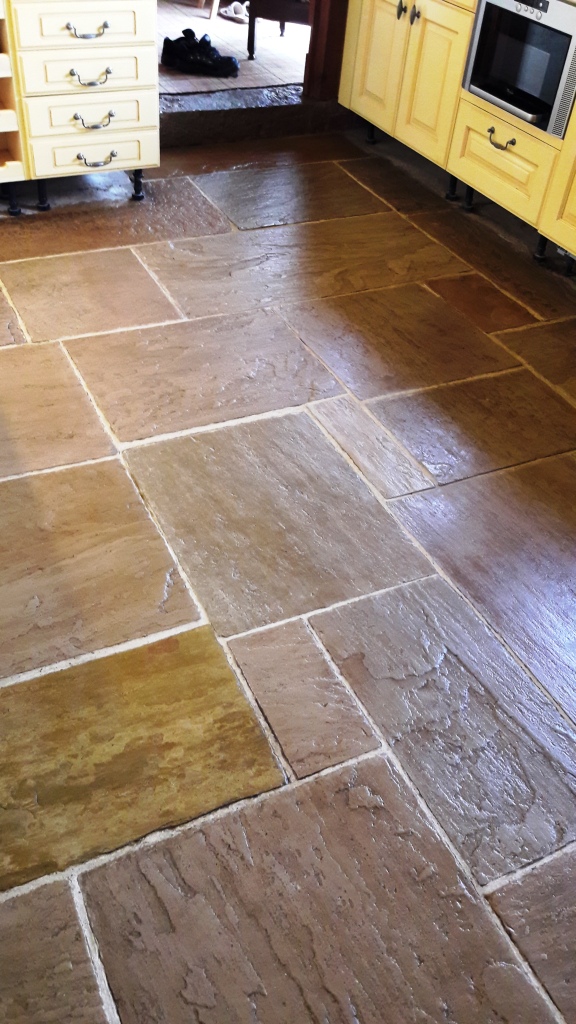
Restoring the Appearance of Sandstone Tiled Floor in Rugeley

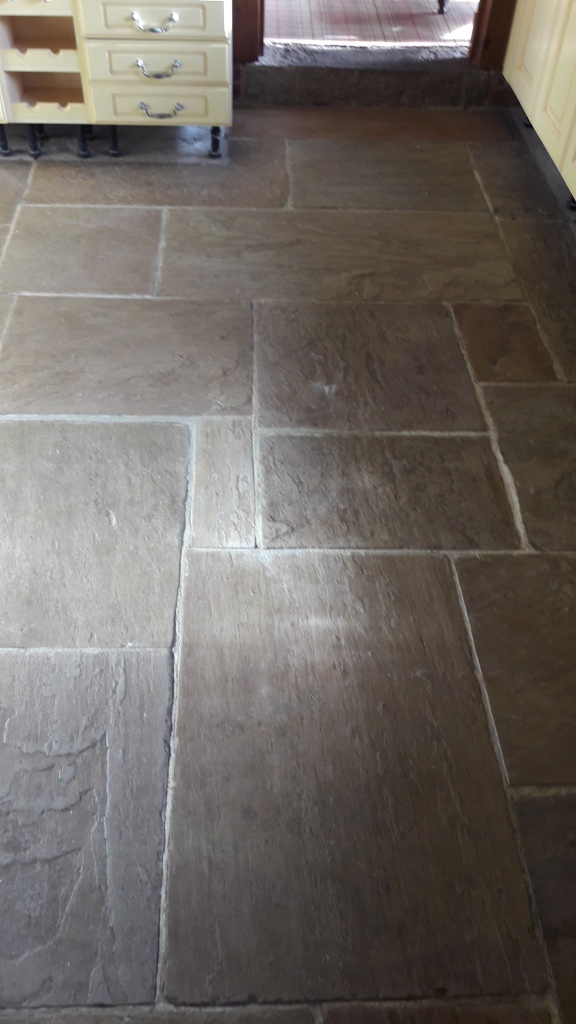
The owners of this barn conversion in Rugeley had got to breaking point with their large Sandstone tiled kitchen and utility floor. They had tried various different cleaning methods without success to clean the floor, but it always appeared grimy, and they suspected it had not been sealed following installation.

Sandstone kitchen floor before cleaning Rugeley

This would make sense: a lack of sealer would have allowed the dirt to become ingrained in the stone, making it impossible to clean. Interestingly their next door neighbour had suffered the same problem and decided to replace the floor entirely. The property owners were seriously considering the same as a solution, that is until they as found Tile Doctor. I was called down to the property to see what could be done.

Sandstone kitchen floor before cleaning Rugeley

Removing Ingrained Dirt from Sandstone Tiles

To begin the cleaning process, I applied a strong, undiluted quantity of Tile Doctor Pro Clean to the floor and left it to dwell for a few minutes. This allows the high alkaline cleaner to seep into the pores of the stone to begin to break down the ingrained dirt. After the short dwelling period, I scrubbed the floor using a rotary machine with a black pad attached. With the tiles clean, I then focused specifically on cleaning the grout lines and edges of the floor using a grout brush in combination with a steamer. Finally, I rinsed the floor with cold water, before vacuuming up the resulting cleaning slurry before leaving the tiles to dry completely overnight. The drying period is exceptionally important because excess moisture can cloud any new sealers and damage their performance.

Sealing Sandstone Tiles

I returned to the property the next day to find the clean tiles showing some signs of damp. It's possible that the property, being a barn conversion, does not have a damp proof membrane installed beneath the floor, making these sorts of issues inevitable. To be on the safe side, I opted to seal the Sandstone tiles with Tile Doctor Seal and Go Extra, which allows full moisture vapour transmission, making it fully breathable and ideal for these situations. It also provides durable protection against ingrained dirt and stains and does a good job enhancing the look of the tiles.

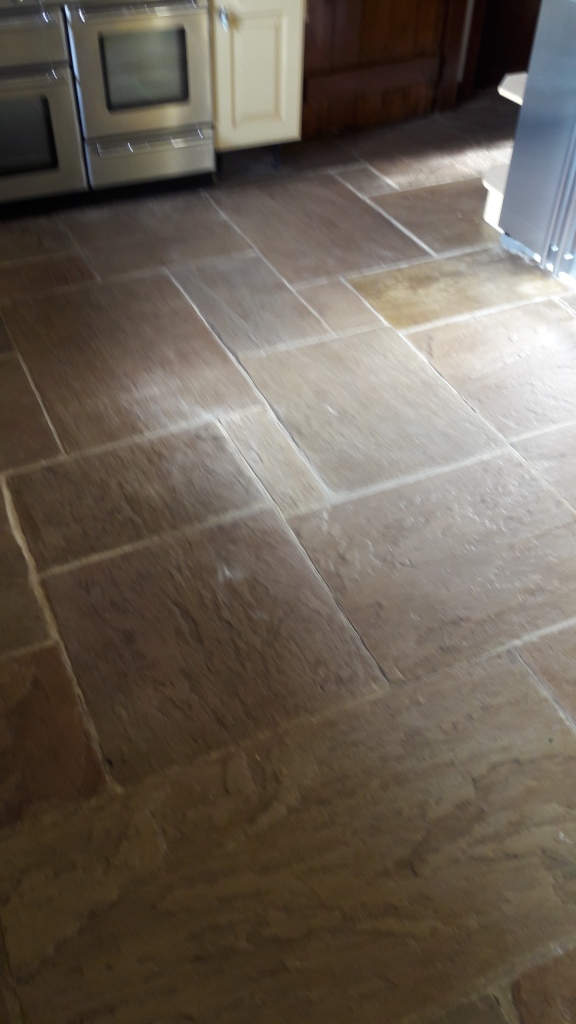
Sandstone kitchen floor after cleaning Rugeley

The customers were very happy with the result, and left the comment below on the Tile Doctor Feedback system. WONDERFUL, delight to have Trevor restoring my very tired flagstone kitchen floor, it is now beautiful. Many thanks Trevor a job very well done. I’m sure they were also relieved that they won't have to go to the expense of replacing their fantastic Sandstone tiled floor. What was Once a problem is now a real asset to the property.

Sandstone kitchen floor after cleaning Rugeley


Source: Stone and Grout Cleaning and Restoration Service in Staffordshire

Thursday, October 6, 2016

How to Restore Slate Tile Flooring

Slate tile flooring looks good in a room, especially in a kitchen. It’s sturdy and will wear well for years. Periodically, however, it will need to be restored. The finish on it will wear down over time. It’s not a complex procedure, although it will take some time and some effort. The results will more than repay the effort you put in it.

What You'll Need
  • Tile cleaner and stripper
  • Warm water
  • Soap
  • Applicator
  • Stone enhancer

Step 1 - Cleaning

Before you can begin the restoration of your slate tile flooring, you need to clean it. Move everything out of the room so the floor is bare. With a broom, sweep up all the dust and debris and gather in a dustpan. After this, give the floor a thorough vacuuming, pushing the nozzles into all the corners and edges. This will enable you to clean up all the small items the broom missed. When you’ve finished, the floor will be very clean and ready for the next stage.

Step 2 - Stripping

Your slate tile flooring will have been sealed. Some of this will have been worn away by people walking over the floor. You’re going to need to strip it all off. For this, you’ll need to use a heavy duty tile cleaner and stripper.
Use a scrub brush on the tiles to take off the sealant. This isn’t easy, and it will take a while. You also need to be sure that you cover all the floor, right into the corners. To be safe, you should go over the entire floor twice. This will guarantee that you go all the way down to the slate and strip off everything on top. Finish by rinsing the floor and allowing it to dry. This might mean leaving it overnight.

Step 3 - Enhancer

To seal the slate tile flooring, you’ll need to buy a stone enhancer and sealer. You’ll be able to find it at hardware stores. To apply it, you’ll need to use a special applicator; lamb’s wool is the best for putting it onto the slate tile flooring. If you don’t want to buy one, you can also use a mop for applying the stone enhancer. Apply it liberally, wait for a few minutes, and then use a cloth to take off any excess before the stone enhancer dries on the slate tile flooring.

Step 4 - Second Coat

You should immediately put on a second coat of the stone enhancer. Don’t wait for the first coat to dry. Again, apply it liberally and then wait a few minutes before you wipe off any excess. This time, you should leave the slate stone flooring to dry overnight before walking on it. The slate tile flooring will now be properly sealed and should be good for another six months before you need to do the work again.

Step 5 - Cleanup

To clean the implements, wash them in mild soap and water and then leave them to dry.

How to Grout Slate Tile Flooring

If you are installing a new floor in your home, slate tile flooring is a great option that you should consider. While you could have a professional grout your new floor, there is nothing stopping you from doing it yourself, whether you are interested in saving money, or simply enjoy doing your own work in your home. Grouting a slate tile floor, while a complex, multi-stage project, is something an amateur can do successfully with the right equipment and knowledge. The following instructions will help you grout your tile floor, and give you all of the information you need to make the finished grout as good as a professional would make it.

What You'll Need:
  • Buckets
  • Water
  • Grout Mix
  • Trowel
  • Sponges

Step 1 - Setting Up

To begin, fill a bucket with water and put on your protective rubber gloves.
Once you have done this, you will need to mix the grout. Fill a second bucket with water, and mix the grout mixture powder in at the correct proportion. It will vary from brand to brand, but the manufacturer's instructions should clearly state how much powder and how much water to use. Once you have done this, use your trowel to evenly mix the powder and water. The end result should be a thick paste that does not run off of your trowel when you pick it up, but is not powdery either. If you need to adjust the proportions of powder and water to get the correct consistency, do so now.

Step 2 - Grouting the Tiles

Apply grout to your joints with your trowel. Hold the trowel at a 45-degree angle, and use it to simultaneously remove excess grout and push the grout into the joint. Go up and down each joint in both directions to ensure an accurate and complete job.
As you work, use your sponge to wipe up any grout that spills as quickly as you can, particularly if it is in the middle of a tile. This will save you a lot of work removing grout haze later. As dried grout is harder to remove than grout when it is wet, you cannot be too thorough at this stage.

Step 3 - Completing the Grout

Use a damp sponge to remove excess grout from the joints. To avoid spreading the excess grout across your tiles, use one side of the sponge to wipe along the joint. Once you have done this, only use the other side of the sponge, and only once. After both sides of your sponge have grout on them, rinse your sponge off and repeat the process until all joints have an appropriate amount of grout.

Step 4 - Finishing Up

Once all of the tiles are complete, you can go over the tiles one last time to remove any partially formed grout haze. By this point, any that has survived may be partially dry, or it may have worked its way into cracks or pores in the tiles, so you may have to scrub. Additionally, doing this may cause you to go through multiple sponges, so be sure to bring spares.

Wednesday, October 5, 2016

Polished Travertine vs Honed Travertine

Honed travertine has a beautiful and shiny appearance and creates a strong impression of cleanliness when properly taken care of. This naturally occurring stone is a delicate and porous material used in finishings mostly as a tile. The question as to whether you should hone or polish your travertine surface actually depends on the kind of cleaning or restoration you want to do on your surface.
When to Hone
Where the tiles have been damaged by a pet, discolored or other serious issues, honing will be a better option to deal with this as polishing will not be useful since it is meant to maintain the shiny beauty of the tiles.
Excessive Honing
It is, however, worthwhile to note that due to the more abrasive nature of honing, your travertine surface is likely to wear out faster if frequently honed. On the other hand, polishing a discolored travertine tile will serve no purpose in terms of restoring the surface shine. Honed travertine also requires polishing to give it the shiny look. If left unpolished, the travertine will have a chalky appearance.
The key is therefore to maintain the travertine without need to have honing as that will give it a longer life where only cleaning and polishing will be required to maintain it in a clean shiny state.
Honing tiles wrongly could cause them to become very slippery which is dangerous to those walking on the tiles. Too much honing of the tiles could also lead to cracks and damage. Frequent honing will also lead to damage of the tiles through water absorption.