Monday, November 28, 2022

How to Deep Cleaning and Sealing a Victorian Tiled Hallway Floor by Middlesex Floor Care Expert

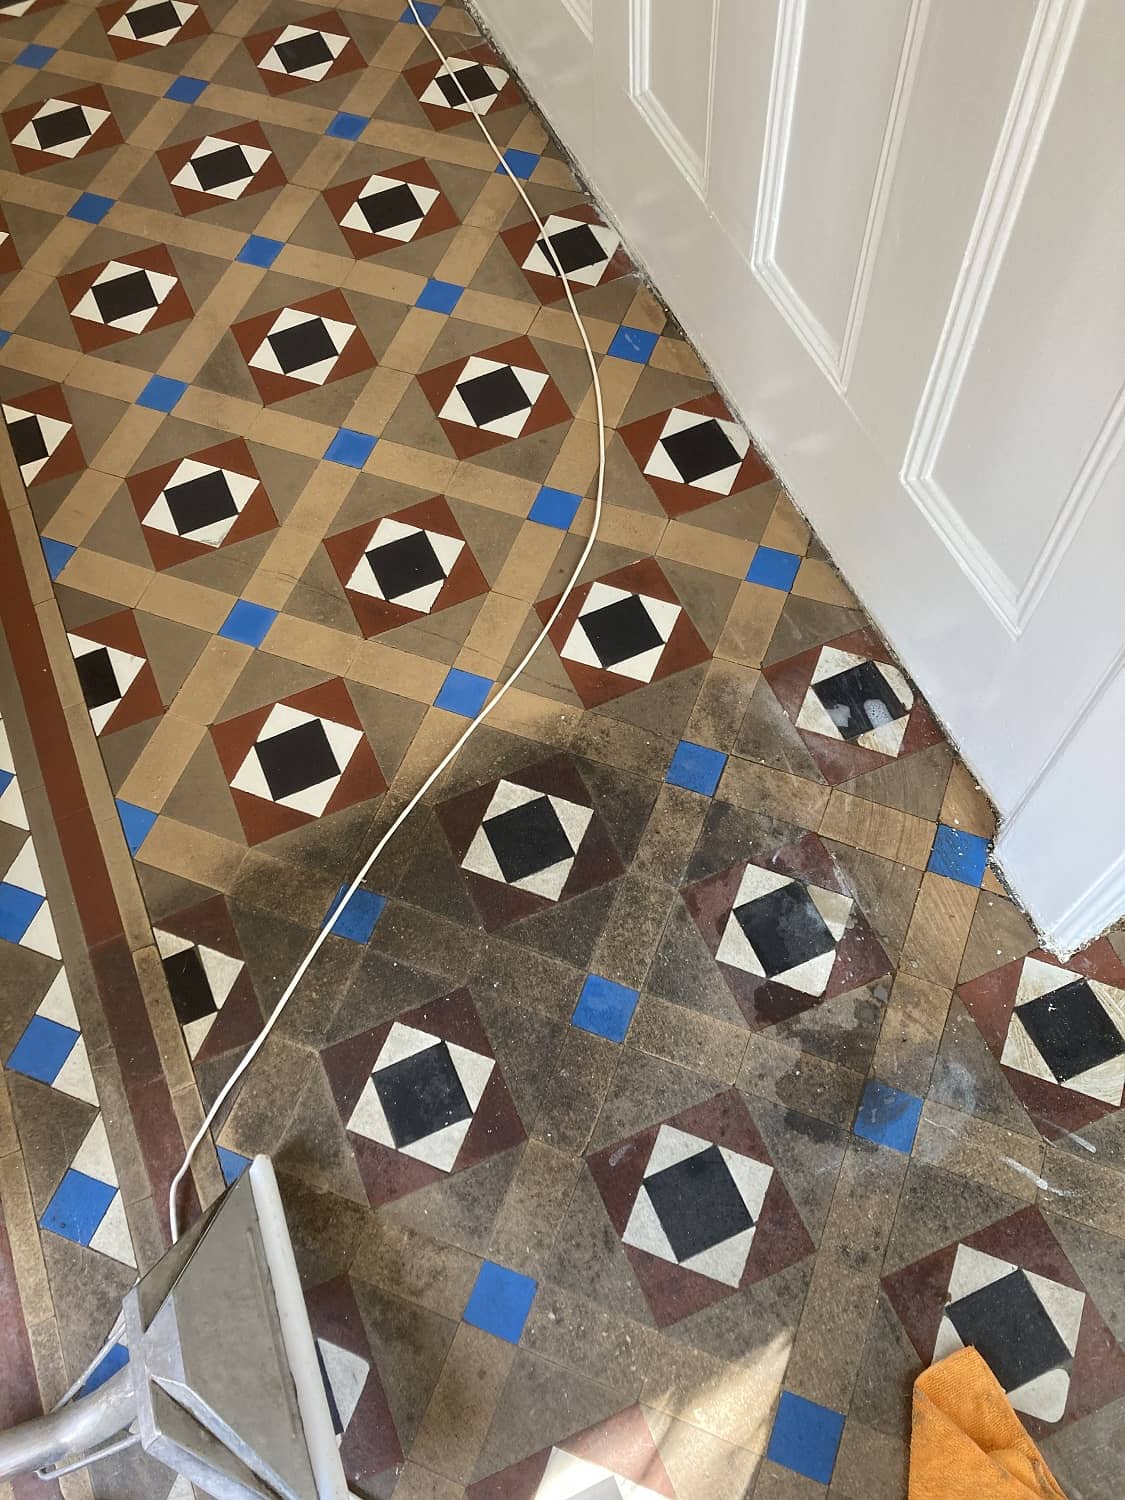
This lovely Victorian tiled hallway floor in Hampton had been covered with carpet for over 30 years. Having removed the carpet, the owner was keen to restore the floor back to its original appearance. As you can see from the pictures the tiles had some lovely traditional colours which have been hidden away. During that time the tiles had absorbed a lot of soil and were stained by rubber from the underlay causing the colours to fade.

Victorian Hallway Tiles Before Cleaning Hampton Victorian Hallway Tiles Before Cleaning Hampton

Fortunately, the gripper rods had only been lightly glued onto the tiles and not held down with nails, sometimes with older floors the rods are hammered in place right through the tile causing them to shatter, which makes for a much larger restoration job. I gave them a price for the work which they were happy with, and we arranged a time to return.
 
Victorian Hallway Tiles Before Cleaning Hampton

Cleaning a Victorian Tiled Hallway Floor

To remove the traces of rubber backing, adhesive and years of stubborn soiling from the tiles the whole floor was soaked in a strong dilution of Tile Doctor Remove and Go. After a short dwell time we then machine scrubbed with Tile Doctor Pro-Clean to restore the tiles to a very clean condition.

The soiling and products were pressure rinsed and vacuumed away, leaving the Victorian tiles much cleaner. I found the best method was to work in large sections of flooring at a time which allowed for the tiles to dry whilst I worked on another section. I was then able to go back and review my work and spot clean stubborn areas until I was satisfied with the result. The wet vacuum removes a lot of the moisture but it needs to be dry before sealing so the floor was then left to dry off overnight.
 
Victorian Hallway Tiles During Cleaning Hampton

Sealing a Victorian Tiled Hallway Floor

The following day we returned and using the damp meter tested the tiles were dry and ready to be sealed. For this we selected to use seven coats of Tile Doctor Seal and Go, these were applied leaving each coat to dry before the next one was administered. This left a nice sheen finish on the floor and does a lovely job of enhancing the colours making the tiles look vibrant again. The floor looks great and the hallway is now very inviting.
 
Victorian Hallway Tiles After Cleaning Hampton

Before leaving I took time to discuss aftercare with the owner and recommend the use of Tile Doctor Neutral Cleaner. Fact is most supermarket products are for cleaning Vinyl or Ceramic tiles contain bleach and are simply too strong for use on sealed surfaces such as this floor, using them can prematurely erode the sealer and once that’s gone the floor will have no protection and begin to accumulate dirt.

Sunday, November 27, 2022

3 Types of Hardwood Installation

Knowing what to expect before, during, and after hardwood installation takes place will help you have a floor that is both nice looking and long-lasting.

Whether you're thinking of installing a hardwood floor yourself or hiring a contractor, you will need to do some basic research first. For example, there are three types of installation methods used for hardwoods: floated, glued, and nailed or stapled.

Installation Methods

With the floated type there are layers of plywood or other types of wood beneath the main wood flooring. Many experts believe the easiest method of installing a hardwood floor is called a floating floor, as they are not secured but rather sit on top of the subfloor and can be installed over any surface. No special tools are required for this type of installation.

The glued method involves the use of adhesives. With this method, you use a high-quality flooring adhesive to attach each hardwood flooring plank to the subfloor. This method can be used for concrete or wood subfloors.

The third type of installation method, the nailed or stapled method, is used when installing engineered or solid woods. Specialized nail or staple guns are required for this method which can be used for concrete floors and can also be used above a sleeper system for radiant heating.

Another part of the research involves consulting your manufacturer's instructions before deciding on which installation method you want to use.

Some of the basics of hardwood installation include installing the hardwood parallel to incoming light; never storing your hardwood in direct sunlight or in the garage and keeping your hardwood flooring away from outside walls, doors, and windows.

You should gain knowledge of not just how to install but also the variety of types of hardwood flooring available, proper care of the flooring, and which type is best suited for your home.

In addition, you should research the market by identifying the material, rates, and other aspects of hardwood floors.

Trade Group Study

According to a study conducted by the not-for-profit trade group the National Association of Home Builders, called "How Long Things Last," hardwood floors are rated to last 100-plus years. No other flooring option available lasts as long.

Should you decide to hire a professional installer, be sure that references are provided and then check them out thoroughly. Look through the installer's portfolio to be sure whether he or she is knowledgeable in installing the type of floor that you have chosen and read the contract thoroughly. Check the time frame for installation and the final cost.

Experts recommend hiring a professional if the subfloor in your home is substandard or non-existent.

Source: www.DoItYourself.com

Tuesday, November 22, 2022

Basic Wood Floor Care

Wood floors should be protected with a sealer. Penetrating sealers go into the wood pores; worn spots can be resealed. Lacquer, shellac, varnish stay on top of the wood; if worn off in traffic areas, usually the whole floor has to be sanded and refinished. Prevent scratches when moving furniture by putting heavy socks over the legs.

Wood Floor Top Coat: Vegetable Oil and Vinegar. Mix a 1 to 1 ratio of oil and vinegar into a solution and apply a thin coat. Rub in well.

Painted Wooden Cleaner: Washing Soda. Mix 1 teaspoon washing soda into 1-gallon hot water and wash the floor with a mop, sponge, or soft-bristled brush. This solution can also be used to remove mildew.

Oil Soap: Use according to package directions.

Cleaning

Vacuum often to keep dirt from grinding into the floor finish or sticking to it. Wipe up spills immediately. A damp (not wet) cloth may be used on a well-sealed wood floor to wipe up food spills or mud. Wipe dry with cloth or paper towel. Clean when necessary with a solvent-based liquid wax for wood. Follow directions on the container. Solvent removes dirt and old wax and leaves a thin wax coating that must be buffed. Apply with:

A dry cloth, rubbing floor and refolding the clean part of the cloth as dirt is taken up; hard on knees

Cloth over long-handled wax applicator, rubbing and refolding cloth as above

Electric floor polishers can be rented at many supermarkets, changing to clean brushes or pads as dirt and wax are taken up.

Buff wax left on floor: immediately if by hand; or after 20-30 minutes if with an electric polisher.


Source: www.DoItYourself.com
Friday, November 18, 2022

Lancashire Tile Expert Reveals Travertine Renovation Secrets

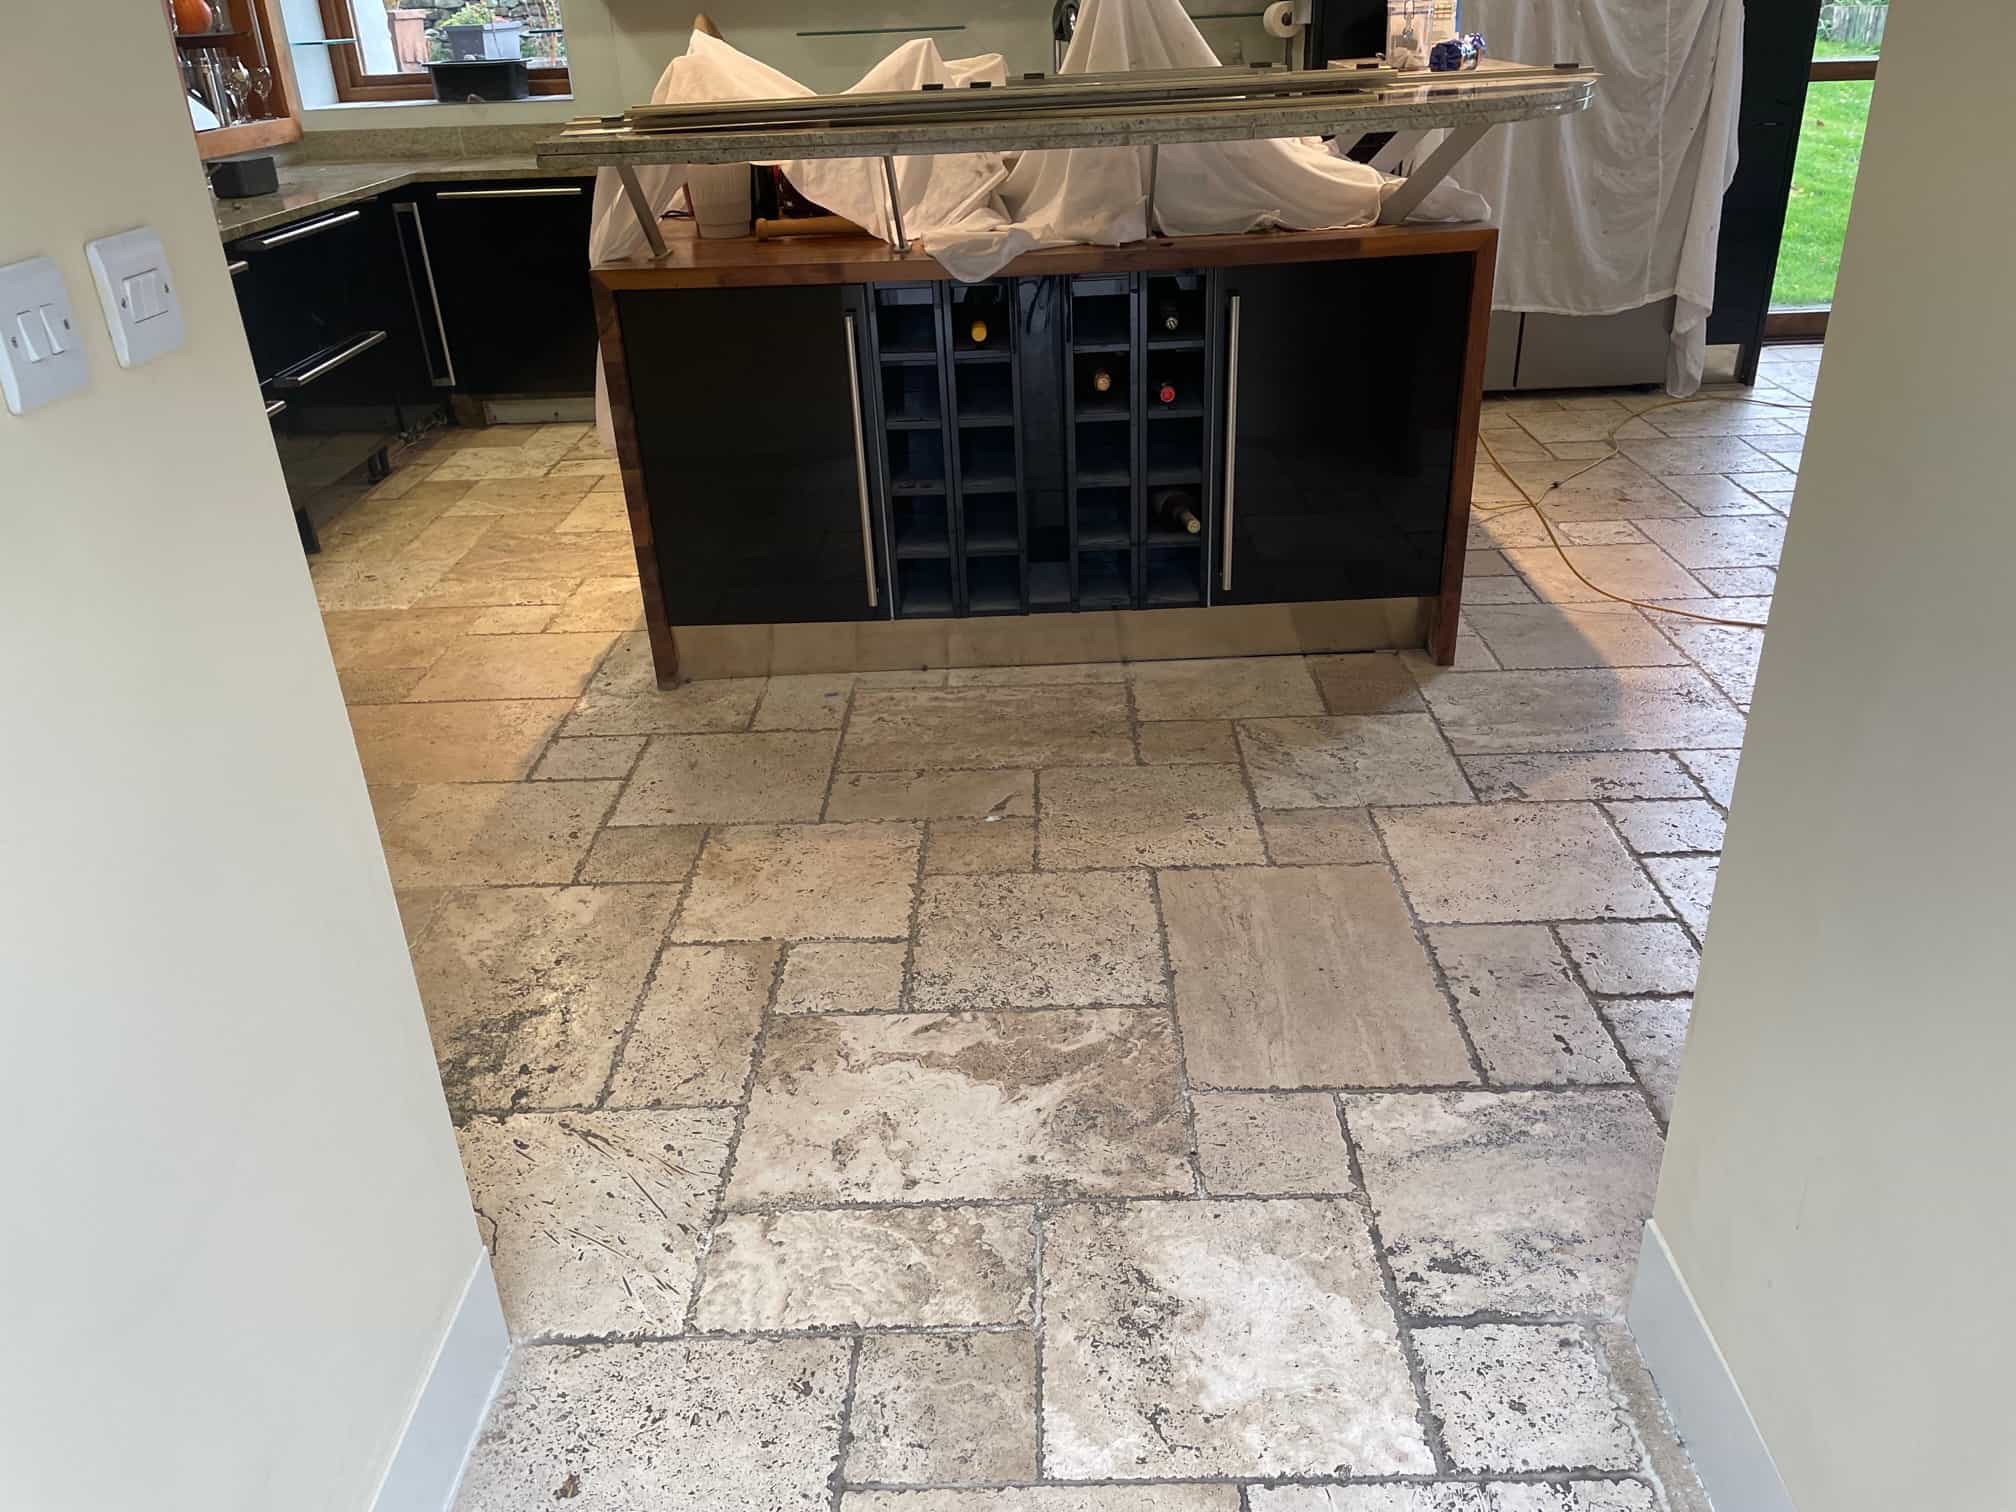
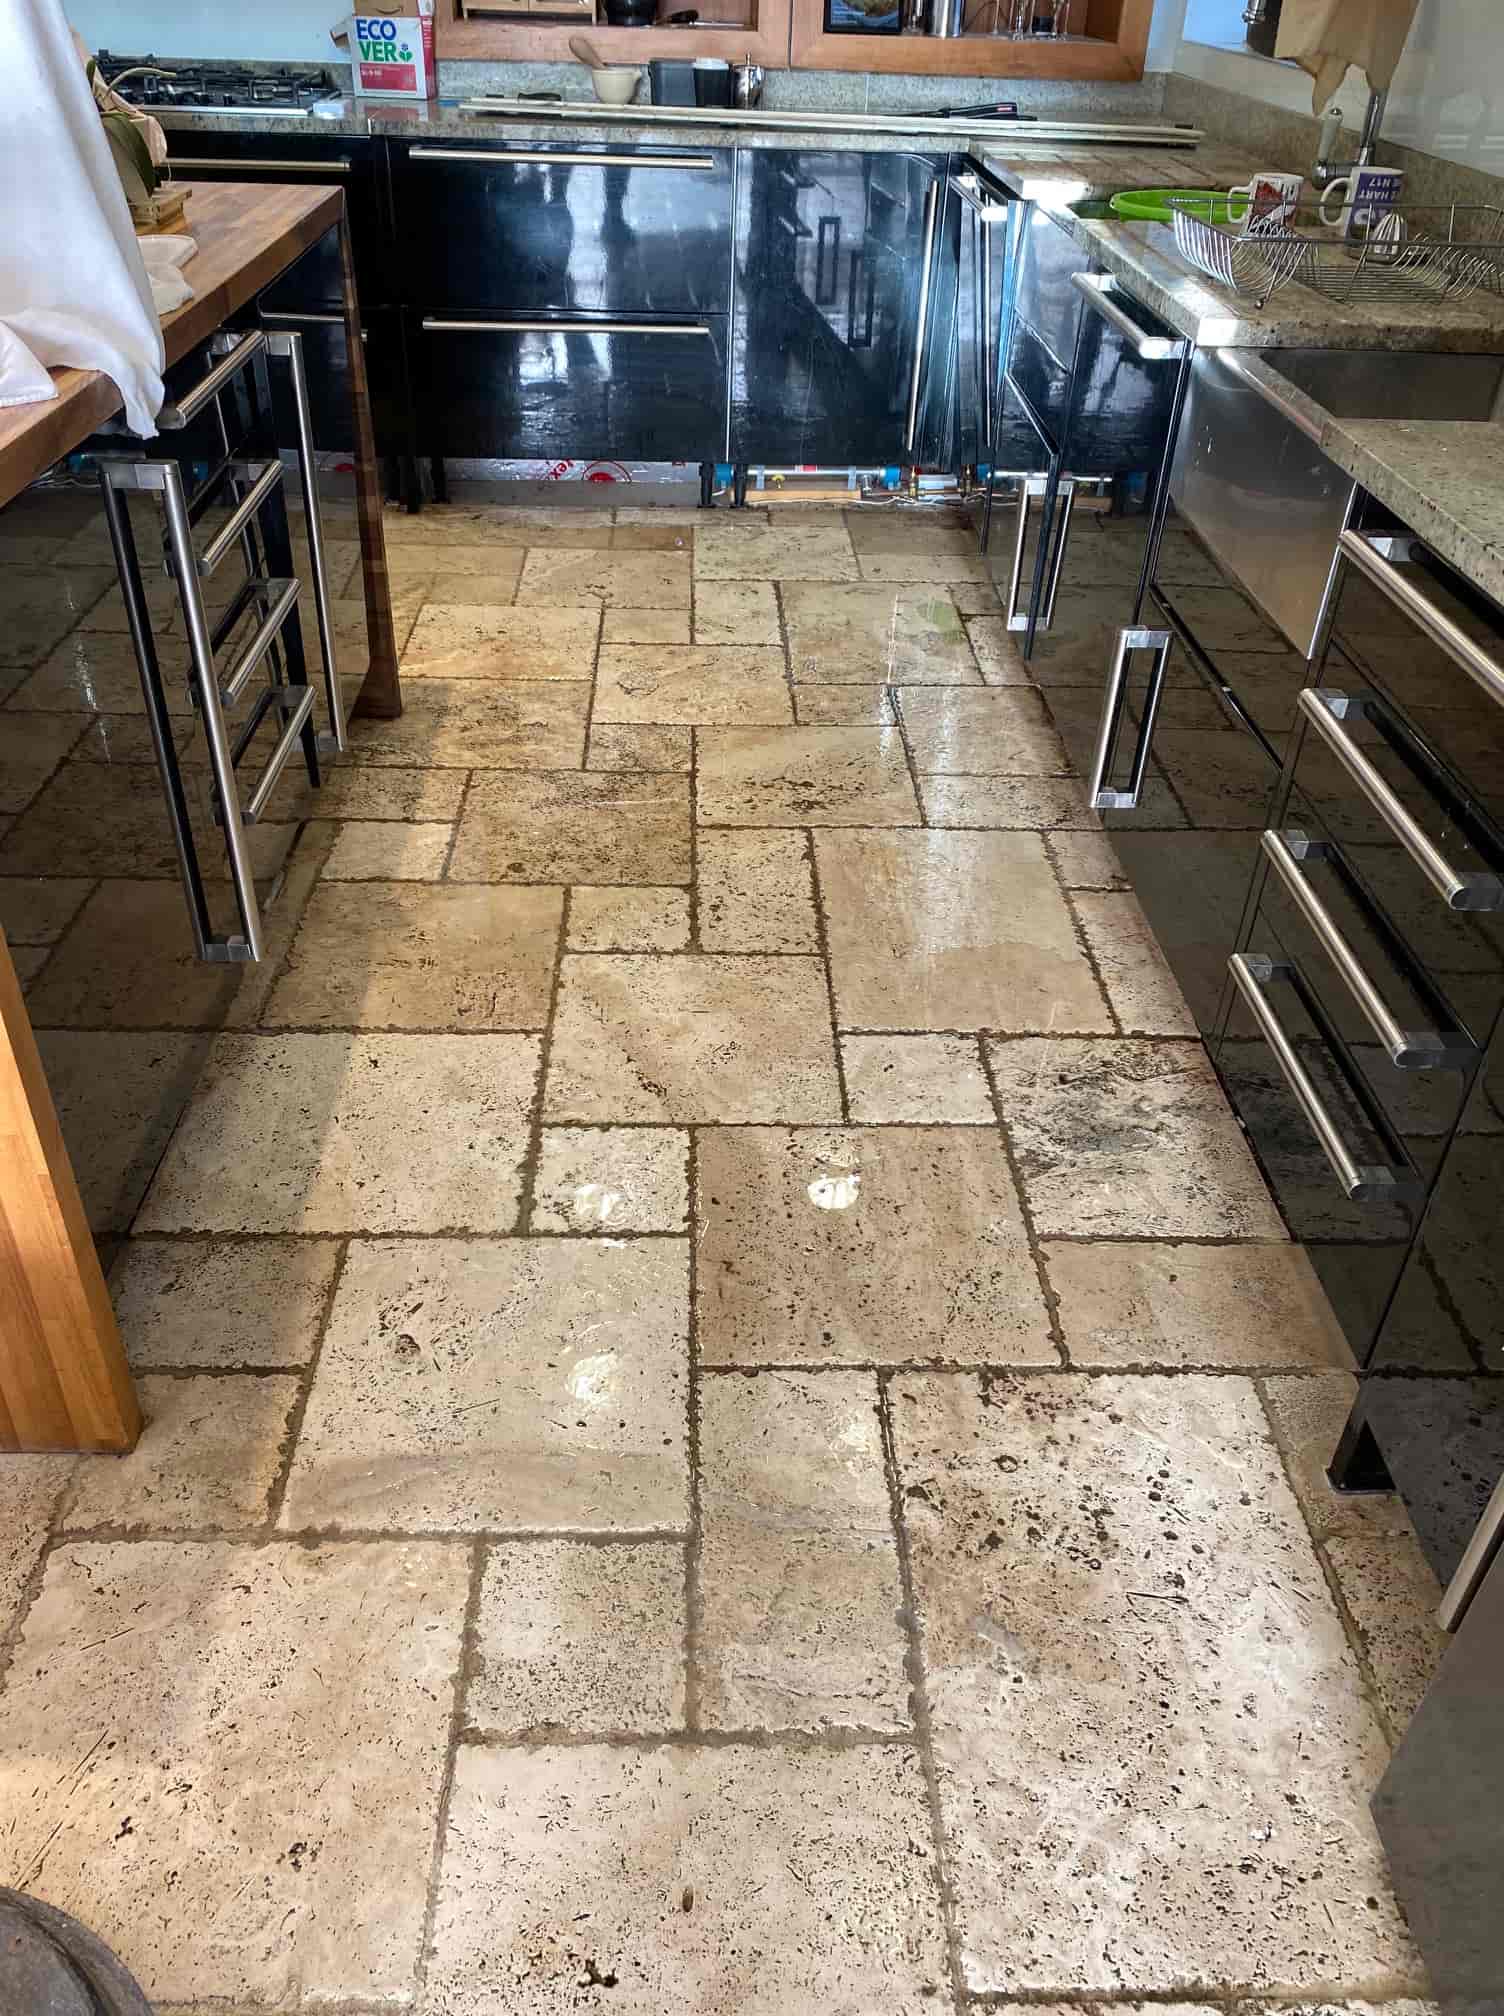
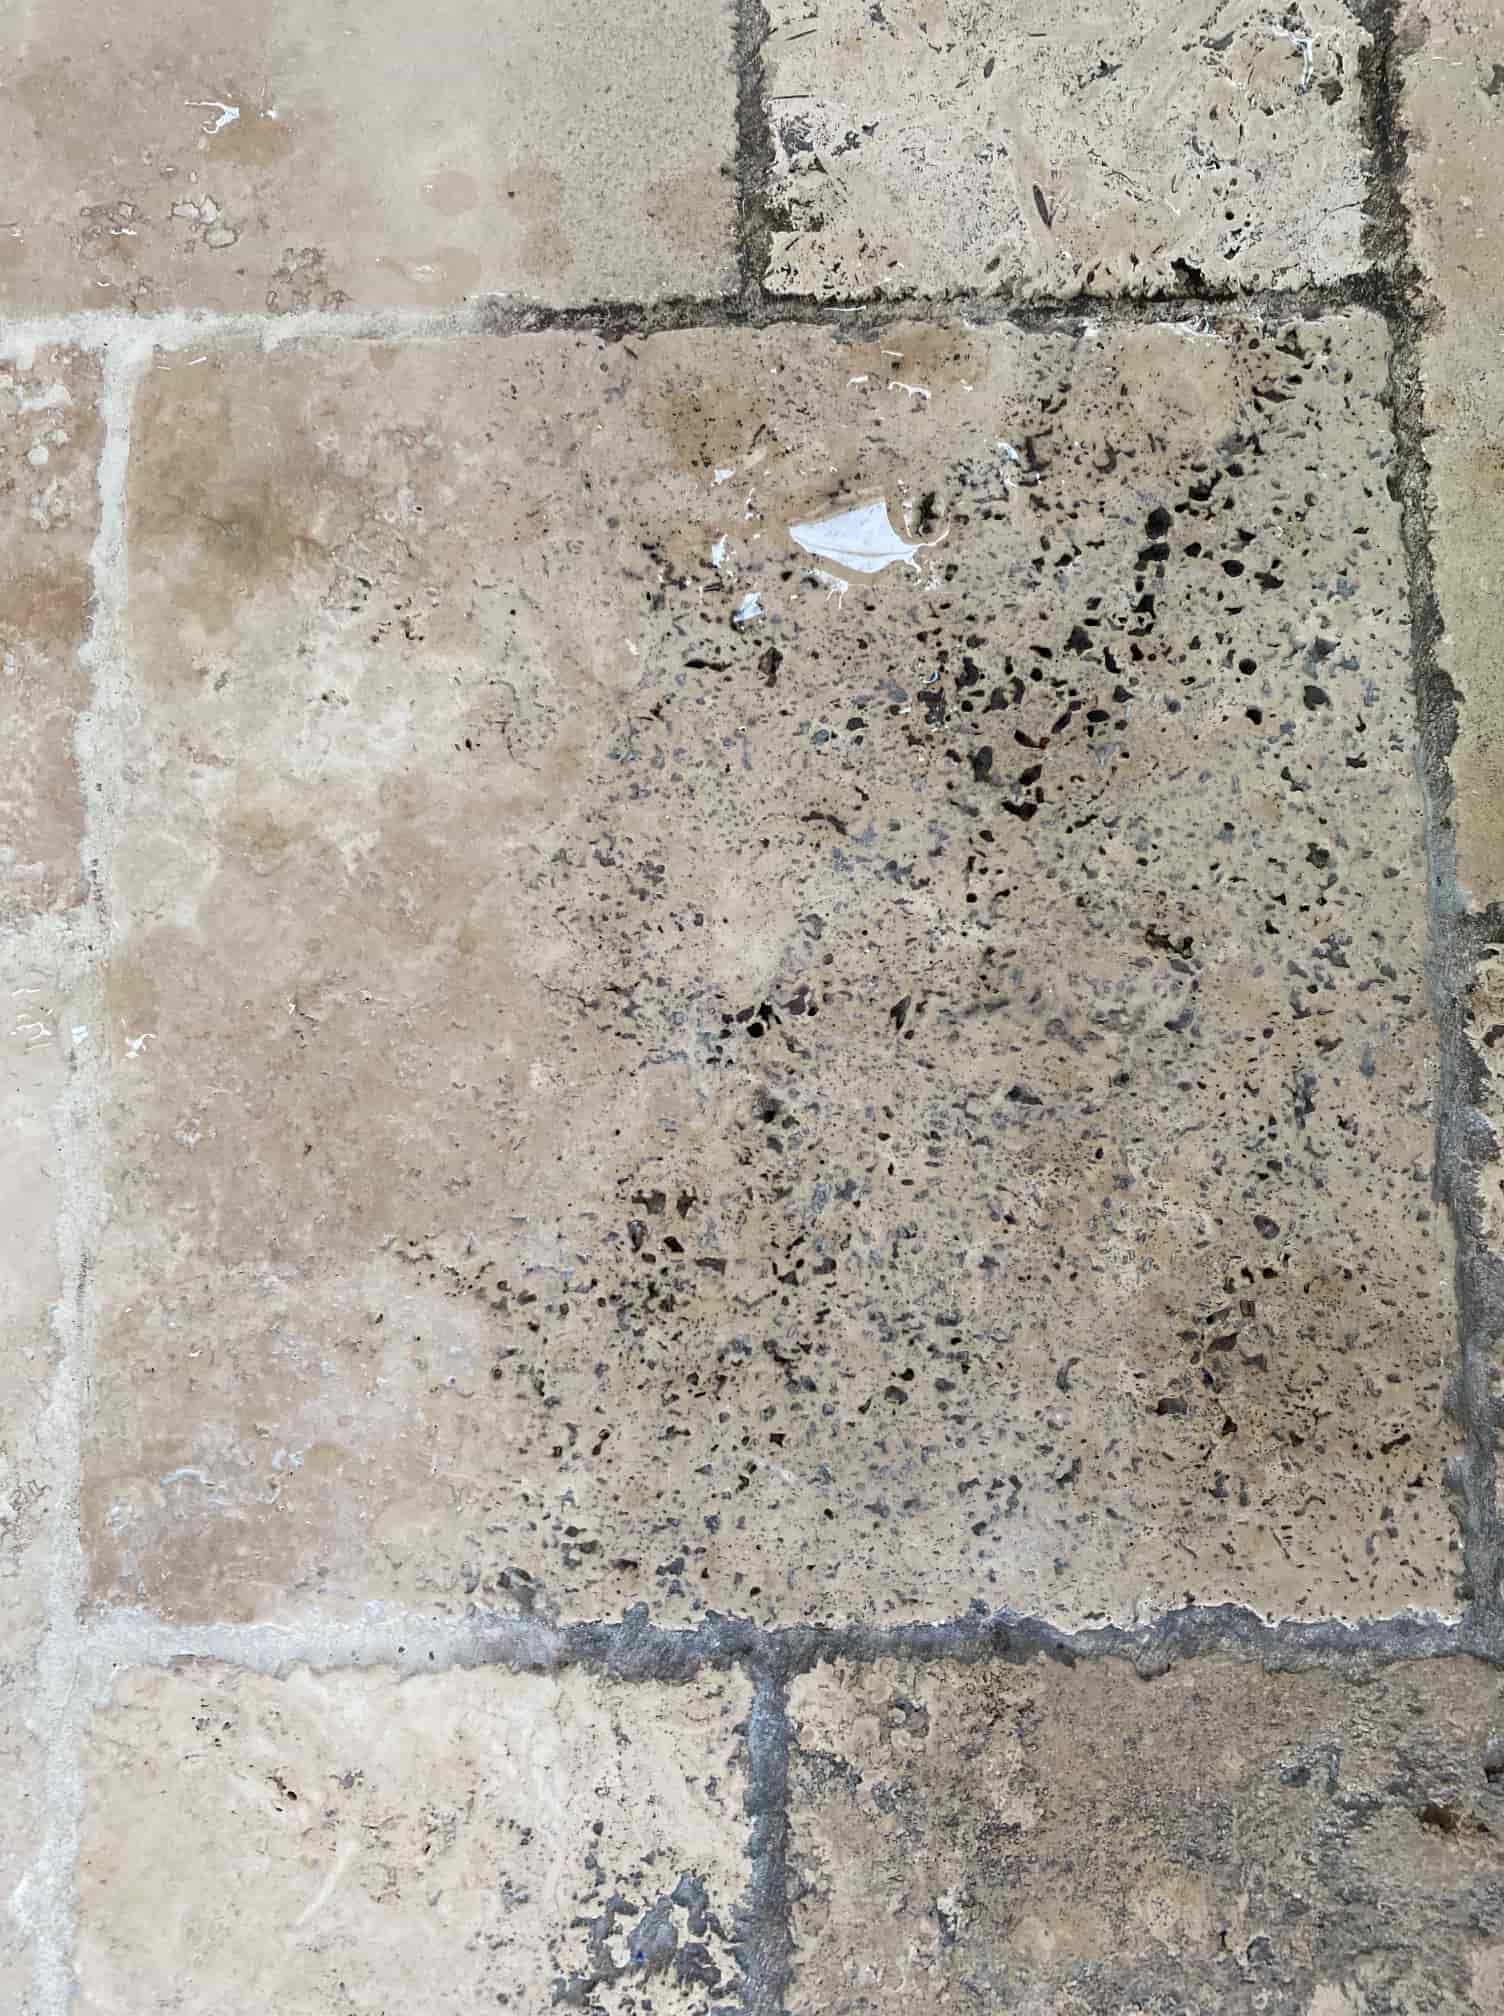
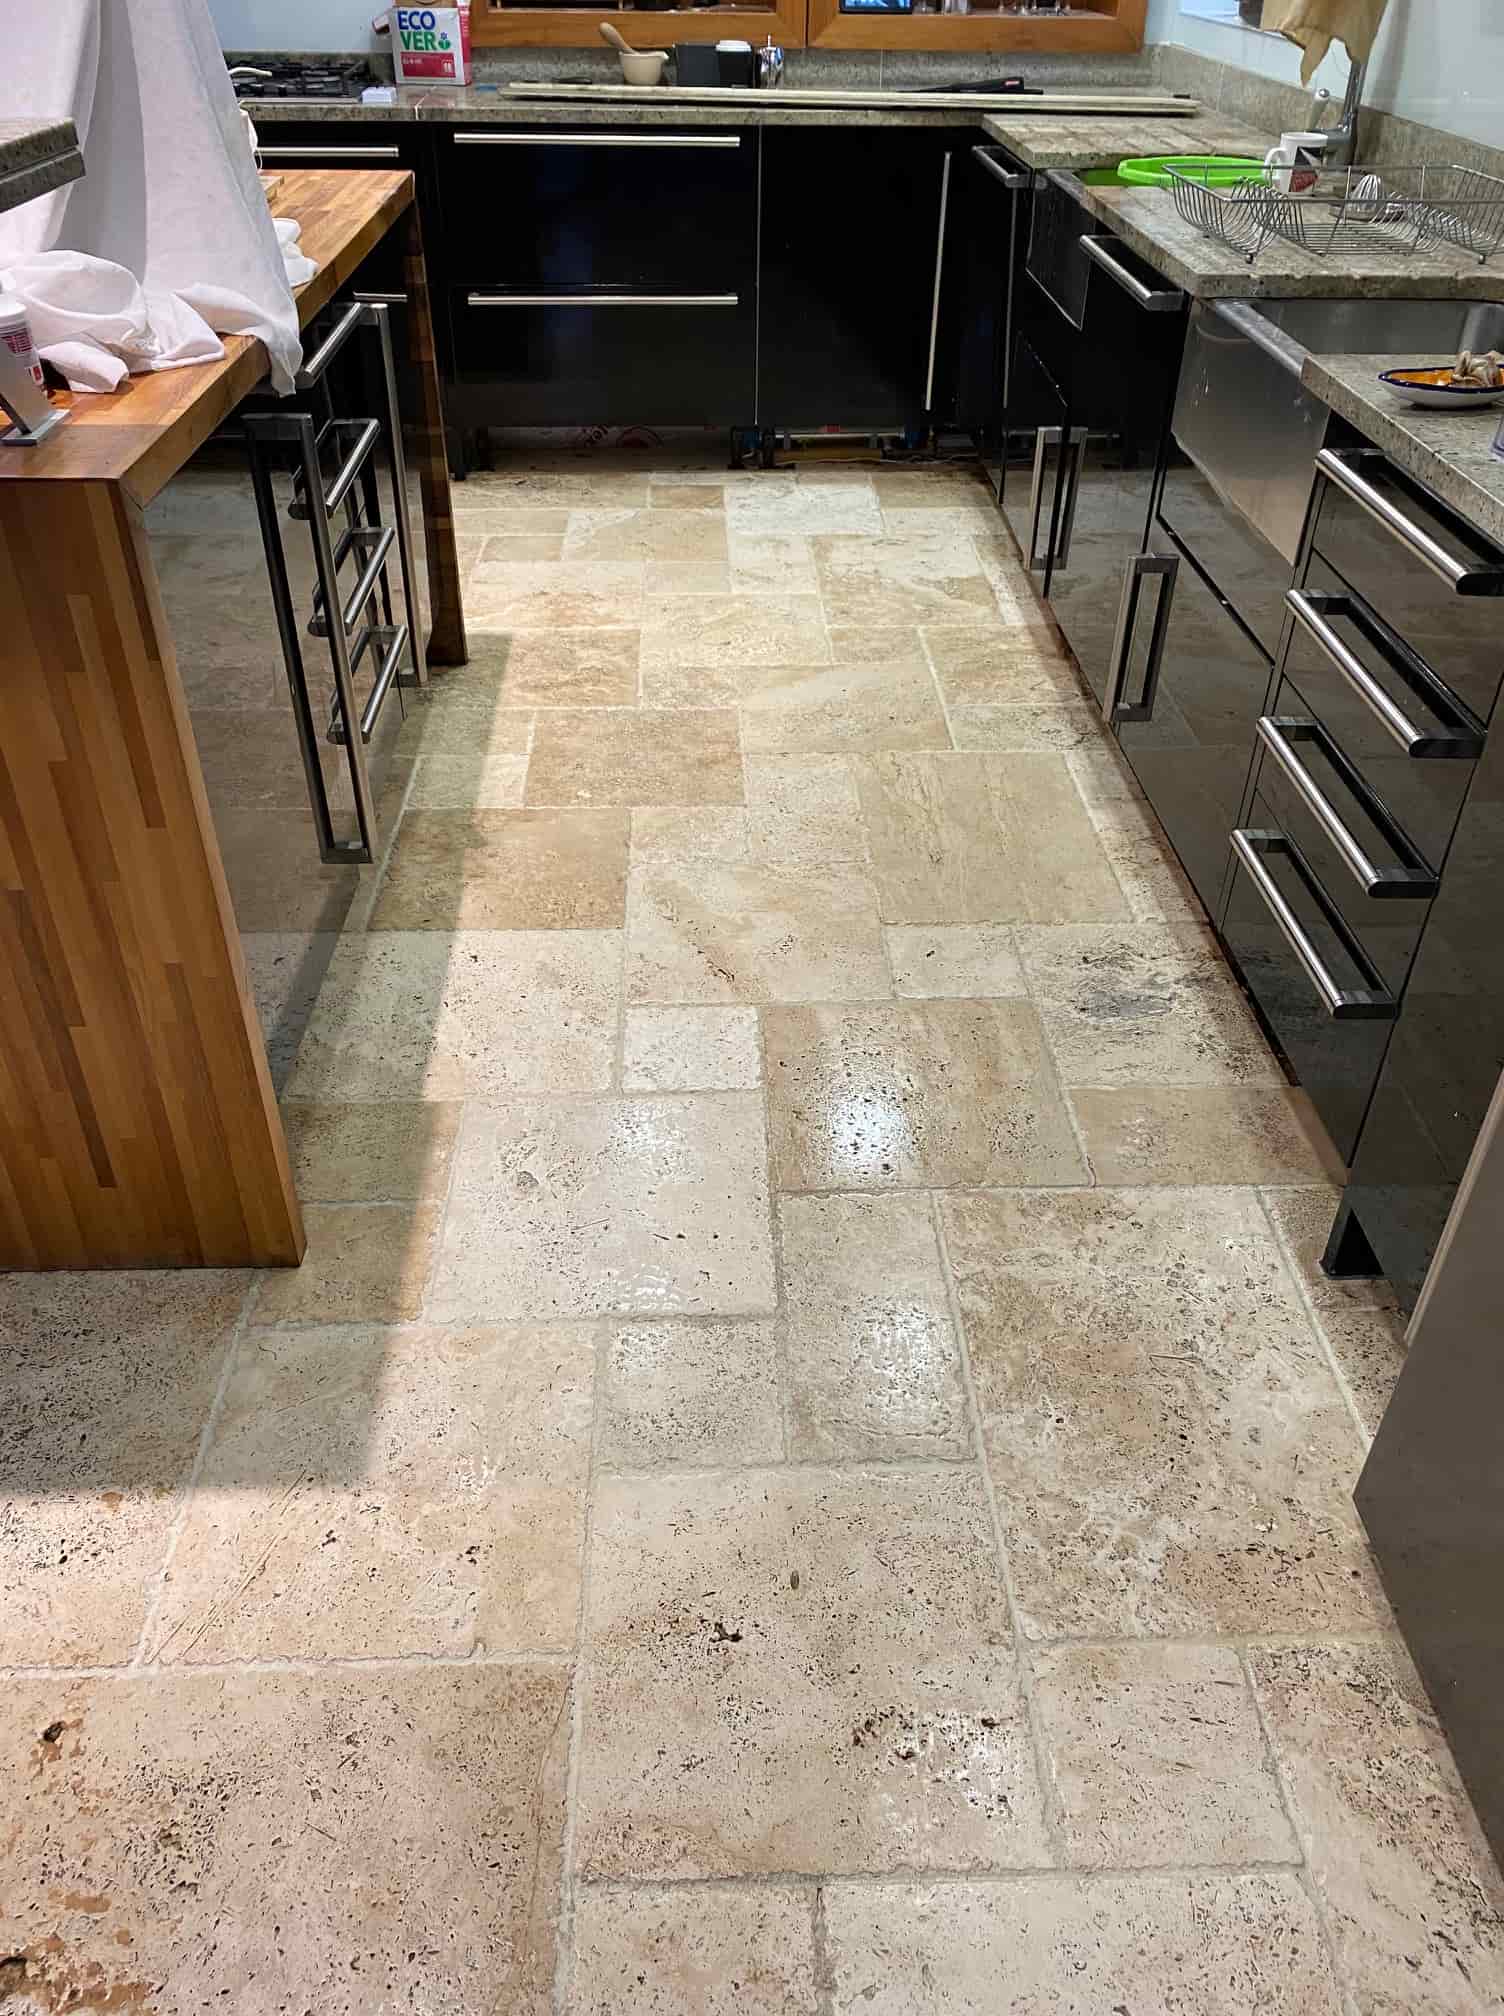
This customer in Preston in Lancashire had just moved into a house with a large 60m2 Travertine tiled floor that was installed throughout most of the ground floor. Travertine is a lovely stone but the previous owner had not maintained the sealer on the tiles and as a result it now looked grubby and there was a lot of dirt ingrained in the tiles leaving black staining, especially in the Kitchen.
   
Honed Unfilled Travertine Kitchen Floor Before Renovation Preston

This is a common problem with all natural stone floors, some are hardier than others but without a protective barrier in place they will attract dirt as the sealer become worn off. The new owner was seriously considering having the tiles ripped up, fortunately however they came across our service and decided to try having them renovated first.
   
Honed Unfilled Travertine Kitchen Floor Before Renovation Preston


Deep Cleaning a Travertine Tiled Floor

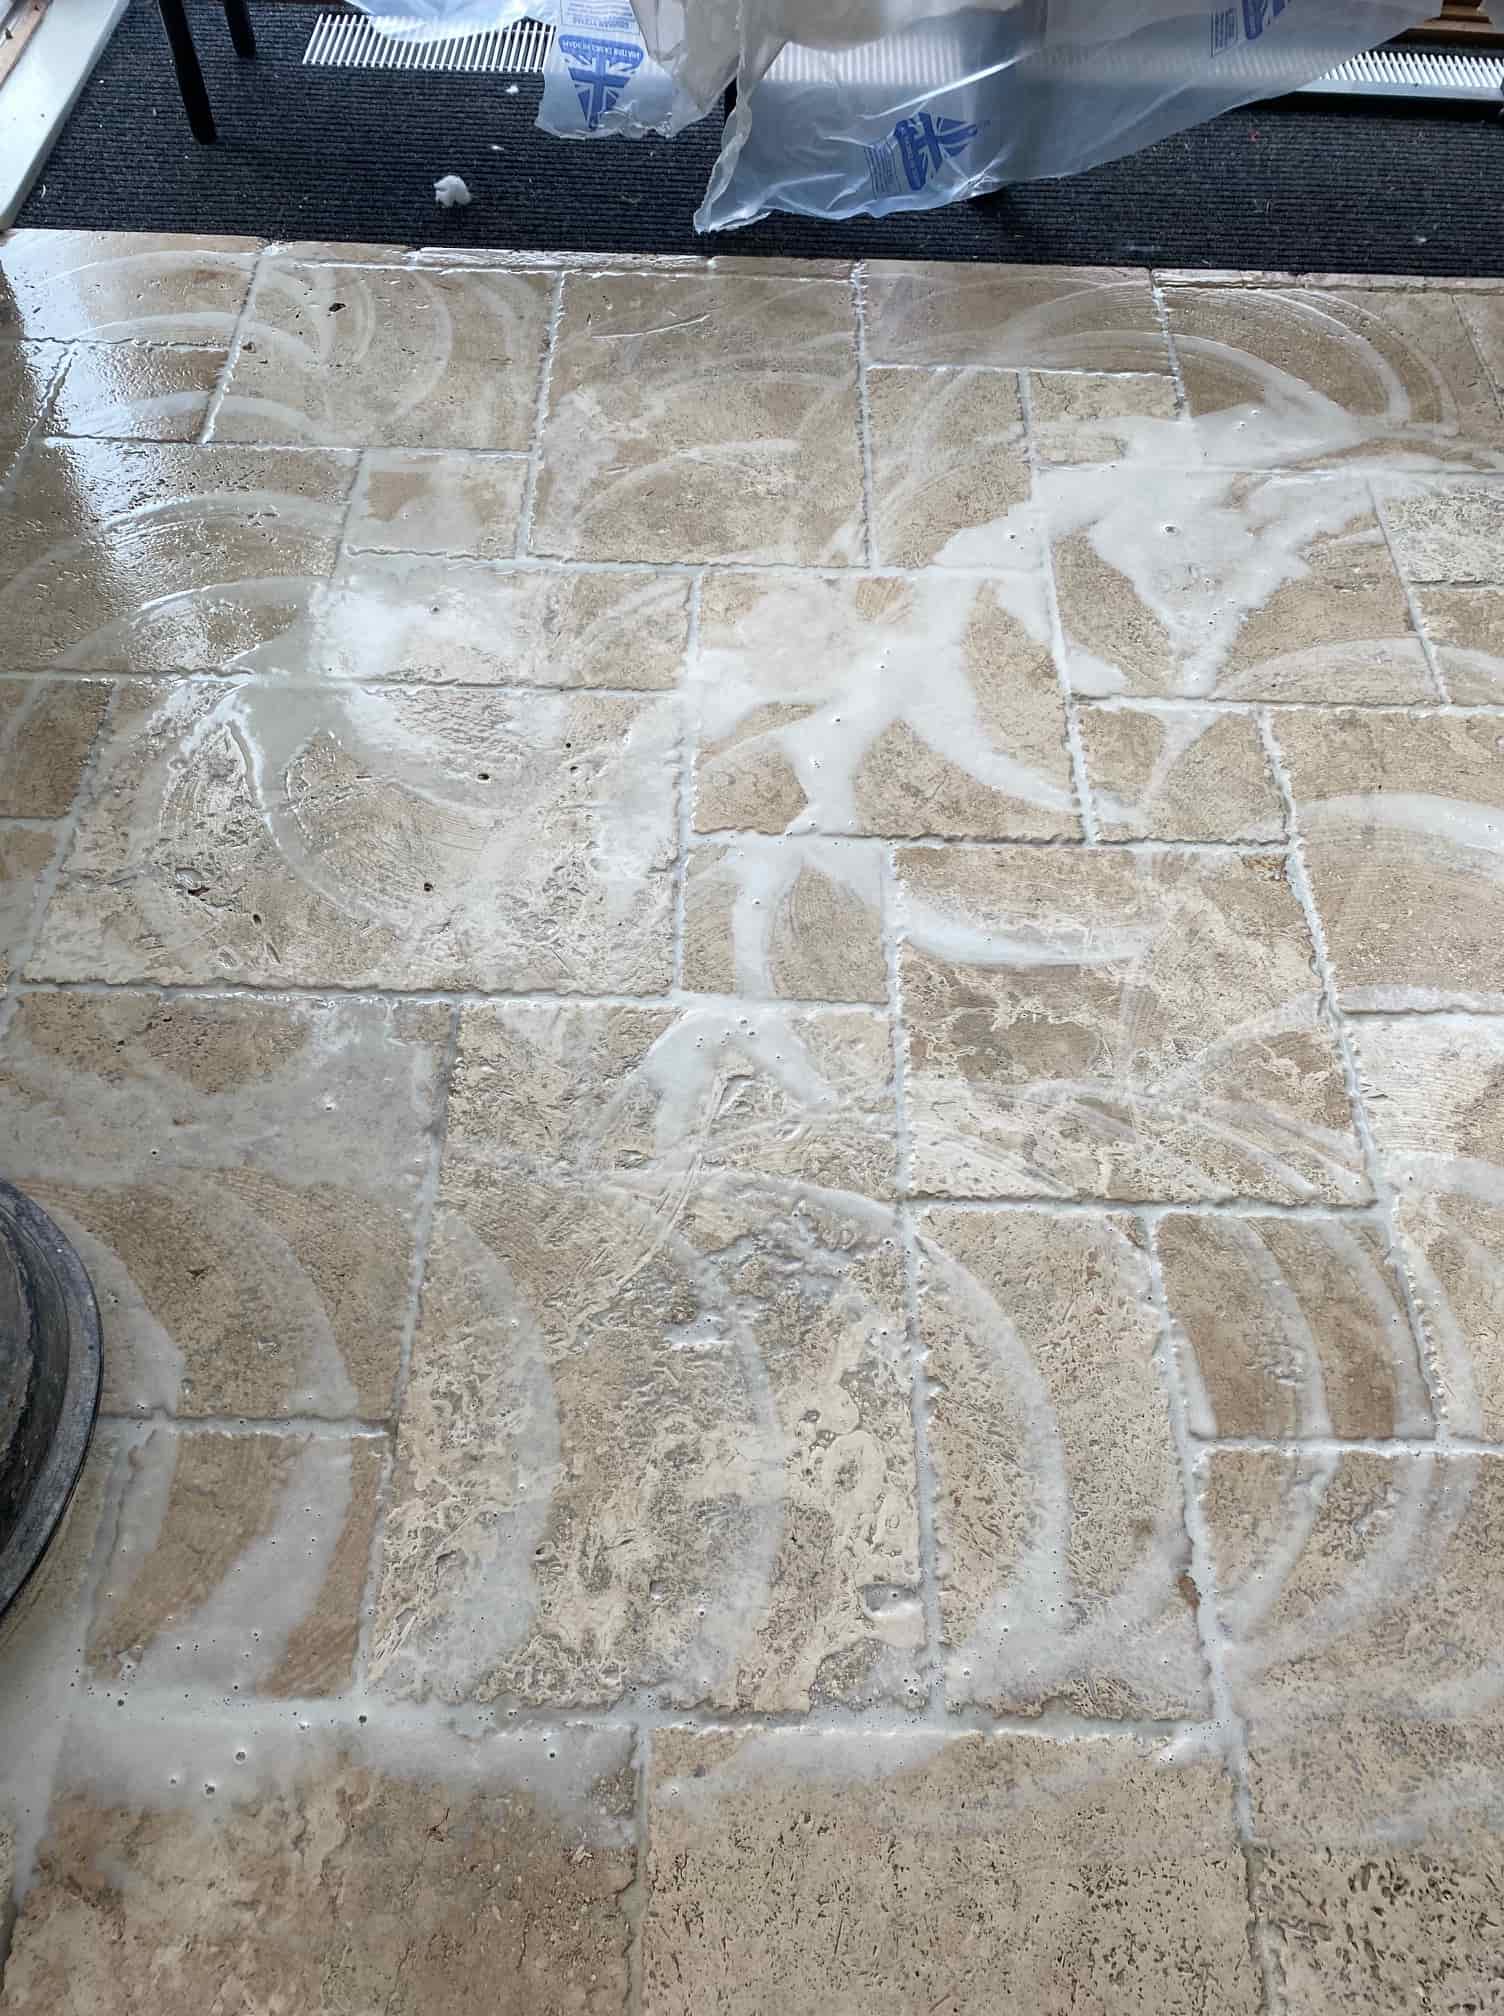
To get the stone clean and bring back the beautiful appearance of the Travertine I used several diamond burnishing pads which are run over the tiles with water for lubrication. The first was a coarse 200-grit pad which is fitted to a rotary floor machine and buffed into the stone in a circular motion. This process generates a lot of slurry which is then rinsed off afterwards and extracted with a wet vacuum.
 
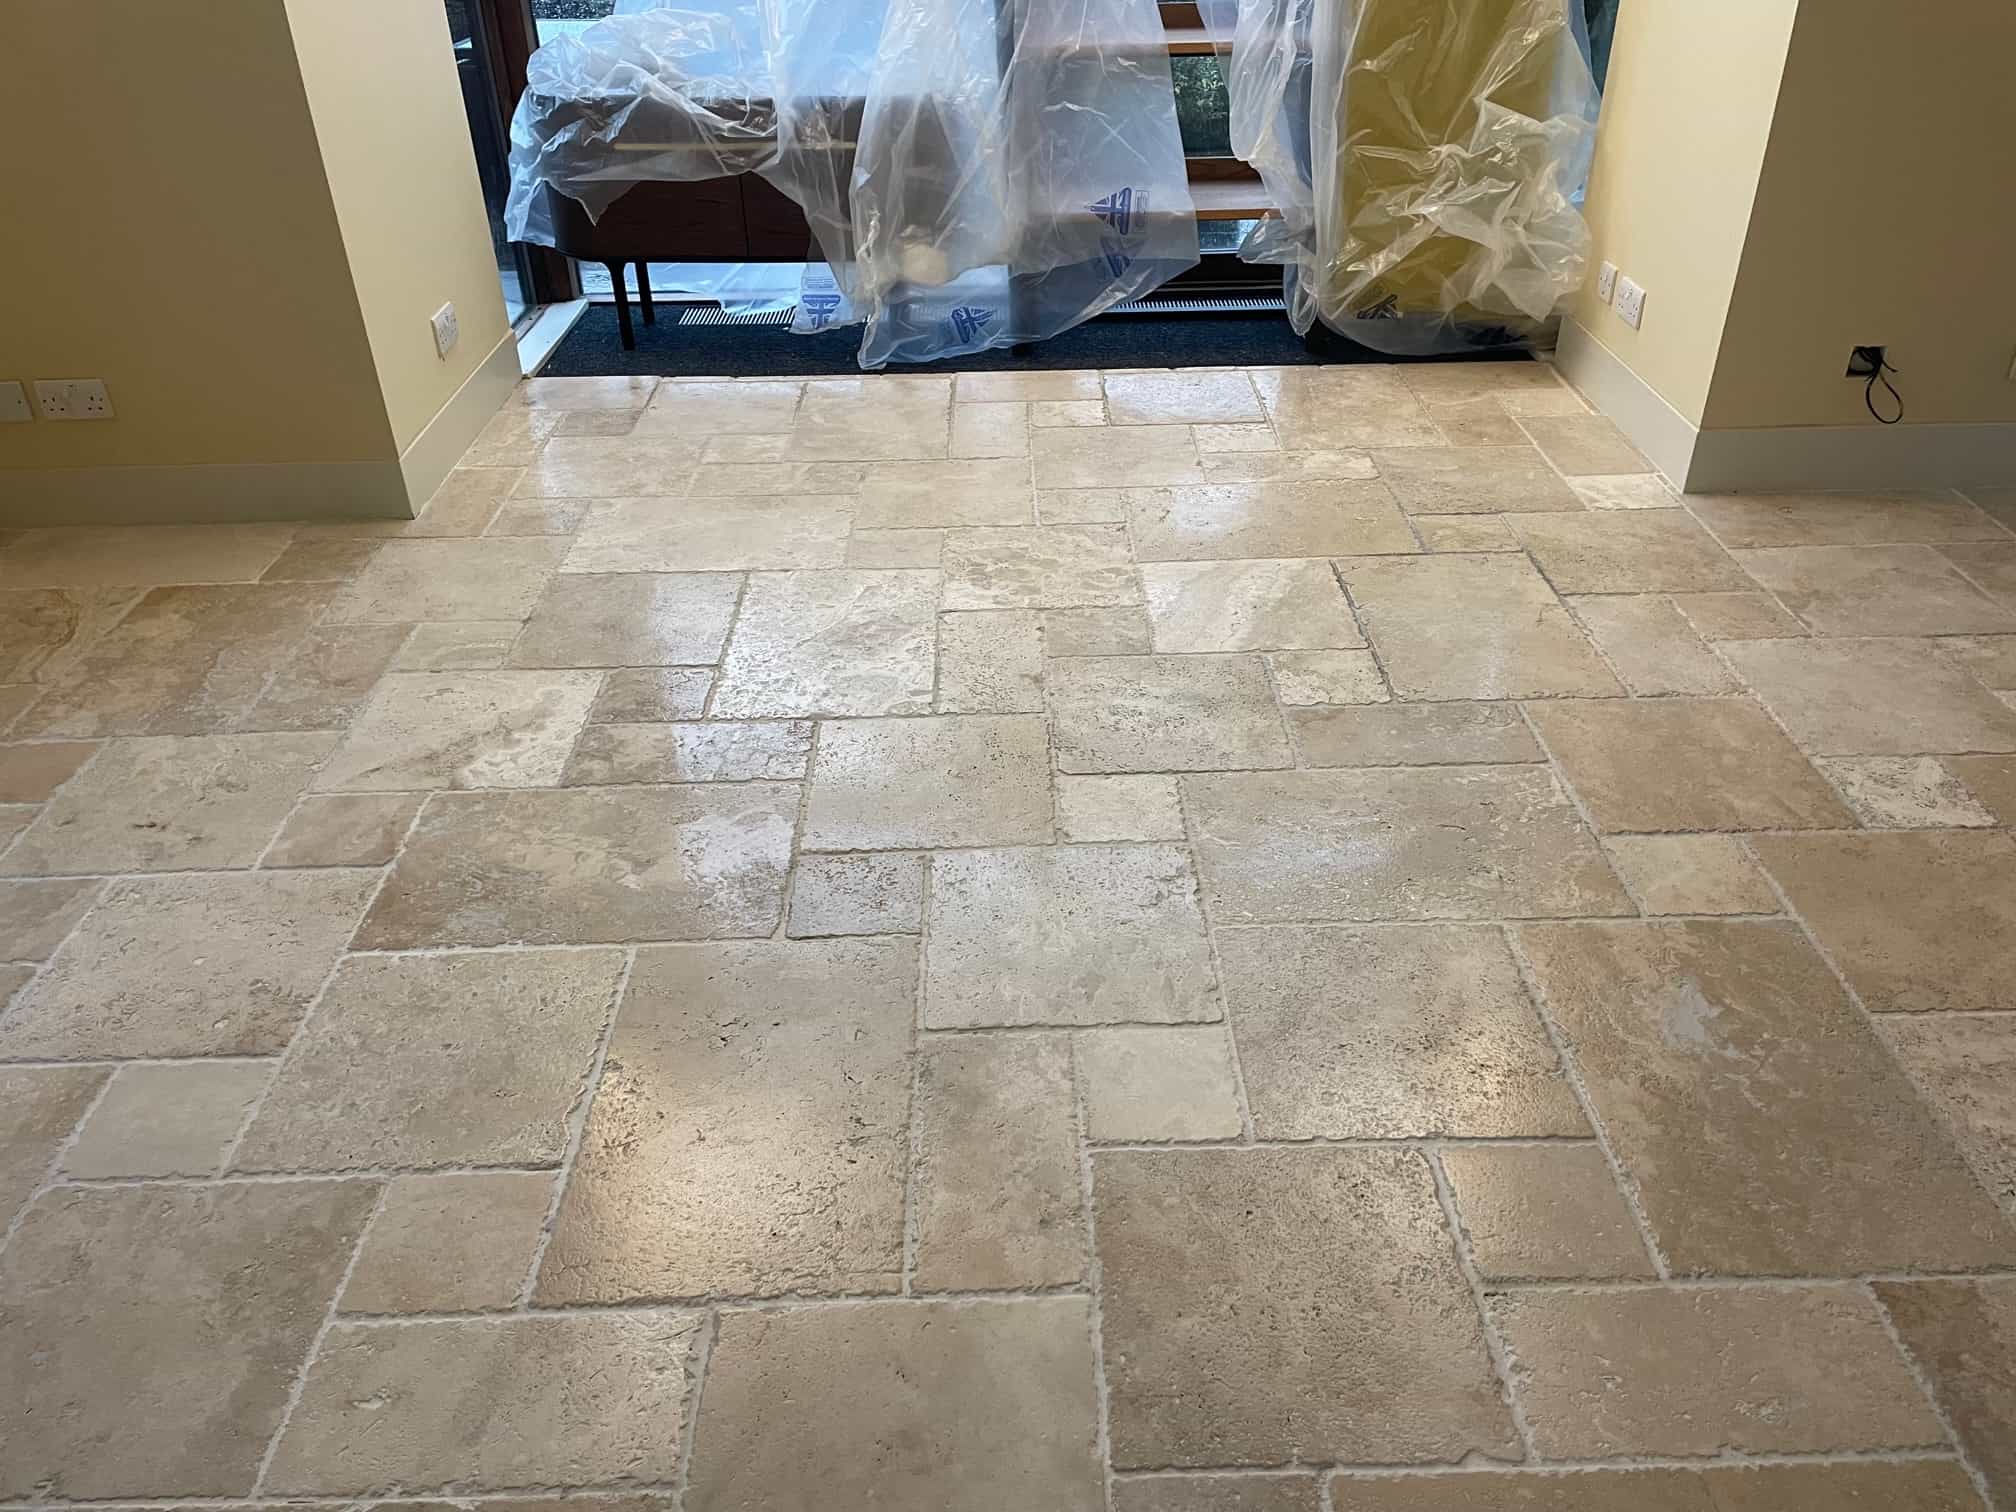
Honed Unfilled Travertine Kitchen Floor During Renovation Preston

This process was then repeated using finer burnishing pads and continued with a 400-grit, 800-grit and finally a 1500-grit, again each pad was run over the tiles several times and then the slurry extracted as before. It’s a completely abrasive process with no other products needed and the result is a sealer and dirt-free tile.
 
Honed Unfilled Travertine Kitchen Floor During Renovation Preston

At this point I inspected the floor to see if the pads had been able to clean up the grout as well as the tile. Pads can struggle to reach down into the recess so I often find more work is needed on the grout. As suspected the Travertine had responded well to the treatment however it was clear the grout would need more work and was still stained black in places. Normally use a grout cleaning product called Tile Doctor Pro-Clean for the grout but on this occasion, I felt something stronger would be needed. So, on this occasion I applied undiluted Tile Doctor Remove and Go along the grout lines and left it to soak in for ten minutes. It was then scrubbed in by hand, rinsed off and the soil remove with the wet vacuum. The grout cleaning had worked a treat and happy with the condition of the floor it was left to dry off overnight.

Sealing a Travertine Tiled Kitchen Floor

The next morning time was spent filling in holes (aka pitting) in the Travertine with colour matching grout before running over the whole floor with a very fine 3000-grit polishing pad to further bring up the appearance of the stone. This is done using a little water sprayed onto the tile a process we call a spray burnish. Spray burnishing also leaves the floor dry and ready to be sealed. The owner wanted the Travertine to look as natural as possible so two coats of Tile Doctor Ultra Seal were applied. This is an impregnating sealer which is recommended for use on polished stone and for use in kitchens.
 
Honed Unfilled Travertine Kitchen Floor After Renovation Preston

Before leaving I took time to discuss aftercare cleaning and how important it is to avoid the use of strong cleaning products (especially bleach) on Travertine, not only will it degrade the sealer but can also harm the stone. For the regular cleaning of sealed Travertine, I recommend using Tile Doctor Stone Soap which is a gentle but effective cleaner that also helps maintain the patina.

Tuesday, November 15, 2022

Clean your Carpets the Green Way

 Taking care of the carpets in your home can be frustrating. When they’re fresh and clean, they’re a joy, but it sometimes it seems you just turn around and your carpet is looking dirty and not smelling so fresh either. So, how can you keep your carpets clean and looking good without using a bunch of chemicals. Here’s some ideas

Floor mats

Put floor mats at the entrances to your home. As people walk in, any dirt on their feet will come off on the mats and won’t make it to your carpets. Inexpensive and attractive floor mats are available at most department and home store and as an added bonus, many of them are washable, so you can easily keep them clean.

Use the carpet cleaners you’ve already got in your home

Regular vacuuming will prevent dirt and pet dander from settling in your carpet fibers. Experts suggest vacuuming twice a week will extend the life of a carpet and keep it looking good for years.

Freshen your carpets while vacuuming

Sprinkling some baking soda on your carpet before vacuuming will help eliminate potential odors before you even notice them. Want to add a little ‘spice’ to the air in your home, put some cinnamon or cloves in the baking soda before you spread it. Plain or scented, let the baking soda sit on your carpets for at least ten minutes before vacuuming and when you do, you carpets will be totally freshened.

Spill something? Here’s some environmentally safe ways to get that spot out

First use a clean dry cloth or paper towels to absorb as much of the spill as possible. Be sure to ‘blot’ the original stain, don’t rub it or you’ll just spread and fix the stain into the carpet fibers. Once you’ve blotted the stain, apply club soda or soda water to help bring out the stain then blot up the liquid. Alternatively, you can use hydrogen peroxide, vinegar mixed with water or rubbing alcohol in the same way to lift stains.

You can even make your own ‘spot cleaner’ be mixing a teaspoon of liquid dish detergent with one to two cups of water.

Candle wax spill on your carpet?

Wait for the wax to cool then pick as much as you can off the carpet fibers using your fingers and a sharp pointed object like a toothpick. Work carefully and be sure not to damage the fibers themselves. Next spread a clean, dry white cloth over the wax spill and rub your iron (set on low) over it. The heat of the iron will melt the wax and it will stick to the cloth. Alternatively, you can use a plain, brown grocery bag (be sure to use a bag with no markings) on the wax and do the same thing.

A word of warning

Carpet fibers aren’t all the same and unfortunately what works well to clean one type of carpet may not work as well with another. For example, natural fibers react differently to cleaners than do synthetics. Always follow the manufacturer's directions for cleaning your carpets and to be safe, try out any ‘green’ cleaning solution in an inconspicuous area before using it where it can be seen.


Source: www.DoItYourself.com
Tuesday, November 8, 2022

Cleaning Wood and Laminate Floors

Proper care of your floor prevents damage, extends its life, and keeps it looking new for years. How do you properly care for your flooring?

If you enjoy going barefoot or even if you don't, kick your shoes off at the door. Why remove your shoes? If you have a rough board that needs smoothing you grab a sheet of sandpaper for the job. Guess what's on the bottom of your shoes? Sand and dirt grind away at the fibers in your carpet causing them an early death.

A closer look at the bottoms of those shoes and you'll find oil, dirt, and heaven only knows how many tidbits of leftover dog deposits. Small wonder why your floor stubbornly refuses to come clean. Do wear slippers or socks inside. The oil from the bottom of your feet also dirties your floors.

Always vacuum or dust hard floor surfaces before mopping

Clean your wood floors with ½ cup vinegar in a gallon of water. If you have been using vegetable oil on your floor increase the vinegar to 1 cup per gallon of water. Go over your floor several times to remove the residue. Rinse with warm water and dry. Vegetable oil cleaners can leave a residue on wood floors that can deteriorate the sealant over time.

Laminated Floor Caution:

The manufacturers of some laminated wood floors now recommend cleaning them with ammonia. We prefer only vinegar and water. As you saw in the linoleum floor section, ammonia is used to strip the wax off floors. It may do the same to the sealant on most laminated floors.

Self-wringing mops can leave excess water on the floor, which works between the boards warping the edges. Then sanding and refinishing becomes necessary. Water also contains alkaline, the culprit behind water spot damage on glass shower doors. It leaves damaging water spots on your wood floors. Vinegar neutralizes the alkaline helping to eliminate the problem.

To clean hardwood or laminated floors mix ½ cup distilled white vinegar in a gallon of water. Dampen a towel in the mixture and wring out all the excess moisture. Use the towel as your mop. No need to rinse. Dry the floor if necessary.

Source: www.DoItYourself.com
Sunday, November 6, 2022

How to Deep Clean Slate Tile and Grout by Berkshire Stone Expert

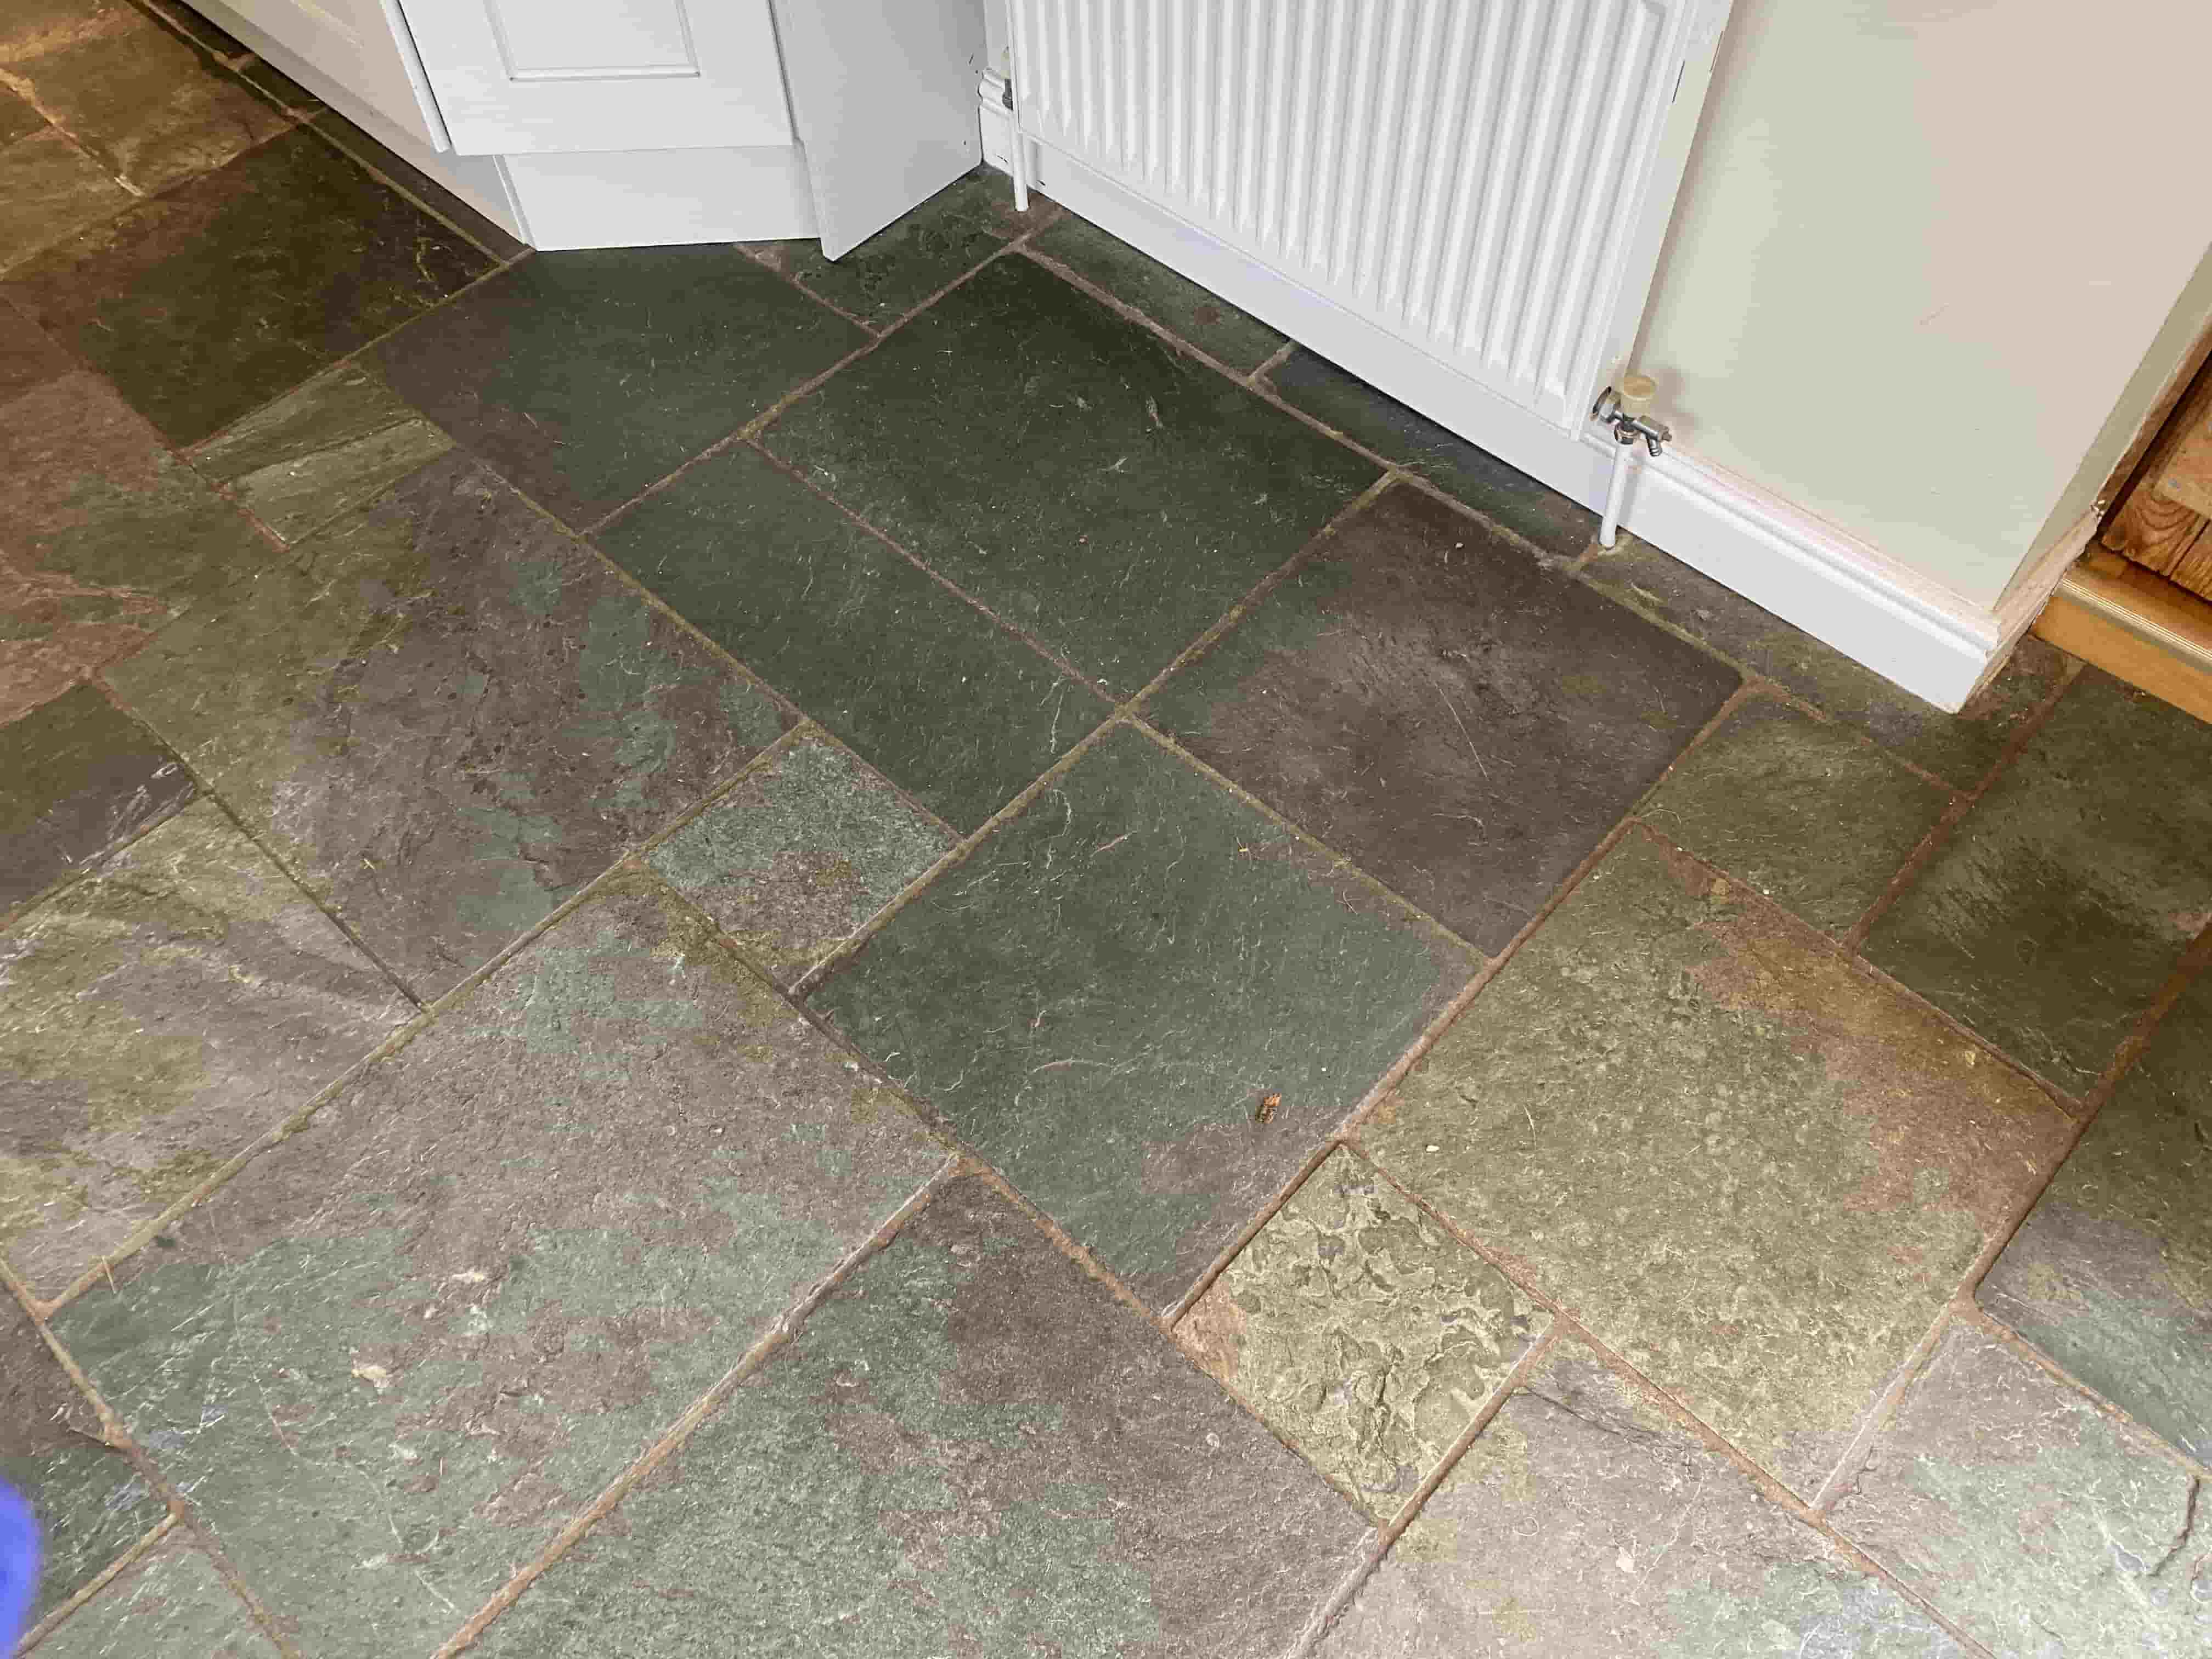
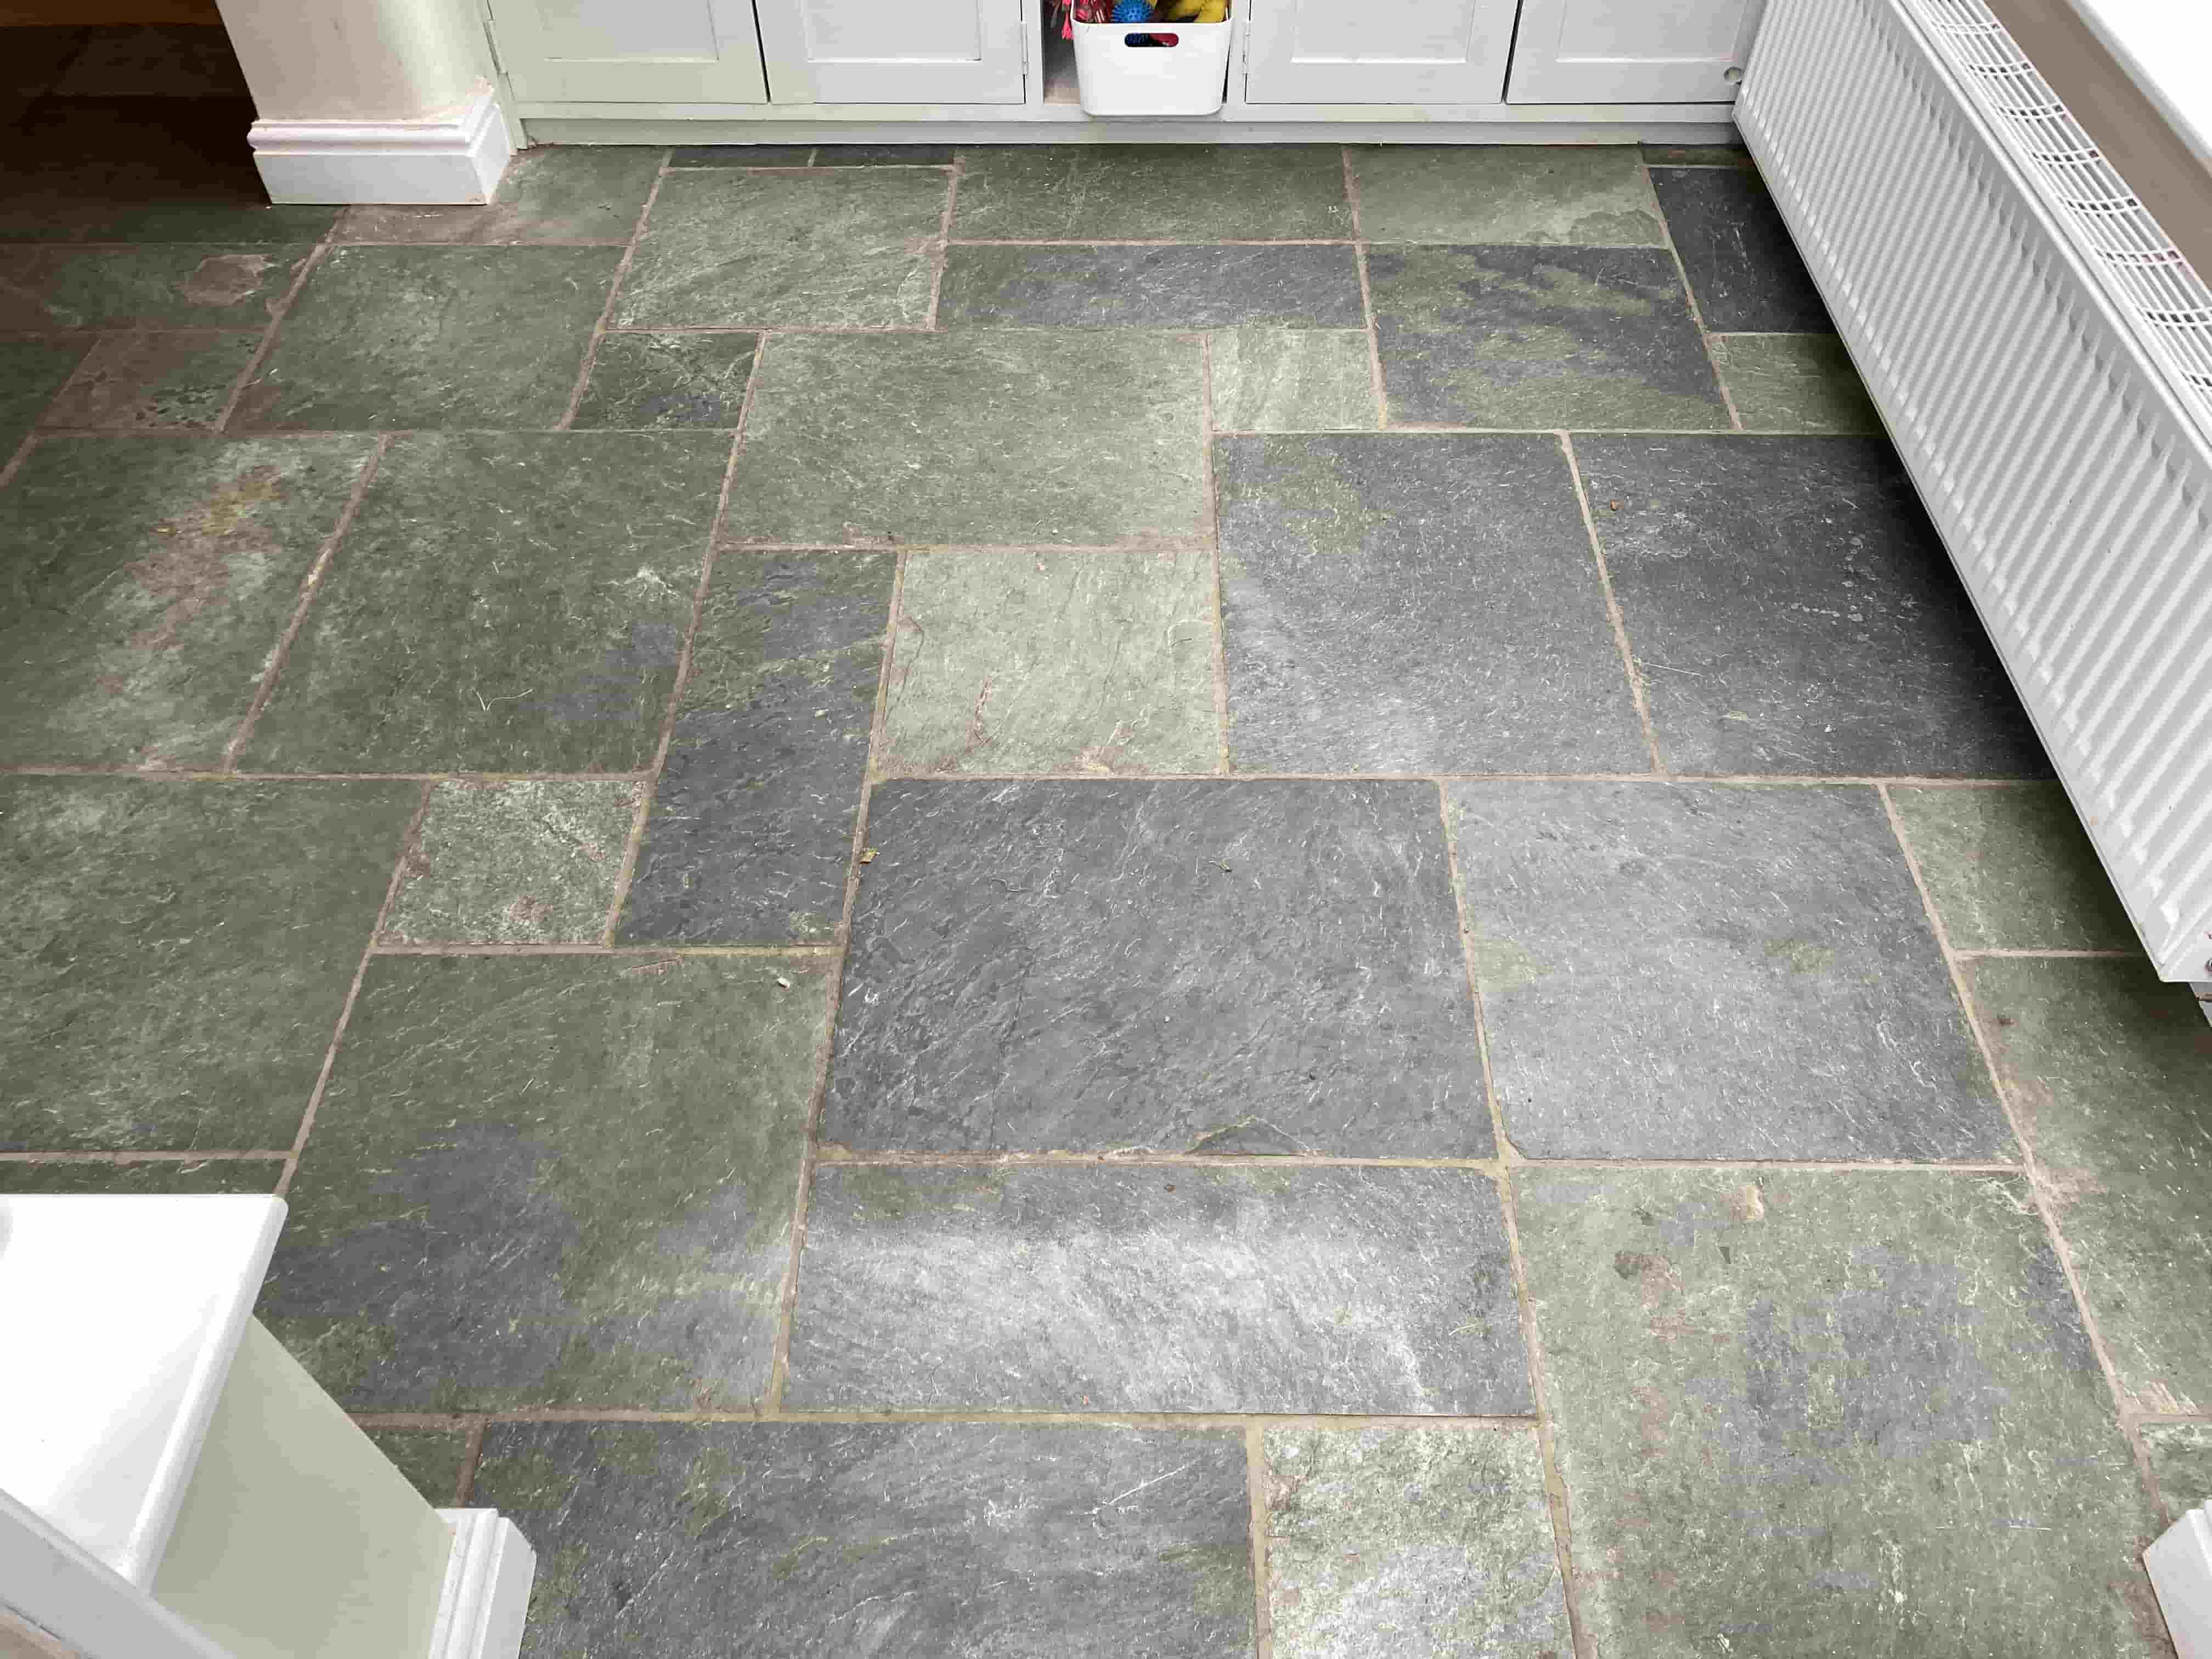
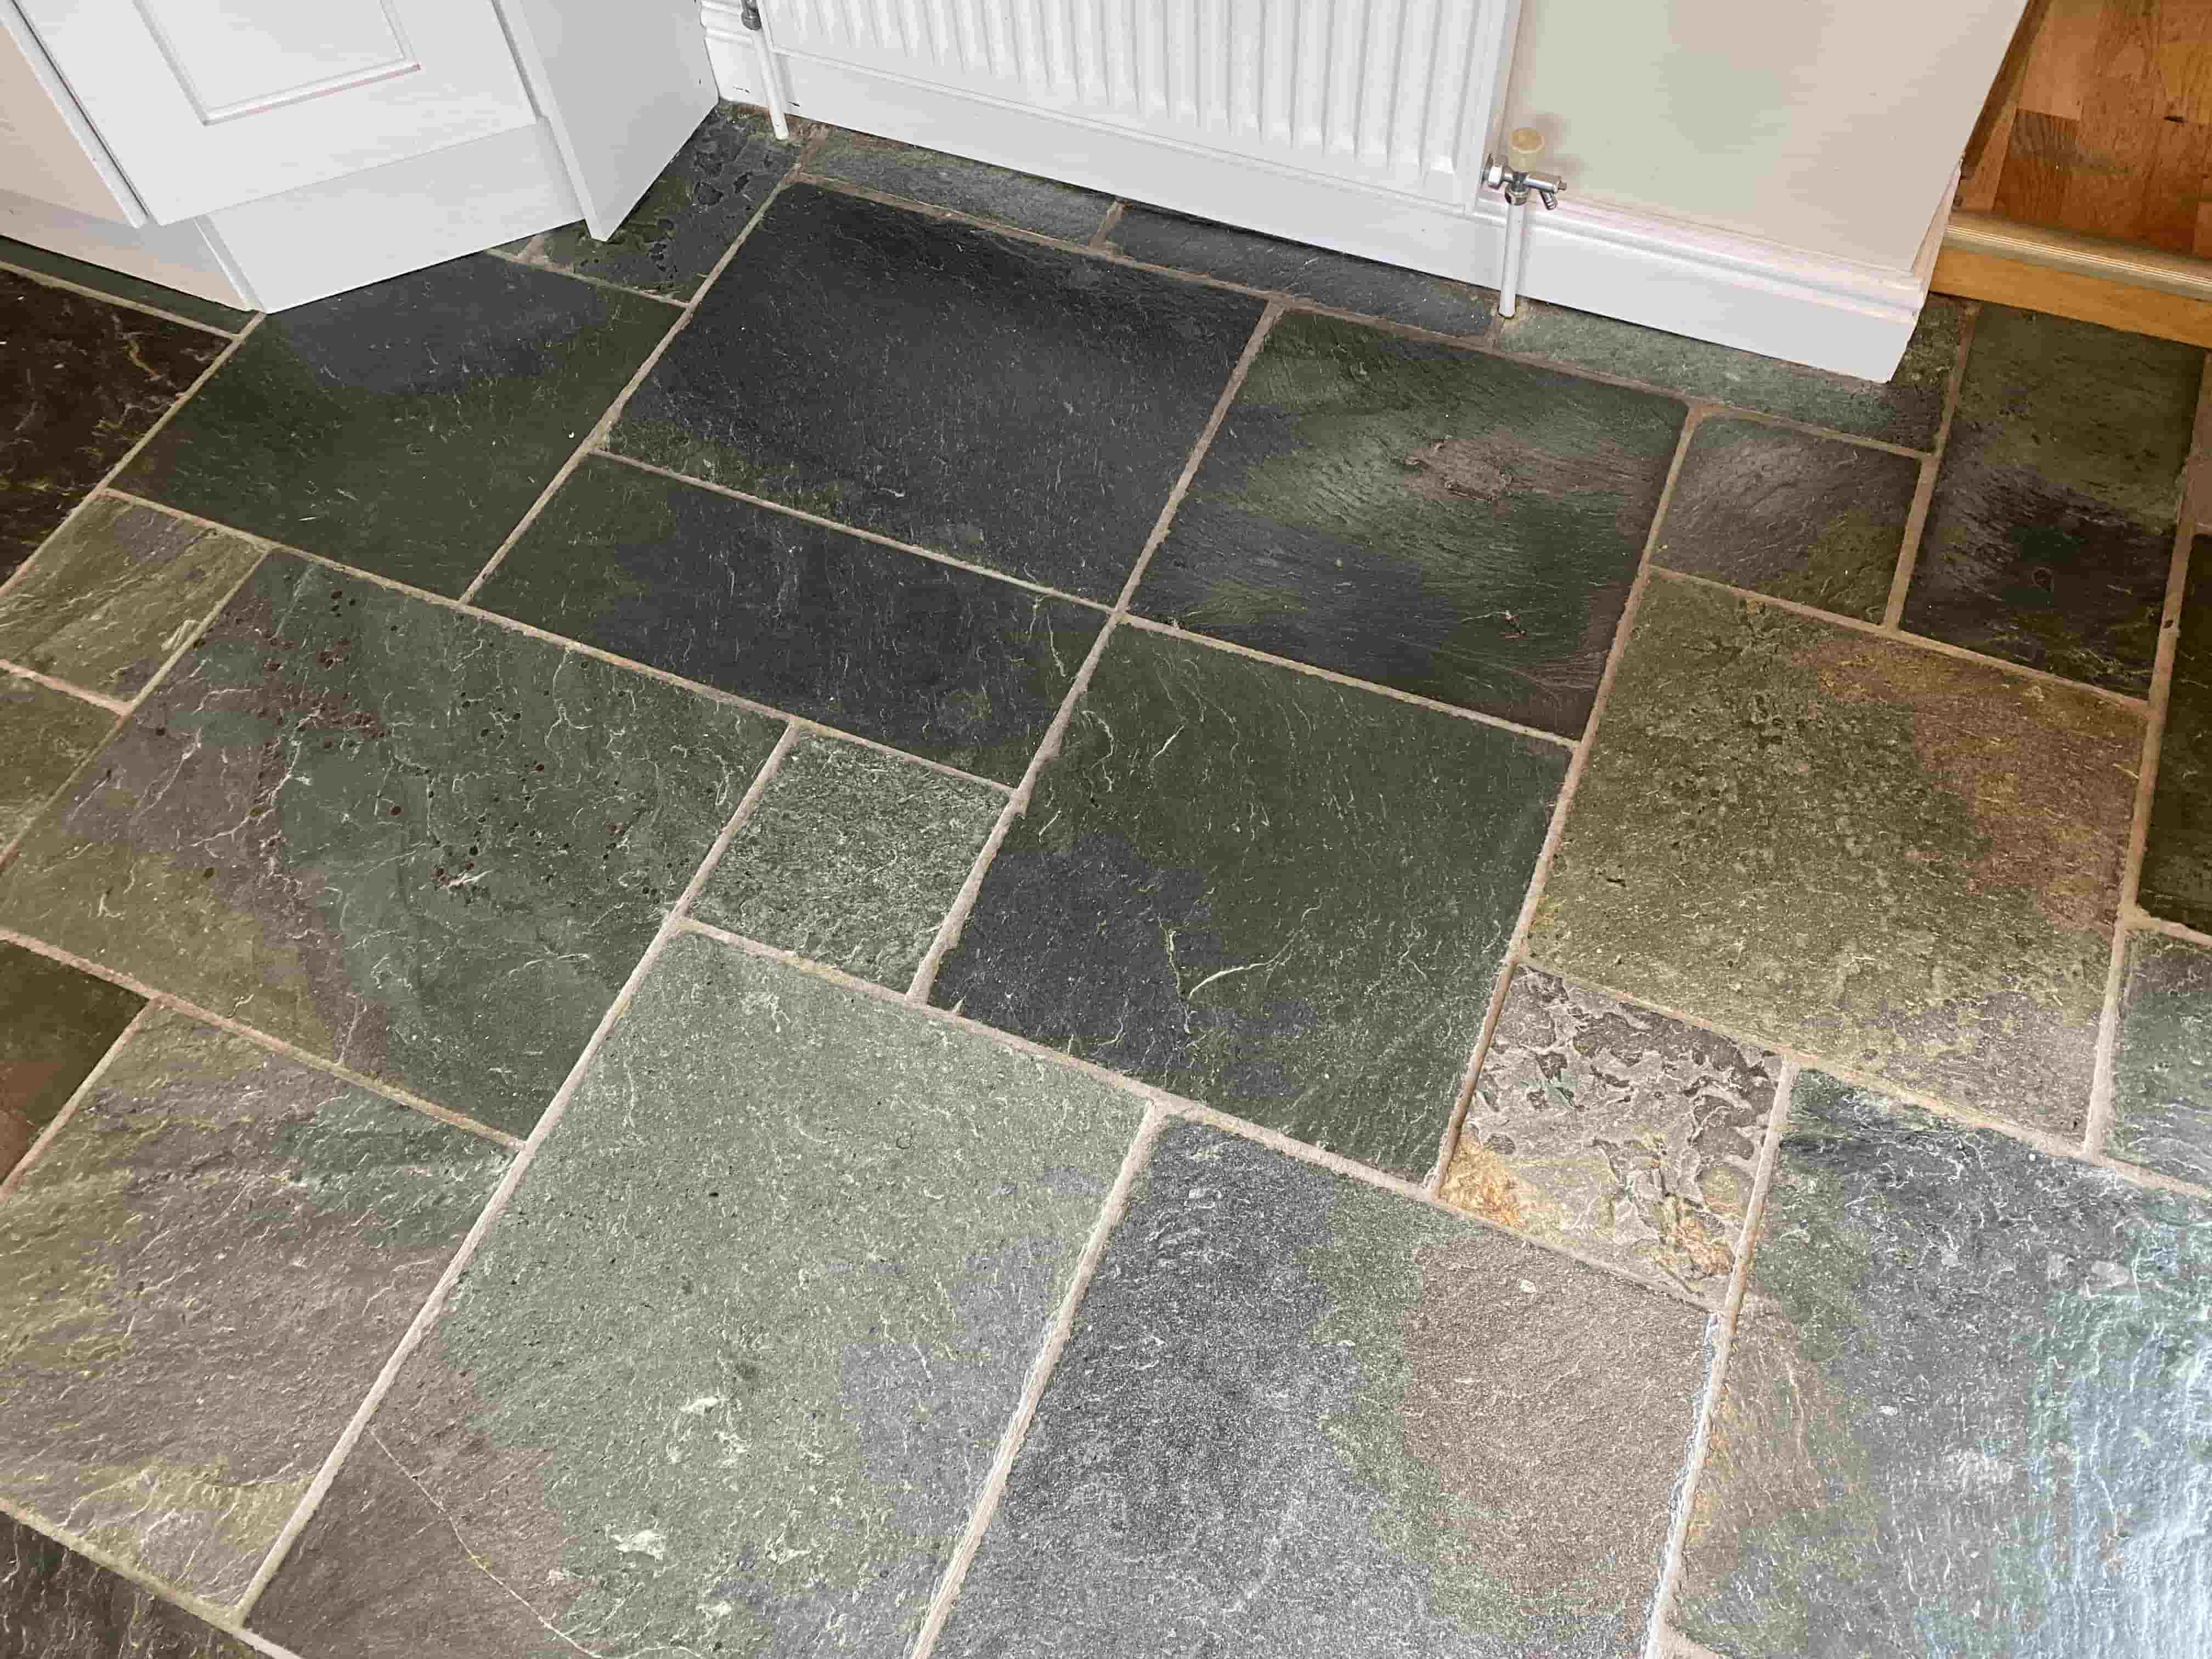
This customer in Thatcham, near Newbury in Berkshire had inherited a rare semi-riven Slate floor with their kitchen. However, years of dirt and contaminations had built up and left the Slate looking dull and the grout discoloured.

 
Semi-Riven Brazilian Slate Floor Before Renovation Thatcham

Slate is a very popular floor and wall tile due to its low porosity; there are many varieties and textures of slate available, it does need to be sealed though to keep the dirt from becoming ingrained in the stone. Unfortunately, the previous owners had not maintained the sealer and owning four dogs had probably used a strong acid cleaner on the floor which will have shortened its life. Inevitably time took its toll on the tiles and it was now overdue a deep clean and new sealer.

 
Semi-Riven Brazilian Slate Floor Before Renovation Thatcham

Cleaning a Semi-Riven Brazilian Slate Tiled Kitchen Floor

The first job was to apply a strong dilution of an alkaline detergent called Tile Doctor Pro-Clean which was applied and left to dwell for several minutes before agitating with a rotary floor buffer fitted with a scrubbing pad. A stiff brush was also run over the grout lines to get them clean.

I worked in sections and then used a hot water encapsulation system that is used a lot by carpet cleaners to remove the slurry and get the floor as clean as possible. After inspecting the floor, I could see a few stubborn areas than needed more work, so the process was repeated until I was satisfied the Slate tile and grout was as clean as it could be. The floor was then left to dry overnight

Sealing a Semi-Riven Brazilian Slate Tiled Kitchen Floor

The following morning, we returned, the floor looked nice and dry but I took several moisture readings with a damp meter just to be sure. All was in order, and I was able to progress onto the next step of applying a fresh sealer to the floor.

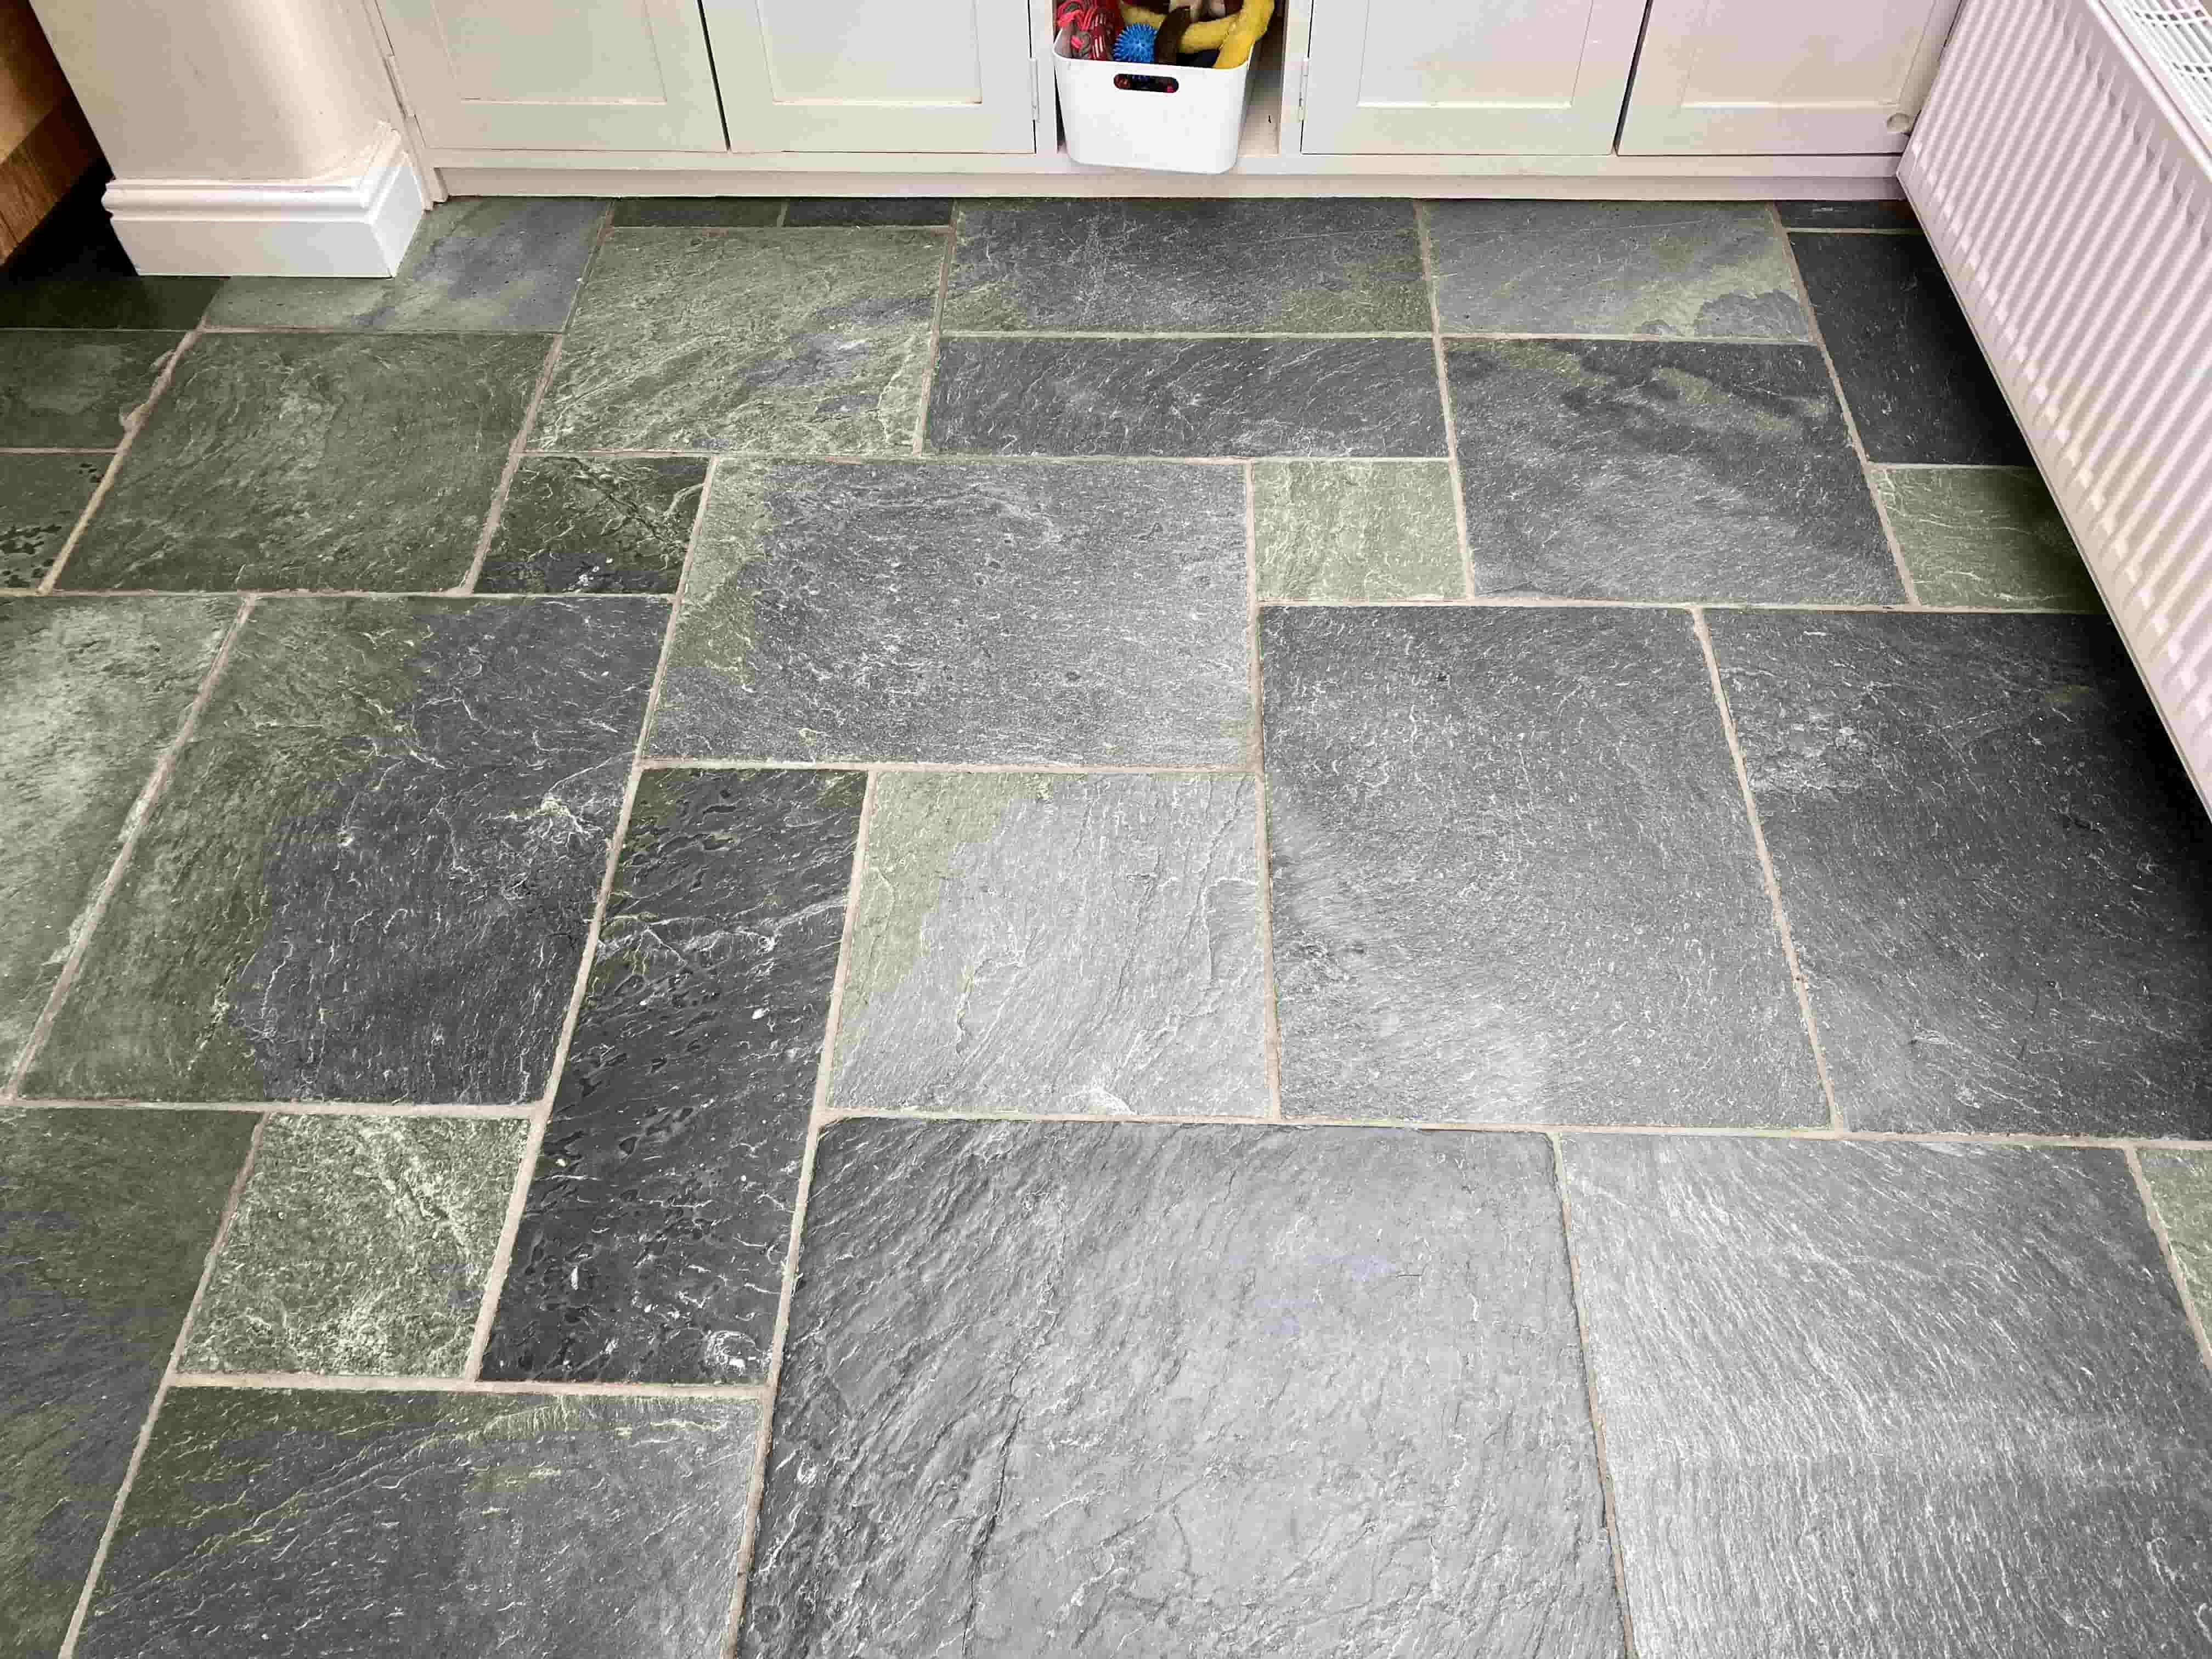
For this type of tile and conditions I chose to apply Tile Doctor Seal and Go which is a water-based sealer (no smell as it dries) that works really well on Slate. Multiple coats were required and each coat is left to dry before applying the next. The seal is very hard wearing, perfect for high traffic areas such as the kitchen and it leaves a lovely sheen without making the floor appear too shiny.

 
Semi-Riven Brazilian Slate Floor After Renovation Thatcham

The customer was very happy with the outcome and left the following feedback on our website:

 
“Extremely professional from point of contact till completion of the job, Dennis has done a magnificent job of my tiles. And I would highly recommend his services”

Before leaving made sure to leave a complimentary bottle of Tile Doctor Neutral Floor Cleaner to help maintain the floor going forward. This is a pH neutral product which makes maintenance of the floor easy and ensures that the newly applied sealant will stay in place and not be compromised. As mentioned before most people, including I suspect the previous owner, tend to use supermarket products which are far too harsh and break down the sealer taking them back to square one.

Thursday, November 3, 2022

Laminate Flooring: Cheaper Options with Lasting Appeal

If you want the look of marble or bamboo flooring in your home, but cannot justify the cost, then laminate flooring is what you are looking for. Probably the biggest advantage of laminate flooring is its cost. Here, we discuss laminate flooring, both advantages and disadvantages, and what to look for in laminate flooring.

The Case For Laminate Flooring

For remodeling a kitchen on a budget, laminate flooring is often the best choice. It is durable, easy to clean, and the many styles and colors can almost duplicate more expensive floor treatments. Because of its versatility, it comes in different grades for the home. These grades, which are approved by The Association of European Producers of Laminate Flooring (ELPF), are guidelines for every area of the home. Called AC hardness ratings, they range in number from AC1, which is designed for low traffic areas such as a bedroom, to AC5, which can be used in heavy traffic areas such as a commercial enterprise. Your choice is determined by the area of the home in which you would install the flooring – for example an AC3, which is suitable for just about any high traffic area of the home. Here, price is the guideline.

Laminate flooring is made up of several layers of material, which include a moisture resistant layer under a layer of high density fiberboard. The process is finished with a high resolution photographic image of natural wood flooring, making it almost undetectable from actual hardwood flooring. The good thing about laminate flooring is that it does not need to be installed above grade, as hardwood or other types of flooring must.

Maintenance

Laminate flooring does not require special cleaners or polishes to maintain it. In fact, manufacturer’s recommend that you don’t use abrasive cleansers or soap based detergents on this flooring. A dust mop or a vacuum cleaner with a soft brush is sufficient to clean it, followed by a damp mop and drying with a soft cloth. Stubborn stains such as tar or oil can be cleaned with acetone, or fingernail polish, followed by wiping with a damp cloth.

Because of the nature of its design, manufacturers recommend that some caution be used on a laminate floor installation. You should not wear stiletto heels when walking on the floor. Tables and other objects with concentrated weight on the flooring should utilize felt pads to avoid denting of the surface. If heavy appliances must be moved, care should be taken to avoid damage, and a sheet of plywood placed on the floor to protect the laminate.

In Conclusion

Although this may sound like a lot of extra work in the home, the cost savings are well worth the extra effort to maintain a laminate floor. A beautiful floor is the key to the ambiance of a room, and laminate flooring fits the bill. In the next part of this series, we discuss the installation of laminate flooring.


Source: www.DoItYourself.com