Showing posts with label floor tiles. Show all posts

Friday, December 5, 2025

Removing Ceramic Tile

 Depending on where they are and how they're installed, removing ceramic tiles can be either a nightmare or a relatively simple job requiring little effort. Stripping all the ceramic tiles from a wall or floor, rather than just trying to remove one or a small number, will also be easier simply because you're not worrying about damaging the surrounding tiles. Here are a number of different situations in which you’ll be removing ceramic tile and some ideas on how to do it right.

What You'll Need:

  • Putty knife
  • Hammer
  • Chisel
  • Flat-blade shovel
  • Safety glasses
  • Gloves
  • Dust mask

Ceramic Wall Tiles on Cement Board or Gyproc

This is by far the easiest situation. If you want to protect the underlying wall, take a three-inch, stiff putty knife and hold it at a very low angle relative to the wall. Starting at the edge of the wall, place the blade against the mastic and give the handle a solid tap with a hammer. In most cases the knife will slide under the tile and by simply lifting the handle up, the tile will pop off the wall.

Removing a single tile from a wall can be trickier. In this case, your first step is to remove the grout surrounding the tile using a rotary tool, a thin chisel, or a grout removing tool. Once you've taken care of the grout, use your stiff putty knife again, tapping the end to slide it under the tile.

Removing Tiles on Concrete Board

Removing floor tiles laid on cement board is more work than wall tiles but the methodology is similar. Choose an edge, where flooring and the wall come together, and start by removing any edgings or moldings. Now, you may be able to remove a starter tile using your putty knife, but more likely, you will need to remove the grout around a few tiles first.

Once you get a few starter tiles off the floor, break up the underlying cement board by banging on it with your hammer and discard it. Now you've created a small opening where you can slide a flat-bladed shovel under both the cement board and the ceramic tiles. Lifting up the shovel from underneath will break the cement board and the grout holding the tile so you can remove it. Repeat the process, sliding the shovel under the cement board then lifting and you can get rid of the floor in chunks.

Old Ceramic Tiles Laid Directly onto a Cement Base

This is by far the most difficult situation to deal with and thankfully this installation technique isn't used anymore. There are lots of old homes with ceramic tiles installed right onto a cement base. Once the mortar has cured, the concrete base and the floor tiles are in reality a single piece. There are only a few ways to remove ceramic tiles in this situation. One solution is to break up the tiles with a sledge hammer. However, it's a back-breaking, labor intensive project, and you risk damaging the base if you’re not careful.

The easier solution to this problem is to use a chisel and a hammer. You will want to start at a broken tile, if you have one, or in an area with loose grout so you can get the chisel under the tile. As you get the chisel tip underneath, tap the end of the tool with your hammer to work it further in. These tools will also work to chip away at the old thinset mortar adhered to the floor, which can’t be removed with a sledgehammer. It will be a time-consuming job, but one that will get you a good, clean subfloor to proceed from.

A Safety Reminder

No matter whether you're removing a whole floor or wall of tiles or just a single tile, remember you need to wear wrap-around eye protection, good quality work gloves, and a dust mask. Obviously, it's also a good idea to place protective covering on the floors and walls around where you're working.

Tuesday, June 25, 2024

How to Polish a Marble Floor by Cumbria Tile Doctor

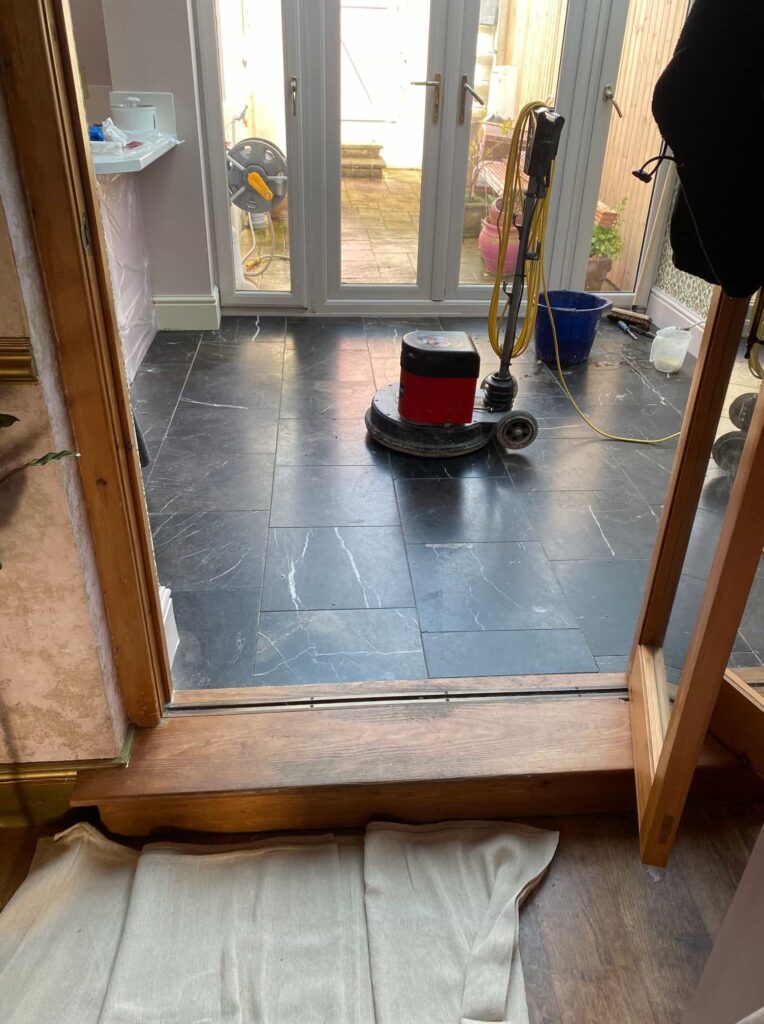
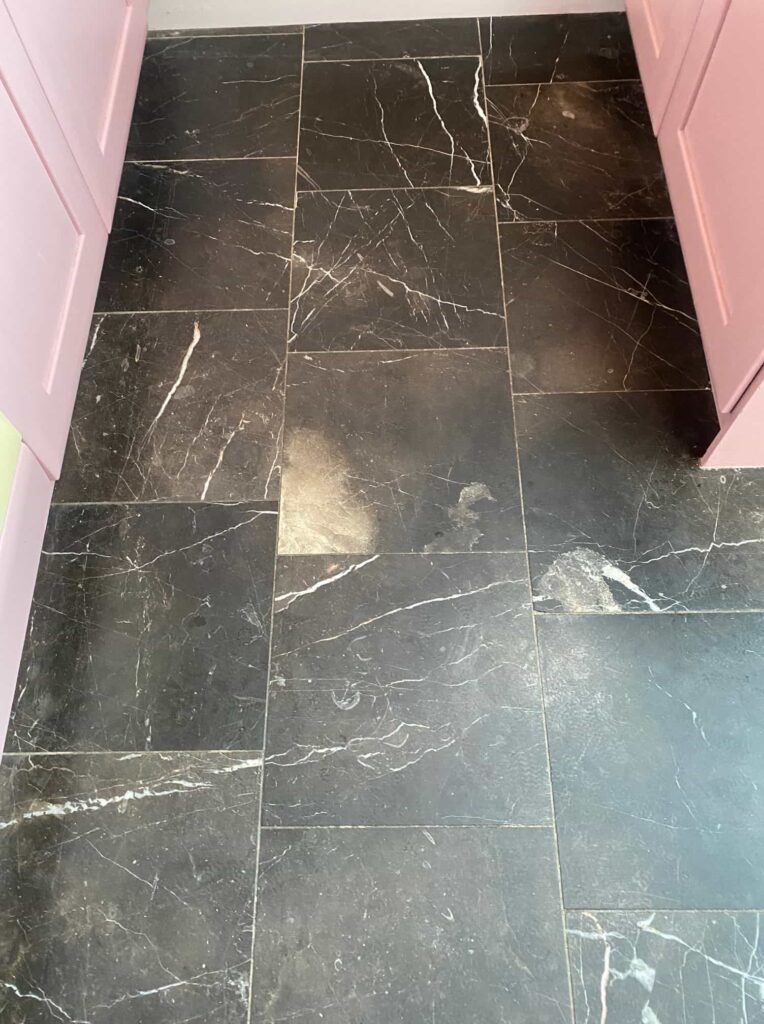
This client from Barrow in Furness contacted Tile Doctor about their polished black marble floor which had been installed 20 years ago. Its polished appearance had diminished with use over that time, and they had wasted money on different products sourced from DIY shops and the internet to rectify it.

Polished Black Marble Floor Before Cleaning Barrow in Furness

Many of these products were unsuitable for this type of tile and as such the top surface was quite tacky to walk on and had done nothing to improve its appearance. Happy I could resolve the problem they accepted my quote to re-polish the floor and a date was agreed to commence the work. 


Cleaning a Polished Black Marble Dining Room

My first task was to protect the woodwork by applying a bead of clear waterproof mastic between the wood and the floor, this prevents water being soaked into the wood through capillary action, this can cause water staining and worst-case blow MDF skirting and doors.

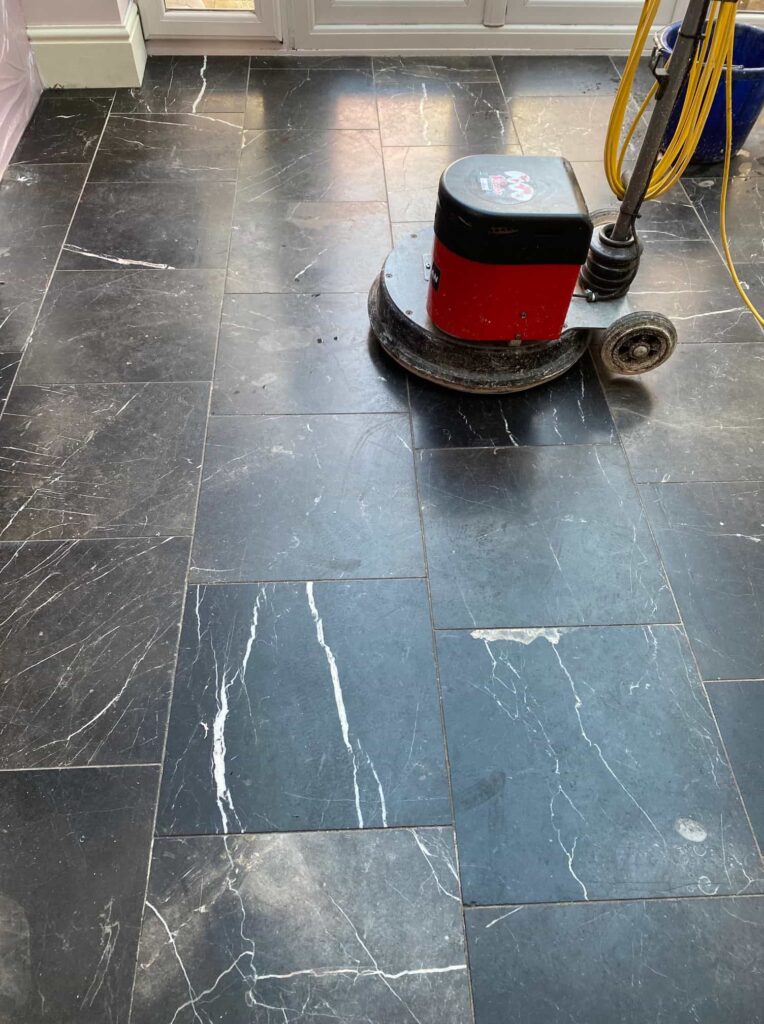
Once done work started on polishing the marble floor using a 200-grit 17-inch diamond pad fitted to a rotary floor machine. This pad removes encrusted sealers, old polish and other products that were upsetting the stone finish. Applied with water for lubrication this pad does a good job of cleaning up the stone but leaves it looking dull with a matt finish.

To bring back the finish, finer grit diamond Burnishing pads are applied in sequence starting with 400 then 800 and 1500-grit. These pads clean and rebuild the polish on the Marble slowly brings the stone back to life again. The floor is rinsed off with water after each pad and the soiling extracted with a wet vacuum. The edges were then completed with a small handheld machine using smaller pads of the same grits.

After this work, I started on the grout lines which were scrubbed by hand using Tile Doctor Pro-Clean which is an alkaline cleaner and will not upset the marble. I find it best to do this work by hand as the pads can struggle to reach into the recesses of the grout line.
   
Polished Black Marble Floor During Cleaning Barrow in Furness Polished Black Marble Floor During Cleaning Barrow in Furness

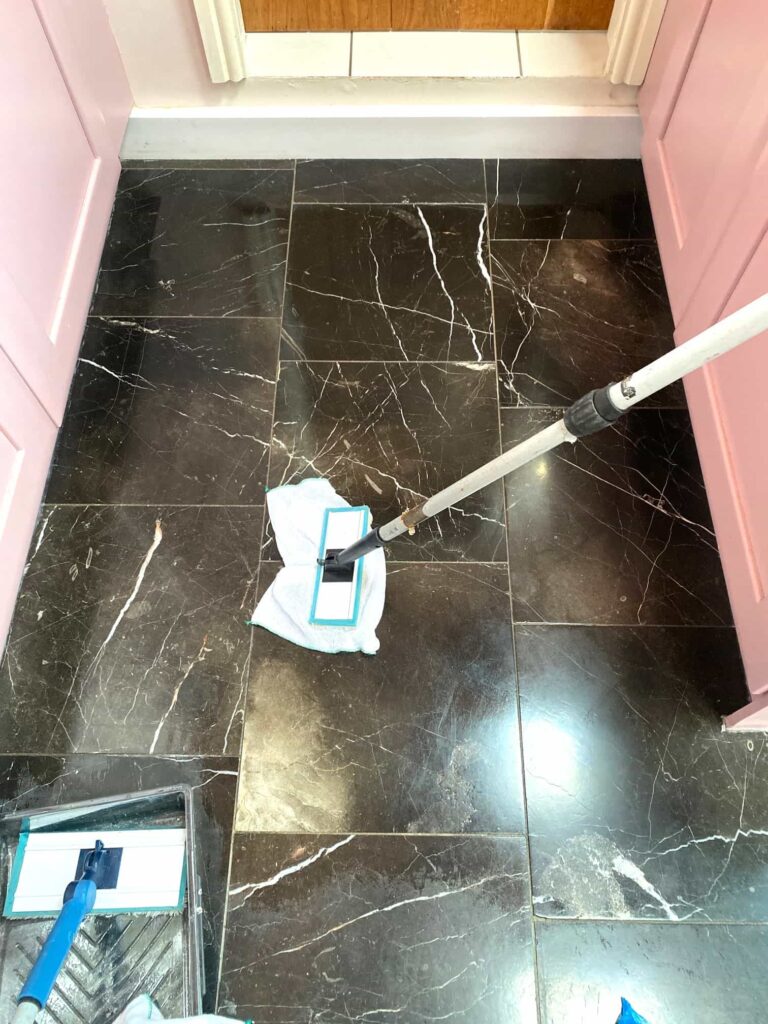
A final rinse with clean water which was then extracted with the wet vacuum and the floor left to dry off overnight.

I called back the next day and started work by checking the stone and grout was nice and dry and ready for a final polish using a 3000-grit diamond pad. This pad brings up the polish on the floor even further and is applied using a tiny amount of water from a spray bottle which aids in the final polish.


Sealing a Polished Black Marble Dining Room

Once the whole floor was polished including all the corners and edges it was time to start applying the sealer. With this being a Black Marble floor with more than a few marks on it from the wear and tear over the last twenty years, I opted to use a sealer normally designed for outside areas called Tile Doctor X-Tra Seal. This is an oil based breathable sealer that soaks into the pores of the stone protecting it from within and ensuring any dirt remains on the surface.

Polished Black Marble Floor During Sealing Barrow in Furness

We don’t normally recommend X-Tra Seal for polished surfaces as the oil takes a lot to cloth off, however in this case I felt the extra work would be justified as the oil works well on Black stone.

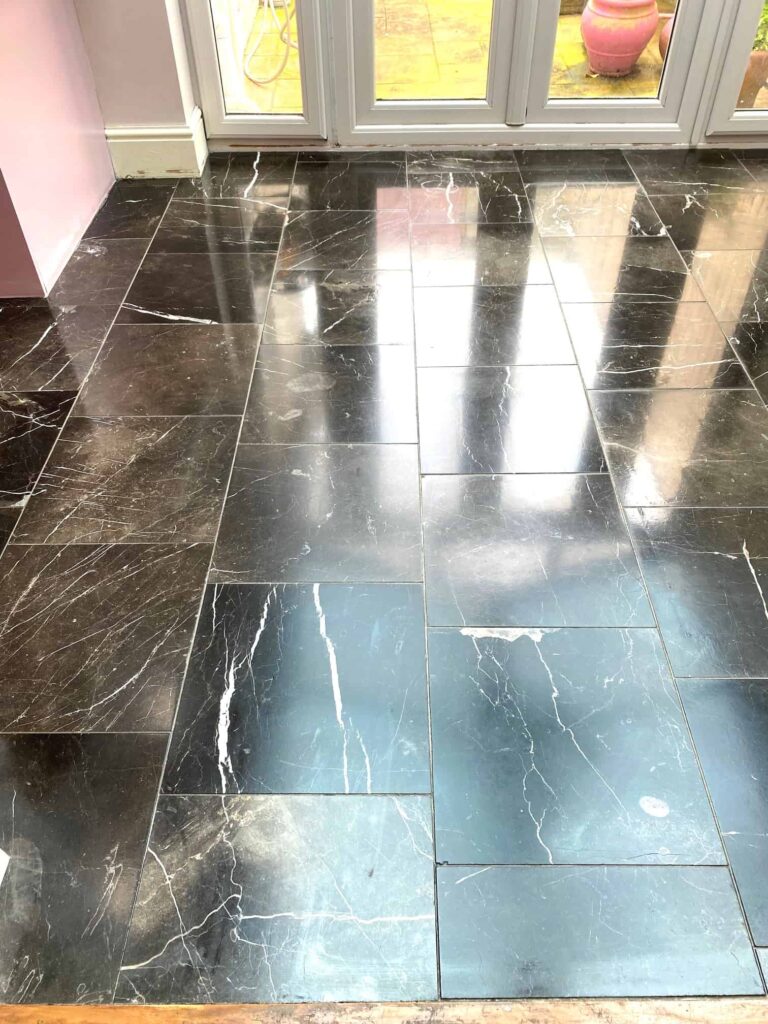
Polished Black Marble Floor After Cleaning Barrow in Furness

Once done the Marble tiles were transformed by the work much to the relief of the owner who had really struggled to maintain the floor. Before leaving I made sure to spend time discussing future cleaning and recommended, they use Tile Doctor Stone Soap going forward. This is a mild but effective cleaner which helps maintain the patina on the Marble.


Sunday, February 12, 2023

Getting a Great Finish on a Black Slate Kitchen Floor in Hounslow

This Slate tiled floor at a property in the West of London suburb of Hounslow was not looking its best and now in need of a strip and seal to restore its appearance. The decorators the client used had agreed to clean and re-seal the floor after painting but unfortunately didn’t do a good job of it. I suspect they applied the sealer without rinsing properly and didn't allow the floor to dry fully beforehand.

 
Slate Tiled Kitchen Diner Floor Before Cleaning Hounslow Slate Tiled Kitchen Diner Floor Before Cleaning Hounslow

My client was unhappy with the finish and so asked me to quote for resolving the problems. I went over to survey the floor and advised the client that to rectify the problems we would need to strip off the sealer they had applied, clean the floor again and then reseal with the correct product. They were happy to go ahead with my recommendation as they wanted the floor restored to its pre-decoration state. They agreed my quote and we scheduled a mutually convenient time to carry out the works.

 
Slate Tiled Kitchen Diner Floor Before Cleaning Hounslow


Cleaning a Slate Tiled Kitchen Diner Floor

In order to break up the sealer, a coatings remover was applied to the floor called Tile Doctor Remove and Go. This is a strong sealer stripper that breaks up the sealer allowing it to be removed. This was left to dwell for a short while to lift the sealer.

The products were then scrubbed into the floor using a heavy-duty machine, alongside this we also applied another cleaning product called Tile Doctor Pro-Clean. This action ensured that all the sealer was removed and it also removed any dirt that had been left on the surface. The floor was then low pressure rinsed and the old sealer and soils were then vacuumed away leaving the floor ready for sealing.


Sealing a Slate Tiled Kitchen Diner Floor

The following day, after allowing the floor to dry overnight with the under-floor heating it was ready for sealing. Two coats of Tile Doctor Colour Grow sealer were applied which is a durable impregnating product that works by occupying the pores in the stone preventing dirt from residing there.

This sealer also contains a colour enhancer which is ideal for Black Slate as it further darkened the colour and brought out the contrast in the tiles. This product is also fully breathable and recommended for use on a large variety of flooring and can even be used externally.

 
Slate Tiled Kitchen Diner Floor After Cleaning Sealing Hounslow

The client pointed out that it looked like it did when originally installed and was very pleased to say the least. Before leaving I took time to discuss aftercare and recommended the use of Tile Doctor Neutral Tile Cleaner. This is a pH neutral tile cleaning product that is mild enough to be used regularly and will ensure that the newly applied sealer will stay in place. The new sealer will also ensure cleaning will now be easier which the client was very grateful for.

 
Slate Tiled Kitchen Diner Floor After Cleaning Sealing Hounslow Slate Tiled Kitchen Diner Floor After Cleaning Sealing Hounslow


Sunday, January 23, 2022

Tips and Techniques - Victorian Floor Restoration in York, England

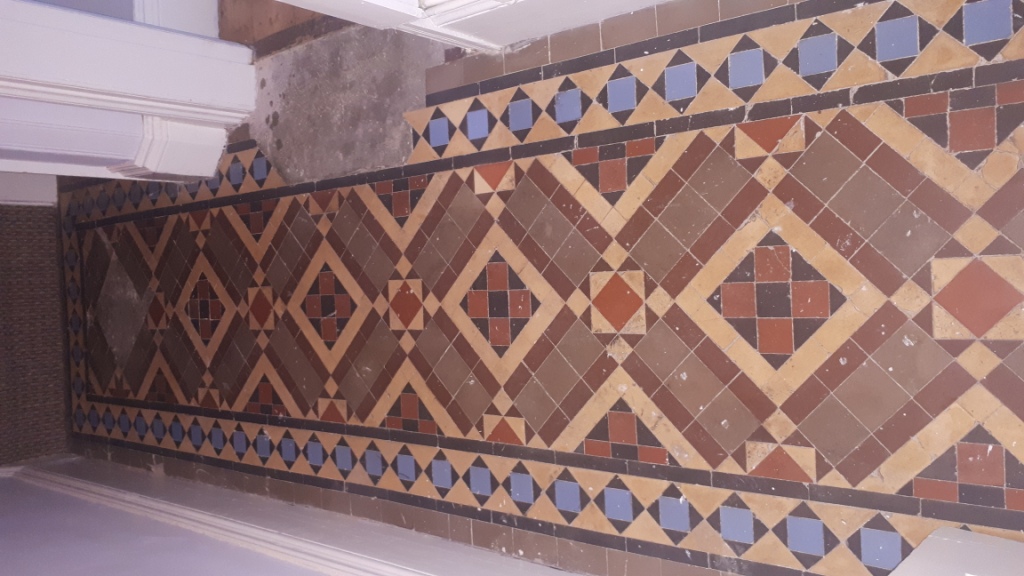
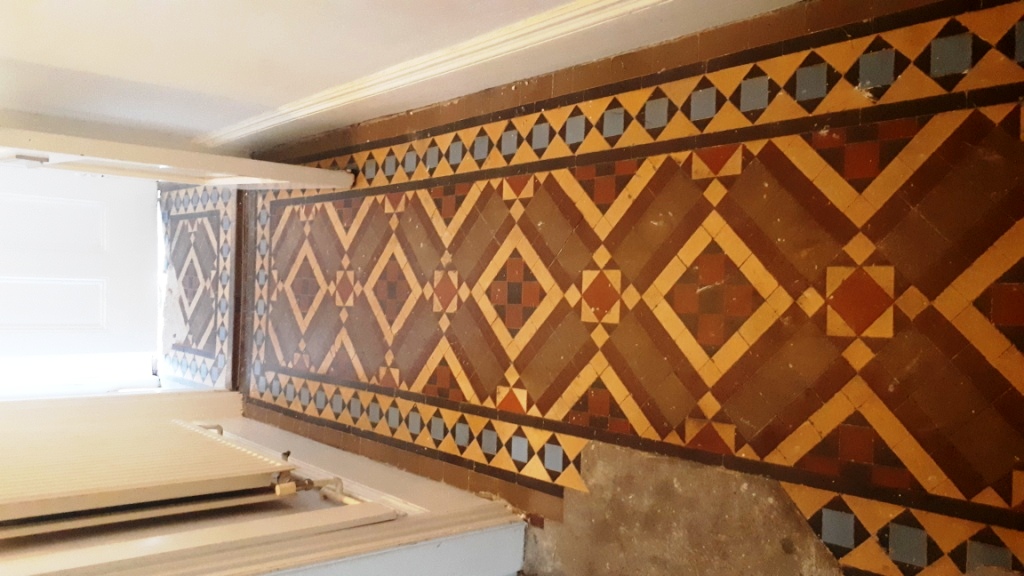
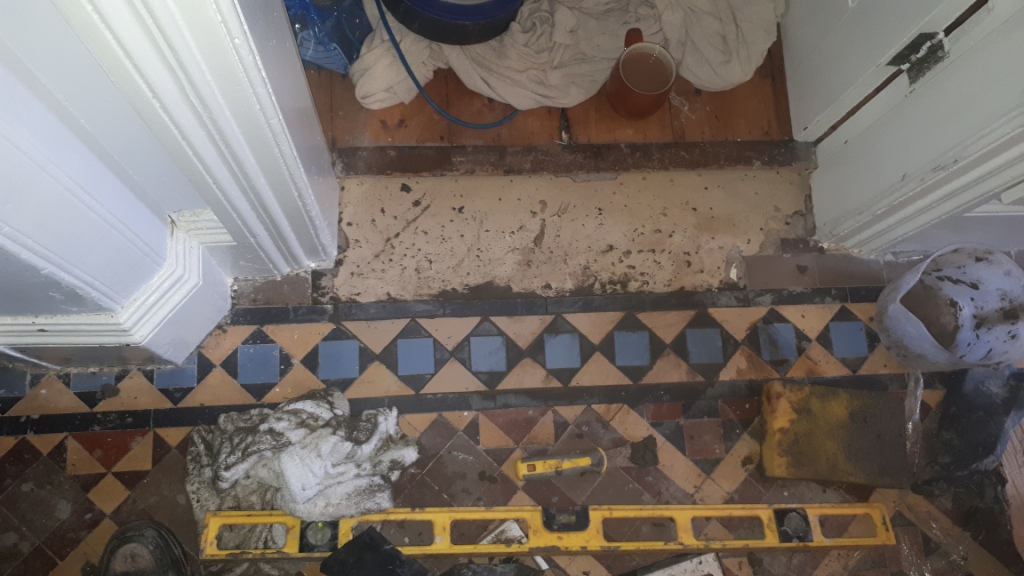
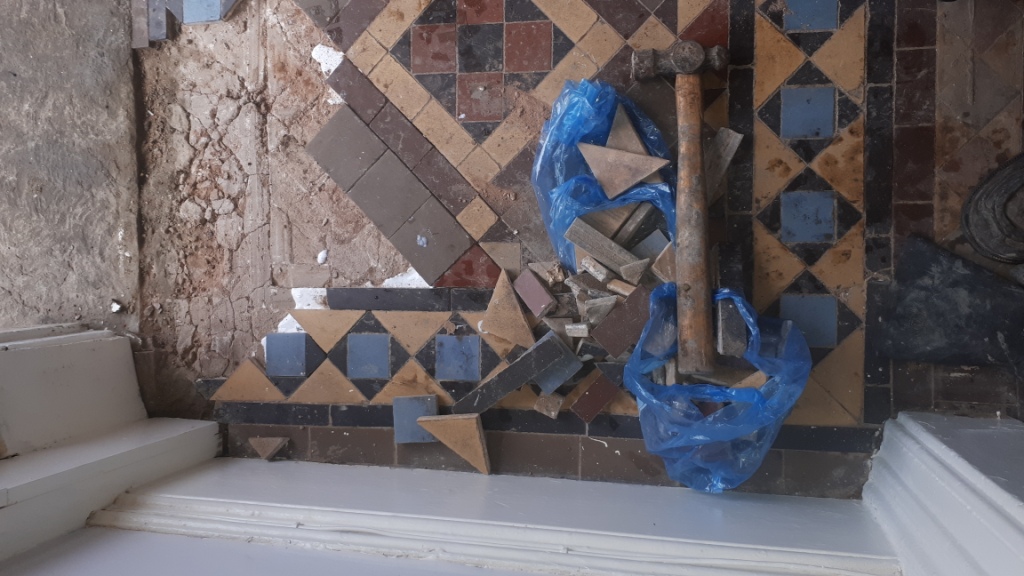
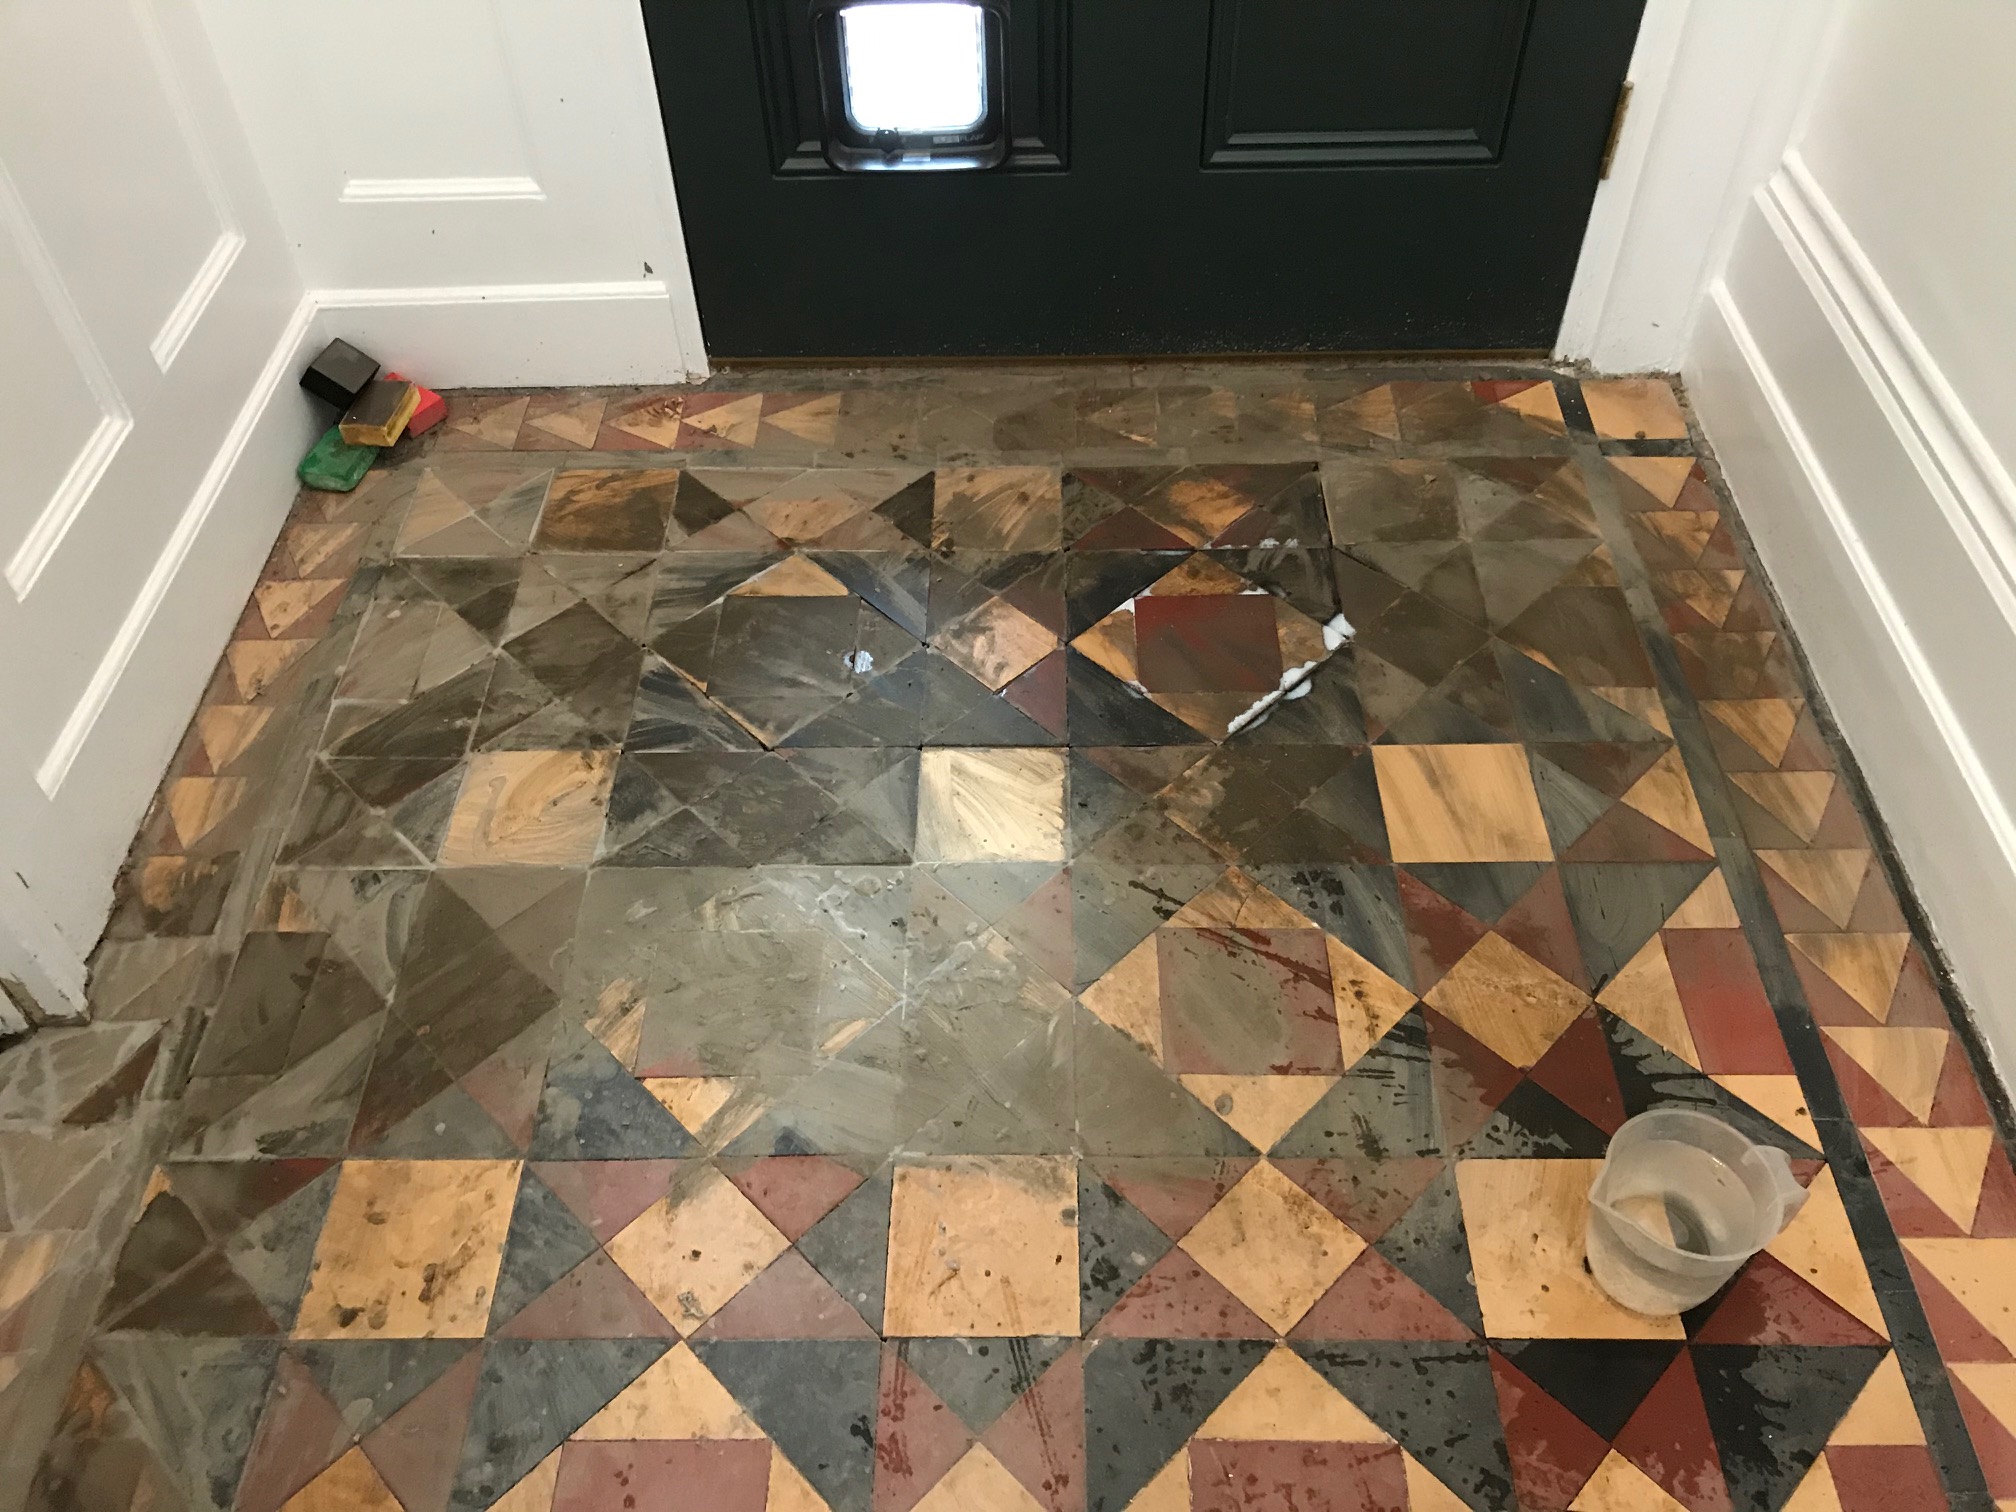
The owner of this beautiful period property on the outskirts of York was renovating the whole property and had uncovered a Victorian tiles floor in the hallway. The tiles were extremely dirty and stained with white paint spots from decorating at some point in its long history.

 
Victorian Hallway Floor Before Renovation York

I visited the property to survey the floor and come up with a renovation plan. It was indeed dirty but fortunately in reasonably good physical condition for its age. It needed a deep clean and there were some small repairs needed. I conducted a test clean on a small part of the floor which responded well and based on that I was able to give them an accurate quote for the renovation. They were happy to go ahead, and we arranged a mutually convenient time to complete the works.

 
Victorian Hallway Floor Before Renovation York


Cleaning and Repairing a Victorian Tiled Hallway Floor

The first thing needing attention was to re-set some loose tiles at the door entrance which is a common problem with old floors. The sub floor and old tile were cleaned and reset using a fast-setting adhesive and grout. This was left to set for a time before making a start on deep cleaning the hallway floor.

First up was to apply Tile Doctor Pro-Clean which is our go to Tile and Grout cleaner which is diluted before being mopped on to the tile and allowed to soak in for ten minutes before being scrubbed in with a black pad and rotary machine.

After rinsing off the now dirty cleaning solution I could see something stronger was required to really shift the deep-seated dirt, paint sports and who knows whatever else had been used on the floor over the years. So, to turn up the cleaning power a notch I applied a strong dilution of Tile Doctor Remove and Go using the same process and extracting the soil with a wet vacuum. This process where repeated and hand scrubbed some areas until I was satisfied the floor was clean.

The final stage was to give the tiles and acid wash by scrubbing in Tile Doctor Grout Clean-up, this process is designed to counter and salts in the tile, remove old grout smears and neutralise the pH level of the tile after using the alkaline cleaners earlier.

The floor was given a final rinsed and the wet vacuum was deployed for the las time until as much moisture as possible was taken out of the floor. The floor was left to dry naturally for a few days before returning to carry out the sealing.

Sealing a Victorian Tiled Hallway Floor

On returning to the property to carry out the sealing it was first tested for moisture using a damp meter. The tiles needed to be dry before sealing and any high readings can be resolved using a heat gun.

Once satisfied the floor was dry the floor it was sealed using four coats of Tile Doctor Colour Grow which will provide maximum protection from staining and enhance the colours in the tile. Additionally, Colour Grow is fully breathable which basically means it will allow any damp in the subfloor to rise through the tile and evaporate at the surface. This is an important consideration for old floors without a damp proof membrane as a non-breathable sealer can cause problems with damp building up under the floor.

 
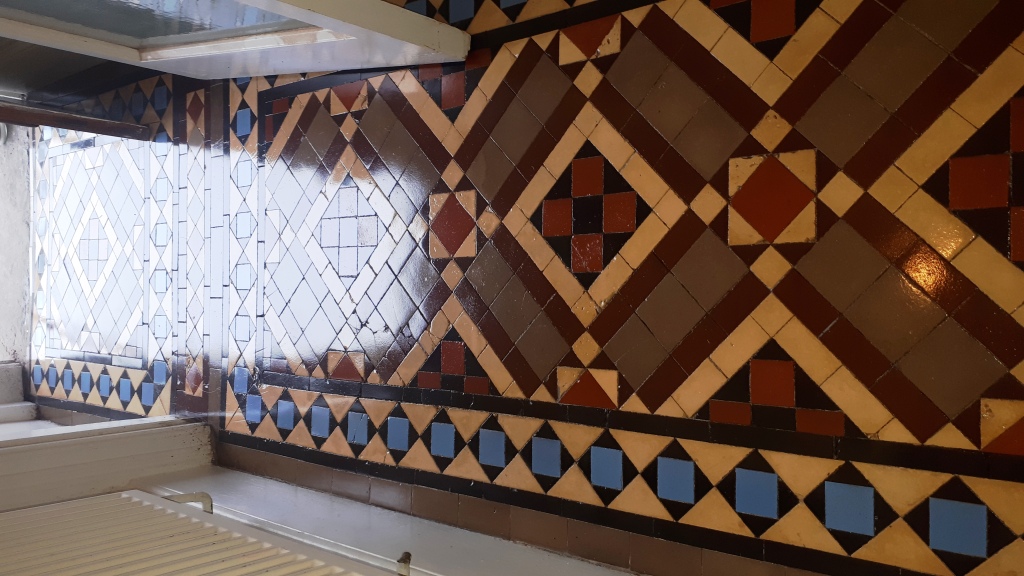
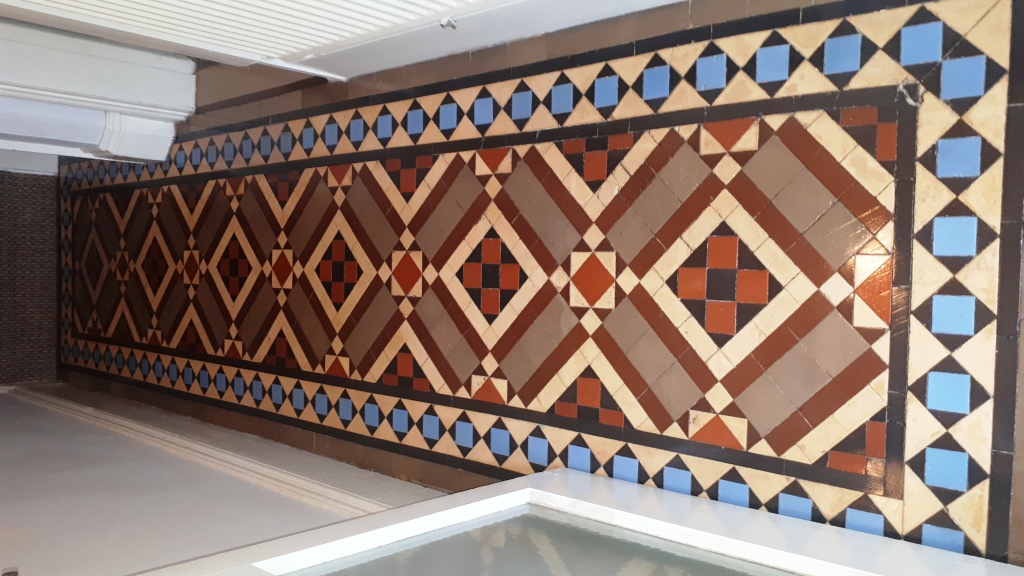
Victorian Hallway Floor After Renovation York

The client was delighted with the result and was really pleased to see the floor restored to its former glory. As you can see from the photos the floor now looks clean and bright and this vastly improved the appearance of the hallway in keeping with the rest of this beautiful period property.

Wednesday, June 2, 2021

How to Restore the Polish on old Marble Floor Tiles

This Black and White Marble tiled hallway floor at a Grade II listed property in the village of Tattenhall has quite a history. The building was constructed in 1865 and at one time it has been the home to the high sheriff of Cheshire, and the family home of Edith Wignall the daughter of Sir Henry Tate the founder of the sugar company Tate and Lyle.

In more recent years the property had been used as a council building and even a nursing home for the elderly. After a long history of decline it has now been restored to a lavish family mansion however the marble floor had suffered over the years and still need attention. The current owner had been in touch as they wanted it restoring and basically brought back to life.

 
Marble Tiled Floor Before Renovation Grade II Listed Building Tattenhall

As it turns out I had already planned to go to Tattenhall the following week to work on another listed building which was formerly the village bank. After discussing the Marble floor over the phone, I agreed a date and time to pop over from the bank and inspect the floor in detail. I can provide a rough quote from photographs, which has been especially useful recently, but it’s far better for all concerned if I’m able to properly survey the floor first.

The Marble floor consisted of Black and White Mable tiles laid in a diamond pattern, it wasn't a very large area perhaps 9 square metres in total. The tiles were well worn as described but also stained and scratched. I would see they would need a deep burnish and polish to bring them back to life and then protected with a fresh sealer. Following on from that visit I was able to provide an accurate quote which was accepted, and a date agreed for my return.

 
Marble Tiled Floor Before Renovation Grade II Listed Building Tattenhall


Removing Scratches and Stains from a Marble Tiled Entrance Hall Floor

The first job was to protect the surrounding heavy wooden panelling with masking film. The floor was very heavily stained yellow with deep scratches, to remove these I would have to grind the marble back until a clean fresh tile was left. To start I used a 200-grit coarse pad fitted to a weighted buffing machine, the abrasive action of the pad was lubricated with water. After inspection I found that the staining and scratches were still there, so I needed to use stronger pads, so I worked my way through a set of very coarse milling pads starting at a 50, 100 and finishing with a 200-grit pad. Again, water was used to lubricate, and the resultant slurry was removed by a powerful wet vacuum and washed down between each pad.

The milling pads had the desired effect, and I was then able to bring back the polished appearance of the Marble surface using a set of finer burnishing pads with the same process. The 400 and 800-grit pads helped to clean and remove the fine scratches left by the milling pads and then the next 1500-grit pad started to build the shine back on the marble tile.

After finishing with 1500-grit pad I washed the Marble with Tile Doctor Stone Soap and vacuumed up the residue with the wet vacuum. I left an industrial blower in place overnight to dry out the floor ready for the next morning when it would be sealed.


Sealing a Marble Tiled Entrance Hall Floor

The next morning, I used the last of the four burnishing pads which is a very fine 3000-grit to polish the floor further. This last pad is applied dry with just a spray of water to create a high gloss finish.

When I was happy, I sealed the floor with two coats of Tile Doctor Colour Grow which is an impregnating sealer that soaks into the fine pores of the Marble to protect it from within. This product also improves colour and after application it was left to soak into the tile for five minutes before polishing off and then leaving it to dry.

 
Marble Tiled Floor After Renovation Grade II Listed Building Tattenhall

The last step was to I buff the floor with a white pad. The finish was impressive, and the family were very happy with the work we had carried out. For aftercare I recommended they use Stone Soap as its designed for the regular cleaning of sealed and polished stone, as well as cleaning it also helps build the patina.


Monday, March 29, 2021

Middlesex Stone Floor Expert Shares Secrets of Travertine Floor Renovation

Our client had inherited this Travertine floor when purchasing in a lovely street in Walton-On-Thames, close by was the River Thames which runs all the way into London. The new owners were unhappy with the floor in that it did not look very clean, and they were keen to get this rectified. I arranged a site visit to survey the floor and see what could be done to restore its appearance. 

 
Travertine Floor Before Cleaning Walton-on-Thames

The floor itself was in good physical condition, however, it was apparent from the level of dirt ingrained in the stone that it had not been maintained very well by the previous owner. I carried out a small test clean which came out well and they could see straight away what the floor should look really like! They were happy with my renovation quote and we agreed a mutually convenient time where I could work in relation to the COVID guidelines.


Cleaning a Travertine Tiled Kitchen Floor

The Travertine floor was scrubbed using a mixture of Tile Doctor Pro Clean and Remove and Go. These are heavy duty cleaning products designed for use on tile and stone can be combined to form a powerful cleaning/stripping solution which is left to dwell on the floor surface. After a short while the solution was worked into the stone using a rotary machine fitted with a black scrubbing pad.

This cleaning recipe works extremely well breaking down dirt, stains, and grease in the stone. Following a machine scrub and a more manual hand scrub of the grout lines, we then pressure rinsed the soil away and then it was extracted using an industrial wet vacuum. In a couple of areas, it was necessary to repeat the process to ensure it was completely clean. Once we were satisfied that the stone was fresh and clean, the floor was left to dry off overnight, so it would be ready for sealing the following day.

 
Travertine Floor During Cleaning Walton-on-Thames


Sealing a Travertine Tiled Kitchen Floor

After drying overnight, the floor was checked with a damp meter to make sure it was dry. Once reassured I started with the application of the fresh sealer to the floor using Tile Doctor Colour Grow Sealer which is a colour enhancing sealer that works from within by soaking into the pores of the stone. Several coats were applied allowing each one to dry before applying the next. This sealer does not provide a glossy finish, just a nice natural sheen. This brought back the contrast and natural colours in the stone, whilst adding protection to stone for many years to come.

 
Travertine Floor After Cleaning Walton-on-Thames

The client was very happy with the work we carried out, the floor had come up much better than they had expected, and it really made a difference to the lovely kitchen space. The floor looked like new. I recommended the regular use of Tile Doctor Stone Soap for future cleaning which will keep the floor in great condition and ensure the longevity of the newly applied sealant.


Saturday, August 8, 2020

How to Renovate Old Terracotta Floor Tiles

This client had acquired a 400-year old cottage in Leatherhead as part of his divorce agreement. The front room was tiled with Terracotta which is a soft stone and particularly porous. The tiles had seen a lot of wear and use over the years and were now in need of some love.
  Terracotta Tiled Floor Before Restoration Leatherhead  
He emailed over some photographs however it’s difficult to tell the best remedy without doing any testing, so I arranged visit the property and take a proper look. It was immediately clear the Terracotta had become badly discoloured in places some of which was from burning logs which had previously fallen from the fireplace onto the tiles. There was also a considerable amount of red paint around the edges that would need removing.

This work would take two days with at least 48 hours in-between days to allow for evaporation as a wet tile cannot be sealed. The client was happy to go ahead with my quote and we arranged a suitable time to complete the work for him.


Cleaning a Terracotta Tiled Living Room Floor

Firstly, as the terracotta is soft and more importantly red it can make a mess of the woodwork when cleaning with water, so I covered the kickboards with sticky plastic coating to ensure they were protected.

Then I removed the edging paint by softening it with an application of a strong dilution of Tile Doctor Remove and Go. Once left for half an hour the paint starts to soften and this makes it easier to remove, although this is a manual process carefully scrapping the remains of the paint away.

Next, I coated the floor with Tile Doctor Oxy-Gel. This strong cleaning product is left for half an hour to work into the pores of the Terracotta. With some water I gently cleaned the floor with a rotary machine fitted with a nylon pad. This is a wet process, so no dust is created.

For the next few hours, I cleaned the whole room. The areas damaged by burning wood were worked on with a diamond encrusted pad to get deep into the tile. When finished, the tiles were clean and more consistent in appearance and colour. I left the floor for the weekend to fully dry.


Sealing a Victorian Tiled Hallway Floor

On the Monday I returned to seal the Terracotta first checking the tiles had dried out using a damp meter. The customer didn’t want either a shiny finish or a matte finish. He did want a strong, protective sealer so we agreed on using Tile Doctor Seal and Go Extra which leaves a sheen finish and will last for years. The floor was now fully protected and should be durable for the foreseeable future.
  Terracotta Tiled Floor After Restoration Leatherhead  
The client was very happy with the work we had carried out, it had really transformed the room and he was looking forward to getting the furniture back in to position.


Sunday, June 21, 2020

How to Restore Victorian Minton Floor Tiles

Details below of the full restoration of a Victorian Minton tiled hallway floor that I restored earlier this year in the South Birmingham suburb of Kings Heath. The owner had recently purchased the property and discovered a Victorian tiled floor underneath an old carpet in the hallway.

Victorian Tiled Hallway Before Restoration Kings Heath Victorian Tiled Hallway Before Restoration Kings Heath

The floor was in a very poor state with areas where tiles were missing and had been backfilled with a cement levelling compound. The adjacent vestibule also had a large area of tiling missing. My client was delighted when they had found some of the missing original tiles and now wanted to investigate having the floor returned to its former glory.

Victorian Tiled Hallway Before Restoration Kings Heath

I went along to quote and give a demonstration of the restoration process and provide an indication of the expected results. The test area responded well to the treatment and they were happy with my quote to repair and renovate the floor, so were booked in to restore the whole floor and I set about sourcing matching replacement tiles.

Victorian Tiled Hallway Before Restoration Kings Heath


Repairing a Victorian Tiled Hallway Floor

The first two days were spent carefully removing the leveller, cleaning up the exposed subfloor then cutting and fitting replacement tiles. One of the areas that needed extra work was a doorway which required a sub-floor installing before being able to tile with a matching pattern.

Victorian Tiled Hallway During Restoration Kings Heath

With the main hallway tiling completed I started on the tiling in the adjacent vestibule. I had been given a couple of bags of original tiles to sort out by the owner and fortunately most of them were in good condition, so I was able to repair the vestibule with approximately 90% original tiles. The rest were made up of reproduction tiles that I had managed to source. Additionally, the floor had numerous loose tiles which needed resetting and finishing with replacements. Due to so many of the tiles being original the appearance between the newly replaced area did not look too much different however I was confident the following deep clean and seal would blend them in well.

Victorian Tiled Hallway During Restoration Kings Heath


Deep Cleaning a Victorian Tiled Hallway Floor

With the tiling now repaired my next focus was the cleaning which I started on day three with an application of neat Tile Doctor Pro-Clean to help loosen the carpet adhesive and paint splashes that were staining the floor. The Pro-Clean was mopped onto the floor and then worked in with a 200-grit diamond pad fitted to a weighted rotary buffing machine. The extra weight, cleaning agent and coarse pad gets into the pores of the tile releasing years of ingrained dirt and removing old sealers and coatings. The floor was then rinsed with water and the waste extracted with a wet vacuum.

Victorian Tiled Hallway During Restoration Kings Heath Victorian Tiled Hallway During Restoration Kings Heath

The next step was to give the floor an acid rinse using another Tile Doctor product called Grout Clean-up which is designed to remove grout smears and mineral salts that will have been trapped into the pores of the tile after years of being covered in carpet. The grout clean-up was worked into the tiles using a 400-grit burnishing pad to refine the tile surface and close up the pores. The floor was rinsed and extracted again and left to dry out for two nights.


 Sealing a Victorian Tiled Hallway Floor

I returned a few days later and after testing the floor was dry set about applying a sealer. For this floor I chose to apply six coats of Tile Doctor Seal and Go which gives a lovely sheen finish and really brought out the character in the beautiful tiles. It’s also water based so it doesn’t leave a smell as it dries.

Victorian Tiled Hallway After Restoration Kings Heath Victorian Tiled Hallway After Restoration Kings Heath

By the time I had finished the floor was looking transformed and the client was delighted, so much so they left this fantastic review:

Kieron was fantastic. He brought our Minton flooring back to life and kept us informed every step of the way. He really knew what he was talking about and has done a fantastic job. Not to mention he was a really really lovely guy and great value for the incredible workmanship he offers."

I left the customer with a bottle of Tile Doctor Neutral Tile Cleaner to help maintain the tiles appearance. It is important to use a neutral pH cleaner when maintaining sealed floors as stronger tile cleaning products that you find in supermarkets are too strong and will prematurely strip the protective sealer off a floor.

Victorian Tiled Hallway After Restoration Kings Heath


Source: Minton Tile Cleaning and Restoration Service in Birmingham

Thursday, February 27, 2020

How to Rebuild and Restore a Victorian Tile Floor

The photos below are of a 1.7 metre by 3 metre Victorian tiled floor at the entrance to a property in Prizet, south of Kendal. As you can see the hallway and porch was in a poor state due to old age and neglect. Some tiles were cracked, missing and stained with cement, and what I suspect was carpet adhesive. One of the tiles had a four-inch hole down to the cellar where a soil pipe was installed previously when the room was used as a downstairs W.C. The client was doubtful that we would be able to restore the floor but thought it would be worth contacting us just in case.

Victorian Tiled Entrance Floor Before Rebuild Prizet Kendal Victorian Tiled Entrance Floor Before Rebuild Prizet Kendal

I visited the property to take a proper look and found their description of the floor was accurate and clearly overdue some serious attention. I also noticed that some point in the past cracked tiles had been removed and replaced with cement. However, I was confident the floor could be restored and gave them a price for the restoration which they were happy to proceed with.

Victorian Tiled Entrance Floor Before Rebuild Prizet Kendal


Repairing a Victorian Tiled Hallway Floor

Work started by rebuilding the worst part of the floor which would require the services of my partner Russell. This involved removing the existing tiles, then preparing the concrete base which needed to be level and smooth before we started tiling.

Victorian Tiled Entrance Floor During Rebuild Prizet Kendal

We had previously managed to source very similar tiles which would be needed to replace those that were missing or damaged. Once the floor was prepped, the replacements were cut to fit taking care to ensure they matched the original pattern. Once cut they were fixed in place with flexible adhesive. We recommend the use of flexible floor adhesive on old floors due to the potential movement and the flexible floor adhesive doubles up as a grout as well. The floor was then left overnight to dry.

Victorian Tiled Entrance Floor During Rebuild Prizet Kendal


Deep Cleaning a Victorian Tiled Hallway Floor

On day two the floor was deep cleaned using a 100-grit resurfacing pad followed by a 200-grit pad and then a 400-grit burnishing pad. The pads are attached to a rotary machine and the floor is rinsed with water and the soil extracted with a wet vacuum in-between.

We then finished the clean with an acid rinse using Tile Doctor Grout Clean Up. This is needed to remove the cement stains from the surface of the Victorian tiles and neutralise any potential efflorescent salt issues in the tiles. Another advantage is the acid slightly etches the tiles making a better bond with the sealer.

The floor was given another rinse with water and then the wet vacuum was pressed into surface again to extract the fluids and get the floor as dry as possible before leaving for the day.


Sealing a Victorian Tiled Hallway Floor

We returned on the third day and first checked the floor was fully dry using a moisture meter. Four coats of Tile Doctor Colour Grow were applied to achieve a strong enduring seal that will cope well with the traffic coming through the entrance.

Colour Grow is a colour intensifying sealer that provides durable surface protection to the tiles, but at the same time allows the surface to breath which is important in a floor such as this where no damp proof membrane is present. The results speak for themselves I was particularly happy with the area where we had repaired the hole, it was barely noticeable.

Victorian Tiled Entrance Floor After Rebuild Prizet Kendal

Many thanks to my customer for sending over the before photos and for leaving the following testimonial.

“Great restoration job done on our Victorian hall and porch tiles including replacing broken tiles and cleaning. Now looking better than ever. Russell was very professional and knowledgeable. Nicola F. Kendal”


Source: Victorian Tiled Floor Cleaning and Restoration Service in Cumbria

Tuesday, April 18, 2017

Restoring a Mexican Terracotta Floor in Shrewsbury

Mexico is known to produce some of the best quality Terracotta tiles, with the Saltillo region in the north-east of the country being particularly famous for its craftsman. People from countries all over the world import these tiles and use them in their houses to create fantastic, colourful Read more...

Mexican Terracotta Tiles Deep Cleaned and Sealed in Shrewsbury

Mexico is known to produce some of the best quality Terracotta tiles, with the Saltillo region in the north-east of the country being particularly famous for its craftsman. People from countries all over the world import these tiles and use them in their houses to create fantastic, colourful floors. This set of Mexican Terracotta floor tiles had been installed throughout the ground floor of a property in historic Shrewsbury which is on the Welsh border and renowned for being the birthplace Read more...

Friday, November 20, 2015

Grout Cleaning and Colouring 25m2 of Tiles in Preston

Oddly Enough I had sold these Ceramic tiles to the customer in Preston when I used to work at a local Tile Shop many years prior. I had also been back to clean and seal the grout on his floor tiles originally in 2007 and then again in January 2010 when we used a Grout Colourant on them. It's nice to get called back like this as it shows they appreciate the service you provide; for this visit the request was to freshen up the floor tiles and also the Ceramic Kitchen wall tile and Grout which Read more...

To read more on this topic click here