Showing posts with label Polishing Marble. Show all posts

Wednesday, October 18, 2023

How to Add a Deep Durable Shine to Marble Tiled Flooring

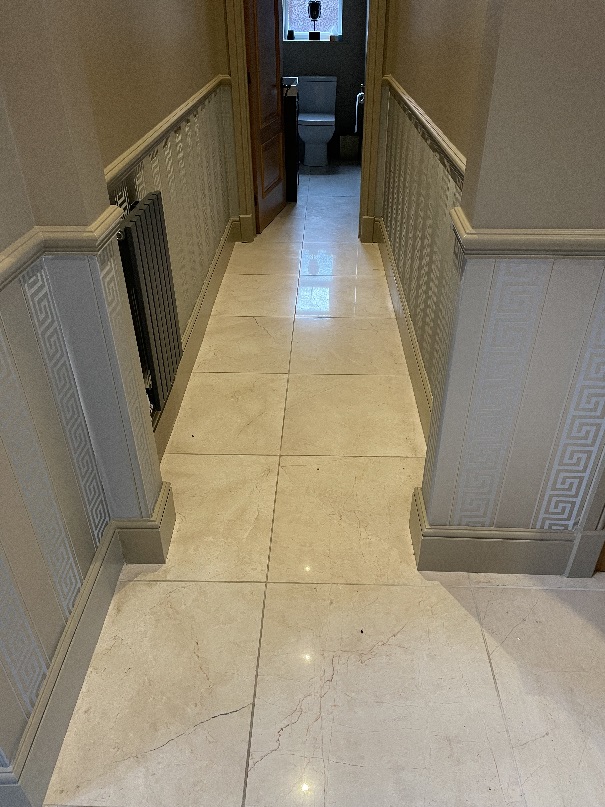
The pictures below are of a Marble tiled floor installed in the hallway of a property at Crakemarsh Hall, near Uttoxeter. The Marble had lost its shine due to several years of wear and was now looking quite flat and uninteresting. This happens with highly polished floors which need to be re-polished every six to 12 months if you want to keep them looking fabulous.

     Marble Floor Before Polishing Crakemarsh Hall Uttoxeter 

Naturally my client had become unhappy with the dull appearance of the stone and I was asked to call round and put the shine back. I viewed the floor and talked them through the polishing process. I left them with a quote which they were happy to accept.
 
Marble Floor Before Polishing Crakemarsh Hall Uttoxeter Marble Floor Before Polishing Crakemarsh Hall Uttoxeter


Cleaning a Marble Tiled Hallway Floor and Grout

The first job was to clean the floor using a rotary floor machine fitted with a Black pad to scrub in Tile Doctor Pro-Clean which is an effective alkaline tile and grout cleaner. I used a medium dilution of Pro-Clean sprayed onto the tiles and left to soak in for ten minutes before scrubbing.

These pads can struggle to get right into the grout so I used a hand-held scrubbing brush along the grout lines to tackle any stubborn grout stains and dirt hiding in the recesses. The soiling was then rinsed off the floor with water and extracted with a wet vacuum.


Polishing a Marble Tiled Hallway Floor

Work then commenced on polishing the Marble for which I used several grades of diamond burnishing pads starting with a coarse 400-grit. Only water is needed to help lubricate the process and once the pad has been run over each tile at least three times the soiling is rinsed off and extracted with the wet vacuum as before. This process is then repeated with the 800 and 1500-grit pad until you reach the 3000-grit pad which is applied with only a little water sprayed onto the tiles.


Sealing Marble Floor Tiles

To add a deep durable polish to the Marble I then applied Tile Doctor Polishing Powder which is spread over the floor ground into the marble using a White polishing pad. I also went around the edges with a handheld buffing machine fitted with smaller 6" pads.
 
Marble Floor After Polishing Crakemarsh Hall Uttoxeter Marble Floor After Polishing Crakemarsh Hall Uttoxeter

I finished the floor by using a super high speed burnishing machine fitted with a White polishing pad to remove any marks left on the floor. My client was so happy that they have booked in for an annual Maintenance clean for next year to keep the floor in top condition.
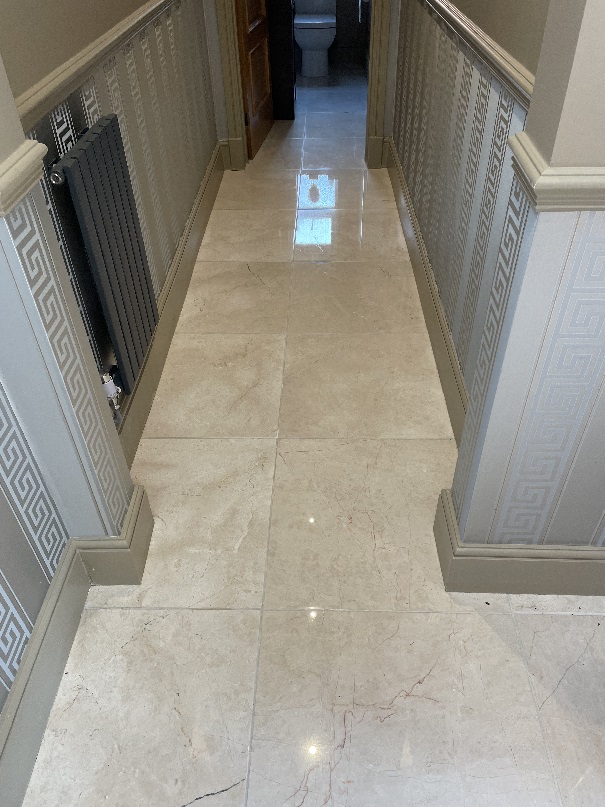
  Marble Floor After Polishing Crakemarsh Hall Uttoxeter

Before leaving I also encouraged then to clean the floor using Tile Doctor Stone Soap which is a mild but effective cleaning solution that helps maintain the patina on polished stone. Many of the floor cleaning products you find in supermarkets are simply too strong for use on a sealed floor.


Friday, January 15, 2021

How to Renovate Marble Floors by Berkshire Flooring Expert

I had a call out late last year to a property in the market town of Wokingham to survey a dull Marble floor which was installed throughout most of the ground floor. It turns out that the house was only built two years prior and had been the show home for a new development. The owner explained to me that to show off the potential of the new homes the developer had installed quality materials throughout, particularly the marble flooring, however the property had seen more than its fair share of foot traffic because of it.
   
Marble Floor Before Polishing Wokingham Marble Floor Before Polishing Wokingham

Two years of wear later and the owner was concerned with how dull the Marble floor was and the appearance of small circular stains which had appeared throughout. I explained that Marble which is made from calcium is easily etched by the use of acidic cleaning products and that most tile cleaners you purchase in supermarkets are really only for use on Ceramic or Vinyl floor tiles. I suspect any sealer used on the floor to protect the stone had also been worn away for the same reason resulting in the now dull appearance.

 
Marble Floor Before Polishing Wokingham Marble Floor Before Polishing Wokingham

After explaining the process, I would use for burnishing the Marble to deep clean and restore the shine I measured up and worked out a quotation. I received a message later that evening comforting they would like to go ahead, and a date was booked in.


Cleaning and Polishing a Marble Tiled Floor

I should mention that this job was carried out in compliance with the Covid-19 restrictions to ensure it was a safe working environment for both myself and the customer. This includes the wearing of full PPE equipment, increasing air circulation, and ensuring we kept our distance.

My first task was to protect the skirting and the fitted kitchen units from splashing by applying protective sheeting. Once this was done, I turned my attention to the grout which had become dark in places in accumulated dirt. To do this I used a strong dilution of Tile Doctor Pro-Clean which is a strong alkaline cleaner specifically designed to break down soils, grease and oils on Tile and Stone. The cleaner was sprayed onto the grout lines and left to soak in for a few minutes before being scrubbed in by hand. Some of the grout needed more attention than others and once done the soil was rinsed off the floor with water and extracted using a wet vacuum.

Now the grout was cleaned I moved onto polishing the Marble floor tiles. I did this using the Tile Doctor four stage diamond burnishing system. This consists of applying a sequence of four refinishing pads fitted to a weighed buffing machine. You start with a coarse 400-grit pad and working through to a fine 1500-grit pad, each time removing the stone slurry with a wet vacuum. This process removed the acidic etching and repolished the surface of the Marble to a nice shine. I worked in sections room by room and then left the floors to fully dry off overnight.


Sealing Marble Tiled Flooring

I returned the next day and using a damp meter took a few readings from the floor to check the moisture levels to ensure it was dry and ready to be sealed. Before sealing though I went over the floor with a very fine 3000-grit pad which is applied dry with a little water sprayed onto to the floor, this final pad further builds up the polish and achieve the appearance desired by the customer.\

Marble Floor After Polishing Wokingham Marble Floor After Polishing Wokingham

Last step was to seal the floor with Tile Doctor Colour Grow, a colour enhancing seal designed to bring out the natural colours in the stone whilst adding protection from liquid and oil spills. Impregnating sealers like Colour Grow work by occupying the tiny pores in the stone thus preventing contaminates from becoming ingrained in them.

 
Marble Floor After Polishing Wokingham Marble Floor After Polishing Wokingham

The customer could not believe with how well the floor had come up and were pleased they finally had the floor they had been promised prior to moving in. For aftercare I left them with a complimentary bottle of Tile Doctor Neutral Cleaner which is designed for the regular cleaning of tiled floors.


Wednesday, August 16, 2017

Restoring Polished Marble Bathroom Tiles Blighted by Limescale

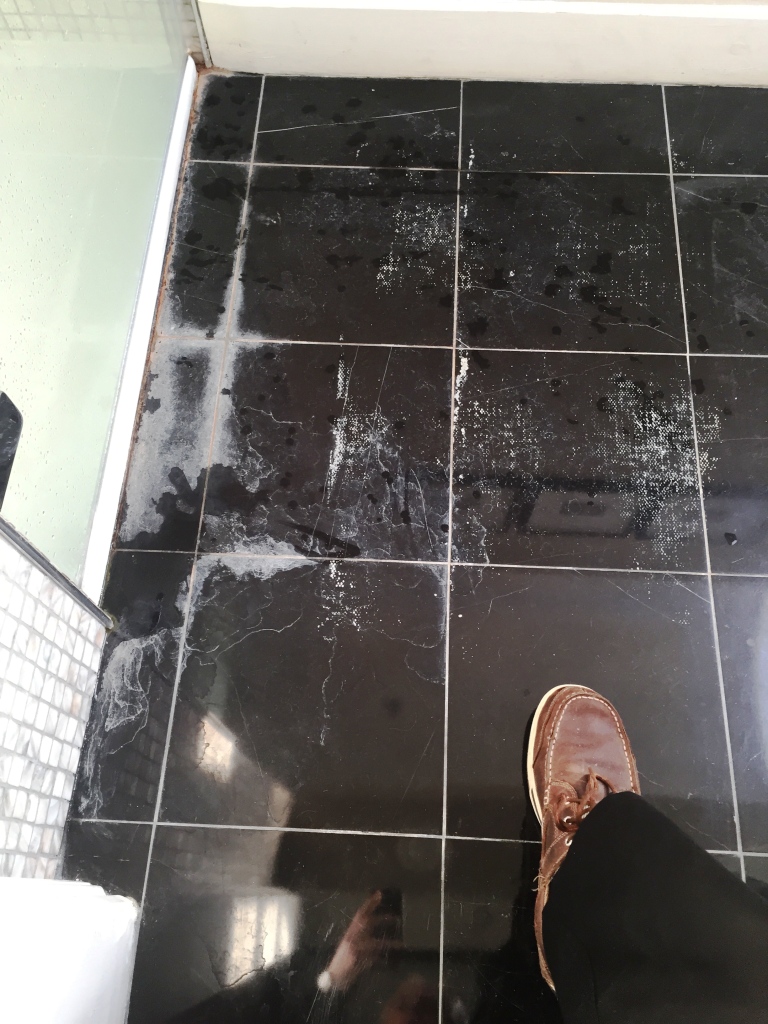
This customer in Baldock, North Hertfordshire has a beautiful Black Marble bathroom floor which unfortunately was far from looking its best due to a build-up Limescale. Normally this can be removed with an acidic cleaning product however Marble like all natural stones is acid sensitive would be damaged in the process.

Black Polished Marble Bathroom Floor in Baldock Before Limescale Removal

The only way to remove the Limescale would be to polish it off using a set of diamond pads which would also restore a high shine finish to the Marble floor tiles.

Removing Limescale from Polished Black Marble

The first step before starting the process was to cover the threshold edges, skirting’s and doors with tape to protect it from splashing etc. Next we used a medium dilution of Tile Doctor Pro Clean which is an alkaline tile and grout cleaner with hand brushes to clean-up the thin gout lines and remove any grit from the floor.

The floor was then rinsed with fresh water to remove the now soiled cleaning product and also steam cleaned to neutralise floor. The water was extracted from the floor using a wet vacuum.

Honing Black Marble to Restore Polish

To bring back the natural shine we honed the floor using a series of diamond-encrusted burnishing pads. Firstly, I applied a Coarse 400 grit pad to strip away what remained of the old sealer and Limescale, rinsing the floor afterwards. I then applied the Medium 800 grit and Fine 1500 grit pad to gradually close the pores of the stone which, in turn, restores the polished effect. Again each pad is used in combination with a small amount of water and any excess moisture is removed with a wet vacuum. The final 3,000 grit pad brings up a really deep shine and is applied with small amounts of water sprayed onto the tile.

Sealing Polished Black Marble Tiles

After drying the floor the Marble tiles were sealed with two coats of Tile Doctor Ultra-Seal which is a natural look sealer that doesn’t alter the appearance of the stone and protects it from staining by occupying the pores in the stone.

The last step was to buff the Marble tiles with a white buffing pad.

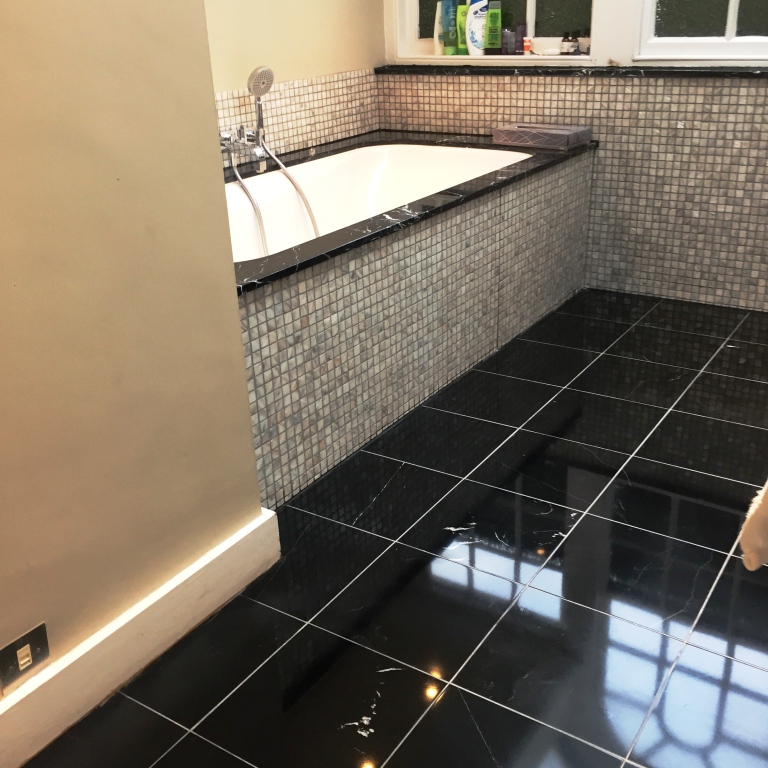
Black Polished Marble Bathroom Floor in Baldock After

The floor now looks fantastic and you can really see your reflection in the shine of the black Marble tiles.


Source: Marble Tile Cleaning and Restoration Service in Hertfordshire