Showing posts with label bathroom. Show all posts

Sunday, July 12, 2026

How to Install Brick Tiles on a Backsplash

 How to Install Brick Slips on a Splashback

Adding a coordinating splashback made from brick-effect tiles (or brick slips) creates character and visual interest for your bathroom or kitchen. If you have leftover tiles from a previous project, such as tiling a worktop or shower enclosure, creating a splashback is a perfect way to use them. If purchasing new tiles, it is highly recommended to compare sample tiles against the rest of the room's colours and decor to ensure they coordinate harmoniously.

What You'll Need:

  • Tape measure

  • Cleaning cloths (old t-shirts work well)

  • Notched trowel

  • Brick slips / Brick-effect tiles

  • Waterproof tile adhesive

  • Tile spacers

  • Screwdriver

  • Spirit level

  • Tile cutter

  • Work gloves

  • Grout

  • Grout float

  • Pencil

Step 1: Measure and Prepare the Splashback Space Begin by measuring and marking off the wall space where you will install the splashback. Make pencil marks at each top corner and in the centre so you know exactly where the top edge will sit. Standard splashbacks begin at the edge of the worktop and are typically raised between 10 and 20 centimetres high, depending on the size of the tiles, the worktop dimensions, and your desired look.

Inspect the wall area to ensure there are no cracks, uneven patches, or glossy paint that might interfere with the installation. Sand down any gloss paint and wipe away the dust with a damp cloth. Fill in any noticeable wall cracks and allow the filler to dry overnight before continuing.

Step 2: Apply Tile Adhesive Once your wall area is marked, patched, and cleaned, you are ready to secure the tiles. Construction-grade tile adhesive can irritate the skin, so wearing work gloves is recommended. Adhesive dries fairly quickly, so work in small sections at a time. The adhesive for your first tile should be applied at a thickness of 1.5 to 3 millimetres—enough to grip the tile securely, but not so much that it seeps out from the edges.

Step 3: Add Tile Spacers After attaching your first two brick slips, place a tile spacer between them at each corner. For spacers located at the corners where the splashback meets the worktop, you may need to snip off one end of the spacer with scissors to make it fit flush.

Step 4: Set and Level Tile Rows Once you have finished your first row, check that the tiles are perfectly straight using a spirit level, making any necessary adjustments. Continue laying the rest of the rows in the same manner. To create an authentic brick bond pattern, offset each row by exactly half the length of a single tile. Continue checking with your spirit level as you progress. Once all rows are completed, wipe away any excess adhesive. Finally, apply grout to your new splashback according to the manufacturer's instructions.


Source: www.DoItYourself.com

Wednesday, April 9, 2025

How to Properly Clean Tile Grout Residue

Having clean tile grout is important to have a bathroom wall that looks nice. Once the tile is installed, grout is applied over the entire wall. It is pressed into the spaces between each tile using a rubber grout float. Until the grout sets and dries it can still be easily removed from the surface of the tile. It is not impossible to miss areas on the tile. Once the grout dries it will leave a grout residue or haze on the surface of the tile. You can clean tile grout haze and residue easily from the surface of the tiles and the following article will show you how to correctly do it.

What You'll Need:

  • White distilled vinegar
  • Spray bottle
  • Water
  • Green scrub pad
  • Sponge
  • Clean rag
  • Baking soda
  • Plastic bowl

Step 1 - Start Simple First

If you happen to notice a haze or residue forming on the tile within a day you can still clean the tile grout haze without chemicals. The simplest way to do this is to use warm water. Soak a normal sponge in the warm water and squeeze out the excess water. You want the sponge to be damp but not soaking wet. Use medium pressure and wipe clean the tile grout residue off of the surface of the tile. Dry the area with a clean rag and then run your hand over the area. If the residue was removed the tile will feel smooth whereas if there is still a residue on the tile it will feel somewhat coarse.

Step 2 - Use a Vinegar Solution

Vinegar is one of those household products that make for a great cleaner and can cut through grime and dirt. It can also clean tile grout residue. Fill a clean spray bottle with 4-parts warm water and 1-part white vinegar. Spray down the tile and allow the vinegar and water solution to work for a minute or two and then wipe down the tile with a clean rag. You can increase the strength of the solution by adding more vinegar. You can then clean the tiles off with pure water. If this does not clean the tile grout residue then you will need to use a stronger method.

Step 3 - Make a Chemical Reaction

You normally want to stay away from strong cleaners that you find in the store because some of them can eat away at the grout. They also are not very friendly to the environment and some can be dangerous to you if inhaled. They are always a last resort. This does not mean a simple chemical reaction cannot be used to clean tile grout residue. You will need a bowl, baking soda, water, and vinegar. Place baking soda in a bowl and add a few drops of water. Stir the water into the baking soda until it forms a smooth paste. Add water as needed. Apply the paste to the tile with a dry sponge. Fill a clean and dry water spray bottle with vinegar and then spray the area. The baking soda will react to the vinegar causing it to bubble and fizz. Once the chemical reaction slows or stops, simply wipe the area down with a damp rag.


Friday, June 1, 2018

Renovating Ceramic Bathroom Tiles in St Albans

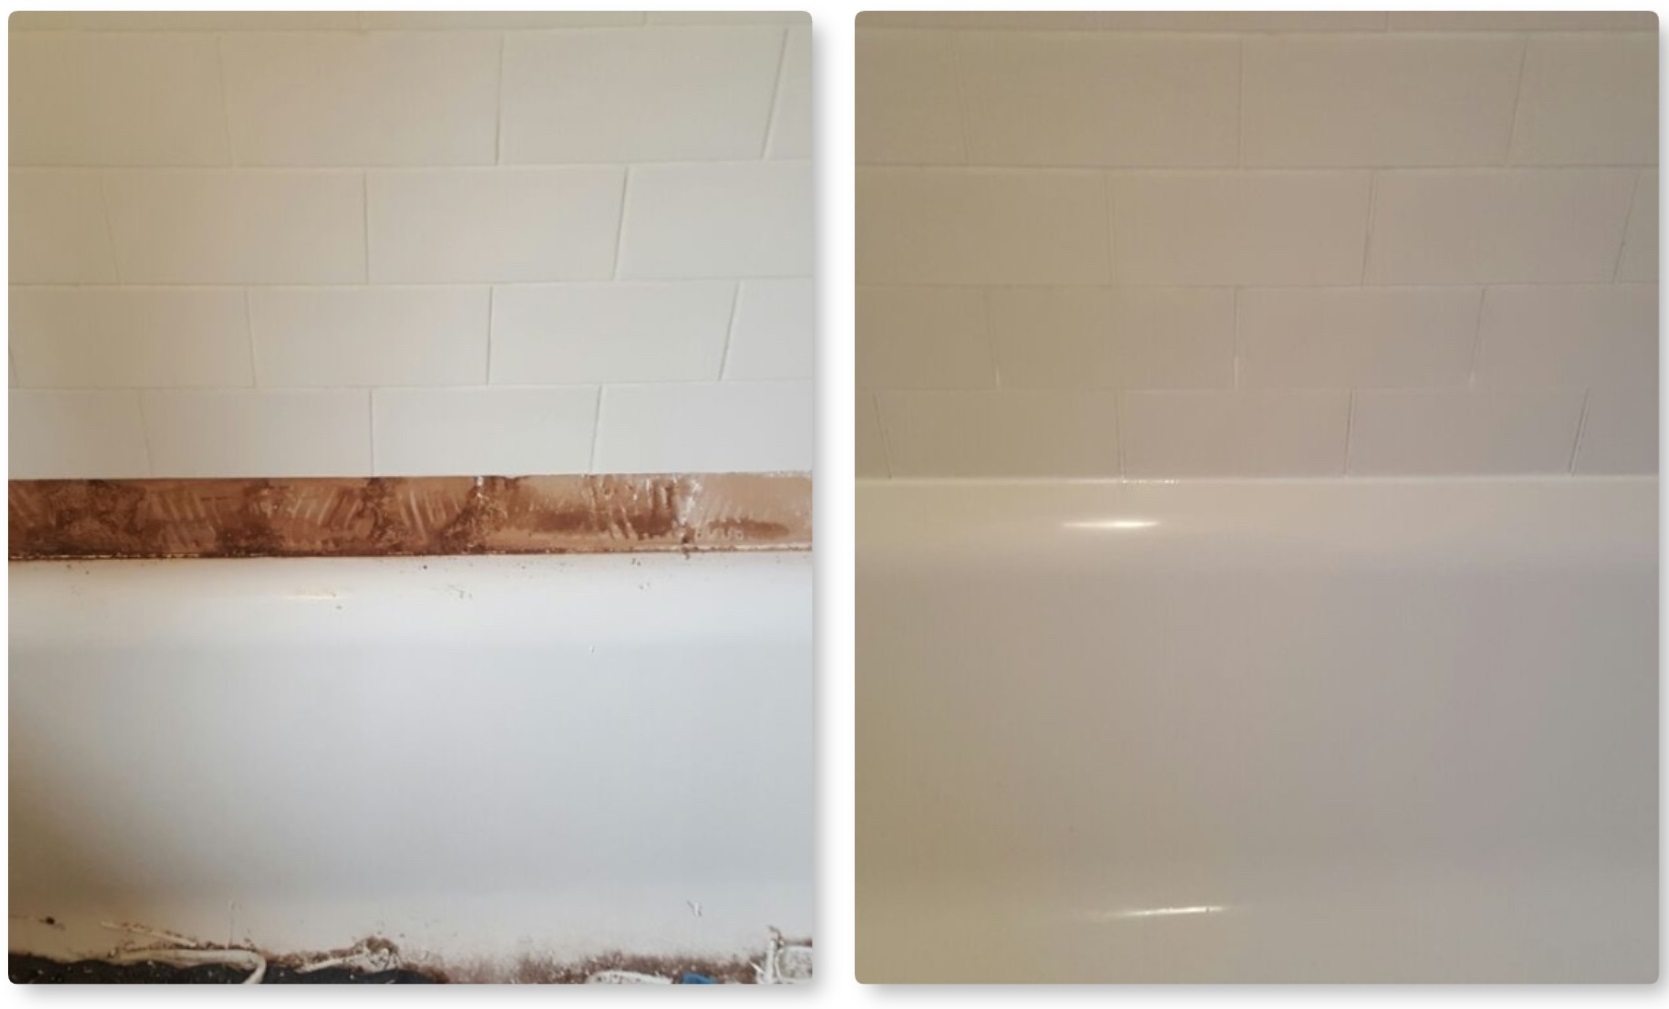
This was a small family bathroom at a house in St Albans with white ceramic glazed tiles and what was once white grout. The grout was now stained and proving difficult to keep clean, additionally the silicone seal between the tile and the bathtub was perishing. The bathroom needed cleaning and restoring to give it a new lease of life as well as making it easier to maintain for the busy family.

Bathroom Tiles Before Cleaning St Albans

Were actually based in St Albans so always a pleasure to pop round and meet fellow residents. The city dates to the Romans when it was known as Verulamium and these days its popular with commuters working in London.

Cleaning a Ceramic Bathroom Tile and Grout

On arrival I inspected the tiles around the bath and could see they were going to be problematic, the silicone sealant was starting to perish, and I was concerned that the bottom row may be not be watertight. I like to do a job right the first time round so I decided the best thing to do would be to remove the row around the bathroom edge, clean them up and refit them with fresh adhesive, grout and reseal with silicone.

With that in mind my first job was to give the ceramic tile and grout a deep clean by spaying on Tile Doctor Aqua-Pro and then scrubbing it in with polypropylene brushes and pads. This product is designed for the regular cleaning of bathroom tiles as is Tile Doctor Duo-Clean which is a stronger product that can tackle mould as well. The tile and grout were then given a high-pressure steam clean using a special machine we usually use on floor tiles and then let to dry off over lunch.


Ensuring a Tight Bath Seal

After lunch the old silicone was stripped off between the bathtub and wall tile and this was followed by the careful removal of the bottom row of ceramic tiles. This is done by removing the grout first with an oscillating hand tool and then carefully prising the tiles off the wall without damaging them.

Bathroom Tiles Replacement St Albans

The old adhesive was then scrapped off the exposed area to prepare the wall for re-tiling and the tiles were re-installed with fresh. Once the adhesive and gone off the tiles were re-grouted and the grout left to dry before applying a fresh silicone sealant between the tile and bathtub. During the various drying phases, the ceramic bathroom tiles were buffed using a soft white buffing pad to give them an as new appearance.

Bathroom Tiles After Cleaning St Albans

The job was completed in one day and the bathroom now looks like it was recently installed.


Source: Ceramic Tile Cleaning and Restoration Service in Hertfordshire

Thursday, May 18, 2017

Restoring an Edwardian Quarry Tiled Bathroom Floor in Braunstone

This is a job I recently completed in the small town of Braunstone, which lies just outside the city boundaries of Leicester, Leicestershire. My client wanted a restorative cleaning and sealing service for their very old Quarry tiled bathroom floor, which dates back to the Edwardian period. The floor was suffering from paint and adhesive staining, and was now in dire need of a thorough clean more generally along with a fresh seal to protect it from further damage. Cleaning an Edwardian Read more...

Monday, May 15, 2017

Quarry Tiled Floor Restored in Shop to Flat Conversion in Oxford

This ground floor flat in the City of Oxford had been converted from a shop which as you can imagine, was quite complex. One significant element involved in the conversation was the restoration of an old Quarry tiled floor which ran through the main hallway and had for many years been covered in Read more...

Sunday, May 14, 2017

Heavily Stained Quarry Tiled Floors Restored in Oxford Shop Conversion

This ground floor flat in the City of Oxford had been converted from a shop which as you can imagine, was quite complex. One significant element involved in the conversation was the restoration of an old Quarry tiled floor which ran through the main hallway and had for many years been covered in a commercial linoleum covering. When the linoleum covering was removed, the sheer amount of glue which had been used to affix it had completely ruined the appearance and condition of the Quarry Read more...

Saturday, May 6, 2017

Replacing the Silicone Sealer Strip in a Cardiff shower

Sometimes my clients ask the question: 'Why is the grout coming out of the joints in my bathroom floor, and what can I do about it?' This job at a house in the city of Cardiff had exactly that problem and I had been asked to resolve it, additionally one of the tiles had become cracked and need replacing. The cause was due to movement in the floor when walked on, causing the grout to dislodge from the tile; this is not uncommon on tiled floors where there is wooden base and there is a lack Read more...

To read more on this topic click here

Thursday, May 4, 2017

Removing Mould from Bathroom Shower Tiles

Having mould in your bathroom is never a desirable situation, especially in a family home with young children. Additionally, severe mould can cause a range of health issues, including respiratory problems, nasal congestion, and throat irritation, so it's important to remove it as soon as possible. I mention this as I was recently called out to a family home in Bedford recently because the parents were getting worried about the mould developing in the Ceramic tiled bathroom, especially on the Read more...

Ceramic Tiled Bathroom with Mould Issues Refreshed in Bedford

Having mould in your bathroom is never a desirable situation, especially in a family home with young children. Additionally, severe mould can cause a range of health issues, including respiratory problems, nasal congestion, and throat irritation, so it's important to remove it as soon as possible. I mention this as I was recently called out to a family home in Bedford recently because the parents were getting worried about the mould developing in the Ceramic tiled bathroom, especially on the Read more...

Friday, April 28, 2017

Deep Cleaning Kitchen and Bathroom Vinyl Floors in Worcester Park

When I discuss tile cleaning with customers they normally think of the ceramic or stone tiles you find in Tile shops. Interestingly our equipment, products and techniques also work well on other hard surfaces as well including Vinyl floor tiles. Things brings me nicely onto this customer in the Read more...

Wednesday, April 26, 2017

Encaustic Cement Bathroom Tiles Burnished and Sealed

I'm often asked if you should seal a tile before grouting and the answer is a definite yes, and this Encaustic Cement tiled bathroom floor installation in Stockport is a great example as to why. The tiles had not been sealed before grouting and then, once the tiler went to grout the newly installed tiles with a grey grout, the colour ran into the tiles, staining them and leaving them looking grubby and dirty. Had the tiles been sealed it would of made the process of removing the grout from Read more...

Sunday, April 9, 2017

Removing Mould from Travertine Bathroom Tiles

This mouldy filled Travertine tiled bathroom was located in a house in Glasgow and as you can see from the photograph below was completely covered in mould right round the whole bathroom, there was also some staining from the dyes in soap etc. Cleaning a mouldy Travertine tiled bathroom Firstly Read more...

Friday, March 24, 2017

Bathroom Tile and Grout Facelift in Didsbury

This Ceramic tiled bath with shower was installed at house in Didsbury, this customer wanted to give the bathroom a facelift and not usually it was the grout rather than the ceramic tile that had discoloured, the silicone also needed to be replaced due to the mould build-up and if you get mould on silicone it's impossible to remove and can only be replaced. Unfortunately mould build-up in bathrooms is quite common in the UK due to our damp climate and modern insulated homes that restrict air flow. If you're having this problem yourself consider installing a more powerful extractor fan or simply leaving the door to the bathroom open more often. Cleaning Tile and Grout The Ceramic tiles and grout were treated using a strong 2:1 dilution of Tile Doctor Pro-Clean which is a highly recommended Tile and Grout cleaning product; being alkaline it's safe to use on all sorts of tile and stone surfaces. For vertical tiled surfaces I recommend the mixture is decanted into a bottle with a Read more...

Thursday, March 23, 2017

Deep Cleaning Kitchen and bathroom Vinyl floors in Worcester Park

When I discuss tile cleaning with customers they normally think of the ceramic or stone tiles you find in Tile shops. Interestingly our equipment, products and techniques also work well on other hard surfaces as well including Vinyl floor tiles. Things brings me nicely onto this customer in the London suburb of Worcester Park who had chequered Vinyl tiled floors in the bathroom and kitchen that were well overdue a deep clean. Cleaning Heavily Soiled Vinyl Tiled Floors I approached cleaning Read more...

Sunday, March 19, 2017

Cleaning Limestone Floors for that Luxury feel

This was a substantial engagement at a luxury rental apartment in Brighton rejuvenating the Limestone tiles in two bathrooms and a hallway taking six days of hard work. In addition, I would be working around two decorators, making for even more testing work conditions. Cleaning Limestone Read more...

Thursday, March 16, 2017

Effective Tile and Grout Cleaning

This Ceramic tiled family bathroom with shower was installed at house in Leighton Buzzard and was in need of rejuvenation. You can see from the photograph below that the tiles were in reasonable condition but the grout had become ingrained with dirt which is not unknown as the top layer of grout Read more...

Tuesday, March 14, 2017

Shower Cubicle Refresh

A customer contacted us regarding a Ceramic Tiled Shower Cubicle problem they had with their house in Epsom Downs, Surrey. All the grout and mastic had started to go black and grow mould which is quite a common problem in modern houses and our busy lifestyles and insulated homes with Read more...

Saturday, March 11, 2017

Removing Limescale from Slate Bathroom Tiles

Our client in Ravensden had a rough slate tiled floor fitted into her en-suite bathroom approximately six years ago. The tiles were never sealed and due to the hard water in the area, plus shower products the floor developed a white crust in areas. Tile doctor deals with tile problems across the Read more...

Wednesday, March 8, 2017

Refinishing Travertine Tiles Post Installation

For this job, I was asked to work on my client's newly installed bathroom in their house in Hull, the largest city in East Yorkshire. The new bathroom consisted of natural Travertine stone, and my task was to give the tiles a thorough clean, polish and seal. Travertine is a form of limestone Read more...

Monday, March 6, 2017

Ceramic Tiled Bathroom Cleaned and Sealed in Leighton Buzzard

This Ceramic tiled family bathroom with shower was installed at house in Leighton Buzzard and was in need of rejuvenation. You can see from the photograph below that the tiles were in reasonable condition but the grout had become ingrained with dirt which is not unknown as the top layer of grout is porous and will discolour over time if not protected. Cleaning Ceramic Tile and Grout The Ceramic tiles and grout were treated using a strong 2:1 dilution of Tile Doctor Pro-Clean mixed 50/50 Read more...