Monday, November 30, 2020

How to Clean Natural Stone Tiles in a Shower

 The exceptional colors and distinct textures of natural stone tiles add elegance to shower surfaces. Varying mineral compositions cause stone tile colors to range from vibrant shades to earthy hues. While stone tiles are durable, they are extremely porous and can accumulate soap scum and dirt particles. Frequent cleaning of natural stone tiles maintains their appearance and prevents damages from abrasive grime. Certain cleaning solutions protect natural stone tiles and allow them to last longer.


Things You’ll Need

  • Plastic bucket
  • 1 gallon water
  • 1/2 cup household ammonia
  • Soft cloth
  • Soft sponge
  • Neutral stone soap cleaner
  • Soft-bristled brush
  • Terry cloth towel


Instructions

  1. Fill a plastic bucket with 1 gallon of water. Add 1/2 cup of household ammonia to the water. Mix the solution thoroughly.
  2. Dampen a soft cloth in the ammonia solution. Wipe the cloth over any soap scum and mineral deposits. Rinse the tiles thoroughly with water.
  3. Dampen a soft sponge with warm water. Apply a few drops of neutral stone soap cleaner to the sponge. Follow the manufacturer’s directions on the product label.
  4. Wipe the sponge over the tiles to remove loose dirt and debris. Gently scrub grout lines with a soft-bristled brush to remove accumulated grime.
  5. Rinse the tiles thoroughly with water. Dry the tiles with a terry cloth towel.


Tips & Warnings

  • You can substitute a non-acidic soap scum remover for the ammonia solution.
  • You can substitute mild liquid dishwashing soap for the neutral stone soap cleaner.
  • Never clean natural stone tiles with lemon juice, vinegar or other acid-based cleaners that can erode and discolor grout joints.
  • Never use abrasive products or scouring powders on natural stone tiles; the tiles can become scratched.


Source: www.Hunker.com

Tuesday, November 24, 2020

How to Renovate a Quarry Tiled by Northamptonshire Tile Doctor

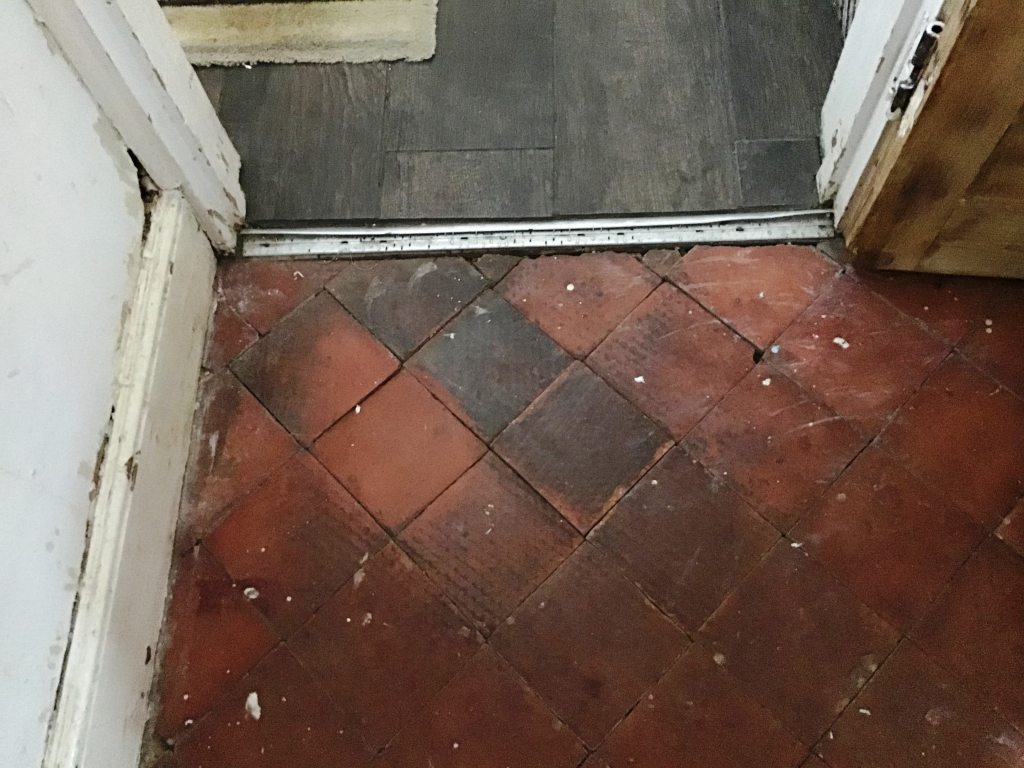
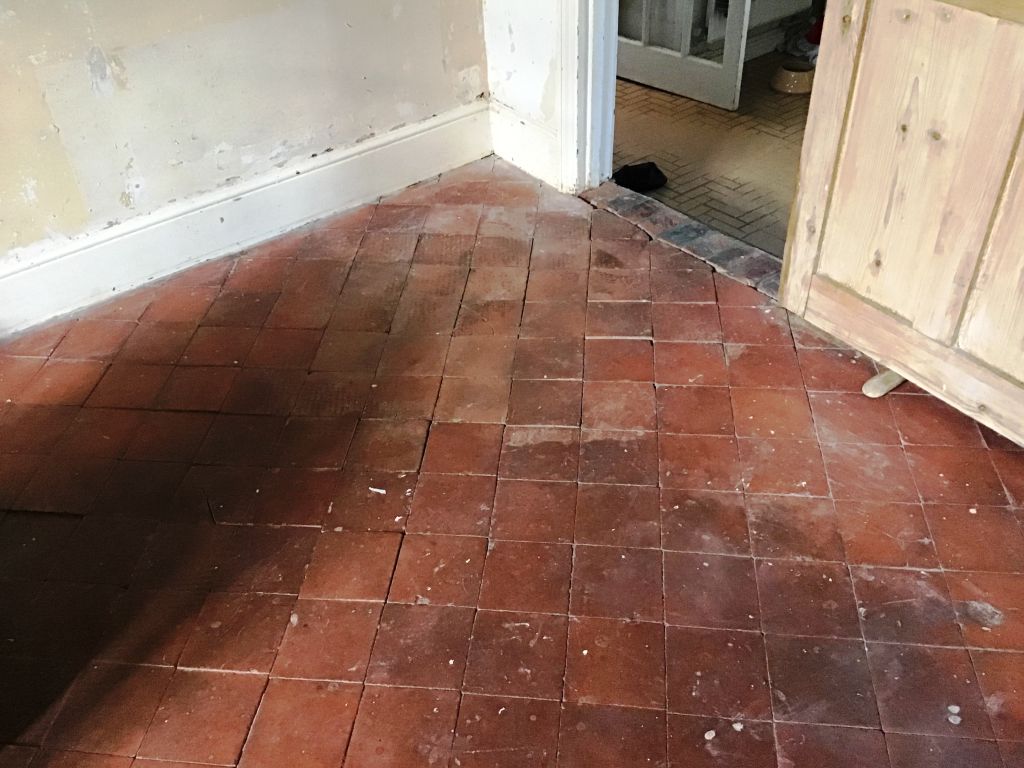
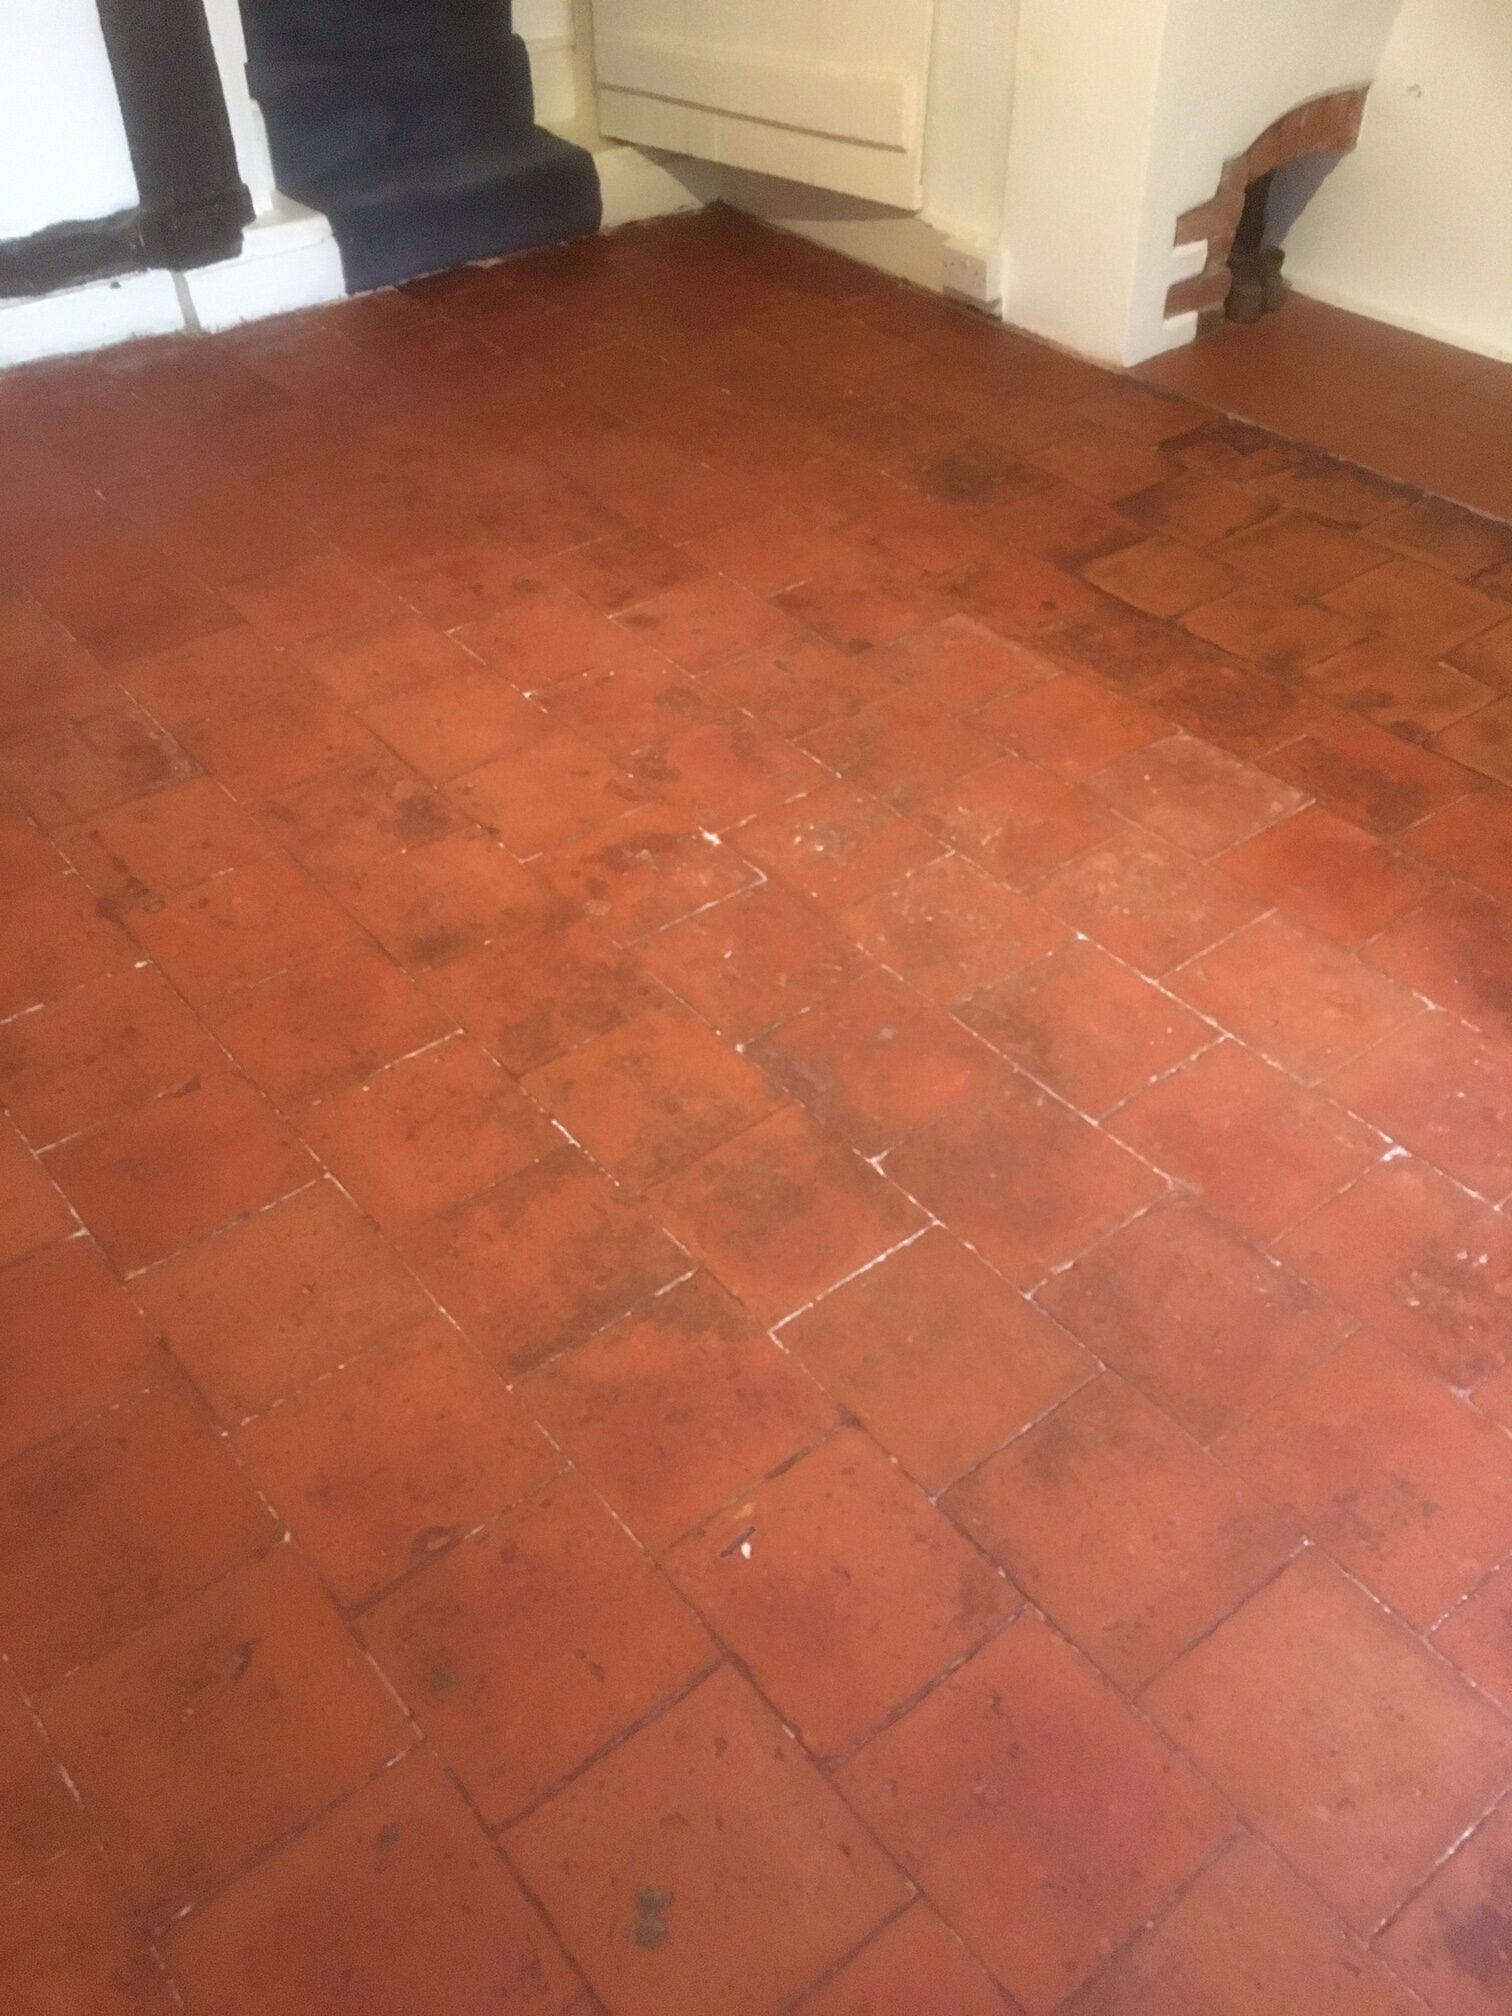
The following photos are of a Quarry tiled dining room floor in a period cottage located in the small village of Bozeat. My customer had removed a carpet and discovered them underneath, as you can see from the photographs however the tiles were in a poor state of repair. Undaunted the owner wanted to restore them as a lovely period feature and contacted Tile Doctor.

 
Quarry Tile Floor Before Restoration Bozeat Cottage Quarry Tile Floor Before Restoration Bozeat Cottage

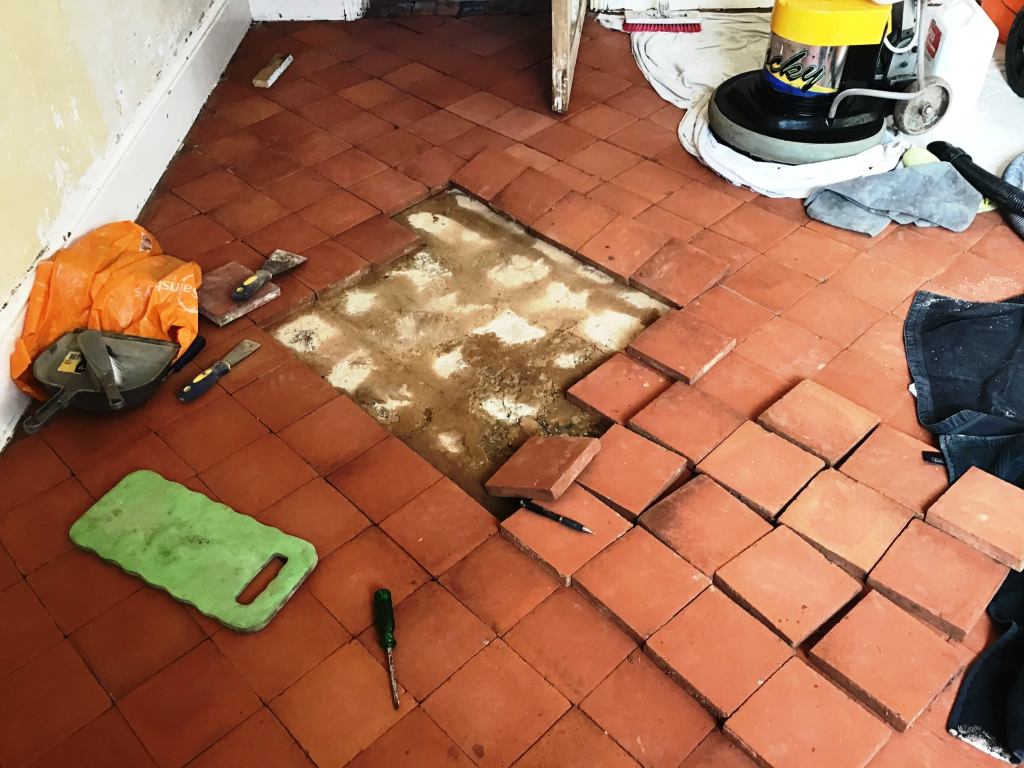
I went over to survey the Quarry tiles and could see the floor had not faired well under the carpet over the years, several tiles were cracked and 40 to 50 tiles were loose and would needed resetting to stop them moving underfoot, especially in the high traffic areas. I discussed with them that Tile Doctor could repair the floor and clean it and would be able to restore in a few days. They were happy to go ahead with my quote and we arranged a mutually convenient time to carry the work out.


Cleaning and repairing a Quarry Tiled Hallway Floor

My first course of action was to deep clean the floors using Tile Doctor Oxy-Gel which is an alkaline cleaner. Working in small areas the Gel was worked in using a stiff brush on a rotary machine using a little water. As this process was completed in each area, I rinsed off the resulting slurry away with water and then extracted using a wet vacuum. The initial clean removed most of the black staining and paint spots which had occurred over the years, but more work was needed.

The next step was to apply Tile Doctor Grout Clean-Up to further clean up the tiles and tackle the cement residue and other staining. I used a repeat of the cleaning process and rinsed twice with plain water to ensure all traces of product were removed. The next step was to tackle the broken and loose tiles however it was now the end of day one, so after assessing the floor for all repairs required, I installed a portable dryer to aid drying and left for the day.

 
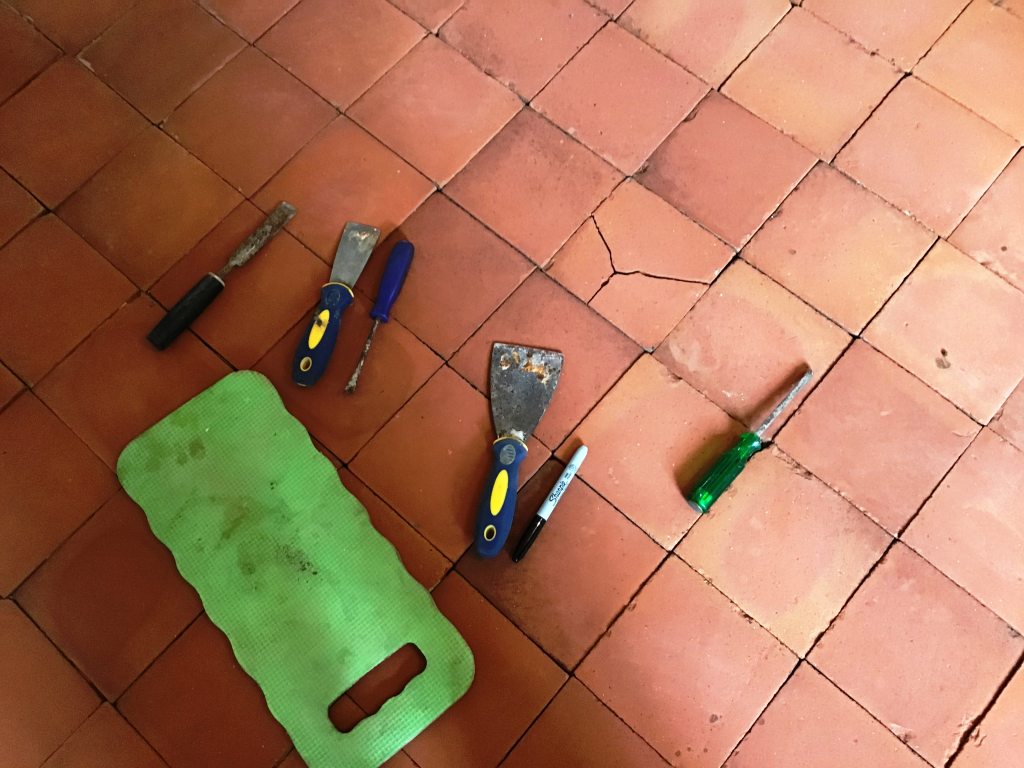
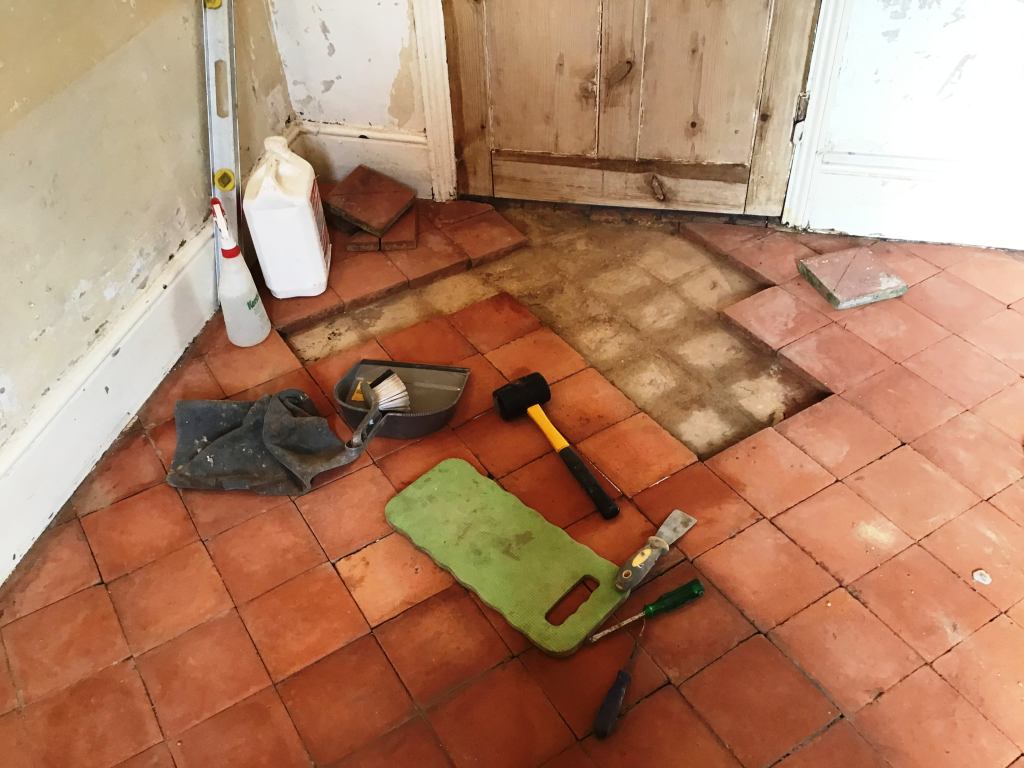
Quarry Tile Floor During Repair Bozeat Cottage Quarry Tile Floor During Repair Bozeat Cottage

The next day I returned to begin repairs starting by lifting all the loose tiles, working in one square metre sections at a time. Fortunately, my customer had already managed to obtain reclaimed tiles from a reclamation yard so that saved me a job. The colours matched with the originals; however, the reclaimed tiles were slightly larger than the originals and needed to be cut into shape as required. Working methodically, I re-laid the tiles on a fresh bed of screed and grouted them in to match the original floor as best possible.

 
Quarry Tile Floor During Repair Bozeat Cottage Quarry Tile Floor During Repair Bozeat Cottage

After the repairs were completed I allowed the floor to fully dry for four days, I needed the tiles dry and the newly laid adhesive and grout to set and bed in before the next step. Before leaving I gave my customer strict instructions not to walk over these areas whilst I was gone.


Sealing a Quarry Tiled Hallway Floor

Returning later the following week, I first checked the floor was dry using a damp meter, once satisfied I was able to start the sealing process. The customer had requested a silk finish, however because of the age of the cottage and the possibility of damp in this old floor my choice of sealer was limited to those that are fully breathable.

 
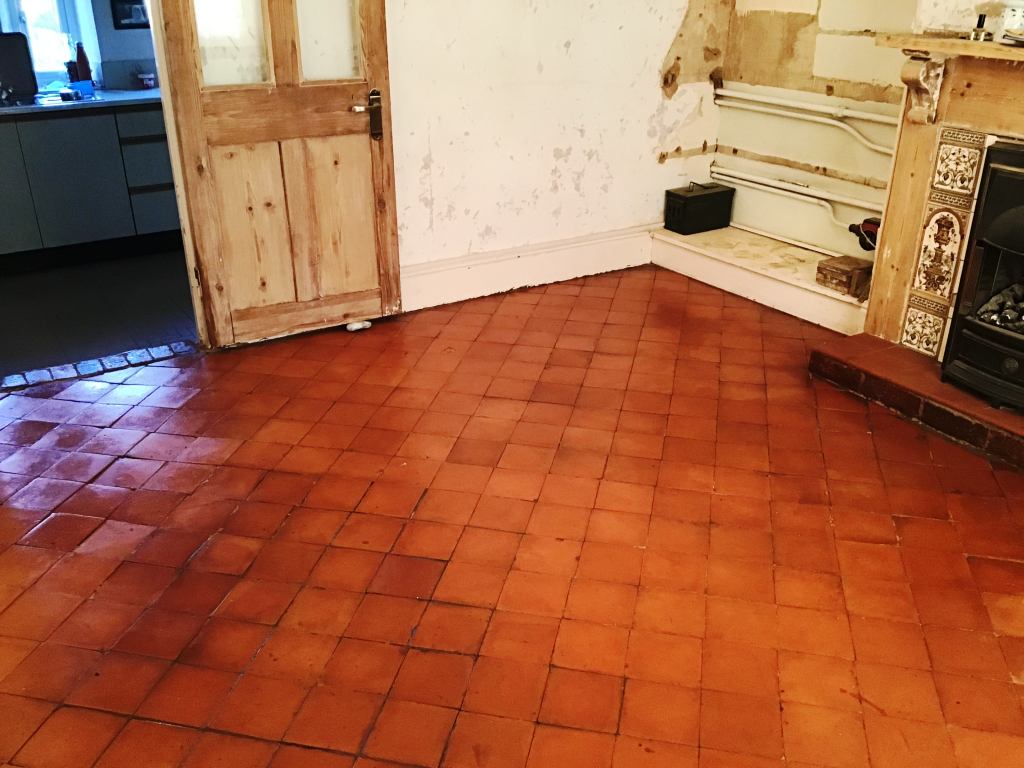
Quarry Tile Floor After Restoration Bozeat Cottage

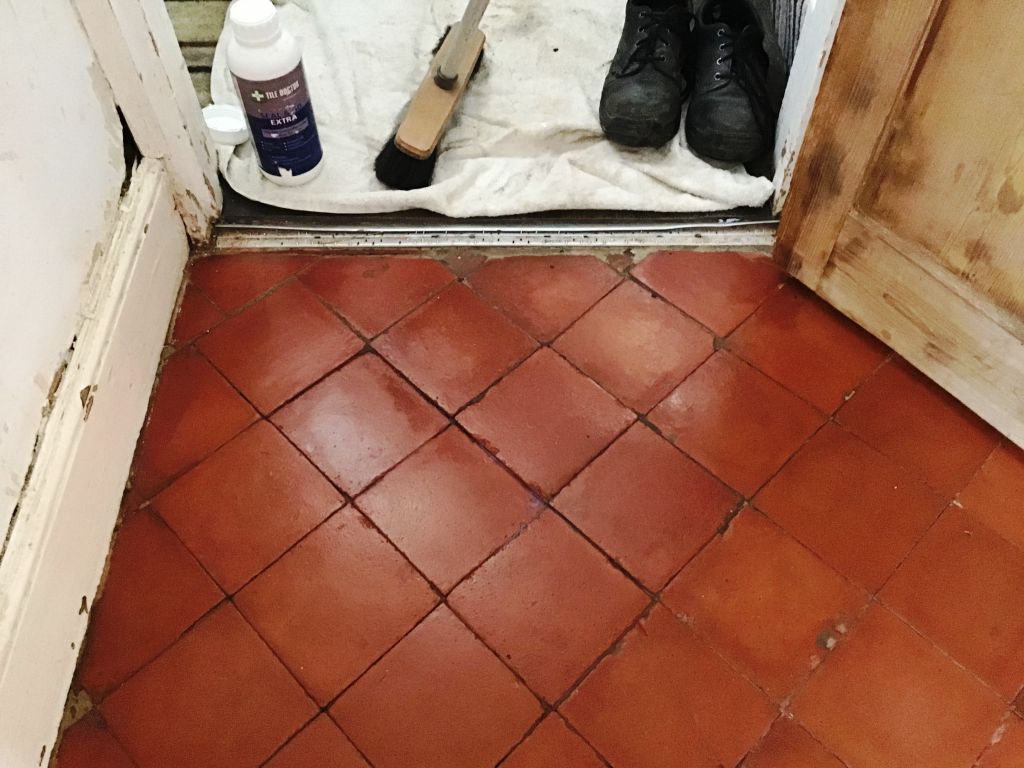
On this occasion I chose to apply several coats of Tile Doctor Seal & Go Extra, this product will allow the floor to breathe and provide the desired finish. It was a good decision, and as hoped it enhanced the appearance of the floor beautifully.

 
Quarry Tile Floor After Restoration Bozeat Cottage

My customer was very happy with the renovation and the transformed floor and left the following feedback:

 
"Friendly service, reasonably priced and a good standard of work. Has breathed new life into my old quarry tile floor."


Source: Quarry Floor Restoration in South Yorkshire

Thursday, November 19, 2020

How to Repair a Slate Floor Tile

Homeowners often choose slate tiles for bathroom and kitchen remodels because they are cost-effective, durable and sturdy. But when accidents happen, even the most well-made tiles can crack or get scratched. Fortunately, slate tiles are simple to replace. Even if you didn't install your tile floor yourself, you can replace a broken tile without calling in a professional. Your most difficult task could be finding a replacement tile that is the same shape and design of your broken tile.

  1. Break away the grout around the damaged slate tile with a utility knife. Scrape away as much of the grout as possible, and try to remove the tile. If the tile will not budge, use a hammer and a chisel to break the tile into smaller pieces. Lightly chisel the center of the tile until it breaks into smaller pieces. Do not use too much force when breaking apart the grout or the tile to avoid damaging nearby tiles.
  2. Remove the pieces of tile. Remove remaining grout by scraping it away with the utility knife. The area behind the tile should be as smooth as possible. Use a piece of sandpaper if necessary.
  3. Fit the open space with the replacement tile. The tile must have the same dimensions as the broken tile. If it fits flush with the other tiles, spread an adhesive on the back and press it into place. Secure the new tile with masking tape, and let it dry overnight.
  4. Remove the tape from the tile. With a sponge, apply a premixed grout over the entire surface of the tile. Allow the grout to cover part of the neighboring tiles to ensure that the grout enters the joints around the replacement tile.
  5. Round out the edges around the replacement tile using a jointing tool or the rounded end of a toothbrush. Drag the tool along the edges of the tile where the grout has been placed. Keep dragging it along until the grout has a concave look that matches the rest of the tiles.
  6. Wipe away the excess grout with a wet rag. Allow the grout to dry for the next hour. Polish the replacement tile with a dry cloth.


Source: www.HomeSteady.com

Tuesday, November 10, 2020

How to Reset Loose Ceramic Tiles

 If one or more of the ceramic tiles on your bathroom floor or kitchen back splash is loose, it's important to reset it immediately. Tiles and grout together prevent moisture from getting underneath the tiles; if that protection is breached by a loose tile, you could end up with more loose tiles. It's best if you have extra tiles of the same type available. If not, you'll have to be extra careful when you remove the tile to avoid cracking it.

What You'll Need:

  • Grout saw
  • Small, sharp chisel
  • Small hammer
  • Hand-held vacuum
  • Heavy metal putty knife
  • Tile adhesive
  • Pre-mixed grout
  • Grout float
  • Sponge

  1. Use your grout saw to remove the grout around the tile. Scrape the blade back and forth, with firm downward pressure, gradually loosening the grout. Stop and vacuum up the debris as necessary.
  2. Work your putty knife under the tile, tapping it with the hammer. Don't try to pry it out (you'll break the tile), but gradually work it around the edges until the tile pops out in one piece.
  3. Use your hammer and chisel to remove all residual grout and dried glue from the hole. Be careful not to chip the adjacent tiles. Vacuum the area thoroughly.
  4. Spread tile adhesive on the back of your tile, using the putty knife. Set the tile in place in the hole. Press it firmly and twist it slightly to get a good seal. Let it set overnight.
  5. Scoop up your pre-mixed grout with your rubber grout trowel and press it into the lines around the re-set tile. Run the edge of the float sideways along the surface, to squeeze the excess grout off the tile face. Wipe down the area with a damp sponge. Let the grout set for a few days before resuming use of the area.


Warning: Wear eye protection when using a grout saw.


Source: www.HomeSteady.com

Wednesday, November 4, 2020

How to Give Shady Grout a Consistent Appearance

The Splashback and Worktops in this Guilford Kitchen had been made from Glazed Ceramic tiles. However, the kitchen units had been extended several times and each time it seems a different shade of grout had been used. Dark grey, light grey and even grout with a brown tint in places. Naturally, she wanted a consistent colour throughout, and the grout needed a good clean.

 
Tiled Worktop Before Grout Colouring in Guilford

You don’t see so many tiled worktops these days, Granite, Marble, Corian and laminates are more popular however it was an interesting project, and I was happy to help. I was confident we could achieve a consistent appearance by recolouring the grout which would also make the grout easier to clean and give the appearance of the Kitchen a lift.

 
Tiled Worktop Before Grout Colouring in Guilford


Cleaning Ceramic Tiled Worktops

Firstly, I prepared the whole area by cleaning the grout. Grout colours achieve better adhesion when the grout is free of dirt and grease and Tile Doctor Grout Colourant Pre-Treat Cleaner is ideal for this. It’s an acid-based grout cleaner that cleans and etches the surface of the grout to make a superior bond with the colourant.

Another option is to use Tile Doctor Grout Clean-Up and as I already had a large bottle of this on the van, I decided to go with this instead diluted 50:50 with water. Working in sections I brushed it into the worktop and splashback grout and left it to dwell for thirty minutes before scrubbing it in with a firm wire brush. This action released the dirt which was then rinsed away with more water and then extracted with a wet vacuum to keep the mess to a minimum.

Following the cleaning the grout was now wet, so for the next half an hour I speed dried the grout with a heat gun. The colourant needs to be applied to dry grout, so this was a necessary step to ensure the best result.

The client had selected to use Tile Doctor Grout Colourant in Light Grey so once dried I started the colouring, brushing it in carefully with a narrow paint brush. The product dries quickly so any excess that gets onto the tile must be wiped off immediately. The process is quite slow and meticulous requiring a steady hand, but the results speak for themselves.

There was no need to apply a sealant over the colourant and the nature of the product acts as a barrier over the grout making it much easier to keep clean. Tile Doctor has a range of Grout Colourants in ten popular colours so there is plenty of choice. Using a colourant is much easier and less labour intensive than scraping the old grout out and re grouting. My client was also keen to avoid the mess of this option.

 
Tiled Worktop After Grout Colouring in Guilford

Once complete the tiles looked so much better, certainly my client was very pleased with the finish and left the following review.

 
“I’m very happy with every aspect of Rupert’s work, he renovated my kitchen worktops and splash backs. Great job. Thank you.”

Tiled Worktop After Grout Colouring in Guilford


Source: Grout Cleaning and Colouring Service in Surrey

Tuesday, October 20, 2020

How to Renovate a Terracotta Tiled Floor

I was called in by a client from the Cotswolds market town of Witney who had lifted up a carpet to discover a Terracotta tiled floor underneath. Although the floor was in good physical condition the carpet and underlay had been trapping moisture from evaporating resulting. Old floors like this one were laid before damp proof membranes became standard so covering them up can cause damp issues. It is important to allow moisture from underneath tiled floors to evaporate unimpeded otherwise moisture can reach out to the walls resulting in rising damp.

 
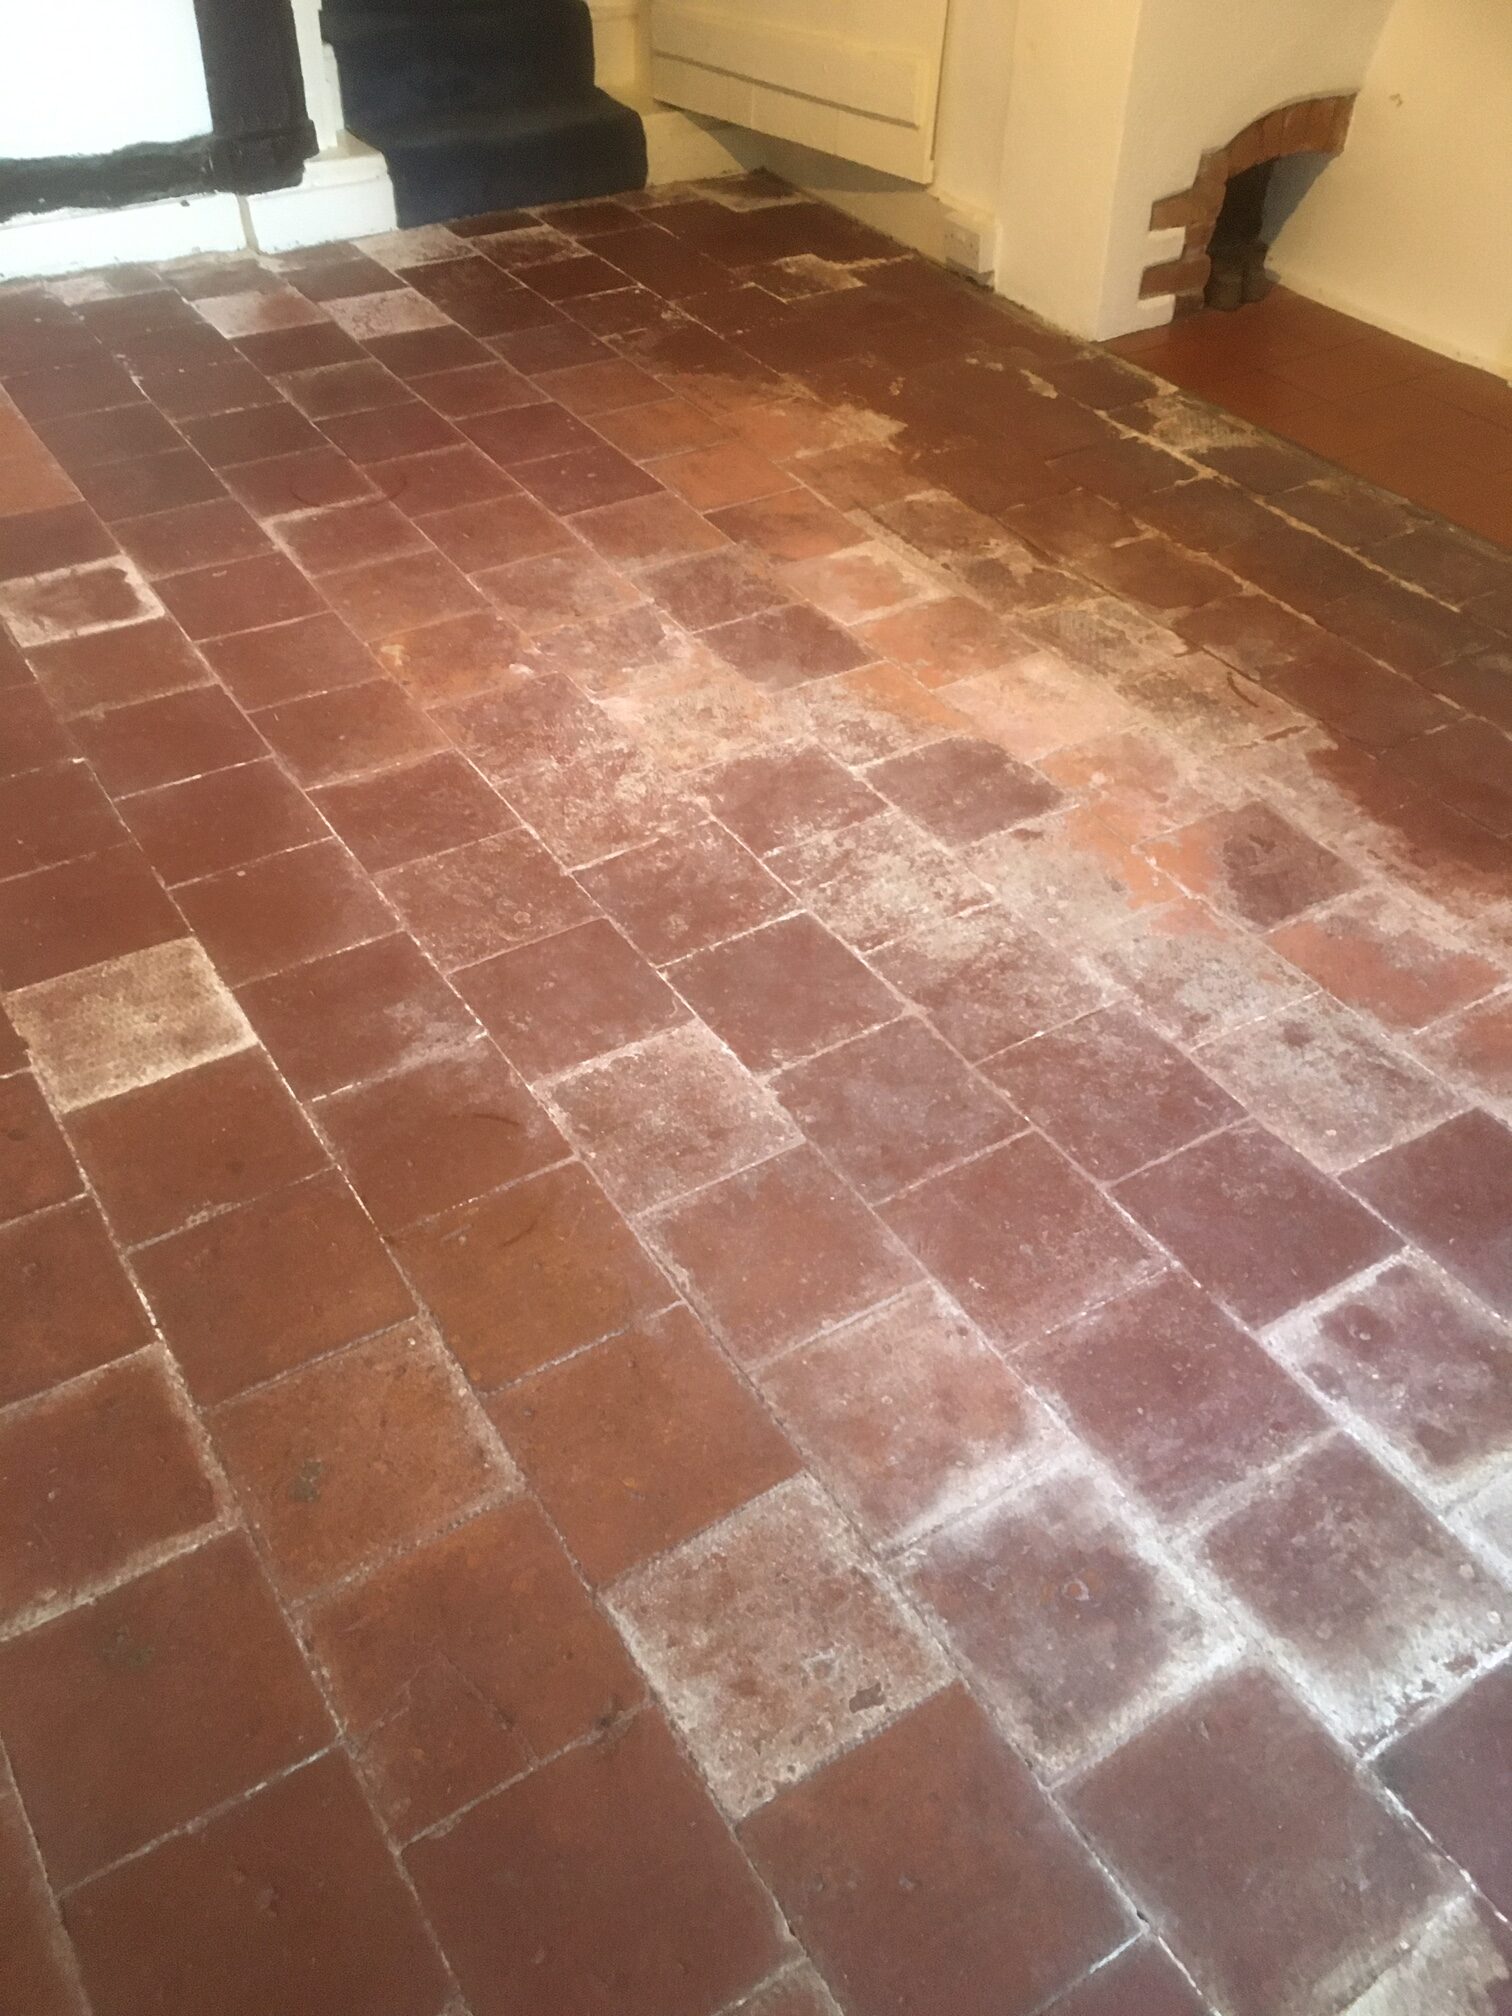
Terracotta Floor Before Cleaning Witney

Moisture can also penetrate the pores of the clay Terracotta tile potentially leading to its degradation over time and in this case resulted in the appearance of white efflorescent salts being deposited on the tile surface causing unsightly staining.


Cleaning Terracotta Tile

I started cleaning the Terracotta by doing applying strong dilution of Tile Doctor Pro-Clean which is an effective alkaline tile cleaner. For best results I spread the solution on the floor and then leave it to dwell and soak in for up to twenty minutes. This gives the product time to eat into the dirt and old coatings before being scrubbed in with a black pad fitted to a rotary floor machine. This worked very well on the floor and the cleaning solution was soon dirty with the released soil which was removed using a wet vacuum and more water to rinse it away and dry the floor as much as possible.

To remove the white efflorescent staining the floor was given an acid wash using Tile Doctor Grout Clean-up which is designed for removing grout and other mineral stains from tiling. This was brushed into the tile and grout by hand and left to fizz as it reacted with the efflorescence. After another rinse and extract with the wet vacuum the floor was left to dry out for a couple of days. The next step would be to seal the Terracotta and for best results the tile needs to be dry.


Sealing Terracotta Tile

On my return I checked the tiles were dry by taking a few moisture readings with a damp meter. The readings came back fine so I need not have been concerned however Terracotta tiles being made from clay are very porous so its always a good idea to check.

Given the previous issues with damp I knew I would need to use a fully breathable sealer, so I opted to use Tile Doctor Colour Grow. This product will cope well with the moisture and contains a colour enhancing formula that really brings out the red colour of the Terracotta.

 
Terracotta Floor After Cleaning Witney

Except for a few deep efflorescent stains in the grout, the floor responded very well to the treatment and made a massive improvement to the overall appearance. My client was pleased with the transformation and the newly restored floor matched well with the character of the property.


Sunday, October 11, 2020

How to Pattern Ceramic Countertop Tiles

Depending on the size, shape and color of the tiles, the number of options can be staggering when it comes to creating a pattern for your ceramic countertop tiles. Countertops can be tiled with ceramic tiles, natural stone tiles, glass tiles with glittering metallic flakes embedded in the surface, glazed porcelain tile, and even elegant polished marble tiles. You can make patterns with mosaic sheets that are covered with a myriad of tiny ceramic tiles or design your own pattern and add personality to any room.

Thing You'll Need:

  • Measuring tape
  • 3 different colored tile samples
  • Paper
  • Pencil
  • Ruler
  • Digital camera
  • Colored pencils

  1. Research tile patterns for decor themes on the Internet or in home decorating magazines. Print or make a copy of any patterns that you would like to use as a visual aid.
  2. Measure the dimensions of the countertop and write them down. Keep these measurements handy as you go to purchase sample ceramic tiles as they help you determine the size of the tile and how they fit together.
  3. Select a main color tile, called a field color, for your countertop that matches the color scheme of your kitchen or bathroom.
  4. Select two to three accent colors tiles that go with the color scheme and your overall decorating theme and enhance the visual appearance of the field color tile. Accent tiles are a lighter or darker hue of color, or they can be a matching color that draws attention to the simple pattern on your counter top. They can be square, diamond shaped or circular and can be a single color or have a striking design painted or embossed on them.
  5. Draw a map of your countertop. Sketch tile design ideas on it to start brainstorming patterns for the ceramic tiles you selected.
  6. Cut a 1-square-foot piece of paper and draw a grid of 1-inch squares on it with a ruler. The grid helps you visualize sections of the counter space and the tile positions of your pattern.
  7. Experiment with tile patterns by laying out your ceramic tile samples on the paper grid. Start with simple designs and set the larger tiles down first.
  8. Fill spaces between the larger tiles with smaller accent tiles as you begin to design your own tile pattern.
  9. Create borders or lines of tile that goes across the entire counter near the midway point to create the illusion of a larger countertop.
  10. Place the tiles on your counter in the desired pattern to see how they look once they are installed. You may need to come up with several different patterns before you find one that fits your room perfectly.
  11. Take a picture of the tile pattern with a digital camera or draw the tile pattern and shade it with colored pencils that match the tile colors. These visuals assist with laying the tiles in your personalized pattern, as you are able to quickly see the color and position of the tiles without having to read over notes.
Tips:
  • Find fabric prints that match the style of your decorating theme and use swatches of the fabric to help you find the perfect tile color combinations for your counter top.
  • Brick patterns, straight, diagonal, checkerboard and herringbone patterns are common tile designs.