Wednesday, November 13, 2024

Cardiff Tile Doctor Details the Restoration of a Quarry Tiled Floor in Penarth

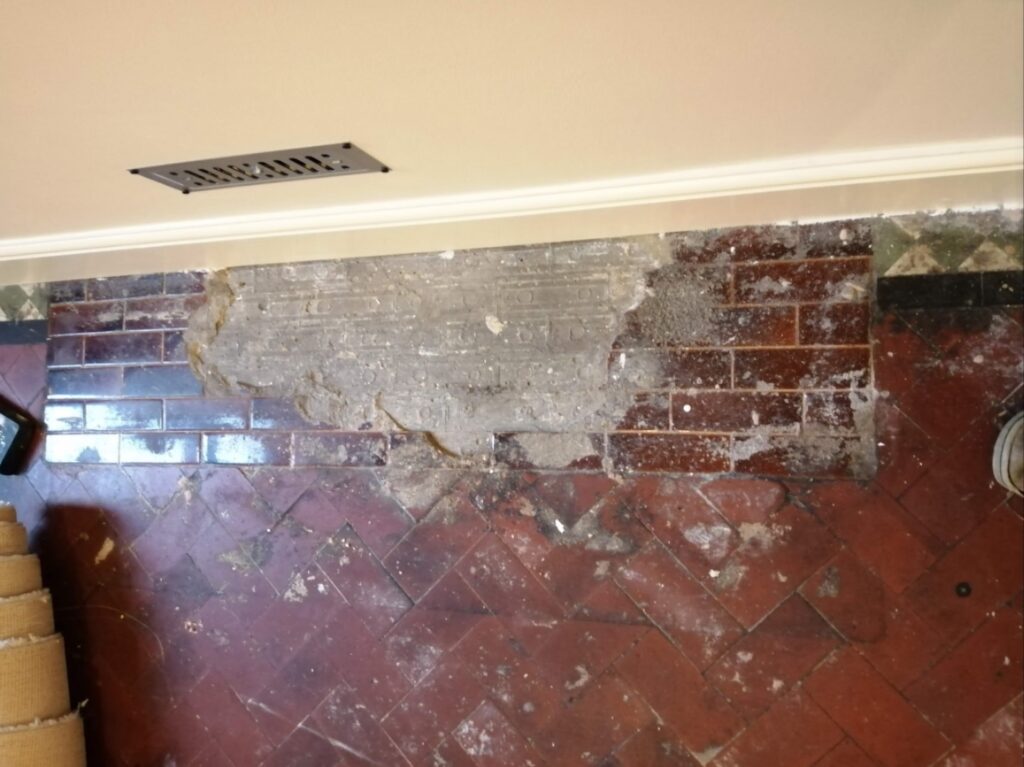
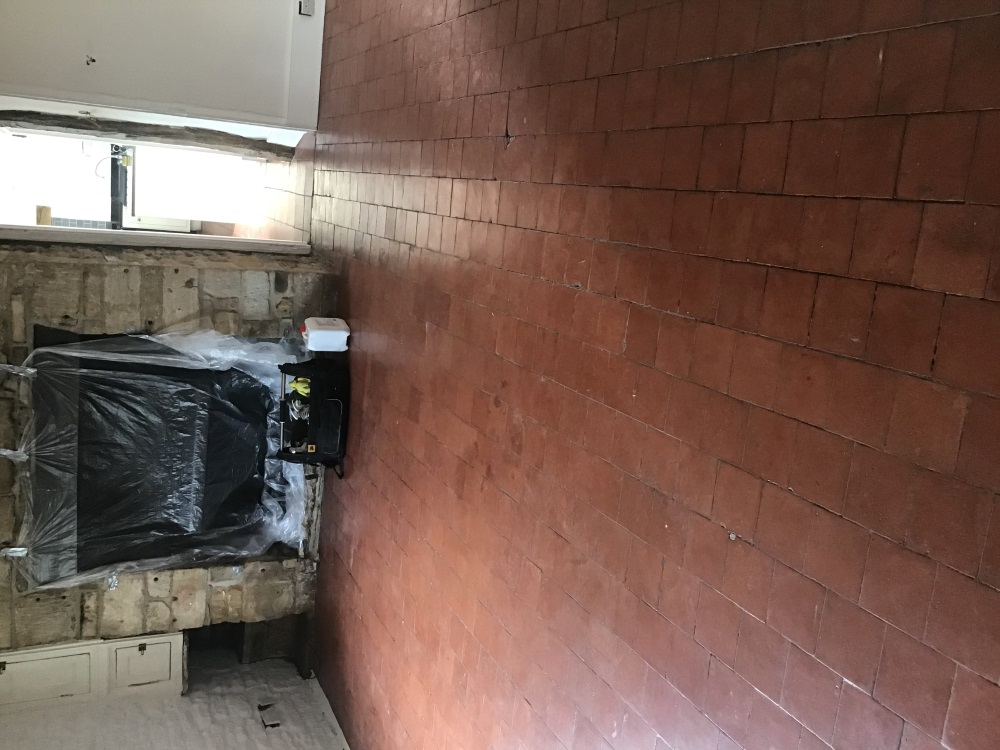
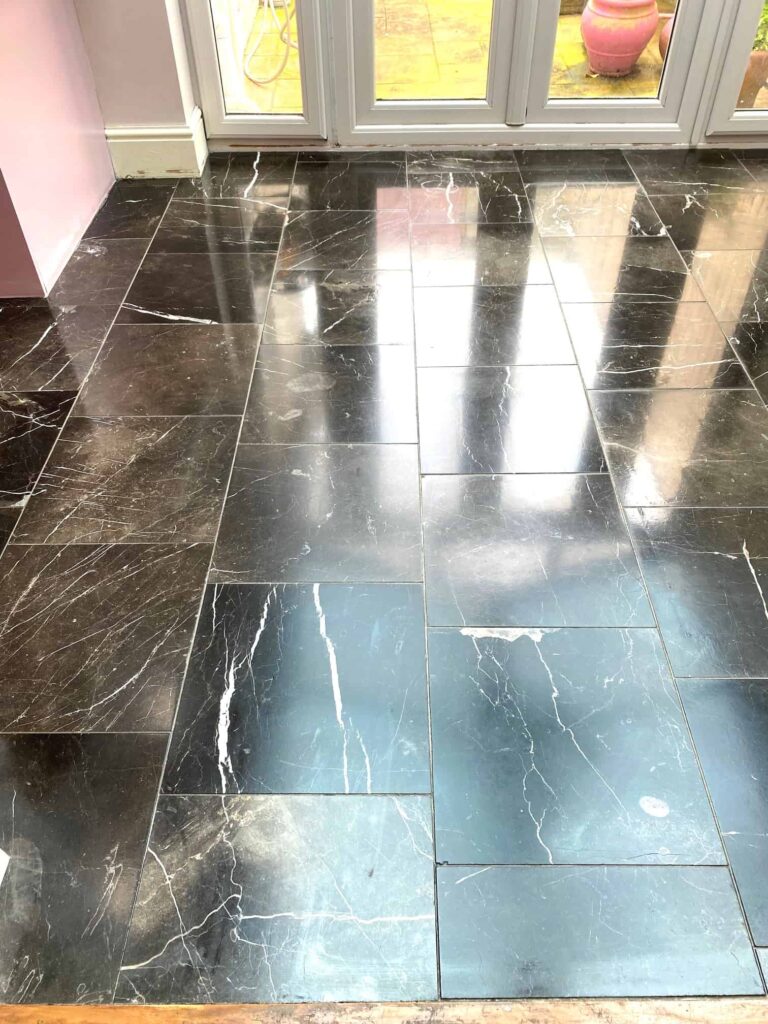
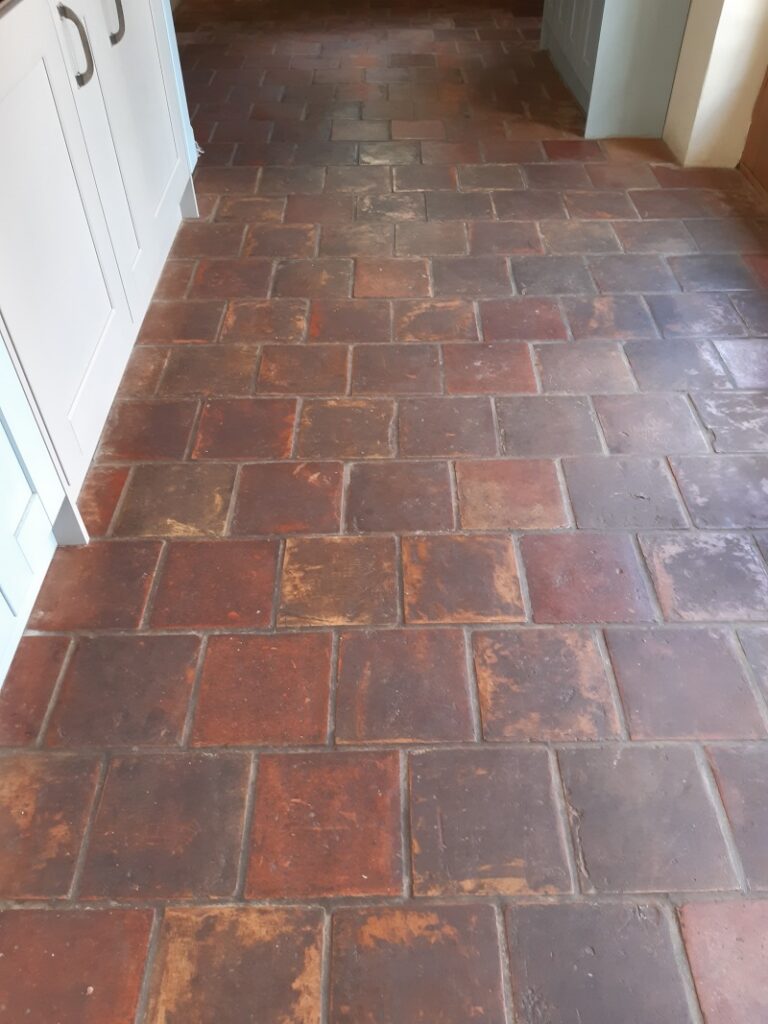
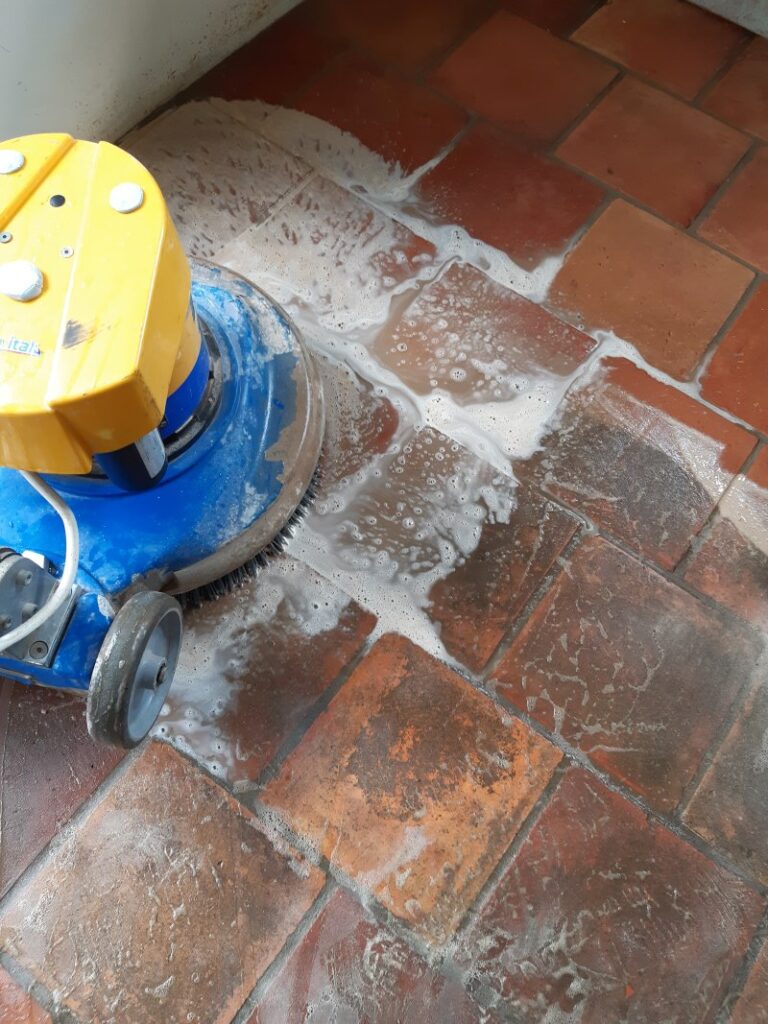
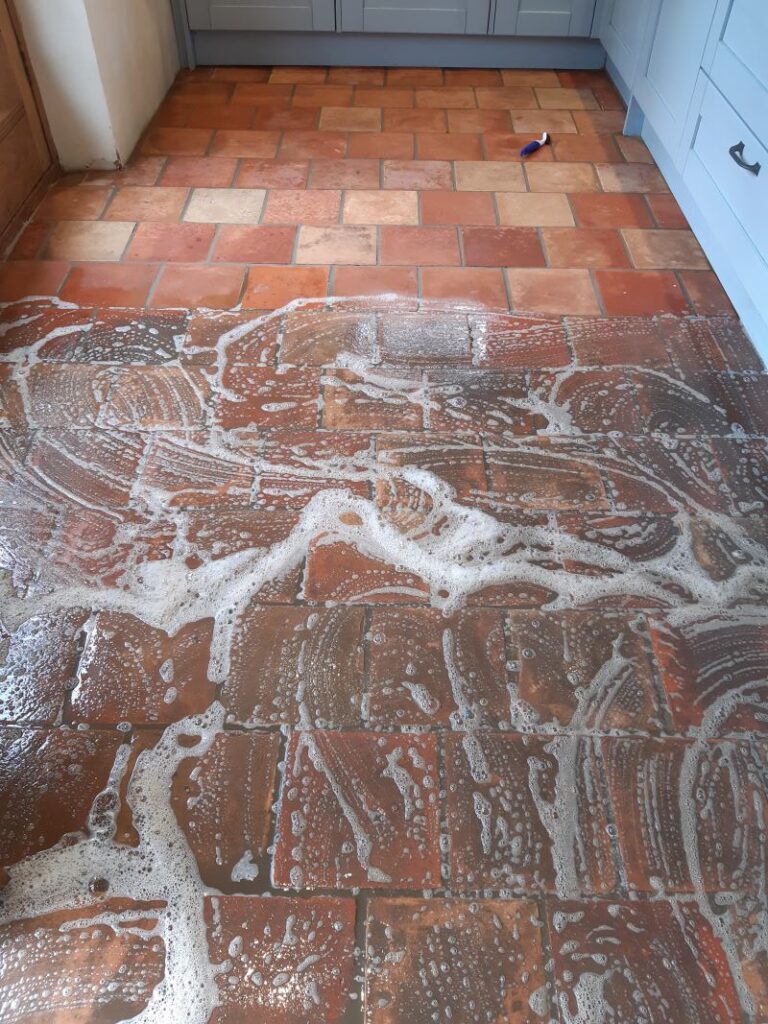
This client from Penarth contacted Tile Doctor to see if their 100-year-old Quarry tiled floor which had broken and missing tiles could be salvaged. The property dated back to 1890 and had experienced many years of wear and tear and it certainly showed. One of the biggest problems however would be to renovate the area in front of the old fireplace where a hearth was once situated.

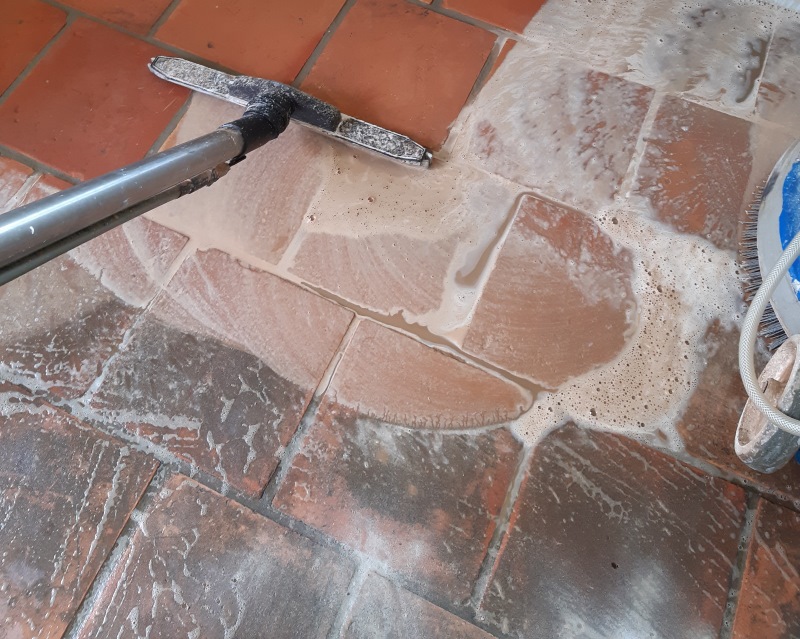
Quarry Tiled Floor During Restoration Penarth

It was clear the area in front of the fireplace would need to be rebuilt using matching replacement quarry tiles more of which would be needed for the other repairs that needed doing. Once that was done the floor would then need a deep clean and a fresh sealer applied to give the whole floor a consistent appearance.

I worked out a comprehensive quote which included the repairs and renovation work. This was accepted by the client and a date set for the work to start.
   

Cleaning and Repairing a Quarry Tiled Room

Work started with the tile repairs which involved breaking out the damaged tiles and those in front of the old fireplace and then cleaning up the floor ready for the replacement tiles to be installed.

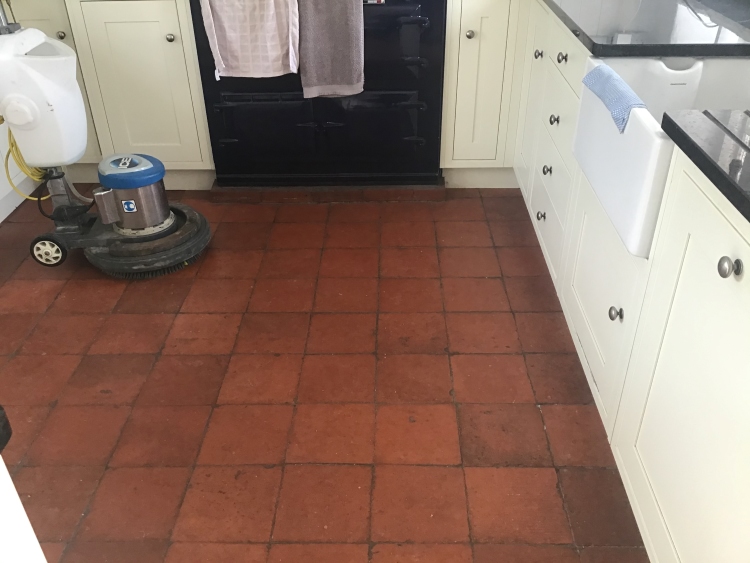
Quarry Tiled Floor During Restoration Penarth 

Quarry tiles are still very popular, so it wasn't a problem finding matching replacements which I had manage to source before work commenced. The replacements were then laid in-line with the existing tiles using rapid set adhesive and grouted in.

Once the tiles had set, I was able to start the cleaning process which started with scraping off as much cement, paint, and plaster residue off the floor as possible. This was then followed up with a deep clean of the tile and grout using a mixture of Tile Doctor Pro-Clean combined 50:50 with with Tile Doctor Nanotech HBU Cleaner.

After leaving these products to soak in for ten minutes I worked by hand scrubbing in 1m2 sections at a time, cleaning and rinsing with water and vacuuming up the waste with a wet vacuum as I progressed. Doing it this way ensures maximum attention to detail and ensures the floor is as clean as possible. 

Once done, the floor was given an acid rinse using Tile Doctor Grout Clean-up which was brushed onto the floor and extracted with the wet vacuum as before. Old floors like this don't have a damp proof membrane and are susceptible to efflorescence, giving the floor an acid rinse like this counters salts and helps further clean the tiles.

After another rinse and extraction with the wet vacuum the floor was left overnight to dry.
   

Sealing a Quarry Tiled Floor in Penarth

The next morning the floor was tested for moisture with a damp meter and the readings confirmed it had dried sufficiently to accept a sealer. I don’t recommend sealing a damp floor as it impacts the sealers’ ability to cure and leads to a patchy finish.

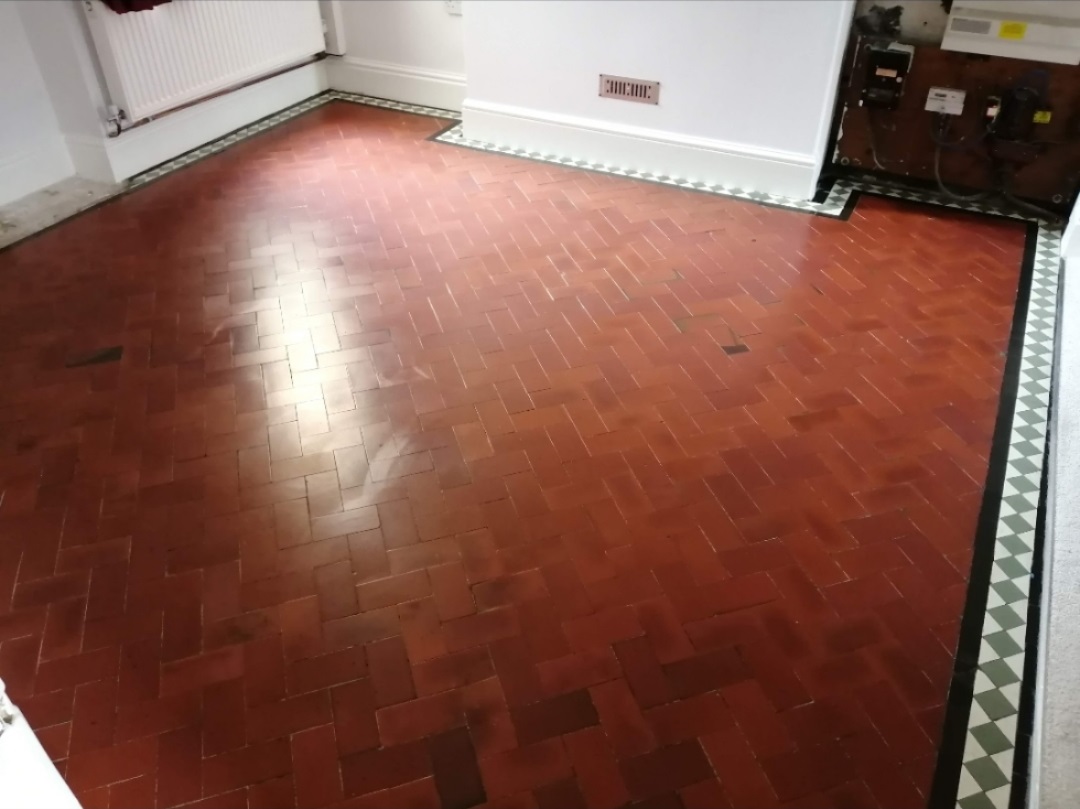
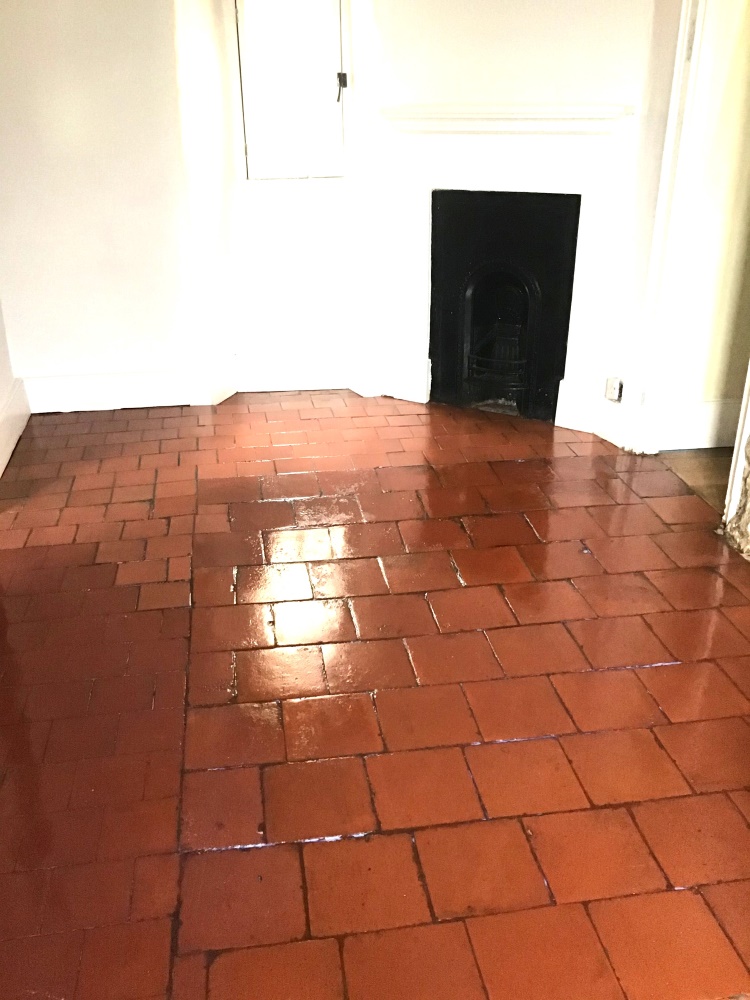
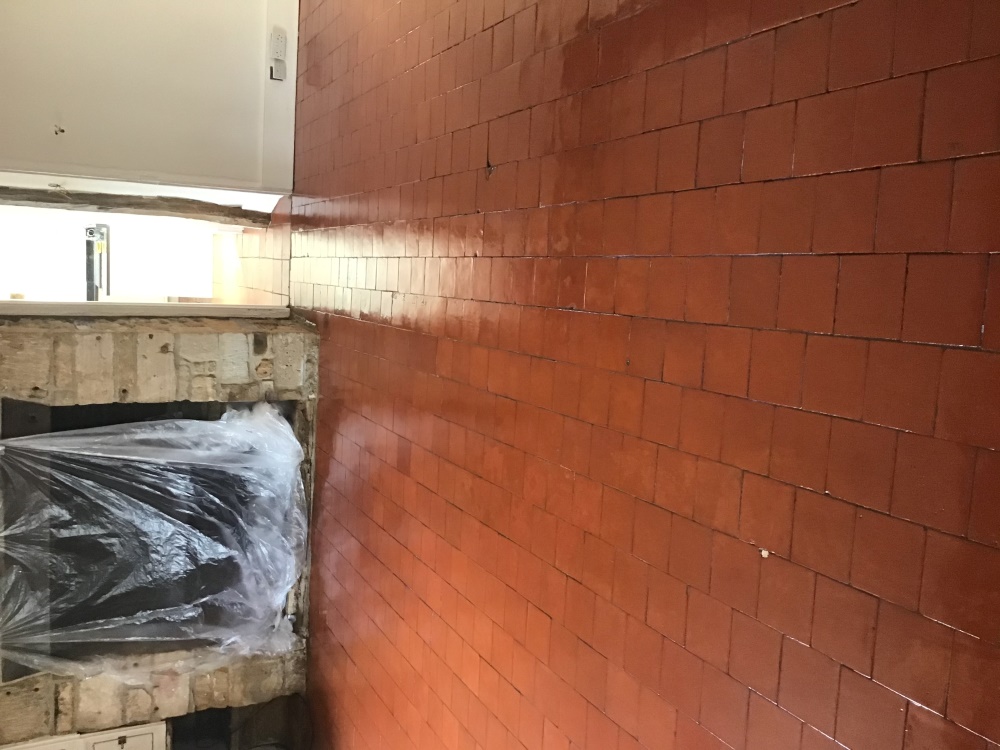
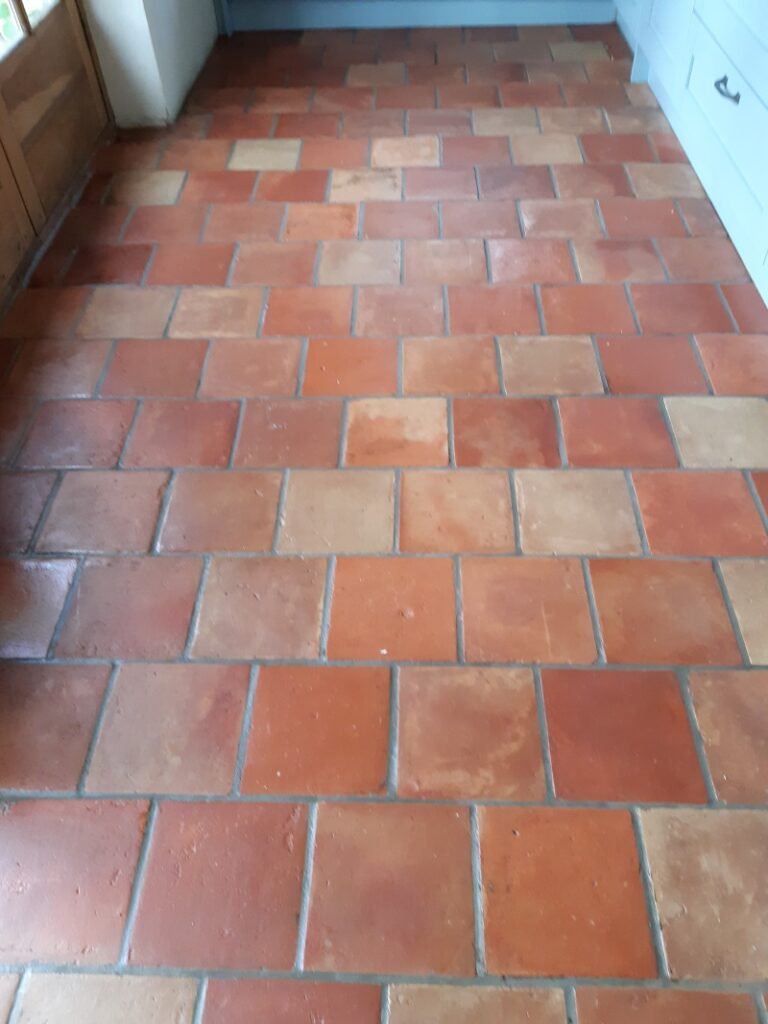
Sealing started with the application of a single coat of Tile Doctor Colour Grow which is a very durable and breathable sealer which being an impregnator provides an excellent base. The customer wanted a shiny finish so this was followed up with a couple of coats of Tile Doctor Seal and Go. This product further protects the floor and adds a subtle shine which together with the Colour Grow really brought out the colours in the Quarry tiles. As you can see the red colour of the floor looks vibrant and stunning after the two different sealers were applied.

Quarry Tiled Floor After Restoration Penarth

My client was delighted with the result and offered to recommended Tile Doctor to their family and friends which was nice. For aftercare I recommended the use of Tile Doctor Neutral Tile Cleaner which is a gentle but effective tile cleaner that's ideal for cleaning sealed floors.

Quarry Tiled Floor After Restoration Penarth

Tuesday, November 12, 2024

How to Clean Hand Scraped Bamboo Flooring

What You'll Need:

  • Broom
  •  Dustpan
  •  Mop
  •  Water and white vinegar solution

Cleaninghand scraped bamboo flooringis one of the things you should consider when buying and installing this type of flooring. It is also one of the most important things you need to know if your office or house hashand scraped bamboo flooring.

Bamboo, the tallest and the most popular grass, has been widely used in different ways. Like any other building and flooring materials, there are appropriate ways of cleaning it. Your flooring is one of your investments so you really have to keep it clean and protect it regularly. Your supplier should have given you the instruction guide on the proper care and maintenance of your bamboo flooring. But if the supplier did not or you have forgotten where you placed the instruction guide, here are some of the easy-to-follow tips in cleaninghand scraped bamboo flooring:

Step one

Move all the furniture out of the room. Do not drag or pull your furniture. Always carry all the heavy pieces because pulling them will damage the floor and cause permanent marks on it. Remove the carpets and rugs carefully. Begin by sweeping up the room you are planning to clean. The room should be free from residues, debris, dust, and other minute matters such as nails, pins, and screws. Use your broom and dustpan for this job.

Step two

Buy an appropriate “wood safe” floor cleaner. Do not use heavy detergents, concentrated chemicals and abrasives because these can damage your bamboo flooring permanently. When there aren’t any “wood safe” floor cleaners available, you can create your own mixture of one-fourth cup of white vinegar to every one-quart of water. If your floor is already free from residues and dirt, get a gallon of warm water and add the recommended amount of “wood safe” floor cleaner. Mix it well so you will be able to produce an even, suitable mixture.

Step three

You will need a mop for yourhand scraped bamboo flooring. Before you start cleaning the floor, make sure you squeeze out the mop completely. Large amounts of water should not be left on the bamboo floor so moisture and molds will not develop in the floor.

Step four

Carefully wipe the floor with the mop in a back and forth motion. The entire area of the floor should be covered. Do not omit any dirty areas so your hand scraped bamboo flooring will have even color and tone.

Step five

Keep your bamboo flooring clean by mopping at least once a week.

Step six

One way to protect your bamboo flooring from getting dirty is to use rugs or carpets in areas where people often walk or stay. By doing so, the floor is exposed to less dirt and residue because the mats, rugs, or carpets filter it. If you have indoor plants, do not place them on top of your floor. Water and moisture might concentrate on the floor, thus, your flooring may fade; molds and bacteria could grow in that area which will lead to staining.


Wednesday, October 30, 2024

Prefinished Bamboo Flooring: Pros and Cons

 Prefinished bamboo flooring is a convenient choice for homeowners who prefer a ready-made and easy-to-install floor type. The floor is manufactured right through to the final finishing stages. This eliminates the need for further processing work on-site which is usually required for unfinished floors. Various urethanes are used during finishing to give the floor an enduring beauty. Urethanes also protect it from the usual wear and tear effects that come with use. You can get prefinished bamboo floors in natural and carbonized varieties as well as vertical and horizontal versions. Below are the pros and cons of prefinished bamboo floors.

Pros of Prefinished Bamboo Flooring

Prefinished bamboo floors don’t require further processes like sealing, sanding, or staining after installation. Once properly installed, the floor can be used right away. The quick turnaround time is helpful where time is an issue. If you’re looking for a bamboo floor type that will retain its attractive look for several years, prefinished is an excellent choice.

The floor surface is highly resistant to chipping, dents, and scratches. The prefinished surface bears up well in high traffic areas such as the living room or kitchen while retaining its attractive appearance. This makes it one of the most durable floor types available. Prefinished floors often come with an extended warranty. Many manufacturers offer a warranty ranging from 15 to 25 years. Such a floor definitely adds to your home value.

The low maintenance requirements of prefinished bamboo floors make them a favorite with many bamboo floor lovers. Simply use a mop to get rid of dust and dirt. Once in a while, you can do a deep cleaning job using special cleaners that are appropriate for bamboo floors. The floor doesn’t develop stains which makes maintenance even easier.

For those who frequently suffer allergies, a prefinished bamboo floor can help control your allergic reactions. Its hypoallergenic quality guarantees that no allergens will get trapped on the floor. This makes it a safe and effective way of controlling allergies for household members. The versatility of prefinished bamboo floors also endears them to many. The floors easily blend with various decors, ranging from traditional to contemporary. Prefinished bamboo floors easily add to the beauty, elegance, and ambiance of a room.

Cons

The color variety for prefinished floors is rather limited. Unlike unfinished floors which can be further stained into whatever color you choose, the prefinished variety restricts you to a smaller color range. This may be disappointing when trying to achieve a unique color scheme. Should a portion of the floor get damaged and repair becomes necessary, the damaged portion may not match the rest of the floor once sanding has been done.

Replacement becomes necessary which ends up being a more costly exercise than repair. The prefinished boards are beveled on the edges to eliminate the sharp edges. This is because the boards have varying heights and thicknesses when being processed in the factory. Bevelling creates grooves that may feel uncomfortable when walked upon. It also makes it impossible to achieve a flawless, uniform appearance.


Source: www.DoItYourself.com

Friday, October 4, 2024

Essex Tile Doctor Reveals how to Remove Years of Dirt from Terracotta Floor Tiles

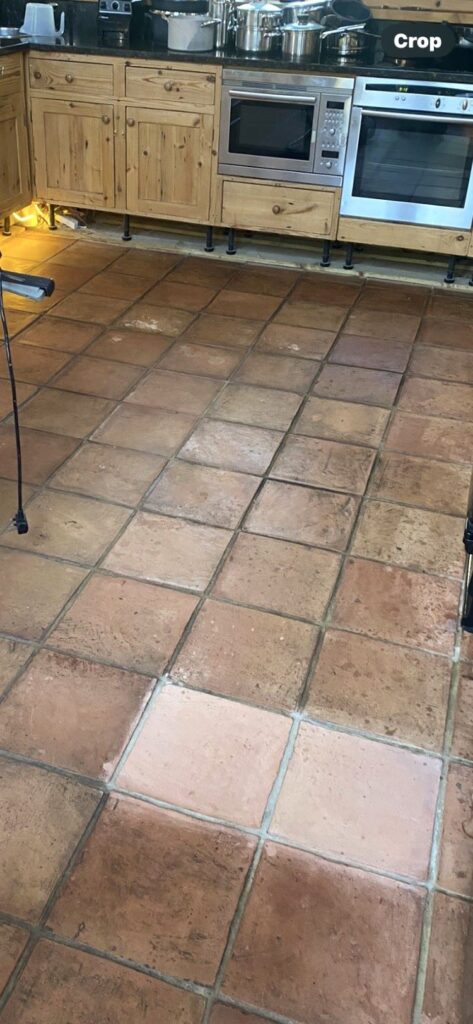
The Terracotta tiles in the kitchen of this property in Danbury near Chelmsford were installed by the owners only five years prior. At the time they didn't like the light colour of the terracotta, so they were sealed with a black pigment added to the sealer in an attempt to darken the floor. Five years later and the sealer had clearly failed, and the tiles and grout were now seriously filthy and impossible to clean.

I wanted to be certain I could remove the dirt and old sealer so whilst at the property surveying the floor I did a cleaning test with Tile Doctor Remove and Go scrubbed into a couple of tiles by hand. The product worked really well and easily cleaned the tiles and grout with excellent results (see picture).

Terracotta Tiled Kitchen Floor Before Cleaning Danbury Chelmsford

The difference was quite striking and equally impressive so after I worked out a quote, they were more than happy to get me booked in to complete the floor.

Deep Cleaning a Terracotta Tiled Kitchen Floor

I returned on the agreed date and immediately set about applying the same process to get the Terracotta tile and grout clean. I used a strong dilution of Tile Doctor Remove and Go working it into the tiles using a black scrubbing pad fitted to a rotary machine which also cleaned the grout lines.

The Terracotta was rinsed, and the soiling extracted with a wet vacuum. Once done the tiles and grout were inspected and any stubborn areas re-treated using the same process until I was satisfied the Terracotta, and grout was as clean as possible.

The underfloor heating was switched on and used to dry the floor overnight so it would be dry and ready for sealing the next day. This was a helpful addition and avoided the need for me to get the fan dryers out overnight.

Sealing a Terracotta Tiled Kitchen

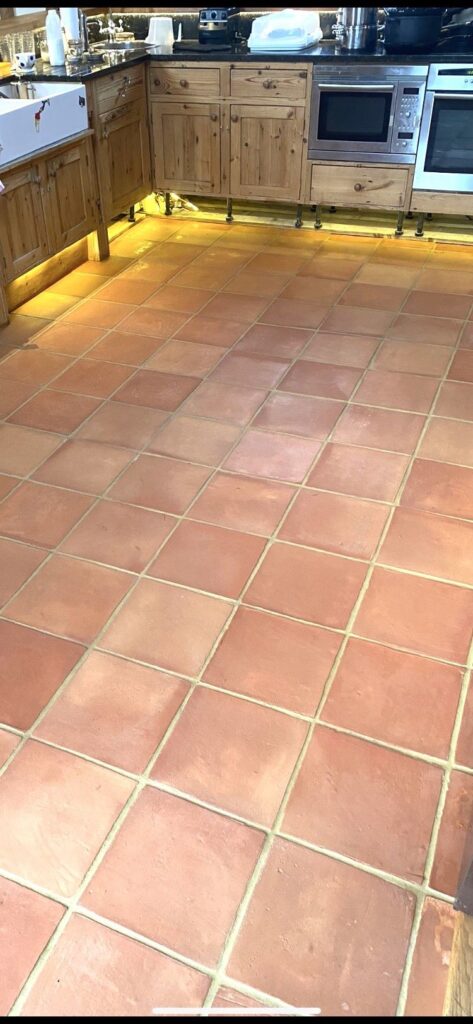
Terracotta is made from clay and as a result is a very porous material, because of this it took eight coats sealer before it was fully sealed. I applied Tile Doctor Colour Grow sealer for this, it contains a colour enhancing formula which really brought out the orange and red colours in the tile.

This sealer is an impregnator that works by soaking into the tile, occupying the pores and ensuring dirt remains on the surface where it is easily cleaned away. It will provide long term protection moving forward and it improves the appearance of the floor without the tiles becoming too shiny.

Terracotta Tiled Kitchen Floor After Cleaning Sealing Danbury Chelmsford

I think you will agree from the photographs that the floor was completely transformed, and I’m pleased to say the owner was really happy and shocked to see it so different from before.

For aftercare cleaning I recommended Tile Doctor Neutral Tile Cleaner, this is a pH neutral product which will ensure the newly applied sealer retains its integrity. Many household cleaning products are simply too strong and will strip away the sealer with use.

Thursday, September 26, 2024

Refinishing Oak Hardwood Floors

Oak hardwood floors are one of the things that can make a home seem extraordinary. It has the natural beauty which does not go out of fashion through time and you are adding to the value of your house if you have oak floors installed. However, although oak is known to be very durable, it can lose its shine over time. It needs to be refinished once the polyurethane covering on its surface starts to wear out.

What You'll Need:

  • 20 to 60 grit sandpaper
  •  Hand sander
  •  Putty knife
  •  Long-handled roller
  •  120 grit sandpaper
  •  Wood filler
  •  Rag

 A refinishing job is also important to protect the wood itself from everyday wear and tear. You will only require a weekend to do the job yourself and if you do not possess some of the equipment needed, you can rent it out from your local hardware outlet. Although a bit challenging, the results of your effort will be well worth it.


Step 1 - Prepare the Room

Remove all of the items from the room that has the floor for refinishing. Once the room is free from any obstacle, take out the moldings from the room edges and sweep the floor to make sure that there is no dust around.


Step 2 - Inspect the Floor

Inspect the entire flooring that you will be refinishing. If there are any staples or nails on it, make sure that you are able to remove all of them before doing the refinishing. Nail holes should be filled up with wood putty. Use the spatula to do it. Ensure that you fill out evenly to make the flooring as even as you can. There is no need to sand it since you will be sanding the entire area anyway to remove the old finish.


Step 3 - Prepare the Sander

Take out the instruction manual for the drum sander and assemble it as directed. If the flooring has been heavily worn down, choose 20 grit sandpaper. If the wear is moderate, you can use a 60 grit sandpaper.


Step 4 - Sand the Floor

Sanding should be started from a corner of the room. Move in the direction of the wood grain and allow the drum sander to work for you. Go about the task back and forth until you have the entire area covered. To ensure that everything has been sanded down, overlap each pass by 1 inch.


Step 5 - Sand the Room Edges

Room edges should be sanded down by hand since they cannot be reached by the drum sander. Use the same sandpaper grit that you used on the sander.


Step 6 - Fine Sanding the Room

After you are done with sanding the edges of the room, repeat the sanding process for the entire room, but this time, use a 120 grit sandpaper. This will be your preparation for the staining.


Step 7 - Clean the Floor

To remove the dust that resulted from sanding, sweep and vacuum the entire area. Never use water on the bare wood.


Step 8 - Stain the Floor

Take a rag and the stain color of your choice and work it over the entire floor area using a circular motion. Ensure that you have the room properly ventilated as you do this as the stain fumes can be toxic. Allow the stain to dry for 6 hours minimum.


Step 9 - Apply Polyurethane

To protect the wood and show its luster, apply a coat of polyurethane. Apply the chemical using a roller with a long handle. Allow the first coating to dry for 6 hours before applying a second coating.


Source: www.DoItYourself.com

Thursday, September 5, 2024

10 Benefits to Using a Peroxide Cleaner

Peroxide Cleaner, or Hydrogen peroxide (H2O2), is a pale blue liquid that is slightly thicker than water and appears colorless when not in its purest form. It has strong burning properties, and is a powerful bleaching agent. It is used as a disinfectant, antiseptic, and even as a propellant in rockets. Hydrogen peroxide only contains water and oxygen and does not contain toxic residue. Hydrogen peroxide is a useful household agent with the following benefits and usage.

1. Removes Carpet and Clothing Stains

Pour a small amount of hydrogen peroxide on the problem surface of your shirt and let it set for a few minutes before finally putting the shirt in the washer. For cleaning carpets, dab a clean cloth with hydrogen peroxide and apply on the stained area of the carpet in smooth, circular motion until dirt is removed.

2. Bathroom Disinfectant

Put your washcloth, loofah and sponge on a basin of hot water with hydrogen peroxide. Let it sit there for an hour. Rinse and put to dry.

3. Use for cleaning toilet bowls

Get rid of those stains by pouring half a cup of hydrogen peroxide on your toilet bowl. Let it sit for a few hours. Flush the toilet bowl. Now there are instances when a little bit of stain remains. Just scrub it off. You will notice how easy the stains get rubbed off. You can do this every few weeks.

4. Removes Bathroom and Shower Mold

Just spray down the surface with hydrogen peroxide whenever you take a shower. You can use a spray bottle. Wipe the sprayed surface often to prevent the gathering of mold.

5. Disinfectant for wounds or bites.

Wash your shallow wounds or bites with hydrogen peroxide to disinfect affected areas. You can use cotton to dab it over the surface.

6. For all-around cleaning.

What you need is a little spray bottle filled with considerable amount of hydrogen peroxide. Spray it on your sink, floor, garbage cans, hard to reach areas like the corners of your cupboard, tables etc. This not only kills bacteria, it also insures to prevent unpleasant odors from building up.

7. Cleans Dentures and Retainers.

Before going to bed, you can use hydrogen peroxide diluted in water to soak your dentures or retainers. Rinse the dentures before using. Make sure to replace the water every night.

8. Removes Drain Clogs

Overtime slime and other refuse tend to build up on your drain. You can get rid of this by pouring a tablespoon of baking soda over a cup of hydrogen peroxide. Pour the contents on the drain. The foaming and fizzing will remove the blockage from your drain.

9. Lightens Your locks

Mix ten drops of hydrogen peroxide with one liter of water and use the mixture to rinse your hair on regular basis. You will notice how your locks will light up.

10. Used as mouthwash substitute

A small amount of hydrogen peroxide in a glass of water effectively gets rid of germs and odor causing bacterias that cause bad breath.


Source: www.DoItYourself.com

Wednesday, August 28, 2024

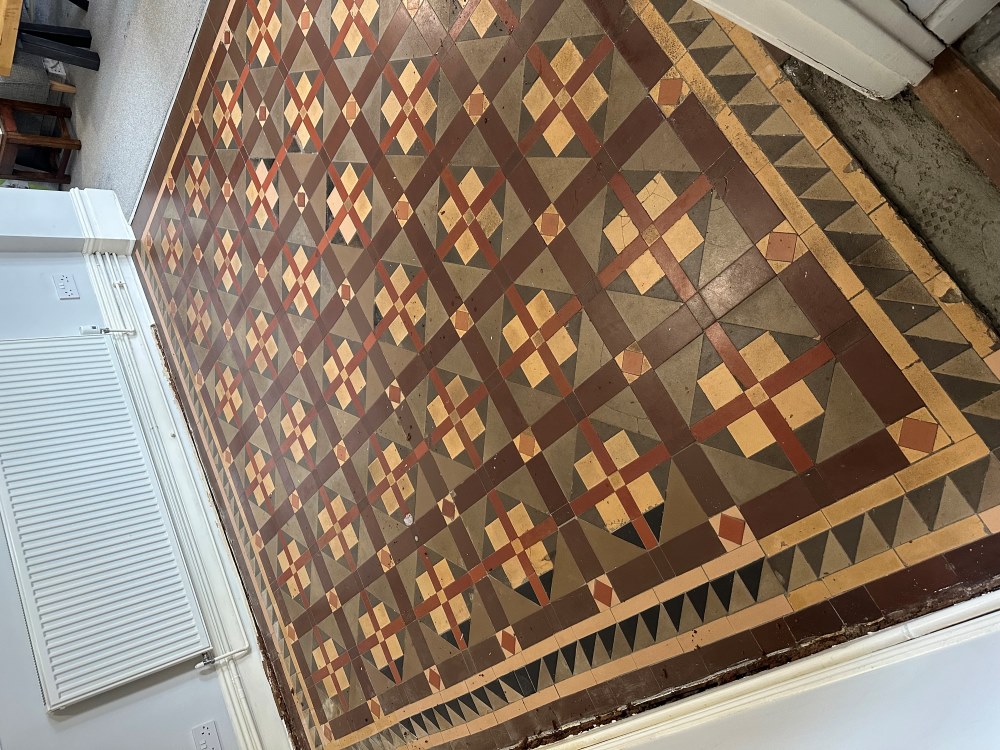
Newport Tile Doctor Details the Restoration of Victorian Floor Tiling

The client had lived at this property in Newport for a few years and decided that it was finally time to sort out the Victorian tiled floor in the dining room. Some repairs were needed in a few areas and the sealer was fading and due for replacement.

Victorian Tiled Dining Room Floor Before Renovation Newport

I went over to the property to survey the floor and advised that with repairs, cleaning and sealing the process would take two and a half days. Having worked on many many floors like these before I was very confident that we could repair the floor where needed and restore its appearance.

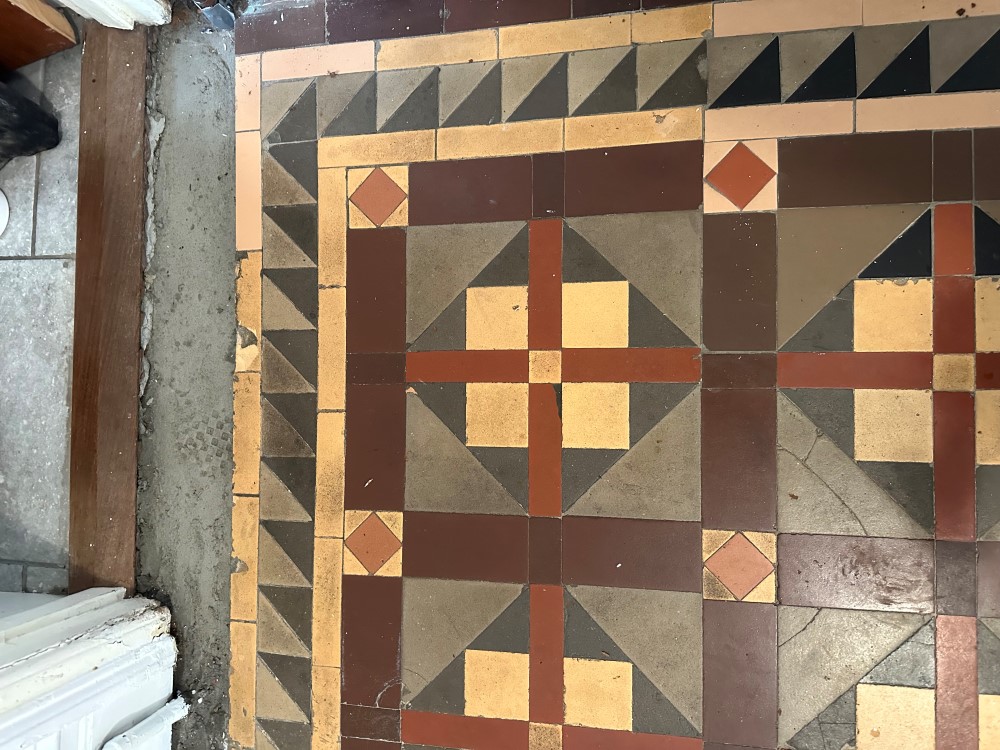
During the visit I noticed that at the door threshold leading into the kitchen, some of the tiles had been taken up for a gas pipe repair and back filled with cement, I suggested I could repair this section using matching tiles, so I included it in the quote. The quote to renovate and repair the floor was accepted and the job was booked in.

Victorian Tiled Dining Room Floor Before Renovation Newport


Cleaning and Repairing a Victorian Tiled Dining Room Floor

I began by addressing the tiling issues so my first course of action was to set matching tiles along the doorway border leading to the kitchen, as the previous tiles had already been removed by the gas company it was fairly straight forward job of carefully knocking out the cement. The tiles I had sourced were from a nearby reclamation yard and needed to be carefully cut to size to ensure a good fit with the original. After setting the tiles and grouting I left them to dry overnight.

The following day I began cleaning, using a combination of Tile Doctor Remove and Go and Pro-Clean, leaving the solution to dwell after being brushed into the floor. After around ten minutes the floor was scrubbed by hand with a stiff brush to release the dirt from the tiles. The resultant slurry was then vacuum away and with the floor cleaner I was able to get a better idea of which areas needed more attention.

I restored the perimeter of the floor with a 200-grit diamond block and this was followed up with a 200-grit diamond pad fitted to a rotary machine. These coarse pads cut into the tile surface removing years of grime and giving them a new lease of life. After another rinse and extraction with the wet vacuum the whole floor had a much brighter appearance. The process was then repeated with a 400-grit diamond pad to close the pores of the tiles.

The floor was then washed by hand with water and a sponge to make sure there wasn’t any areas missed, also to ensure there was no residue from the cleaning products left on the floor which could potentially disrupt the sealing process. The floor was then left to dry overnight ready for sealing the following day.


Sealing a Victorian Tiled Dining Room

To assist with drying I asked the client to leave a couple of air movers running during the evening and to put them back on in the morning. This worked well and by the next day I was able to confirm the floor was dry and ready for sealing with a moisture meter.

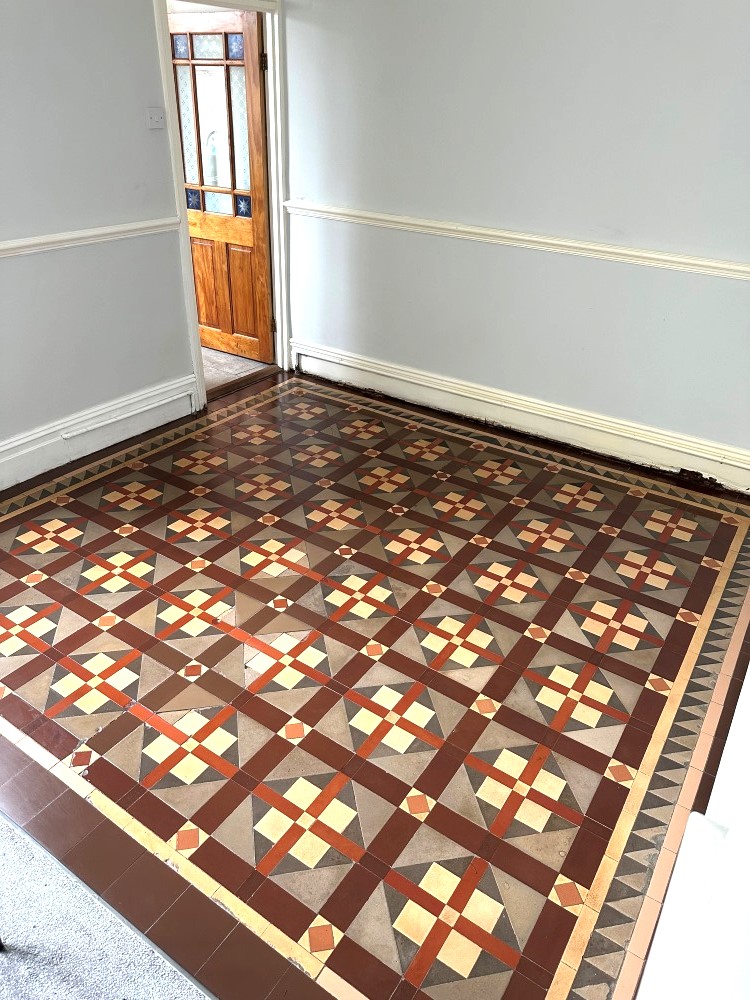
The client had requested a satin finish and so the sealer chosen was Tile Doctor Seal and Go, four coats were applied to the tiles a permanent wet look and gorgeous lustre. Another advantage of Seal and Go is that it’s a water-based sealer so it doesn’t give off a smell as it dries.

Victorian Tiled Dining Room Floor After Renovation Newport

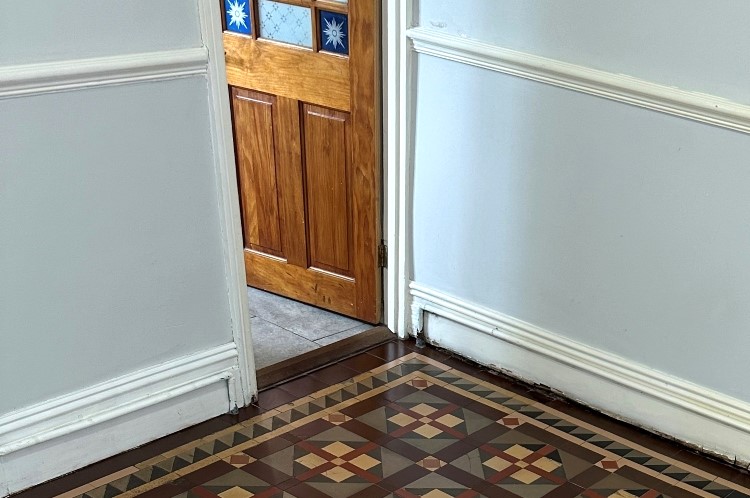
For aftercare I left the client a bottle of Tile Doctor pH Neutral Tile Cleaner to help maintain the appearance of the floor. This is a gentle tile cleaning product that won’t harm the sealer, many of the products you find in supermarkets are simply too strong for a sealed floor.

Victorian Tiled Dining Room Floor After Renovation Newport 


Tuesday, August 27, 2024

Refinishing Oak Hardwood Floors

 Oak hardwood floors are one of the things that can make a home seem extraordinary. It has the natural beauty which does not go out of fashion through time and you are adding to the value of your house if you have oak floors installed. However, although oak is known to be very durable, it can lose its shine over time. It needs to be refinished once the polyurethane covering on its surface starts to wear out.

What You'll Need:

  • 20 to 60 grit sandpaper
  •  Hand sander
  •  Putty knife
  •  Long-handled roller
  •  120 grit sandpaper
  •  Wood filler
  •  Rag

A refinishing job is also important to protect the wood itself from everyday wear and tear. You will only require a weekend to do the job yourself and if you do not possess some of the equipment needed, you can rent it out from your local hardware outlet. Although a bit challenging, the results of your effort will be well worth it. 

Step 1 - Prepare the Room

Remove all of the items from the room that has the floor for refinishing. Once the room is free from any obstacle, take out the moldings from the room edges and sweep the floor to make sure that there is no dust around.

Step 2 - Inspect the Floor

Inspect the entire flooring that you will be refinishing. If there are any staples or nails on it, make sure that you are able to remove all of them before doing the refinishing. Nail holes should be filled up with wood putty. Use the spatula to do it. Ensure that you fill out evenly to make the flooring as even as you can. There is no need to sand it since you will be sanding the entire area anyway to remove the old finish.

Step 3 - Prepare the Sander

Take out the instruction manual for the drum sander and assemble it as directed. If the flooring has been heavily worn down, choose 20 grit sandpaper. If the wear is moderate, you can use a 60 grit sandpaper.

Step 4 - Sand the Floor

Sanding should be started from a corner of the room. Move in the direction of the wood grain and allow the drum sander to work for you. Go about the task back and forth until you have the entire area covered. To ensure that everything has been sanded down, overlap each pass by 1 inch.

Step 5 - Sand the Room Edges

Room edges should be sanded down by hand since they cannot be reached by the drum sander. Use the same sandpaper grit that you used on the sander.

Step 6 - Fine Sanding the Room

After you are done with sanding the edges of the room, repeat the sanding process for the entire room, but this time, use a 120 grit sandpaper. This will be your preparation for the staining.


Friday, August 9, 2024

Stripping Wood Floors With Natural Products

Stripping wood floors with natural products is possible. While it can be more difficult to find these products, they are becoming more popular and accessible as time goes on and people become more passionate about the environment. While it may be difficult, here are a few materials that you need, as well as steps to help guide you.

What You'll Need:

  • Natural wood stripper
  •  Recycled rag
  •  Natural wood cleaner
  •  Outdoor area or ventilation
  •  Scraper
  •  Sander
  •  Paint brush
  •  Goggles
  •  Gloves

Find a Natural Stripper

Finding a natural stripper will be the hardest part of this job. While they are becoming more available in department and hardware stores, you can definitely find them on the internet. There are a few wood strippers with a citric stripper in them that are natural and great for the environment and worker, but also effective. Since you need to order it online though, make sure you do this long before you need the project to be finished.

Sand

Be sure to use safety goggles and gloves from here through the completion of this project. Sanding the wood is important to get any rough spots, stains, and dirt off. Use a rag and water to wipe down the area first and then allow it to dry completely. You can use a hand sander to keep electricity out of the mix if you wish. This may take longer, but it much more eco-friendly.

Strip Wood

You can apply a thick and even layer of stripper onto the wood using a paintbrush or rag. Check the label to see how long the stripper needs to sit there before being taken off. Typically it is anywhere from five minutes to 25. Natural strippers will often take longer to sit and work in because they do not have strong stripping chemicals in them. Be patient and keep in mind you may need to do this several times.

Scrape off Stripper

After you have allowed the stripper to sit for several minutes or the allotted time, take a scraper and begin to scrape the wood. You will want to start in one corner and just work your way to the other end. You can usually get a lot off in the first try. However, usually, you will need to repeat this twice or more. If that is the case, remove everything you can and then wipe it down with water again. Reapply a thick layer of stripper to the spots that need it and then allow to sit again. Use a scraper and repeat until finished.

Clean Area

Using a recycled rag and the natural cleaner, be sure to wipe down the wood completely to make sure you have gotten all of the stripper cleaned off.

Once you are finished, allow the wood to dry and sit for a few days before treating it.

Wednesday, July 31, 2024

Remove a Scratch from Mahogany Wood Flooring

Among household wood floors, a mahogany wood floor is regarded among the more aesthetic and durable options. Mahogany is a durable wood that is inherently resistant to scratches and staining. However, continued use and neglectful handling can take a toll on the most durable of hardwoods. Thus, people having mahogany wood floors should know how to remove the scratches from their floors. This is a simple process that can be done without professional assistance, using some basic household supplies.

Cleaning the Mahogany Wood Floor

You need to thoroughly clean the mahogany wood floor before treating the scratches. This ensures that the debris is not impacted by the scratches during the scratch-removal process. Ensure that you don’t use hard abrasive agents that can further scratch the surface. To clean the debris, repeatedly mop the floor.

Then clean the mahogany wood floor with a cleaning solution made of lukewarm water and dishwashing soap. You can use a sponge to lightly scrub the floor. Remember to rub the sponge in the direction of the wood grain. To remove hard stains around the scratched surface, use a solution made of tap water and white vinegar. Dry the floor before proceeding.

Buffing Mahogany Wood Floor Scratches

Buffing ensures that the outline of the scratches is reduced and they are camouflaged in the background of the mahogany wood grain. You can use a steel wool pad for this. Ensure that you limit your buffing to the scratches only. You can also use fine-grain sandpaper grits. Buff in direction of the wood grain. Don’t use sanding screens and scouring pads or buffing compounds containing harsh mineral spirits as these can harm the mahogany wood floor.

Waxing Mahogany Wood Floor Scratches

Using a dry mop, clean the debris created by buffing. You can also vacuum the floor. To fill up the scratches, you can use wax. Paste wax is recommended for this purpose as it easily attaches to finished wood surfaces. After applying the wax, re-buff the floor, in the same manner, explained above. Paste wax acts as a filler material for deep scratches.

Coloring Mahogany Wood Floor Scratches

To ensure that the scratches are comprehensively eradicated, you need to treat them with a matching color. This a bit of trial and error phase wherein you need to use various approaches to find out which one is most effective. Use mahogany-colored repair markers available at hardware stores. You can fill in the scratches with mahogany-colored wax sticks also. However, this requires repeated buffing since the wax needs to be sanded to be disguised.

Finishing Repaired Mahogany Wood Floor

It is vital to finish this repair project by applying a wood finish. This conceals the presence of repaired surfaces and contributes towards the overall durability of repaired, buffed surfaces. Apply a branded wood finishing compound using a paintbrush. However, using medium or low-gloss finishing compounds is recommended since they are better equipped to conceal the presence of deep scratches. You should use water-based finishing compounds that are easier to handle and can immediately bond with the mahogany wood floor.


Source: www.DoItYourself.com

Wednesday, July 10, 2024

Northants Tile Doctor Details the Renovation of a Quarry Tiled Floor in Wollaston

This client from the village of Wollaston contacted Tile Doctor about cleaning and sealing their Quarry tiled floor. They were refurbishing the house and wanted to keep the original floor tiles as part of the renovation.

The tiles were installed throughout the ground floor, including the kitchen, lounge and hallway. However, as I was to discover myself, they were covered in years of grime, and they were not sure if they could be restored.

Quarry Tiled Kitchen Floor Before Renovation Wollaston

I went over to survey the floor and could see that any sealer that may have protected the tiles from ingrained dirt had long since worn off and as a result dirt had become ingrained into the pores of the quarry tiles. Once this happens its very difficult to keep clean.

 Quarry Tiled Kitchen Floor Before Renovation Wollaston

I had to agree the floor was overdue a deep clean and re-seal and so took some measurements in order to work out a quote for doing the work. The quote was accepted, and a date set for starting the work which would take two days, one to clean and one to seal.


Cleaning a Quarry Tiled Ground Floor

To deep clean the quarry tiles, a strong dilution of Tile Doctor Remove and Go was applied to the floor and left to dwell for a short while. The solution was then scrubbed into the tile using a black scrubbing pad fitted to a rotary machine.

The solution soon turned black with the dirt that was pulled out of the tiles and was rinsed away with water and extracted using a wet vacuum. I inspected the tiles afterwards and could see some paint splashes from years of decorating were still evident, so I re-applied the product and repeated the process to get rid of them.

The grout was then cleaned by hand using Tile Doctor Pro-Clean and a scrubbing brush, again extracting the waste once complete. I find this is the most effective way to clean grout as the pads struggle to reach into the recess of the grout line.

To complete the cleaning process, I then gave the floor an acid rinse with Tile Doctor Grout Clean-up, this was applied to remove old grout smears and further clean up the tiles. All soiling was rinsed off with water and extracted with a wet vacuum. The floor was left to dry off overnight.


Sealing a Quarry Tiled Ground Floor

Returning the following day, the first job was to test the floor with the damp meter to check it was dry. The tiles needed to be dry enough to accept the seal and applying sealer to damp tiles can result in a patchy appearance. This is always worthy checking when cleaning Quarry tiles as that are naturally quite porous so can take some time to dry.

Once satisfied the readings were within the correct range, I was ready to seal. I selected to use Tile Doctor Seal and Go Extra for this, it’s a breathable sealer which is useful for older floors such as this where there is no evidence of a damp proof membrane being installed. Breathable sealers allow for moisture to rise through the tile and evaporate at the surface, without this moisture can build-up under the floor causing it to reach out to the walls where it could cause rising damp.

I applied two coats of Seal and Go Extra waiting for the first to dry before applying the next. The sealer lifts the deep red colours in the Quarry tiles and adds a nice appealing shine. The sealer works by ensuring dirt remains on the surface where it can easily be cleaned away.

Quarry Tiled Kitchen Floor After Renovation Wollaston

My client was very happy with their now clean quarry tiled floor and left the following feedback for me:
"I was looking forward to the results before it was even booked in, and I was not disappointed. A professional approach and very helpful throughout."

Before leaving I took time to explain how to maintain the floor using Tile Doctor Neutral Tile Cleaner. Its important to use a product like this on a sealed floor as many tile cleaning products are simply too strong and will strip the sealer off the floor with regular use.

Quarry Tiled Kitchen Floor After Renovation Wollaston

Tuesday, June 25, 2024

How to Polish a Marble Floor by Cumbria Tile Doctor

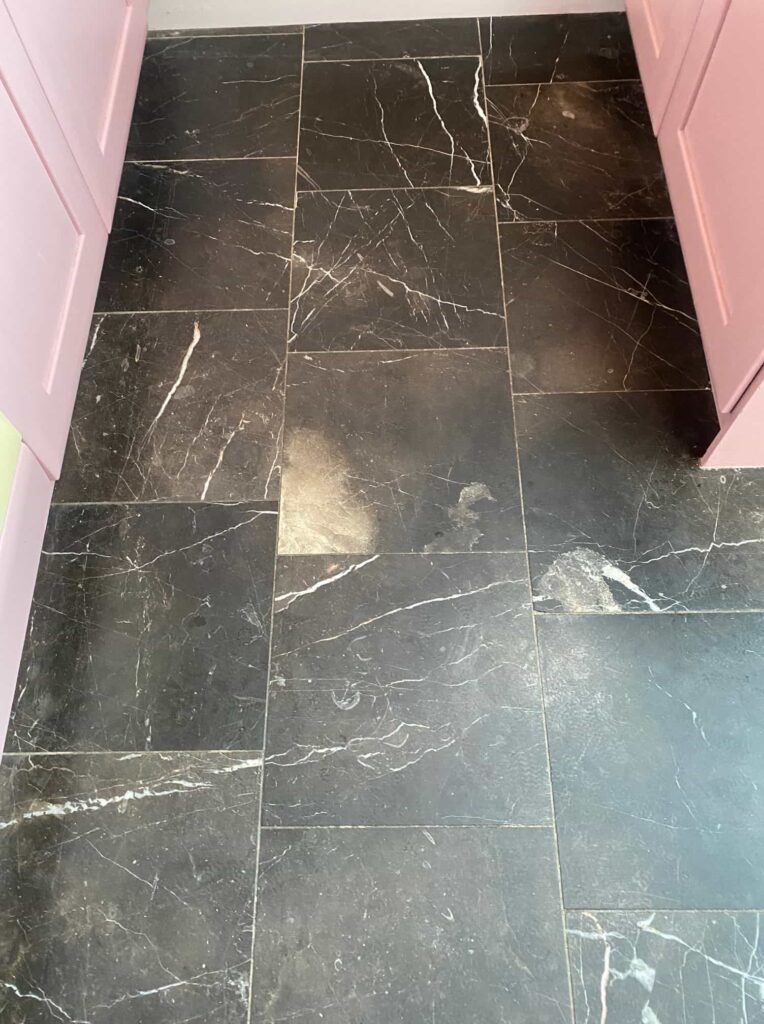
This client from Barrow in Furness contacted Tile Doctor about their polished black marble floor which had been installed 20 years ago. Its polished appearance had diminished with use over that time, and they had wasted money on different products sourced from DIY shops and the internet to rectify it.

Polished Black Marble Floor Before Cleaning Barrow in Furness

Many of these products were unsuitable for this type of tile and as such the top surface was quite tacky to walk on and had done nothing to improve its appearance. Happy I could resolve the problem they accepted my quote to re-polish the floor and a date was agreed to commence the work. 


Cleaning a Polished Black Marble Dining Room

My first task was to protect the woodwork by applying a bead of clear waterproof mastic between the wood and the floor, this prevents water being soaked into the wood through capillary action, this can cause water staining and worst-case blow MDF skirting and doors.

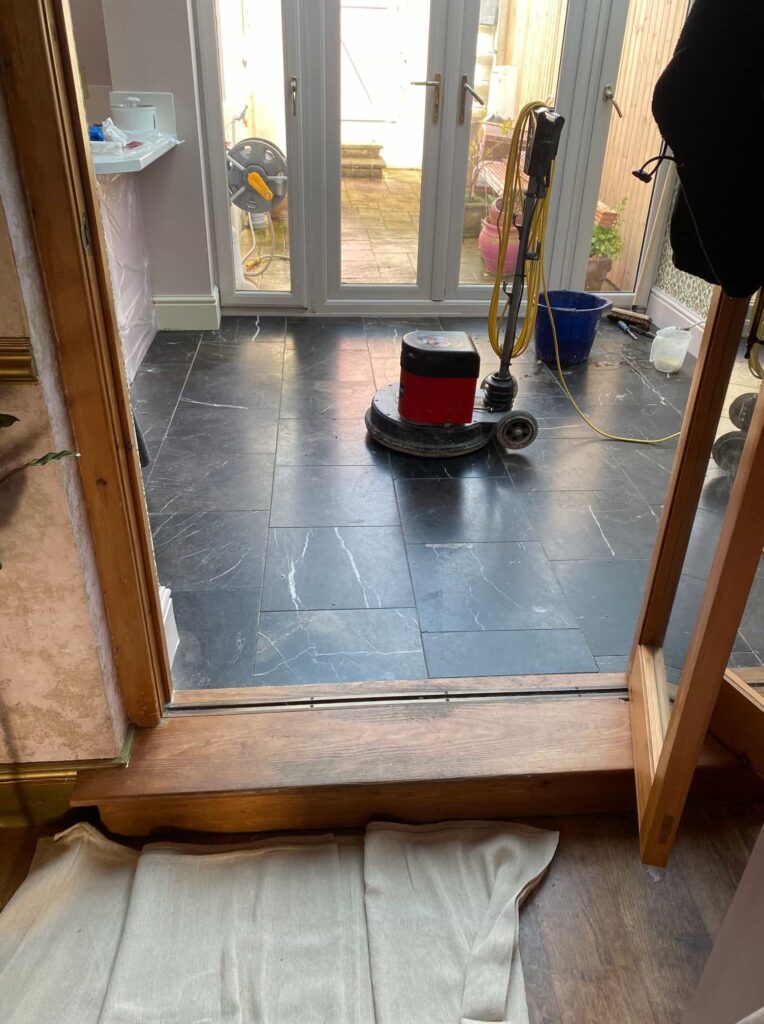
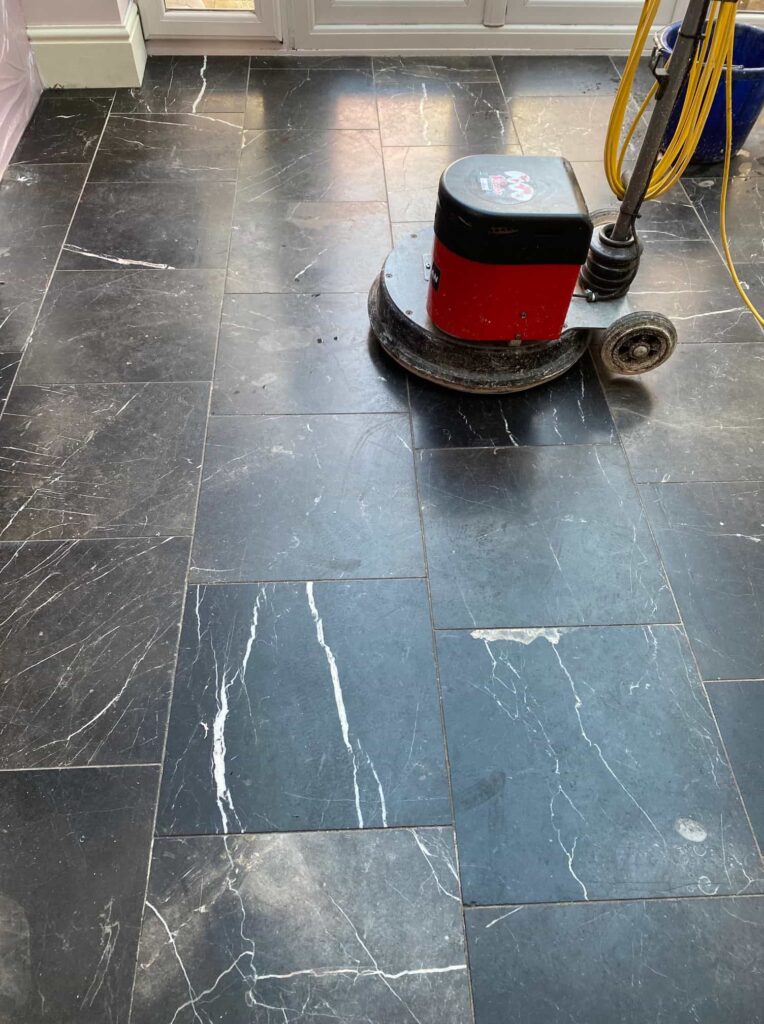
Once done work started on polishing the marble floor using a 200-grit 17-inch diamond pad fitted to a rotary floor machine. This pad removes encrusted sealers, old polish and other products that were upsetting the stone finish. Applied with water for lubrication this pad does a good job of cleaning up the stone but leaves it looking dull with a matt finish.

To bring back the finish, finer grit diamond Burnishing pads are applied in sequence starting with 400 then 800 and 1500-grit. These pads clean and rebuild the polish on the Marble slowly brings the stone back to life again. The floor is rinsed off with water after each pad and the soiling extracted with a wet vacuum. The edges were then completed with a small handheld machine using smaller pads of the same grits.

After this work, I started on the grout lines which were scrubbed by hand using Tile Doctor Pro-Clean which is an alkaline cleaner and will not upset the marble. I find it best to do this work by hand as the pads can struggle to reach into the recesses of the grout line.
   
Polished Black Marble Floor During Cleaning Barrow in Furness Polished Black Marble Floor During Cleaning Barrow in Furness

A final rinse with clean water which was then extracted with the wet vacuum and the floor left to dry off overnight.

I called back the next day and started work by checking the stone and grout was nice and dry and ready for a final polish using a 3000-grit diamond pad. This pad brings up the polish on the floor even further and is applied using a tiny amount of water from a spray bottle which aids in the final polish.


Sealing a Polished Black Marble Dining Room

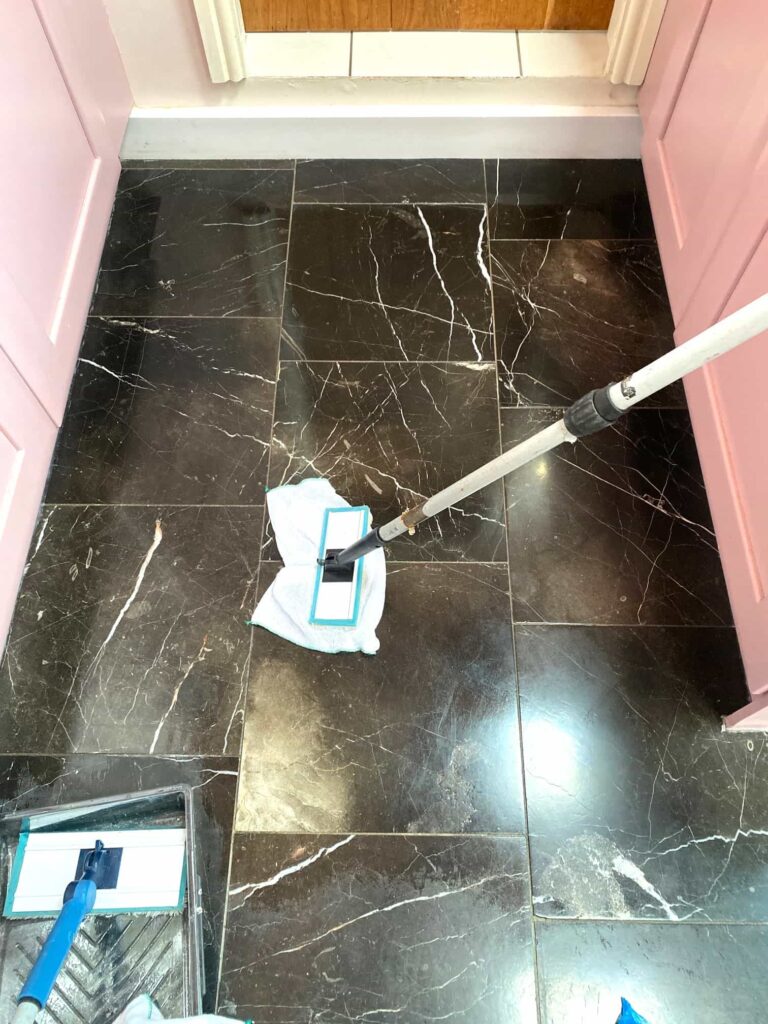
Once the whole floor was polished including all the corners and edges it was time to start applying the sealer. With this being a Black Marble floor with more than a few marks on it from the wear and tear over the last twenty years, I opted to use a sealer normally designed for outside areas called Tile Doctor X-Tra Seal. This is an oil based breathable sealer that soaks into the pores of the stone protecting it from within and ensuring any dirt remains on the surface.

Polished Black Marble Floor During Sealing Barrow in Furness

We don’t normally recommend X-Tra Seal for polished surfaces as the oil takes a lot to cloth off, however in this case I felt the extra work would be justified as the oil works well on Black stone.

Polished Black Marble Floor After Cleaning Barrow in Furness

Once done the Marble tiles were transformed by the work much to the relief of the owner who had really struggled to maintain the floor. Before leaving I made sure to spend time discussing future cleaning and recommended, they use Tile Doctor Stone Soap going forward. This is a mild but effective cleaner which helps maintain the patina on the Marble.


Monday, June 24, 2024

How to Clean Berber Carpet

Many people aren't sure how to clean Berber carpet. Generally, you want to follow the cleaning and maintenance that you would for cleaning other carpet, but because Berber carpet refers to a type of weave pattern used to make the carpet, there are some difference in the cleaning process. Follow this article's suggestions to clean and maintain your carpet.


First Contact Your Manufacturer

Before beginning the cleaning process, contact the manufacturer or store where the carpet was purchased. The store personnel should be able to give you some advice on cleaning your particular carpet, in case the specific kind of Berber carpet requires a different process.

Also contact the manufacturer or read through the user manual for your vacuum cleaner and shampooer, as some models are not suited for Berber carpets. You will need to set your vacuum to “suction only,” as using the beater bar on Berber carpet will tear at the carpet’s loops and cause fuzzing and shedding.


Cleaning the Carpet

There are a couple different options for providing a deep cleaning to your Berber carpet, but whichever route you choose, you should plan on cleaning your carpet at least once per year.

One method is using a steam cleaner with cleaning chemicals. Because of the tight weave of Berber carpet, the moisture will take longer to dry than other kinds of carpet. If you plan on steam cleaning, be sure to plan for plenty of drying time and select a warm day to undertake the cleaning.

Another method that is particularly suited to wool and nylon Berber carpets is a low-moisture cleaning using dry foam. This will give your carpet a very clean finish and greatly reduce the drying time.


Perform Preventative Care

There are several things you can do to extend the life of your carpet and lessen the frequency of a need for shampooing. The main thing is to clean spills and stains as they happen (before they set) so that they are easier to remove.

Placing some rugs atop the Berber carpet on high traffic areas or near doors can also save on wear and tear. It is also recommended to wear socks or slippers on the carpet, as bare feet and outdoor shoes can also accelerate the deterioration of your carpet.

Determine a schedule to vacuum the carpet. Most people will find that if you pick up pebbles and other debris from the floor daily that you only need to vacuum once a week, or even less is it is a low traffic area.

Source: www.DoItYourself.com

Monday, June 10, 2024

DIY Flooring Systems & Installation

Over the past decade, there has been an explosion in the popularity of do-it-yourself projects and renovations. From kitchen remodeling to bathroom transformations, you name it; homeowners everywhere are trying to save money by tackling these projects themselves. And one of the greatest money-saving parts of the job is choosing and installing your own flooring.

Flooring, like the plumbing or the electrical work, is often subcontracted out by homeowners primarily for two reasons – (A) they have no idea what type of flooring will work best in the room and (B) they don’t want to “mess up” the installation. But these days, installing flooring is easy to work and the choices of flooring available allow you to customize the look of your room so it not only looks complete, but it turns out exactly as you imagined it.

In this guide, we’re going to take a look at your flooring options and go over some of the installation guidelines for each. When it comes to choosing the flooring for your project, knowing what’s available is half the work.

Laminate Flooring

Laminate flooring is strong, versatile, and can last for years with proper upkeep. Not long ago, laminate flooring was basically viewed as an inexpensive alternative to installing natural hardwood floors, but in recent years, laminates have become a popular choice as the variety of flooring styles has greatly increased. Today, one can purchase laminate flooring that resembles cork, stone, marble, bamboo, and of course, wood. And best of all, laminate flooring can be installed directly over your existing sub-floor and installation is as easy as “snap-and-click.”

Installing Laminate Flooring

When installing laminate flooring, it is critical for the surface it is being installed over to be flat. It doesn’t have to be a level surface, but it does have to be flat. If you’re installing over concrete, use a surface grinder to get rid of high spots and if you have an area that’s at least 1/8” lower than the rest of the floor, use a self-leveling compound to fill in the gap. Of course, always be sure the compound is completely dry before installing the flooring.

Laminate flooring is sometimes called a “floating floor system” because it is not glued, nailed, or stapled to the sub-floor. A foam underlay is laid on top of the sub-floor and the laminate planks are then laid directly on top of the underlay.

One of the most important keys in a successful laminate installation is to lay only a portion of the underlay at a time and then install the laminate over that area before moving on. This will help protect the underlay from getting damaged as you work. Lay the laminate planks in a staggered fashion, meaning start one row with a full-length plank followed by a row that starts with a half-plank. For the best visual result, the planks should be laid in the same direction as the light that enters the room through the primary window.

Vinyl Flooring

Vinyl flooring falls under the umbrella of “resilient flooring,” which also includes such flooring solutions as rubber, linoleum, and cork. Vinyl flooring was at one time, the inexpensive “do-all” generic flooring solution for just about every room. Style selection was weak and the overall look of it was pedestrian. But these days, vinyl flooring is available in a wide range of styles and textures, from faux wood to slate or marble.

Vinyl flooring offers a wealth of benefits. Besides being an inexpensive flooring solution, vinyl is long-lasting, easy to install, resistant to water and bacteria and it can be custom-ordered for an original look. Vinyl flooring is available in single tiles or in larger sheets, and in different thicknesses. Thicker tiles are more expensive, but they last much longer than thinner tiles.

Installing Vinyl Flooring

When installing vinyl flooring, it is essential that you only use an adhesive that’s made for vinyl. Do not use “tube” construction adhesives as they can produce lumps in your tiles from un-flattened thick gobs of glue. Of course, many vinyl tiles come with pre-glued backing so this may not even apply to your particular installation.

When purchasing vinyl tiles it is wise to use "the extra 10% rule" and buy more than what you need. You may have an occasion where you need to make a repair, and having the exact tile on hand can allow the fix to be performed easily and quickly.

Before you start installing, you need to make sure the sub-floor is flat, clean, and dry. Install one tile and wait 72 hours, then return and try to pull the tile up. If it comes up, then the floor is too damp and you will have to use a special adhesive for damp locations (or wait for the floor to be completely free of moisture). Once the floor is laid, avoid walking on it until the glue is fully dried or you may cause the tiles to shift.

Hardwood Flooring

Hardwood flooring is the Mac-daddy of flooring options. It’s the warmest and most luxurious type of flooring, but with that prestige comes a very high price tag and costly maintenance. Depending on the look you’re going for, hardwood is available in oak, maple, pine, cherry, mahogany, fir, beech, ask, teak, birch, and bamboo (not really a wood, but it still applies here).

When it comes to installing hardwood floors, due to the cost of the materials, many homeowners may be better off trusting their installation to a professional. Installing hardwood flooring is not a weekend project and the tools required to complete the job are quite numerous.

Cleaning and maintaining hardwood flooring is not as easy as many would have you believe. Some chemicals can badly damage hardwood and of course, too much water on the surface will also wreak havoc. If you want your hardwood (and your investment) to last for years, use only a specially-designed maintenance product, like the one available from BonaKemi. Cleaning and maintaining your hardwood flooring with the right product is essential because if you use too much water or acidic chemicals, you will need to refinish the flooring sooner than expected.

Refinishing Hardwood Flooring

Refinishing hardwood floors is a time-consuming, labor-intensive job. Careful attention must be made as sanding one area too long can create shallow spots that are irreparable. Here are a few tips for making the process a little easier:

1. Remove all of the furniture and rugs from the room.

2. Check the floor for any nails, tacks, or staples that may have popped up. If you find any, hammer them back down.

3. Choose an orbital sander over a drum sander as they are lighter and easier to maneuver.

4. Ask an employee at the equipment rental shop for a demonstration on how to use the sander. You don’t want to “test” it out on your flooring.

5. Run the sander WITH the wood’s grain, NOT across it.

6. As long as the sander is on, it should be moving. Never allow it to sit stationary while running.

7. Vacuum up the dust each and every time you change sanding paper.

8. Start sanding with the highest grit sandpaper (36 grit) and with each pass, increase the grit, from 36 to 60 to 80 and then finally to 100 or even as fine as 120 grit.

9. Clean the floor thoroughly before applying stain and/or polyurethane finish.
Thursday, June 6, 2024

Carpet Pad: Determining the Necessary Thickness

 Carpet pad comes in a variety of styles that differ in terms of material, thickness, and density. Padding is used to provide cushion and support for carpeting, and is a necessity in almost all installations. Depending on the type of room and how it is used, the right carpet padding is a vital component, providing comfort while helping to increase the life of the carpeting. Residential carpet padding is first categorized according to class.

Class I padding is suitable for low-traffic areas, while class II padding can be installed in either low- or high-traffic areas. It's important not to choose carpet padding based on how comfortable it feels. Instead, the right padding is determined by appropriate thickness, weight and the carpet manufacturer's guidelines.


Carpet Padding Thickness

Besides providing cushion when walking upon carpeting, the padding underneath supports the carpet and helps to increase its lifespan. Padding also contributes to warmth and noise reduction in a room. Padding is available in several materials with a thickness ranging from 1/4 inch to 9/16 inch. The right thickness for a given room largely depends on the traffic and the type of carpet that is installed. Padding should not be too thick in rooms that get a lot of use. Thick padding can impair the carpet from properly stretching upon installation. This can be exacerbated by a lot of foot traffic, which in turn can cause the carpet to form ripples.


Pad Density or Weight

An equally important consideration is the density or weight of the carpet padding. Rated in pounds, 5-pound to 8-pound carpet padding are by far the most common weights used in homes. Carpet padding derives its rating based on the scale weight of 1 cubic foot. Even if carpet padding is thick, if it is not sufficiently dense, the padding can break down faster which helps speed up the breakdown of carpeting.


Combining the Factors of Thickness and Weight

An optimal combination of carpet padding thickness and density will deliver the best, longest-lasting results. In high-traffic areas such as hallways, rec rooms, or stairways, carpet padding should be no thicker than 3/8 inch yet on the denser side. Thinner padding helps prevent the carpet backing from falling apart, while the high density provides comfort and stability. Thicker, more cushioned padding is best in bedrooms and other lower-traffic areas.


Pad Material

Another factor to consider with carpet padding purchase is the material. Carpet padding may be foam or sponge rubber, urethane, or rubberized or latex felt. Urethane and rubber padding are superior to felt in terms of overall resilience, resistance to moisture absorption, flammability, and hypoallergenic design, hence they are the most commonly used types.

Special Considerations


It's important to install padding that matches the carpeting in quality. Inexpensive padding will accelerate the decline of the carpet. Plus, if the carpeting has a warranty, adhering to the manufacturer's guidelines is necessary, or else it could be voided. Specialty installations such as carpeting over a radiant floor heater call for thinner, lower-density padding. Padding installed to improve heat retention or sound absorption should be as thick and dense as possible without exceeding the manufacturer's recommendations.

Tuesday, May 21, 2024

How to Fix Squeaky Laminate Floors

 No one likes to walk on a floor that squeaks. This can be an annoying problem that will take some time and patience to fix. Squeaky laminate floors simply mean that part of the floor is not firmly secured. When weight is put upon the floorboards, they simply move against each other. If you wish to fix this problem, here is what you need to do:

What You'll Need:

  • Screw driver bit
  •  Power drill
  •  Chalk or tape
  •  Galvanized wood screws
  •  Wax putty
  •  Plastic knife


Location Of The Squeaks

You must first begin by locating the exact points where the squeaking is coming from. Walk slowly over the floors of your home, and listen for the squeaking sound. Take the chalk, and mark the spots where the squeaking is coming from. You may also use dark tape to do this step. You may have to walk the entire house, but if you are determined to stop the squeaks, this step must be done. Be sure that the chalk is easy to be removed, once you have fixed the squeak in each spot.

Drilling Holes Into The Problem Floor

Using your power drill, you will need to drill holes at each point where there is chalk or tape mark. Avoid drilling on any marks on the seam between two floorboards. Instead, you will drill on the side of the spot that is marked. Be sure to do this process on all of the marks on the floor. After this, place the screwdriver bit in your drill. Take the wood screws and drive them into every hole. Make sure that the wood screws are driven straight down, and their heads are slightly below the surface of the wood.

This is a very important step, and it must be done properly. You don't want to take this step for granted since it will be even more time-consuming to repeat this. You are almost done at this point, and you will notice a slight improvement in the sound of your floor. After this is done, put away your power drill and the rest of your wood screws. You have almost completed the task.

Bonding The Squeak That Haunts Your Floor

When you are done with everything else, take your plastic knife, and scoop up a little putty with it. Take the knife and press the putty into every hole. Be sure to do this process throughout the house where there was a problem. Make sure that the putty has a very tight grip, and that there is a little mound of putty over every hole. After this, use the flat front edge of the knife to cut off the mound, making the putty flat. Finally, you will buff the putty with a cotton cloth to remove the excess. In a matter of time, you will no longer have a squeaky floor that is causing your house stress.

Thursday, May 16, 2024

Ways to Soften the Look of Cement Flooring

 Cement flooring has earned a good reputation for strength, durability, cost-effectiveness, and even style—thanks to the recent advances in construction and design. Over the years, basements have become famous for being utility and stock rooms. Now, they are also typically used as living spaces, entertainment rooms, and bed rooms. Transforming basements into living spaces is often much practical than building another room or floor. Below are some of the simple and economical do-it-yourself tips on how to soften the look of your basement’s cement flooring.


Stain and Polish

Cement flooring can be enhanced by staining and polishing, making the concrete floor simulate marble, wood, leather, or even natural stones. Before applying the desired stain to the concrete floor, make sure that your floor has been thoroughly cleaned and prepared. Check if there are cracks and old stains. Prepare the cracks with concrete glue, and then fill the cracks with anchoring cement.

Once the cement is completely dry, sand the floor down to evenly level the texture. Wash the cement floor with a mild soap and scrub the floor with a nylon brush to sweep away dust, grease and adhesives. Before applying the stain, make sure you protect the lower parts of the wall with painters tape, paper, or plastic.

Shake the stain container well before applying to the concrete floor. After the last coat, you can spray a mixture of water and baking soda to neutralize the acid. After allowing it to dry for five minutes, rinse the concrete floor thoroughly with clean water. Finally for finishing touches, apply a sealer to protect the stain.


Ceramic Tile

Cement flooring is the ideal base for tiles, particularly the ceramic. Ceramic tiles are long-lasting and flexible in design. You can choose from a wide selection of colors, patterns and texture that will suit the ambience that you desire.

Prepare the thinset mortar by following the instruction provided on the container. Start applying a good layer of thinset to the center. Fix the tile with even and firm pressure using both hands. Put tile spacers between ceramics. Repeat the process until the entire cement floor is covered. Let the thinset under the tile dry for 24 hours. Once dry, remove the tile spacers and apply the grout over all the joints with a float. Let the grout dry for 24 hours. Remove the excess from the surface using a dampened smooth cloth.


Rubber Mats/Foams

Cement flooring can also be furnished with rubber mats or foams to dampen sounds and insulate noise coming from the basement. Rubber mats and foams are ideal for basements turned entertainment room or studio. Same with the preparation for ceramic tiles, measure the square area of the basement to know how many rubber tiles you have to buy. Rubber mats are easy to install. Just lay it on the floor.

Another good thing about rubber mats is you can replace it piece by piece. There are different colors and textures of rubber mats available, some even have the texture of a thin carpet. Unlike carpet, rubber mats are water-proof and don’t host molds.

Source: www.DoItYourself.com

Monday, May 13, 2024

How to Deep Clean Norfolk Pamment Tiles

I was contacted by clients with a Pamment Tiled Flooring who were living in Gissing, a small village in the centre of South Norfolk which has a long history dating back to Saxon times. The Pamments were reclaimed suffering from heavy soiling and in need of considerable expert attention. All the old protective coatings had pretty much worn completely off the surface of the tiles which had then allowed many years of dirt to become ingrained in the pores of the clay, making it almost impossible to clean for the homeowner using ordinary methods.

  Reclaimed Pamment Floor Before Cleaning Gissing 

 Pamment tiles were very popular in older Norfolk homes; they are made from locally sourced clay and, like terracotta, are extremely porous and therefore need to be thoroughly sealed against fluids and general soiling. When correctly cleaned and sealed, they are quite versatile and can be used for internal floors as well as external areas such as patios and pathways.


Cleaning a Pamment tiled floor

To remove all traces of the old sealers and clean the tiles I decided to apply Tile Doctor Remove & Go, which was diluted with water to form a medium strength solution. I applied a generous coat of this solution to the floor, leaving it to soak into the pores of the tiles for approximately ten minutes. The solution was then worked into the Pamments using a Black nylon scrubbing pad fitted to a 17" rotary machine. Remove & Go is a powerful and versatile cleaner which is safe to use on natural stone floors, kiln-fired tiles and all types of grout.
Reclaimed Pamment Floor During Cleaning Gissing Reclaimed Pamment Floor During Cleaning Gissing
I rinsed the solution off the floor with clean water once it had worked its magic and extracted the resulting dirty residue with a wet-vacuum machine. In order to tackle some particularly stubborn stains, I repeated this process until I was satisfied that the floor had been cleaned to the highest standard possible.

Reclaimed Pamment Floor During Cleaning Gissing
  
  The whole area was then given an acid wash using a dilution of Tile Doctor Grout Clean-Up. This further cleans the tiles to remove old grout stains and neutralises the pH level of the floor following the use of alkaline cleaning products, lastly it also ensures optimal adhesion of the new sealer.

The floor was then left to dry overnight before returning the next day to complete the seal. I left a dehumidifier running overnight to assist the drying process and ensure that the floor would be completely dry on the following day. It’s imperative that a tiled floor is completely dry before sealing as any excess moisture left in the floor can potentially adversely affect the overall performance of the sealer as it evaporates.


Sealing a Pamment tiled floor

To seal and protect the Pamment tiles I applied a total of five coats of Tile Doctor Seal & Go, which provided a robust, durable surface seal along with an aesthetically pleasing, mid-sheen finish (as you can see from the photos). Seal & Go is the go-to sealer for internal, unsealed porous surfaces such as Terracotta, Sandstone or Slate.

  Reclaimed Pamment Floor During Sealing Gissing

The clients had left us to work our magic over the two days, returning at the end of the sealing day and were absolutely staggered at the results we had achieved with a floor they had thought beyond help.

  Reclaimed Pamment Floor After Renovation Gissing

For aftercare cleaning I recommended the use of Tile Doctor Neutral Tile Cleaner, it’s a gentle yet effective product that won’t upset the sealer which can be the problem with many of the stronger products you find in supermarkets.

Thursday, May 9, 2024

How to Make Reference Lines for Ceramic Tile Installation

Ceramic tile looks wonderful when it’s properly installed on a floor, and can add to the beauty of a room. However, there’s a great deal of preparation involved before they’re down on the floor. To ensure the ceramic tile sits properly and that you don’t end up with awkward small pieces at the edges, you need to create reference lines. It’s more work, but the results will make it al worthwhile.

What You'll Need:

  • Chalk
  •  Tape measure
  •  Carpenter square


Step 1 - Square Walls


If laying ceramic tile in a room that’s square, the job is a great deal easier. If the room isn’t a simple square or rectangle, you can still create reference lines for the ceramic tile. The first thing to find is two walls opposite each other that are square to each other. Measure along each of the walls to find the center and make a mark there on each wall.


Step 2 - Create a Square


Using chalk and a straight edge, join the two marks with a line (you can also snap a chalk line between the two points). Now look at the other walls in the room. Measure along the other 2 walls to discover the center point in each and then join them with a chalk line using a straight edge. Where the two lines cross will be the middle of the room, and the angles formed should each by 90 degrees. You should check these with a carpenter square.


Step 3 - More Reference Points


Those who aren’t used to laying ceramic tile can benefit from having more reference points. Measure from the edge of one wall to the center mark and make a mark halfway between the two. Repeat on the opposite wall and join the marks. Do the same in the other half of the room. When this is complete, do the same on the opposite walls so that you end up with a grid of 16 squares. These markings will make it much easier to ensure the laying of the ceramic tile remains straight throughout the entire room.


Step 4 - Using Reference Points


By measuring from the center point in the room to the walls you’ll be able to calculate how many tiles you need to reach the wall, and also whether, and by how much, you’ll need to cut the tile to create and even edge. This knowledge makes it easier to plan for laying the ceramic tile.


Step 5 - Laying Tile


Start at the center of the room and work outward when laying ceramic tile. This is why the reference points are so important as they give you lines to follow and ensure that the tiles are straight. By working one small grid at a time out from the center you’ll be able to see the development of the floor and be certain that everything is even and square. Be careful not to obscure the chalk reference points before you tile over them. Taking time to have the reference points exact and square will result in great looking ceramic tile.

Wednesday, May 8, 2024

How To Restore Heavily Soiled Stone Tabletops by Berkshire Renovation Expert

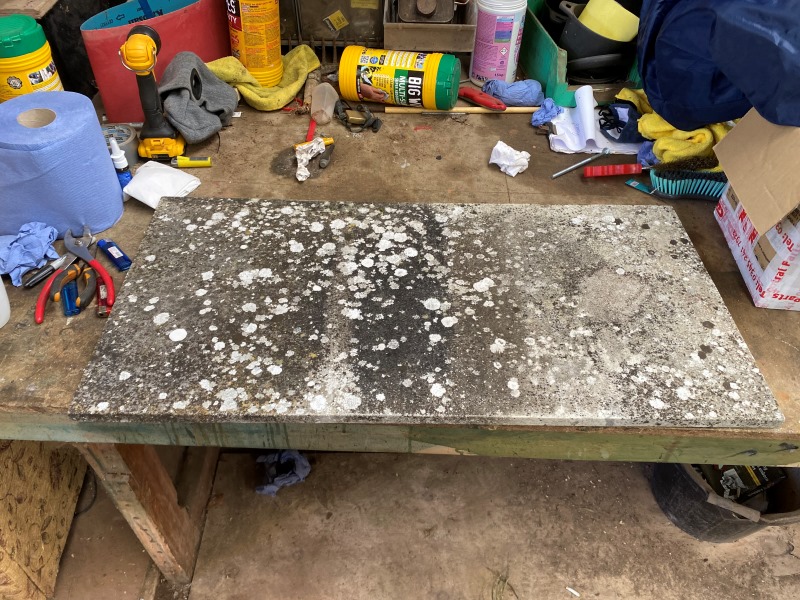
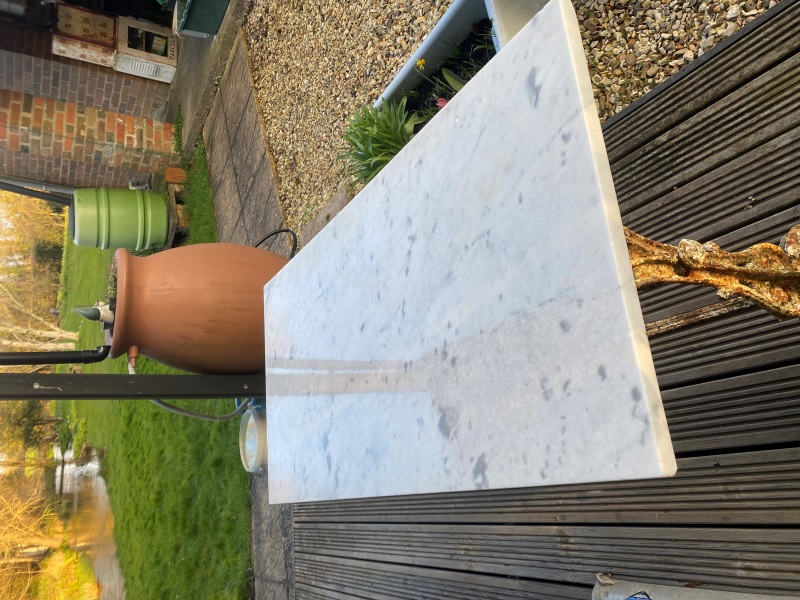
I received an enquiry from a customer in Pangbourne regarding a heavy soiled Marble stone table. The customer was downsizing and thought the marble tabletop would make a great addition to the balcony at the new property. However, as you can see from the photographs below it was in a very bad condition, in fact the customer described the tabletop as “not fit enough for the skip let alone the garden”.

Marble Tabletop Before Restoration Pangbourne

The tabletop was in such dire condition I wasn’t even sure it was Marble. However, after taking a more detailed look, I was able to confirm It was indeed marble and therefore confident it could be renovated to a good standard.

Time was of the essence as the customer was due to move in the following weekend so I quickly worked out a quote for doing the work, which was agreed, and I took the table home so it could be worked on in the evenings.


Repairing and Cleaning a Marble Stone Table

The outside elements had taken its toll on this tabletop and it was covered in algae, black spot and lichens. Tile Doctor have a wide variety of products that help us tackle various issues with stone however I figured a good start would be to use their Patio & Driveway Cleaner.

This product is seriously strong and designed specially to remove algae, lichens and black spot. It’s not what I would usually use on Marble however due to the severity of contamination it was my best option. Returning the next morning the results were incredible, about 80% of the contaminant’s had been removed but I knew if we repeated the process, we could achieve an even better result. I continued with the same method as before and left it to work overnight again. Happy with results I could continue with the next stage.

The next stage was to polish the Marble using a series of pads from Tile Doctors inventory of 6-inch diamond burnishing pads. The first pad in the set to be applied was a coarse 100-grit pad followed by a 200-grit. The pads are applied with water to help lubricate the process and are designed to repair damage left behind as a result of removing the algae and lichens.

The process was then repeated with a coarse 400-grit and fine 1500-grit pads which gradually closed the pores and return the shine. This is a messy process which generates a slurry which is removed with after each pad with the wet vacuum.


Sealing a Marble Stone Table

With the Marble surface restored the last step was to protect the stone with a sealer which will keep any dirt or contaminates on the surface where they can be easily wiped away. So once the table was dry, I applied a thin coat of Tile Doctor Ultra-Seal which is an almost invisible impregnator that soaks into the Marble occupying its fine pores and thereby preventing dirt from becoming lodged there.
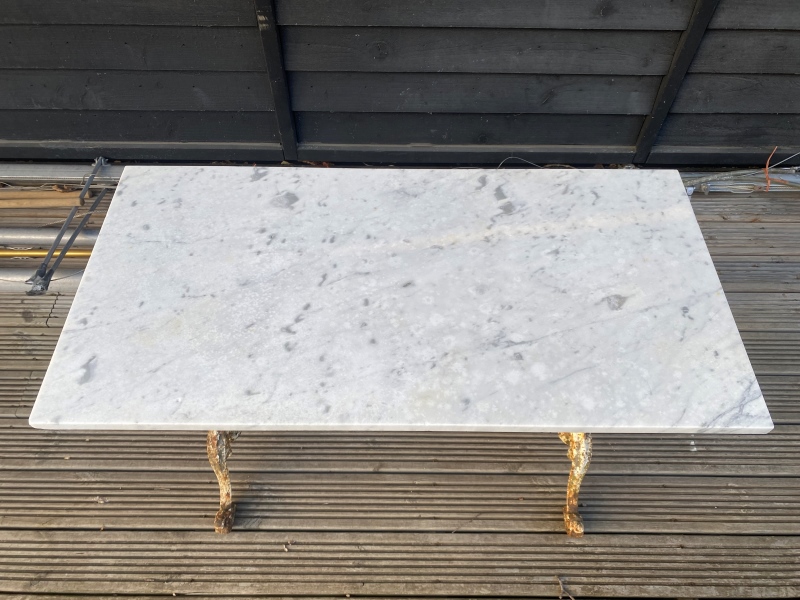
  Marble Tabletop After Restoration Pangbourne 

The transformation was incredible, and both the customer and I were astonished by the outcome. My clients her husband even joked that I must have ‘swapped it out with a new one!’

  Marble Tabletop After Restoration Pangbourne

For aftercare of polished stone worktops and tabletops I recommend the use of Tile Doctor Stone Patina Spray. Its a spray-and-buff cleaner that is designed to enhance the natural beauty and lustre of polished stone as it cleans.

Monday, March 25, 2024

How to Refinish Faux Distressed Hardwood Floors

 Distressed hardwood floors have a unique appearance that it is impossible to replicate. If your home has a distressed wood floor, you already know how attractive they can be. However, it is far too easy to accidentally damage the finish on a hardwood floor. Unfortunately, if this occurs it can be necessary to refinish the whole thing. While this process is long and requires a lot of work, it is simple enough that you can do it yourself. If you know what you are getting into, you can have the seal of your hardwood floor back in perfect condition.

What You'll Need:

  • Adhesive Stripper
  •  Broom
  •  Mop
  •  ShopVac
  •  Floor Sander
  •  Stain
  •  Sealer

Step 1 - Preparing the Area

Before you can do anything, you will need completely unobstructed access to your floor. Remove all furniture and other objects from the area you plan to work in. If your floor is carpeted in any area, you will need to remove the carpet as well. If it is not, simply skip to step 3.

Step 2 - Removing the Carpet

To begin, remove the carpet from your floor. Take out any tacks and staples. Be very thorough, as you will need to have them all out, and it is easy to miss one, especially if your floor is dirty.

Next, you will need to remove the carpet adhesive. There are plenty of commercial carpet adhesive strippers that you can buy at your local hardware store. While the exact procedure will vary from brand to brand, you will usually need to ventilate the area, apply the adhesive stripper, and wait several hours for it to do its work. Once you have done this, you can continue. Consult the manufacturer's instructions carefully before using an adhesive stripper.

Once the stripper has done its job, remove the weakened adhesive with a metal scraper. This may damage the finish on your wood floor, but this is unavoidable.

Finish up by sweeping or vacuuming your hardwood floor. This may reveal more tacks or staples that escaped your notice the first time around. If so, remove them before you continue.

Step 3 - Preparing the Floor

Use your floor sander to sand the floor. Do so using long, straight strokes that cover the entire length of the floor. Keep the floor sander moving as steadily as possible as you do this.

Start out with your heaviest sandpaper. When you have finished sanding the entire floor with it, move on to a lighter grade of sandpaper.

Finish up by using your broom, shopvac, and mop on the floor to remove any debris. Small particles left behind during the sealing process will be trapped, making your finish less attractive and functional.

Step 4 - Refinishing the Floor

Use a cloth to apply your stain of choice to the floor. This may take multiple coats; base your judgment on a combination of the manufacturer's instructions and your own personal opinion on your preferred appearance for the floor. If you need to apply multiple coats, clean the floor between coats to avoid sealing dirt into the finish.

Once you are done applying stain, apply sealer and wait 3 days. You can now move your furniture back into the area.

Monday, March 18, 2024

How to Replace a Steel Floor Joist

Learning how to replace a steel floor joist may look daunting at first, but all it takes is a bit of patience and a lot of elbow grease.

Step 1 - Inspect the problem

The first order of business is to determine what the source of the problem is. The old joist can be cracked, twisted, or have some problem at the rim-joist connection. If your floor is sagging, it might be that you just need to replace the joists. If the old joists are made of wood, you might want to replace them with steel joists. If the joists are already made of steel, bracing will strengthen them for the demands of your floor. Before starting actual work, do consult with a structural engineer to see if the finished construction will be within the building code standards of your area.

Step 2-Get the correct joists

Ensuring you have the correct load-bearing joists will save you time, money and future headaches. A joist is one of the horizontal supporting members that run from wall to wall, wall to beam, or beam to beam to support a section of your house’s floor. It may be made of wood, steel, or concrete. Be sure to consult with a trusted steel joist manufacturer when purchasing your joists. They supply you with load tables so you can calculate for, and determine, the correct size of the joists you will need.

Step 3-Reinforcing and Replacing a Joist

Before you can take out the old joist, you have to install a new one beside the old one in order to bear the weight of the floor above it. Use the same length of joist and place it beside the old one. You may want to use rafter ties to tie them together first before taking out the old joist. Attach the new joist to the frames of the floor or structure firmly on both ends using bolts in an X-pattern.

Step 4-Bracing the Floor

Allow the new joist a bit of time to adjust to the weight before you slowly remove the old joist. This can be done by bracing the floor with a hydraulic jack. Connect the 4x6 inch beam across the underside of the old and new steel floor joists in order for it to run perpendicular to the joists. Utilize screws and rafter ties to hold the beam in place. Use 1-inch thick steel panels in between the jack and the beams to ensure equal weight distribution. Once the jack is secure, you may untie the old joist from the new one and dismantle from end to end slowly.

You may want to use a spirit level to ensure your progress is not wasted by having new joists but uneven floorboards.


Tuesday, March 12, 2024

How to Remove Trapped Moisture From a Floating Subfloor

 A floating subfloor is the layer of flooring installed above concrete and under the finished flooring. The floating subfloor may get moisture trapped and cause cracks in the cement flooring. In order to prevent damage to the concrete and the finished flooring, follow the steps below to remove any trapped moisture.

What You'll Need:

  • Plywood or OSB Sheets (floating subfloor)
  •  Moisture Barrier
  •  Stapler or Nailer
  •  Dehumidifier
  •  Saw
  •  Pencil and Marker

Step 1 - Inspect for Trapped Moisture

Moisture usually gets trapped inside the floating subfloor when the concrete below the structure has a high moisture content and has not been coated with a moisture barrier. Usually, the trapped moisture in the subfloor can be spotted easily because of the darker coloring it has compared to the normal color of the concrete. If some areas of the subfloor do have trapped moisture in it, then make sure to take action before installing the finished flooring above it.

Step 2 - Remove the Affected Subfloor

It is best to remove all the subfloor if this does not cause an issue. The reason is that if the concrete has a high moisture content, it needs to be coated with a moisture barrier first to prevent any moisture issues in the future. When the subfloor has been removed, mix the moisture barrier product in a container and apply it to the concrete floor using a notched trowel. Install a dehumidifier in the room to allow the moisture to evaporate quickly. This will also be useful in creating a moist-free space.

Step 3 - Allow the Floating Subfloor to Dry

While waiting for the moisture barrier to dry, place the subfloor material in a well-ventilated area in order to allow the trapped moisture to evaporate. Sometimes, the affected parts of the subfloor may warp or distort. In this case, make sure to have replacements ready. It's not a good idea to have the subfloor dry under the sun when the moisture is still fresh.

The reason is that the quick drying process will distort the size and shape of the material, especially if the moisture is quite high. Therefore, just let the material dry out naturally in a well-ventilated room.

Step 4 - Reinstall the Subfloor

When the subfloor material has dried out, check for parts that need to be replaced with new ones. Use a pencil and a marker to mark areas that need to be cut. Cut these areas and prepare replacements. Afterwards, reinstall the floating subfloor on top of the coated concrete. Lay the pieces carefully and staple them together to form the subfloor.

As long as the concrete is coated properly with the moisture barrier, the subfloor will never have issues again with trapped moisture. Just to make sure the moisture does not become an issue in the future, make sure to install exhaust fans, dehumidifiers or ventilation materials in order to keep the area free from high humidity.