Tuesday, June 30, 2015

Cleaned and Sealed Quarry Tiled Hallway Floor in Brixton

These images are from a Quarry Tile Cleaning job we did for a lady in Brixton recently, as you can see from the early pictures they were not only dirty but there was also evidence of an old sealer and splashes of paint on them as well both of which would have to be removed first.

Cleaning Hallway Quarry Tiles

Our first task upon arrival was to disconnect her cooker and washing machine which were placed outside in the garden, this would allow us to get at all the tiled areas and also meant there was less to protect.

Working in small portions was the next step and to pre-wet the floor tiles followed by adding a dilution of Tile Doctor Remove and Go combined 50/50 with Nanotech UltraClean, these two products combine to make a powerful cleaner/stripper that's safe to use on tile. The cleaning solution was left to seep into the tile whilst we set up all of our equipment and added protective coverings to the kitchen units, walls and adjoining floors.


After about forty five minutes we re-wet the areas and hand scrubbed the tiles using scouring pads. This process was repeated covering small areas at a time until the kitchen was finished. We then used our scrubbing machine with a medium brush head fitted and thoroughly rinsed the floor to remove any trace of chemical.

We needed the floor dry for sealing so a couple of Turbo blowers were setup to force dry the floor and this took a couple of hours before my damp meter told me that the floor was dry enough.

Sealing Hallway Quarry Tiles

After discussing choices of sealers with the customer it was decided to seal the floor with Tile Doctor Color Grow which provides a natural finish whilst lifting the natural colors in the tile. Two coats were sufficient and once it had dried we refitted the cooker and washing machine, put all the plinths back and removed all of our protective coverings.

The lady was really pleased with our work and left the following testimonial.

"Bill did a fantastic job on my kitchen floor, I can't thank him enough.” -  Mrs Scott, Brixton

Travertine Tiled Floor in Gerrards Cross

I received a phone call a few weeks ago from a lady in Gerrards Cross which requested me to come and clean her large Travertine tiled floors prior to her renting out a property. I had actually carried out this job for her four years ago and she was really pleased with the service we provided and had therefore asked me come back again. Thinking back four years is a long time between floor polishes so we certainly did a good job on the floor the first time.


Maintaining Travertine Tiles

Travertine is a very sturdy stone which required the surface to be cut back before polishing, to do this we make use of a diamond encrusted burnishing pad system which is supplied in a set of four pads each one having a different purpose. We started with a Red pad first together with a little water and this strips dirt and old sealers from the floor, this is followed with the White, Yellow and finally Green pad which doesn't required the use of any water. As you progress through the pads you find the polish is restored and you get a deep shine in the surface of the tile.

Sealing Travertine Tile

In order to protect the floor from stains it was sealed with a single coat of Tile Doctor Color Grow which is a color enhancing sealer that brings out the colors in natural stone. Once the sealer was dry it was buffed using a white buffing pad to make sure that I didn’t leave any residues from the seal.

Once again the lady was really pleased with our work and promised to call the next time the property was to be let out again, but next time she wants me to do the carpets and the patio areas as well.

Monday, June 29, 2015

How to Apply Floor Leveler on Concrete

To keep water from pooling, and to prepare concrete floors for installing flooring, you may at times find it necessary to apply a floor leveler. Even for the inexperienced handyman or homeowner, applying these floor levelers is no more difficult than painting the floor. With the right instructions and a list of needed materials, you will find this project to be quite simple.

What You'll Need
  • Drill
  • Carpenter's level
  • Pencil
  • Paintbrush
  • Paint roller
  • Latex primer
  • Powdered self-leveling cement
  • 5-Gallon bucket
  • Mixer
  • Sanding pad

Step 1 – Cleaning your Floor

Avoid the frustration of applying a floor leveler on a floor that is dirty, dusty, or has debris scattered on it. Before applying your leveler, start with a clean floor. Sweep it to remove dirt and debris, and damp mop it to remove dust that can prevent the leveler from adhering properly to the concrete floor.

Step 2 – Mixing and Applying Your Primer

Before purchasing your primer, check the concrete surface on which you plan to apply your primer. If this surface is more porous, as it often is with older floors, you will need enough primer for 2 coats. If you are in doubt about the floor's porosity, apply a small amount of water to the floor's surface. A porous surface will take longer to dry. To mix your primer, remove the primer can lid and stir with a paint stir stick until the primer color in the can is even. Pour onto the concrete floor an amount of primer small enough for you to work with it. Spread the primer with a paint roller, being sure to cover the entire surface before moving on to the next area. Allow the primer to dry. If, after it has dried, you see areas that seem dryer, apply a second coat.

Step 3 – Mixing the Leveler

In a 5 gallon bucket add a third of a bag of powdered concrete leveler. Add water, and use a variable speed drill with an attached stirring paddle to mix the leveler and water to a consistency of pea soup. Mix only enough of the leveler that you can apply and spread it before it has hardened. If necessary mix more batches, then apply them.

Step 4 – Applying the Leveler

As you begin applying the leveler to the concrete surface, keep in mind you will have only about 10 minutes working time, after the leveler is mixed. Work small areas. You'll need to complete your application before this time has run out. Pour some of the leveler on the concrete surface that you're planning to fill. Use a soft bristle broom to spread the leveler. To avoid having to sand the edges down, be sure to feather them as you spread the leveler. Apply in small rows, finishing each row before beginning the next. Allow the leveler to flow to its own level, evenly covering the edges between rows. When finished applying your mixed leveler compound to all depresses areas of your concrete floor, check to be sure one application will be enough. Then, allow it to completely dry.

Deep cleaning Victorian tiled floors

These Victorian hallway tiles were cleaned at a residence in the historic town of Bideford. As you can see from the photograph below the tiles were dull and had lost their vitality due to ingrained dirt, clearly it had been some time since they were given a good deep clean.

Victorian Tiled Hallway floor in Bideford Before cleaning

Cleaning a Victorian Floor

The first job was to protect the skirting with tape and then vacuum to remove any loose debris and grit. The next step was to cover the entire floor with a strong dilution of Tile Doctor Remove and Go which is a powerful cleaning and coating remover that is safe to use on tile and stone. It was left to dwell on the floor for twenty minutes so it could soak into the tile and make the job of removing any remaining sealer and ingrained dirt easier. The solution was scrubbed into the tile using a black scrubbing pad fitted to a rotary machine and then the soiled cleaning solution rinsed off using a wet vacuum. This process was repeated a number of times until I was satisfied with the condition of the floor and followed with a final rinse with clean water to remove any trace of cleaning product. The water was extracted with the wet vacuum to get the floor as dry as possible before leaving for the day.

Sealing a Victorian Floor Sealing

The tiles were left to dry for 24 hours and I came back to seal the tiles using eight to nine coats of Tile Doctor Seal and Go which is an ideal sealer for Victorian Tiles as it leaves a nice sheen and provides excellent stain protection.

Victorian Tiled Hallway floor in Bideford after cleaning and sealing

I think you will agree the hallway floor came up really well and now been given a new lease of life.  


Source: Professional Victorian Maintenance advice

Friday, June 26, 2015

How to Remove and Salvage a Bathroom Vanity

bathroom vanity is something that a bathroom simply cannot be without. The mirror overlooks it and the sink is placed inside of it. The bathroom vanity is the center and focal point of the space. When you are conducting a bathroom remodel the bathroom vanity may no longer be suited for the design so will need to be removed. The materials used to construct a bathroom vanity are often expensive and destroying them is a waste. The bathroom vanity is easy to remove but salvaging it can be a little more difficult. The article below will show you how to do both fairly easily.

What You'll Need
  • Utility knife
  • Screwdriver
  • Pipe wrench
  • Bucket
  • Small pry bar
  • Thick blanket
  • Painters tape
  • Helper


Step 1 – Plumbing 

Trying to remove a bathroom vanity without dealing with the plumbing first will create a tremendous mess. Under the sink will be the plumbing pipes. Turn the water off by twisting the shut-off valves all the way to the left. You can then turn on the faucets to drain all the water from the pipes. Place the bucket under the main pipe inside he bathroom vanity. Use the pipe wrench to remove the pipes. Turn the bolts to the left. Place the pieces of pipe off to the side. Keeping pipes in place while trying to remove the vanity will spell disaster as they can break the vanity. The pipes can also break. Cut the caulk around the faucet and sink and then remove them.

Step 2 – Remove the Countertop 

The bathroom vanity is attached to the wall by screws and caulk and is also glued to the wooden frame. Trying to remove the bathroom vanity in one piece is nearly impossible to do due to the weight and size of it. Cover the top of the vanity with a blanket and tape it down. Use the utility knife to slice through the caulk on the back of the counter. Do this carefully so you do not cut yourself or the backing board. The caulk may also be along the sides; cut through this as well. Cut through the caulk under the front lip of the counter that meets with the top front of the base. Employ the help of a friend and lift the counter straight up off of the base and place it somewhere safe. Wrap the countertop completely in the blanket and tape it in place. If the countertop is marble it is very expensive to replace.

Step 3 – Remove the Base

With the heavy counter removed the rest of the bathroom vanity can also be removed. It is fastened to the studs with several screws. Use the screwdriver and remove every screw that you find connecting the back or sides to the wall. You can now safely remove the bathroom vanity by lifting it straight up off of the floor. If the vanity is proving to be too heavy you can remove the drawers and the doors as well. This will decrease the weight while protecting other pieces of the bathroom vanity.

Cleansing Black Slate Tiles in Portsmouth

This was a straight forward black slate tile clean and seal in a large kitchen of a house in Portsmouth, the tile and grout were in good physical condition and just needed of a deep clean.

Cleaning Slate Tiled Floor

The initial step was to give the tiles a really good clean using a dilution of Tile Doctor Pro-Clean which was left to seep in the tile for a while before being scrubbed into the floor using a rotary machine fitted with a black pad. It was a large area so we worked in sections and used a stiff brush along the grout lines to get them clean.


The dirty cleaning solution was removed using a wet vacuum before washing down the area completely with clean water; any stubborn marks were revisited with a repeat of the same process until we were happy the tiles were clean.

Sealing Black Slate Floor Tiles

We left the floor to completely dry over the night and came back the following day to seal it using Tile Doctor Seal and Go, a highly recommended sealer for Slate which provides good stain protection with a low sheen finish, slate is quite porous and it took five coats before it was fully sealed.

The black slate looked amazing when we had finished, the customer was certainly glad with the result.

Basalt and Glass Mosaic Tiles in a Wet Room London N6

This property in London N6 had been rented out previously by the owners and they are now renovating it before moving back in. This work included a wet room which had glass mosaic floor tiles and a dark Basalt tile laid on the wall. The main issue was the general lack of maintenance over the years which led to a major unsightly build-up of lime scale all over the wet room. We agreed to do the work but had to explain to the client how difficult the work would be and set their expectation for only an eighty percent improvement. I must apologize in advance for the quality of some of the photographs on this page, the size of the room, low lighting a nature of the stone surfaces didn't lend themselves well to being photographed.


Day 1 -Cleaning Basalt and Mosaic Tiles

Having protected all the chrome furnishings within the wet room we started to soak the Basalt tiled walls with Tile Doctor Grout Clean-Up followed by scrubbing and rinsing constantly with clear water. Grout Clean-up is an Acid based product so you do need to take care when doing this however it is particularly effective at shifting mineral deposits like Limescale. When we were contented, it had removed the majority of soap scum and lime scale we proceeded to clean the Glass Mosaic floor tiles using the same method.

Day 2 -Polishing Basalt wall Tiles

The basalt tiled walls now needed to be fixed back to their original factory condition using small diamond encrusted burnishing pads attached to a hand held polishing machine. We started with a coarse pad which removed any remaining Limescale which had impregnated the surface of the stone and moved onto the finer pads which polish the stone. Once this was complete the tiles were given a final clean with Tile Doctor Neutral Cleaner which is an everyday cleaning product designed for regular use on stone or sealed tiled surfaces.

Day 3 -Sealing Basalt wall Tiles

We went back on the third day and after making sure the Basalt tiles had dried we gave it a final buffing to restore the stone to a deep high gloss shine. The last step was to seal the Basalt tile in order to protect it and make it easier to clean in the future and for this we applied three coats of Tile Doctor Color Grow which is an impregnating sealer that soaks into the pores of the stone.

Lastly, we used a rotary floor polisher fitted with a white buffing pad to buff the mosaic glass floor to a high shine.

Restoration of Quarry Tiled Floor in Grove Park, South London

I just concluded this Quarry Tile restoration work for a young couple in Grove Park, South London. They were refurbishing their property and wanted to keep as much of the original features that they could. In the kitchen they had the original quarry tiles and had attempted to clean the floor themselves but weren’t successful. I quoted for the job and took time to explain the process and which products I would be using.

They contacted me a couple of days later to let me know that they wanted me to do the work which was pleasing as I had put a lot of time into the quote. Turns out I got the job because they could see I knew what I was talking about giving them confidence I could do the work and another company had quoted twice the price I gave them and didn't even pop round to carry out a site survey.

Cleaning Hallway Quarry Tiles

I turned up at the agreed time and set about by cleaning the floor with a mixture of Tile Doctor Pro-Clean and NanoTech UltraClean which combine well together to produce a very effective cleaning product that is safe to use on tile and stone. The solution worked into the floor using a rotary scrubbing machine fitted with a black scrubbing pad; after a while the soiled solution was removed using a wet vacuum and the floor was given a thorough rinse with clean water to see what I had left to deal with.

What was left was a mixture of paint, grease and sticky residues from old carpet tape and if that wasn't enough there were lime scale deposits. To tackle this a stronger product was required so I laid down Tile Doctor Remove and Go and left it to dwell on the tile for about 45 minutes which was sufficient to break down the stubborn marks and allow for them to be scrubbed out. Remove and Go is a strong coatings remover which as its name suggests should remove just about anything and with the exception of the lime scale it lived up to its name.


I think it's a fair statement to say that Tile Doctor have a product to treat every problem and to remove the lime scale I used Tile Doctor Grout Clean-Up which is an acid based product usually used to remove excess grout but it's also effective on the removal of mineral deposits; needless to say it removed the lime scale without a problem. You do have to be very careful when using strong products like these on tile so I only left it on the floor long enough to do the job.

Finally, it was time to fit a brush head onto my rotary floor machine and gave the floor a thorough rinse neutralizing the floor and making sure that all trace of cleaning products were removed. Once I had finished, I locked up the house and left the floor to dry for several days.

Sealing Hallway Quarry Tiles

When I came back, I first checked that the floor was dry enough to seal using a moisture meter. The floor was dry so we started the process of sealing the floor with Tile Doctor Seal and Go, the Quarry Tiles were very porous and it tool seven coats of sealer before the tiles were completely sealed. Seal and Go was chosen as the customer wanted liked the low sheen finish this sealer provides whilst also offering excellent stain protection.

The owners were absolutely delighted with the results and they put in a fantastic review about me on the Tile Doctor website.

"Bill Bailey provided an extremely professional and high quality service from first point of contact to end result. He took time to assess the tiles to be cleaned and approached the job with a genuine commitment to get it right and achieve the best possible results. He carefully explained all the processes involved and was able to answer all our questions and provide advice. We would not hesitate to recommend him very highly.” -  Gemma, London

Victorian Tiled Hallway Floor Cleansing in Weeping Cross

This classic Victorian tiled floor was set up in the hallway of a house in the town of Weeping Cross, Staffordshire. The floor was in pretty good condition but had become dull and was in need of a deep clean to put some life back in the tiles, there was also manifestation of an old adhesive around the edges indicating it had been covered by carpet at some point.

Cleaning Victorian Floor Tiles

Initially, I had to remove the glue which I did with a small black scrubbing pad and a mixture of Tile Doctor Remove & Go combined with NanoTech UltraClean and a scraper.


The Remove and Go NanoTech worked well on the unyielding adhesive so I went onto clean the rest of the floor using the same product combination but this time worked in using a rotary machine fitted on slow speed with a black scrubbing pad. The resulting soiled solution was vacuumed up using a wet pick up machine and the floor left to dry overnight.

Sealing Victorian floor Tiles

The following day, I mopped the floor with a damp mop and then when it was dry applied four coats of Tile Doctor Seal & Go which is a recommended protective sealer for Victorian tiles and leaves a nice shine on the floor. Obviously, it looks fantastic and when the owners came home they were thrilled with the results and left the comment below on the Tile Doctor feedback system.

"Trevor has done a great job with our tiled floor, we are so pleased with the results! We would definitely recommend him!”
Mark Broomhall, Stafford"

Wednesday, June 24, 2015

Maintained Limestone Tiled Floor at Manchester Country Club

This beautiful Limestone tiled floor was furnished at a busy country club in Hale, Manchester around eighteen months prior and had seen significant foot traffic with around 500 people traversing it daily. The floor was taking a significant amount of punishment and although regularly cleaned the dirt had started to become ingrained into the stone and the maintenance team were struggling to keep it looking good, I also suspect that the cleaning product used on the floor may have accelerated the degradation of the sealer leading to the premature ingress of dirt.


Cleaning Limestone Floor Tiles

The floor was given a quick wash with Tile Doctor Neutral Cleaner in order to eliminate any surface grit and then cleaned using a set of Burnishing pads fitted to a rotary machine. The burnishing pads come in four different types and you work your way through them starting off with a course stripper pad with a little just water and then carry on with the white pad and then the yellow pad until the floor is thoroughly cleaned and any previous sealer removed. Next step was to use Tile Doctor Pro-Clean along the grout lines with a stiff brush to get the grout clean as well. To bring up the polish on the Limestone tiles I used a green polishing pad which is the last in the set of the four burnishing pads.

Sealing Limestone Floor Tiles

Once the floor was completely dry, we went on about sealing it using two coats of Tile Doctor Color Grow which is a color enhancing sealer designed to provide maximum stain protection on natural stone floors whilst bringing out the deep color in the stone. The last step was to buff the floor to a nice shine with a rotary machine fitted with a white pad.

The Limestone floor is now back to its best and I took the time to explain the need to use a neutral cleaning product such as Tile Doctor Neutral Cleaner on the stone in future.

Cleaned and Sealed Milled Slate Tiled Floor

These mixed milled slate floor tiles were installed in the Kitchen, Hall and toilet of a house in Broadwell, Warwickshire. The Slate was staining easily from drink spills and proving hard to clean; on top of that all the tiles were covered in a slight grout haze and had not been sealed or cleaned properly after installation. The customer needed the floor to be easy to clean and manage and was keen to bring out the rich color and texture of the floor but keep a matt finish.

Cleaning black slate floor tiles

Our first job was to give the floor a deep clean using Tile Doctor Pro-Clean which was worked into the pores of the Slate tile and grout using a slow speed rotary machine fitted with a scrubbing pad. I then used a wet vacuum to remove the resultant dirty solution and rinsed the floor down with water.


Removing Grout Haze from Slate

Next was to tackle the grout haze which was evident across the tiles; for this we used Tile Doctor Grout Clean-Up which is an acidic product that you allow to dwell on the tile for a one to two minutes and then agitate with a scrubbing pad and then remove shortly afterwards with a wet vacuum washing the floor down quickly to ensure the acid is removed.

Further cleaning was required to some areas which had proven stubborn to clean earlier and for this we used Pro-Clean again mixed 50/50 with NanoTech UltraClean which adds tiny abrasive particles to make a more effective cleaning product; again this was scrubbed in and then once we were happy with the result the floor was washed down with clean water in order to neutralize it before sealing.

Sealing Slate floor tiles

I left the floor overnight to dry then came back following day and used a damp test meter to verify the floor was dry and ready for sealing. Once satisfied, I proceed to apply four coats of Tile Doctor Color Grow which matched their requirements in a sealer exactly as it provides a matt finish brings out the color in the stone and offers great stain protection.

Refurbishing a Victorian Tiled Bathroom in Horncastle

The owner of this Victorian tiled bathroom floor in Horncastle had tried scrubbing and scraping these tiles will little to show for it, in the end after spending hours on this cold floor and trying lots of different products he was fed up and it still looked less than satisfactory. The tiles were very old and dirty and had remnants of glue stuck around the edges indicating they had previously been covered by something else such as lino, luckily Victorian tiles are our bread and butter and we have managed to restore tiles in a much worse state than this.

Cleaning Victorian Tiles

We set about cleaning the tile using Tile Doctor Remove and Go which is a strong coatings remover which is ideal for removing old sealers and adhesive products. It was left it to seep in the floor for a while in order to give it chance to soak into the tile and get to work on the glue before being agitated using a rotary machine fitted with a black scrubbing pad. The dirty solution was then removed using a wet vacuum and the floor given a good rinse with clean water again using the wet vacuum to get the floor dry. This process tackled the glue but the tiles were still in need of a good clean so Tile Doctor Pro-Clean which is a strong alkaline cleaning product safe to use on tile and stone was applied; this was left to dwell and then scrubbed into the tiles to get a really deep clean, stiff brushes were used along the grout lines to get them clean as well and then the floor was given a thorough rinse to neutralize the tile and remove any trace of cleaning products.


Sealing Victorian Tiles

Finally it was time to seal the floor, however the tiles need to be dry before you can do this so we got our Turbo drying system out of the van, switched it on and it soon had the floor dry. Four coats of Tile Doctor Seal and Go were applied to the floor allowing twenty minutes to dry between coats; this particular sealer is recommended for Victorian tiles and does a great job of adding a nice sheen to the floor as well as adding stain protection.

We managed to complete the work in a single day and the owner was absolutely delighted by the results.

Victorian Tiled Hallway Rehabilitation in Balham

A Victorian Tiled floor for a client in Balham, South London. They found the floor under an old carpet, and were keen to restoring it. Sadly, their builders did not listen and didn't bother to put down any protection when they painted, as a result there were paint everywhere. I've included a detailed photograph below so you can see for yourself what state the floor was in.

Cleaning the Victorian Floor Tiles

For starters, the floor was cleaned using a dilution of Tile Doctor Pro-Clean mixed 50:50 with NanoTech UltraClean which had been left to seep in for 20 minutes before being agitated using a rotary machine fitted with a buffing pad. I used a wet vacuum to remove the dirty cleaning solution and then realizing something more powerful would be required to shift the stubborn stains and paint marks. To rectify this I applied a Tile Doctor Remove and Go which is a coatings remover and left it to dwell on the Victorian tile for forty minutes before applying plenty of elbow grease. This did the trick to remove the paint and glue etc. so I worked across the floor in sections applying the same treatment until the floor was completely clean.


Once it had all been removed I gave the whole floor a run down with Tile Doctor Grout Clean-Up which brightened up the colors and finally I gave the floor a very thorough rinse with clean water to remove any remaining cleaning product that might have an adverse effect on the sealer. I left the floor to dry over the weekend and returned on the following Monday to seal it, but first I carried out a couple of repairs because some of the tiles were loose so I reset them in cement.

Sealing Victorian Tiled Floor tiles

Upon my return I sealed the floor using two coats of Tile Doctor Color Grow which is a penetrating sealer that provides maximum stain protection whilst bringing out the color in the stone.

All the customer could say was AMAZING I didn't think it was possible to get like this.

Cleaning Ceramic Wall and Floor Tiled Toilets in a London Night Club

Our client's project was to refurbish four toilets in a London Night Club but didn't want the expense of replacing all the existing ceramic floor and wall tiles; after come across our web site we were invited to visit the club and provide a demonstration after which we were awarded the contract. Our main task on this project was to deep clean the ceramic wall tiles and floors and colour seal grout lines which had over the years had stained to a yellow appearance.

Night Club Toilet Cleaning Day One

We started by giving all the tiles a though deep clean with Tile Doctor Pro-Clean which is a strong alkaline cleaner that is able to penetrate into the tile and lift the years of built up soiling on the tile and grout lines. This was followed with a further treatment of on the wall tile grout lines using Tile doctor Grout Clean up and another deep clean with Pro-Clean and pressure cleaned using our powerful truck mounted system which cleans under heat and high pressure and returns all the slurry to our recovery tanks for disposal.


Night Club Toilet Cleaning Day Two and Three

The tiles looked fantastic and like new again with the exception of the grout lines which although being deep cleaned of twenty years of dirt and grease still had a yellow appearance. The solution was to use a Grout Colourant to colour all the grout lines white again, the product we use is brilliant as not only does it give the appearance of newly applied grout is also protects the grout with a waterproof and stain proof barrier that is very easy to clean. Once dried we removed all the excess grout colourant residue from the tile and then polished the tiles to a pleasing high shine.

The client was totally satisfied and impressed with our work which cost a fraction of what it could of cost to replace all the wall tiles. In fact a member of the management team was adamant that we had replaced the tile and grout as he thought it impossible we could of managed this good as new look any other way.

Sunday, June 21, 2015

How to Repair Cracked Basement Floor Tiles

Basement floor tiles provide an interesting design element to any floor. Although tiles are generally durable, they are not invulnerable to cracks. Cracks on your basement floor tiles are unsightly, no matter how small the crack is. Repairing these cracks is quite easy, if you have the right tools and materials for the job.

What You'll Need
  • New tiles (same as the old ones)
  • Gloves
  • Grout sealer
  • Tile grout
  • Putty knife
  • Sponge
  • Chisel or awl
  • Safety glasses
  • Adhesive
  • Hammer

Step 1 - Matching the Existing Tile

Find tiles that match your existing basement floor tiles. The size, shape, design and texture of the new tiles should be the same as the old one. Bring a sample of the old tile or you can go to the same place where you got the old tiles.

Step 2 - Removing the Old Grout

Carefully remove the cracked tile. To do this, remove the old grout around the tile using the chisel or awl. Be careful in doing this to ensure that the tiles surrounding the cracked tile will not be damaged during this process.

Step 3 - Removing the Cracked Tile

Once the old grout is removed, you can now carefully remove the cracked tile. It is important, however, that you remove the cracked tiles chip by chip, instead of trying to remove the whole piece. To do this, use the hammer and chisel to crack the damaged tiles further. Remove all the pieces carefully. Once done, remove any adhesive or tile grout from the floor. Use the putty knife for this to scrape and make sure that the area is smooth and clean.

Step 4 - Replacing the Cracked Basement Floor Tiles

Spread adhesive onto the back of the new tile and carefully place it on the floor. Press the tile firmly and allow it to dry. Apply some tile grout around the new tile and remove excess grout using the sponge. Let it set for a few minutes.

Friday, June 19, 2015

Tips for Finishing a Basement Floor

Many people like to make use of every inch of space in their house as family living space, and finishing basement floor is part of the process of turning your basement into useful living space to be enjoyed by the family. Once you have finished your basement, you might use it as a recreation room with a pool table and other games, a den, or a TV area for the family. However you decide to finish the basement, making sure you have a floor that is completely dry is essential before finishing the basement floor.

Do Prep Work

Check and see if it is possible to paint the floor. To do this, use a large piece of plastic, such as a drop cloth or trash bag, and spread it over the basement floor. Tape it down using either duct or masking tape. Let it sit overnight, or 24 hours. When you pull the bag up, if there is moisture under there, then you have a water seepage problem and cannot seal the concrete. If it is dry, you can finish it. Many home improvement stores carry epoxy-based paints that you can use to paint the garage floor. This will seal the concrete while providing you with a durable finish.

Address Moisture

If moisture is an issue, first you will want to determine why. Is it something that is a new problem, or has it always been an issue? If it is a new problem that was caused by recent heavy rains, then checking to make sure the gutters are clean and routing the down spouts away from the house might clear up the problem. You will need to make sure to solve the water problem and make sure the floor is completely dry. Otherwise, mold and mildew will be an ongoing problem.

Personalize it

Once you have addressed any possible moisture problems, and the floor has completely dried, you are ready to paint it and personalize it. One way to do that is with an epoxy kit. Epoxy kits are mostly very easy to apply and are water based for easy cleanup. Such kits include colored chips that can be sprinkled on the floor while the paint is still wet. It gives an impressive finish and is resistant to chemicals, spills, water, and more. It runs around $50 for a kit that covers approximately 250 square feet but is well worth it.

Another idea for finishing the basement floor is to paint it with a gray concrete paint that is made for floors, and then, using a torn sea sponge, sponge on black, light gray and yellow paint to give the floor a granite look.  
Concrete Stain

Concrete stain has become more popular lately. Most of them are water based and are available in several different colors. They are easily sprayed on and can be sealed with a separate sealer to protect the stain. If you want to, you can even add personalized designs, such as stenciling, prior to sealing.


White Porcelain Tiles Cleaning at Premises in Aylesbury

This commercial unit in Aylesbury had white porcelain tiles laid in the lavatory and reception areas several years ago and had been assured they would be easy to clean, yet over the years they had deteriorated leaving an unsightly grey staining throughout and were now in need of a thorough deep clean.


Cleaning White Porcelain Tiles

A mixture of Tile Doctor Pro-Clean combined with NanoTech UltraClean impregnating cleaner products was spread evenly across the tiles and worked into the floor using a rotary scrubbing machine set on slow speed. We went on to work the floor in this manner to lift the soling followed by black stripping pads on a 150rpm rotary machine. When we were satisfied that the ingrained dirt had been lifted from the porcelain tile we used our van mounted pressure cleaning system to wash away the dirt from the floor, this system has been a great investment for us and uses heat and high pressure to clean and clear away the grime back to the recovery tanks in the van.

We allowed the floor to dry overnight and returned the next day to scrub along the stained grout lines and return them to their original color using a strong mix of Tile Doctor Grout clean-up and with this solution rescrubbed the areas using our rotary machines and with a complete final clean and rinse buffed the tiles to a high shine.

Marble Floor Tiles Scratch Removal in Woodhall Spa

This Marble Tiled floor was installed in the conservatory of a house in Woodhall Spa who had asked if we could eliminate the scratches from their inherited marble tiles around the door area and where furniture had been dragged across the tile as shown in the photos. Much to our surprise, our customer is a chief engineer on cruise ships all over the world and knew what this floor could look like if restored professionally.

Burnishing Mable Tiles

Other than the scratches the majority of the floor had been well maintained so the solution was to burnishing the marble back to its original condition using a set of diamond encrusted pads fitted to a slow speed machine and lubricated with a little water. The burnishing pads come in a set of four and applied to the floor with a little water one by one using a rotary machine running at slow speed.


The process begins with the coarse pad which strips back the top layer and removes sealers and dirt from the surface of the stone. The pads then become finer and finer with the last pad being a final polish that takes the tile back to near it's originally intended shine. You can see from the photographs that we actually managed to resurface the marble, remove the scratches and we also filled in some small holes and then allowed the floor to dry overnight helped by our turbo drying system allowing for minimal drying times.

Marble Tile Sealing

The following day we applied two coats of Tile Doctor Color Grow sealer to the tiles, the sealer fills the pores of the stone protecting it from stains and this particular sealer also lifts the natural colors in the stone.

As you can see the scratches were removed and the tiles now shine and are protected and polished to a stunning finish that the client was over the moon with and couldn't thank us enough for the professional and excellent job on time and budget.

Cleaned and Polished Marble Tiled Floor in Oxshott

Checking up on a referral from a Property Management company I dropped by to this palatial property in Oxshott which had approximately 300m2 of Marble tiled flooring that they wanted cleaning and re-polishing, my initial quotation to do this mechanically was too high so I offered an alternative using diamond encrusted burnishing pads which diminished the cost significantly. I didn't receive an answer so I thought that was the end of it however five months later I got an email asking me to carry out the works.

Marble Tiled Floor Polishing

It was a huge area so we had two men working with burnishing pads in 10 metre sections. The pads come in a set of four; you start with the coarse pad together with a little water and this cuts through and removes surface grime and any surface seal. You then progress through the other finer pads one by one until you get to the final polishing pad which provides a high polish.


Luckily, there were not many stains and the ones that were there came out quite easily. When we had completed a room using this system we then applied Tile doctor Shine powder which is a crystallizing power worked into the floor using a white buffing pad and a little water; it adds an extra level of deep shine to the marble floor giving it that extra wow factor together with a tough durable finish, we did this working 1 m2 at a time.

The entire process took five days to complete and when we had finished the customer came to investigate it with the homeowner. She was delighted with the final finish and has said that she will be recommending us to all her friends and clients. This is also great for the property manager because it has given him a good reputation for providing a trustworthy and highly skilled contractor for the works. Also he has promised us further work from his other clients including a job to carry out the external stone cleaning works for the same client.

Friday, June 12, 2015

Stained Terrazzo Tiles Cleansed at a Wigan Fish and Chip Shop

The attached video here is about a Stained Terrazzo Tiled floor from an old Fish and Chip shop in Wigan which had been closed for several months due to the owner being ill. The shop had then been sold and the new owners asked us to call in and re-furbish the tired and badly stained tiles rather than go to the expense of re-tiling or re-surfacing the Floor area, which would have cost a lot more than what we charged.

Terrazzo is a combined tile made up of Marble and Limestone chippings, sometime Granite, all mixed into a clear cement resin and then made up into tiles of all sizes. We estimated these tiles we laid more than fifty years prior and were not looking their best after being stained with rust stains from heavy equipment, cooking oil and grease, ingrained dirt and grime. Although a tough job to tackle it didn't put us off and as you will see we still managed to get them clean again.


Cleaning Terrazzo Tile

The approach we used to restore the surface was to cut them back using a set of burnishing pads which take off a few millimeters off the tile surface and regrinds to make them look as good as new, this is something you can't do with Vinyl Tiles or Ceramic and Porcelain. The pads are encrusted with diamonds and are used in conjunction with a little water; you start with a coarse pad and work through the set of pads which become finer in grade as you progress until your polishing the surface. Once this process is done the floor was given a good rinse to remove any dirt and allow us to spot any areas that needed further attention.

Sealing Terrazzo Tile

When the Terrazzo tile was dry it was sealed sealing with two coats of Tile Doctor Color Grow which is an impregnating matte sealer that brings out the colors in natural stone, the client had also specified they didn't want a shiny finish as they had a concern about slippery surface that could lead to slips and falls. Once the sealer was dry it was buffed using a white buffing pad.

The results are quite satisfying given the age of the floor and the stains we had to deal with not only that but the owner had engaged a number of other cleaning companies who had tried a test clean and he had even tried cleaning it himself but the results were poor.

Old Encaustic Tiled Floor Rebuilt in Fulham

I had an inquiry from a customer in Fulham, who represented the residents of an old building. The building had recently undergone redecoration and in the hallway, they had removed a thirty year old carpet to discover an original encaustic tiled floor underneath which turned out to be 102 years old.

As you can see from the photos the floor was extremely dirty and covered in lots of glue and paint from the carpet and decorations. Naturally they were keen to have it restored and brought back to life. Given the condition of the tile and the age I to set their expectations and told them that although I was confident of making a big difference to the floor I couldn't give any guarantees. I gave them my quotation and although it was slighter higher than what they had I mind, it was still less than other quotations that they had received and were also considering the option of replacing the carpet.

After a couple of days I received a call asking me to go ahead with the work and I booked it in.


Encaustic Tiled Floor Cleaning

My approach to the job was to initially spray a mixture of Tile Doctor Remove and Go combined with Tile Doctor NanoTech UltraClean which creates a powerful tile safe coatings remover with tiny abrasive particles that aid the cleaning process.

I left this to dwell on the tile for about fifteen minutes before scrubbing it in using a black scrubbing pad on my rotary machine. This method removed some glue and a lot of old grime so I then sprayed down more Remove and Go and also used a steamer to loosen the remaining glue and paint. This process was repeated a section at a time until at the end of the day I gave the whole are a thorough rinse before packing away my equipment and leaving it to dry.

Encaustic Tiled Floor Sealing

I went back three days later and carried out a test with my moisture meter to make sure that the floor was dry enough to seal. The meter confirmed it was dry so I then sealed the floor using two coats of Tile Doctor Color Grow which is an impregnating sealer that really brings out the color in the tiles.

And as you can see the floor is transformed and now I have some happy residents who are really pleased that they opted to have the old floor cleaned instead of replacing the carpet. Not to mention that restoring such an original feature has probably added value to their investment as well.

Spruced Up Sandstone Tiled Patio in Cambridge

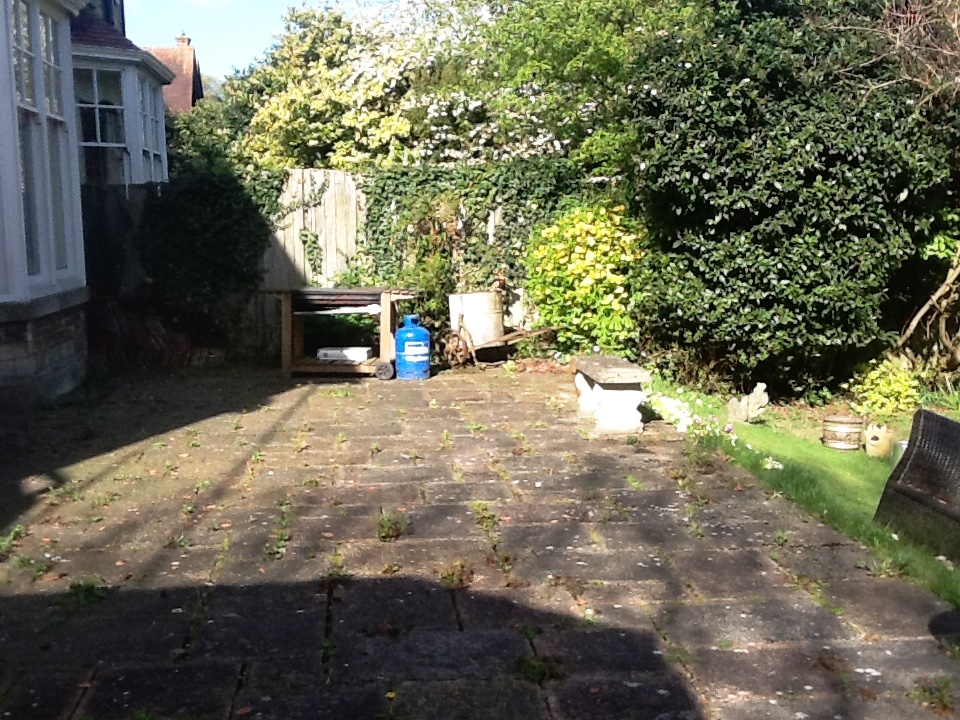
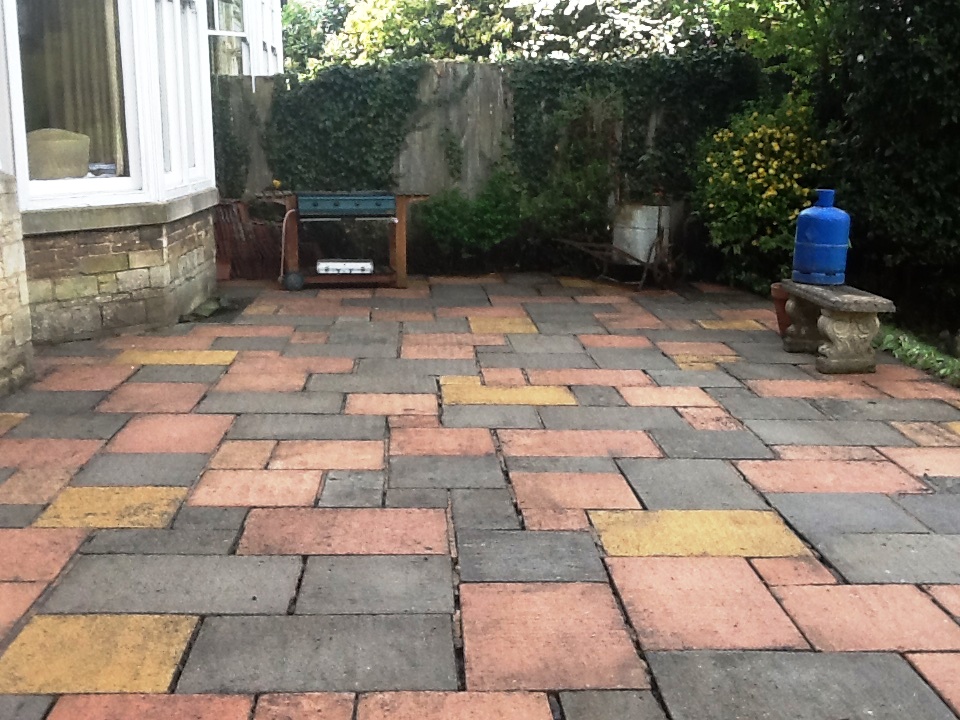
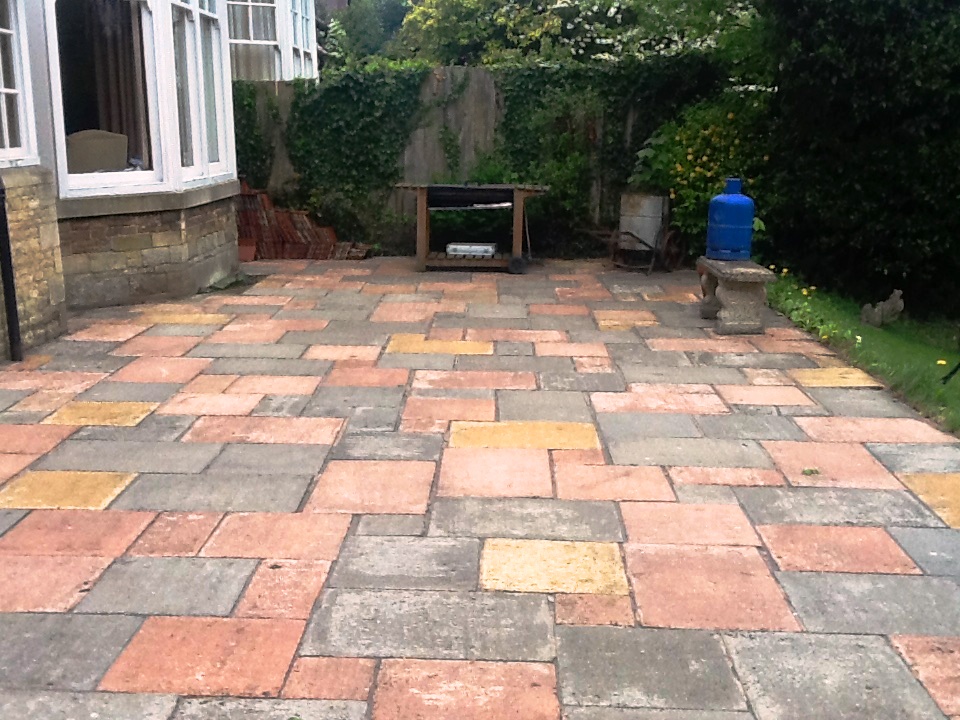
For starters, we don't just clean stone and tile floors we also do external patios as well and this particular job was at a property in Cambridge with a Sandstone patio. We have all the tools and products to tidy up most surfaces so cleaning patios and brick paved driveways is not an issue.

The process was quite straight forward which involved soaking the driveway first with Tile Doctor Pro-Clean, it's an all-around cleaner that is equally effective on Patios as well as Tile, Grout and Stone; being an alkaline cleaner it has the added advantage that it doesn't cause damage to the surface that typical acid cleaners can.


The Pro-Clean was left to seep on the patio for a good hour before scrubbing it in with a stiff brush and following up with a high pressure professional jet washing machine which did a great job dislodging the grime that had built up on the surface over time. You can see from the photographs what a difference it made.

Pressure washing can dislodge the grout joints so once we were done cleaning the floor the gaps between the tiles was filled in kiln dried sand.

I think you will agree the patio looks good as new.

Thursday, June 11, 2015

Putting the life back into your patio for the summer

You may be surprised but we just clean interior stone and tile we also specialise in exterior stone cleaning as well as you will see with the post below where we cleaned and re-pointed a neglected patio at a house in Rushden. The first photo shows the condition of the patio which hadn't been professionally cleaned for over forty years, weeds and moss had eaten through all the original mortar and made any remaining cement very lose and would need to be replaced after pressure washing.

Patio Before Cleaning and Repointing in Rushden
The second picture shows the equipment set up ready to pressure wash the patio, the power of the pressure washer blasted away most of the dirt and we used Tile Doctor Remove and Go on any stubborn stains that became evident.

Patio Before Cleaning and Repointing in Rushden

The third picture below shows the results after the patio has been pressure washed; you can see that the remaining mortar had all but washed away.

Patio Cleaned not Repointing in Rushden

After allowing a few days for the patio to completely dry out I returned to site to repoint all joints between the slabs. There are a few different colours to choose from and on this occasion the customer chose a light grey. The final picture shows the finished patio after it had been sealed.

Patio Cleaned and Repointed in Rushden

The customer was over the moon with the results as she had no idea that the slabs were different colours under the 40 years of dirt, grime and weeds.


Source: Professional UK wide maintenance service for your stone

Victorian Tiles Cleaning at Grand Residence in Cambridge

The photographs are from a lovely old period property in the village of Harston near Cambridge which had an original Victorian Tiled floor installed throughout the hallway and stairwell. Considering its age the tiles were in a very good condition but they were looking dull and overdue for a deep clean and re-seal.

Cleaning the Victorian Tiled Floor

Working in portions was the first step was to protect the beautiful skirting boards with clear plastic fixed with decorator's masking tape. It was then followed by applying a dilution of Tile Doctor Pro-Clean and letting it soak into the tile for about 20 minutes before being agitated using a rotary machine fitted with a black scrubbing pad.


Scrubbing Harston

The scrubbing did a good job of cleaning the floor however there were some stubborn stains that needed further attention so more Pro-Clean was applied and worked in with a stiff hand brush as a steamer was used to help lift the dirt out of the pores in the tile. Once we were happy with the floor the soiled cleaning fluid was removed from the floor using a spinner tool which applies hot water under pressure effectively rinsing the floor whilst removing the water at the same time with suction.

Sealing the Victorian Tiled Floor

The floor was left to dry assisted with air blowers before moving on to sealing with Tile Doctor Seal and Go which is a recommended sealer for Victorian floor tiles that provides on-going stain protection as well as adding a nice subtle shine to the floor.

The client was really pleased with the results and even asked us back to do the slate tiles in the kitchen something I will no doubt write about in a later post.

Cleaned and Sealed Slate Tiled Kitchen Floor in Harston

The photographs on this article are from that lovely old period property in the village of Harston near Cambridge, you may recall an earlier post where I worked on the Victorian Tiled hallway. These photographs are from the Slate Tiled Kitchen floor which they asked me to clean and re-seal as well.

Cleaning the Slate Tiled Floor

The process for cleaning and sealing slate is very similar to Victorian and Quarry tiles so this was as they say a bread and butter job for a Tile Doctor. The beauty of working in a kitchen is I was able to remove the kick boards instead of having to protect the skirting boards with tape. Once all preparations were done a dilution of Tile Doctor Pro-Clean was applied and left to soak into the Slate tile for a while before being worked in using a rotary machine fitted with a black scrubbing pad. Pro-Clean by the way is an alkaline cleaner so it's safe to use on tile and stone unlike some acidic products which will cause damage over time.


As before I re-applied Pro-Clean on any stubborn stains and also gave the grout lines a good scrub with a stiff hand brush to make sure they were clean. Once happy with the general condition of the tile it was time to use the spinner tool which applies hot water under pressure effectively rinsing the floor whilst removing the water at the same time with suction. This does a great job of rinsing the floor and removing any trace of cleaning product before sealing, this is important to ensure a good finish when sealing.

Sealing the Slate Tiled Floor

The spinner tool does a good job of removing liquids from floors however the tile was still damp so it was left to dry assisted with air blowers until dry. NormalIy, I would use Tile Doctor Seal and Go to seal slate tile however the customer wanted a matt finish for this surface so it was sealed using two coats of Tile Doctor Ultra Seal which provides a more natural look it's also recommended for use in food preparation areas.

Cleaned and Polished Limestone Tiled Floor in Fulham

This Limestone tiled floor was installed at a property in Fulham, I was asked round to quote for cleaning the floor and whilst I was there I did a patch test. The test worked very well and the owner couldn't believe that the grout was actually white not dark grey.

Cleaning Polished Limestone Floor Tiles

The first step was to give the floor a quick sweep to remove any surface grit etc. Before starting the burnishing process which we use on hard stone surfaces such as polished Limestone to clean and bring up the shine on the floor. The burnishing pads and encrusted with diamonds and come in a pack of four consisting of Coarse, Medium, Fine and Very Fine 17" pads. I started with a coarse pad which removes sealers and dirt from the floor, a little water is added to lubricate the process.


Once we had finished with the coarse pad the grout was cleaned up using Tile Doctor Pro-Clean diluted 1 part cleaner to 4 parts water. The solution was then scrubbed into the grout with a stiff hand brush until it was clean. The floor was then rinsed with clean water to remove any cleaning products and we then continued with the remaining burnishing pads applied in order with Medium, Fine and Very Fine until the floor was thoroughly cleaned and polished. We left for the day at this point to allow the tiles to dry overnight.

Sealing Limestone Floor Tiles

The following day we returned to seal the floor using two coats of Tile Doctor Colour Grow which is a great sealer for natural stone such as Limestone as it works to lift the colours out of the stone. The last step was to buff the floor to a nice shine with a rotary machine fitted with a white polishing pad.

The customer was really pleased with the result and couldn't believe that the floor could look much better.

Dirty and Cracked Limestone Floor Tiles Restored in Louth

This particular client from Louth had a very dirty Limestone tiled floor with some cracks evident installed throughout the kitchen, hallway and conservatory. It was dull and not looking it's best so she had asked several companies in the local area to quote but they did not feel able to help. Luckily she discovered Tile Doctor and gave us a call, naturally this sort of work is well within our ability so not only were we able to help restore the appearance but also repair the cracks at the same time.


Burnishing Limestone Tiles

For us to resolve the surface cracks and remove the dirt from the floor we used a set of diamond encrusted burnishing pads which incidentally are a very environmentally friendly system which only requires water. The pads come is a setup of four and you start with the coarse pad which fitted to a buffing machine running on slow speed, the coarse pad removes old sealers and then you move onto the medium, fine and very fine pads until the Limestone is cleaned and polished again. The floor was washed down with clean water at this point to remove the soil generated by the burnishing process and left to dry overnight assisted by a turbo dryer.

Limestone Tile Sealing

The following day the floor had dried and we applied two coats of Tile Doctor Color Grow sealer to the tiles, the sealer fills the pores of the stone making it water and resistant and will protect it from stains in the years to come, this particular sealer also lifts the natural colors in the stone.

The client was delighted with the results as she had nearly given up on having a nice looking floor, see feedback below which was left on our automated feedback system.

“I am very pleased with the work which was completed yesterday. From my first enquiry to the completed work was excellent,” - Mrs V Pedder, Tetney

Victorian Tiled Floor Restoration in Oxford Hidden Under Parquet

Let me begin this story by telling you this was one of the most challenging floor that I have come across so far. It all started with a request to visit a property in Oxford where they had discovered an original Victorian tiled floor under a parquet floor in the hall.

When I arrived the customer had taken up a small area in the corner and had already tried to remove the black bitumen that the parquet floor was stuck down with, he had made some progress but realized it would be a massive project without the right tools. After I had showed him how much cleaner I could take his patch he booked me to restore the floor, the customer said he would remove the parquet floor himself.

Removing Bitumen from Victorian Tiles

When I arrived the parquet had been taken up to reveal a completely bitumen covered tiled floor that was very sticky. My first task was to put protection around the doors and skirting before moving on to removing the bitumen which was done by covering the half the floor in a mixture of Tile Doctor Remove and Go combined with Nano Tech UltraClean which was left to seep in for about an hour.

Next was I scrubbed the solution into the floor using a black scrubbing pad on my Rocky floor scrubbing machine, this loosened the bitumen from the floor which was then washed off with water and removed using a numatic wet vacuum. The same process was repeated on the other half of the floor and then the whole process was repeated again on both parts of the floor until it was clear of bitumen. This was arduous work and took a whole day to complete.


Cleaning Victorian Tiles

When I came back the following day I gave the floor a deep clean using a medium dilution of Tile Doctor Pro Clean, like the Remove and Go this was spread over the floor leaving it to dwell for 10 minutes before being scrubbed in using the scrubbing machine fitted with a black pad; again the floor was rinsed clean with water which was removed using the wet vacuum.

After this I applied Tile Doctor Grout Clean Up which is an acidic product that is great at removing grout smears and mineral deposits from tiles, being an acid you can only leave it on the tile for a short while so I worked in 1m square sections at a time on my knees spraying and scrubbing with a deck brush and then rinsing.

When I was done with this process the whole floor was thoroughly rinsed with clean water to ensure there were no cleaning products left on the floor. I then left the floor to dry promising to return a few days later when it had dried.

Sealing Victorian Quarry Tiles

I returned as agreed a few days later to seal the floor with five coats of Tile Doctor Seal and Go which is a great for Victorian tiles as it leaves a nice shine to the floor which is exactly how the customer wanted it. This process does take time however as you have to let the first coat dry before moving onto the next.

From start to finish the transformation of the floor was amazing and the client was very impressed with the results. Although the area was not large this was a very testing floor as bitumen stays sticky and was very difficult to remove even with the correct machines and products.

Wednesday, June 10, 2015

How to Patch a Tear in a Linoleum Floor

Linoleum floor is an environmentally friendly flooring option that feels comfortable and looks great. One of the problems with linoleum is that it can tear from time to time. If you have a tear in the flooring, this does not mean that you have to replace the whole area. You should be able to patch it in many cases. Here are the basics of how to patch a tear in a linoleum floor.

What You'll Need
  • Scrap linoleum
  • Hair dryer or heat gun
  • Tape
  • Utility knife
  • Adhesive
  • Seam sealer
  • Trowel
  • Scraper


Step 1--Locate Scrap 

In order to make this work, you will need a piece of the exact same linoleum. Your best hope is that you have a piece of linoleum left over in the garage, the basement, or the attic. You need it to match because it is going to go into the area that is damaged. If you do not have a scrap piece, go back to the place where you bought the flooring and see if you can order another piece. It will not match exactly, but it will be better than looking at a hole in the floor.

Step 2--Acclimate the Piece

After you have obtained a scrap piece of linoleum, you need to allow it time to acclimate in the area that you are going to be installing. Linoleum is a natural product and it can expand and contract significantly. Lay it in the room for about 48 hours so that it can get up to the right temperature and humidity level.

Step 3--Making a Cut

Take the scrap piece of linoleum and lay it on top of the area that needs to be patched. Take some tape and tape the scrap piece to the top of the existing flooring. This way, it will not move while you are cutting. Then take your utility knife and make a cut down through the scrap piece of linoleum and the linoleum that is installed on the floor. By doing this, you will be able to make the piece fits exactly in the floor without any gaps.

Step 4--Remove the Flooring

After you make your cut, you need to remove the linoleum that is still on the floor. For this process, you may need to heat it up with a blow dryer or a heat gun. This will loosen up the adhesive and make it easier to take up. You may need to use something to scrape the adhesive also.

Step 5--Installing the Scrap

You are now ready to install the scrap piece of linoleum into the hole. Use a trowel or a putty knife to apply some of the linoleum adhesive to the floor. Then take your linoleum scrap and press it down into the hole. Make sure that none of the adhesive seeps out from around the edge. Put something heavy on the linoleum while the adhesive dries.

Step 6--Sealing the Seam

You should then use a seam sealer to seal up around the patch. This will keep dirt from getting in the seam and keep it from looking bad.


Tuesday, June 9, 2015

3 Ideas to Cover an Old Linoleum Kitchen Floor

Covering up a linoleum kitchen floor can be very simple when you have the right research and information guide. Below are few ideas to do this.

1. Painting

Painting is a great and inexpensive way of covering up linoleum kitchen floor. If there are any rough edges of bumps in the kitchen floor sand them down prior to painting. Choose the color you want to use to paint your floor. Cover your floor with two coats of paint or until the entire floor is well covered and there you have it, a new floor in one easy step.

2. Luan Sheeting

Luan sheeting can be used to cover up a linoleum kitchen floor. Simply place the luan sheeting over the floor and secure it. Once the sheeting is down you will be able to replace the linoleum kitchen floor with the material of your choice.

3. Rubber Flooring

Rather than remove your linoleum kitchen floor your can simply cover it up. Rubber flooring is a great way of doing this. Measure your kitchen floor and identify the amount of rubber you need. Purchase the rubber of your choice and cut it to size. Lay your rubber over the linoleum kitchen floor and you will have a new floor in minutes. The rubber shouldn’t need to be secured as it is heavy. That will keep the rubber flat on the floor.

Monday, June 8, 2015

Remove a Linoleum Floor vs Cover a Linoleum Floor

If you are remodeling your kitchen, you may question whether it is better to Remove a linoleum floor vs cover a linoleum. There are a few things to take into consideration before you make the decision.

Amount of Work

Either project will require a lot of work although generally it may be easier to cover the floor than to remove the floor. Removing old linoleum involves making sure it doesn't contain lead, scraping glue and disposing of all the flooring. You also will need to make sure the subloor is in good shape or it will also need to be replaced before putting new flooring on top of it.

Condition of Old Floor

If there are missing pieces of linoleum or deep cuts or tears you can still cover the floor with new linoleum but first you should fill in these places with floor leveler. This is a compound something like grout that can be purchased at any home improvement store. New linoleum needs a smooth surface to wear well.
If the sub-floor doesn't seem solid or if the linoleum seems to be crumbling, there is a moisture or rot problem and the linoleum should be removed before installing new.

Sunday, June 7, 2015

Cleaned and Sealed Quarry Tiled Floor in Great Ouseburn

The aforementioned Quarry tiled floor was in the hallway of a residence in Great Ouseburn near York, the tiles were in a dreadful state with plaster, carpet glue and what appeared to be one hundred years of dirt. We’re often being asked to restore old tiled floors that have been hidden under carpet since the 1970 when tastes changes and this one seemed no different.

Cleaning Hallway Quarry Tiles

To deal with the glue the floor was covered with, a dilution of Tile Doctor Remove and Go which was left to dwell on the floor for an hour to soften before being scrapped off with a paint scrapper. I should mention Remove and Go is a powerful coatings remover which is safe to use on tile and stone. Once contented that all traces of the glue had been removed the floor was washed down with clean water and the solution was removed using a wet vacuum.


The plaster was then dealt with using Tile Doctor Grout Clean-Up which is an Acid based product that we normally use for removing grout smears from tiles however it works just as well with plaster and can also remove mineral deposits and rust stains. You have to be quick with an acid on tile though as prolonged exposure can damage the tile, once done the tiles were washed down again.

The next step was to scrub the whole floor using a rotary machine fitted with a black scrubbing pad and a strong one to one dilution of Tile Doctor Pro-Clean to ensure we have removed all the dirt and grime for the tile, again once done the floor was rinsed with clean water to neutralize the tile before sealing. The wet vacuum was used again to remove the soiled cleaning solution and reduce the drying time of the floor.

Sealing Hallway Quarry Tiles

We dropped by the following day to seal the floor which we did using four coats of Tile Doctor Seal and Go which will provide protection going forward and also leaves a beautiful satin finish on the surface of the tile. The clients were very surprised and happy with the results, it's a great bonus when you exceed a customer's expectations.

Cleaned and Sealed Victorian Tiled Hallway in Windermere

I recently paid a visit to Windermere in the Lake District to clean and re-seal a Victorian Tiled hallway floor. The client wanted the shine back on the Victorian tile and some tile grout had become loose and needed replacing.

Victorian Floor Tiles Cleansing

Upon arrival I set up my tools and covered any areas that needed protecting against water. After that was done, I started to strip the floor of any remaining sealer using Tile Doctor Remove and Go which is a coatings and sealer remover product that is safe to use on tile, stone and grout. Working in small areas the product was scrubbed into the tile and then washed it off with water using a wet vacuum to excrete the soiled solution. This process was repeated until the whole floor was clean, there were few hard areas and for these I mixed the Remove and Go 50/50 with Nano Tech Ultra Clean which adds tiny abrasive particles into the solution to make a more effective product. The process of scrubbing the floor made me realize that the loose grout problem was greater than first thought and some tiles need re-laying so I decided to come back and do this the next day, before leaving however I gave the floor a thorough rinse to ensure any trace of cleaning product was removed.


Grouting Victorian Tile

The next day I arrived and fixed all the loose tiles, my preference is to use the Mapei range of tile adhesives and grout, in fact the grout comes in a range of colors which is very useful if you are filling in holes in travertine etc. Once the adhesive had gone off I began to grout them in including those areas where the grout was missing or become loose. The last step was to wash off the grout from the tile surface and making sure it was all tidy for the next day.

Sealing Quarry Floor Tiles

After 3 days, I returned to the house and after verifying the floor was dry with a damp tester and the grout had hardened I started sealing the floor with Tile Doctor Seal and Go putting on thin coats which took about twenty minutes to dry, in total seven coats were applied which gave the floor the nice shine the customer was after.

This job took me three days all in all and after I was done we discussed how to maintain the appearance and increase the longevity of the sealer by using a Neutral Cleaning product which unlike many acidic cleaners does not eat away at the sealer.

Revived 100 Year Old Victorian Tiled Floor in Skipton

This one hundred year old floor needed some serious cleaning; these Orange and Black Victorian tiles installed in the hallway of a period house in Skipton, North Yorkshire had paint, glue and around twenty years of ingrained dirt on them due to previously being covered in carpet.

Rehabilitating Victorian Floor Tiles

In order to restore the tile surface we used a process we call the Blanket method which includes covering the floor in a mixture of Tile Doctor Remove & Go and Nano Tech Ultra Clean. The whole floor was covered very liberally with the chemical mixture and then sheeted over with polythene and sealed all the way round with water proof tape. There must be a perfect seal so no chemicals can dry out by oxidation and is left over night to soak into the tile.


The following day the polythene was removed in portions and the chemicals were first cleaned off with rags and then rinsed of many times with warm water. The whole floor was then scrubbed with a rotary machine fitted with a black pad and Tile Doctor Pro-Clean mixed 1 to 4 parts warm water to remove all the residue of the chemicals and any dirt. Pro-Clean is an industrial strength cleaning product that is safe to use on Tile, Stone and Grout.

Sealing the Victorian Tiled Floor

The following day, I returned and checked the floor for dampness using a Damp Meter which indicated the floor was dry and ready for sealing. Three coats of sealant was used and for Victorian Floor tiles I recommend Tile Doctor Seal and Go which provides a low sheen finish whilst offering great stain protection.

The 100 year old floor now looks as good as new and I think you will agree it has undergone a transformation.

Deep Cleaned Victorian Tiled Kitchen and Hallway Floor in Teddington

The said Victorian tiled hallway and kitchen floor in Teddington, Middlesex, was in dire need of a deep clean including stripping out the old sealer and re-sealing to ensure easy maintenance in the future. Being a high traffic area the tiles had accumulated a high amount of soil over the years, there was also a lot of glue that had been used to stick carpet down in the past which had to be removed and there was heavy staining to the kitchen tiles from spillages over the years. If that wasn't bad enough the owners of the house were in the middle of renovating the property so there was paint and plaster on the surface which would also need to be treated prior to sealing.

Victorian Tiles Cleansing

In order to tear down the glue and paint the affected areas were sprayed with Tile Doctor Remove and Go which was then left to seep in. After 10 minutes of soaking time, I then proceeded to scrub off the glue and paint and the resulting dirty solution was rinsed away.


The next step was to scrub the whole tiled floor using a rotary machine fitted with a scrubbing pad and a strong dilution of Tile Doctor Pro-Clean high alkaline cleaner. This broke down the soil ingrained in the tile and released it along with the remaining old sealer; the floor was then pressure rinsed to ensure all of the dirt was removed from the pores and stubborn areas re-treated.

Sealing Victorian Tiles

We then left the floor alone to dry for twenty four hours before coming back to seal it for which I used four coats of Tile Doctor Seal and Go. This is a water based topical sealer that leaves no smell and provides a nice sheen to the floor; it will also repel liquids and dirt making it easier to maintain the tiles in the future.

You can see from the photographs how the sealer has given a high sheen finish to the tile which reflects the light and enhances the colors of the stone leaving the floor looking as good as new and very vibrant.