Wednesday, August 28, 2024

Newport Tile Doctor Details the Restoration of Victorian Floor Tiling

The client had lived at this property in Newport for a few years and decided that it was finally time to sort out the Victorian tiled floor in the dining room. Some repairs were needed in a few areas and the sealer was fading and due for replacement.

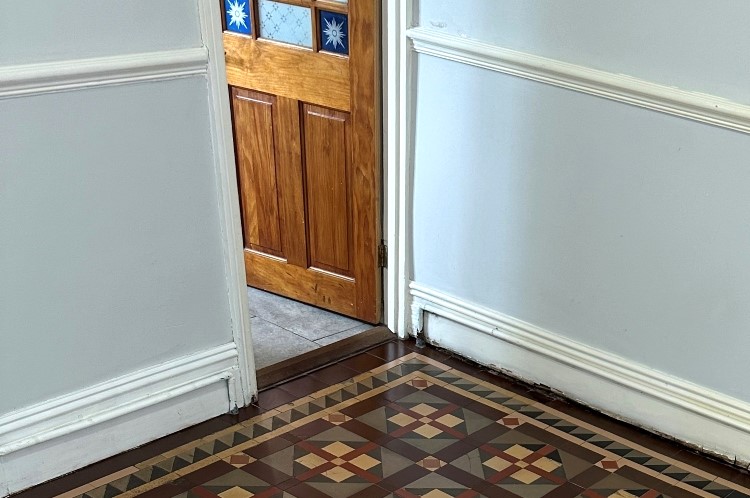
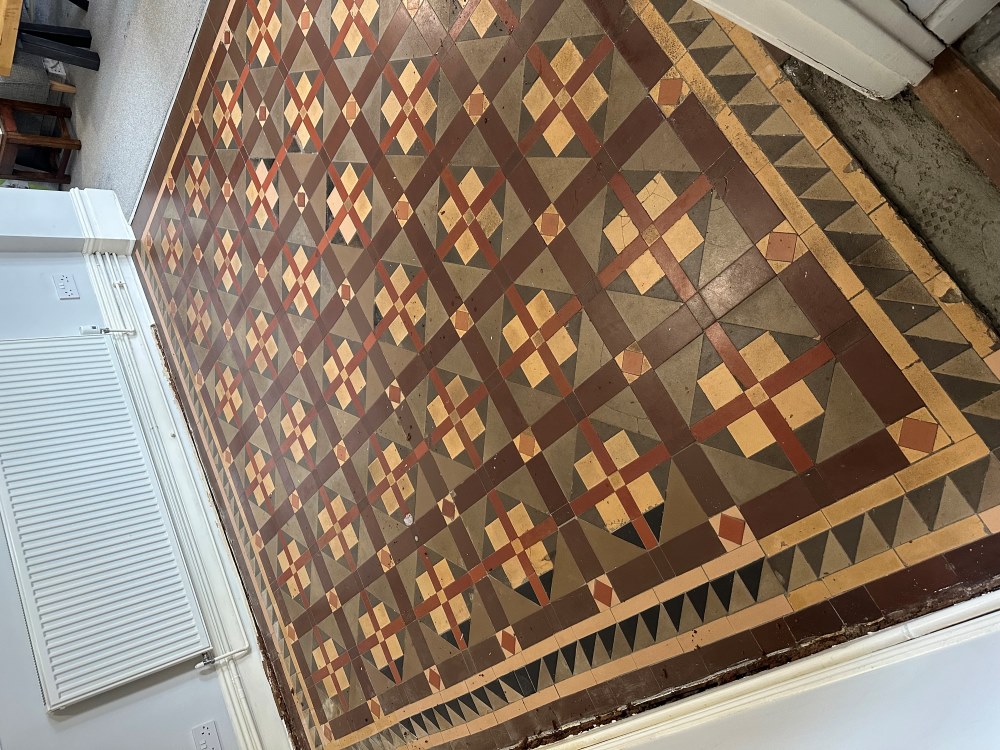
Victorian Tiled Dining Room Floor Before Renovation Newport

I went over to the property to survey the floor and advised that with repairs, cleaning and sealing the process would take two and a half days. Having worked on many many floors like these before I was very confident that we could repair the floor where needed and restore its appearance.

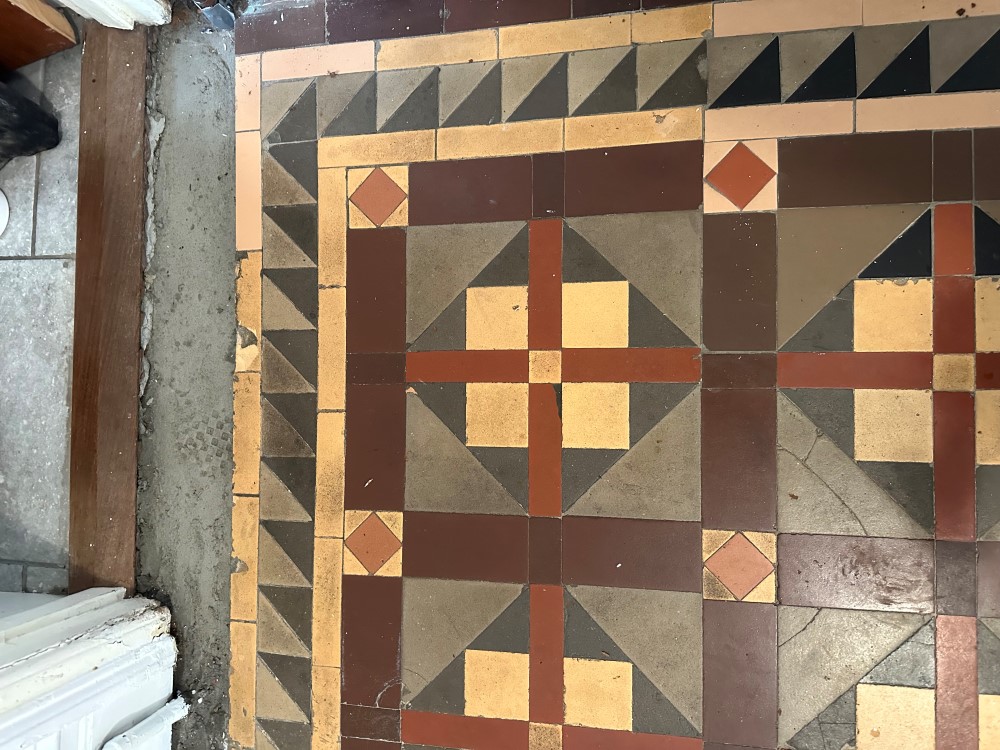
During the visit I noticed that at the door threshold leading into the kitchen, some of the tiles had been taken up for a gas pipe repair and back filled with cement, I suggested I could repair this section using matching tiles, so I included it in the quote. The quote to renovate and repair the floor was accepted and the job was booked in.

Victorian Tiled Dining Room Floor Before Renovation Newport


Cleaning and Repairing a Victorian Tiled Dining Room Floor

I began by addressing the tiling issues so my first course of action was to set matching tiles along the doorway border leading to the kitchen, as the previous tiles had already been removed by the gas company it was fairly straight forward job of carefully knocking out the cement. The tiles I had sourced were from a nearby reclamation yard and needed to be carefully cut to size to ensure a good fit with the original. After setting the tiles and grouting I left them to dry overnight.

The following day I began cleaning, using a combination of Tile Doctor Remove and Go and Pro-Clean, leaving the solution to dwell after being brushed into the floor. After around ten minutes the floor was scrubbed by hand with a stiff brush to release the dirt from the tiles. The resultant slurry was then vacuum away and with the floor cleaner I was able to get a better idea of which areas needed more attention.

I restored the perimeter of the floor with a 200-grit diamond block and this was followed up with a 200-grit diamond pad fitted to a rotary machine. These coarse pads cut into the tile surface removing years of grime and giving them a new lease of life. After another rinse and extraction with the wet vacuum the whole floor had a much brighter appearance. The process was then repeated with a 400-grit diamond pad to close the pores of the tiles.

The floor was then washed by hand with water and a sponge to make sure there wasn’t any areas missed, also to ensure there was no residue from the cleaning products left on the floor which could potentially disrupt the sealing process. The floor was then left to dry overnight ready for sealing the following day.


Sealing a Victorian Tiled Dining Room

To assist with drying I asked the client to leave a couple of air movers running during the evening and to put them back on in the morning. This worked well and by the next day I was able to confirm the floor was dry and ready for sealing with a moisture meter.

The client had requested a satin finish and so the sealer chosen was Tile Doctor Seal and Go, four coats were applied to the tiles a permanent wet look and gorgeous lustre. Another advantage of Seal and Go is that it’s a water-based sealer so it doesn’t give off a smell as it dries.

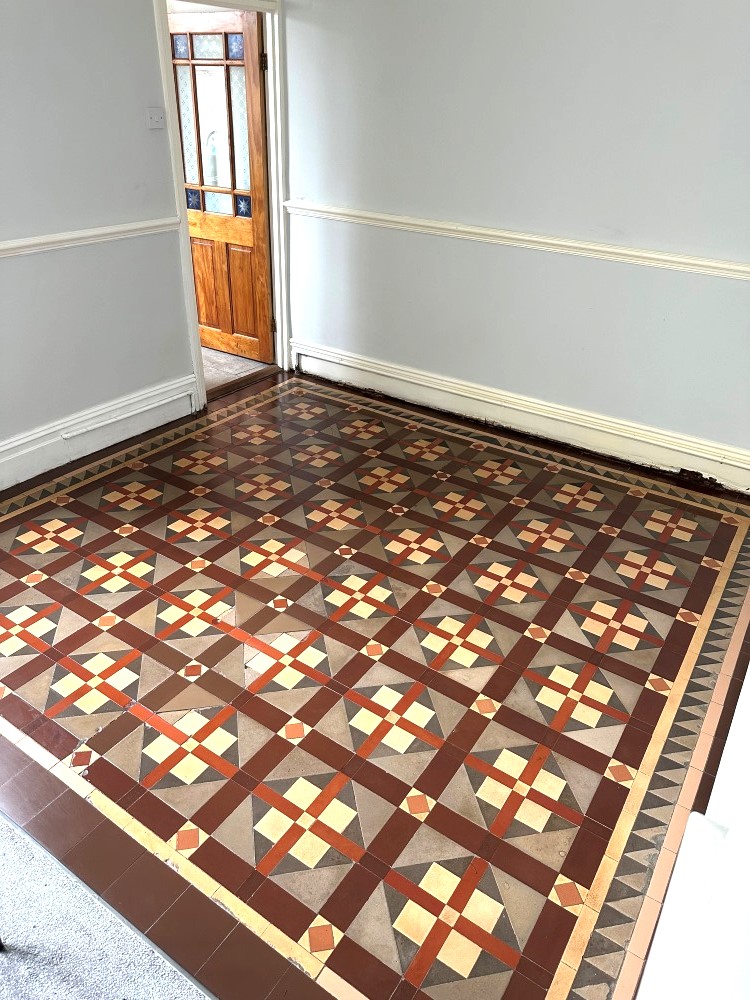
Victorian Tiled Dining Room Floor After Renovation Newport

For aftercare I left the client a bottle of Tile Doctor pH Neutral Tile Cleaner to help maintain the appearance of the floor. This is a gentle tile cleaning product that won’t harm the sealer, many of the products you find in supermarkets are simply too strong for a sealed floor.

Victorian Tiled Dining Room Floor After Renovation Newport 


Tuesday, August 27, 2024

Refinishing Oak Hardwood Floors

 Oak hardwood floors are one of the things that can make a home seem extraordinary. It has the natural beauty which does not go out of fashion through time and you are adding to the value of your house if you have oak floors installed. However, although oak is known to be very durable, it can lose its shine over time. It needs to be refinished once the polyurethane covering on its surface starts to wear out.

What You'll Need:

  • 20 to 60 grit sandpaper
  •  Hand sander
  •  Putty knife
  •  Long-handled roller
  •  120 grit sandpaper
  •  Wood filler
  •  Rag

A refinishing job is also important to protect the wood itself from everyday wear and tear. You will only require a weekend to do the job yourself and if you do not possess some of the equipment needed, you can rent it out from your local hardware outlet. Although a bit challenging, the results of your effort will be well worth it. 

Step 1 - Prepare the Room

Remove all of the items from the room that has the floor for refinishing. Once the room is free from any obstacle, take out the moldings from the room edges and sweep the floor to make sure that there is no dust around.

Step 2 - Inspect the Floor

Inspect the entire flooring that you will be refinishing. If there are any staples or nails on it, make sure that you are able to remove all of them before doing the refinishing. Nail holes should be filled up with wood putty. Use the spatula to do it. Ensure that you fill out evenly to make the flooring as even as you can. There is no need to sand it since you will be sanding the entire area anyway to remove the old finish.

Step 3 - Prepare the Sander

Take out the instruction manual for the drum sander and assemble it as directed. If the flooring has been heavily worn down, choose 20 grit sandpaper. If the wear is moderate, you can use a 60 grit sandpaper.

Step 4 - Sand the Floor

Sanding should be started from a corner of the room. Move in the direction of the wood grain and allow the drum sander to work for you. Go about the task back and forth until you have the entire area covered. To ensure that everything has been sanded down, overlap each pass by 1 inch.

Step 5 - Sand the Room Edges

Room edges should be sanded down by hand since they cannot be reached by the drum sander. Use the same sandpaper grit that you used on the sander.

Step 6 - Fine Sanding the Room

After you are done with sanding the edges of the room, repeat the sanding process for the entire room, but this time, use a 120 grit sandpaper. This will be your preparation for the staining.
Friday, August 9, 2024

Stripping Wood Floors With Natural Products

Stripping wood floors with natural products is possible. While it can be more difficult to find these products, they are becoming more popular and accessible as time goes on and people become more passionate about the environment. While it may be difficult, here are a few materials that you need, as well as steps to help guide you.

What You'll Need:

  • Natural wood stripper
  •  Recycled rag
  •  Natural wood cleaner
  •  Outdoor area or ventilation
  •  Scraper
  •  Sander
  •  Paint brush
  •  Goggles
  •  Gloves

Find a Natural Stripper

Finding a natural stripper will be the hardest part of this job. While they are becoming more available in department and hardware stores, you can definitely find them on the internet. There are a few wood strippers with a citric stripper in them that are natural and great for the environment and worker, but also effective. Since you need to order it online though, make sure you do this long before you need the project to be finished.

Sand

Be sure to use safety goggles and gloves from here through the completion of this project. Sanding the wood is important to get any rough spots, stains, and dirt off. Use a rag and water to wipe down the area first and then allow it to dry completely. You can use a hand sander to keep electricity out of the mix if you wish. This may take longer, but it much more eco-friendly.

Strip Wood

You can apply a thick and even layer of stripper onto the wood using a paintbrush or rag. Check the label to see how long the stripper needs to sit there before being taken off. Typically it is anywhere from five minutes to 25. Natural strippers will often take longer to sit and work in because they do not have strong stripping chemicals in them. Be patient and keep in mind you may need to do this several times.

Scrape off Stripper

After you have allowed the stripper to sit for several minutes or the allotted time, take a scraper and begin to scrape the wood. You will want to start in one corner and just work your way to the other end. You can usually get a lot off in the first try. However, usually, you will need to repeat this twice or more. If that is the case, remove everything you can and then wipe it down with water again. Reapply a thick layer of stripper to the spots that need it and then allow to sit again. Use a scraper and repeat until finished.

Clean Area

Using a recycled rag and the natural cleaner, be sure to wipe down the wood completely to make sure you have gotten all of the stripper cleaned off.

Once you are finished, allow the wood to dry and sit for a few days before treating it.