Friday, December 31, 2021

Making a Polished Concrete Floor

 It’s safe to say the industrial look is here to stay. Many of the highlighted materials included in the style are the same ones that have been used in construction for over 100 years. The difference now is that we don’t put a façade over them but rather allow the iron, steel, and concrete to show off all their natural appeal.

But that doesn’t mean they need to look raw or unrefined. Polished concrete floors are sleek and elegant, and blend with almost any design style for your home.

What You'll Need:

  • Concrete (optional)
  •  Concrete polisher w/vacuum attachment
  •  Metal bonded diamond sanding wheels of varying grits
  •  Polymer bonded diamond sanding wheels of varying grits
  •  Epoxy concrete repair
  •  Concrete densifier
  •  Concrete sealer
  •  As ALWAYS proper safety gear, including eye protection and gloves.


Step 1 - Pour Your Slab

Actually, this is a lot of work with a lot of equipment that merits a step-by-step article of its own. Your average DIYer should start with an existing slab. If you're an advanced DIYer starting your building project literally from the ground up, make sure you have all the necessary permits in hand before starting.

Mark out the boundary of your slab, check the level, and excavate as necessary. Create a solid base of compacted gravel. Frame out the form with dimensional lumber. You may need rebar reinforcements, especially on the perimeter.

Pour the premixed concrete into the form. Distribute the concrete into all the areas of the form. Screed it level to the top of the form using a 2x4. Use an edger to round the edges of the slab. Cut in control joints with a straight edge and a groover.

Let the concrete cure a little longer, then use a float to smooth it further. The concrete should continue to cure for three to four days, and can be misted with water and covered with plastic to keep it from cracking. After this point, remove the form, build a room around it, and get to polishing.


Step 2 - Prep Your Concrete and Your Space

If you’re pouring your own slab, it should be in pretty good shape, but if you’re polishing a pre-existing piece of concrete, this is the time to check things over for repairs and maintenance. Any large issues, like dried construction adhesive, should be removed at this time. The polishing process will create a lot of dust, so it’s best to keep things clean. Make sure the room you’re working on is properly separated from the rest of the living area with dust barriers.


Step 3 - The First Pass

If there’s already a finish on the concrete, it will be removed by the first pass with a concrete polisher. This tool is a walk-behind machine with sanding and polishing discs spinning at the bottom. It's rentable at many home improvement stores. Make sure you get one with an attached vacuum for dust control.

The polishing of the concrete starts with the heaviest grit metal bonded diamond disc. This will remove any finishes and small flaws on your slab. Take your time with each pass, overlapping slightly so there are no bare patches. This method will be the approach for the entire process.

Once the first pass is finished, inspect for more flaws exposed by the grinding. Use epoxy concrete repair to fill any cracks or blemishes.


Step 4 - Heavy Metal Grinding

Now that the first pass on the slab is done and the flaws are repaired, it’s time to work your way through the metal bonded diamond disc grits, going from heavy to light. Again, take your time with each pass, keeping an eye on how the surface is being removed. You may need to replace the discs in order to keep things fresh before you’re ready to step down to the next level.

If the polisher you rented doesn’t get all the way to the edges of your room, you’ll need to rent a separate edger so everything is even. Like everything else in this process, don’t rush and don’t skip a step. Because the polished look is so refined, it’ll reveal where you’ve skimped.

Continue on with the metal bonded discs, using finer and finer grit until you get the concrete to the desired level of smoothness.


Step 5 - Concrete Densifier and Polymer Polishing

With the heavy grinding done, you're almost ready to move on to polishing. But before that, there’s an important step that will add years to your polished concrete, and make it much easier to maintain. A liquid concrete densifier should be applied to the entire floor.

This material soaks into the concrete, bonding with it and making it denser. This surface is harder and will take a polish more readily.

Once the densifier is dry, mount the polymer-bonded diamond discs to the concrete grinder and start polishing. Like the last process, go down from heavier to lighter grits, taking your time with each pass, until the concrete reaches the desired level of polish.


Step 6 - Finish the Finish

Now that your floor is at the level of shine desired, you can apply a concrete sealer. This step is optional because the slab should be quite hard from the densifier, but the sealer will help in keeping the concrete clean.

Maintaining your polished concrete is simple. A microfiber cloth sweeping can take care of light dust and dirt. Wet mopping, either with clear water or a floor cleaner, can be used for heavier trafficked areas. Other than that, the concrete should give you years of durable use.

A simple process can take a basic building material like concrete and make it shine, producing a durable design element that can fit with nearly any style.


Sunday, December 19, 2021

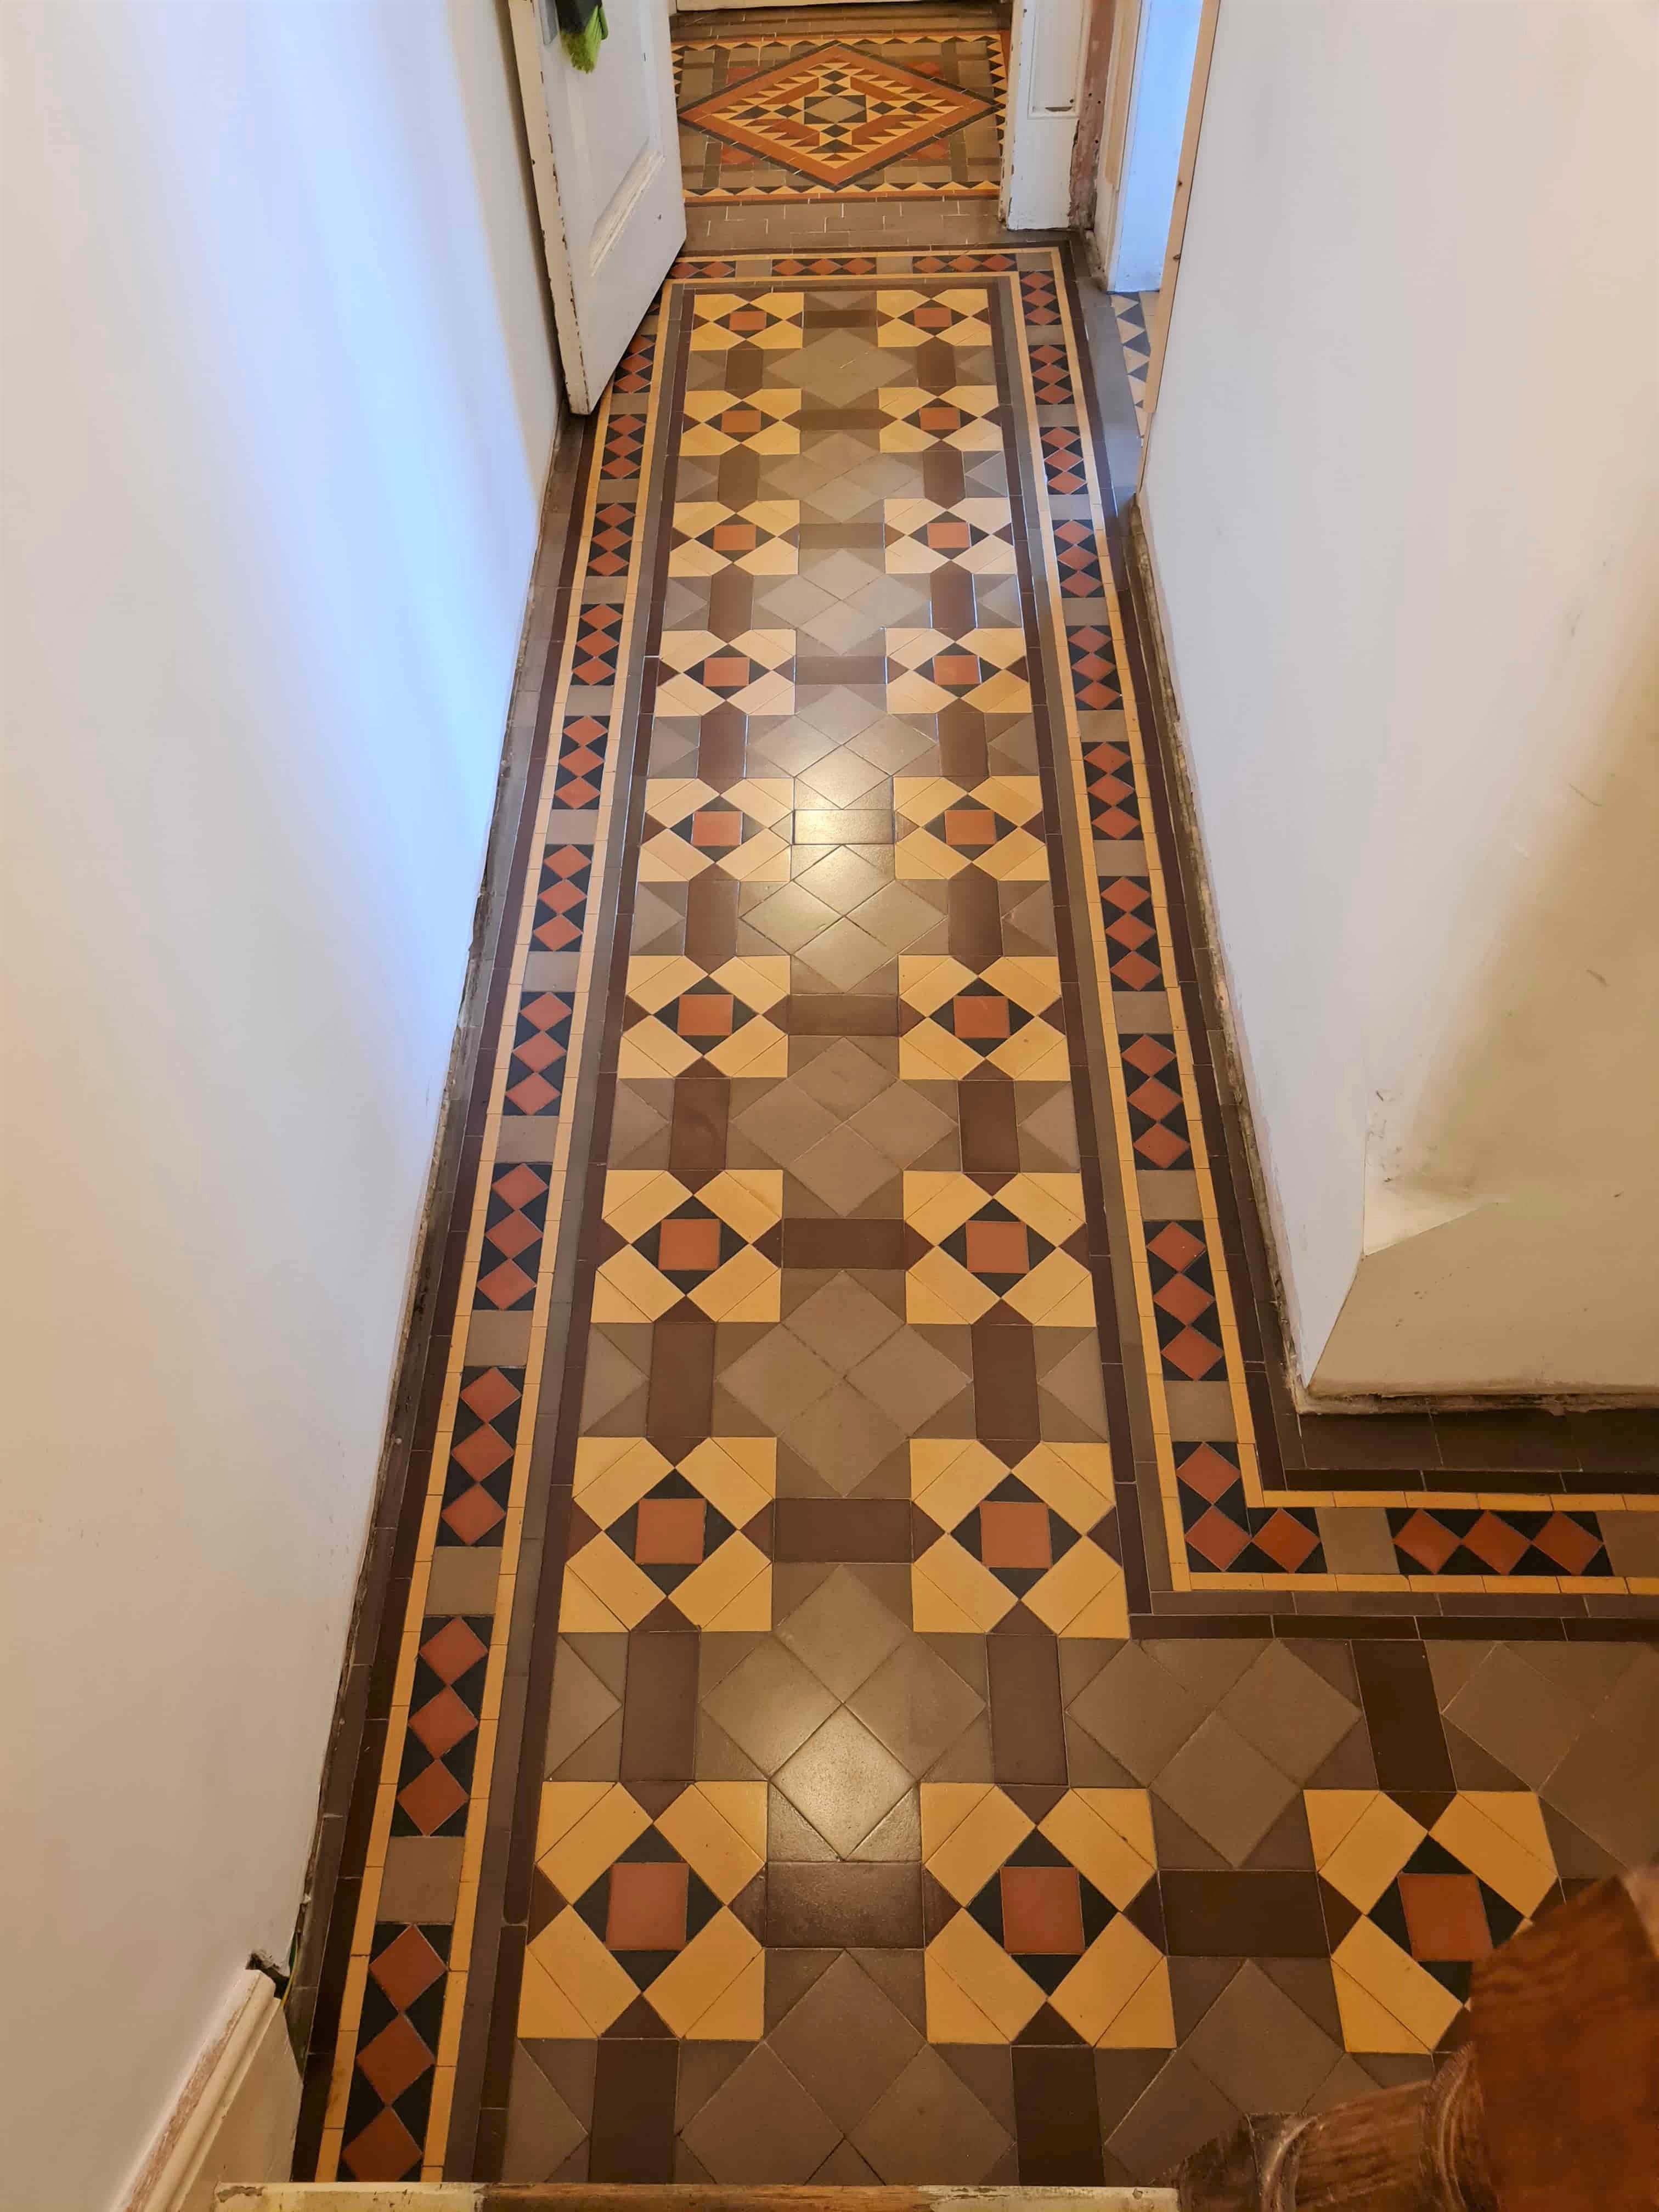
Damaged Classic Tiled Hallway Floor Fully Restored in Lancashire

Cleaning and Repairing a Victorian Tiled Hallway Floor

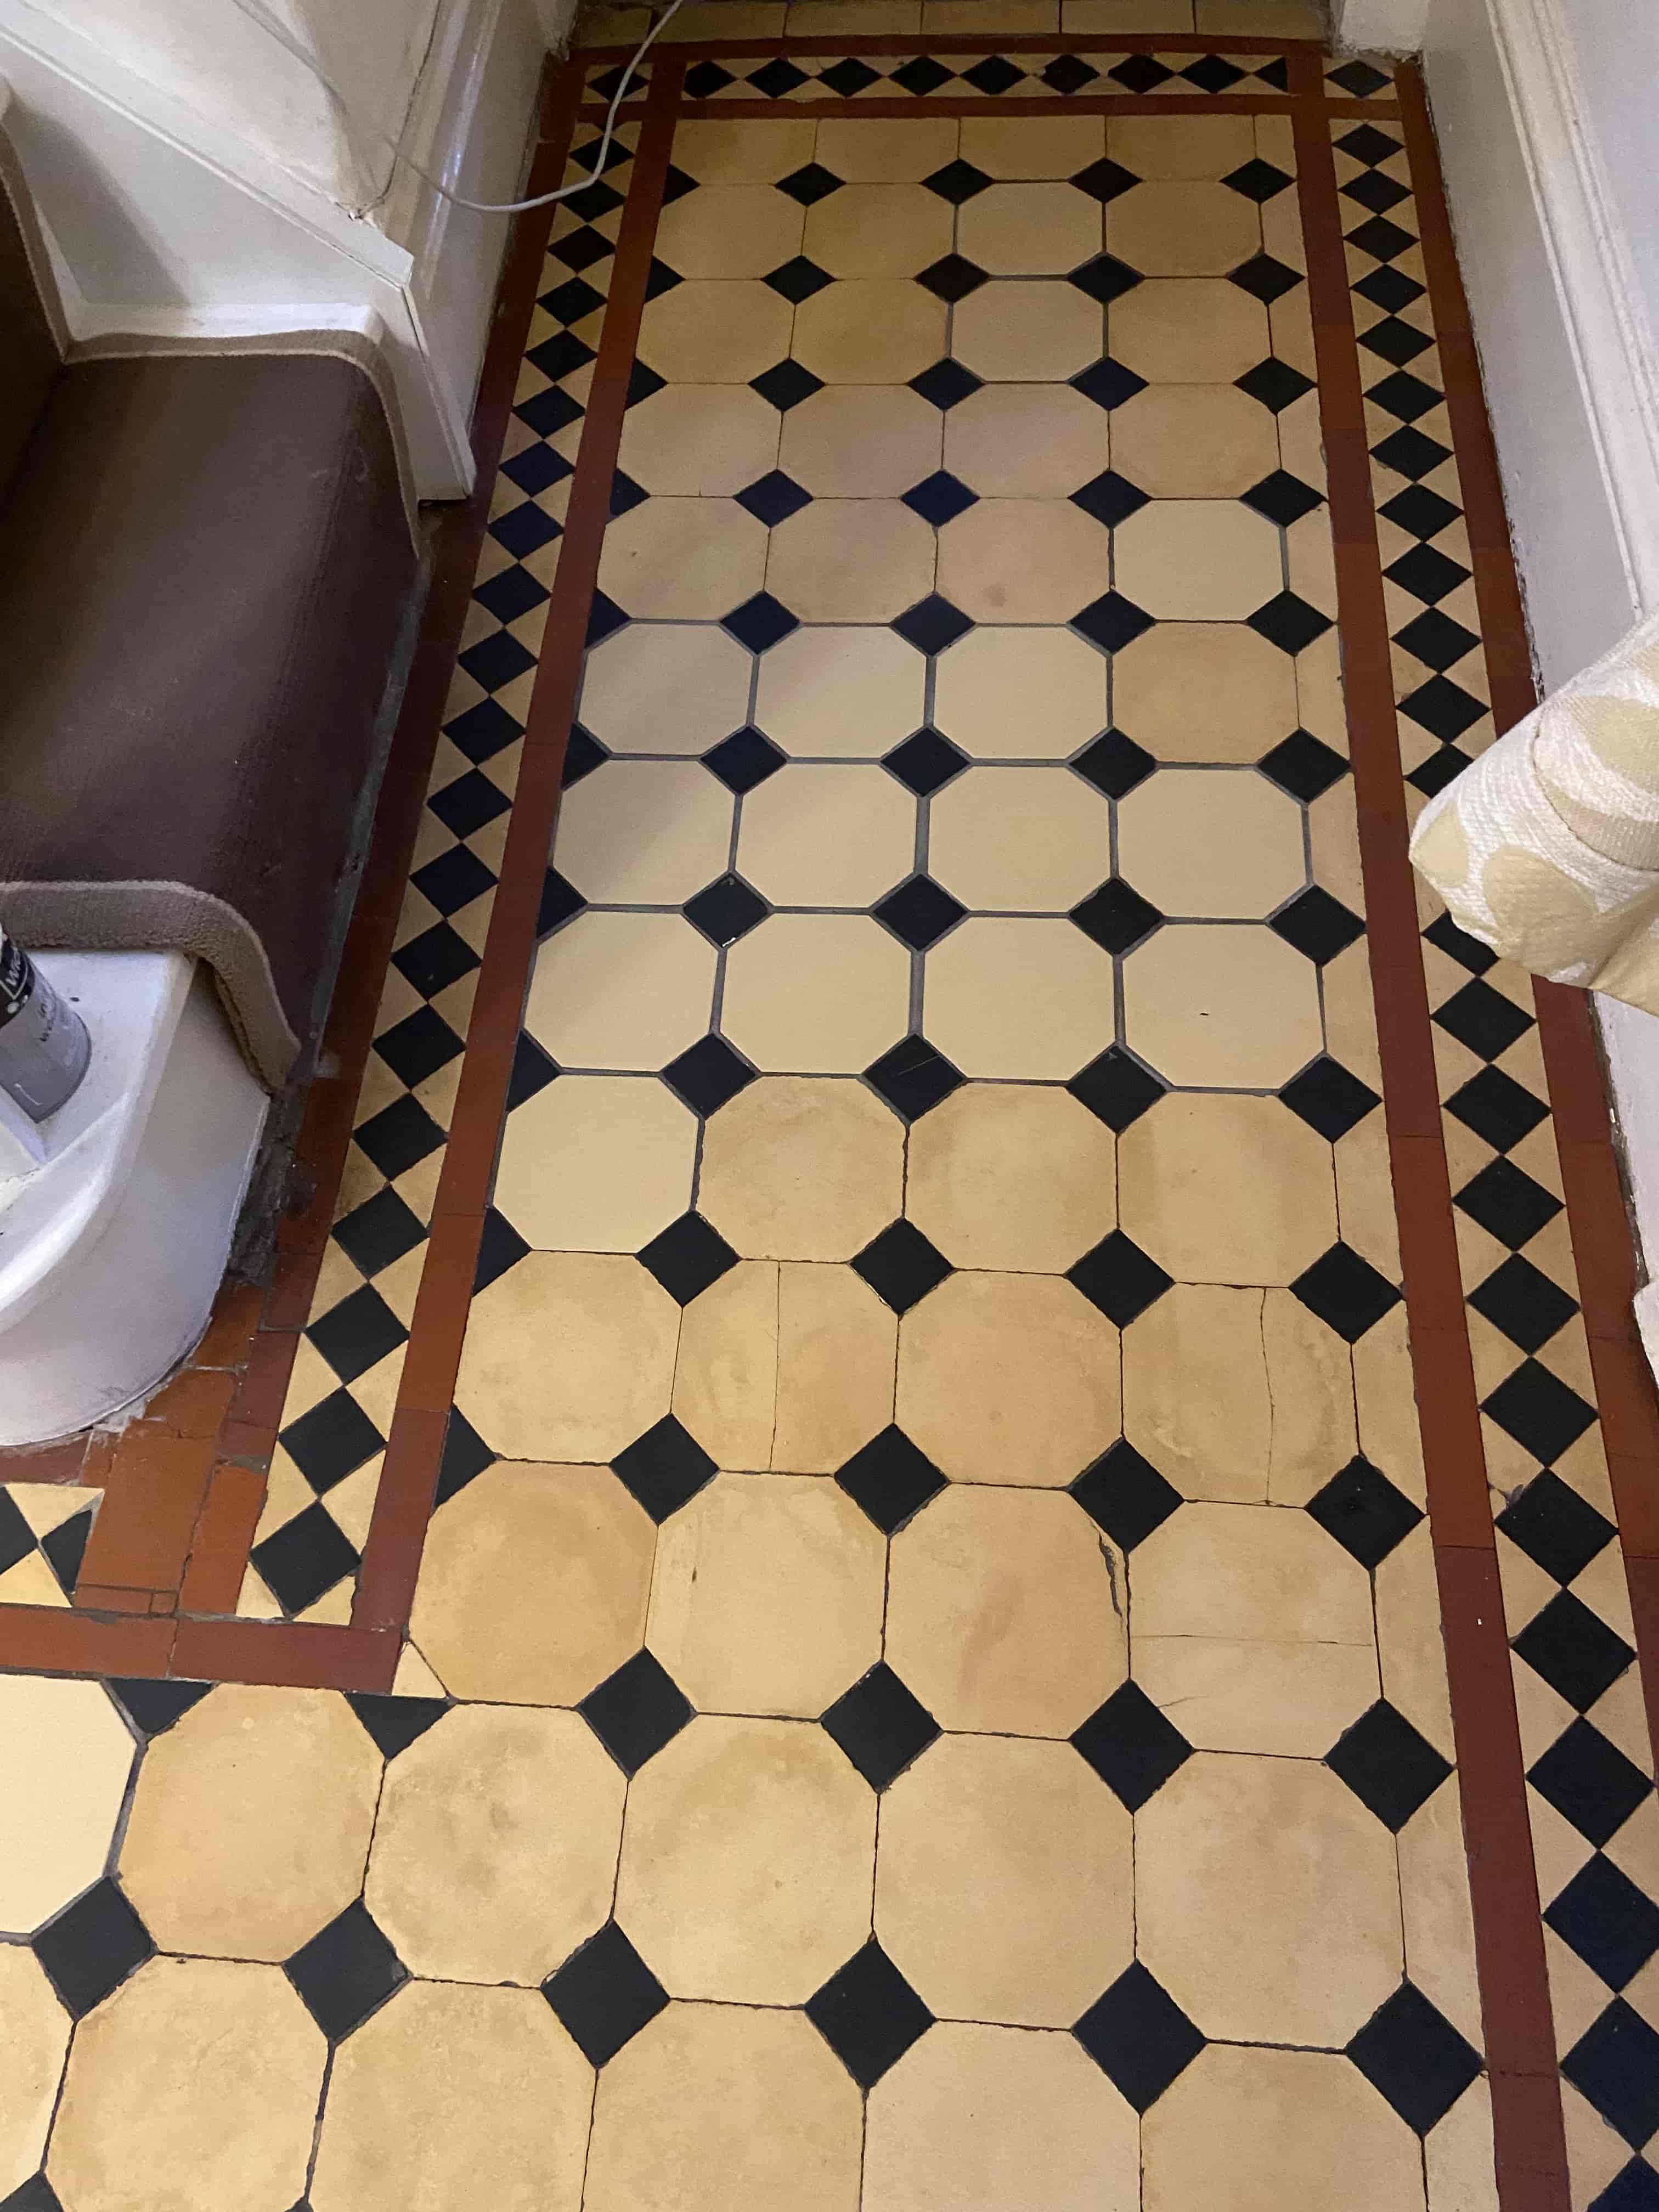
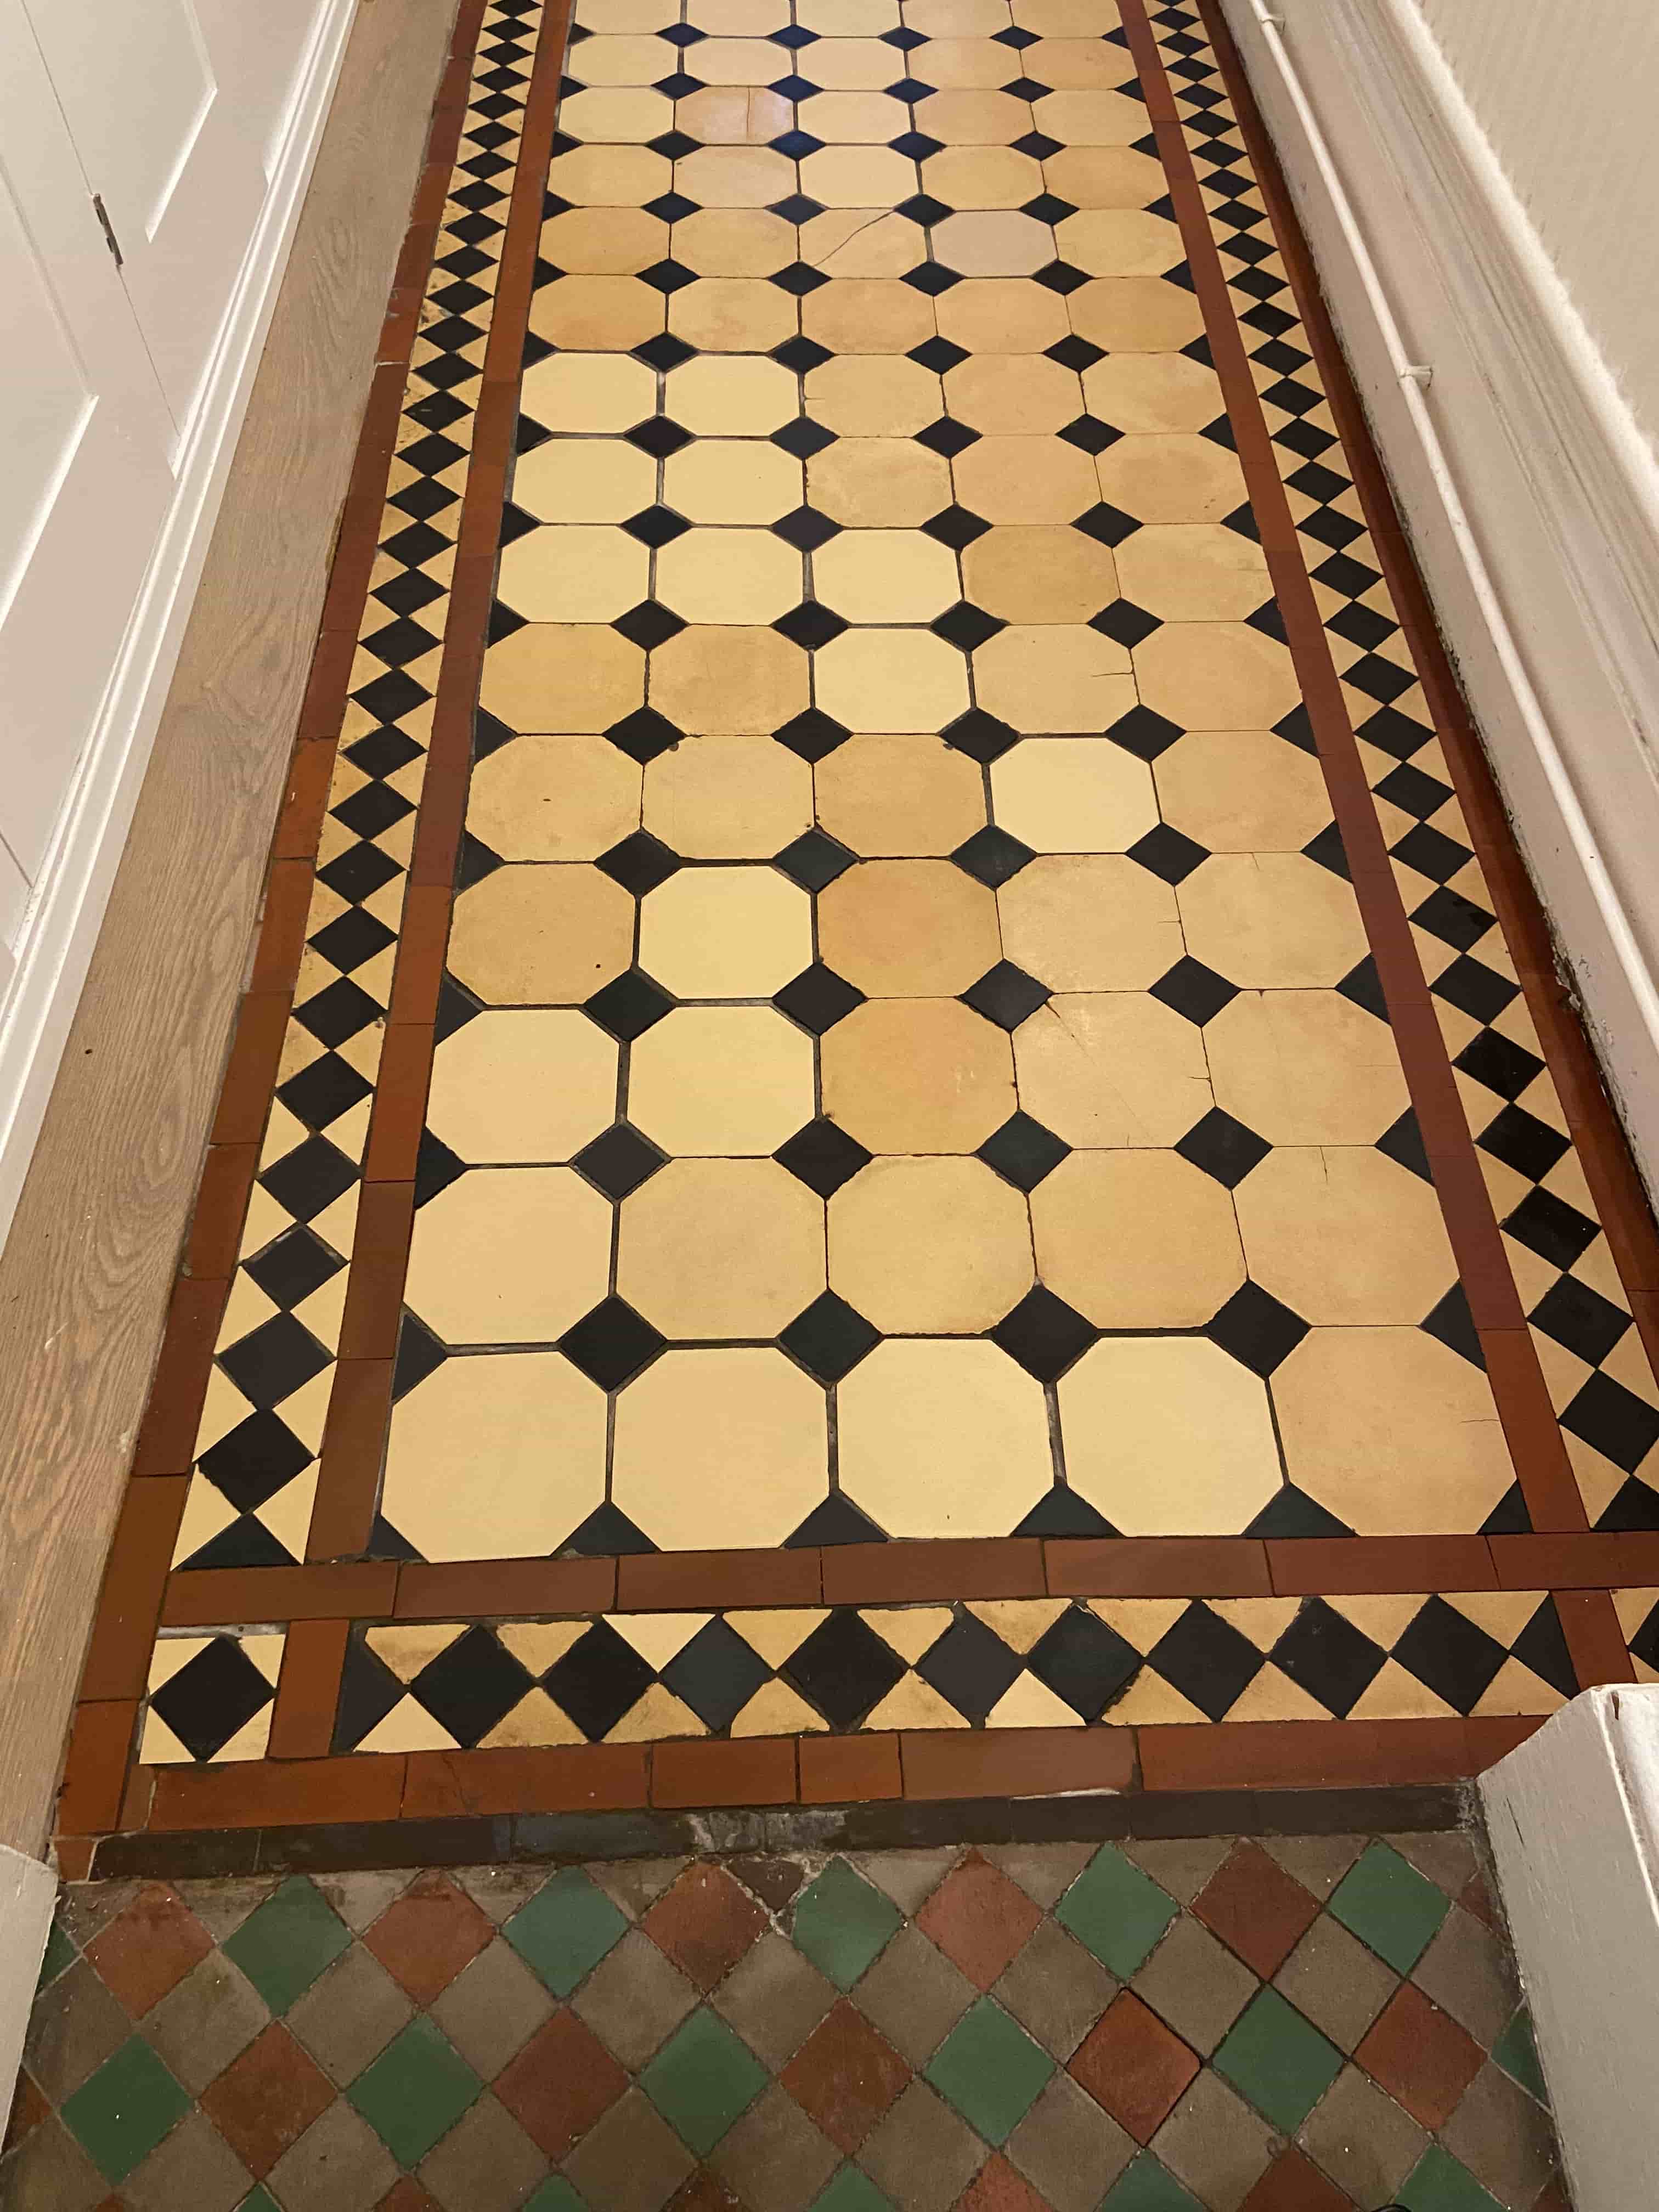
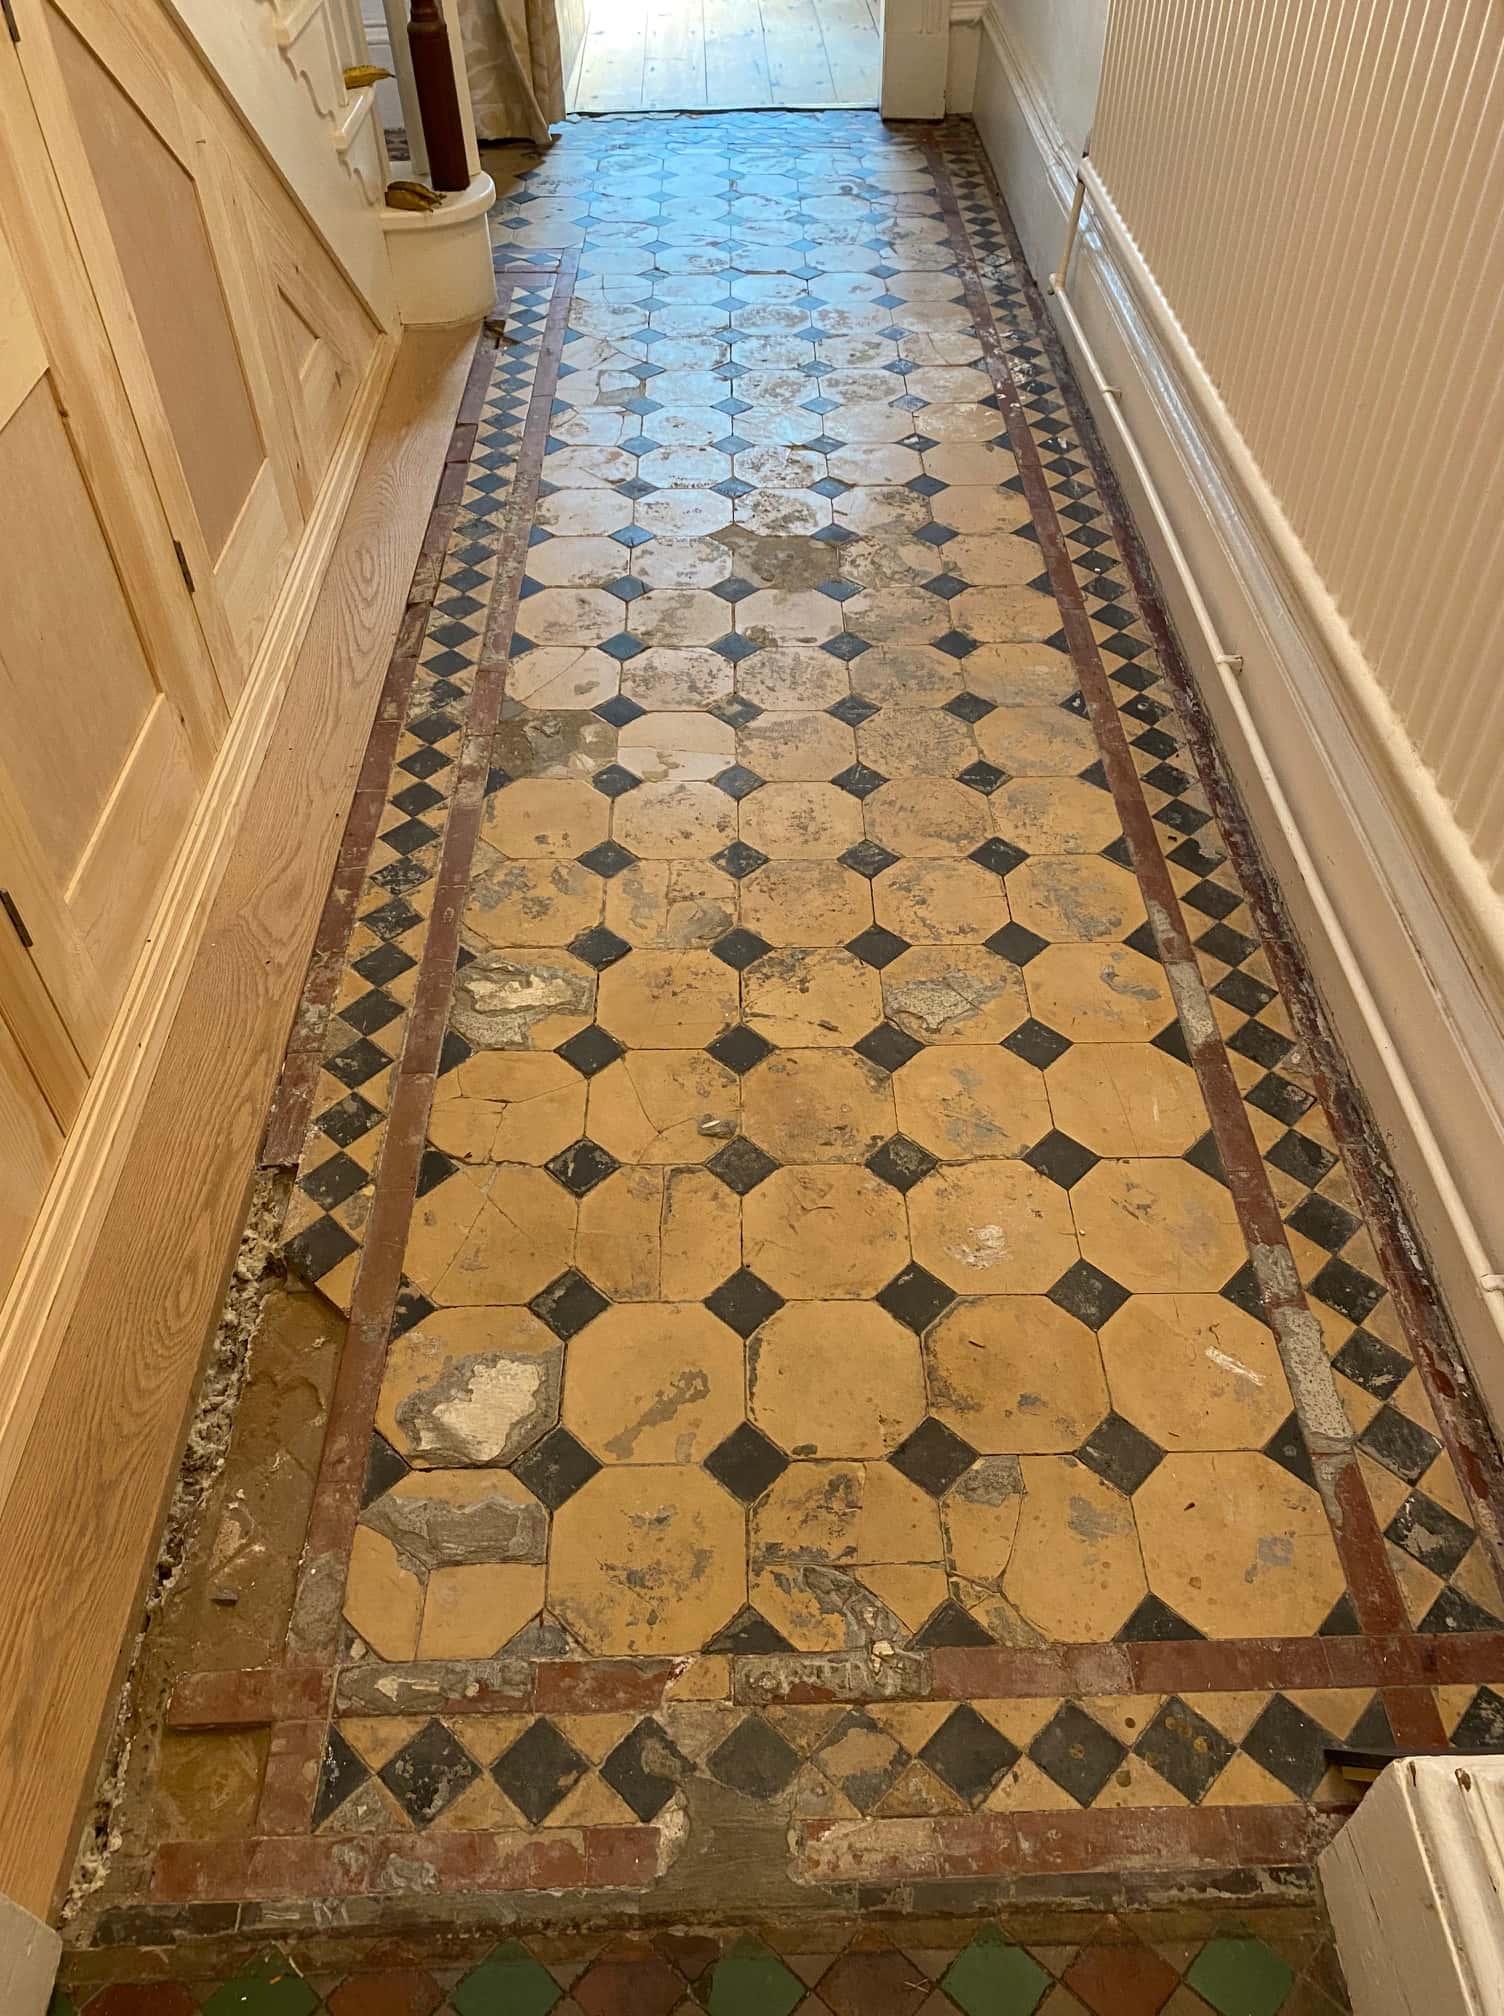
Detailed below is the restoration of a Victorian tiled hallway floor that we started back in June in Preston. Although we started in June there was so much damage to the subfloor and the tiles it took some time to complete, additionally, the client did not like the colour samples of the replacement tiles we had brought along and so decided to source their own which took some time.

 
Damaged Victorian Tiled Hallway Floor Before Restoration Preston


Deep Cleaning a Victorian Tiled Hallway

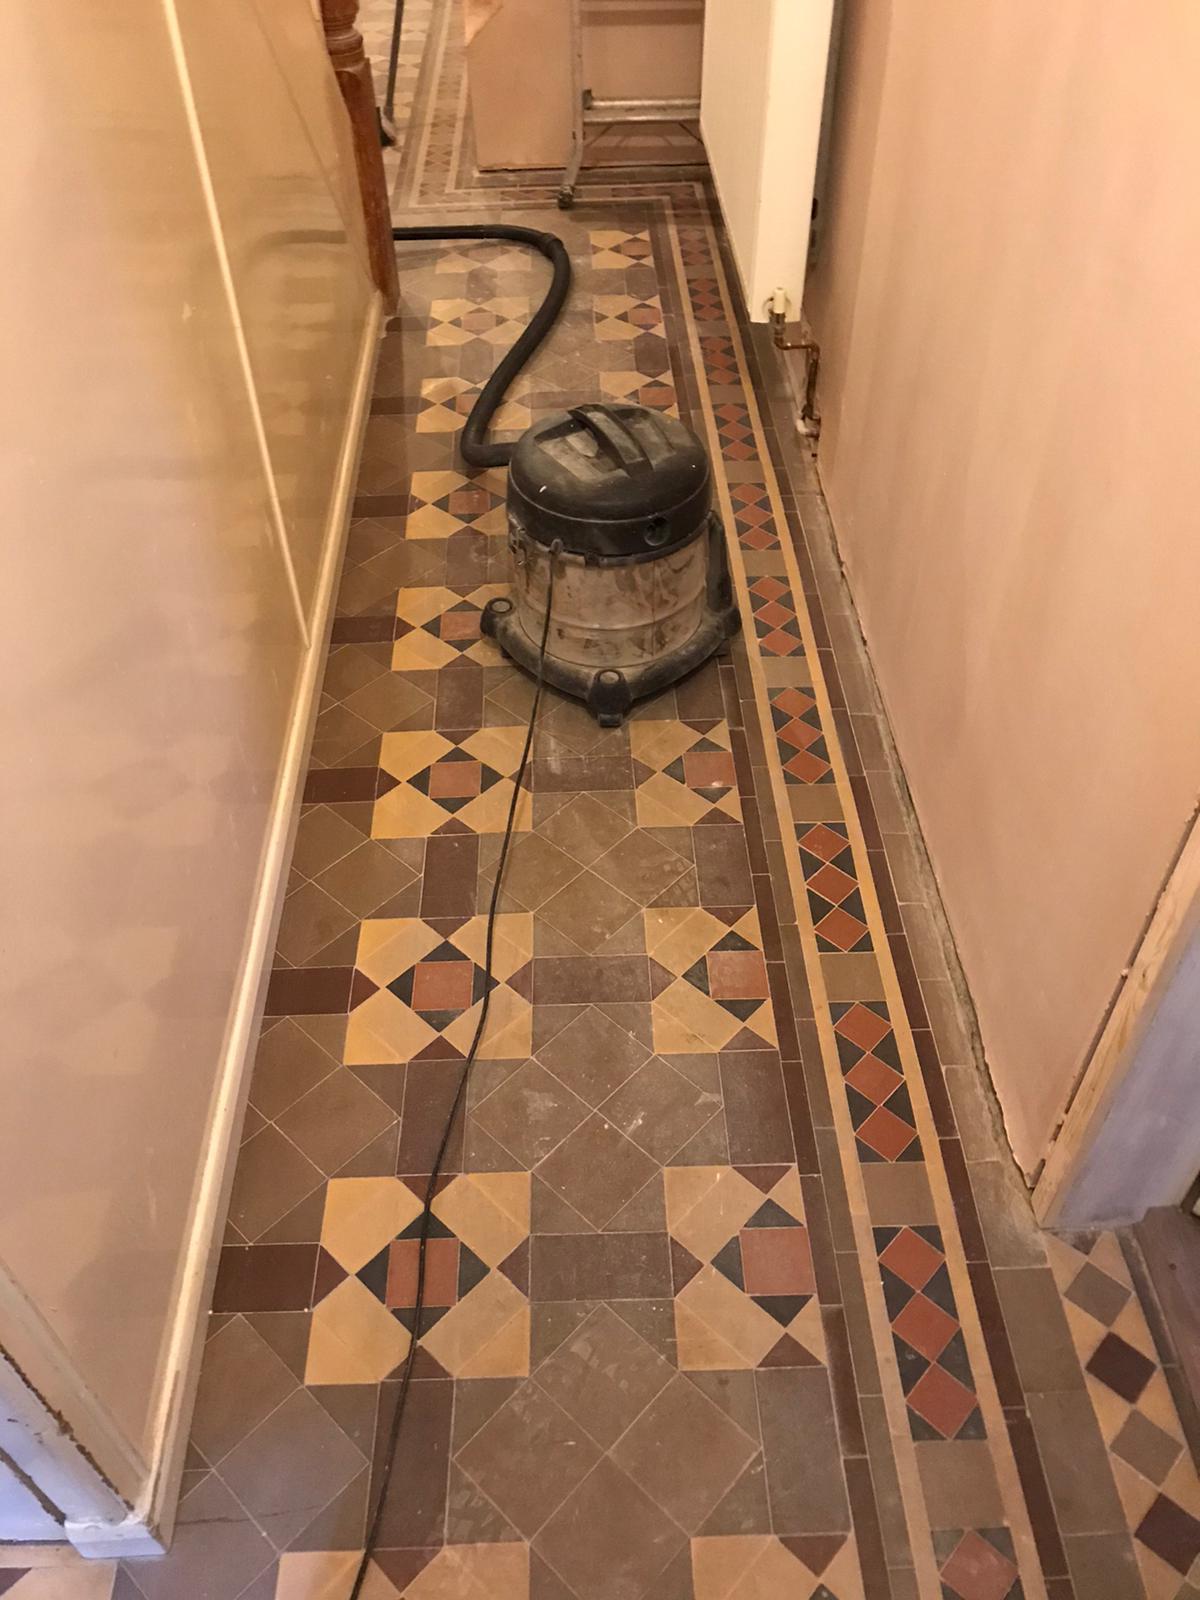
Three months later with replacement tiles now sourced we were given the go ahead to start the restoration. The first day’s focus was cleaning the original floor using very coarse 100-grit and 200-grit Diamond pads fitted to a rotary buffer machine and applied to the floor using a strong dilution of Tile Doctor Remove and Go to add extra cleaning power. Tile edges were given special attention using a flex machine fitted with small diamond grit pads.

 
Damaged Victorian Tiled Hallway Floor Before Restoration Preston

The floor was rinsed with water to remove the soil generated and this was followed up with an acid rinse using a 1:3 dilution of Tile Doctor Grout Clean Up. This last step in the cleaning process is especially recommend for old floors like this which don’t have a damp proof membrane and can suffer from efflorescence issues.


Replacing Damaged Victorian Tiles

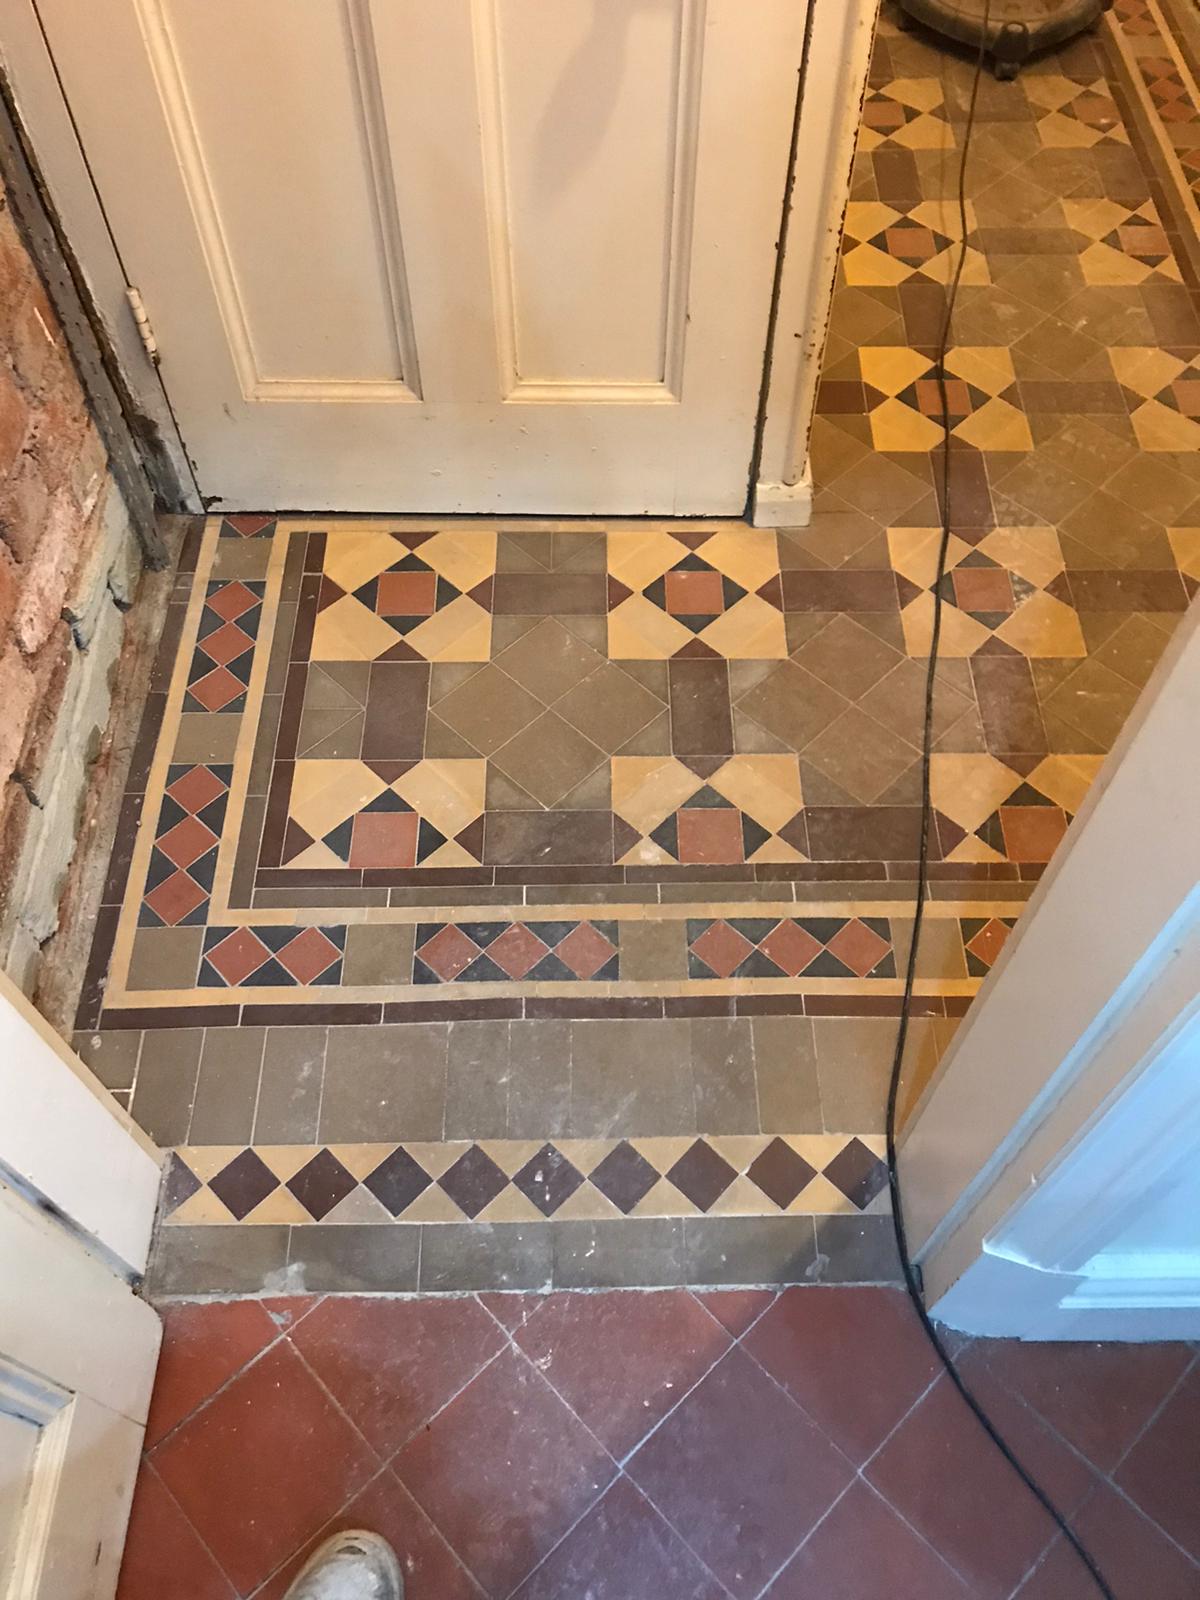
The next stage focused on repairing the floor and started by carefully knocking out all the broken and chipped tiles. We had previously estimated over 30 tiles needed replacing and so the client had bought two boxes, meaning I had plenty of spares to work with.

Before tiling however, the subfloor had suffered over the years and needed attention first. To deal with this the damaged areas were raked out, cleaned up and then back filled with rapid setting self-levelling screed from Mapie adhesives. Once the sub-base was fixed then we put the new tiles back in, they were not an exact match, about 5mm too short and lighter in tone, but the colour was pretty close.

Tiling an old Victorian floor like this can be a bit like dominoes as you move one out of place 2 decent ones come loose and then they also need refixing. Some of the tiles had hair line cracks in them and once they were loose, they just cracked in half. As such the 20 spare tiles that I thought were spare came into good use and I actually ended up using all of them. I could have done with a few more so it was decided to reset the last four broken tiles and grout them in. Luckily for me the client was very understanding about the nature of tile restoration and had accepted that there would be some imperfections and they were not expecting a new floor.

The Tiles were fixed down using Ultralite Rapid Flex (another product from Mapie) and then grouted using the same adhesive (not a grout, as they did not have grout back in the day, just cement and screed).

The floor was left this to cure overnight, and we came back the next day to finish the clean using a 200-grit diamond pad fitted to a buffing machine and lubricated with water, then one last acid rinse to get the tiles as clean as possible and remove any lingering grout haze. This last clean helps to blend the new tiles in with the original.


Sealing a Victorian Tiled Hallway Floor

Before applying a protective sealer, the floor was left to dry for a couple of days, the tiles need to be thoroughly dry before sealing or you can end up with a patchy appearance.

For this floor with no damp proof membrane, it was important to use a fully breathable sealer that will allow moisture to rise through the tile and evaporate at the surface, so Tile Doctor Colour Grow was chosen. This is a good choice for old floors like this as its fully breathable, head wearing, and it contains a colour enhancer that improves the overall appearance of the tile.

 
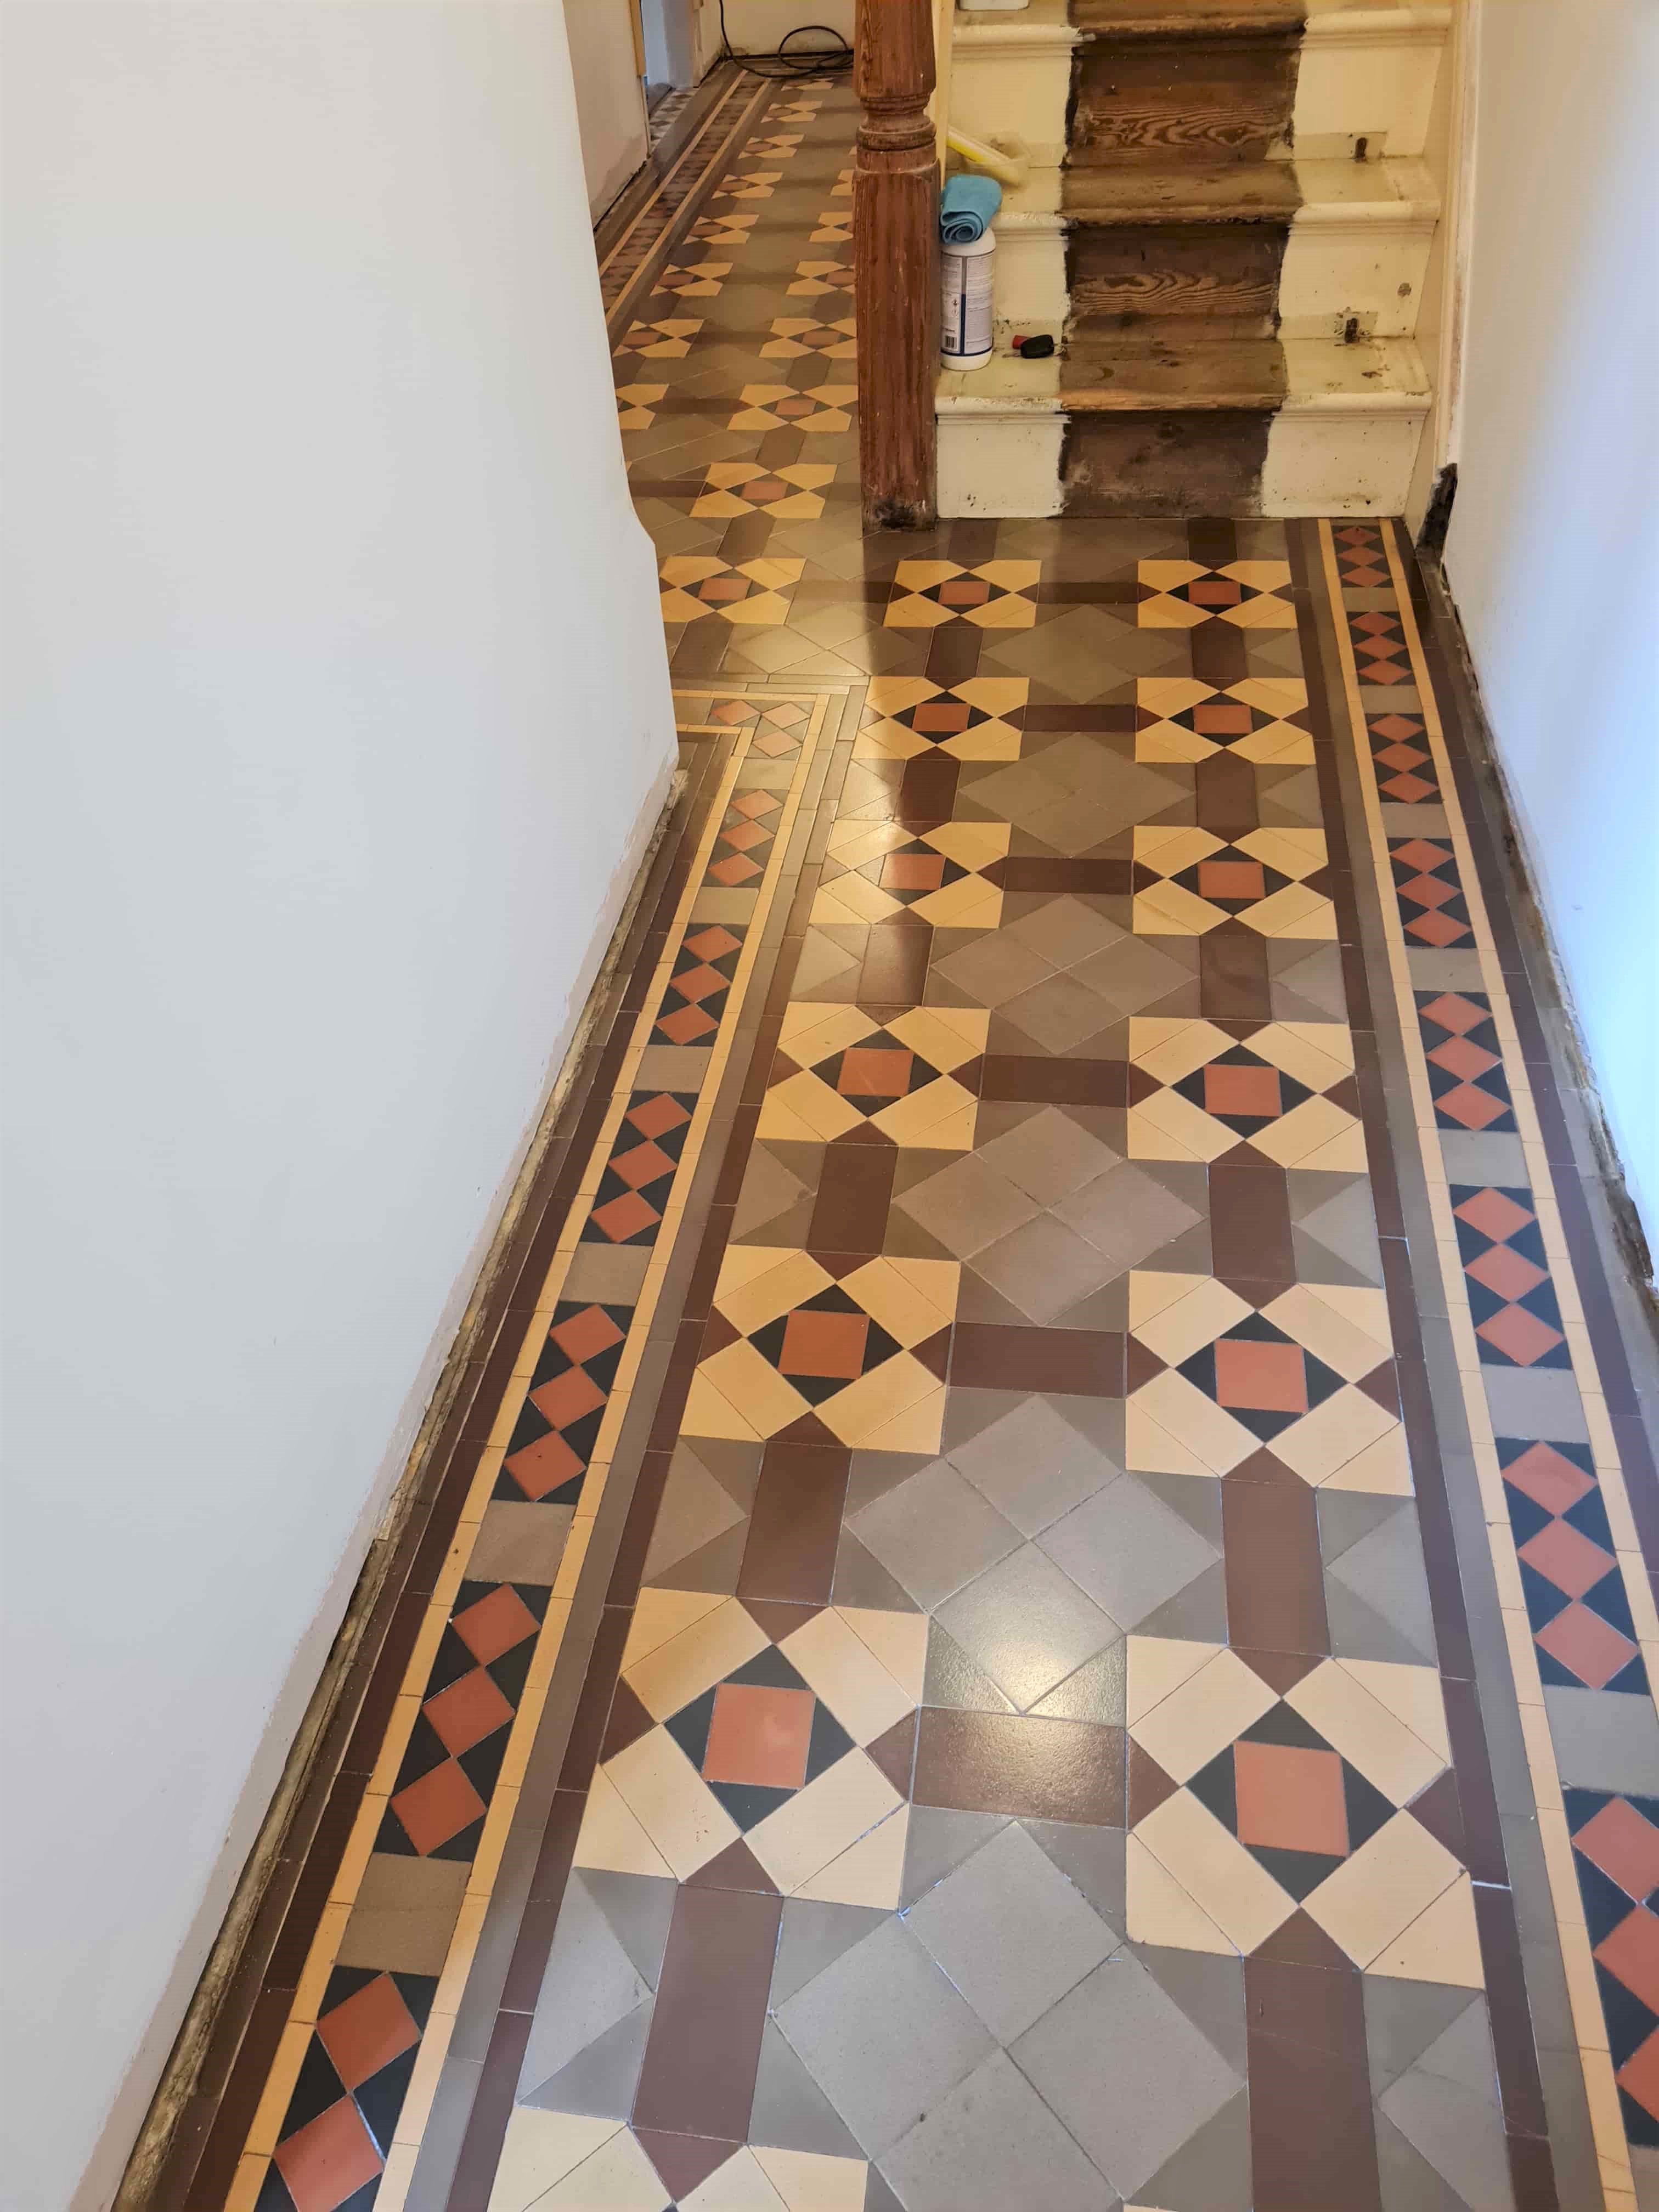
Damaged Victorian Tiled Hallway Floor After Restoration Preston

Three coats of Tile Doctor Colour Grow which is a fully breathable, colour enhancing sealer hat works by soaking into the pores of the tile protecting it from within. It has a matt finish, and it works really well with all clay tiles and is ideal for these types of floors.

 
Damaged Victorian Tiled Hallway Floor After Restoration Preston

You can probably spot the lighter coloured tiles in the after photos on this page, however it’s a very subtle difference and I think they have blended in quite well with the original. Certainly, my client was very pleased with the newly restored floor, its completely transformed from when we first visited the client, and the floor has now gained character and history. For aftercare we recommend Tile Doctor Neutral Cleaner, its an effective pH neutral product that is compatible with the new sealer.


Tuesday, December 14, 2021

Pros and Cons of Installing Cork Flooring

 Natural cork is gaining serious ground in the flooring world. Although it’s been used for thousands of years, modern day concerns for sustainable practices have brought it back in vogue. There are more than a few reasons to install cork flooring, but it’s not necessarily for everyone. If you're thinking about giving it a try, here are a list of pros and cons to help you make your final decision.

PROS

Hypoallergenic

Cork is naturally hypoallergenic, so if anyone in your home suffers from asthma or allergies, it's a great option. This intrinsic quality also means cork is mold and mildew resistant, and has some natural anti-microbial qualities that keep dust, dirt, and dander at bay.

Soft to the Step

The composition of cork is allows for a very soft step. Air-filled cells compress and release for a springy feel that's more comfortable than laminate or hardwood.

Beautiful

You may never have noticed this while popping wine bottles, but the natural swirls of cork grains are mesmerizing. They look especially cool under a layer of protective polish.

Retains Heat

Cork has a natural insulation ability that can help keep your home, and especially your flooring, warm. This cozy quality can contribute to lower heating bills in cold areas.

Sound Dampening

If you’ve ever pulled out carpet and padding in favor of laminate or hardwood, you’ve probably noticed the accompanying increase in noise. Suddenly, you’ll hear the click of the dog’s nails, the scrape of furniture, and every step made on the surface. Cork’s sound dampening qualities buffer the noises of household activity, like cooking, appliances, and watching TV.

Sustainability

Sustainability is one of the main factors of cork’s renewed fame. In contrast to wood that takes decades to grow back when it's felled, cork harms no trees in the harvesting process. In fact, cork is actually a bark, removed from cork trees that are around 20 years old. 70% of these trees grow in Portugal, with others from various spots around the Mediterranean. Many survive hundreds of years, even with the cork being removed up to 15 times during that span. This environmentally-friendly product makes a great choice for the conscientious consumer concerned about their carbon footprint.

Refinishing

Solid cork flooring can be sanded and restained for an updated look. This allows the flooring to last generations if it is properly sealed and maintained. It also adds to the sustainability aspect of not having to replace the flooring as often as other options.


CONS

Sensitive to Temperature

Going back to those cells full of air mentioned above, cork is a breathable material, meaning it expands and contracts. Temperature changes can bring this on and cause pesky issues, especially if your cork is installed without room for expansion. You can fight this problem ahead of time by acclimating your cork flooring for a few days prior to installation, and leaving a small gap around the edges when you lay it down. It's not too big a deal, though. The expansion isn’t worse than you'll see with traditional hardwood.

Trendy

Ten years ago, cork was a rarely-seen flooring option. Who's to say what the status will be ten years from now. If you like the look, go for it, but if you’re considering resale, remember it might not appeal to everyone.

Dents & Scratches

Like any wood, cork can incur damage in the form of dents and scratches. Dragging furniture, sharp heels, and pet nails can all contribute to scuffs and gouges. Damaged cork can be repaired, but it makes sense to at least consider the traffic patterns of your household when deciding where to install.

Fading

If your cork flooring will be in front of a window or glass door, you’re likely to see fading as a result of sunlight. If you cover part of a cork floor with rugs and mats you later move, this can eventually create an inconsistent look across a room.

Absorbs Liquid

One of the most common complaints about cork is that it absorbs liquids. A well-sealed floor can repel stains, but if the seal fails or is improperly applied, cork is fairly unforgiving when exposed to liquids. Many woods have this same quality, as evidenced by water rings on tables around the globe, but the absorbent nature of cork make it a questionable choice for kitchens and bathrooms, unless you’re willing to take the chance on discoloration and swelling.

Maintenance

As mentioned, cork flooring can handle some wear, but in order to protect your floor you'll need to seal it regularly. Daily upkeep involves sweeping or vacuuming, but cork isn’t considered low maintenance, because it can be difficult to clean more deeply. Oil-based cleaning products will stain the surface, so stick with water-based options and clean up spills immediately.

Durability

Some people consider durability to be a redeeming quality of cork because it holds up better than carpet or hardwood in most ways. However, sand and grit can easily damage the surface of cork. Plus it is very susceptible to dents caused by furniture legs and heavy objects.

While the list of cons may seem long, in reality all flooring options have characteristics that may make them unappealing. Before you commit, consider the area your floor material will be installed, how much daily use it will see, and what kind of maintenance will be required.


Source: www.DoItYourself.com

Thursday, November 4, 2021

6 Natural Stone Flooring Design Tips

Natural stone flooring can make a smashing accent. The subtle complexity of patterns formed by weather is both calming and engrossing, and they're right on trend with the recent movement toward design elements drawn from nature.

Stone flooring is also intrinsically durable, but it's important to pick the right kind for your needs and to maintain it carefully for the best long-term results. Here are some tips to get you on the right footing.

1. Subtle Styles are More Durable

The variety of stone styles available has exploded over the years. Manufacturers now provide a wide assortment of colors and finishes ranging from dull to shiny. The surface of the tile can also be smooth or rough, allowing you to select from a spectrum of more finished to more rugged.

Of course, your personal preference and existing decor will weigh heavily on your selection. If you want a boost of color, go for it! Consider, though, the value of more understated designs. Neutral tones are well-positioned to accommodate changing trends and future renovations.

2. Some are Easier to Keep Clean

Think about how hectic life in your household tends to be, too, and how much cleaning you like to do. A polished floor will reflect light and offers a snappy look, but it also shows dirt more than a rustic finish. Chips and scratches will also be more noticeable in a polished finish, possibly resulting in more repairs over the life of the flooring.

3. Stone Stays Cool

Similarly, the environment where you live can influence your decision regarding natural stone tiles. They're an ideal choice in warm climates because they stay cool and do not radiate heat.

Even in cooler climates, natural stone performs well, especially when paired with a warming option like radiant heating. It also offers water resistance, which is a great benefit for bathrooms, kitchens, pool rooms, and anywhere else where water is prevalent.

4. Cost Will Vary by Style

Natural stone flooring used to be a product found only in the homes of the elite, but an increase in international trade has made these options more accessible. Now the cost of these types of flooring is about the same, and sometimes even less, than wood flooring. Even if you don’t plan to stay in your spot for decades, natural stone flooring is an investment that typically pays you back by increasing the value of your home.

Marble can be the priciest, as its mesmerizing swirls are highly prized. Slate and granite are typically the cheapest options, with materials like travertine and limestone falling somewhere in between. As a general rule, the larger the tile size you choose, the more you should expect to pay.

5. Think Ahead to Minimize Your Cleaning

The texture you choose may have different maintenance needs, but in general, natural stone flooring is easy to care for with simple, regular upkeep and occasional deep cleaning.

Most stones will just need a sweep or soft vacuuming a few times a week, and occasional mopping to collect dust and dirt. Don't use any harsh chemicals, and avoid acidic cleaners such as vinegar—these can all result in discoloration or damage.

For a deeper clean, use a mild vegetable soap and water or a cleaner specifically made for your type of stone. Clean up spills promptly and apply cleaner directly to any stains as soon as possible.

Rugs near entryways can help minimize the dirt tracked onto the floors. You may want to start a new habit of removing your shoes at the door to make cleaning easier. Furniture cushions on the legs of couches and chairs can help you avoid scratching your stones.

6. Even Installation is Essential

Perhaps the most important tip regarding natural stone flooring is to make sure it's properly installed. Flooring that's not completely level will be much more likely to buckle, shift, and crack over time. That can result in an expensive and time-consuming repair.

Whether you install the natural stone flooring or have a professional tackle the task, watch for slopes and uneven sections that could affect the end result.


Source: www.DoItYourself.com
Wednesday, September 22, 2021

Can I Apply a Polyurethane Finish to My Laminate Floors?

Laminate floors are often used as an affordable wood alternative because they have the same look and feel as hardwood. Laminate flooring is usually created with a very thin layer of real wood placed between layers of resin. Many homeowners find laminate floors more durable and easier to care for than actual hardwood floors.

The look of the two materials is where the similarities end, however. When it comes to finishing laminate flooring, you don't want to treat it the same way you would hardwood.

Putting Polyurethane on Laminate

Applying a coat of polyurethane is a common way to finish hardwood floors—it keeps moisture out of the cracks and grain of the wood, which prevents swelling and preserves the natural look of the hardwood. Polyurethane sticks well to real wood and creates an invisible layer of protection to the floors to protect them against scratching, staining, and wear. However, polyurethane doesn't have a similar effect on laminate flooring.

While you can add a layer of polyurethane to laminate flooring, it's really not the best material to use. Polyurethane doesn't stick well to laminate floors, which are already covered in resin because of the way laminate is made. You can't sand down laminate in order to get the polyurethane to stick, so there's no way to improve the cohesion between the two. Polyurethane simply isn't a good option for laminate floors, but you can seal them in other ways to keep them looking great for as long as possible.

Sealing Laminate Floors

To prevent moisture from seeping in between the cracks of laminate floors, you can always use a crack sealer. Look for sealers that are specifically designed to work on laminate so you can ensure that you get a strong bond between the laminate and the sealer you use. You'll apply this directly to the cracks between laminate floorboards or tiles. Wipe away the excess to give your project a neat, finished look. You want to allow the sealant to settle and dry for 24 hours before you use your floors.

You can also get a special laminate coating to apply directly to your laminate floors. These coatings are designed just for laminate to preserve the look and help prevent scratches and stains.

Touching Up Your Floors

If your laminate floors do become dull or damaged, you can always try to repair these issues with a touch-up kit. Get a special laminate touch-up kit and follow the directions to apply laminate restorer directly to the problem area.

Preserving Laminate

By its nature, laminate flooring stands up to ordinary wear and tear. It's low-maintenance, easy to clean, and withstands heavy foot traffic and daily use. Because of the way it's made, laminate flooring doesn't need any additional treatment after it's been put in place. So you don't actually have to seal your laminate floors or give them any additional treatment. Even without any extra care, laminate floors will stay beautiful and withstand daily use far better than most hardwood floors.

Adding sealers and special coatings to laminate floors can actually make them highly slippery, which is a hazard. Most laminate flooring isn't designed to be sealed and doesn't need to be sealed. The resin coating that's already used on laminate provides plenty of protection against scratches, stains, and wear.

If you see that your laminate floors are looking dull and want to give them extra shine, try a specialized laminate floor cleaning product. These products are designed to restore the sine to laminate and fix dull areas to make your floors look like new again.

You can add polyurethane to your laminate floors, but there’s no reason that you'd want to! It won’t work all that well, and there are much better ways to get the pretty, gleaming look you want for your laminate floors, whether they’ve been damaged or simply dulled over time.


Source: www.DoItYourself.com

Wednesday, September 8, 2021

South East London Tiler Demonstrates how to Restore a Damaged Victorian Steps

This client in Chislehurst wanted to create a better first impression as their front Victorian tiled step looked tired and had been damaged by long term settlement in the sub floor. They ideally wanted to keep the original tiling but thought it would have to be replaced. The problem was that one section of the base had dropped and the tiling had cracked either side of this.

 
Victorian Tiled step Before Repair and Restoration Chislehurst

After visiting the property, I told the client that it could be repaired with matching reproduction tiles and fully restored. My client was happy with this suggestion, and they agreed to go ahead with my quote on that basis.

 
Victorian Tiled step Before Repair and Restoration Chislehurst


Repairing a Victorian Tiled Path and Step

Our workload has been busy this year so I returned as soon as I could and started by carefully lifting the tiles from the dropped section and all the cracked tiles that had been affected. Before retiling I had to underpin the original base and raise the level with new concrete. Once this was done, I left the property for a few days so the new concrete base could cure fully. When I returned to the job, I set about fixing the replacement reproduction tiles in place laying them down in the same pattern as before, again these needed time for the adhesive to set so I left the property once completed.

 
Victorian Tiled step During Repair and Restoration Chislehurst


Restorative Cleaning of Victorian Tiles

I returned again a few days later to clean and seal the tiles. I first used Tile Doctor Remove and Go to remove any ground in dirt and old sealers that may be on the original tiles. As these tiles were outside and open to the elements, I needed to remove some blackening from the tiles and used Tile Doctor Patio and Brick Driveway Cleaner to get that off. I put this on the tiles and let it dwell for a while, adding water to it to keep the tiles wet. It was a small area so to help lift the dirt out of the tile I scrubbed the tiles by hand. Once done the whole area was rinsed with more water and the soil extracted with a wet vacuum. The next step was to bring up the appearance of the tiles and remove further dirt with the application of a 100 and then 200-grit milling pad. These pads are applied with water for lubrication and do a great job of deep cleaning the tiles and hone up the face of the tile to ease the sealing process. It was a small area, and the weather was good so it wasn't too long before I could move onto sealing.


Sealing a Victorian Tiled Path and Step

When the tiles were dry, I applied two coats of Tile Doctor Colour Grow and then once this had dried, I applied a coat of Tile Doctor Stone oil. Both these sealers are impregnators, which soak into the pores of the tile to enhance the appearance and natural colours of the tiles.

 
Victorian Tiled step After Repair and Restoration Chislehurst

It took a half few days to fully restore the path, fortunately Chislehurst is very close to my base in Bromley and so I was able to do some other work in between. The step looked new afterwards and my client was very impressed with the completed job.


Sunday, September 5, 2021

9 Ways You're Ruining Your Wood Flooring

You’ve spent the time, the money, and the effort putting in that new hardwood floor—and it shows! Protect your investment by following a few simple rules, and keep that floor looking showroom-worthy for years to come.

1. An Un-Welcome Entry

You’re probably ready to invite friends and neighbors over to ogle your newest project, but before you do, roll out the Welcome Mat. Literally. This simple thing is more than a gesture to let your guests know they’re welcome in your home. It’s also a reminder to wipe your feet before coming inside. Besides the obvious dirt and grime that can enter your home, smaller pieces of grit can get ground in, causing your floor to age prematurely. And who wants to look older than they are?

2. No Shoes, No Entry!

Yes, we know. Wear and tear is bound to happen, but some things cause wear and tear to happen much quicker—high heels, for instance. So, we’d like to offer a suggestion. For some, it might sound extreme, but it’s a common custom in many cultures around the world. If you’re comfortable doing so, now's the time to institute the “no shoes in the house” rule. It’s probably more convenient if you live in a climate where "slippahs" are the norm, but it’s still a good practice in general.

Aside from the regular foot traffic and high heels that can wear down the floor, keeping shoes out of the house also prevents the possibility of tracking dangerous chemicals like arsenic or lead into your home. These chemicals are sometimes present in the soil of homes near refineries. Check with your local university extension services for information on how to test the soil for these chemicals.

3. Using Wrong Floor Cleaners

They may all sound alike, but they aren’t all made the same. The wrong cleaner can contain abrasives, waxes, or harsh chemicals, which can either strip or cause a waxy buildup that can dull the floor. Verify with the installer or manufacturer what types and methods of floor cleaning are best for your particular product.

4. Unprotected Furniture Feet

Attaching felt pads under the feet of your furniture is a must. Even small adjustments made to straighten out the coffee table or push a sofa away from the wall are enough to mar the surface. These pads are inexpensive and attach to the bottom of the feet with a peel-and-stick adhesive side to keep them in place.

5. Too Much Sunlight

Just like you don’t want the sun’s rays to hit your skin without proper UV protection, the same goes for your floor. Direct sunlight can fade the finish and cause discoloration, which becomes obvious when you move the furniture or rugs to expose those previously protected sections. Keep direct sunlight to a minimum by closing blinds or drapes during those times of the day. And consider rearranging furniture now and then to allow you to clean the neglected spots and hidden areas and offer shade to those areas that were once exposed.

6. Wrong Rug Pad

A nice area rug adds warmth and coziness to a room in addition to protection from sun exposure and foot traffic. Keep you and your guests safe by installing non-slip padding underneath. Rubber-backed mats have great non-slip qualities, can dull the finish. Consider rug pads that contain a combination of felt and rubber to keep those rugs from moving around and causing tripping hazards.

7. Improper Vacuum Attachment

The beater brush used for rugs is—ahem—for rugs. The floor attachment is a less aggressive cleaning method that sucks up the never-ending amount of grit and dust bunnies that seem to escape no matter how much sweeping and vacuuming we do.

8. Pet Nails

It’s not just the nails of large, heavy dogs that can scratch up the floor. Your little fur babies might not have the weight behind them, but they have claws, and if they can scratch up your skin, they can do the same to the floor. Keeping those nails trimmed reduces the likelihood of damage while increasing your sanity by reducing the infernal clicking of their toes when they walk around at night!

9. Put the Brakes on Those Wheels

The convenience of a home office has never been so important as it has been in the past year. A dedicated space must include the all-important rolling office chair. Put a rug or padded mat under that chair to keep scratches at bay. Trust us—we’ve already suffered through the heartache of this tragedy. Please learn from our mistake.

With your new floor in place, keep wear and tear to a minimum by following these simple rules so you can enjoy the new look without worrying about every new scratch that happens.


Sunday, August 15, 2021

Adding Value to your Victorian Property with Floor Tile Renovation

We were contacted by a customer in West Kirby who needed help renovating a Victorian tiled hallway in a house they had just purchased. Kirby is a desirable seaside location North of Heswall that expanded with the arrival of the railway in 1848. The railway brought a demand for property and so it’s not unusual to find housing stock in this area dating back to the Victorian era.

 
Victorian Tiled Hallway Before Renovation West Kirby

The Victorian tiles at this property appear to have been neglected by the previous owner and were now looking very dull and marked by paint from decorating; all the colours looked washed out and the floor was now looking very unappealing.

 
Victorian Tiled Hallway Before Renovation West Kirby

The good news however is that this problem is not uncommon and with a deep clean and a fresh sealer applied it can be transformed. I gave the owner a quote which was accepted a date agreed for my return to do the work.

 
Victorian Tiled Hallway Before Renovation West Kirby


Deep Cleaning a Victorian Tiled Hallway Floor

On the first day the floor was sprayed with a neat solution of Tile Doctor Remove and Go which is a powerful alkaline cleaning and stripping agent used to remove old seals and paint. The solution was left to dwell for about twenty minutes so it could soak in and get to work. It was then scrubbed into the tiles using a coarse 200-grit pad fitted to a heavy buffing machine. Water was then added to the floor for lubrication and the soils released from the pores of the tile during scrubbing was removed by with a wet vacuum.

To treat the stubborn paint stains and remains of what I suspect was carpet adhesive a hand scraper and wire brush was used, this was made easier by the Remove and Go which had softened the paint etc.

The next stage was to give the Victorian tiles a mild acid wash using Acid Gel which is applied to the floor, scrubbed in, and rinsed off with a little water then extracted using the wet vacuum. We always recommend an acid wash for old floors like these as it will counter any efflorescent salts resident in the tiles and helps to remove other mineral contaminates and old grout that can mask the true beauty of the tiles.


Sealing a Victorian Tiled Hallway Floor

I left the tiles to dry out for two days before returning to apply the sealer, first checking it was dry by testing for moisture in various places with an electronic damp tester. It’s not a good idea to apply a sealer to a damp floor so we always check first.

Satisfied the floor was dry, I started applying a coat of Tile Doctor Colour Grow which is a colour enhancing impregnating sealer that helps to bring out the true colours in the tile. This was allowed to dry for thirty minutes and then followed up five coats of Tile Doctor Seal and Go Extra which is a breathable sealer that leaves a lovely satin finish and builds on the protection.

 
Victorian Tiled Hallway After Renovation West Kirby

Once done the Victorian hallway tiles looked so much cleaner and healthier. It was quite a transformation and the new sealer had given the floor a nice low sheen shine which the customer was very happy with.

 
Victorian Tiled Hallway After Renovation West Kirby

For aftercare cleaning I left them with a bottle of Tile Doctor Neutral Cleaner which is specially formulated for cleaning sealed tiles. We don’t recommend tile cleaning products you find on supermarket shelves as the are usually too strong and can strip a sealer off the floor prematurely. If your choosing another product to clean your floor always read the label to make sure its compatible.


Friday, July 23, 2021

Cheshire Expert Details how to Remove Mould and Completely Renovate a Ceramic Tiled Shower Cubicle

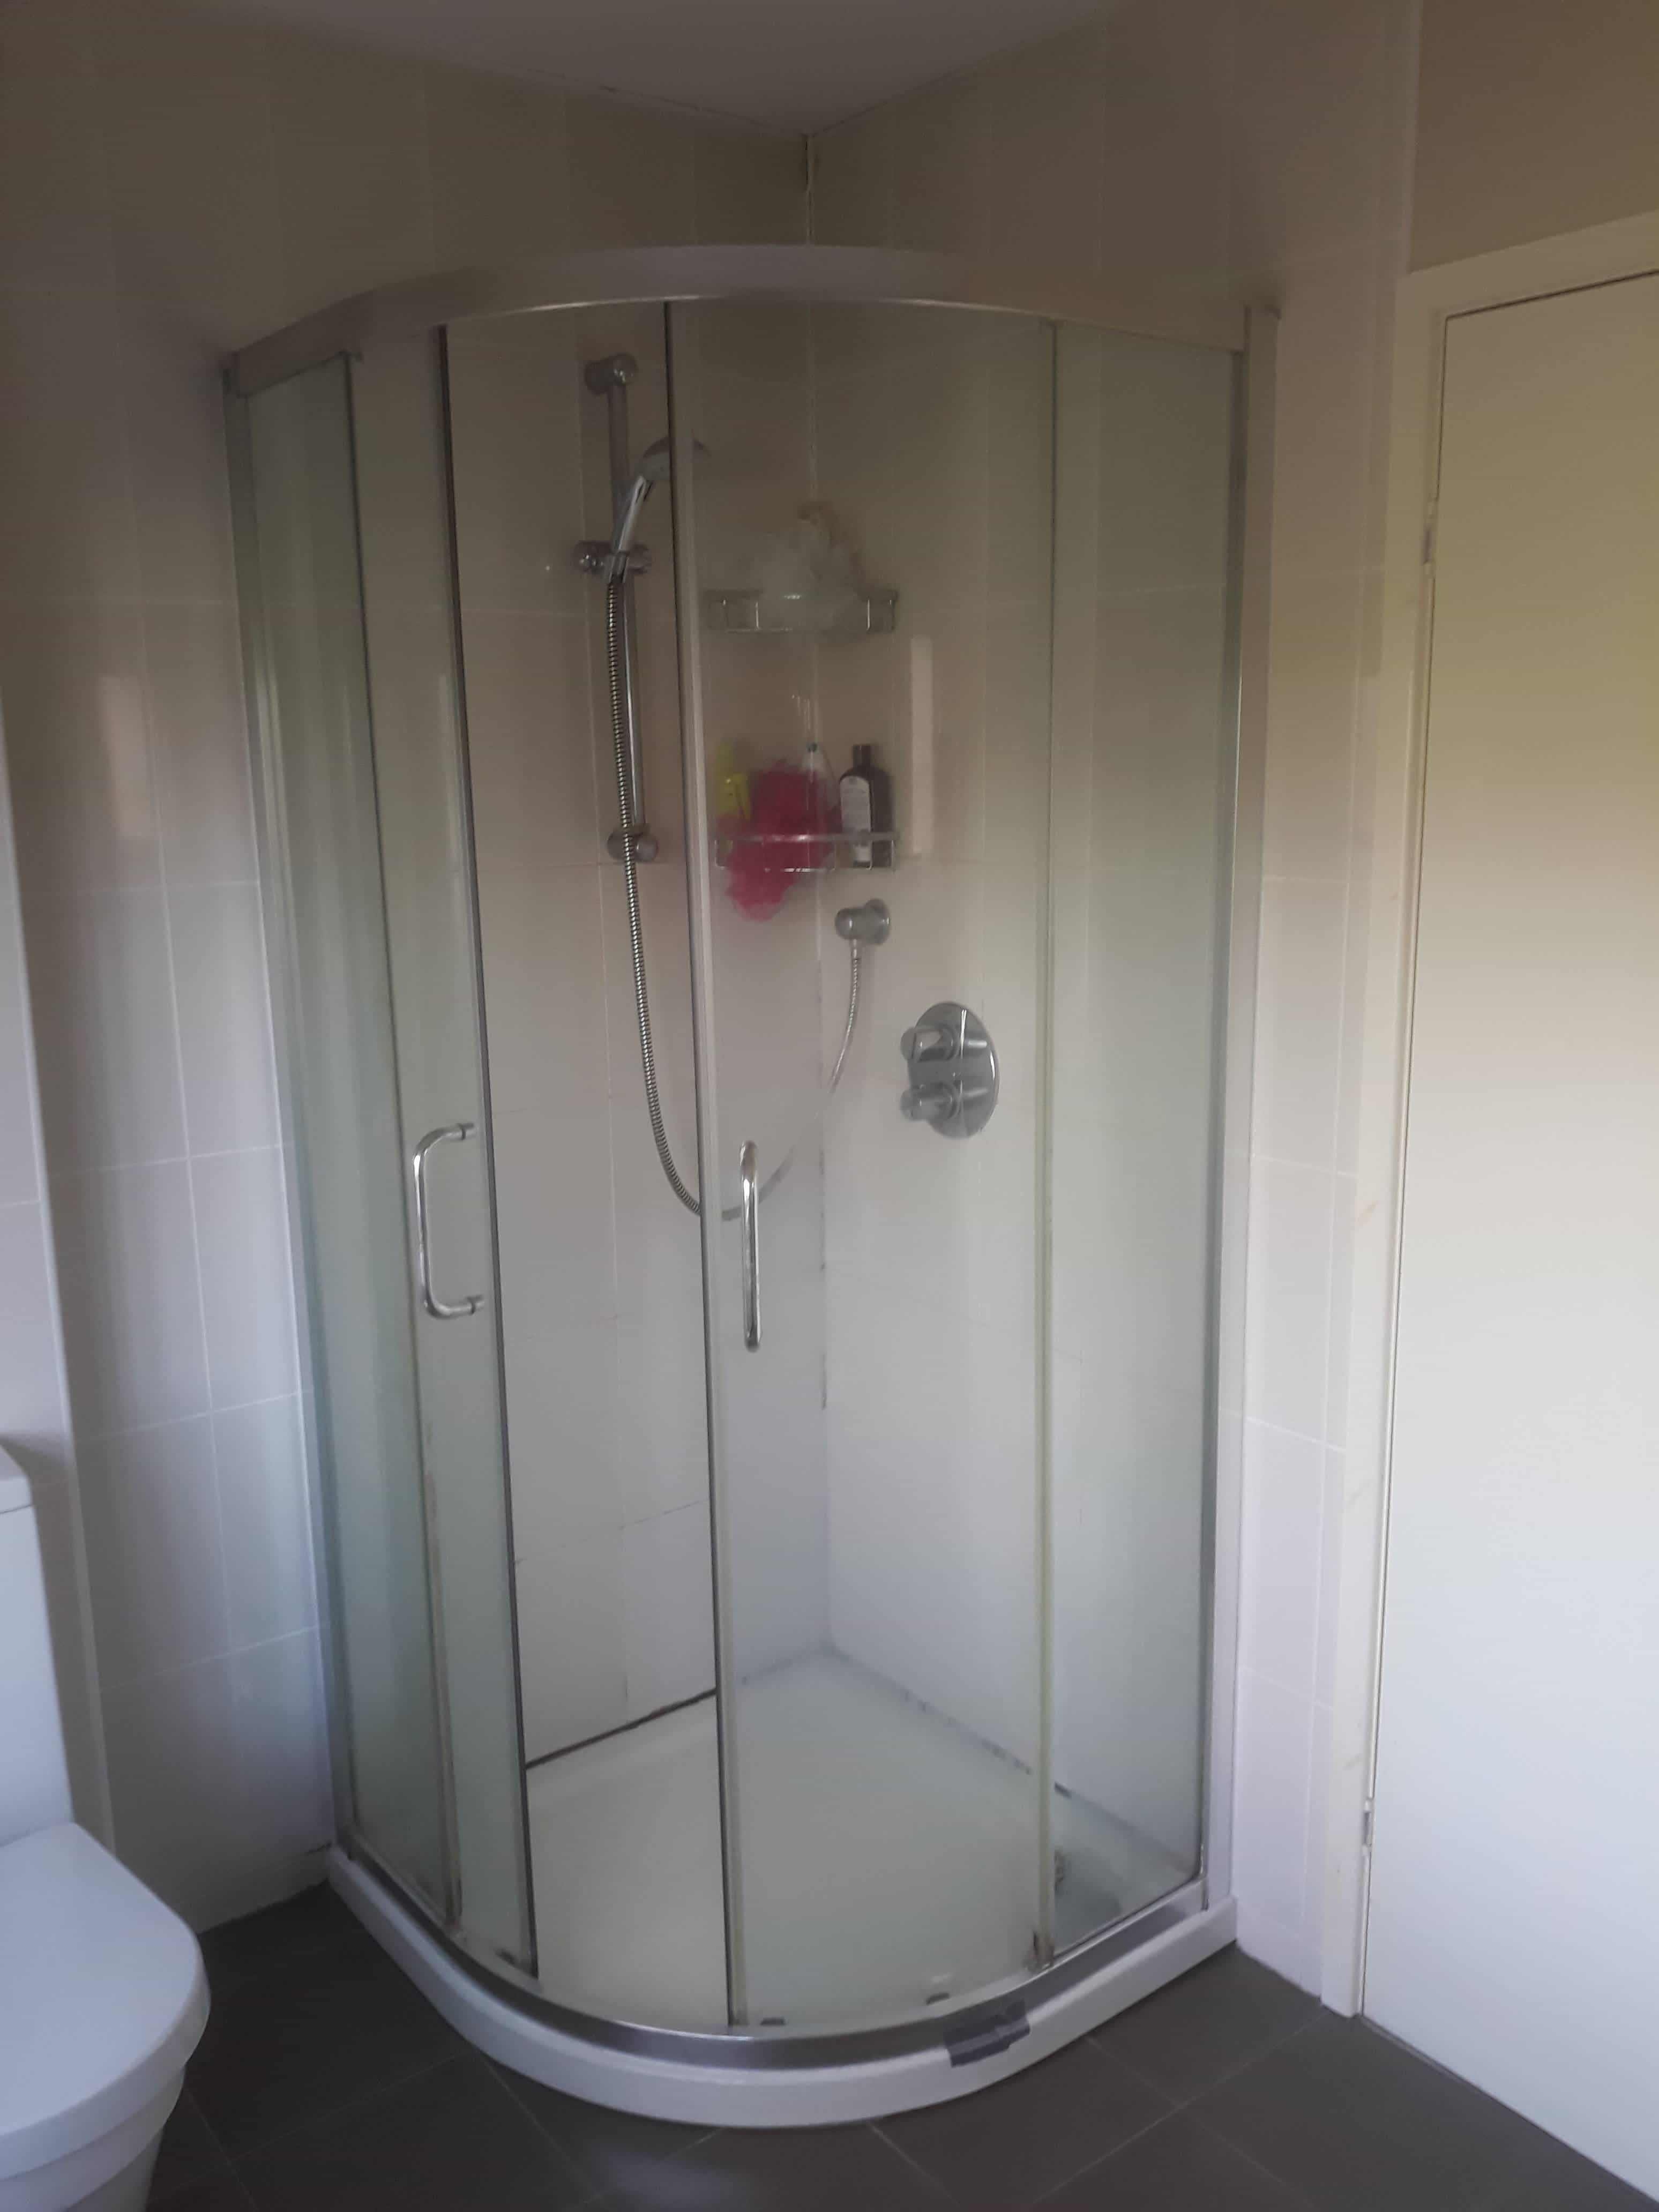
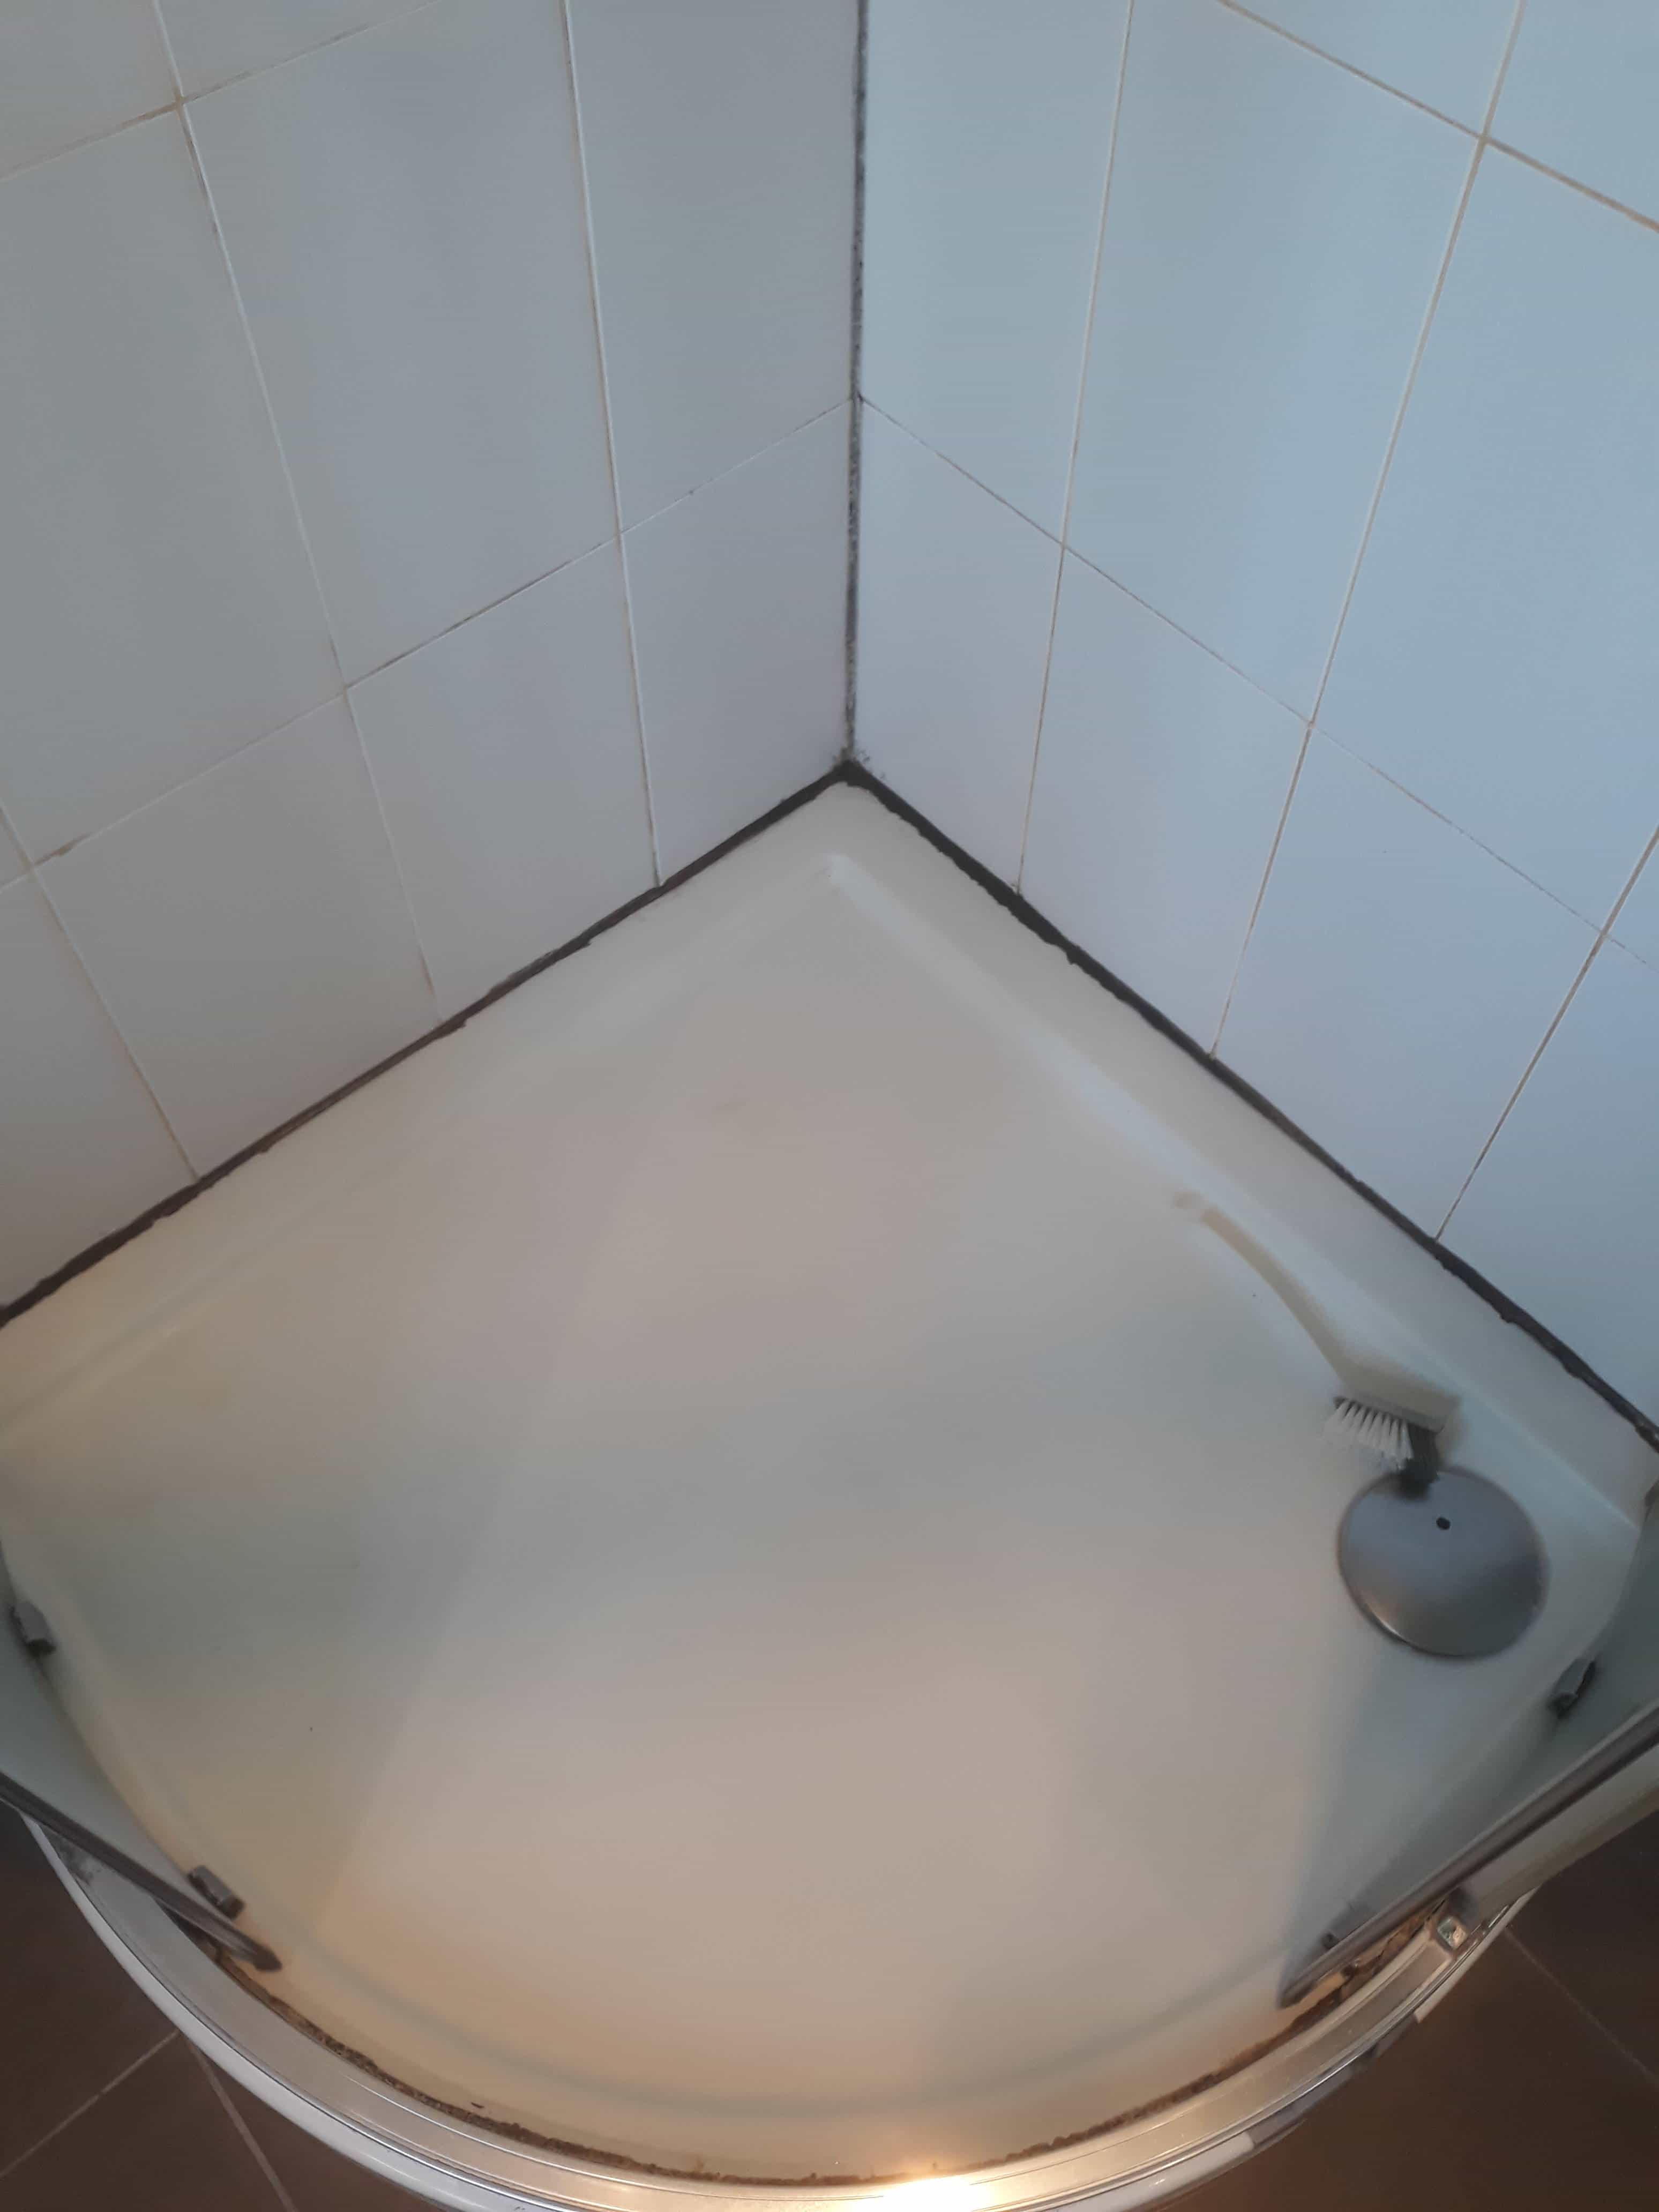
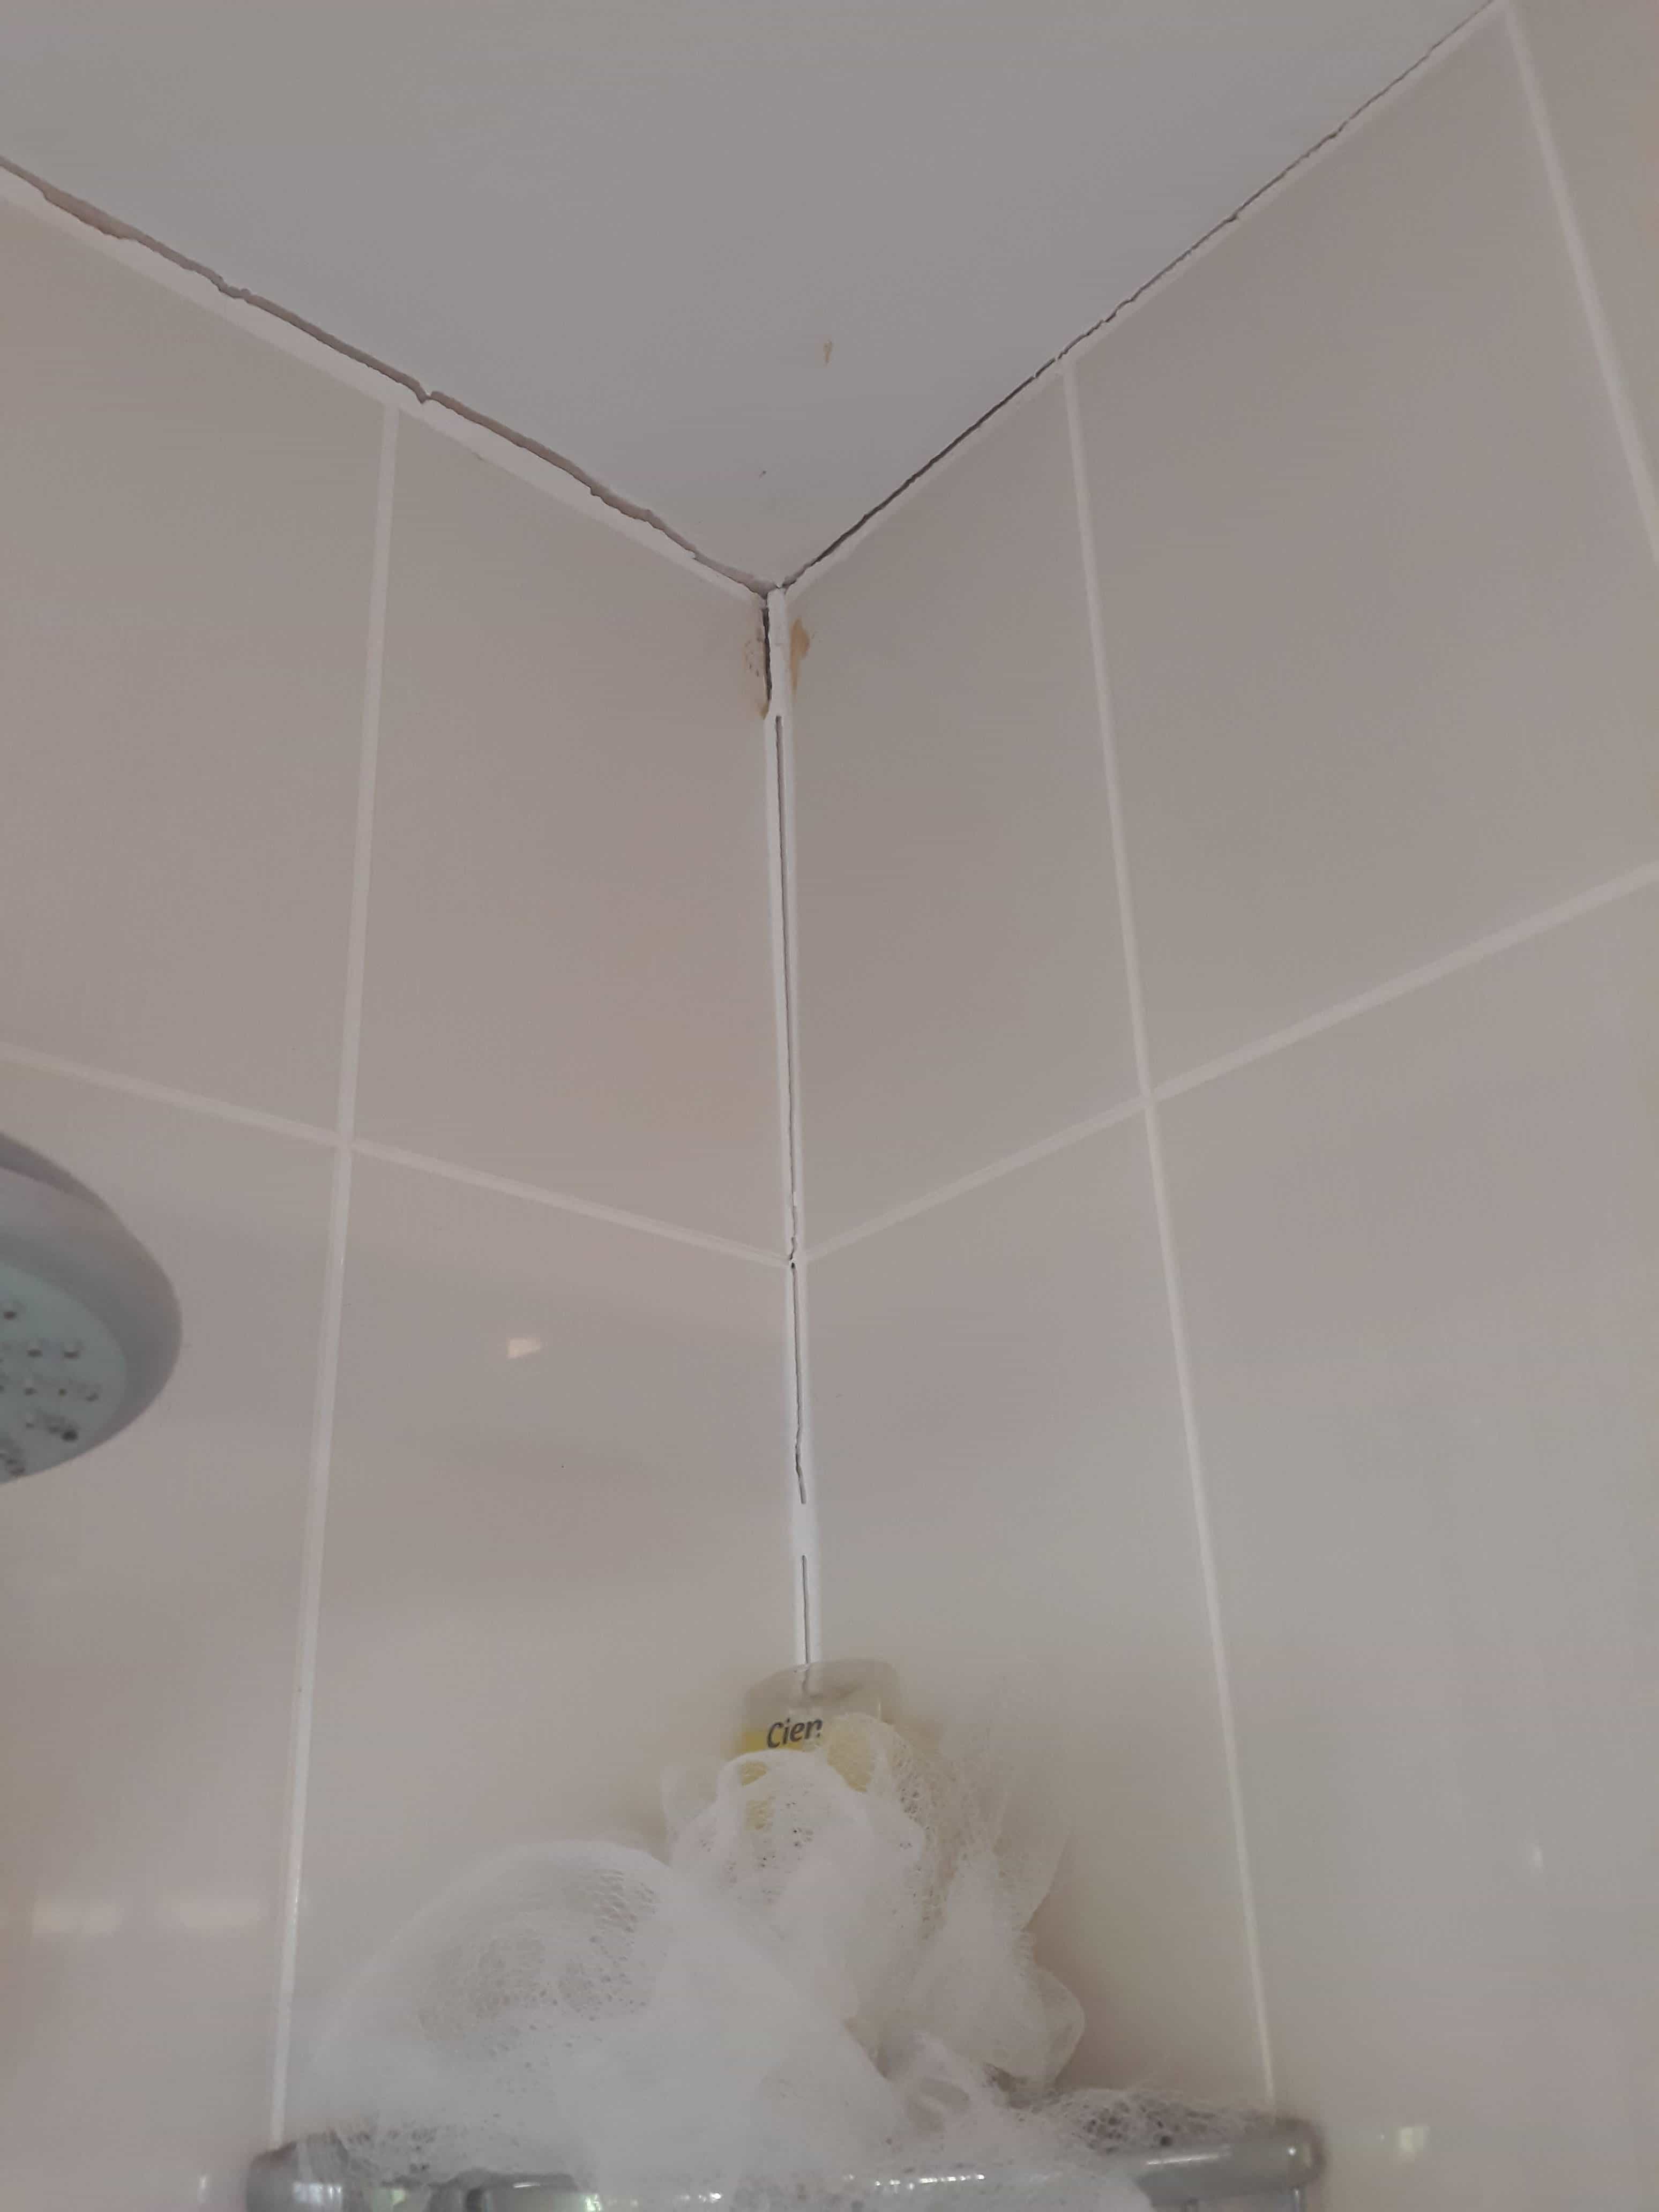
I was asked by a Chelford homeowner (near Alderley Edge) to renovate their Ceramic Tiled Shower Cubicle which had an unsightly mould problem. They say pictures speak louder than words, so I’ve added some photos on this page which show how the grout and silicone sealant had become discoloured with mould over the ten years since it was installed.

 
Mouldy Ceramic Tiled Ensuite Shower Cubicle Before Renovation Chelford Mouldy Ceramic Tiled Ensuite Shower Cubicle Before Renovation Chelford

Mould likes damp warm areas and shower cubicles make a perfect habitat for it, grout especially can be a problem due to its cementitious rough surface that mould can get a grip on. In this case the ventilation in the ensuite was inadequate and ideally there should have been an extraction vent over the cubicle itself. My advice in these situations is to leave doors and windows open after showering and to run the cold water afterwards.

 
Mouldy Ceramic Tiled Ensuite Shower Cubicle Before Renovation Chelford Mouldy Ceramic Tiled Ensuite Shower Cubicle Before Renovation Chelford


Removing Mould from a Ceramic Tiled Shower Cubicle

To renovate the Tile and Grout I sprayed on Tile Doctor Duo-Clean which was left to soak into the grout line for ten minutes before being scrubbed in by hand. The Ceramic tiles cleaned quite easily but the grout had to be scrubbed hard and needed several applications before I was satisfied.

The whole shower needed treating in this fashion and once rinsed and dried I set about stripping out all the old silicone sealant that had also been badly affected by mould. This is done carefully using a sharp knife. I removed the debris and moved onto applying a fresh mould resistant silicone sealant.


Sealing a Ceramic Tiled Shower Cubicle

Last step before leaving was to spray the Ceramic tile and especially the Grout and Silicone with a can of Tile Doctor Aerosol Grout Sealer. This doesn’t last as long as other sealants in the Tile Doctor range but its quick to apply, especially on wall tiles. The sealer ensures water will run straight off the walls into the shower tray and it also makes the shower easier to clean later.

 
Mouldy Ceramic Tiled Ensuite Shower Cubicle After Renovation Chelford Mouldy Ceramic Tiled Ensuite Shower Cubicle After Renovation Chelford

The shower looked like a new installation by the time I had finished, and my client was delighted with the transformation. He was also thankful that I had replaced the silicone, this was something he had considered doing himself but applying it does take practice and you can get yourself into a mess. 


Tuesday, July 20, 2021

9 Ways You're Ruining Your Wood Flooring

You’ve spent the time, the money, and the effort putting in that new hardwood floor—and it shows! Protect your investment by following a few simple rules, and keep that floor looking showroom-worthy for years to come.

1. An Un-Welcome Entry

You’re probably ready to invite friends and neighbors over to ogle your newest project, but before you do, roll out the Welcome Mat. Literally. This simple thing is more than a gesture to let your guests know they’re welcome in your home. It’s also a reminder to wipe your feet before coming inside. Besides the obvious dirt and grime that can enter your home, smaller pieces of grit can get ground in, causing your floor to age prematurely. And who wants to look older than they are?

2. No Shoes, No Entry!

Yes, we know. Wear and tear is bound to happen, but some things cause wear and tear to happen much quicker—high heels, for instance. So, we’d like to offer a suggestion. For some, it might sound extreme, but it’s a common custom in many cultures around the world. If you’re comfortable doing so, now's the time to institute the “no shoes in the house” rule. It’s probably more convenient if you live in a climate where "slippahs" are the norm, but it’s still a good practice in general.

Aside from the regular foot traffic and high heels that can wear down the floor, keeping shoes out of the house also prevents the possibility of tracking dangerous chemicals like arsenic or lead into your home. These chemicals are sometimes present in the soil of homes near refineries. Check with your local university extension services for information on how to test the soil for these chemicals.

3. Using Wrong Floor Cleaners

They may all sound alike, but they aren’t all made the same. The wrong cleaner can contain abrasives, waxes, or harsh chemicals, which can either strip or cause a waxy buildup that can dull the floor. Verify with the installer or manufacturer what types and methods of floor cleaning are best for your particular product.

4. Unprotected Furniture Feet

Attaching felt pads under the feet of your furniture is a must. Even small adjustments made to straighten out the coffee table or push a sofa away from the wall are enough to mar the surface. These pads are inexpensive and attach to the bottom of the feet with a peel-and-stick adhesive side to keep them in place.

5. Too Much Sunlight

Just like you don’t want the sun’s rays to hit your skin without proper UV protection, the same goes for your floor. Direct sunlight can fade the finish and cause discoloration, which becomes obvious when you move the furniture or rugs to expose those previously protected sections. Keep direct sunlight to a minimum by closing blinds or drapes during those times of the day. And consider rearranging furniture now and then to allow you to clean the neglected spots and hidden areas and offer shade to those areas that were once exposed.

6. Wrong Rug Pad

A nice area rug adds warmth and coziness to a room in addition to protection from sun exposure and foot traffic. Keep you and your guests safe by installing non-slip padding underneath. Rubber-backed mats have great non-slip qualities, can dull the finish. Consider rug pads that contain a combination of felt and rubber to keep those rugs from moving around and causing tripping hazards.

7. Improper Vacuum Attachment

The beater brush used for rugs is—ahem—for rugs. The floor attachment is a less aggressive cleaning method that sucks up the never-ending amount of grit and dust bunnies that seem to escape no matter how much sweeping and vacuuming we do.

8. Pet Nails

It’s not just the nails of large, heavy dogs that can scratch up the floor. Your little fur babies might not have the weight behind them, but they have claws, and if they can scratch up your skin, they can do the same to the floor. Keeping those nails trimmed reduces the likelihood of damage while increasing your sanity by reducing the infernal clicking of their toes when they walk around at night!

9. Put the Brakes on Those Wheels

The convenience of a home office has never been so important as it has been in the past year. A dedicated space must include the all-important rolling office chair. Put a rug or padded mat under that chair to keep scratches at bay. Trust us—we’ve already suffered through the heartache of this tragedy. Please learn from our mistake.

With your new floor in place, keep wear and tear to a minimum by following these simple rules so you can enjoy the new look without worrying about every new scratch that happens.


Source: www.DoItYourself.com
Friday, July 9, 2021

How to Refinish Marble Tiles

 Marble tiles make a beautiful accent to any home. However, they need to be regularly cleaned and buffed to bring out the natural beauty of their finish. Like any other flooring material, they are susceptible to scratches and discoloration that may dull the finish. It is easy to refinish marble tiles using a few simple tools and cleaning products that you can purchase at the hardware or home improvement store. Remember to wear appropriate clothing and to use safety equipment such as gloves and goggles when handling chemicals and power tools.


What you’ll need

  • Variable speed angle grinder
  • Buffing compound and polyester buffing pad
  • Water
  • Detergent
  • Sponge
  • Tile or marble stone sealer
  • Terry cloth towel


Step 1 – Clean the Marble Tiles

Clean the marble tiles using water and mild detergent. Agitate the area using a soft sponge to safely remove dirt, oil and stains on the surface. Let the surface dry before proceeding.

Step 2 – Buff the Surface

Apply an appropriate amount of buffing compound or marble refinishing compound to the buffing pad and use the angle grinder to buff the surface of the marble tile. Apply plenty of water on the marble tiles to provide better lubrication for the buffing pad. Work in a small area at a time. Follow the directions stated on the container of the buffing compound to find the right amount of compound required.

Concentrate the grinder for at least 30 seconds on each tile to thoroughly remove scratches and other contaminants on the surface. Apply more water as needed. Move the grinder in small circular motions to polish the entire surface evenly.

Step 3 – Clean the Area

Pour additional water on the buffed surface to remove excess compound. Wipe the area dry with a terry cloth towel. Pay special attention to the surrounding areas and fixtures that may have been splashed with the buffing compound during the buffing process. Remove any excess compound with a wet towel or sponge and wipe it dry.

Step 4 – Apply Sealer

Use a soft paint brush to seal the marble tiles after refinishing. This will help protect the surface against stains and mild scratches. When using chemical based compounds, follow the directions on the packaging of the marble sealer. A single coat is enough to protect the surface, but applying two coats of sealer is highly recommended. Let the first coat dry before applying a final coat.

Open surrounding windows and doors when using sealers to enhance indoor ventilation. This will help prevent the inhalation of harmful vapors and fumes that may lead to allergic reactions and other health related concerns. Wear a mask when working with sealers and other chemical based compounds. Protective eyewear is also recommended to prevent irritation.


Source: www.DoItYourself.com
Sunday, June 13, 2021

How to Build a Ceramic Tile Cutter

 A ceramic tile cutter is an important tool for cutting border tiles during floor tile installation. A ready-made tile cutter with base, clamp, and cutter in one unit can cost a lot of money. To lessen the cost, make an improvised ceramic tile cutter unit with a table base instead.

What you’ll need

  • Handheld Tile Cutter
  • Table (2-3 feet in width and at least 3 feet in length)
  • 1x1 or 2x2 Wooden Board
  • Drill
  • Screws
  • Screwdriver
  • Meter Stick
  • Two C-Clamps
  • Saw

Step 1 – Setting up the Table

Determine which side edge of the table to work with. For right-handed people, the right side edge is best. On the back length of the tabletop, secure the meter stick on the edge with the scaled markings, rising up and facing toward the tabletop. Half of the width of the meter stick should be rising from the tabletop and the scales should be in centimeters (or in inches depending on one’s preference). The end of the stick should be flush with the right side edge of the table. At the back of the meter stick, on the lower half of its width, pre-drill screw holes 2 inches apart. Set the screws and tighten them.

Step 2 – Installing the Fixed Straight Edge

Cut two 1x1 or 2x2 wooden boards exactly the same width as the table. Position one on top of the table with the tip exactly on the starting edge of the meter stick and the length perpendicular with the meter stick. The other board will serve as the straight edge guide for cutting the tile.

Step 3 – Positioning the Tile on the Table Base

To prepare a tile for cutting, position it on top of the table with one side flush with the fixed wooden beam and the other side flush with the meter stick. The meter stick and the beam will ensure that the tile is positioned at a right angle. Position one of the C-clamps on the back length of the table and use it to clamp the left side corner of the tile. Tighten the clamp, but make sure not to put too much pressure to avoid breaking the tile.

Step 4 – Marking, Scoring and Cutting the Tile

Using the scales on the meter stick, determine where the tile will be cut. Use the straight edge wooden beam as a guide; mark the tile with a pencil. With the straight edge in position, use the other clamp to secure it on top of the tile. Take the hand-held tile cutter and position it on top of the marked line. Place the tip of the cutter exactly on the marked line, apply pressure and score the entire line downwards to the bottom edge. Remove the clamps and the straight edge, move the tile towards the right side edge of the table until the scored line is in line with the edge. Press the left side of the tile with the left hand and push the right side of the tile slightly downwards until it snaps off.


Source: www.DoItYourself.com
Wednesday, June 2, 2021

How to Restore the Polish on old Marble Floor Tiles

This Black and White Marble tiled hallway floor at a Grade II listed property in the village of Tattenhall has quite a history. The building was constructed in 1865 and at one time it has been the home to the high sheriff of Cheshire, and the family home of Edith Wignall the daughter of Sir Henry Tate the founder of the sugar company Tate and Lyle.

In more recent years the property had been used as a council building and even a nursing home for the elderly. After a long history of decline it has now been restored to a lavish family mansion however the marble floor had suffered over the years and still need attention. The current owner had been in touch as they wanted it restoring and basically brought back to life.

 
Marble Tiled Floor Before Renovation Grade II Listed Building Tattenhall

As it turns out I had already planned to go to Tattenhall the following week to work on another listed building which was formerly the village bank. After discussing the Marble floor over the phone, I agreed a date and time to pop over from the bank and inspect the floor in detail. I can provide a rough quote from photographs, which has been especially useful recently, but it’s far better for all concerned if I’m able to properly survey the floor first.

The Marble floor consisted of Black and White Mable tiles laid in a diamond pattern, it wasn't a very large area perhaps 9 square metres in total. The tiles were well worn as described but also stained and scratched. I would see they would need a deep burnish and polish to bring them back to life and then protected with a fresh sealer. Following on from that visit I was able to provide an accurate quote which was accepted, and a date agreed for my return.

 
Marble Tiled Floor Before Renovation Grade II Listed Building Tattenhall


Removing Scratches and Stains from a Marble Tiled Entrance Hall Floor

The first job was to protect the surrounding heavy wooden panelling with masking film. The floor was very heavily stained yellow with deep scratches, to remove these I would have to grind the marble back until a clean fresh tile was left. To start I used a 200-grit coarse pad fitted to a weighted buffing machine, the abrasive action of the pad was lubricated with water. After inspection I found that the staining and scratches were still there, so I needed to use stronger pads, so I worked my way through a set of very coarse milling pads starting at a 50, 100 and finishing with a 200-grit pad. Again, water was used to lubricate, and the resultant slurry was removed by a powerful wet vacuum and washed down between each pad.

The milling pads had the desired effect, and I was then able to bring back the polished appearance of the Marble surface using a set of finer burnishing pads with the same process. The 400 and 800-grit pads helped to clean and remove the fine scratches left by the milling pads and then the next 1500-grit pad started to build the shine back on the marble tile.

After finishing with 1500-grit pad I washed the Marble with Tile Doctor Stone Soap and vacuumed up the residue with the wet vacuum. I left an industrial blower in place overnight to dry out the floor ready for the next morning when it would be sealed.


Sealing a Marble Tiled Entrance Hall Floor

The next morning, I used the last of the four burnishing pads which is a very fine 3000-grit to polish the floor further. This last pad is applied dry with just a spray of water to create a high gloss finish.

When I was happy, I sealed the floor with two coats of Tile Doctor Colour Grow which is an impregnating sealer that soaks into the fine pores of the Marble to protect it from within. This product also improves colour and after application it was left to soak into the tile for five minutes before polishing off and then leaving it to dry.

 
Marble Tiled Floor After Renovation Grade II Listed Building Tattenhall

The last step was to I buff the floor with a white pad. The finish was impressive, and the family were very happy with the work we had carried out. For aftercare I recommended they use Stone Soap as its designed for the regular cleaning of sealed and polished stone, as well as cleaning it also helps build the patina.


Thursday, May 13, 2021

Steps To Laying A New Subfloor

 If you’ve removed an old floor to replace it only to find that the subfloor underneath is damaged, you will have to replace the subfloor before installing a new floor. While this is not an easy task, a do-it-yourselfer can complete the job with a few pointers. Here’s what you need to know.


What you’ll need

  • ¼ -inch plywood
  • Hammer
  • Nails
  • Tape measure
  • Hand Saw
  • Straight ruler
  • Jig Saw
  • Circular Saw


Step 1: Remove Old Baseboards

The baseboards will be replaced after you install the new subfloor, but in the meantime you will need to get the baseboards off the wall. Place them aside if you plan on reusing the same boards.


Step 2: Take Measurements

Measure the dimensions of the room you are installing the floor in. You will want to allow a 1/8-inch gap for natural expansion at each edge. Sketch the dimensions on a piece of paper as you measure. This will help you create a diagram to scale to use as a guide for the materials.


Step 3: Orientation

You need to figure out what way you will want to lay the flooring. Remember you need to use the least number of plywood sheets you can. So use your diagram to figure out which direction will give you the most coverage.


Step 4: Start Laying the Plywood

Start by laying one piece of plywood down on the old floor starting in the corner. Remember to leave your 1/8-inch for expansion. Nail this piece down using plenty of nails. They are cheap and will make the floor quieter once it’s finished.


Step 5: Lay Subsequent Pieces

You can now use your jig saw or circular saw to make cuts to the next few pieces and lay them out so they fit snugly. Lay them out in one row from wall to wall.


Once you have finished the first row you can move on to the second row. You will want to use a plywood piece that’s about half the length of the first one. This will create the seams that you need for the subfloor. It should look similar to what a bricklayer would do.


Step 6:  Keep Working Until It’s Finished

You will want to continue laying the flooring down in this manner until you have completed the entire area. Go back over and make sure all the pieces are nailed down securely and the seams are even.


You’ve just finished your new subfloor, and can now start working on laying the new floor down. Once the floor is done you can go back and reattach your baseboards and add any finishing touches.


Source: www.DoItYourself.com
Thursday, May 6, 2021

How to Soften the Edge after Cutting Ceramic Tile

Cutting ceramic tiles can lead to sharp and serrated edges. These edges require smoothing for both safety reasons and aesthetic appeal. Here is how to soften the edge after cutting ceramic tiles.


What you’ll need

  • Protective eye wear
  • Work gloves
  • Low grit sandpaper
  • High grit sandpaper
  • A power sander
  • A low grit file
  • A high grit file
  • Cement/concrete slab
  • Step 1 – Safety
  • Put on your protective eye wear and work gloves.


Step 2 – Sanding the Edges by Hand

The type of sandpaper used to smooth the tiles will depend on the roughness of the edges. The rougher the tile edge, the more abrasiveness needed on the sandpaper. Begin with a sixty grit sandpaper. Use the sandpaper to dull the rough and serrated edges on the tile. Continue the sanding process with finer sandpaper, moving up to a four hundred grit level. The finest sandpaper should be used to smooth and polish the tile edges. 


Step 3 - Power Sanding the Edges

A rotary sander works well with curved tiles and a belt sander is best with flat edged tiles. Use a low grit sandpaper. Connect the paper to the power sander. Gently sand the tile edges. Stop to check the edges often to be sure you are not removing more tile than you would like. Once the sharp edges are dull, polish them with a four hundred grit paper. 


Step 4 – Filing the Edges

Use an abrasive file to begin filing the sharp edges of the tiles. Once the edges are dull, use a finer file to continue the process until the edges are smooth and polished.


Step 5 – Other Smoothing Techniques

Concrete and cement can be used to smooth straight edges if you are unable to locate any sandpaper or files. Hold the tile securely. Gently slide the tile edge along the concrete or cement. This process may not produce a polished texture to the edge, but it will reduce any dangerous sharp edges.


Source: www.DoItYourself.com
Sunday, April 18, 2021

How to Soften the Edge After Cutting Ceramic Tile

A complex design or just less-than-perfect dimensions might lead you to having to cut your ceramic tiles to install them properly, whether it’s in a shower, as part of a kitchen backsplash, or on your floors. But while manual score-and-snap tile cutters make the task easy, cuts will leave behind sharp and serrated edges. These edges may require smoothing for both safety reasons and aesthetic appeal, such as when you need to set the end of a tile against a bathtub. Here is how to soften the rough areas on your cut ceramic tiles.

What you’ll need

  • Protective eye wear
  • Work gloves
  • Sanding block
  • Emery cloth
  • Low-grit file
  • High-grit file
  • Cement/concrete slab

Step 1 – Stay Safe

Since the edges of cut tile can be very sharp and filing them can produce nasty slivers, you will need some heavy-duty work gloves to ensure that you don’t injure yourself. Dust coming off the tile could also irritate your eyes or lungs, so you should put on a face mask and safety glasses too.

Step 2 – Smooth the Edges by Hand

When sanding by hand, avoid using simply sandpaper in your hand as the sharp, rough edges can cause it to rip. Instead, use a sanding block with a low-grit side or some emery cloth. Both of these solutions are much more durable than straight sandpaper and are more likely to yield a better result. If your edges are particularly rough to start, use the emery cloth first as it is made to be able to smooth rough metals, and then move progressively to a high-grit edge on your sanding block for the final touches. 

Step 3 - File the Edges

You can also use an abrasive file to begin smoothing the sharp edges of the cut tiles. Just place your tile on a flat, firm surface, holding the end down with your non-dominant hand. Then, place the file on the edge, about an inch from the tip, and push downward in a single smooth stroke. Repeat this process until the edges are no longer sharp. Switch to a finer grit file to continue refining until the edges are smooth and polished. 

Step 4 – Try Other Smoothing Techniques

Concrete and cement can be used to smooth straight edges if you are unable to get ahold of the aforementioned materials. Hold the tile securely and gently slide the edge along the concrete or cement several times. Check between every few strokes to see if the edge is as smooth as you need This process may not produce a polished texture, but it will work in a pinch to reduce any dangerous sharp edges.


Source: www.DoItYourself.com
Sunday, April 11, 2021

How to Prepare a Floor to Install Porcelain Tile

 Before preparing to install porcelain tile in the floor of a kitchen, living room, bathroom, or bedroom, make sure to have a subfloor that is in good condition. Porcelain tile can be a good substitute to other types of ceramic tiles, but when you install porcelain tile, like any other ceramic tile, be sure to work on a level subfloor. Here are the instructions for how to achieve that goal.

What You'll Need:

  • Cement Backer Board
  • Thinset Mortar
  • Notched Trowel
  • Drill
  • Seam Tape for Cement Backer Boards
  • Utility Knife
  • Pencil
  • Tape Measure
  • Square
  • Saw
  • Patch and Leveler
  • Level
  • Roofing Nails or Screws


Step 1 - Prep the Subfloor

Check if the subfloor is ready for the installation of the backer boards by using a level to check for surface uniformity. If some portions of the subfloor are lower than the others, make it level by applying a patch. Apply the patch according to the manufacturer’s instructions and allow it to dry before checking again with a level. If there are baseboards or trim at the sides of the floor, remove them first and reinstall them after the backer boards and the tiles are all set.


Step 2 - Prep the Cement Backer Boards

Do not install porcelain tile directly to the subfloor unless it is already made of cement that has been made accurately level. Install cement backer boards first if the subfloor is made of other materials. First, measure the entire area to be tiled and use that measurement to determine how many backer boards are needed for the job. Purchase additional backer boards just in case (about ten percent of the estimated number of backer boards required). Cement backer boards are very useful because they provide a sturdy and stable foundation for the tiles.

Step 3 - Install the Cement Backer Boards

Prepare the thinset according to the manufacturer’s instructions and mix it well in a container. Scoop out a good amount of the mixture and transfer it to the notched trowel. Start working on the corners for easier installation. Begin the application of the mortar on a small portion of the floor enough to cover the area of one cement backer board. Make sure the thinset is applied evenly to ensure the backer boards will be installed uniformly.

Place one piece of backer board on top of the thinset mortar. Be sure to have its edges touch the walls. Press firmly until it is all set. Drill the screws on all four sides to secure it to the subfloor. Proceed with the other backer boards by following the same procedure. For the final pieces, measure the required dimensions and transfer the measurements on the boards. Cut them using a utility knife and install them in the same manner.

Step 4 - Finishing Touches

When everything is all set, cover the butt joints with seam tape. Cover the seam tapes with thinset mortar as well and allow it to dry. When the foundation is ready, install porcelain tile.


Source: www.DoItYourself.com
Sunday, April 4, 2021

How to Soften the Edge After Cutting Ceramic Tile

Cutting ceramic tiles can lead to sharp and serrated edges. These edges require smoothing for both safety reasons and aesthetic appeal. Here is how to soften the edge after cutting ceramic tiles.


What you’ll need

  • Protective eye wear
  • Work gloves
  • Low grit sandpaper
  • High grit sandpaper
  • A power sander
  • A low grit file
  • A high grit file
  • Cement/concrete slab


Step 1 – Safety

Put on your protective eye wear and work gloves.


Step 2 – Sanding the Edges by Hand

The type of sandpaper used to smooth the tiles will depend on the roughness of the edges. The rougher the tile edge, the more abrasiveness needed on the sandpaper. Begin with a sixty grit sandpaper. Use the sandpaper to dull the rough and serrated edges on the tile. Continue the sanding process with finer sandpaper, moving up to a four hundred grit level. The finest sandpaper should be used to smooth and polish the tile edges. 


Step 3 - Power Sanding the Edges

A rotary sander works well with curved tiles and a belt sander is best with flat edged tiles. Use a low grit sandpaper. Connect the paper to the power sander. Gently sand the tile edges. Stop to check the edges often to be sure you are not removing more tile than you would like. Once the sharp edges are dull, polish them with a four hundred grit paper. 


Step 4 – Filing the Edges

Use an abrasive file to begin filing the sharp edges of the tiles. Once the edges are dull, use a finer file to continue the process until the edges are smooth and polished.


Step 5 – Other Smoothing Techniques

Concrete and cement can be used to smooth straight edges if you are unable to locate any sandpaper or files. Hold the tile securely. Gently slide the tile edge along the concrete or cement. This process may not produce a polished texture to the edge, but it will reduce any dangerous sharp edges.


 Source: www.DoItYourself.com
Monday, March 29, 2021

Middlesex Stone Floor Expert Shares Secrets of Travertine Floor Renovation

Our client had inherited this Travertine floor when purchasing in a lovely street in Walton-On-Thames, close by was the River Thames which runs all the way into London. The new owners were unhappy with the floor in that it did not look very clean, and they were keen to get this rectified. I arranged a site visit to survey the floor and see what could be done to restore its appearance. 

 
Travertine Floor Before Cleaning Walton-on-Thames

The floor itself was in good physical condition, however, it was apparent from the level of dirt ingrained in the stone that it had not been maintained very well by the previous owner. I carried out a small test clean which came out well and they could see straight away what the floor should look really like! They were happy with my renovation quote and we agreed a mutually convenient time where I could work in relation to the COVID guidelines.


Cleaning a Travertine Tiled Kitchen Floor

The Travertine floor was scrubbed using a mixture of Tile Doctor Pro Clean and Remove and Go. These are heavy duty cleaning products designed for use on tile and stone can be combined to form a powerful cleaning/stripping solution which is left to dwell on the floor surface. After a short while the solution was worked into the stone using a rotary machine fitted with a black scrubbing pad.

This cleaning recipe works extremely well breaking down dirt, stains, and grease in the stone. Following a machine scrub and a more manual hand scrub of the grout lines, we then pressure rinsed the soil away and then it was extracted using an industrial wet vacuum. In a couple of areas, it was necessary to repeat the process to ensure it was completely clean. Once we were satisfied that the stone was fresh and clean, the floor was left to dry off overnight, so it would be ready for sealing the following day.

 
Travertine Floor During Cleaning Walton-on-Thames


Sealing a Travertine Tiled Kitchen Floor

After drying overnight, the floor was checked with a damp meter to make sure it was dry. Once reassured I started with the application of the fresh sealer to the floor using Tile Doctor Colour Grow Sealer which is a colour enhancing sealer that works from within by soaking into the pores of the stone. Several coats were applied allowing each one to dry before applying the next. This sealer does not provide a glossy finish, just a nice natural sheen. This brought back the contrast and natural colours in the stone, whilst adding protection to stone for many years to come.

 
Travertine Floor After Cleaning Walton-on-Thames

The client was very happy with the work we carried out, the floor had come up much better than they had expected, and it really made a difference to the lovely kitchen space. The floor looked like new. I recommended the regular use of Tile Doctor Stone Soap for future cleaning which will keep the floor in great condition and ensure the longevity of the newly applied sealant.


Friday, March 26, 2021

Non Sanded vs. Sanded Grout: Which to Use?

Sanded grout is just one of the two main types of grout available for construction use. Home builders use grout to secure the joints between tiles of various sorts. Laying the right grout with the right tiles needs careful consideration, depending on the type of project.

Sanded Grout
Sand can be added to all grout to supplement the strength in the tile joint. The amount of sand added depends on what sort of tiles you are using. If the tile joints are equal to or larger than 1/8th inch, sand should be used to increase the joint strength.

Ceramic tiles
Ceramic tile grout needs less or no sand at all. If the joint is a thin joint between the set tiles and no greater than 1/8th inch, then there is less reason to use sanded grout. Non-sanded grout is usually Portland cement based. It also contains colored pigments and water retardant additives.

Conclusion
When you decide which grout to use, you should consider the size of the joints, the type of the tile, and the base upon which the tiles will be laid, for example, whether you are laying tiles on the floor or they are being set onto a wall.


Source: www.DoItYourself.com

Friday, March 19, 2021

Removing Drips of Wall Paint from Ceramic Tile Floors

If you have ceramic tile floors and you paint the walls, there is a good chance that you will get paint on the ceramic tile at some point. When you do this, the process of removing the paint is not difficult but it will take a little bit of work on your part. Here are the basics of how to remove drips of wall paint from ceramic tile.


Scrape the Paint

One of the good things about ceramic tile is that it is hard and flat in many cases. This means that you should be able to scrape the majority of the paint drips off of the tile. In order to do this, you can use a putty knife. Take the putty knife and angle it. Then apply pressure to the paint and scrape it up. 


Scouring Pad

You may also need to remove the paint with a scouring pad. If the putty knife does not work or if you get paint on the grout, you can use a scouring pad to get it up. Put some soapy water on the spot and then use a scouring pad to try to remove it. In most cases, this should remove the paint.


Source: www.DoItYourself.com


Sunday, March 14, 2021

Tile Restoration Expert Details Floor Restoration Project in London

This client owned a property in Haringey, North London, which had a classic Victorian tiled floor laid in the hallway. Unfortunately, the floor was in a bad state, the tiles were dull and dirty and there was a missing section by the bottom of the stairs that had been back filled with cement. Fortunately for him however his neighbour decided to remove their front path which was made with matching tiles and so he was able acquire replacements from him. He then contacted us to see if we could use those tiles to fill in the missing ones and revive the whole floor with a clean and seal at the same time.

 
Victorian Tiled Floor Before Restoration Haringey

Before quoting for the restoration work, I paid a visit to the property to survey the floor. I can give quotes from photographs, but much prefer to visit and conduct a test clean, and in this case, I was able to check the spare tiles he had acquired. From that I emailed a quote which the client was happy with, so we arranged a date to return and do the work.

 
Victorian Tiled Floor Before Restoration Haringey

Cleaning and Reviving a Victorian Tiled Hallway Floor

This was a large job, so I teamed up with Jackson Davis the Central London Tile Doctor and whilst Jackson started on cleaning the floor, I took the reclaimed tiles outside and carefully grinded off the excess cement and adhesive from them and cleaned them by hand. We managed to do this by about 3pm. Jackson and I work on a lot of jobs together so it made sense to work as a bubble from the beginning of Covid so we could continue to work together, with two of us on the job it also means we can get the job done quicker.

Cleaning the floor involved applying a 200-grit diamond burnishing pad to the tile lubricated with a strong dilution of Tile Doctor Remove and Go, the slurry was then rinsed off the floor with more water and then extracted with an industrial vacuum. The process was repeated on stubborn areas until we were satisfied the tiles were really clean.

We then moved onto carefully removing the cement from the floor at the bottom of the stairs and cleaning up the base. Once done the newly renovated replacement tiles were laid in place using a rapid setting adhesive which meant they could be grouted later that day before heading home. The floor was then left overnight to dry off.


Sealing a Victorian Tiled Hallway Floor

We then returned the following day and took some moisture readings with the damp meter. The readings were within the expected range, so we were good to go ahead and apply the sealer. If the floor is not dry the seal will not cure properly, and this can lead to a patchy finish.

 
Victorian Tiled Floor After Restoration Haringey

Three coats of Tile Doctor Colour Grow were applied to seal the tiles. This is a colour intensifying impregnating sealer that works from with and will gives the Victorian tiles durable protection, ideal for a high traffic area such as the hallway. In addition, Colour Grow is a fully breathable sealer so it will allow for moisture to rise through the tile and evaporate, this is critical for floors of this age that will not have the benefit of a damp proof membrane installed under the floor.

 
Victorian Tiled Floor After Restoration Haringey

The hallway is now looking transformed by the work we did, we certainly thought so, but more importantly our client was very happy with the result and now has the floor he hoped for.