Sunday, December 16, 2018

Renovating a Salt Stained Quarry Tiled Floor in Cambridgeshire

We were called out to quote for restoring this Quarry tiled living room & hallway for a building contractor in the local area of Wicken. This is a small village on the edge of The Fens near Soham in East Cambridgeshire.

The works needed to be completed at short notice as the property was due to be put up for rent, so I agreed to work over two evenings to make sure it was ready for the first tenant. We discussed the cost and the process, and the contractor was happy to go ahead. We can always be flexible with our diary to help out our clients.

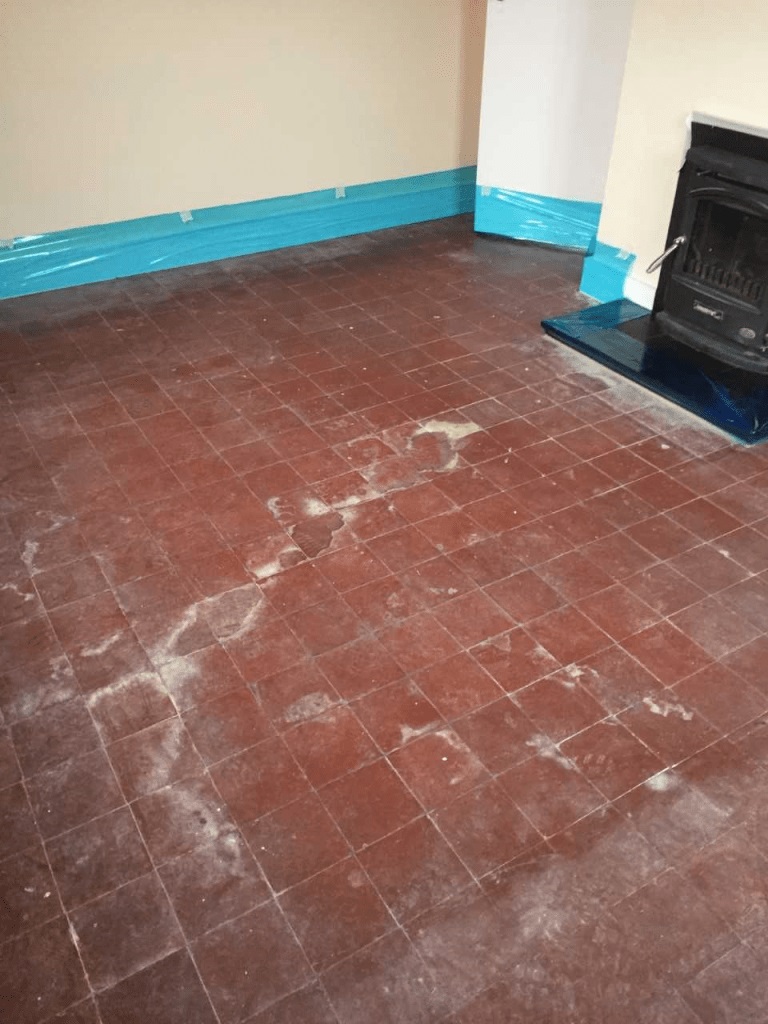
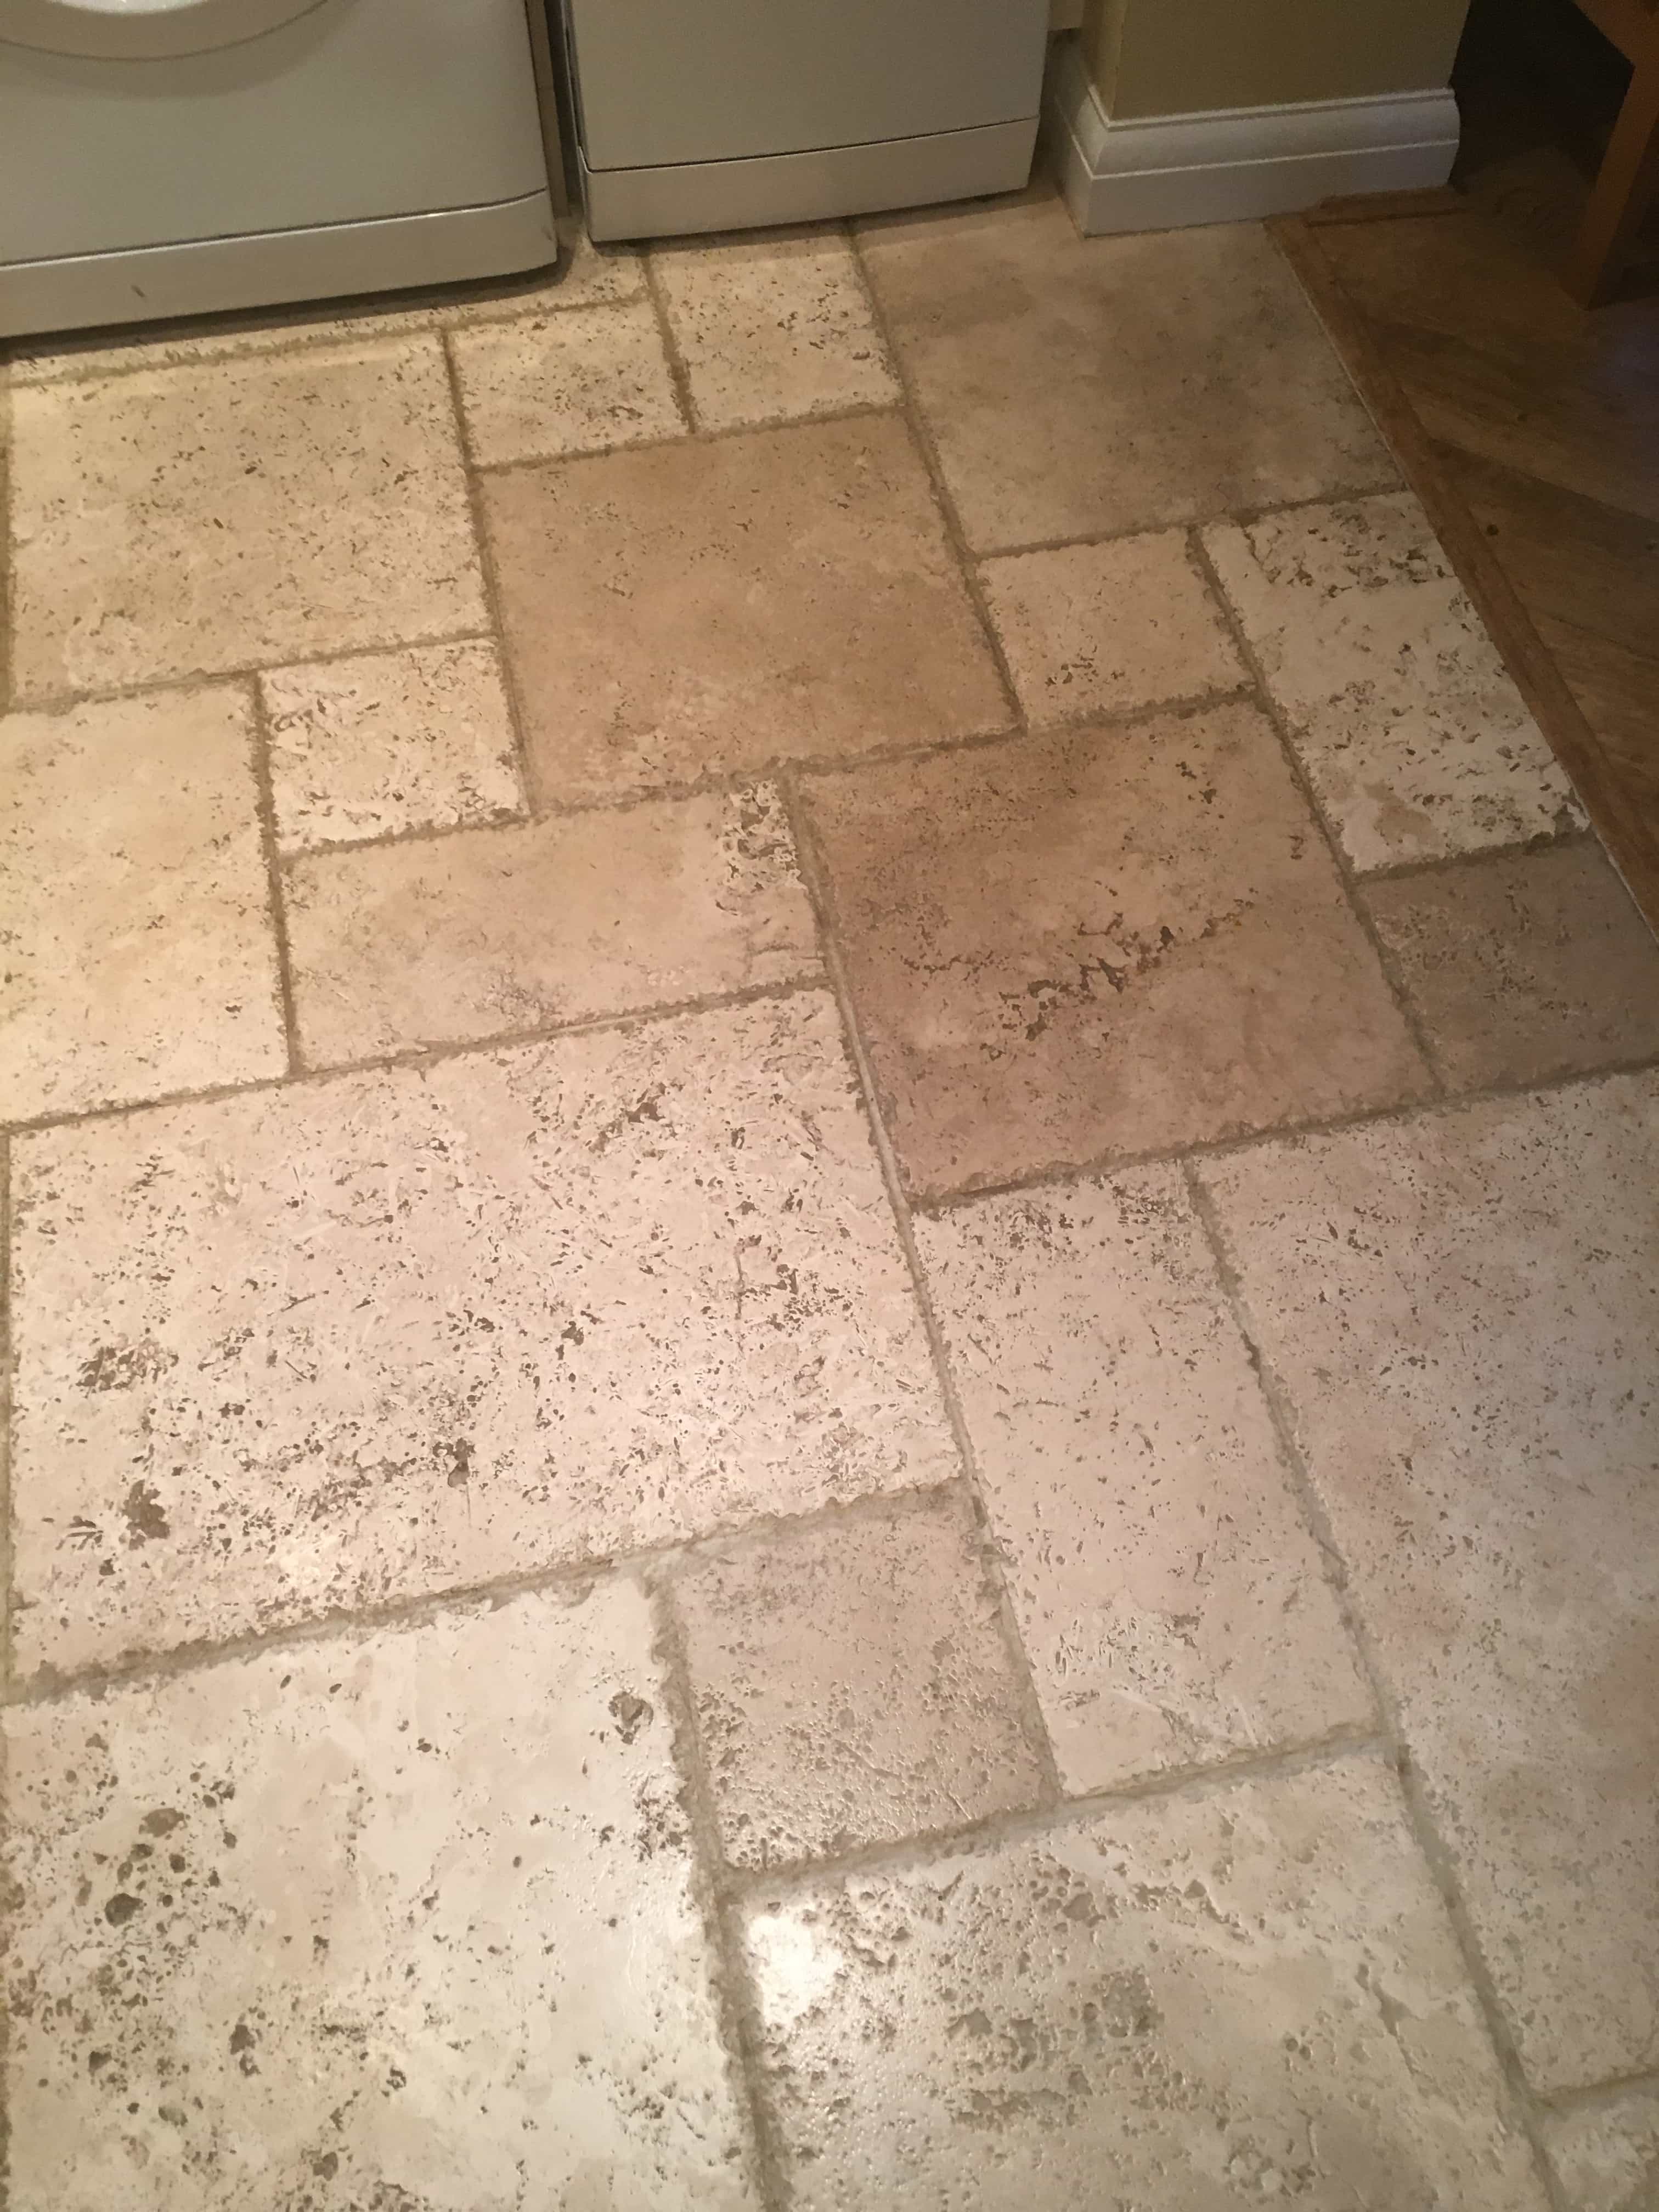
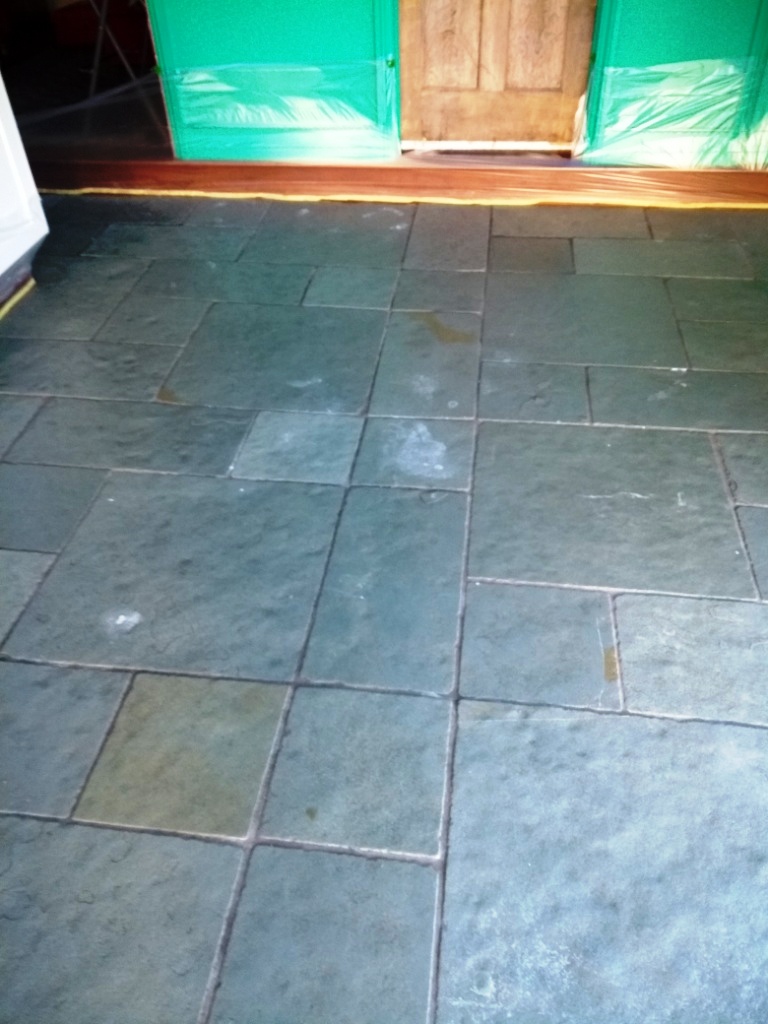
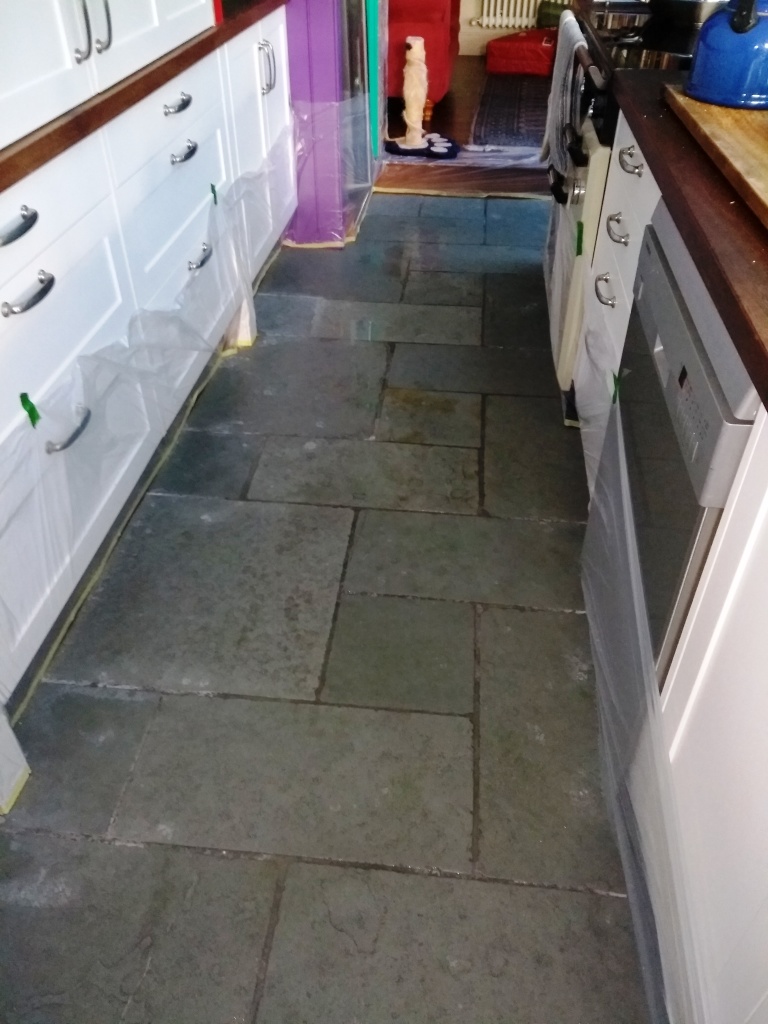
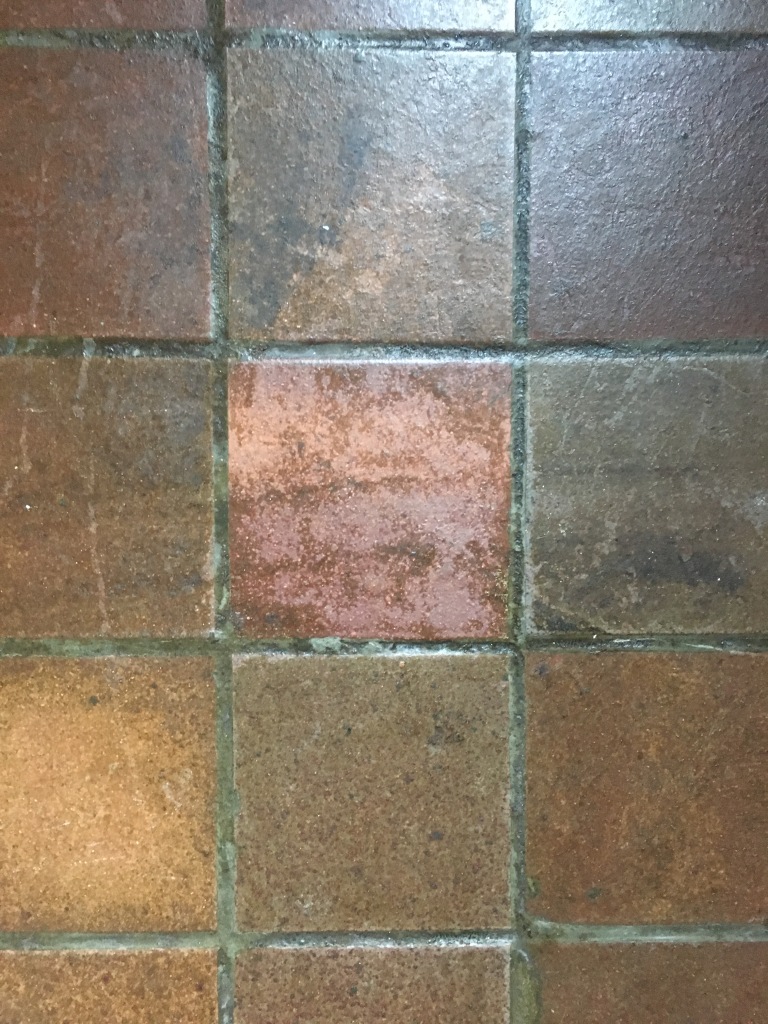
Quarry Tiled Floor With Salt Staining Wicken Before Cleaning Quarry Tiled Floor With Salt Staining Wicken Before Cleaning

The floor had signs of alkaline salt efflorescence which had left white patches on the tiles, this problem is usually indicative of a damp issue but when I went over to survey the floor, I checked with a damp meter and couldn't find any evidence of dampness. Clearly something had happened in the past and as the floor dried out it left these white salt deposits on the surface.

Cleaning a Quarry Tiled Living Room and Hallway Floor

To remove the salt stains the floor was given an Acid Wash several times with Tile Doctor Grout Clean-Up worked in with a stiff brush pad fitted to a rotary machine. The acid in the product counters and removes the alkaline salts, it also cleans up the tiles of any other mineral deposits such as old grout smears. The floor was then rinsed with water to remove the now soiled solution and then extracted using a wet vacuum.

Once I was happy that the salts had been removed, we applied Tile Doctor Remove and Go to strip the quarry tiles of old sealers. This is a non-flammable, multi-purpose stripper which is safe to use on tiles and works best when left to soak into the tile for ten minutes first. This product also draws out ingrained stains and removes heavy grease build-up and any ingrained dirt. We used the rotary machine again fitted with the stiff brush as before to get the floor nice and clean. As before the floor was rinsed with water and the soils extracted using the wet vacuum.

The floor was then left to dry overnight in preparation for the sealant to be applied.

Sealing a Quarry Tiled Living Room and Hallway Floor

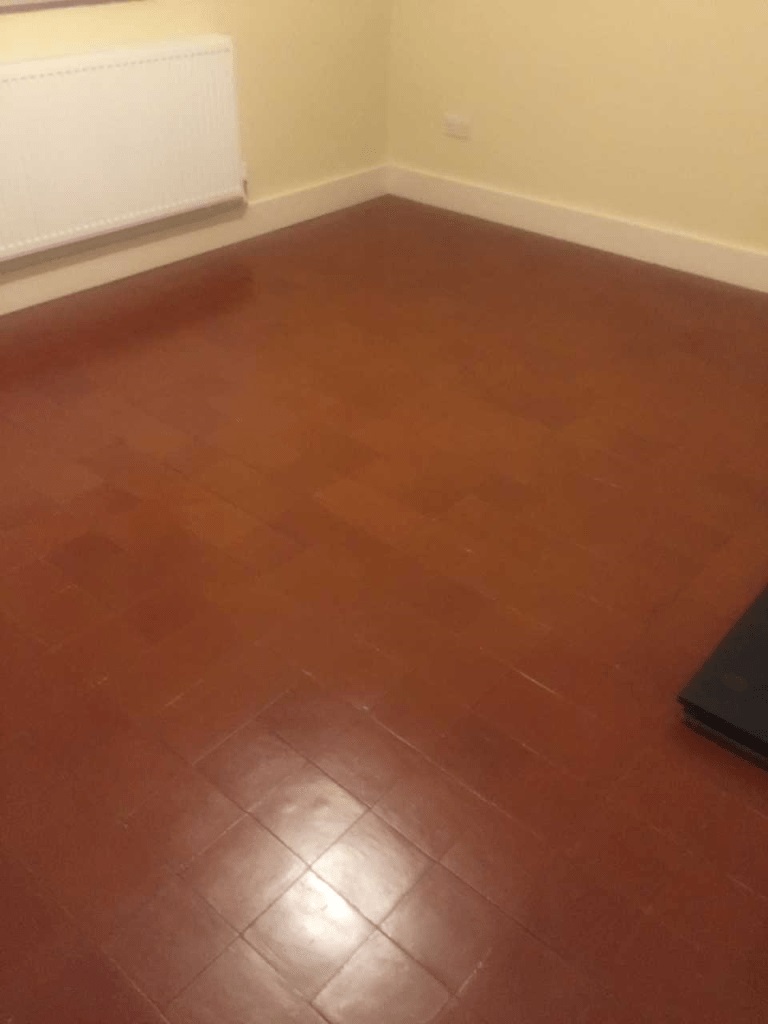
Upon arriving the following evening, the floor was checked again with the damp meter to make sure it was dry, all was well, so it was then sealed with multiple coats of Tile Doctor Seal & Go. This provides both a stain resistant surface seal and a durable low-sheen. The sealer brought back the deep colour in the tile and made a huge difference to the look of the floor. It would also make the floor much easier for the new tenant to maintain going forward.

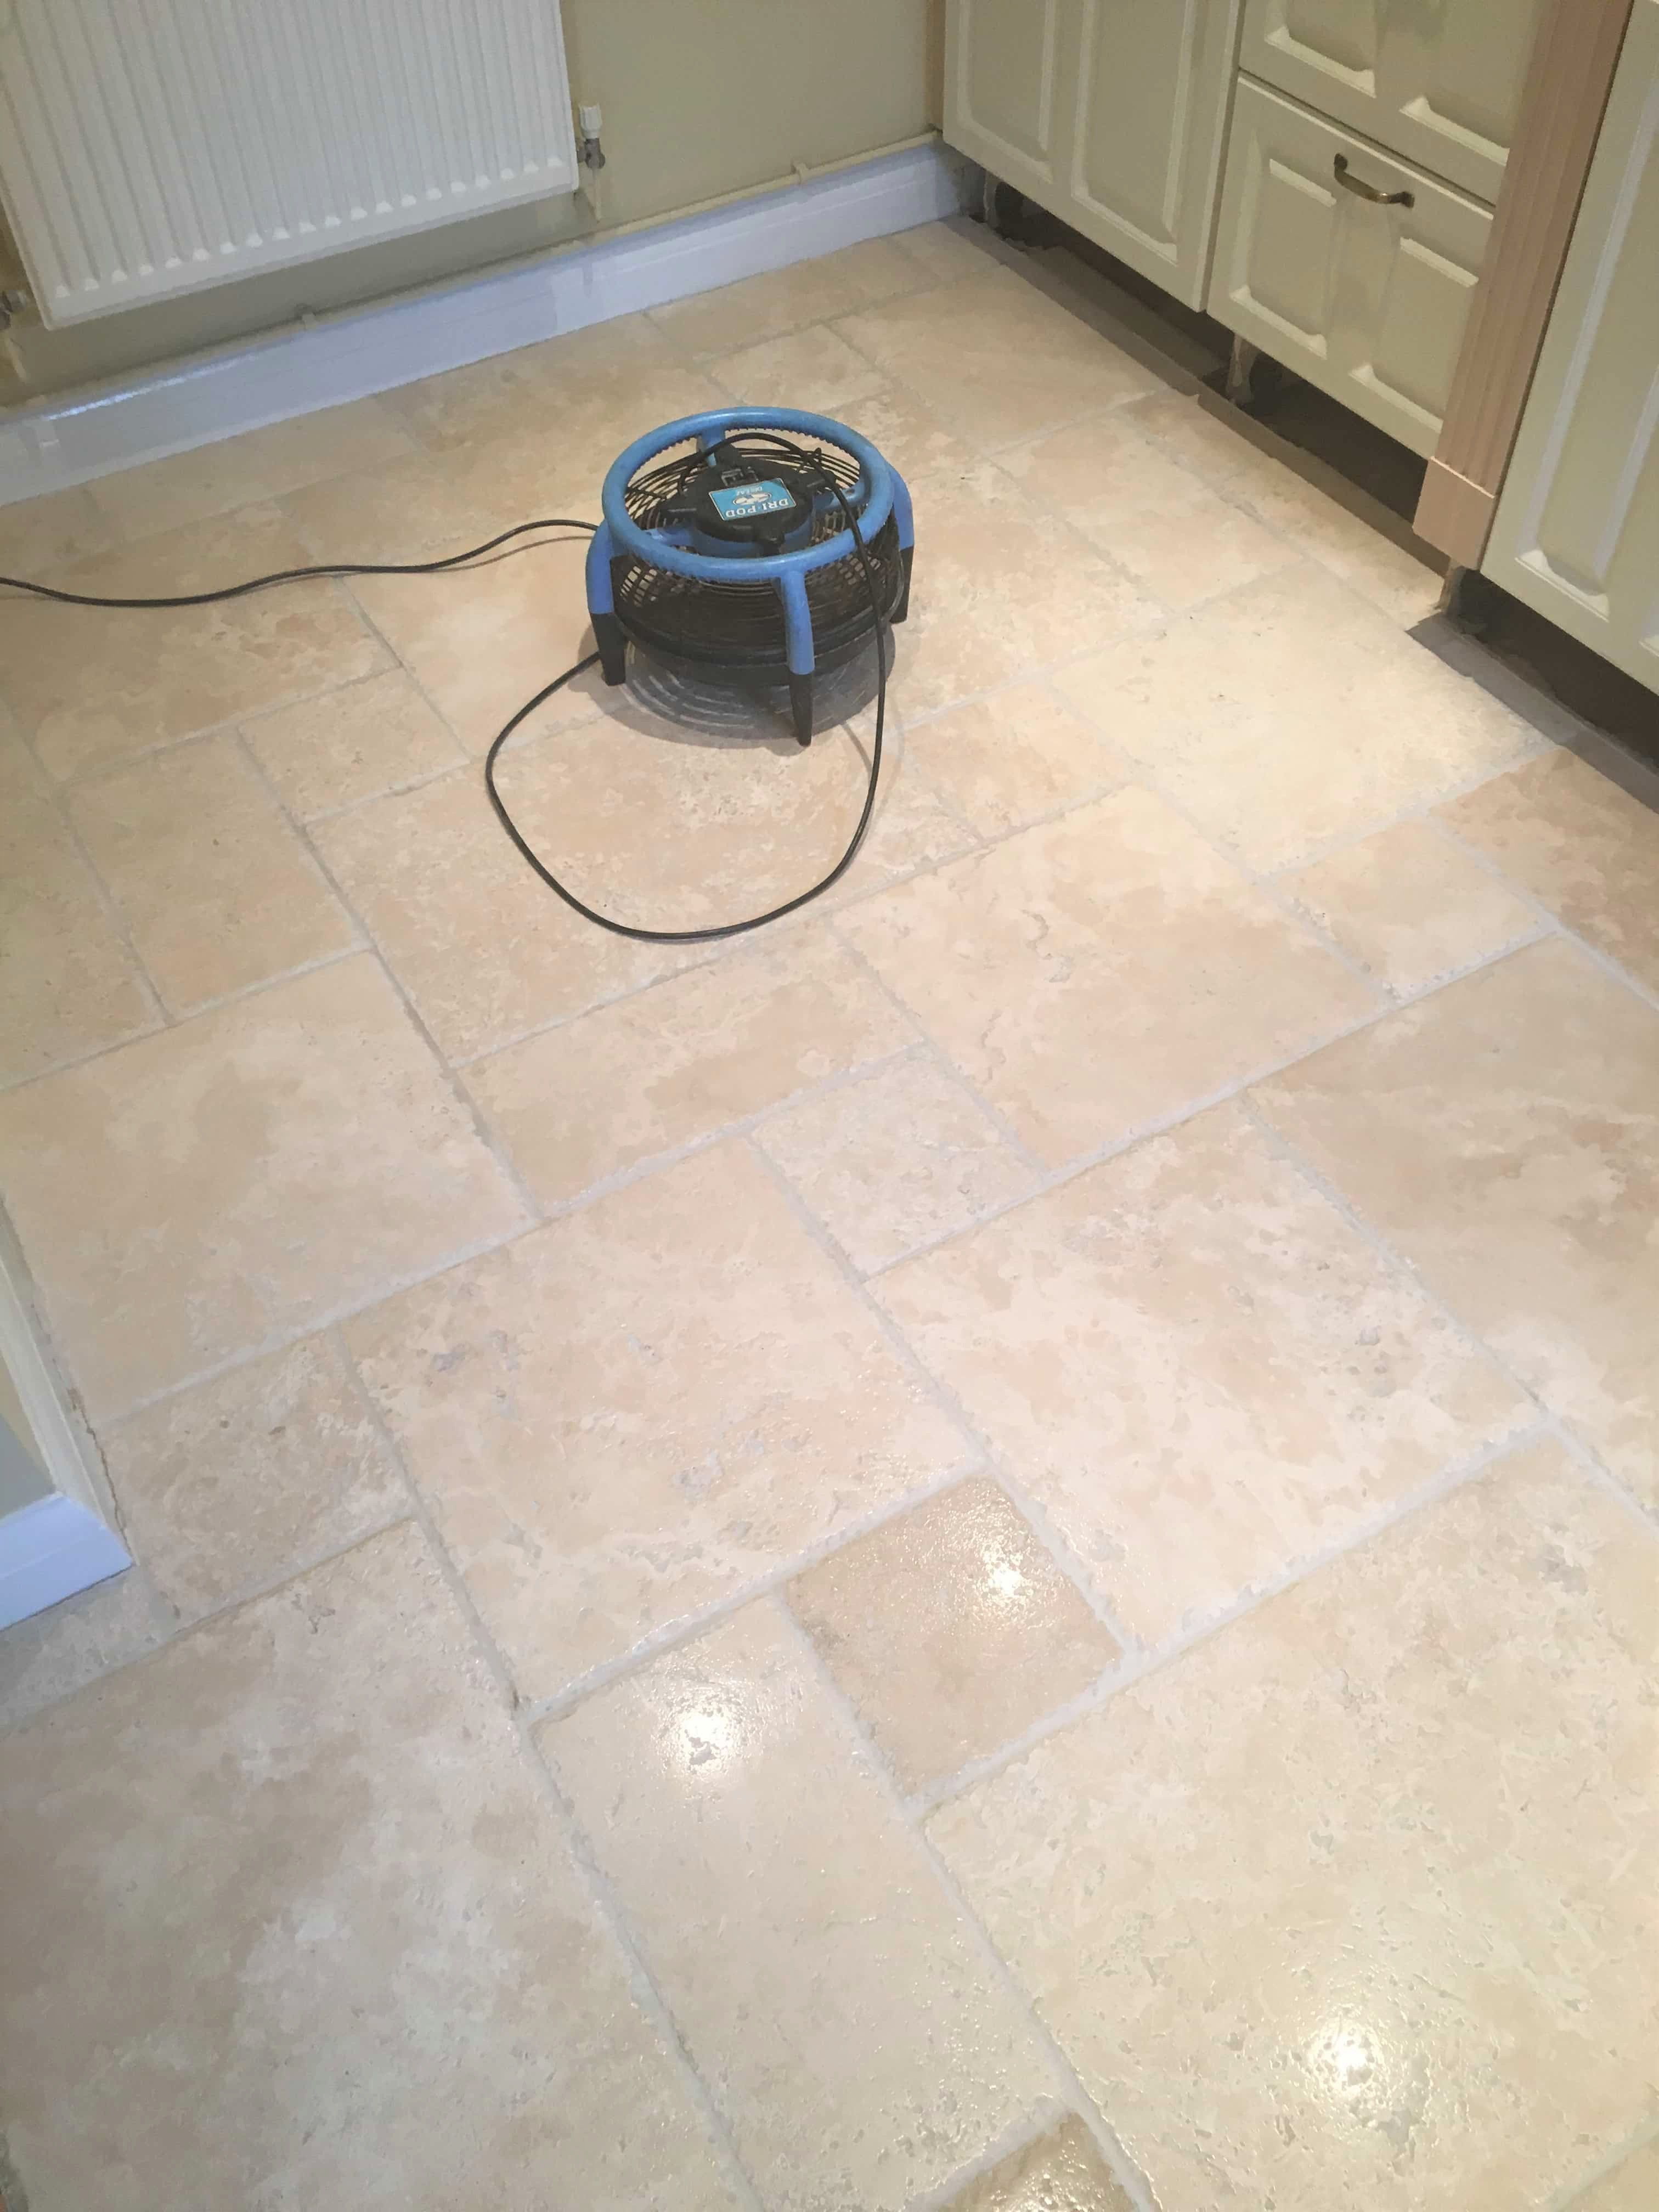
You can see from the pictures the transformation that was achieved. The client was very happy with the completed work and was satisfied he would now be able to rent the property out to his next tenant.

Quarry Tiled Floor Wicken After Cleaning Quarry Tiled Floor Wicken After Cleaning


Source: Quarry Tile Cleaning and Renovation Service in Cambridgeshire

Saturday, December 15, 2018

5 Tips for Installing Cork Tile Flooring in the Bathroom

Putting cork tile flooring down is becoming more and more popular in today's world. Cork is very popular with the green movement and more homeowners are going with it than ever before. Cork is quiet and warm underfoot and it also provides you with a lot of durability. Many people are now going with it as an option in the bathroom. If you are planning on installing cork in the bathroom, here are a few tips that you need to keep in mind.

Pull The Toilet

Some people try to get by with leaving the toilet in while they install flooring. When you put cork in, pulling the toilet is really the best way to do it. You will want to set the toilet back down onto the top of the flooring after you install it. This will give you a finished look and it will help you seal up the cork better when you are done.
Acclimate the Cork

Before you install the cork, make sure that you acclimate it to the surroundings. Being a natural product from a cork tree, cork flooring can expand and contract based on the temperature and humidity in the room. You will want to make sure that you allow it to acclimate for 24 to 72 hours prior to trying to install it. This will ensure that you keep your manufacturer warranty and that you will not run into problems in the near future.
Expansion Gap

Around the outside of the floor, you need to leave an expansion gap. This expansion gap provides room for the floor to expand and contract over the years. You will need to put baseboards over the edge of the gap or quarter round. Where it meets the bathtub, you may have to use caulk so that the joint remains flexible.
Glue Joints

When you are putting cork in a bathroom, you definitely need to glue the joints. Where cork locks together, it is susceptible to moisture. In a bathroom, water will end up getting on the floor at some point. Getting in and out of the shower, you will drip water on the floor. This makes it very important that you seal the joints up so that water can not get down in there as easily.

There are a number of wood glues on the market that will work in this application. Just make sure that you check with the company that you buy it from to make sure that it will work for this.
Center the Tiles

When working in a small space like a bathroom, it will usually look better if you center the tile in the room. Get a tape measure and determine the exact center point of the room. Then snap a chalk line so that you know exactly where to start from. Work from the middle out and put your cut pieces of cork up against the wall.


Monday, December 10, 2018

Burnishing a Deep Polish onto a Dull Marble Tiled Floor in Greater Manchester

This customer in Middleton near Manchester wanted to bring the shine up on the tiled floor in their Kitchen and Dining Room, it had been laid nearly fifteen years before and was now dull, lifeless and the grout was also in need of a clean.

I was told the tiles were Ceramic however after visiting the property and running some tests if became clear that the tiles were in fact Marble. There are some very realistic Ceramic and Porcelain tiles on the market however you usually find they have a set of repeating patterns whereas with natural stone no two tiles are the same.

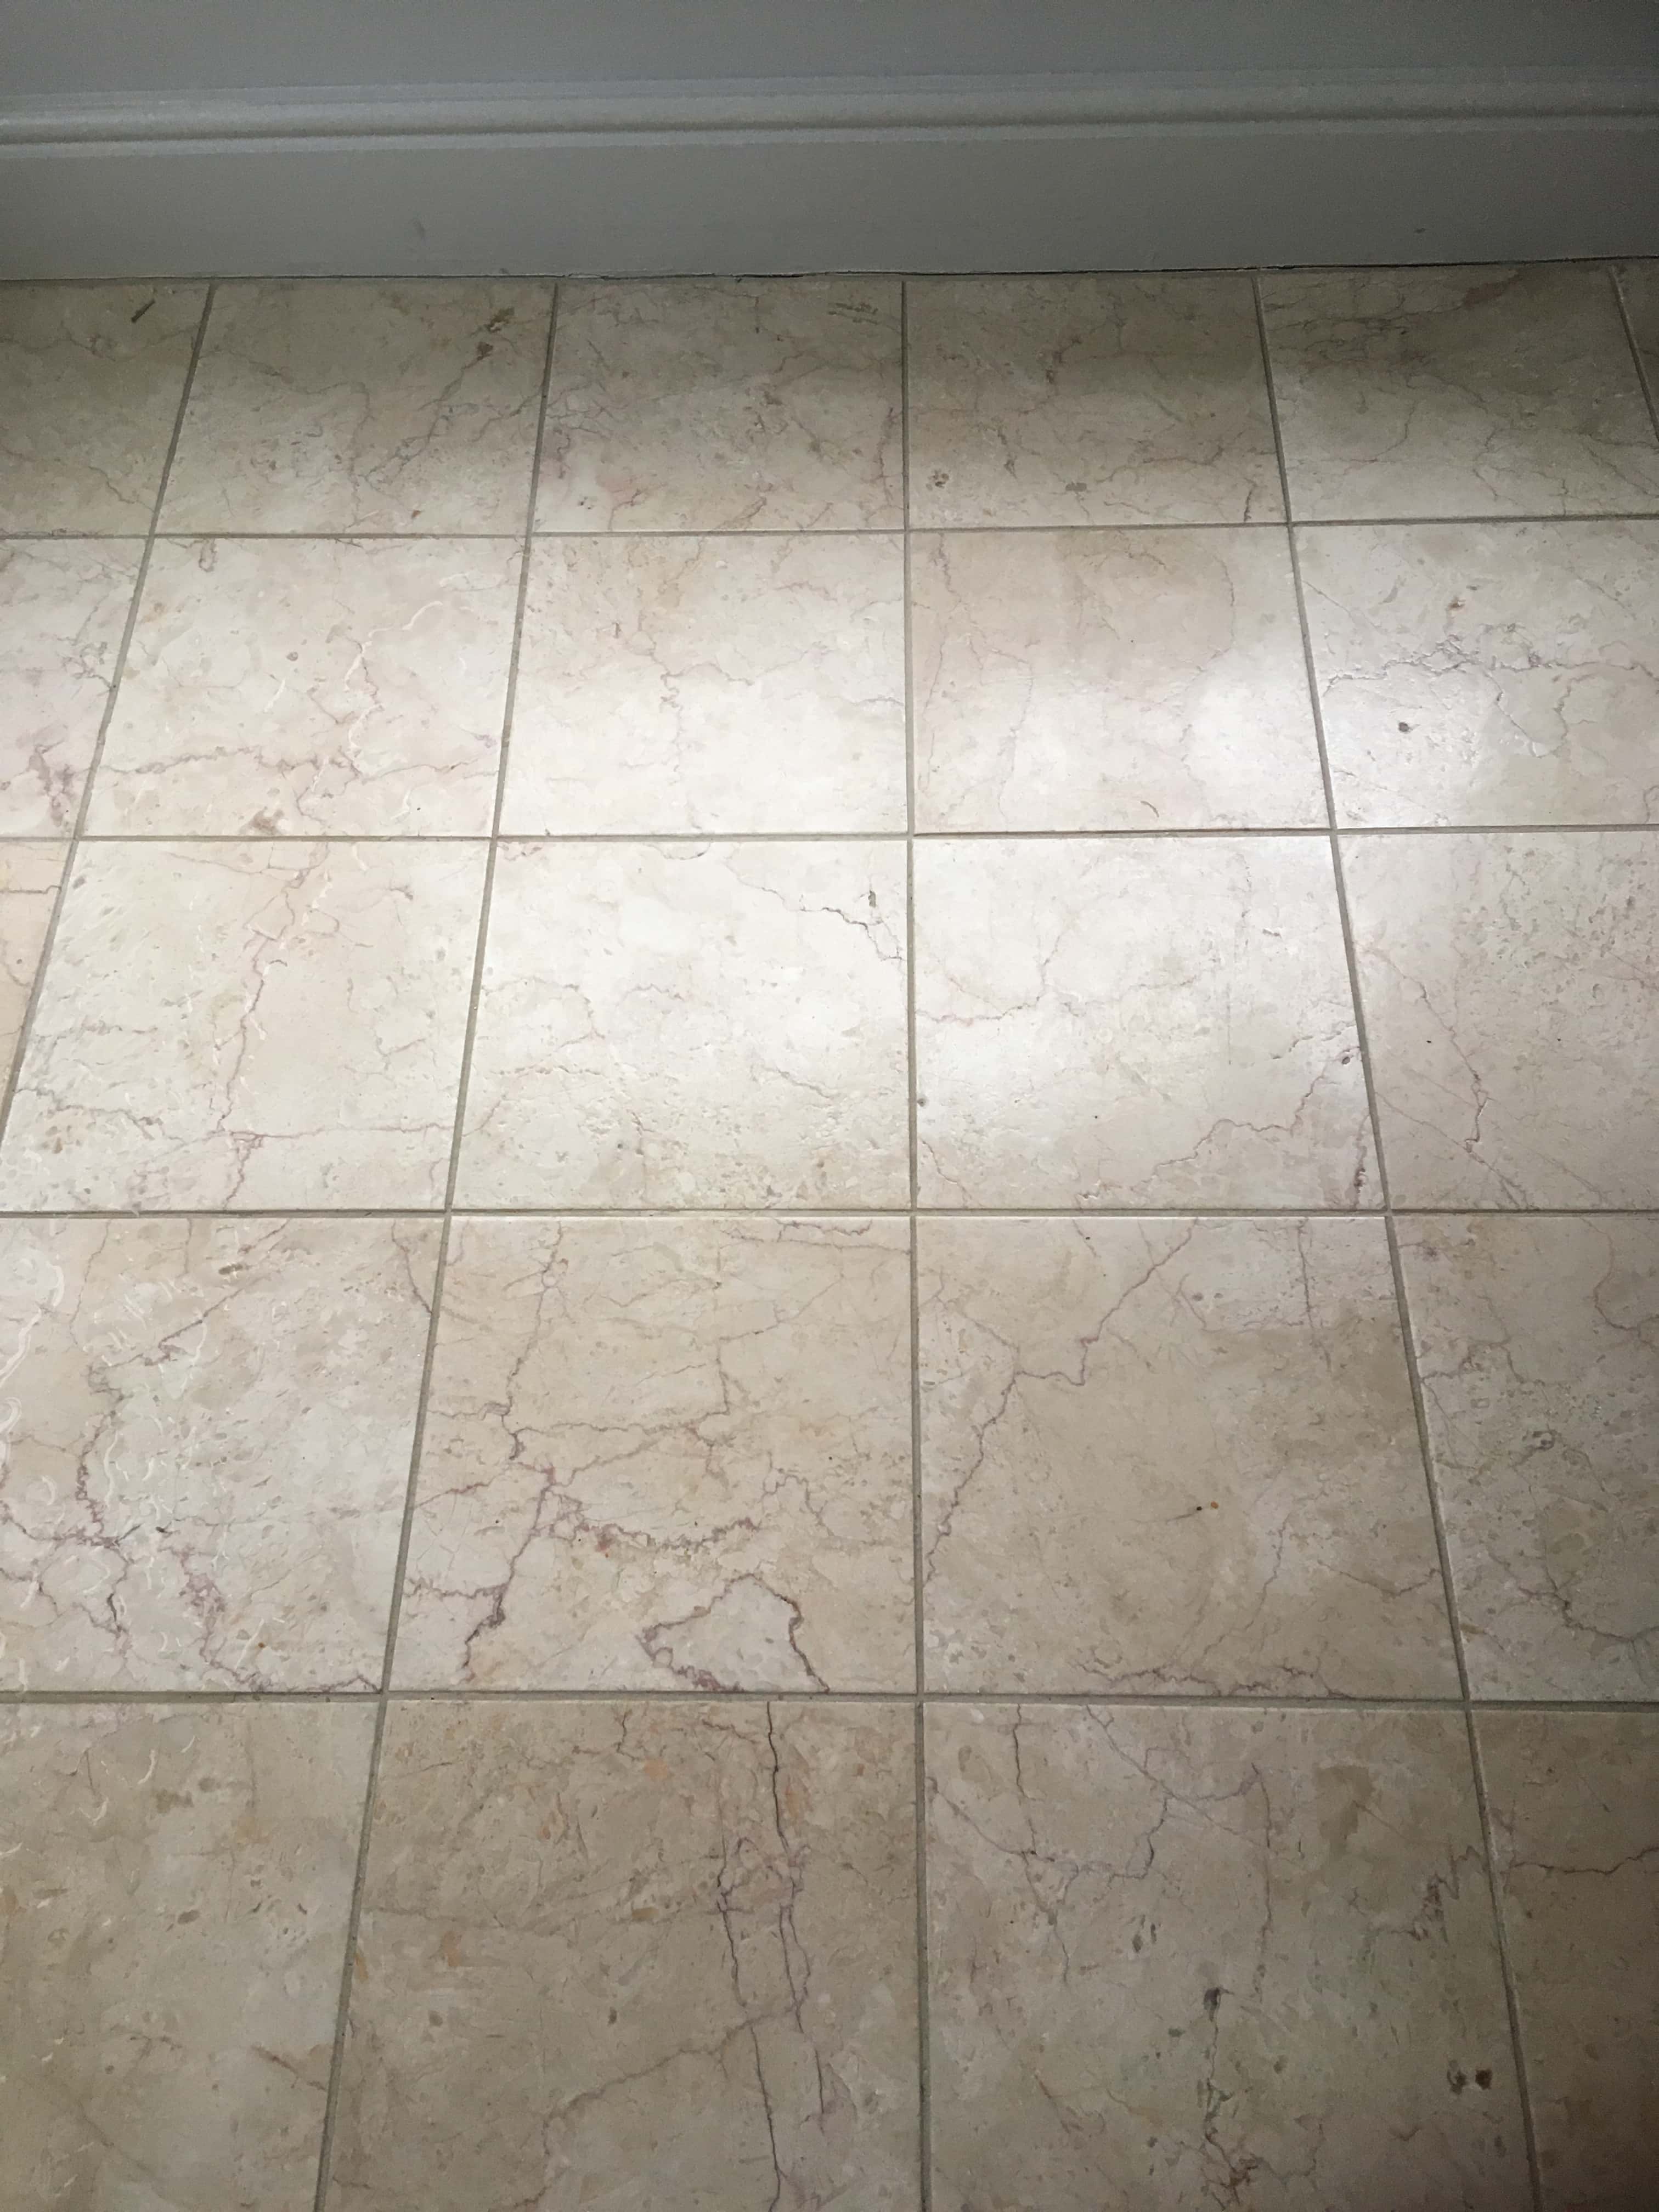
Marble Tiled Floor Before Polishing Middleton Manchester Marble Tiled Floor Before Polishing Middleton Manchester

The floor had lost its shine over the years which is a common problem with natural stone such as Marble which ideally needs to be polished and have the sealer topped up every year to keep it in the best condition. The cleaning test results were so good that the customer booked us in to complete the floor straight away after agreeing the quote.


Cleaning and Polishing a Marble Tiled Kitchen and Dining Room Floor

We started by giving the floor a general clean with Tile Doctor Pro-Clean paying special attention to the grout where it was scrubbed in along the grout lines using a stiff narrow brush. The soiled cleaning solution was then rinsed off and extracted using a wet vacuum.

The next step was to clean and re-polish the Marble using the 400, 800 and 1500 grit burnishing pads which re-hone the stone bringing up the polish gradually. You use water to lubricate the process and rinse with more water in-between each pad to rinse off the soil that is generated. The soil is then extracted with a wet vacuum.

After running all three pads over the floor in sequence and the floor was left to dry off overnight and I returned the next day to complete the work.


Sealing a Marble Tiled Kitchen and Dining Room Floor

On my return I started by running over the floor with the fourth burnishing pad in the set which is a very fine 3000-grit pad. It’s applied with a little water sprayed onto the floor using a technique we call a “Spray Burnish” and it really brings up the polish on the Marble tiles.

The last step was to seal the Marble tiles which will protect them from dirt becoming ingrained in the pores of the stone and make them easier to clear. For this I chose to use Tile Doctor Colour Grow which is an impregnating sealer which has the added benefit of enhancing the natural colours in the stone.

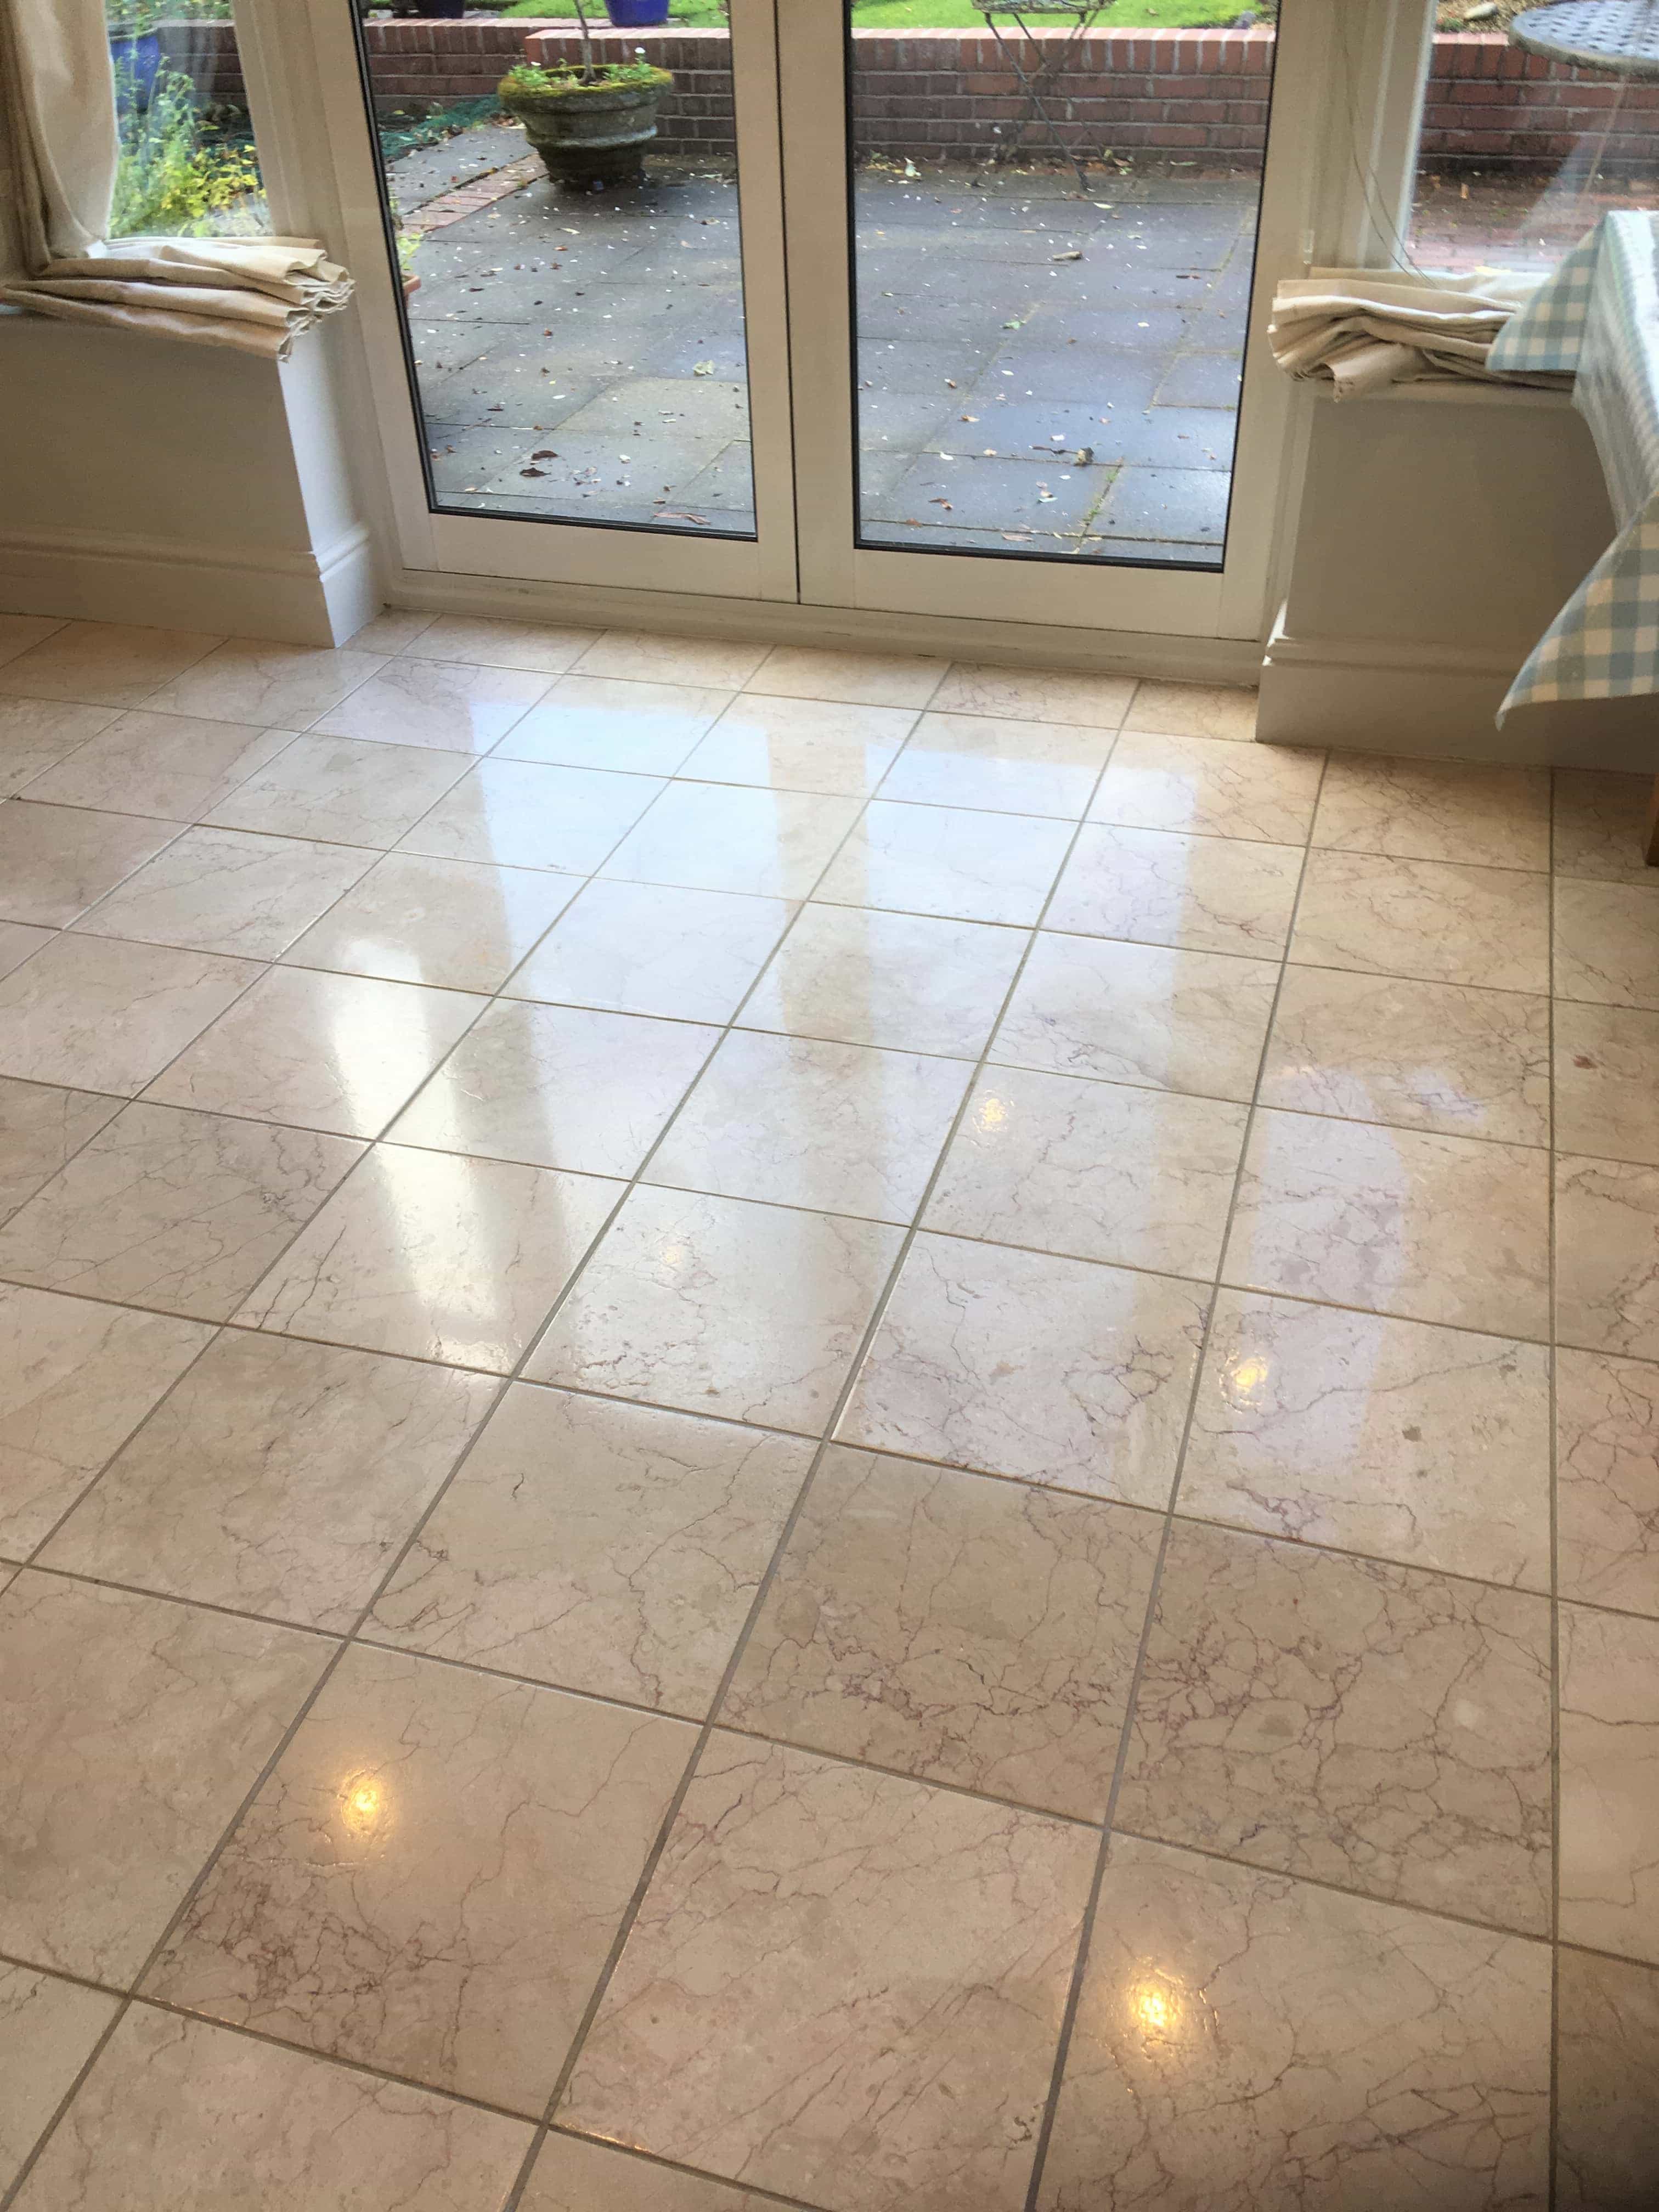
Marble Tiled Floor After Polishing Middleton Manchester Marble Tiled Floor After Polishing Middleton Manchester

It was the perfect choice for the floor and the final result was quite a transformation. Certainly my customer was very happy with the results and left the following feedback on the Tile Doctor feedback system.

"Excellent professional service. The floor tiles are back to how to how they were 14 years ago."

Before leaving I discussed aftercare and explained that the more a polished floor gets used the more the shine and sealer wears off, so I always advise having the floor re-polished once a year using the 3000-grit pad and then adding another coat of sealer. My customer agreed and has already booked me in for a years’ time to do the work which should only take about two hours.


Source: Marble Tile Cleaning and Polishing Service in Greater Manchester

5 Tips for Installing Kitchen Cork Flooring

Installing kitchen cork flooring can provide you with a very durable, functional floor. The kitchen is one of the most highly-trafficked areas of the house. Therefore, you want to make sure that you put a floor in there that will stand up to the wear and tear everyday for years. Cork can do just that, but it needs to be installed correctly in order to do so. If you do not install it properly, you could run into problems down the road. Here are a few tips for installing kitchen cork flooring effectively.

1. Clear the Area

Before you can do anything, you need to clear the area of everything. Remove the appliances, remove the kitchen table, and remove anything else in the room. You need a clear workspace and a good clean floor for the cork to be installed on.
2. Prepare the Subfloor

The floor that you put the cork on needs to be flat and level. Since cork is a floating floor, you should be able to install it over a number of different subfloors. You can put it over a wood subfloor or concrete. You can even install it over other types of flooring like vinyl or ceramic. If there are imperfections in the floor, you will want to level them out with floor patch. If you are not over a crawlspace, you will want to make sure that the floor is sealed off from moisture. You can do this with a Visqueen vapor barrier or with a liquid floor sealer that you roll onto the concrete. Just make sure that moisture does not have any direct access to the cork flooring.
3. Don't Forget to Acclimate

Since cork is a natural product, it will expand and contract in different conditions. When the temperature around the flooring changes, it can expand and contract. It can also change based upon moisture content in the air. For this reason, it is necessary to acclimate the cork for a certain period of time in the environment that it will be installed in. Check with the manufacturer recommendations to see how long you should acclimate it. Depending on the company, they recommend somewhere between 24 and 72 hours. In order to make sure that your cork is still under warranty, you will want to follow the manufacturer's recommendation on acclimation.
4. Leave Expansion Gap

Something else that you will want to keep in mind is that you need to leave an expansion gap around the outside of the room. When you install cork, you want to make sure that there is room for the floor to expand and contract. When you forget to leave an expansion gap, your floor will eventually end up buckling at the joints.
5. Glue the Joints

When you are installing a floating floor in a wet area like a kitchen, you will most likely want to glue the joints as you install the planks. A good glue will help keep the boards together and prevent surface spills from getting down into the cork.


Wednesday, December 5, 2018

Restoring an Old Terrazzo Hallway Floor in Newmarket

The owner of an older property in Newmarket got in contact with us about restoring his Victorian Terrazzo Tiled Hallway. We like to do a site survey to ascertain the condition of the floor and give the client a fixed price for the works, so we organised a time to pop over and look at the floor.

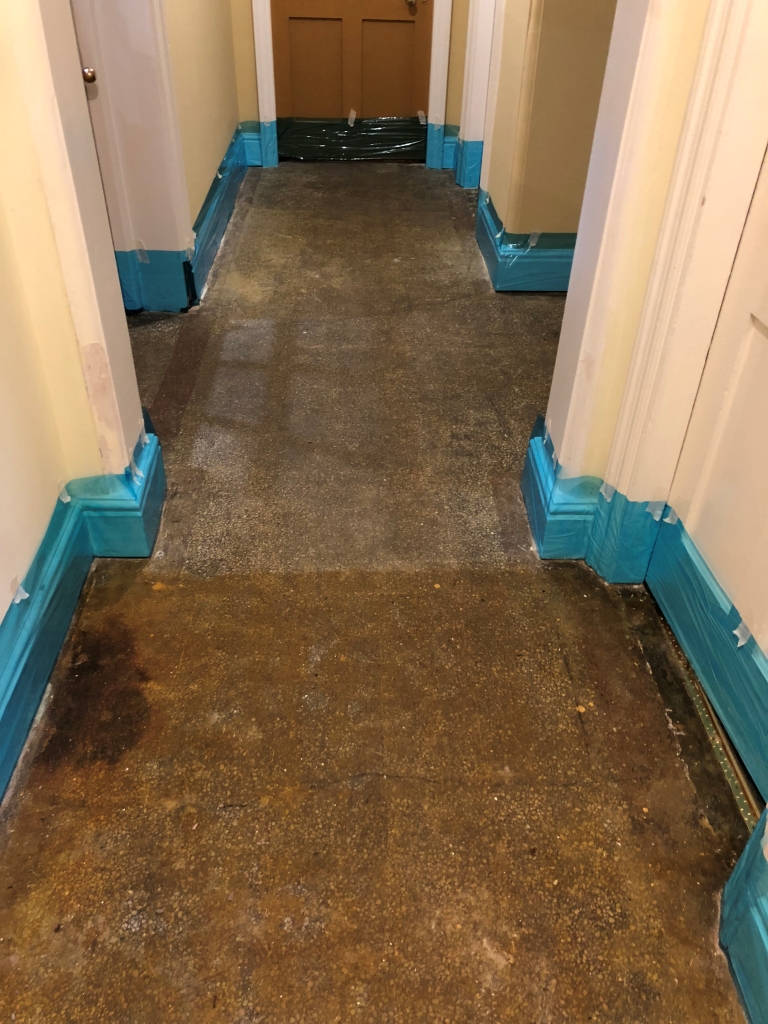
Adhesive Covered Victorian Terrazzo Hallway Before Cleaning Newmarket Adhesive Covered Victorian Terrazzo Hallway Before Cleaning Newmarket

The floor had taken a battering over the years and was completely unrecognisable after being completely covered up with carpet that had been secured in place with a lot of adhesive. Removing the glue and restoring an old floor like this is a difficult task but something we are familiar with and we were confident it could be restored to a reasonable standard. We discussed with the client the process and agreed a price to carry out the restoration.


Cleaning and restoring a Victorian Terrazzo Tiled Hallway Floor

The first day consisted of adding protection to the wooden skirting and then carefully scraping off as much excess adhesive as possible. To remove the rest of the glue a thick coat of Tile Doctor Nano Tech HBU remover was applied. I had tried applying this product on the floor first, but it struggled to make any impact given the huge amount of adhesive that was present. Incidentally HBU stands for Heavy Build-Up which pretty much described the problem with the floor. I left the HBU to dwell for about fifteen minutes, scrubbed it in and then rinsed off the soil with water and extracted with a wet vacuum.

To finish the job, I then repeated the process with a coat of Tile Doctor Remove and Go which was scrubbed it in to the floor to release the last bits of adhesive. Again, the floor was rinsed with water and the soil extracted with a wet vacuum. The floor was then inspected to ensure all the adhesive had been removed and stubborn areas were spot treated using a mixture of techniques until I was happy.

Removing the adhesive was hard work and took up the whole of the first day but was well worth the effort as the Terrazzo was now visible and the end goal was in sight. So, returning the next day we proceeded to build on the restoration by honing and polishing the Terrazzo with 100 through to 3000-grit diamond encrusted burnishing pads. They are applied in sequence i.e. 100, 200, 400, 800, 1500 and finally 3000 grit, using water to lubricate and then more rinsing and extracting between each pad.

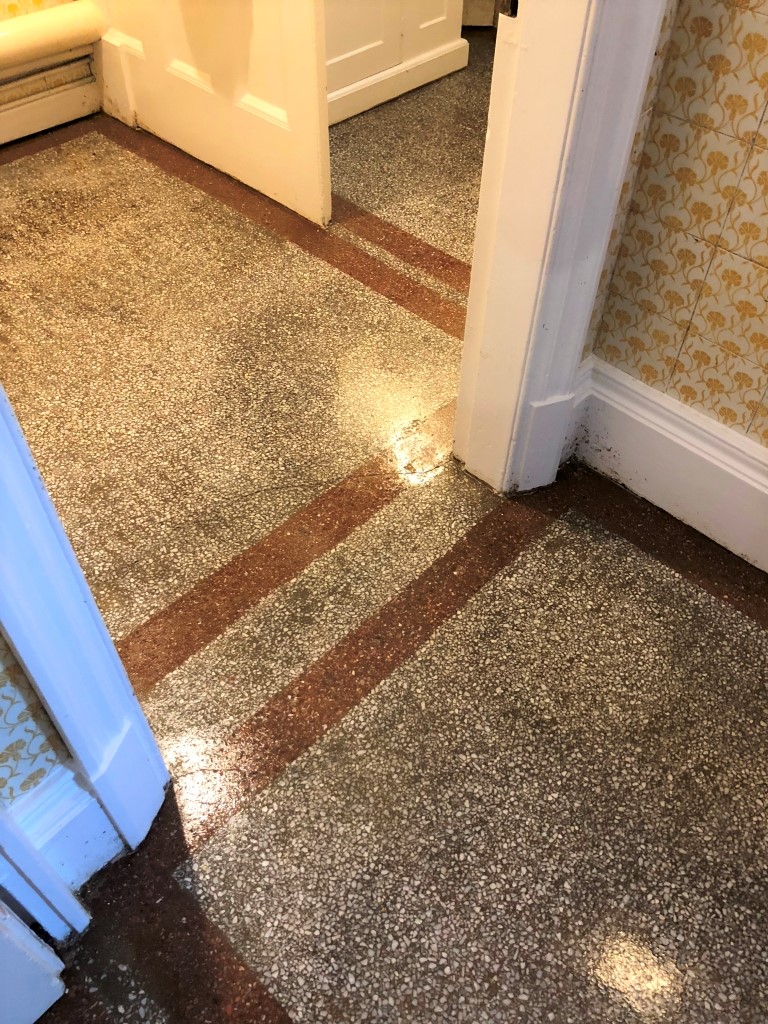
With the glue was removed and the Terrazzo renovated a large crack was clearly visible across part of the hallway floor, whilst it’s not possible to repair this without taking up the floor I was able to improve its’ appearance by applying a matching filler to the cracks whilst the floor dried.


Sealing a Victorian Terrazzo Tiled Hallway Floor

The final stage was the application of an impregnating sealer. We selected to use Tile Doctor Colour Grow which is a colour enhancing product that soaks into the pores of the stone protecting it from within. It had been some time since the Terrazzo had been sealed so it took more coats then usual to properly seal the floor.

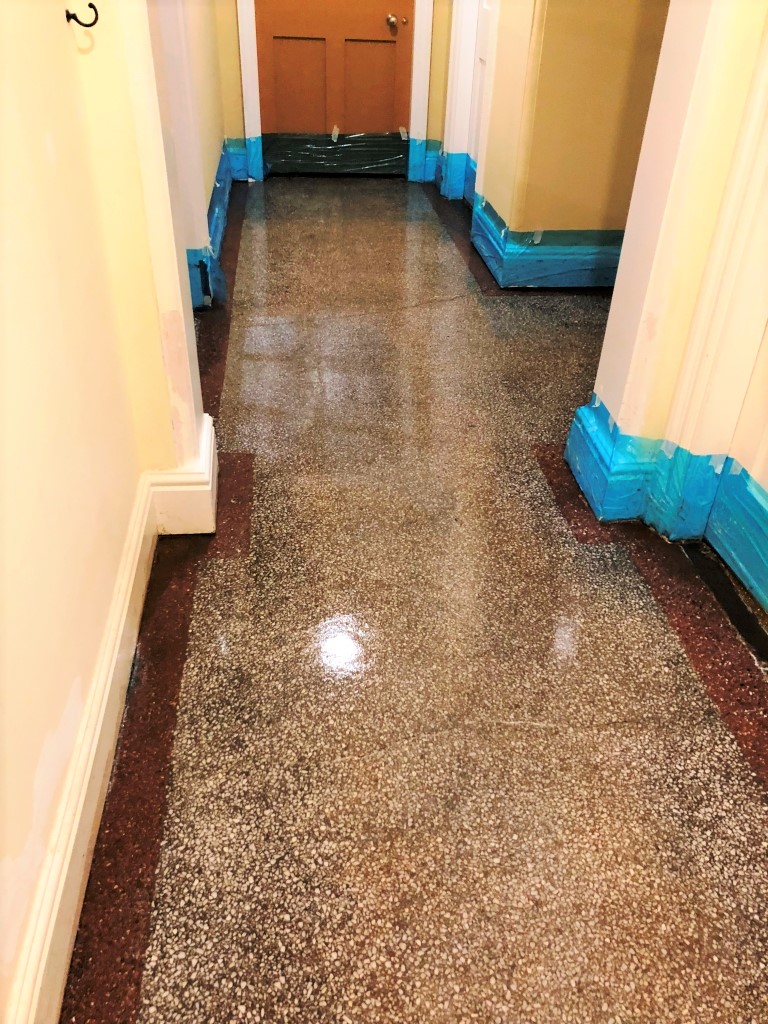
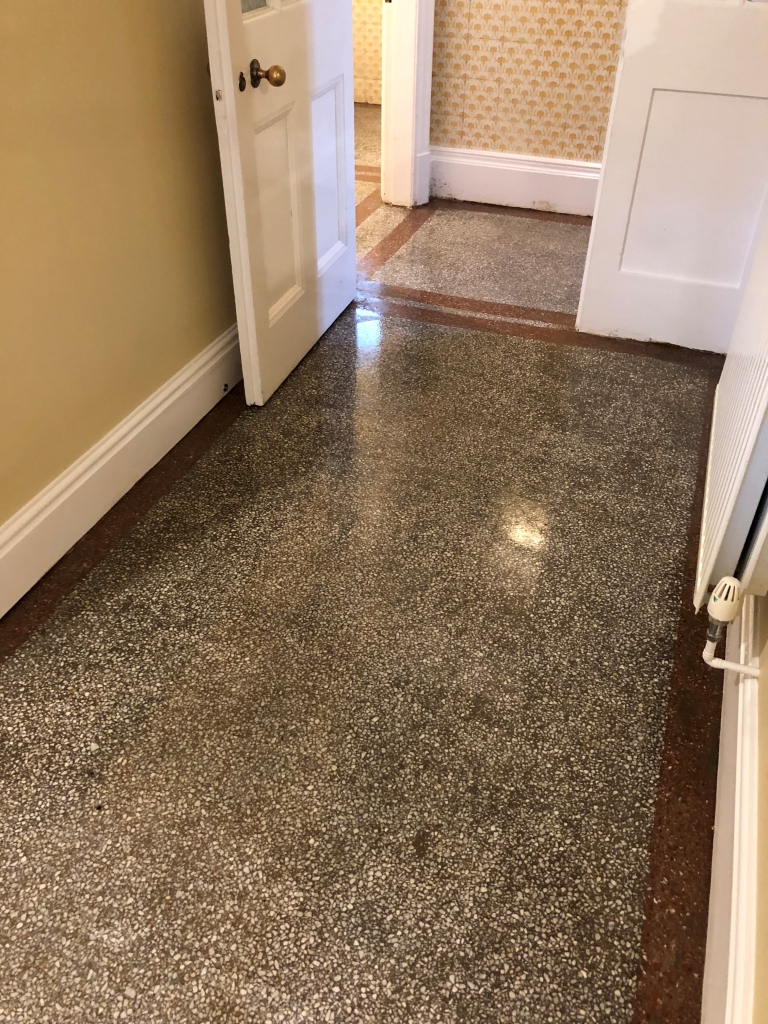
Adhesive Covered Victorian Terrazzo Hallway After Cleaning Newmarket Adhesive Covered Victorian Terrazzo Hallway After Cleaning Newmarket

As you can see the floor looked a lot better once completed, the client was very happy with the final result and left the following feedback:-

”We knew that restoring our Victorian Terrazzo floor was going to be a very difficult job, so we were heartened when Tom was so positive about doing a good job and his quotation was very reasonable. He tackled the work very professionally, always turned up on time, explained exactly what he was doing and minimised our inconvenience. We are delighted with the finished job (at the quoted price!) and would have no hesitation in recommending Tom to anyone who needs a similar service.”
Des B, Newmarket

Adhesive Covered Victorian Terrazzo Hallway After Cleaning Newmarket


Source: Terrazzo Tile Cleaning and Sealing Service in Newmarket

Tuesday, December 4, 2018

How to Dye Your Cork Floor

The look of a cork floor can be changed by dying it to change the color. When specific dyes are applied to the cork tiles they can change the color of their flooring very easily.

All cork floors will be coated with a protective coating to prevent stains. If you are working with a new floor then the stain can be applied before this coating, otherwise the coating will need to be removed so that the stain can be properly applied.

What You'll Need:
  • Brush
  • Cloth
  • Polyurethane clear coat
  • Paint roller
  • Stain
  • Paint stirrer


Step 1 - Cleaning the Floor

Start by sweeping the floor to make sure that there's no debris or dust covering it. If there is a protective layer on the floor then this first needs to be removed using strippers.

The whole project will take around 24 hours before you can actually walk on the floor. Plan to carry out this work when you have enough time to spare.

Step 2 - Opening the Stain

Now you need to open up the can of stain and stir it to mix it up by using a stirring stick. Carry on stirring the stain until it is even in color and texture. A paddle can also be fitted to your drill for faster and quicker results.

Step 3 - Testing

If you have any of the cork flooring left over from when you installed then you will be able to test the stain on this. This will help you to check that the stain won't cause any problems or damage your existing floor. It will also help you to check that the color of stain is suitable for use in your room.

Step 4 - Applying the Stain

Dip a clean cloth into some of the stain and then rub the stain into the cork flooring. Use the stain in a circular motion. Try to keep the coat of stain as even as possible, use the cloth again to remove any excess stain. If required you might need to apply extra coats of the stain to improve the color of the floor.

Step 5 - Drying

Leave the cork stain to dry over night so that it's completely dry. Check a small area of the stain around the edge to ensure that it's dry.

Step 6 - Coating
When the flooring is dry you then need to apply a coat of polyurethane by using a paint roller. Choose polyurethane sealant which is designed for use on cork flooring. Once the first coat is down allow it plenty of time to dry. You might need to choose coating which is suitable for use in areas of the house which have heavy traffic if this is being installed in hallways or living rooms.

Step 7 - More Coats

Next all you need to do is apply extra coats of polyurethane onto the floor. Wait for the coating to dry properly before applying the next coats. Also try to avoid setting foot in the room until the coating is dry.


Thursday, November 29, 2018

Typical Fees when Hiring Tile Installers

Tiles are very common types of floor covering which are especially popular in the bathroom and kitchen, hiring tile installers can be a very costly business. Fitting tiles yourself isn't actually a very complicated project and this can sometimes save you lots of money.

If you do want to hire a tire installer then you will need to consider a few important tips so that you can work out how much they are likely to charge.

Requirements

The cost of hiring tile installers will vary depending on your requirements. If you want a whole wall tiled in the same color then this will often be much cheaper than if you want to create a mosaic design on one of the walls or floor. Think about exactly what you are trying to accomplish so that you will be able to get accurate quotes.

The type of tiles used will also significantly affect the cost of the project. Using ceramic tiles will typically be much cheaper than using marble tiles. Marble is a much more expensive material and the installers will typically want more to fit it too.
Shopping Around

No two tile installers will be the same and their prices will probably be different too. Look through the yellow pages or on the Internet to find some tile installers. You should be able to find out roughly how much they are charging to customers by reading reviews on the Internet.
Average Prices

The prices of tile installing can vary from between $6 to $20 per square foot for a basic bathroom tile installation. Whereas more specialty tiles including marble and granite tiles cost more.

If you already have tiles in your bathroom then these will first need to be removed. Most professional tile installers do not include removal in their budget. Unless you want them stuck over the top of your old tiles you might want to remove them yourself, or ask how much it will cost.

The prices can vary significantly which is why it's so important to get a quote before starting the work.

Doing the Project Yourself

If you are a skilled DIYer then you will be able to save yourself quite a lot of money by completing the tile installation project yourself. You will only need to purchase some tools and materials. Ceramic tiles are affordable and the only other supplies you really need are adhesive and grout.

When buying ceramic tiles make sure that you buy the same batch number where possible. Also buy too many rather than risking buying too few. This will ensure that the colors all match and that the tiles don't look strange together.

You will also need a tile cutter and glue spreader. If you are doing this project yourself make sure that any flooring tiles are secured level against the floor. If they are not fully supported then this can cause them to crack when they rock and move. Also ensure that you are purchasing floor tiles when completing flooring projects.


Thursday, November 22, 2018

Renovating Travertine Kitchen Floor Tiles in East Surrey

Travertine is a beautiful product however like all-natural stone it needs to be protected with a sealer if you want to keep it looking its best. The trouble is sealers wear down with foot abrasion eventually allowing dirt to become ingrained in the stone at which point it becomes difficult to clean. This was pretty much the issue with this tumbled Travertine floor in the kitchen of a house in Godstone, East Surrey. The owner was fed up with the appearance of the floor and asked if we could anything to improve it.

Tumbled Travertine Kitchen Floor Before Cleaning Godstone Tumbled Travertine Kitchen Floor Before Cleaning Godstone

I went over to take a look and could see it was as suspected the usual problem of the sealer wearing off and needing replacing. Before we could do that though I would need to remove any remaining sealer and deep clean the tiles to extract the dirt. Fortunately, it was only a small Kitchen and summer time, so I was confident I could do the whole floor in a day.

Cleaning and Polishing Tumbled Travertine Kitchen Tiles

The first thing I needed to do was to remove the plinths from the kitchen units to prevent them from encountering the cleaning products. Next and working in sections I started applying Tile Doctor Remove and Go which is a powerful tile coatings remover that would strip what was left of the old sealer from the floor. This is important, so we could get down to the base stone, otherwise we would end up with different levels of sealer which would affect the overall appearance of the floor.

Tumbled Travertine Kitchen Floor During Cleaning Godstone

I left the Remove and Go on the Travertine for about ten minutes before scrubbing it in by hand with a scrubbing brush. Normally I would use a machine for this but given the size of the floor that was not a practical approach. As well as removing the sealer this process also got the Travertine and Grout clean and after rinsing off the now soiled solution with water and extracting it with a wet vacuum the floor was looking much improved.

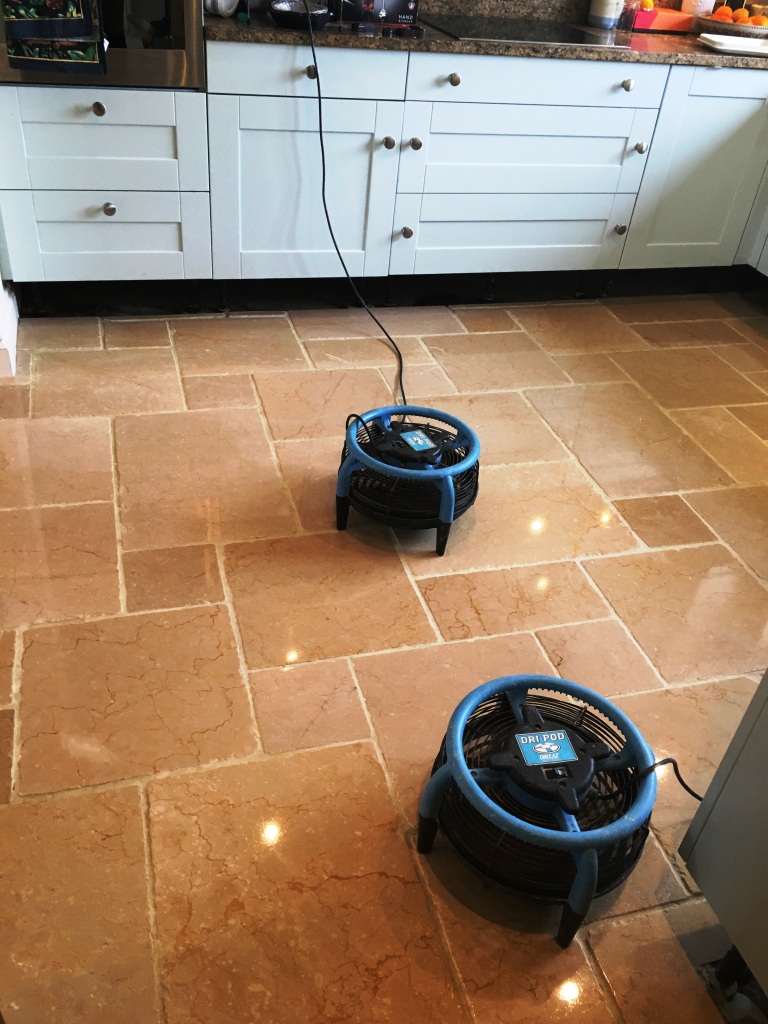
I inspected the tile and grout at this point and spot treated any areas that needed further attention using a repeat of the previous process. Once I was happy I setup a couple of air dryers to speed dry the floor.

Sealing Tumbled Travertine Kitchen Tiles

After speed drying the Kitchen floor for a couple of hours, we had a moisture content reading low enough to apply a coat of Tile Doctor Ultra Seal which is an impregnating natural look sealer that works by occupying the pores in the stone thus preventing dirt from becoming ingrained in there. Speed drying for a further hour then allowed the application of two coats of Tile Doctor Seal and Go to produce a lovely finished look that really brightened up the kitchen.

Tumbled Travertine Kitchen Floor After Cleaning Godstone Tumbled Travertine Kitchen Floor After Cleaning Godstone

Before leaving my very happy customer to the enjoy, I left her with customer with a complimentary bottle of Tile Doctor Stone Soap, a neutral and highly reliable cleaner for natural stone floors such as Travertine. This will assist her in maintaining the appearance and condition of the tiles going forward. Another satisfied customer!


Source: Travertine Tile Cleaning and Sealing Service in Godstone, East Surrey

Tile Installer Trade Secrets You Can Use

Tile installers have a number of great insider secrets. They are consummate professionals, so they’ve developed systems and even shortcuts that work well. Often, they’ll try to keep their tricks to themselves but nothing can truly stay secret for long. Knowing some of those secrets can make your tiling job a lot easier. You might imagine that most tillers will have superb secrets regarding the laying of the tile itself. In fact, their greatest secret is in the preparation they do before a single tile is laid.

Secret 1: Preparation

The biggest key to making a job go smoothly is good preparation. In the case of large jobs this can mean days of preparation. Check the rooms to see how square the walls are, how even and smooth the edges appear and how level the surface is that you’ll be covering with your tiles.

Once you’ve established this, begin work your preparation methods out. If necessary, build up floors a little, using mortar rather than self-leveling compound. Where walls are being tiled, especially if they have concave bows, use thinset to level them out. With convex bows, remove the board and use a plane on the wall studs before replacing.

This can take longer than the actual tiling but it’s definitely worthwhile. Not only will the tiling process go smoothly, but you'll have a much outcome. Starting with a level floor spares you having to deal with a problem called lippage, which effectively means the tiles aren’t quite even.

Secret 2: Layout

You’ll save a lot of time later if you establish lines parallel and square to the longest wall in the room. Next, lay out a run of tiles about 6 feet long, including spacers. This will let you know if you’ll end up with slivers around the room edges. If that’s the case, you can make adjustments so it doesn’t happen.

Lay out tiles from the center of the room, going in all directions to ensure the perimeters will all be the same. When you’ve done that, re-check everything thoroughly to avoid mistakes later.

Secret 3: Installation

To avoid boxing yourself into a corner and having to wait while the mortar dries, move from the field which is classed as the center of the room and work outwards to the perimeter of the room. Set the tile in the thinset then take the time to level it in all directions. This ensures you’ll have a perfectly level floor.

If you’re tiling more than the floor, complete the other surfaces such as countertops and walls first. This means that you’ll never be stuck for a surface to work on.

Some tiles, such as ceramic, porcelain and terra cotta, will require grout. However, you should still take the time to make sure they’re flat and even rather than relying the grout to make things look good. It’s a matter of pride and craftsmanship.

Secret 4: Grouting

When you’ve grouted the tiles, use clean water and thick sponges to clean up and do so thoroughly. When you caulk areas with splashbacks or where two different surfaces join, use latex caulk that’s matched in color to the grout. To get a good bead, work the caulk into the join carefully and firmly.


Friday, November 16, 2018

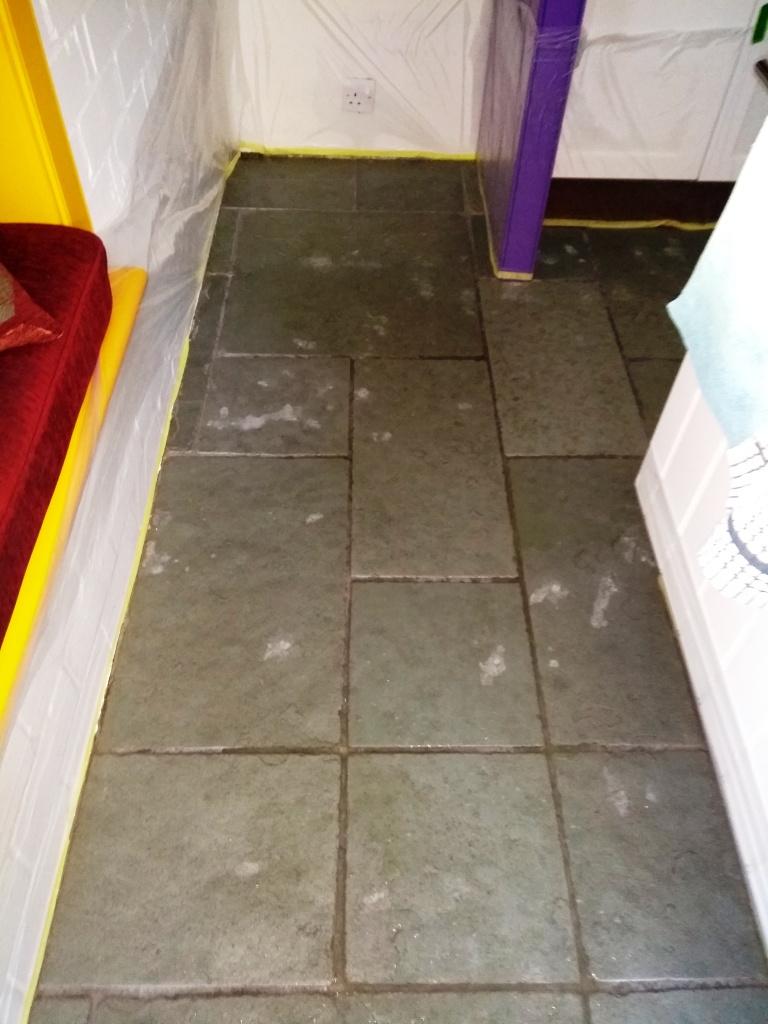
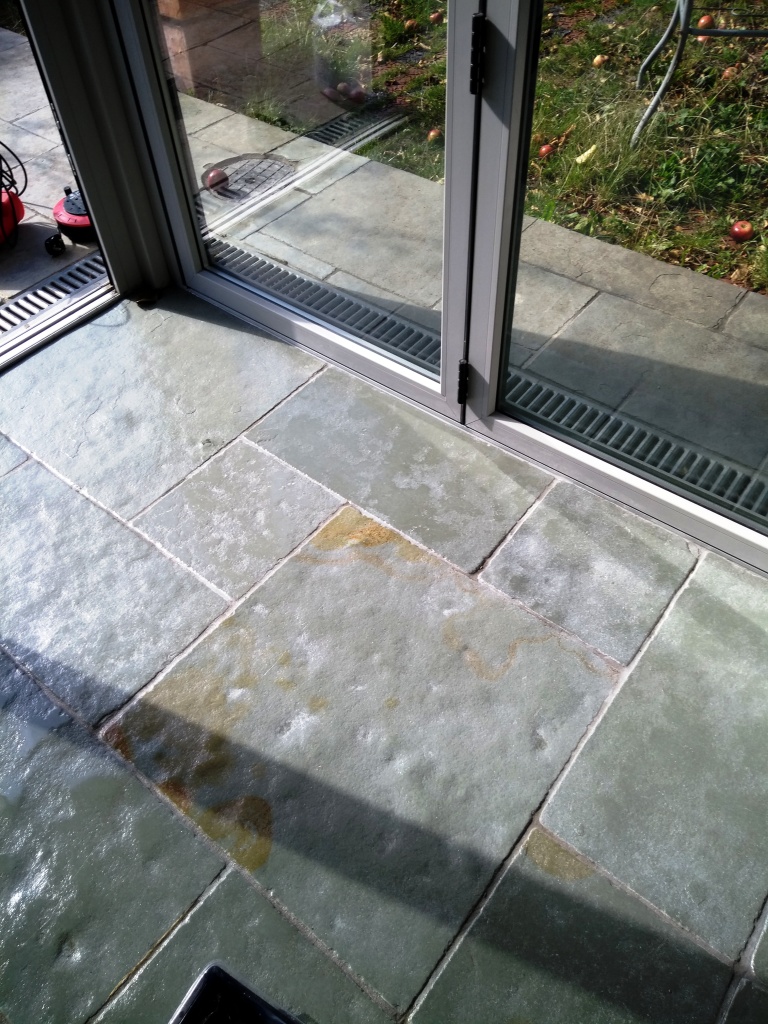
Stained Flagstone Floor Deep Cleaned in Gloucestershire

I recently helped a homeowner from my home town of Dursley who got in touch about her kitchen Flagstone floor. The problem revolved around an accident she had with raspberries which had stained the flagstones and the problem became compounded when a house hold clearing product was applied neat to clean up the mess. If you follow any of our Tile Doctor blogs, you will know that using strong household cleaning products can damage the sealer and, in this case, it had left white marks on the floor.

Flagstone Floor Before Cleaning Dursley

I called round to the property to survey the floor as was surprised to find out that the floor had been cleaned and sealed only four months prior by another company. I don’t like to comment on other people’s work, but I found the grout lines and flagstones were still badly ingrained with dirt, so it wasn’t a through job.

Flagstone Floor Before Cleaning Dursley Flagstone Floor Before Cleaning Dursley

I completed by survey and demonstrated the process I would follow to resolve the issues on one of the flagstone tiles. She could not believe the difference I was able to make and booked me in straight away to restore the entire floor.

Cleaning a traditional Yorkshire Stone internal floor

My first task was to protect the wooden kitchen units from splashing that can happen when cleaning the floor. Once that was done, I set about stripping the sealer from the floor and deep cleaning the tile and grout with a strong dilution of Tile Doctor Pro-Clean. Pro-Clean is a concentrated, multi-purpose high-alkaline cleaner, stripper and degreaser which is safe to use on all types of tile, stone and grout including natural stone.

Working in sections across the Kitchen and adjacent dining room I diluted one part Pro-Clean to two parts water and mopped it onto the flagstones and grout where I left it to soak in for roughly fifteen minutes. Then using a rotary floor buffer fitted with a black scrubbing pad I scrubbed the solution into the floor into the old sealer and trapped dirt came away turning the cleaning fluid black in the process. The soil was then rinsed off with water and then extracted with a powerful 3,000 watt wet and dry vacuum. This process was repeated until I was satisfied the floor was clean and I ran a stiff grout brush along the grout lines to ensure they also received a good scrub. After I was satisfied the section was clean it was rinsed thoroughly with water to neutralise the floor and remove any trace of product and then dried with the wet and dry vacuum.

The cleaning process took up the whole day, but the flagstones would need to be dry before sealing so after giving the owner an update I left the floor for two days, so it could dry out thoroughly.

Sealing a traditional Yorkshire Stone internal floor

On my return I tested the floor was dry in multiple places with a damp meter to ensure it was ready to be sealed. The readings showed that the wet and dry vacuum had done a good job in removing the moisture, so all was well. To seal I applied several coats of Tile Doctor Seal and Go allowing each coat to dry before applying the next however with such a large area to cover I was able to work in sections around the floor.

Seal and Go works really well on Flagstones and leaves a very appealing sheen finish, also being water based it doesn’t leave a smell as it dries.

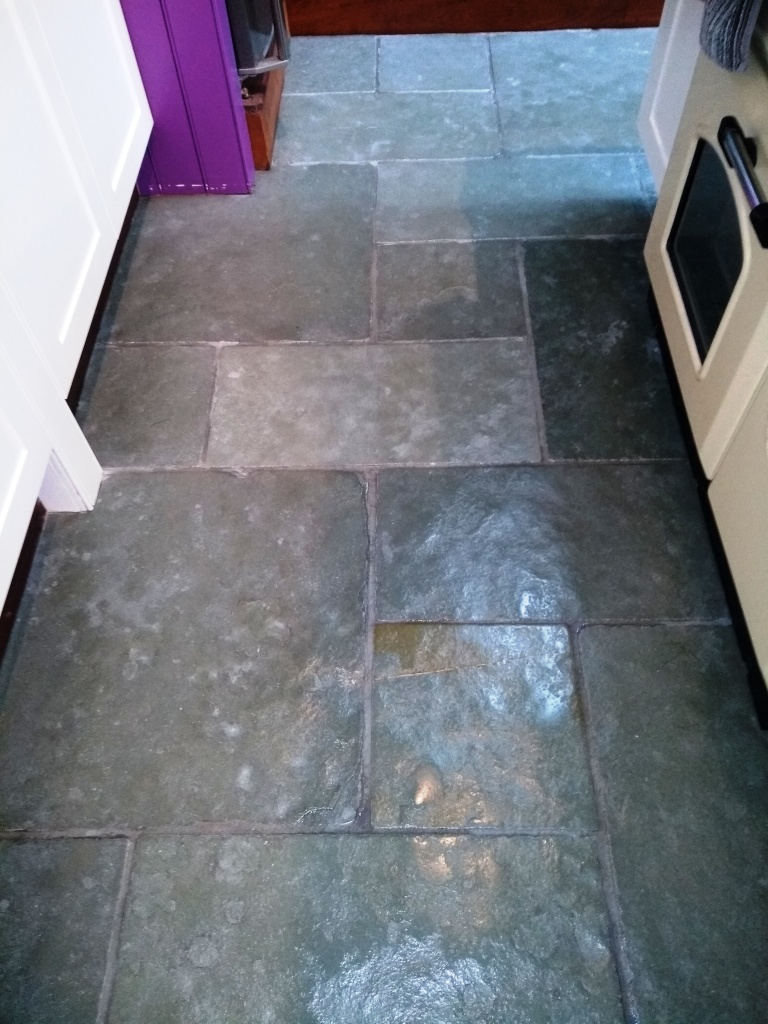
Flagstone Floor After Cleaning Dursley Flagstone Floor After Cleaning Dursley

The results were amazing, and the customer thanked me for making such a massive improvement on her floor. Before leaving I made sure to discuss after-care and to avoid the use of hash cleaning products.

Flagstone Floor After Cleaning Dursley


Source: Flagstone Tile Cleaning and Sealing Service in Dursley, Gloucestershire

Wednesday, November 14, 2018

Floor Tiles: Pros and Cons

Floor tile is a popular material used for many different rooms in a home. A wide variety of floor tiles exist today on the market ranging in size, shape and material. Most frequently used in kitchens and bathrooms, floor tile is also commonly used in entryways, sunrooms or even as the threshold to a fireplace. Here are some pros and cons regarding the use of floor tiles
Pros of Floor Tiles
There are so many advantages to floor tiles. We have chosen our top five things we love about floor tiles.  They are as follows:
1. Tile Floors are Beautiful
Floor tiles add an element of beauty to the floor. Coming in so many unique styles, shapes, colors and designs, floor tiles accent a room’s design and ambiance. They quickly become an integral part of the room’s look and feel.
2. Tile Floors are Durable
Most floor tiles are hard to crack, break and destroy. Drop a pot, a dish or any other piece of glassware and you'll find that the tile isn't  cracked, shattered or broken. They will last for years to come.
3. Tile Floors are Easy to Clean
The easiest way to clean floor tile is with a mild vinegar and warm water solution. Mop up the tile and you'll have a shiny, clean surface.
4. Tile Doesn't Absorb Odors
If you like to cook, and if you cook food using oils or strong smells, you know how the odor can penetrate almost anything. Tile floors are generally not porous materials and they resist absorbing any of the smells or scents that are developed inside your home because of your hobbies or your cooking desires.
5. Tile Floors are Easy to Install
With a little instruction and the right materials, floor tiles are very easy for the average person to install. Installation of floor tiles becomes a great weekend do-it-yourself project.
Now to the Cons of Floor Tile
Yes, there are some negative aspects to your lovely floor tile. Here they are!
1. Cold To The Touch
If you have sensitive feet or if you get cold easily, going barefoot is not an option on tile floors, especially in the colder months. Tile flooring tends to retain cold. 
2. Slick when Wet
After a good wash and a rinse, floor tiles may have you flying across the room if you don't have a matt or rug.  Because most floor tiles do not have texture, they are slippery when squeaky clean!
3. Noisy!
If you wear click-and-clack shoes or high heels, the floor tile will do nothing to muffle the sound. Be ready to every step in your household  and a great deal of echoing as tile tends to carry sound across rooms and down hallways.

Saturday, November 10, 2018

Renovating Tired Quarry Tile and Grout in East Surrey

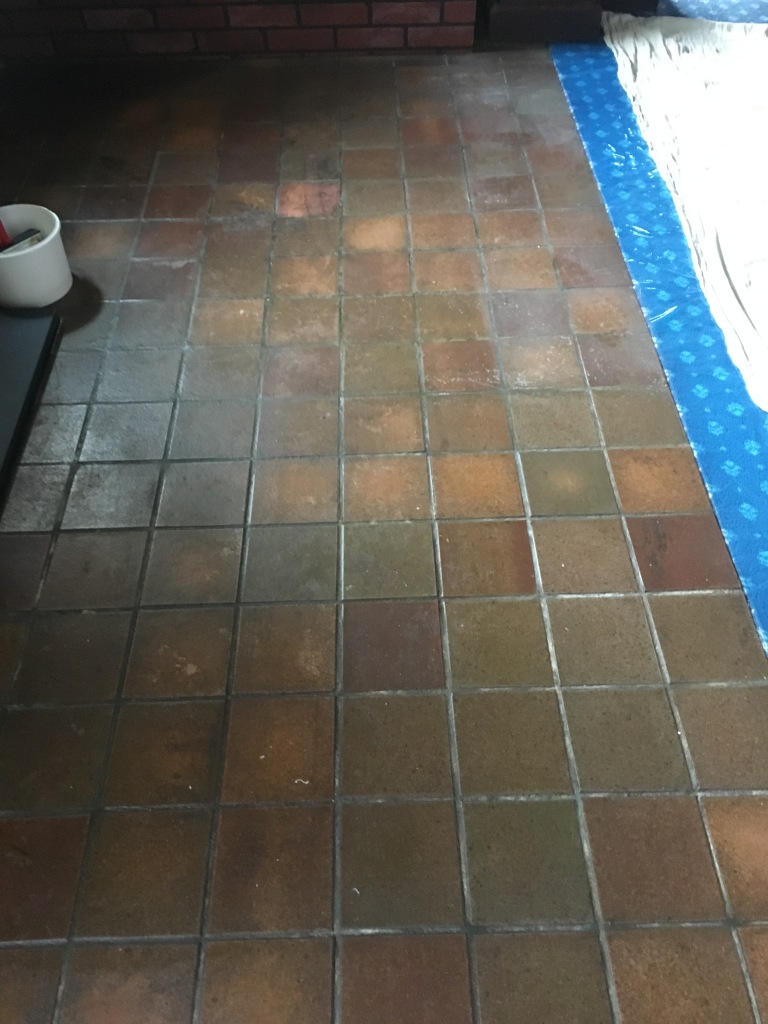
This client who lived in a property in the Village of Outwood had a tired looking Quarry tiled floor in their lounge and asked if we could improve the look of it. I went over to take a look and can see the tiles were situated in front of a brick fireplace and added a nice rustic feel to the room that was well suited to the house.

Quarry Tiled Floor Before Renovation in Outwood Quarry Tiled Floor Before Renovation in Outwood

It had clearly been some time however since the Quarry tiles had been given a good clean and seal; the tiles were looking dull and lifeless and the grout was especially bad and had darkened with the ingrained dirt. I could see a deep clean would be required to lift the dirt out so after discussing the process we agreed a date for me to come back and renovate the floor.

Quarry Tiled Floor Before Renovation in Outwood Close Up


Deep Cleaning Quarry Tile and Grout

When I returned to clean the floor my first task was to protect any areas that may be impacted by the cleaning process which in this case related to the adjacent carpet.

To be able to reach into the pores of the tile and grout and lift out the dirt I needed to remove any remaining sealer. To do this I applied a medium dilution of Tile Doctor Remove and Go which is a strong coatings remover and cleaner that’s ideal for these situations. The product is left to dwell for ten minutes, so it can get to work breaking down the old sealer and dirt and is then scrubbed into the floor. Normally I use a black scrubbing pad fitted to a rotary machine running on slow speed to do this however given the size of the floor I decided to use a deck brush to scrub the tiles and a narrow grout brush along the grout lines.

The soiled cleaning solution was rinsed off the floor with water and extracted using a wet vacuum. I then inspected the floor and spot treated any areas that needed further attention with a repeat of the same process. Once I was satisfied the Quarry tile and grout was as clean as it could be, I left for the night so the floor cold dry off.


Sealing Quarry Tiles

Returning the next day, I sealed the Quarry tiles with several coats of Tile Doctor Seal and Go which adds a nice subtle sheen finish to the tiles and will provide the tiles with long lasting protection. Seal and Go is a water-based sealer so doesn’t leave a smell as it dries which is always a plus.

My client was impressed with the transformation and as I think you will agree the Quarry tiles now look much brighter and the grout has returned to a much lighter shade.

Quarry Tiled Floor After Renovation in Outwood Quarry Tiled Floor After Renovation in Outwood


Source: Quarry Tile Cleaning and Renovation Service in East Surrey

Saturday, November 3, 2018

Installing And Maintaining Peel And Stick Tile

A very affordable and easy-to-do renovation of a floor uses peel and stick tile. These tiles work exactly as their name suggests.

What You'll Need:
  • Very sharp craft knife
  • Metal straight edge
  • Tape measure
  • Waste bin

Step 1 – Clean the Floor

The success of most jobs depends on the early preparation, and this preparation is very important with peel and stick tile. The floor must be totally clean and dust-free. Fix any irregularities before you lay the first tile.

Step 2 – Find a True Corner

Find a true corner in the room or the longest straight wall for your starting point. Test the tile against the corner before you remove the backing to make sure it fits snugly on both edges.
Step 3 – Fit the First Tile

Remove the paper backing and fit the tile to the floor. Try to get the tile into the right position immediately. The adhesive is quite strong, and you will probably ruin the tile if you try to reposition it.

Some people tear the paper backing, and the parts left behind prevent the full adhesive surface from making contact with the floor. With care, you can remove all the backing sheets in one piece.
Step 4 – Fit Other Tiles

Repeat the process. Make sure each new tile sits tight against any others. The paper backing of peel and stick tile is very slippery, so you should immediately dispose of each backing sheet into the waste bin.
Step 5 – Fill Gaps

Once you fit all the tiles, measure and cut tiles to fill the remaining gaps. The tiles are difficult to cut with scissors. Use a sharp knife, drawn along a straight edge. It is safer to stand and use a table for cutting, but always make sure you have some backing material to prevent damage to the floor or the table where you cut.

Don’t dispose of all the tiles or parts of tiles you have left. You might need them for repairs later.
Step 6 – Clean and Maintain the Floor

Maintaining your peel and stick tile floor is easy. You can clean the tiles with a damp mop, but you should never wash them.

Consult the manufacturer’s recommendations before you try any exotic cleaners. Most vinyl cleaners are acceptable, and some non-wax floor polishes can help create and maintain a glossy finish. To achieve the very best results, you can hire a buffing machine every month or so to bring the shine back to the tiles and remove any stains.

Peel and stick tile is supposed to be a short-term solution, but if you install and maintain them correctly, they could serve you well for a long time.


Wednesday, October 31, 2018

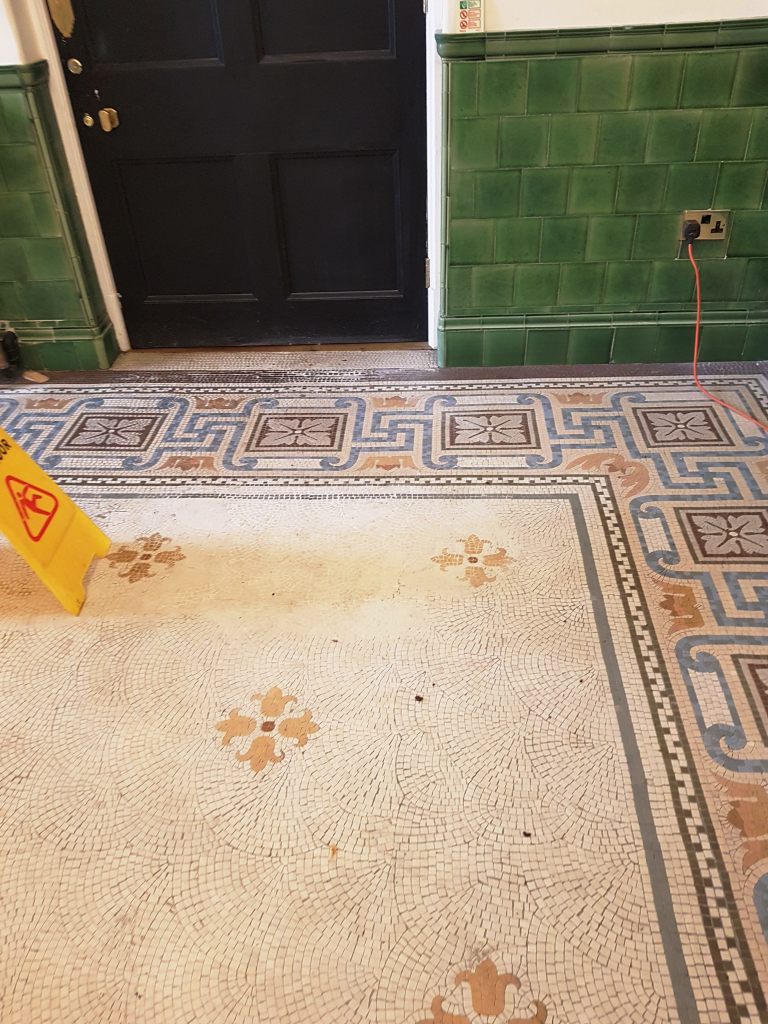
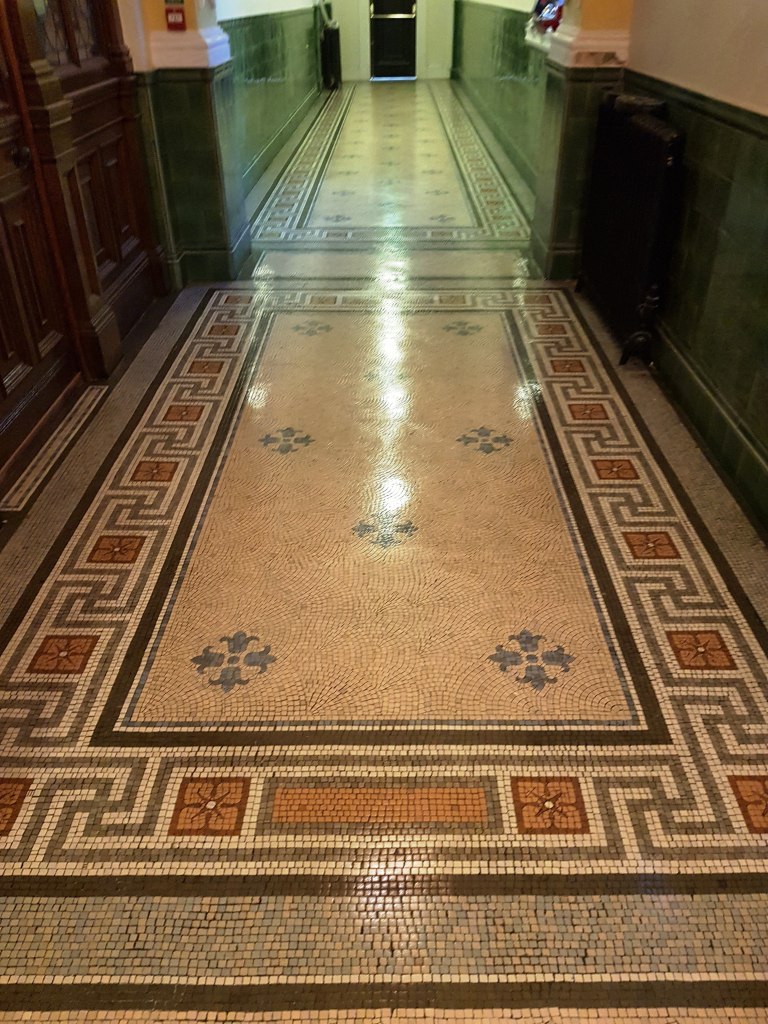
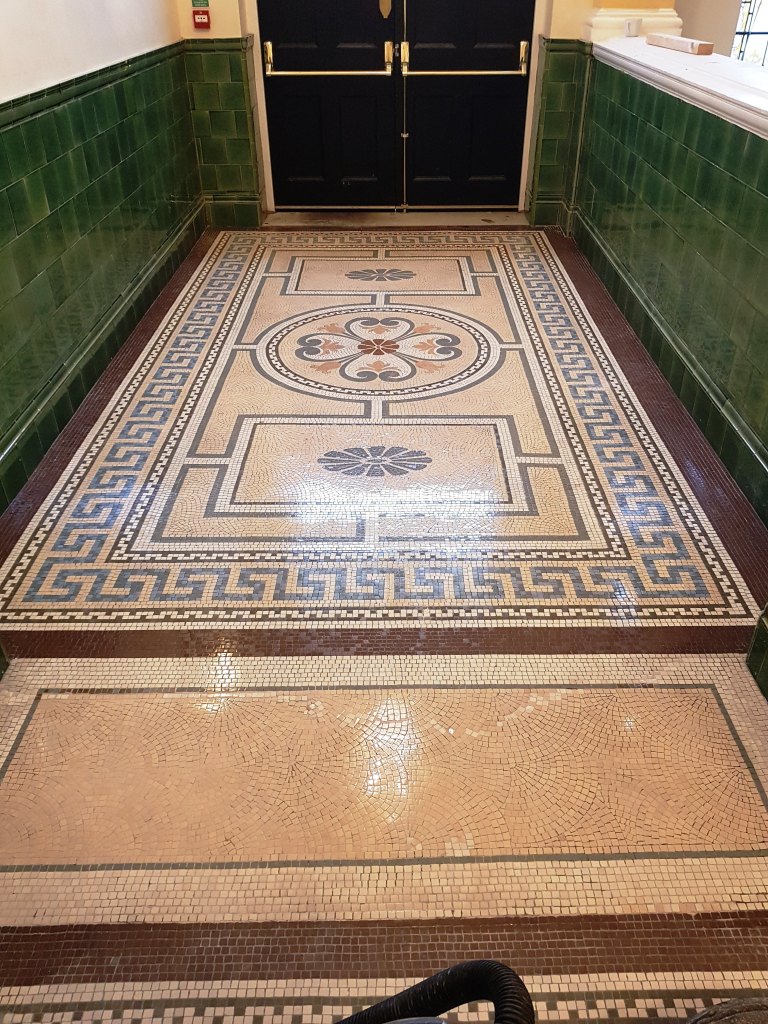
Original 1901 Mosaic Floor Restored in Warrington, Cheshire

Around five years ago Tile Doctor was asked to quote for restoring the Mosaic tiled floors in the former Warrington Technical College which is a Grade II listed building that was built in 1901. Tile Doctor are the biggest restorative tile network in the UK and we often get asked to quote for restoring old floors like these. Although we quoted for the work, nothing happened, and it now appears the local borough council had put the work on hold until they could come up with a fully costed plan to fully restore it.

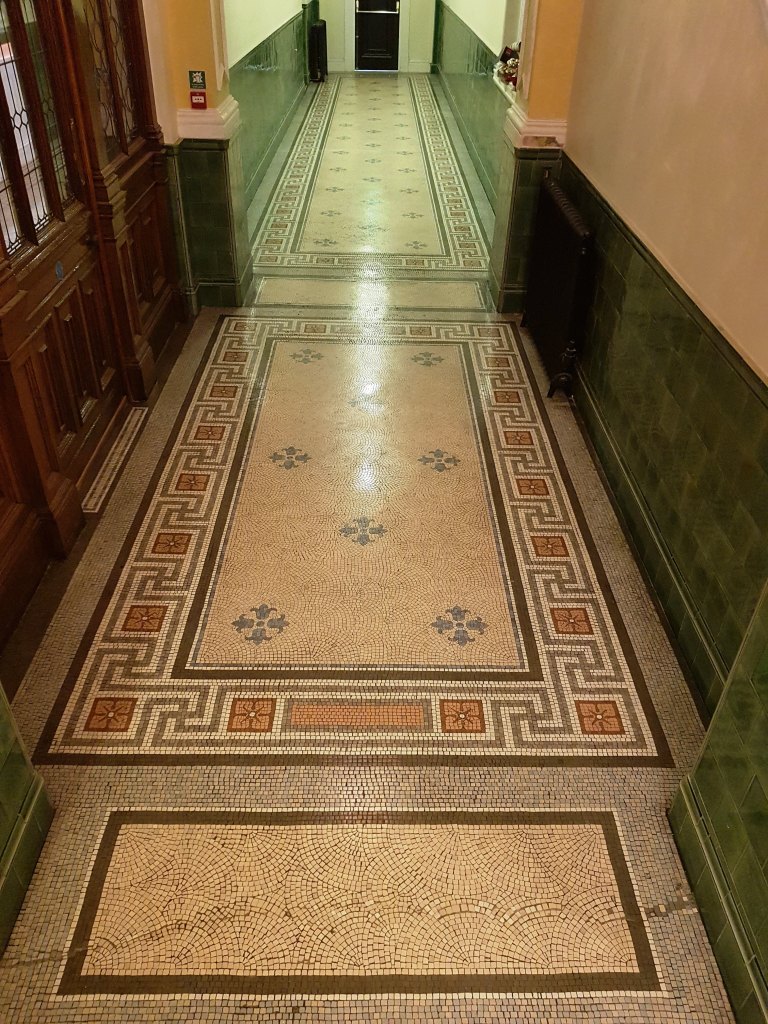
It took some time, but I’m pleased to report that a plan did evolve and a joint venture between the council and a developer has now restored the building to its former glory and is now home to several restaurants and bars spread across its three floors.

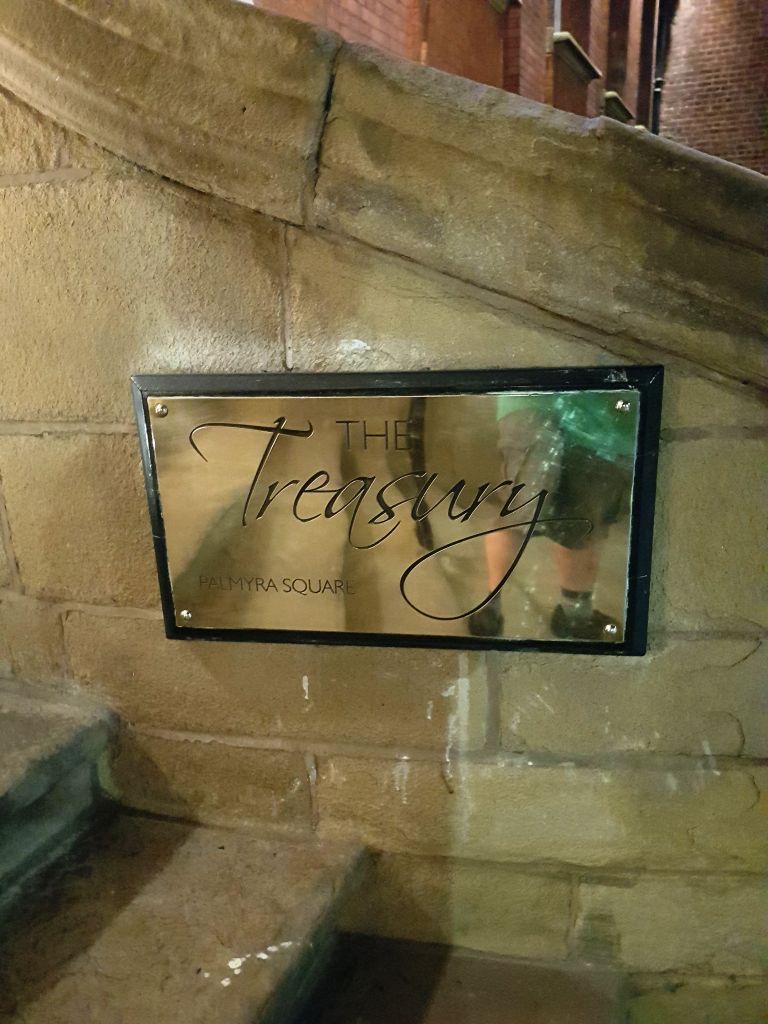
The Treasury Building Palymra Square The Treasury Building Palymra Square

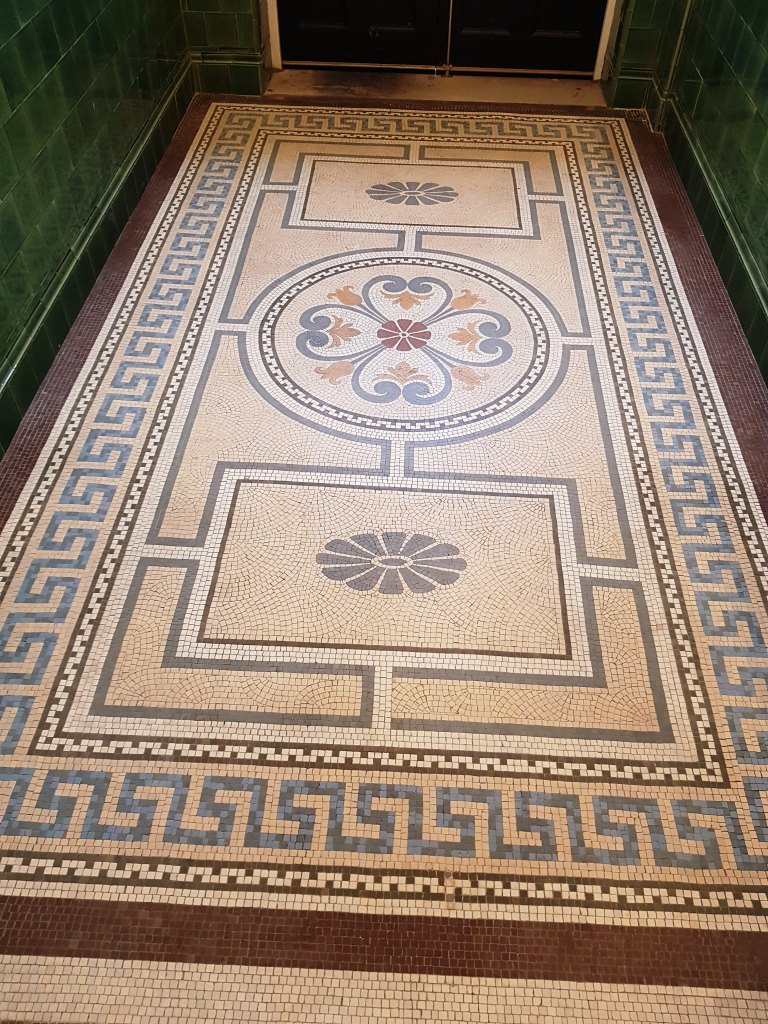
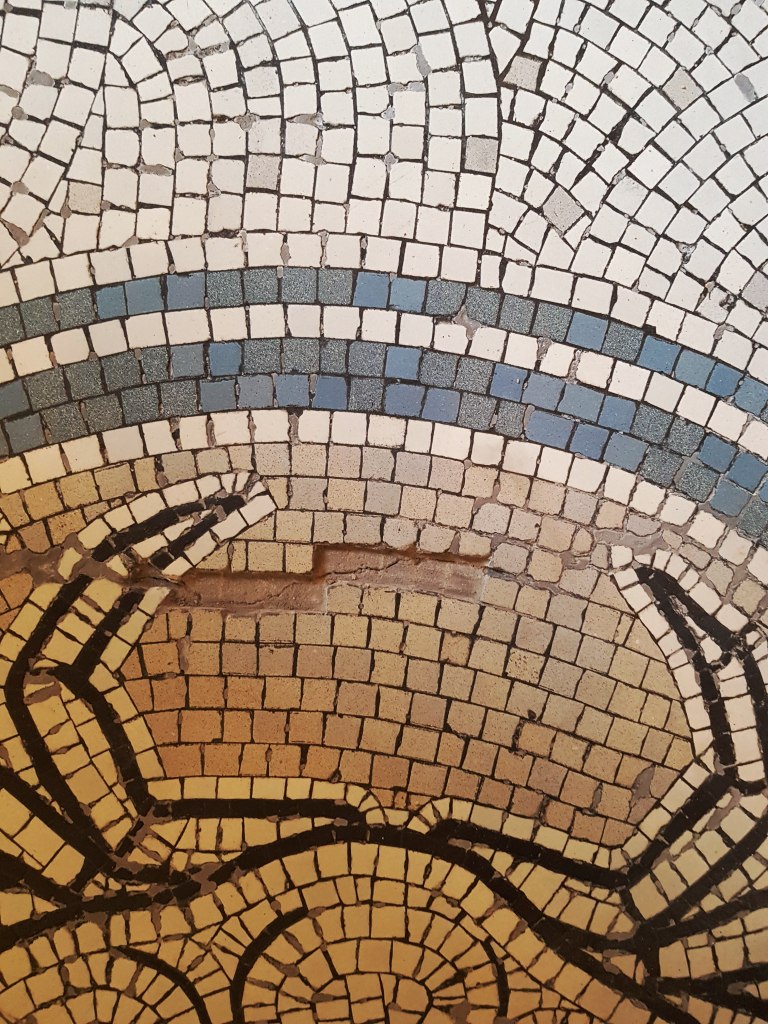
The restoration plan included preserving the main stair enclosure along with the original features which includes oak panelling and thankfully the beautiful Mosaic floor tiles. Having previously quoted for the latter and with the main building works complete we were asked to return and restore the floors ASAP at what has since been renamed as “The Treasury Building of Palymra Square”.

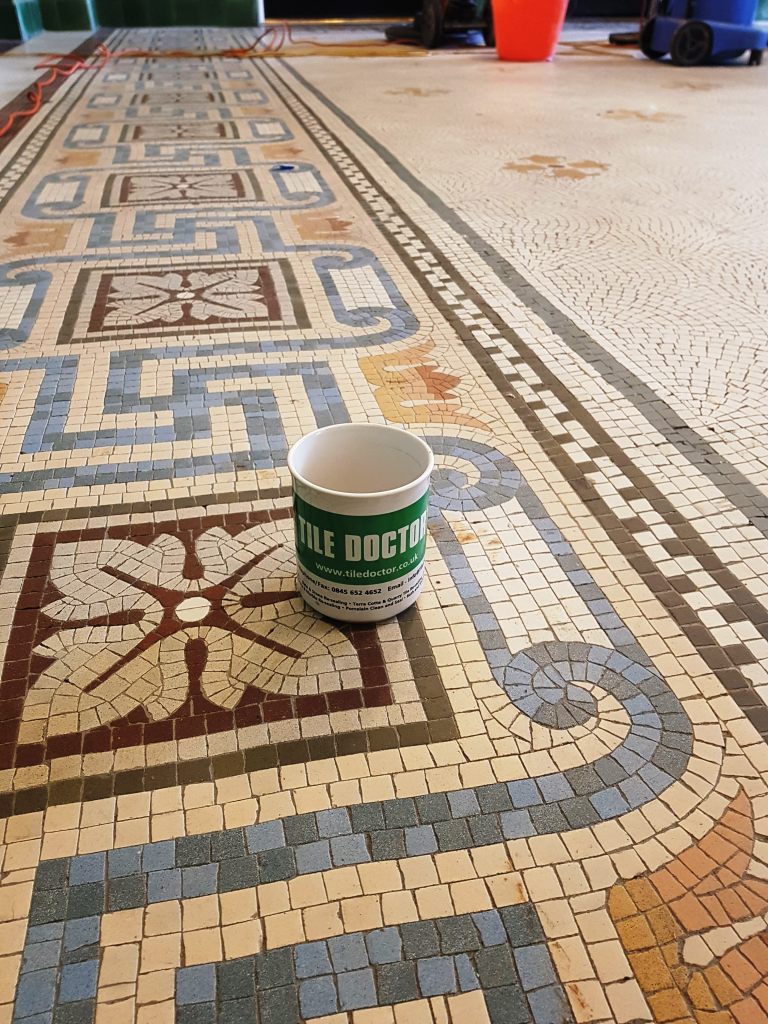
On the first day I was given a large vase full of mosaic tile pieces which the developers had collected during the building works and figured would come in handy later.
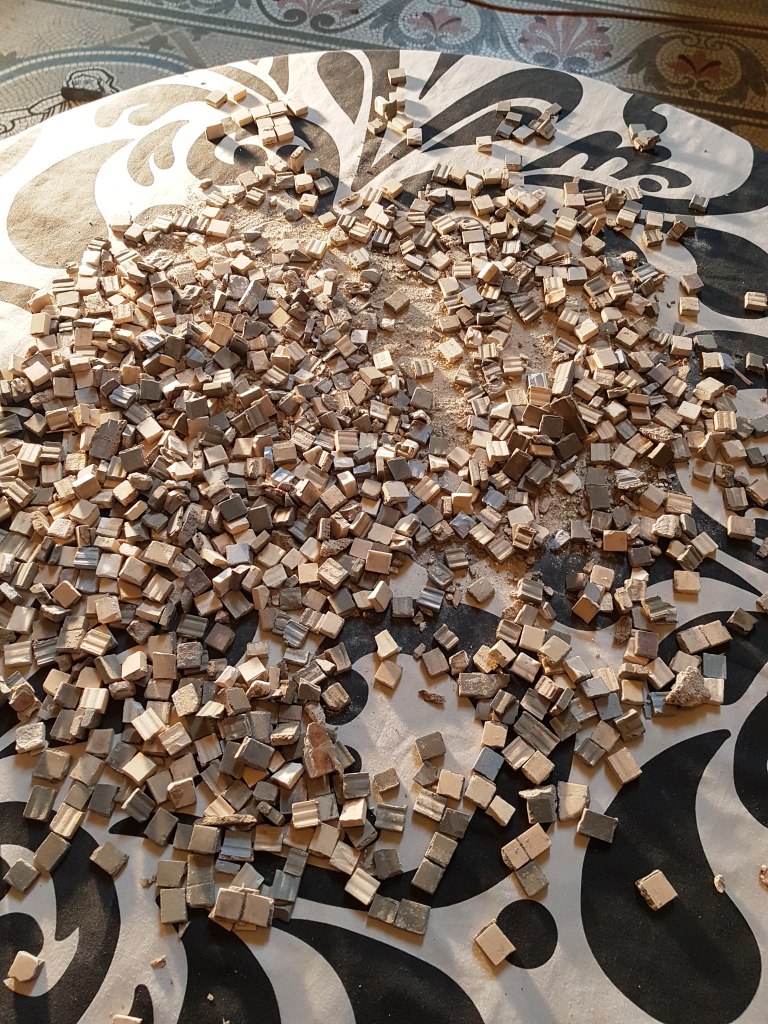
Mosaic Tile Collection


Day 1 – Preparing and Cleaning the Mosaic Flooring

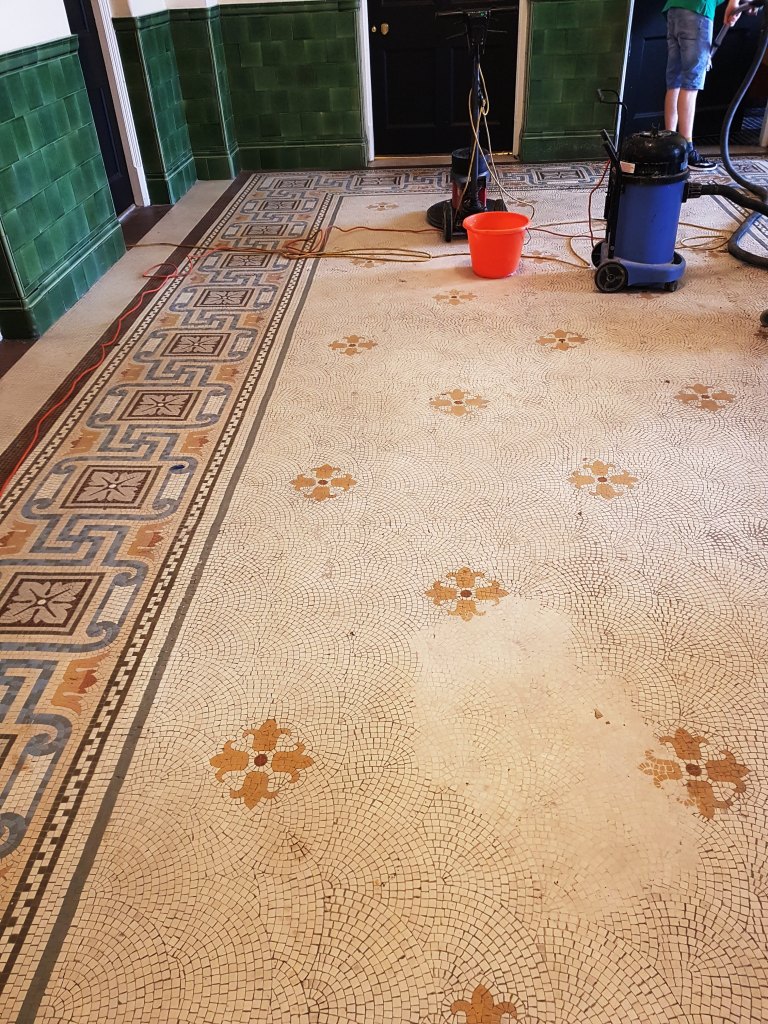
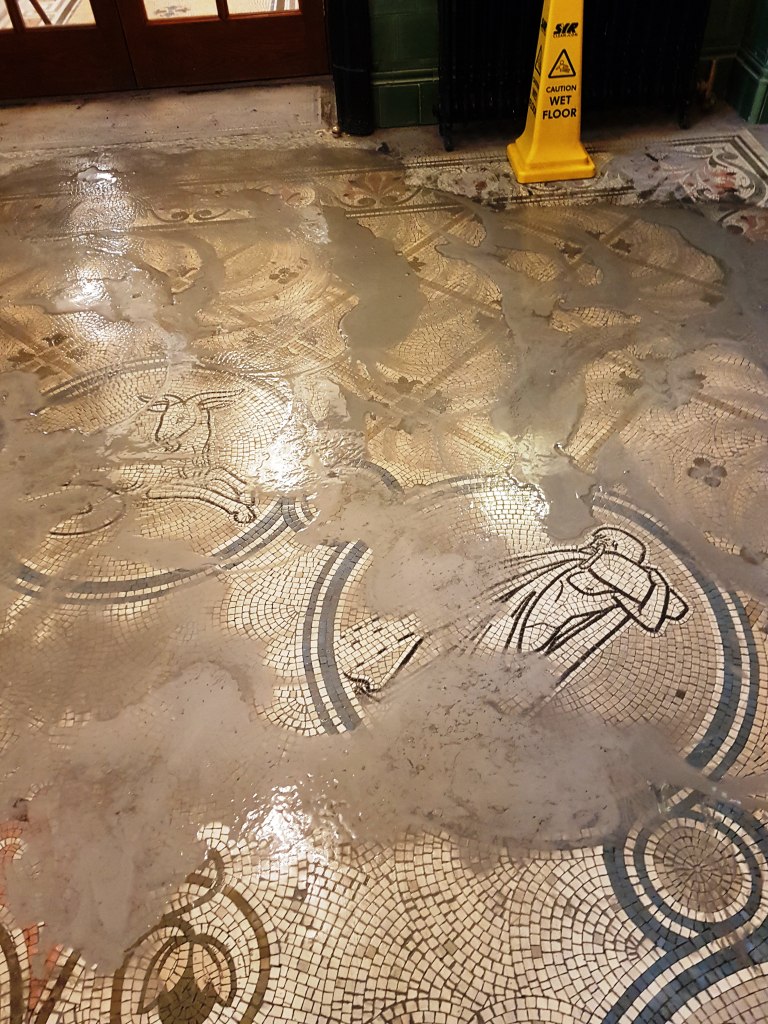
Starting at the top of the building my first job was to remove the builders rubbish and sweep both floors. I then washed both Mosaic floors with Tile Doctor Pro-Clean using a strong 1:3 dilution with water. After leaving the cleaning solution to soak in for a few minutes it was scrubbed in using a black scrubbing pad fitted to a weighted buffing machine.

Cleaning Mosaic Flooring Warrington Treasury Building Cleaning Mosaic Flooring Warrington Treasury Building

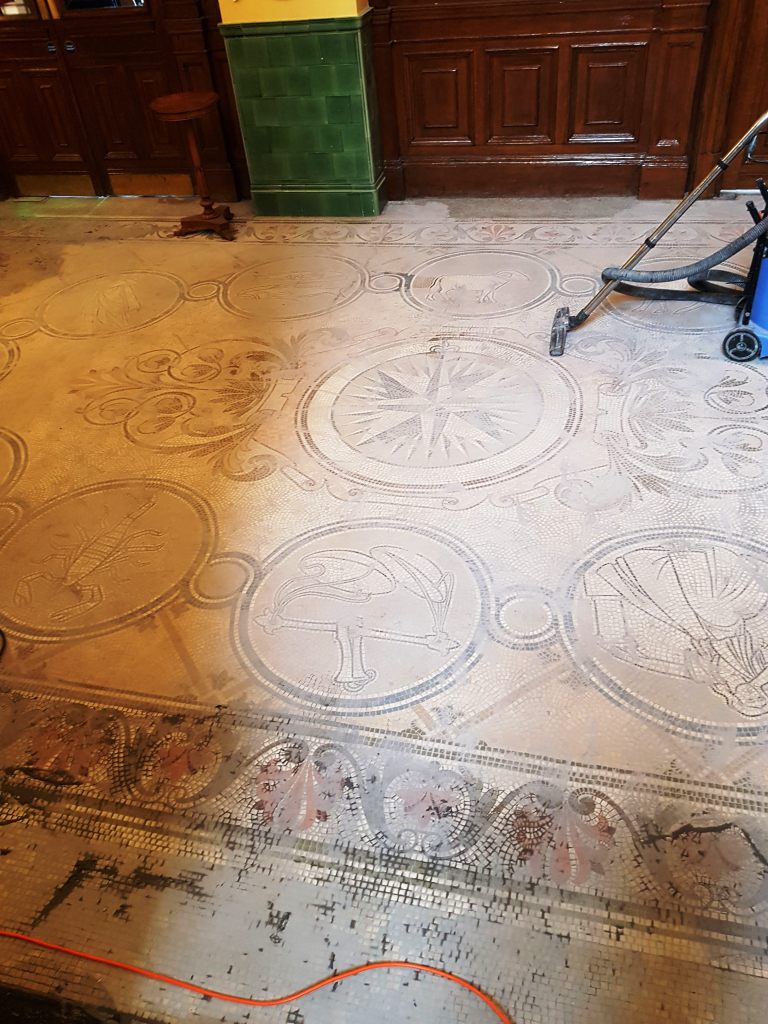
This process brought out the dirt and dust that had been ingrained in the tiles turning the cleaning solution into a grey slurry which was then removed with a wet vacuum. It was a large floor and I had to repeat the cleaning process a couple of times to remove the layers of dirt, but the result was worth it and by the end of the first day the colours and design of the floor was really standing out.

Cleaning Mosaic Flooring Warrington Treasury Building Cleaning Mosaic Flooring Warrington Treasury Building


Day 2 – Replacing Missing Mosaic Tiles on the Top Floor

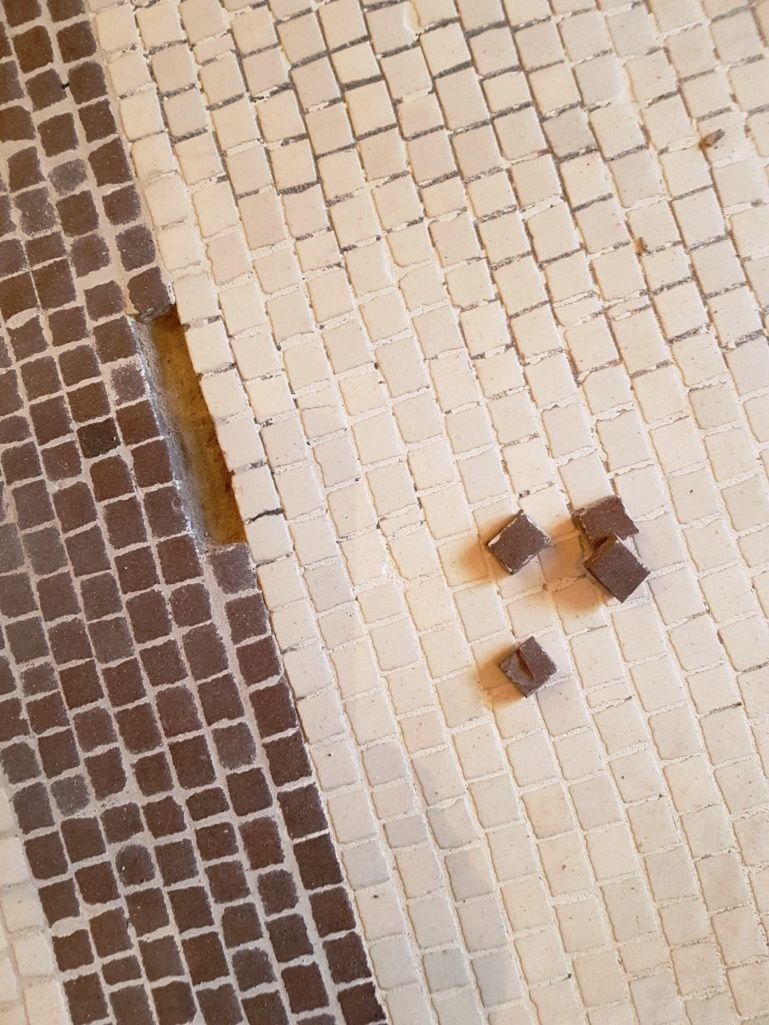
On day two I started work to repair the floor where the mosaic pieces were missing using the collection of mosaic tiles the builders had kindly left me at the start of the restoration. It was quite a jigsaw that involved looking through the hundreds of pieces that had been collected, finding a suitable piece and if necessary shaping it with a grinder so it could fit in the pattern. I used a flexible tile adhesive and then left them to set overnight.

Repairing Mosaic Flooring Warrington Treasury Building Repairing Mosaic Flooring Warrington Treasury Building
Replacing the missing mosaics on the first floor was a slow process which ended up taking up much of the second day.


Day 3 – Replacing Missing Mosaic Tiles on the Top Floor

My plan on day 3 was to continue the restoration work on the top floor and ensure the repaired areas were level with the rest of the floor. I attempted to use a 50-grit milling pad fitted to weighted floor buffing machine for this but found the segments on the pad would catch the edge of the replaced pieces and knock them out of place. Clearly this was not going to work so I changed tack and smoothed them down using a set of graded hand-held Diamond burnishing blocks. Again, there was lot to do so this work took up much of the day; some might say I could have worked around this but I’m a bit of a perfectionist and I like to ensure a job is done right.


Day 4 – Burnishing Mosaic Tiles on the Top Floor

The next step was to use a set of Tile Doctor Burnishing Pads to clean and restore the finish of the mosaics. The pads which are encrusted with industrial diamonds are applied with a rotary floor buffer in sequence from coarse to extra fine. The first pad is a coarse 400-grit and is applied with only water for lubrication, it removes minor scratches, sealers, and the top surface dirt.

Cleaning Mosaic Flooring Warrington Treasury Building Cleaning Mosaic Flooring Warrington Treasury Building

Working in sections, I applied the pad across the floor, rinsing with water in between and picking up the soiled solution with the wet vacuum. I then repeated this same procedure with the medium 800-grit pad which is the first stage polishing pad again rinsing with water after use. The next two pads are a fine 1500-grit and extra fine 3000-grit which really build up a high-quality polish on the stone. This last pad is applied at the very end of the process when the floor is dry and is run over the floor using a small amount of water which is sprayed onto the floor.


Day 5 – Restoring Mosaic Flooring on the Ground Floor

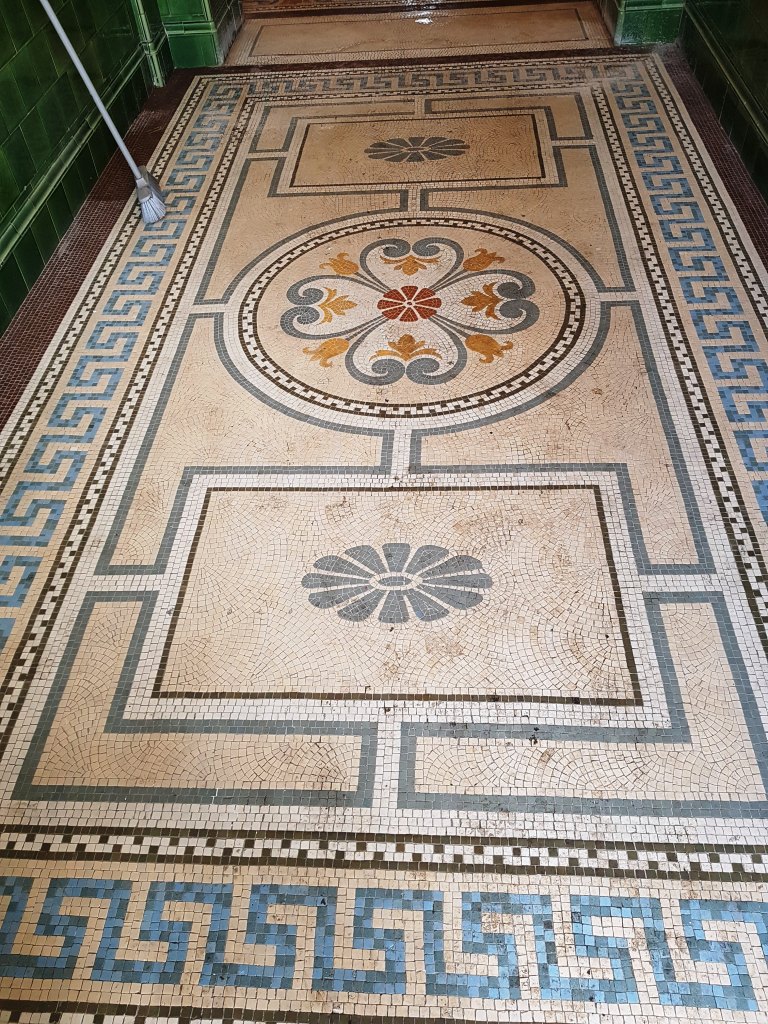
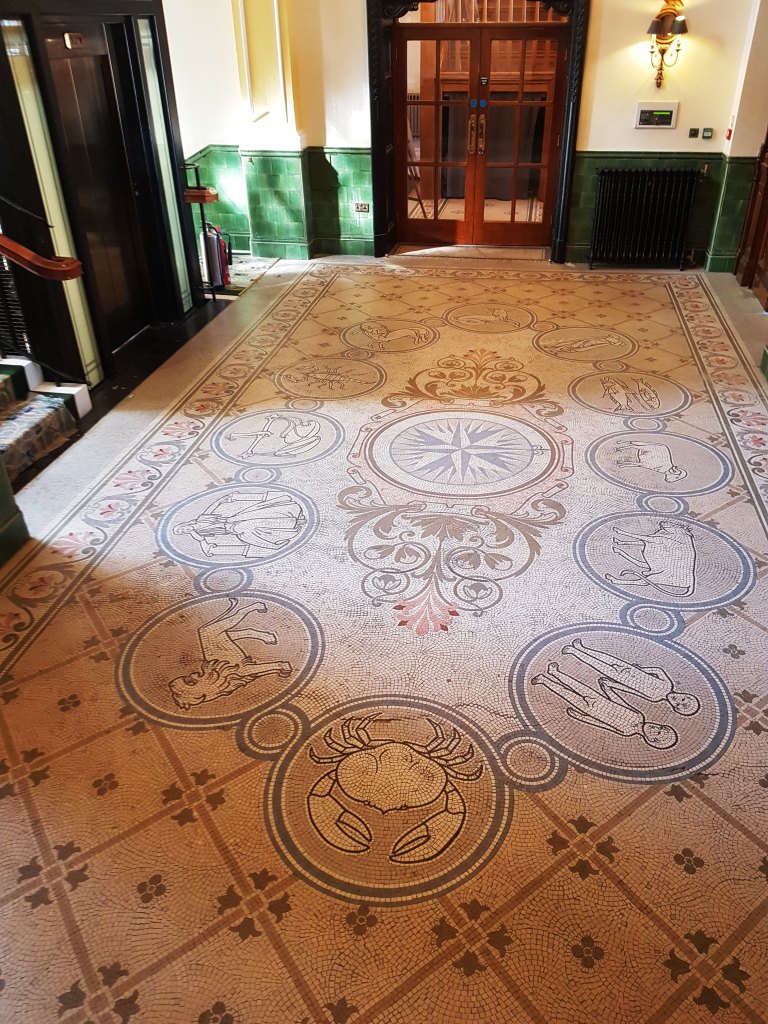
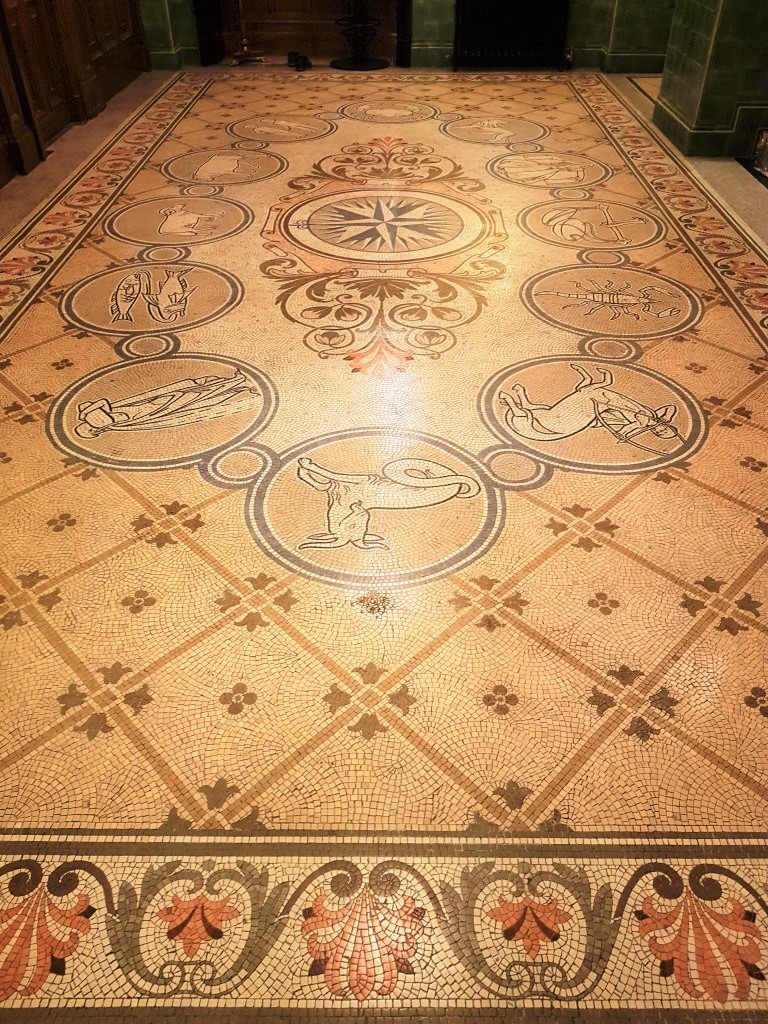
The next day we started on the ground floor which consisted of a large main lobby and hallway running off it. The mosaic pattern in the lobby featured an impressive oval zodiac design with two restaurants looking on to it behind wood and glass panelling. It must have taken a long time to lay back in 1901 and we were quite often stopped by people that worked there saying how nice it was seeing the wonderful floor being restored to its former glory.

Cleaning Mosaic Flooring Warrington Treasury Building Repairing Mosaic Flooring Warrington Treasury Building

The ground floor Mosaics had the same issues as the first floor however the experience gained restoring the first floor meant I was able to crack on quite quickly and completed the repairs in a single day.


Day 6 – Burnishing Mosaic Tiles on the Ground Floor

On the sixth day I proceeded to burnish the Mosaic flooring on the ground floor and hall using the same system as before

Burnishing Mosaic Flooring Warrington Treasury Building Cleaning Mosaic Flooring Warrington Treasury Building

With two large areas to cover I found the burnishing of the ground floor and hall using the 400, 800 and 1500-grit pads as before took up the whole day. After finishing the floor was given a final rinse to remove the slurry and then left to dry out overnight.


Day 7 – Sealing Mosaic Flooring

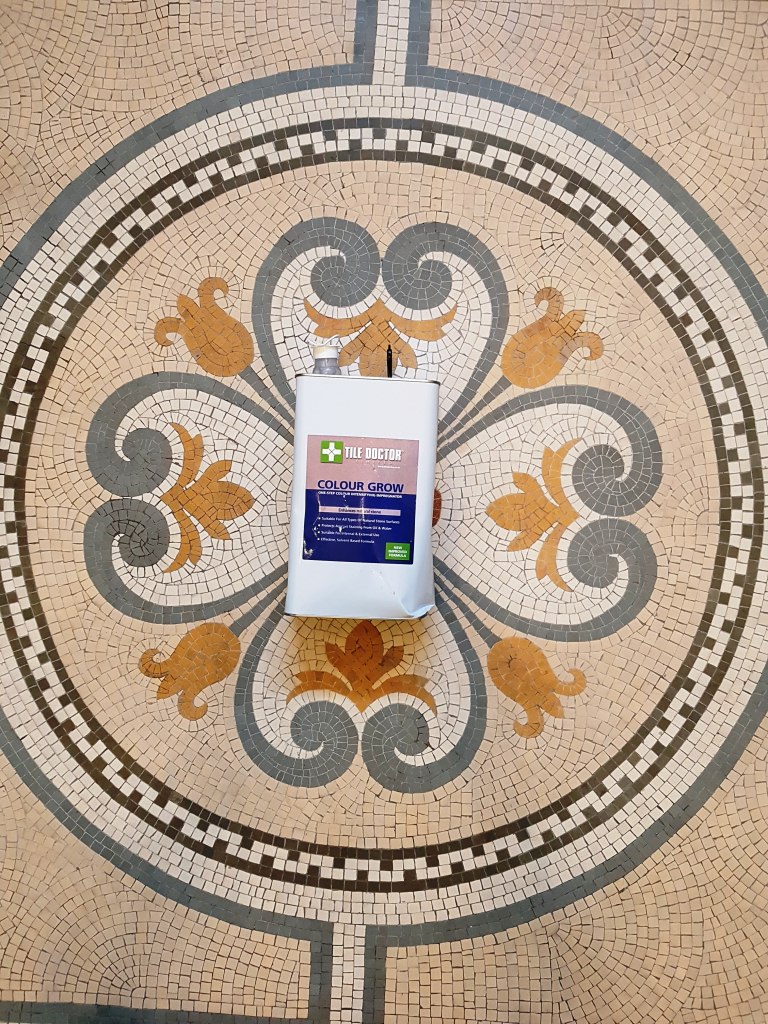
I returned early the next day to complete the polishing process using the 3000-grit burnishing pad which further builds the polished appearance of the floor. Once this was done the floor was sealed using two coats of Tile Doctor Colour Grow which is an impregnating sealer that adds stain protection to the floor and enhances colour. With two floors to do I was able to work on one floor as the sealer on the other dried.

Sealing Mosaic Flooring Warrington Treasury Building Sealing Mosaic Flooring Warrington Treasury Building

The owners were very pleased with the work we did and have asked us if we can come back every two months to maintain the floor and keep it in tip top condition. Having a maintenance plan in place for busy tiled areas like these are a good idea if you want to keep your floor looking its best.

Polishing Mosaic Flooring Warrington Treasury Building Polishing Mosaic Flooring Warrington Treasury Building


Source: Mosaic Tile Cleaning and Restoration Service in Cheshire
Tuesday, October 30, 2018

Install A Foam Floor In A Kids' Room

A kids room will greatly benefit from having a foam floor. This flooring is not only comfortable and soft, but it also adds a new dimension for you to decorate your room.

Many home owners install their foam floors in playrooms and even on basement floors where the kids can have their own play area. These foam floors are incredibly durable, easy to clean, and spill proof. There is a wide variety of different shapes, sizes, and designs for the foam floor which makes it easy to match to any decor. Depending on what your child likes, you can have letters, designs, cars, dinosaurs, colors, and even sports teams as designs on the foam floors.

What You'll Need:
  • Foam flooring of your choice
  • Utility Knife
  • Carpet tape
  • Measuring Tape
  • Square

A Big Puzzle

For the most part, installing a foam floor is much like putting together a puzzle. Foam floors come with interlocking joints that make them much more stable, and less likely to come apart from use.

Step One

Clean the entire subfloor of the area you are going to be working in. You can install the foam floor on any type of hard surface, but it needs to be clean of any residue, oils, nails, or splinters.
Step Two

Take the time to lay out the foam floor tiles in the way you want them. Resist the temptation to begin laying them down permanently right at the beginning. You might see that they way you originally planned the floor does not look quite right.

Leave at least 18 inches all the way around the room for the border tiles. Position the floor in the middle so that there are equal amounts of a floor all the way around the room so the border tile installation will be much smoother.

This step is important so you will get the exact pattern that you want for the children's play area.
Step Three

Measure the remaining floor space and transfer these measurements to the border tiles. Cut them down to size using the utility knife and a straight edge. Once these are cut to size, then install them along the entire outside edge of the room, or play area.
Step Four

When you are absolutely sure you have the right configuration you want for your foam floor, then begin to adhere them to the floor for a permanent fixture.

Pull up each border tile and place double sided carpet tape onto floor. Use tape for each corner of the tile and the middle area. Press the tile back into place and apply pressure to it to create a stronger bond. Repeat this process all the way around the room.

Do not adhere the middle tiles to the floor. This way you still have the option of changing them out or rearranging them for a new look.


Friday, October 26, 2018

Cleaning and Polishing Marble Tiled Flooring in Reigate, East Surrey

The photographs below are of a Marbled Tiled floor that was installed over much of the ground floor of a cottage that formed part of a large county estate near Reigate.

Marble Tiled Floor Before Polishing Reigate Marble Tiled Floor Before Polishing Reigate

The Marble floor tiles were lovely however the polish and sealer had worn off some time ago and the were now looking much worse for wear, additionally the once white grout had turned dark with dirt and I`m not sure even the owner realised its full potential. I provided a quote for cleaning and applying a deep polishing to the floor which was agreed and set a date to do the work.


Marble Tile and Grout Cleaning in Reigate

After protecting the wooden skirting with tape, I started the cleaning process by applying a medium dilution of Tile Doctor Pro-Clean which was scrubbed into the tiles using a stiff brush to remove any loose dirt and debris from the floor but primarily along the grout lines. The soiled cleaning solution was then rinsed off with water and then extracted with a wet vacuum.

Next step was to deep clean the tiles and bring back the polish using a set of four Tile Doctor diamond encrusted honing pads which fit a weighted rotary floor buffer and are applied in sequence starting with the 400-grit pad lubricated with water. This is followed with the 800-grit and then the 1500-grit pads rinsing with water after each pad and removing the soil generated by the burnishing process with the wet vacuum as before.

This work took much of the day so after applying the 1500-grit pad and rinsing I left the floor to dry out overnight.


Sealing and Polishing Marble Tiles with Shine Powder

The next day I started by applying the 3000-grit pad which is the final pad in the polishing process and really helps bring up the polished appearance of the Marble. The pad is applied to the floor dry using a little water sprayed onto the floor using a process we call a spray burnish.

The last step was to seal the Marble tiles and build the polish even further by applying Tile Doctor Shine Powder which is diluted with water and buffed into the Marble tiles using a white buffing pad. The shine powder did an excellent job of building the shine on the floor and provides a tough durable finish that should last.
 
Marble Tiled Floor After Polishing Reigate Marble Tiled Floor After Polishing Reigate

After two days work the Marble tiled floor looked transformed and I was especially pleased with the deep level of shine and restored white grout that I had managed to achieve.


Source: Marble Tile Cleaning and Polishing Service in East Surrey