Thursday, September 14, 2017

Restoring Stained Victorian Hallway Tiles in Lancashire

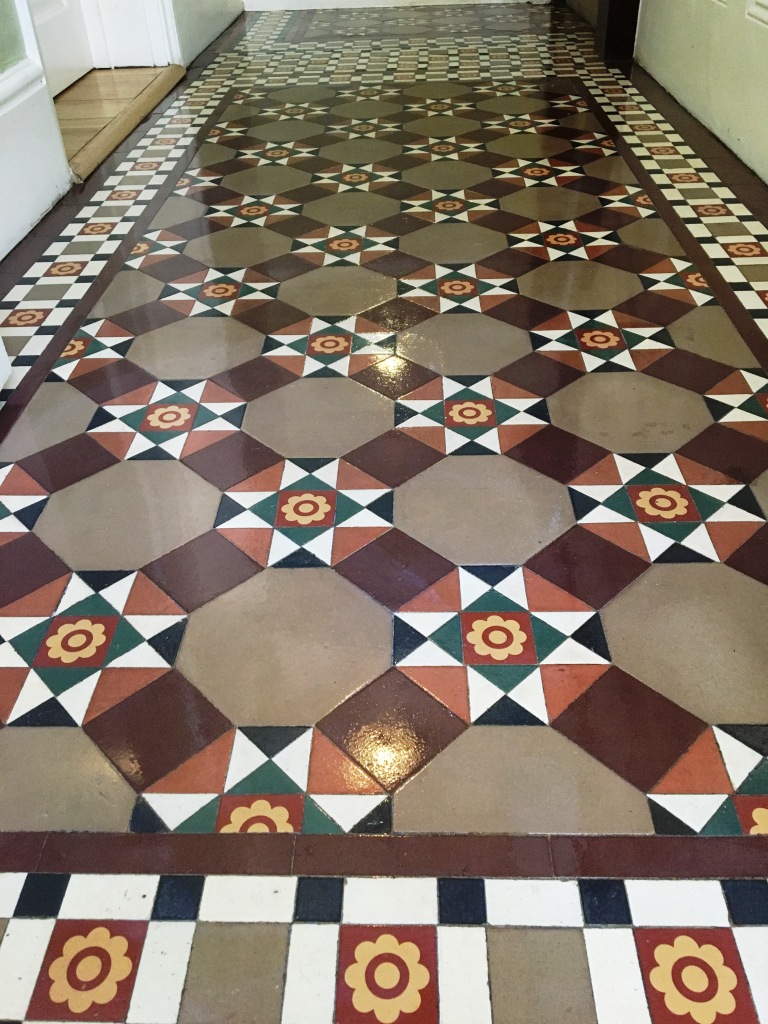
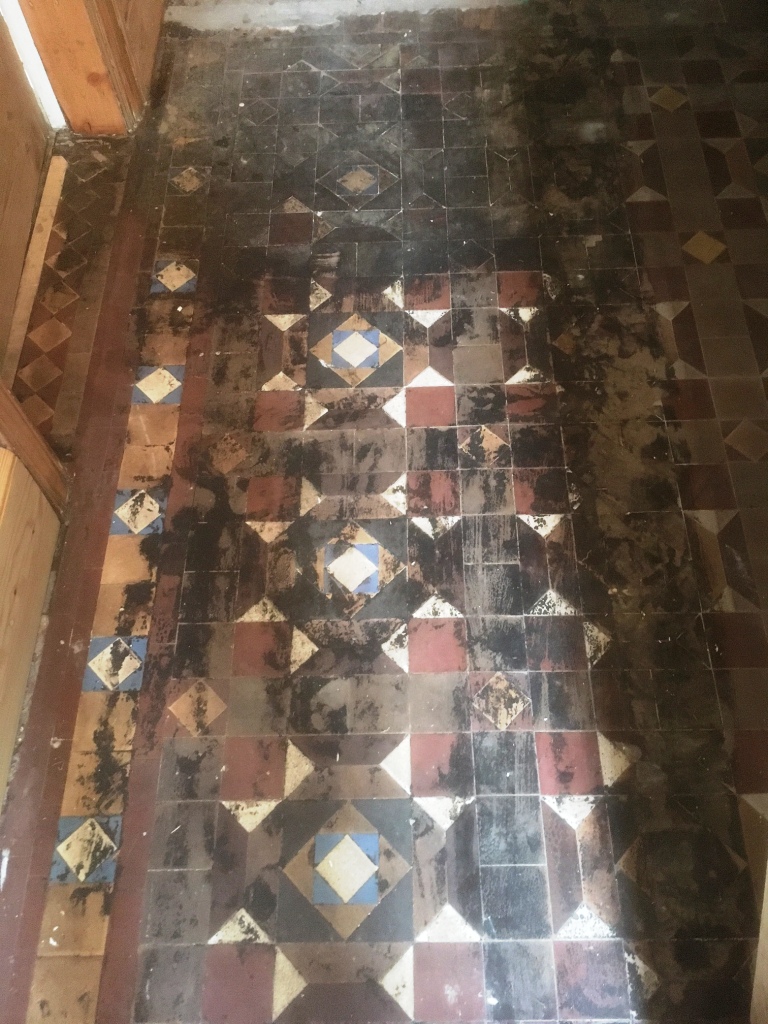
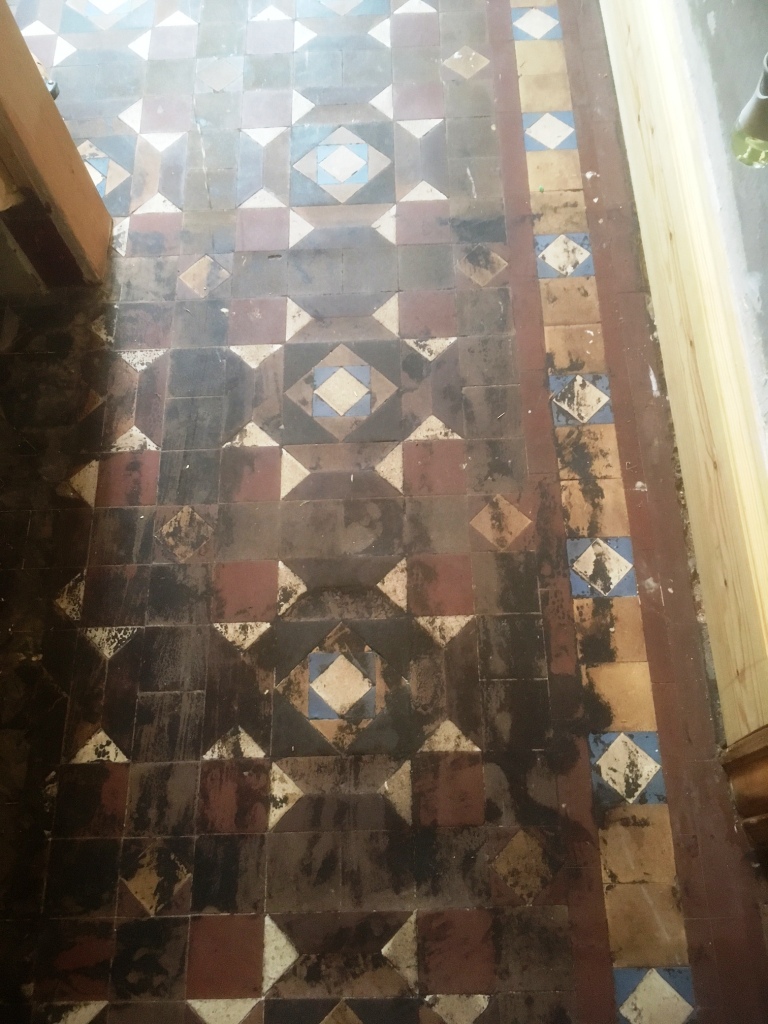
This old Victorian tiled Hallway floor, laid in a geometric pattern, at a house in Barrow in Furness was a challenging project. The tiles were extremely dirty and also stained with Black Bitumen which has been used as an adhesive, however we have come across these sorts of problems before and so I was confident it could be resolved.

Geometric floor before Restoration Barrow in Furness Geometric floor before Restoration Barrow in Furness

Deep Cleaning an Old Victorian Tiled Floor

I roped in Heidi and my son Lewis who spent a whole day cleaning with chemicals, steam, buffing pads and unfortunately the results were far from satisfactory; the customer wasn't happy and Heidi wasn't happy with it either. It was clear that the black bitumen had penetrated deep into the pores of the clay and becoming so embedded that no chemical or technique we were using would shift it fully.
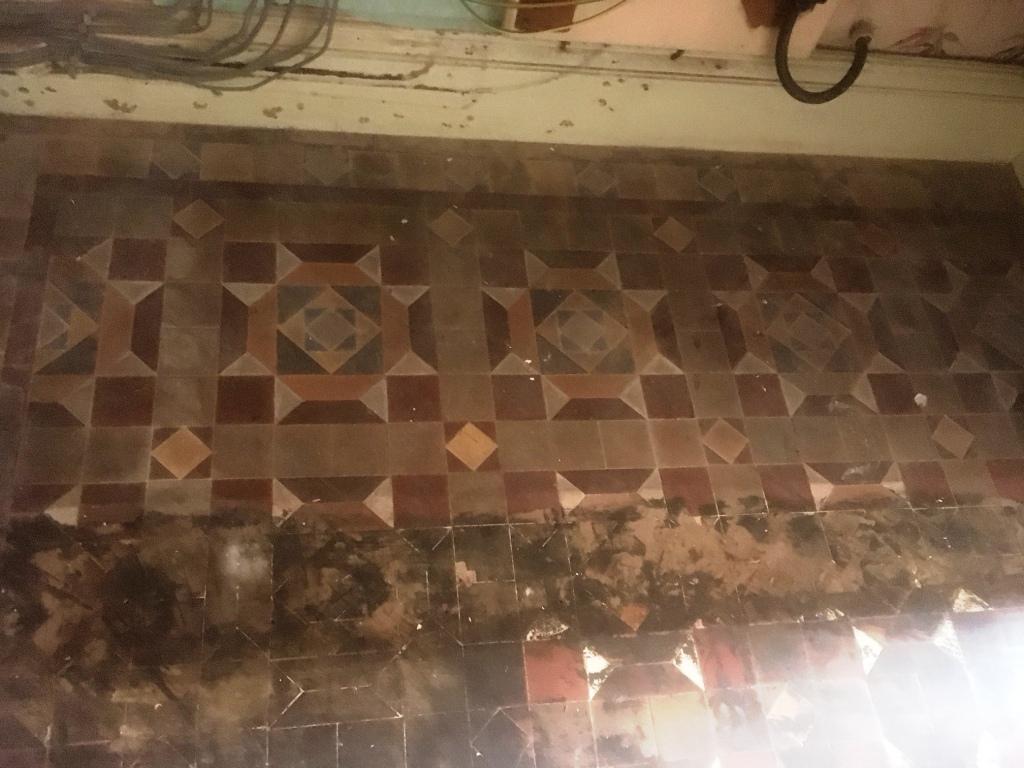
Geometric floor before Restoration Barrow in Furness

To top it off I had gone out earlier to tile the old mat well with matching tiles before we started the cleaning but due to the depth of the floor matt. The matt well was at least 35mm so it was clear I couldn't use standard floor adhesive. I opted instead for a sand cement mix, similar to what the Victorians would have used originally. This filled up the depth and allowed me to tile and grout the same day, however overnight there was a bit of shrinkage and some of the new tiles settled unevenly.
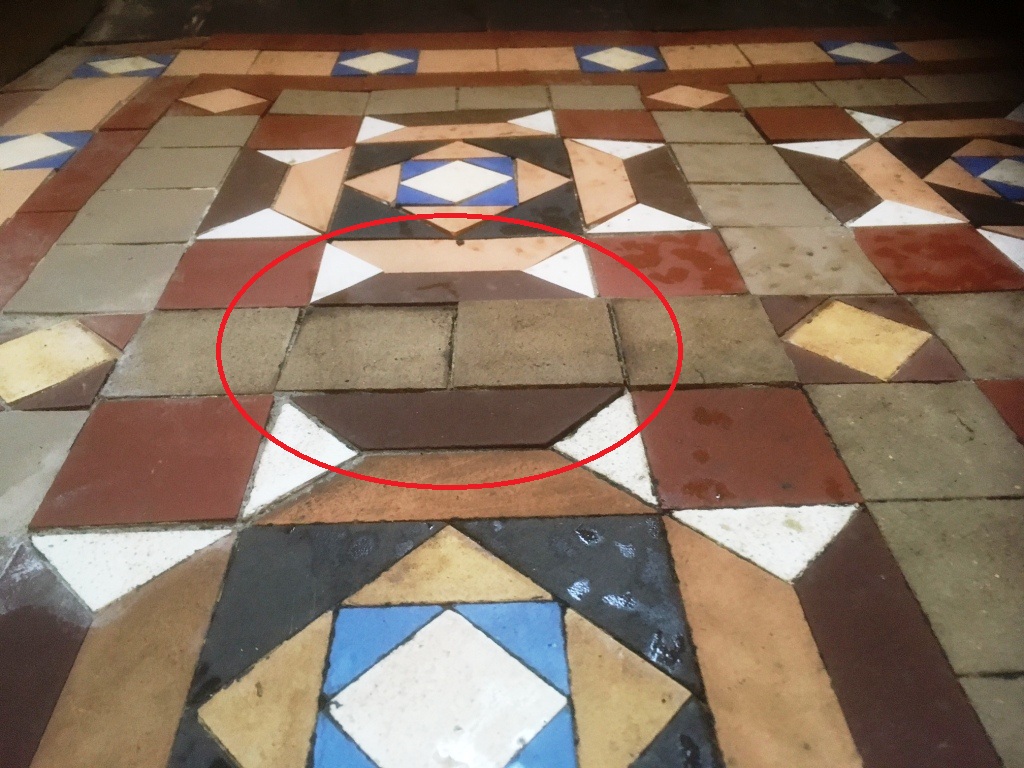
Geometric floor before Milling Barrow in Furness

I racked my head for a solution to both issues and decided the best course of action would be to Mill the clay tiles to remove the Bitumen and smooth down the uneven effect of my tiling. This is not something we would normally do on a clay tile as this system can leave scratches which potentially would look worse that the dirt. After I had milled the Tiles down with a course pad fitted to a heavy buffing machine and removed all the issues I then counteracted any scratches left over using a higher grit milling pad. This solution fully resolved both issues leaving it ready for the final step of sealing.
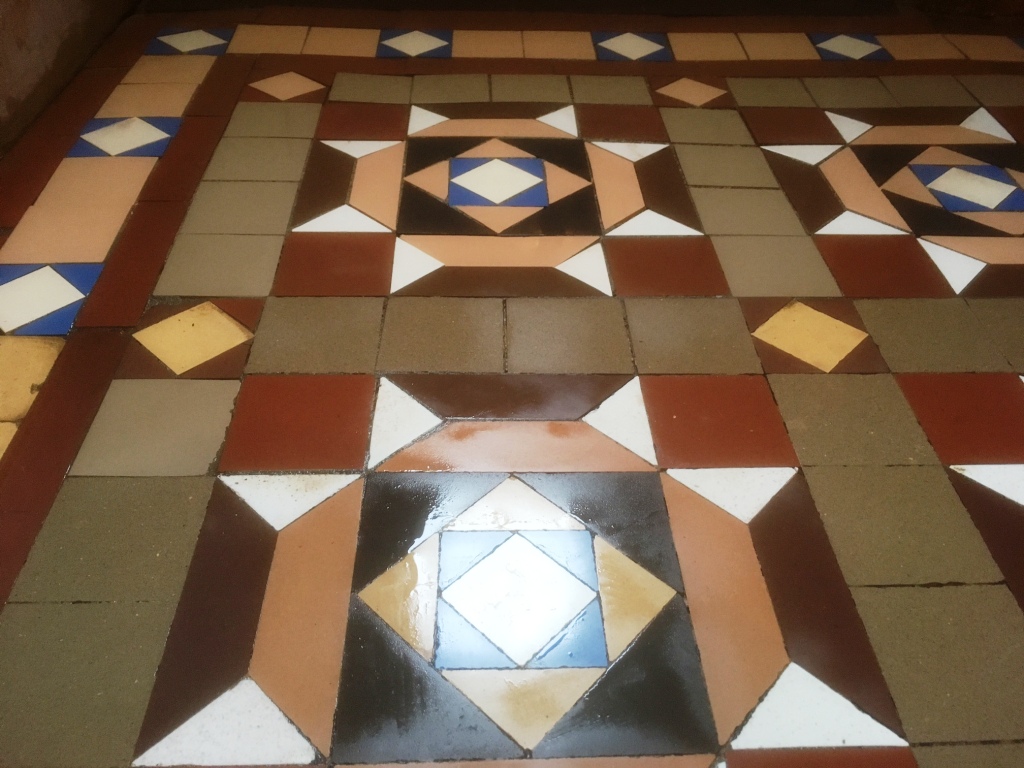
Geometric floor After Milling Barrow in Furness

Sealing an Original Victorian Tiled Floor

The floor was left to dry off overnight and we returned the next day to seal the tiles using Tile Doctor Colour Grow, which is a matt finish, fully breathable and colour enhancing sealer which really lifts the colour of the stone or in this case clay tile. Colour Grow is impregnating – meaning that it penetrates the pores of the stone to fill them and prevent trapped dirt and stains. We recommend Colour Grow for both internal and external applications and especially for areas where no damp proof membrane is evident, since the sealer allows for the floor to breathe moisture.

Geometric floor After Restoration Barrow in Furness Geometric floor After Restoration Barrow in Furness

There were plenty of problems to overcome and It took a lot of work but I’m pleased to say the floor was transformed by our efforts and now looks fantastic and I’m sure has added a lot of value to this period property.


Source: Victorian Floor Tile Cleaning and Renovation Service in Lancashire

Wednesday, September 13, 2017

Installing a Vinyl Cove Base Step-by-Step

A vinyl cove base is an easy to install option for those who have installed vinyl flooring. They resist scuffs, look great, and are very easy to clean. Installing them is simple providing you have the right tools and a little patience. Here’s what you need to do.

Materials Needed:
  • Utility Knife (A new blade is recommended)
  • Cove Base
  • Adhesive
  • Marker
  • Framing Square

Step 1- Choosing the Cove Base


You need to choose your vinyl cove base first. Many people will choose to use a complimentary color for the base, others will want it the same color as the wall. The choice is yours. You will be able to find cove base in just about every color under the sun.

Step 2- Proper Measurements

Measure to find how much molding you will need to install. Start in the corner when measuring and work your way out. The molding will need to be installed first, so this is important.

Step 3- Start Laying It Out

Lay a piece of the base down on it’s face on top of a piece of wood. Measure this to match the molding you measured earlier. Use the framing square to mark a line.

Step 4- Cut the Cove

With the base cove still lying on the flat wood, cut through it. Press down firmly on the framing square to ensure your cut is even. You may have to make several passes at it to cut it all the way through.

Step 5- Glue It Up

Use the adhesive you purchased made specifically for vinyl and apply it to the wall. Press the cove firmly against the wall to make sure you have an even bond.

Step 6- Work with Second Strip

Now you can start to measure for your next strip. Attach the second strip next to the first one. Hopefully you’ve made perfectly straight cuts. A straight cut will eliminate noticeable seams and you won’t be able to see where the two pieces butt against each other.

Step 7- Working with Inside Corners


Use the inside corner of the wall to carve a curved portion. You want this to be seamless so it won’t look off. Once you have a curve cut out you can adhere it to the wall using the same glue.

Step 8- Outside Corners

Use your marker to place a mark on the back of a piece of cove. This is the piece that will be placed on the outside corner. Bend the two ends together to form a slight seam to make it easier to apply.

Step 9- Glue the Corners

You will want to slice a little less than half of the bend piece to make it easier to install. Don’t slice all the way through, just slightly on the back side. Adhere this piece to the wall.

Step 10- Finish the Room
Continue this process all around the room until you have your vinyl cove base installed completely.

You will want to wait to clean the new cove base until the adhesive completely dries. It may feel secure long before it has cured. Follow the directions on the glue to find this amount of time.

A cove base is a great way to add a distinctive touch to any wall. With the ease of installation, this is a good project for anyone to try.


Friday, September 8, 2017

Guide To Replacing Linoleum Tile

Linoleum tile is an inexpensive vinyl flooring material that is commonly used in kitchens, bathrooms, laundry rooms, and mud rooms. The tile is quite durable and cleans easily.

There are times, however, when you will have to replace a tile, or whole sections of tile, because of water damage, cuts or just general wear and tear. Replacing these linoleum tiles is a project that can be done within a few hours with basic tools.

Materials Needed


There is not a lot of specialized machinery involved in replacing a linoleum tile except for the vinyl tile cutter. You can use a utility knife, but a vinyl tile cutter works quicker and makes straighter cuts. They can be rented or bought at your local home center.

  • Replacement tile
  • Vinyl tile cutter
  • Utility knife
  • Vinyl tile adhesive
  • Vinyl roller
  • Scraper
  • Sponge
  • Bucket of warm water
Replacement Tiles

If your linoleum tile has been on the floor for several years, there might be a good chance that the tile you need is no longer being manufactured. If this does happen you might have to replace all the tile in that room or area. It might be that the home center does not have them in stock, but can order them from the manufacturer.

Remove Damaged Tiles

Once you have all your tools and replacement tiles gathered you can then remove the old, damaged tiles. If there is a section already missing from the tile that you can insert the scraper under, then begin prying the rest of the tile up. If not, then use your utility knife to score the tile, along the seam, until you get to the underlayment. Insert the scraper and begin to pry up the damaged tile.

Clean Floor

One the damaged linoleum tile, or tiles, are removed then you begin to remove the remaining adhesive, glue residue or pieces of tile that didn't come up. Wet the sponge and scrub the area to loosen up the adhesive and residue. Then, using the scraper, go over the area to remove the debris until the surface is flat and smooth. Vacuum up the particles.

Lay New Tiles


Once the surface is free from any dirt, or tile particles, you can then spread out the new adhesive with a notched trowel. Spread out evenly over the entire surface keeping a uniform level. If you are using the peel-and-stick variety, you can simply press the tile into place.

Lay the new tile onto the adhesive and press firmly. Use a small, heavy roller to get rid of any air bubbles, and roll until flat. Check to make sure the seams are together and use seam adhesive to keep them from curling up and to form a barrier for protection from water.

Clean and Enjoy

Immediately clean any adhesive that escapes from under the tile while you are pressing it with the sponge and warm water. Let it set for a day and then mop, or use a sponge, to wash the entire area.


Sunday, September 3, 2017

Renovating an original Victorian Tiled Hallway in Surrey

Esher is a small suburb in Surrey, situated just outside London. It was a fashionable area to live in amongst royalty and the aristocracy in the Victorian period, and during this time many buildings were built. One such building has since been turned into a block of separate flats, and some of the flats still contain the original Victorian tiles in the hallway. I was contacted by one of these flat owners about restoring their tiles back to the best possible condition. Interestingly this customer’s tiles were part of a larger floor that had been divided between two flats.

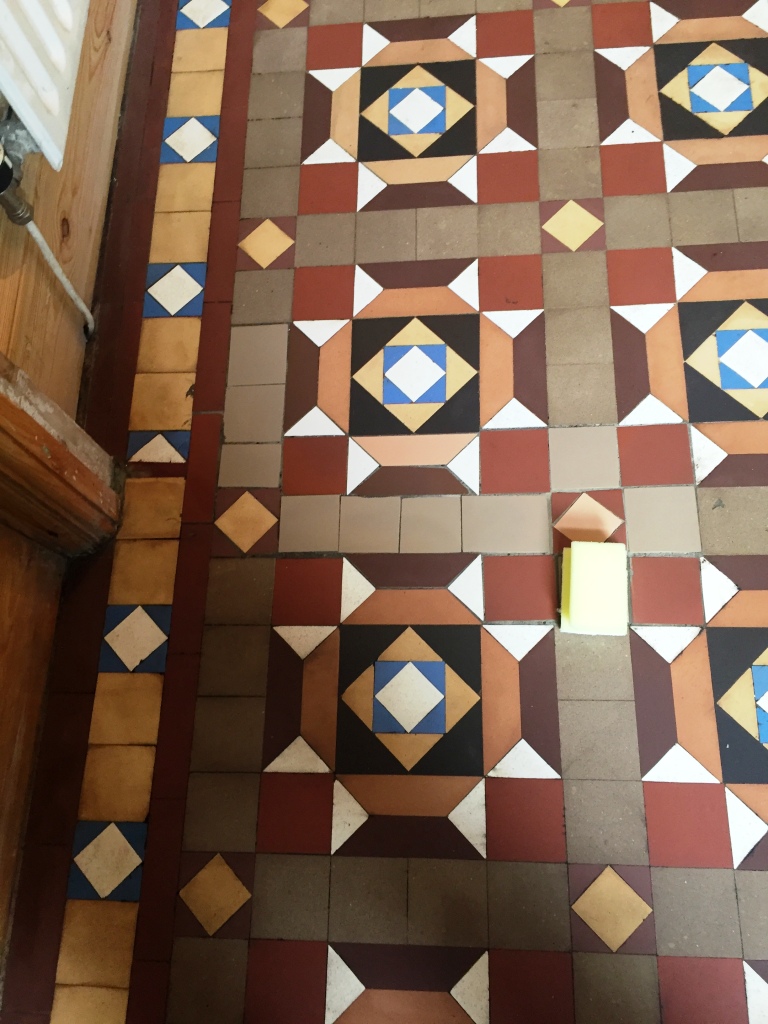
Victorian Floor Tile Before Cleaning Esher

Cleaning Original Victorian Tiles

I began the restoration by spreading Tile Doctor Remove and Go across the entire set of tiles. Remove and Go is a heavy-duty stripper that helped to loosen and remove old glue deposits where carpet had been laid over the tile, it will also strip off old sealers and release ingrained muck. The Remove and Go was worked into the tile and grout with a stiff brush and then the soiled solution rinsed off and extracted using a wet vacuum. I followed by this applying a coarse 200-grit diamond encrusted burnishing pad, fitted to a handheld buffer, to grind away the particularly stubborn dirt and stains to restore the appearance of the stone. Afterwards, I rinsed the tiles again with water and soaked up the resultant slurry with a wet vacuum. I noticed that there remained several ingrained stains dotted across the floor, so to remove these I aggressively burnished the affected areas with a very coarse 50-grit handheld diamond block. This essentially removed the very top layer of the stone, taking with it the ingrained marks. Next, I dried the area with a large blower and heat gun. Under normal circumstances, 48 hours needs to pass before the tiles can be sealed, but as this was a small area I was able to dry it very quickly. After carrying out a damp test, I determined the tiles were ready to be sealed.

Sealing Original Victorian Tiles

To seal the Victorian Tiles, I applied six coats of Tile Doctor Seal and Go sealer, which provides a high-quality sheen finish, as well as plenty of protection for the future. Tile Doctor have a range of suitable sealers available including Colour Grow which provides a matte finish – it’s just a matter of personal choice for the customer.

Victorian Floor Tile After Cleaning Esher

The outcome of the restoration was fantastic and the customer was very pleased, leaving the following testimonial. "Promptly organised, delivered when promised. Good looking job when complete. Well done."


Source: Victorian Tile Cleaning and Renovation Service in Surrey

Friday, September 1, 2017

How To Fix Water Damaged Linoleum Tile

Water damage to your linoleum tile is a common occurrence in areas such as a bathroom, entry way, or even in the kitchen. Spills, water leaks or just walking on them with wet shoes can cause water to be trapped under the tile and cause the adhesive to give way or cause stains.

Repairing the linoleum tile that has been damaged by water is a easy, straightforward process. The key to making the repair a success is the initial preparation.

Materials Needed

There are a few basic tools needed for repairing your linoleum tiles.
  • Matching Vinyl Tiles 
  • Vinyl Tile Cutter or Utility Knife 
  • Straight Edge 
  • Scraper 
  • Tile Adhesive 
  • Tile Roller 
  • Warm Water and Sponge 
Remove Damaged Tile

Begin your linoleum tile repair by lifting out the water damaged tile. Using your utility knife, make a few passes with it to score the damaged tile. Using your scraper edge, pry underneath and lift the tile up. You may have to remove several pieces rather than just 1 full tile.

Matching the Tiles

The good thing about linoleum tile is that you can match it by taking a piece into the hardware store once you have it removed from the area. The tile may have to be ordered from the manufacturer if the home center doesn't have in stock.

Prepare Floor

Once you have the matching linoleum tile, then get the floor ready for the new tile.

  1. Check the underlayment of the floor for more water damage. If the underlayment is also damaged you will have to do a more extensive repair. 
  2. Scrape off old adhesive and debris until the floor is clean. 
  3. Use warm water and sponge to wash the surface down and clean it any type of remaining dirt. If after the warm water wash, there is still more adhesive residue left, then continue scraping, and washing, until it is fully removed. 
  4. Vacuum the floor to remove any left over clumps of tile or adhesive. 
Install New Tile

There are 2 types of linoleum tile that you can be using at this point. The first is a peel-and-stick type of linoleum tile. The second type will have to be installed with the use of an adhesive that must be spread out like mortar.

  1. Apply adhesive to floor. 
  2. Using notched trowel spread out the adhesive for a complete covering. Make sure that the entire area is uniformly covered. 
  3. Clean up any adhesive that gets on any other tiles immediately. You can do this with a sponge and warm water. 
  4. Lay down new tile and press firmly into place. Use a roller to make ensure there are no air bubbles under the tile and to make a firm contact with the tile and the adhesive. 
Clean and Let Sit

Once you have the tile installed, clean off any adhesive that came through the seams with a sponge and warm water. Then let the tile sit for a day to ensure a firm bond.


Source: www.DoItYourself.com

Monday, August 28, 2017

Original Period Victorian Hallway Floor Restored in South Wales

Many property owners who are lucky enough to have an original Victorian tiled floor in their homes face the same conundrum: can an old and potentially very damaged floor be salvaged and restored to peak condition or should I replace it? Some people would instinctively tell you that the answer is no – even trained professionals! In fact, a leading tile restoration company (which shall remain unnamed) based in Cardiff told a recent customer of mine that her original Victorian tiled floor, dating back to 1905, was beyond repair. The company recommended that she not waste any money on having it restored and instead that she should have it ripped up and replaced.

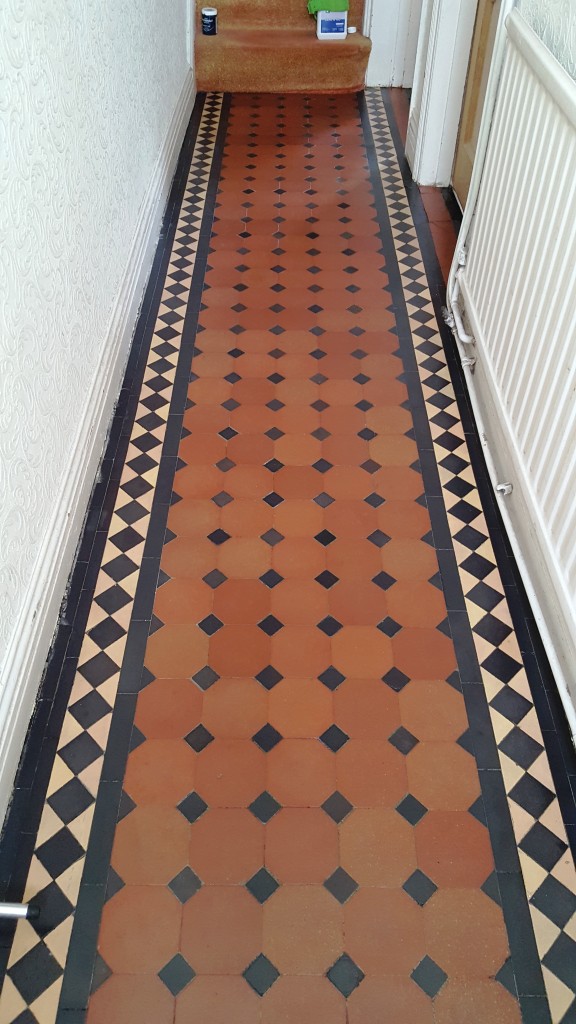
Victorian Tiled Hallway in Cardiff Before Restoration

It was in a bad state, however replacing the floor would incur a significant cost and the original characteristics of the period floor would be lost. The customer was feeling rather deflated and was left undecided on what to do. Fortunately after browsing the web for a solution, she came across Tile Doctor and I was asked to pop over and take a look. I visited the customer at her home and removed parts of her hallway carpet to get a better look at the Victorian tiles beneath. The floor was certainly in a very poor state, there were many old paint splash marks covering the tiles and the surface of the floor was deeply darkened after many years’ worth of wear and tear. In my opinion however, it was still salvageable, and the customer was happy to see what could be done.

Cleaning an Original Victorian Tiled Floor

A week before I was due to start the restoration, I asked the customer to remove the foam-backed carpet to let the floor breathe a bit. Before beginning the work, I ran a few damp tests and the floor proved surprisingly dry considering how old it is and the very probable lack of a damp proof membrane. I started by manually scraping as much of the old paint staining off the stone as possible and cleared other debris from the surface. Knowing that clay based Victorian tiles like these easily soak up paint splashes, I knew it would take a thorough clean to remove them completely. I firstly soaked the floor with water and left it to dry slightly before mixing a concoction of Tile Doctor NanoTech HBU, Tile Doctor Pro-Clean, and Tile Doctor Remove and Go. NanoTech HBU is a particularly powerful cleaner which uses nano-sized particles to penetrate the pores of the stone, while Pro-Clean is an alkaline-based cleaner that tackles heavy soil build-up. Remove and Go is a multi-purpose product which both cleans and strips away any old sealer. I left this mixture to dwell on the floor for around half an hour, scrubbed it in firstly using a black scrubbing pad fitted to a rotary machine and then a wire wool pad. I followed by rinsing the products off with water and extracted up the excess with a wet vacuum machine. This technique was repeated until I was satisfied with the condition of the floor.

Sealing an Original Victorian Tiled Floor

After leaving the floor to dry off completely overnight, I returned to the property the next day to carry out the sealing process. I applied seven coats of Tile Doctor Seal and Go, which not only adds a protective covering to the tile, but also enhances its appearance. The customer was absolutely thrilled with the results of the restoration, especially considering that she was told the floor was ruined by a leading company and not worth saving.

Victorian Tiled Hallway in Cardiff After Restoration


Source: Victorian Tile Cleaning and Restoration Service in South Wales

Thursday, August 24, 2017

Slate Tiled Shower Cubicle Restoration in Oxfordshire

Just Southwest of Bicester, Kidlington is one of the largest villages in England with a population of nearly 14,000. There are a lot of amenities, making it a great place for families to make their homes and I recently visited the area to see a customer with a Slate tiled shower cubicle in need of restoration.

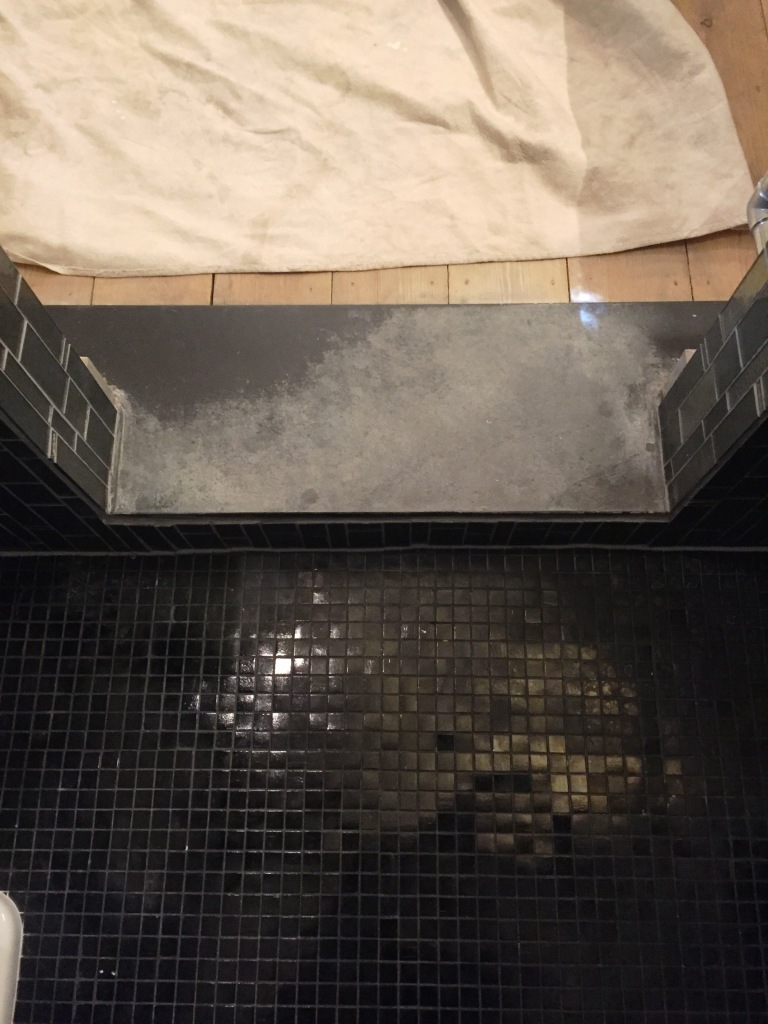
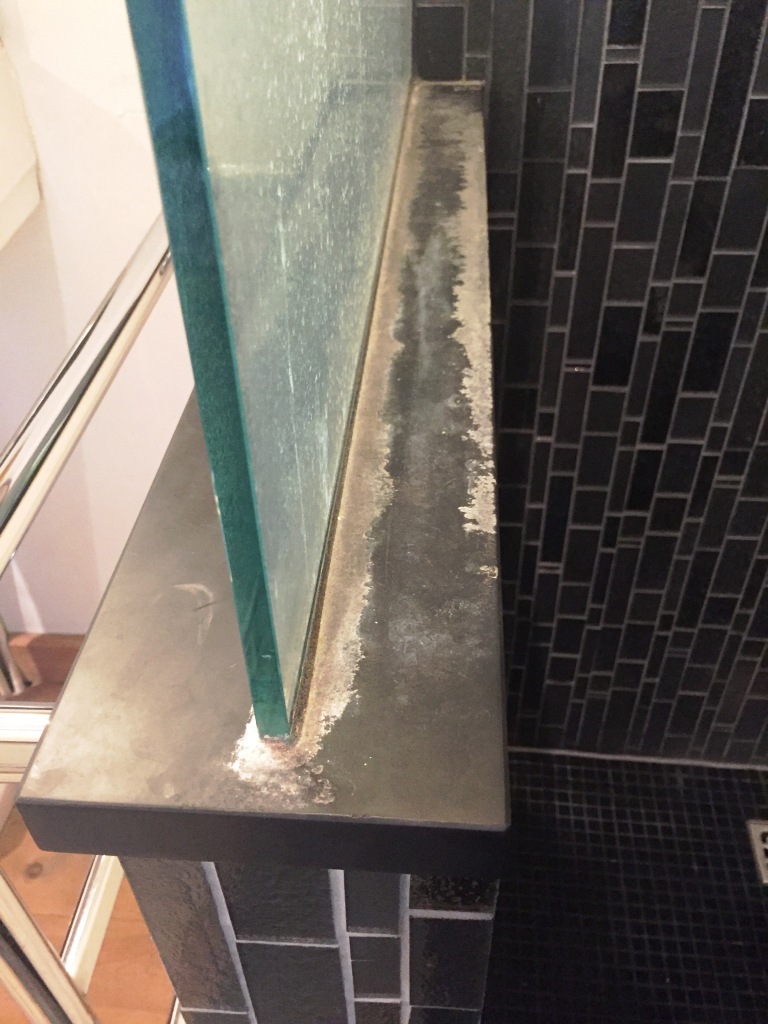
Slate Bathroom Kidlington Before Cleaning Slate Bathroom Kidlington Before Cleaning

It’s not unusual to get asked to restore natural stone shower cubicles because they can suffer with mould, water marks and Limescale issues and can easily get into poor condition. Quite a lot of these problems can be avoided by rinsing the tiles down after a shower to remove traces of shampoos and soaps and ensuring the room has adequate ventilation. If you want to read more on this subject take a look at http://shower.tilecleaning.co.uk/

Cleaning a Slate Tiled Shower Cubicle

The first process involved in restoring this cubicle was to cover the entire area in Tile Doctor Remove and Go, which is a multi-purpose cleaner designed to strip away any old sealers, synthetic finishes, adhesives and paint stains. It also helps to draw out ingrained stains and remove heavy grease build-up. The product was left to dwell for roughly ten minutes before I scrubbed it into the tiles and grout with a stiff hand brush. Next, I rinsed the area with water to remove traces of chemicals and wiped it dry with a cloth. Following this, I covered the tiles with Tile Doctor Grout Clean-Up, which is a concentrated phosphoric acid cleaner formulated to remove grout smears and mineral deposits such as Limescale. The product was scrubbed into the grout a couple of times, before the area was rinsed again with water and wiped dry with a cloth. Grout Clean-up is an acidic product and so shouldn’t be left on stone for too long as it can damage it.

Sealing a Slate Tiled Shower Cubicle

To seal the Slate, I used Tile Doctor Stone Oil, which is an easy-to -apply, impregnating sealer that is particularly effective on low porosity stone. It is formulated to restore the naturally dark colour and patina in the stone. To finish I applied a single coat of Tile Doctor Ultra Seal which is an impregnating sealer that gives a natural look finish to the slate. I applied the sealer with a lint-free cloth, left it for about 30 minutes to cure and then wiped off any excess with a clean cloth.

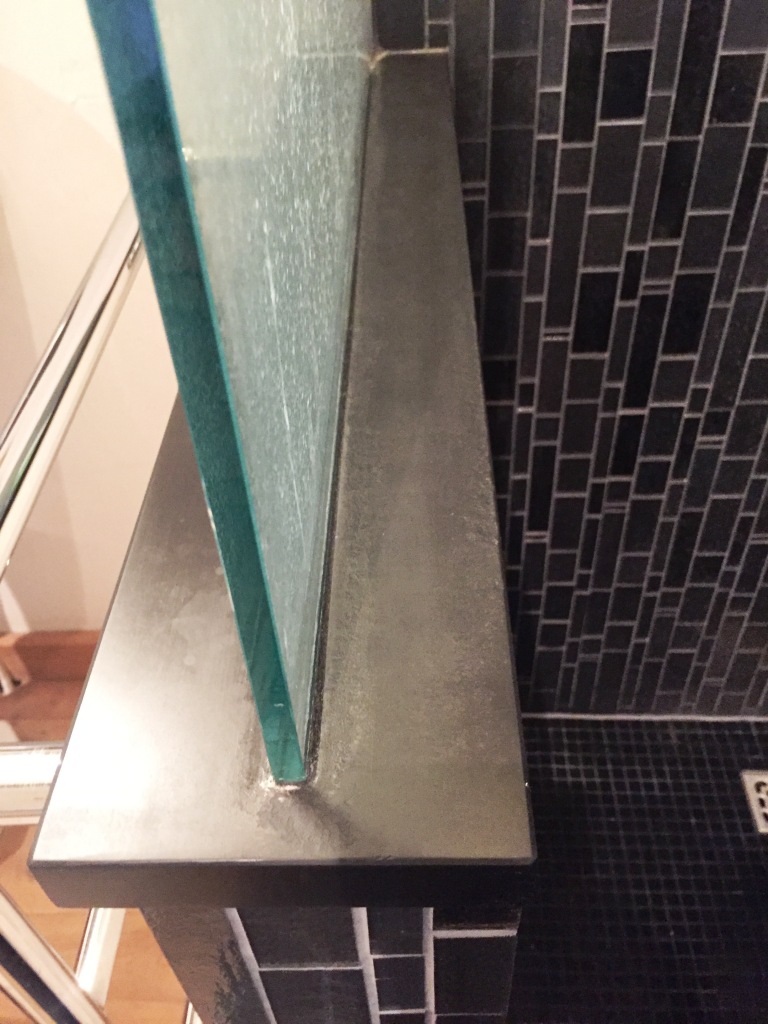
Slate Bathroom Kidlington After Cleaning Slate Bathroom Kidlington After Cleaning

The results were fantastic and the customer was especially pleased with the clean, natural look the sealer had given the Slate.


Source: Slate Tile Cleaning and Restoration Service in Oxfordshire