Thursday, September 27, 2018

Rebuilding a Classic Edwardian Tiled Floor in Hertfordshire

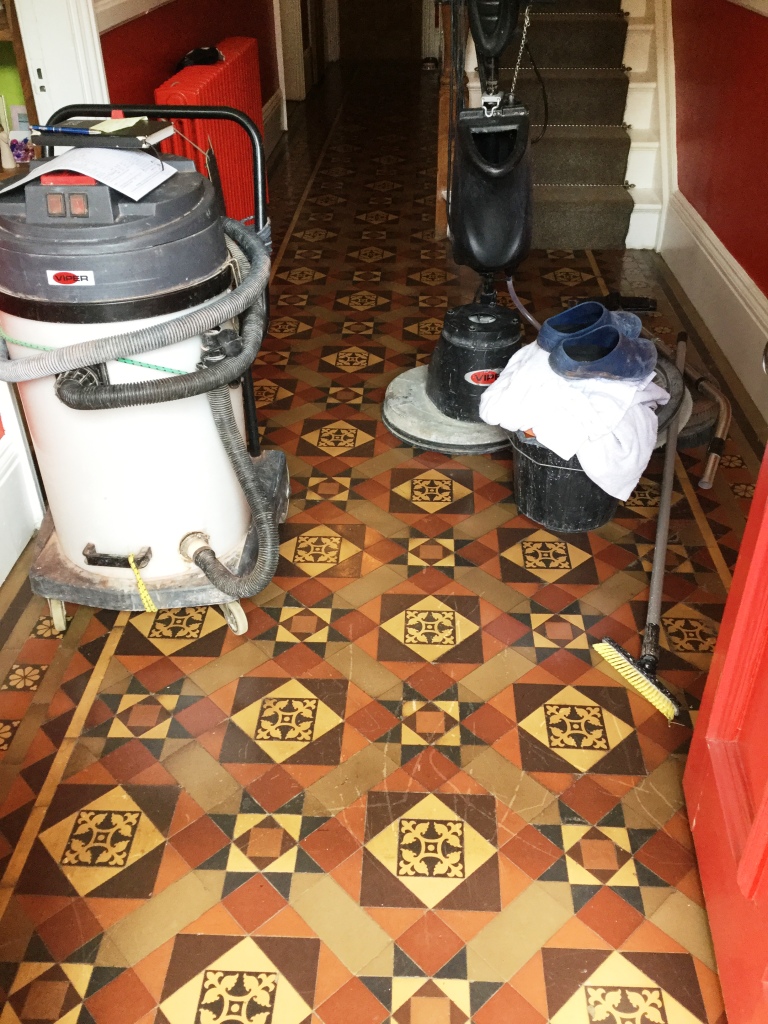
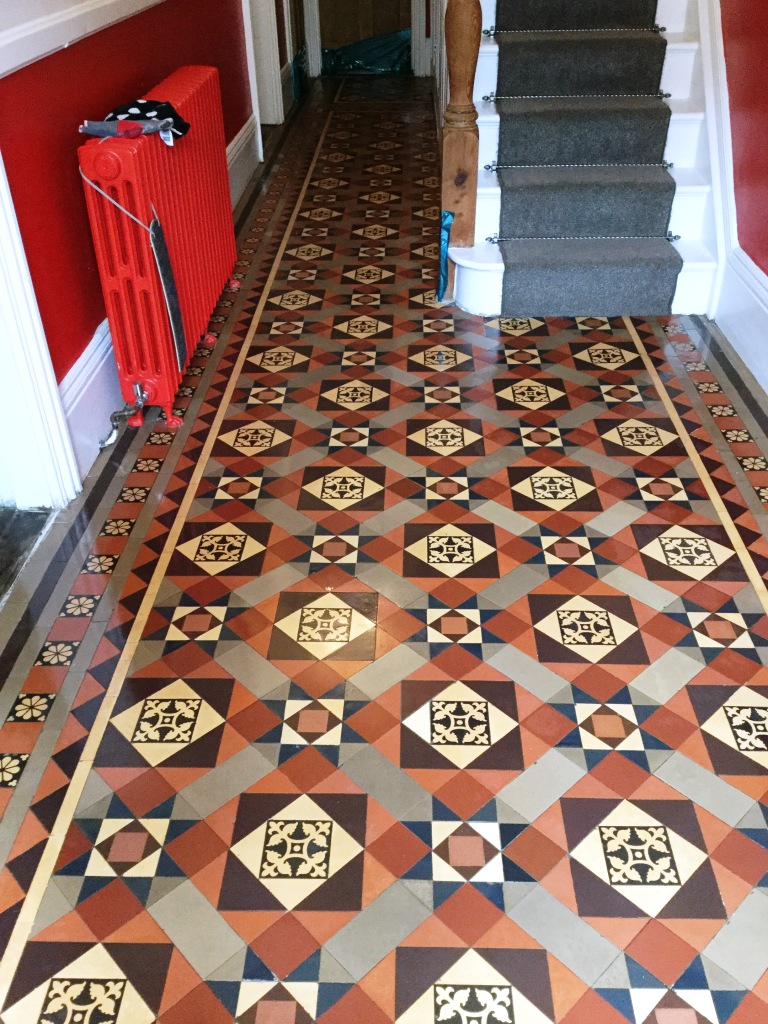
The owners of this property in Harpenden asked us to come and clean and reseal their Edwardian Tiled hallway floor and return it to its’ former glory whilst carrying out a few minor repairs to missing, broken and cracked tiles around the edge.

On visiting the property at this popular commuter town within the St Albans district, it was clear the floor was looking a little neglected and in need of some care and attention. They were keen to retain this feature of their Edwardian property. We discussed what could be done to restore the floor and the client was given a quote and a timescale for the work. They were happy to go ahead.
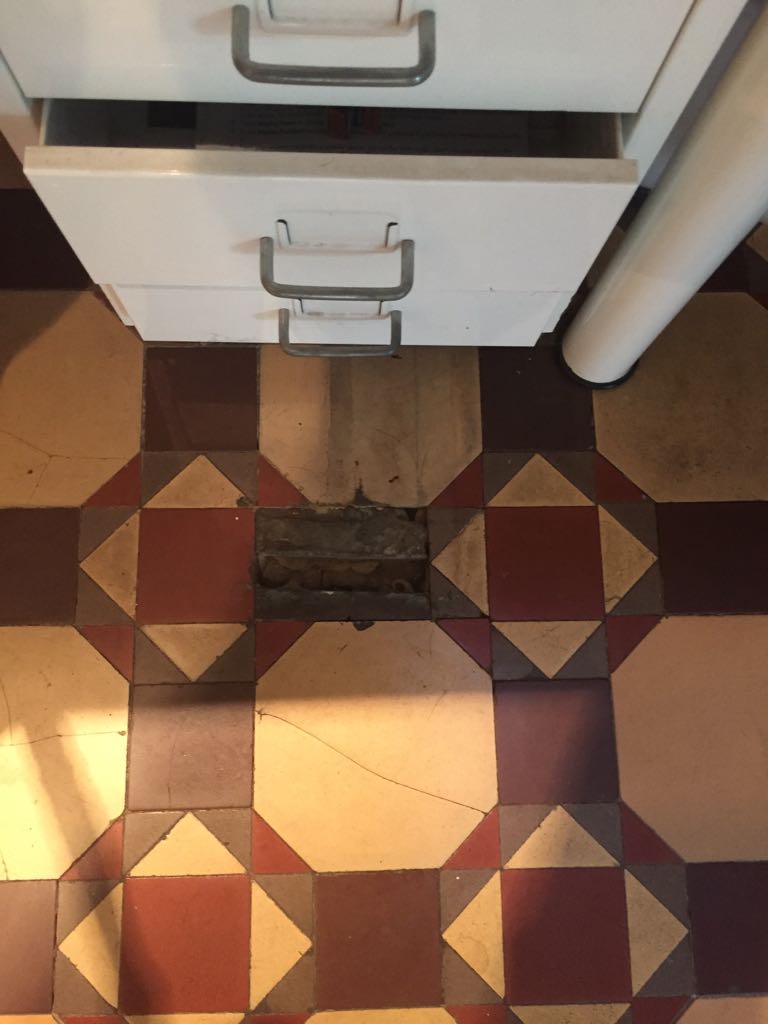
Edwardian Hallway Before Rebuild Harpenden Edwardian Hallway Before Rebuild Harpenden


Cleaning and Repairing an Edwardian Tiled Hallway Floor

The first step was to give the floor a deep clean with a strong dilution of Tile Doctor Pro-Clean. This product is designed for use on Tile, Stone and Grout and when used in a strong dilution can strip away any old sealers without harming the tile itself. The product is left to dwell on the tiles for short time and then scrubbed in using a rotary brush. We then rinsed with water to remove the slurry produced and using a wet vacuum we removed the residue.

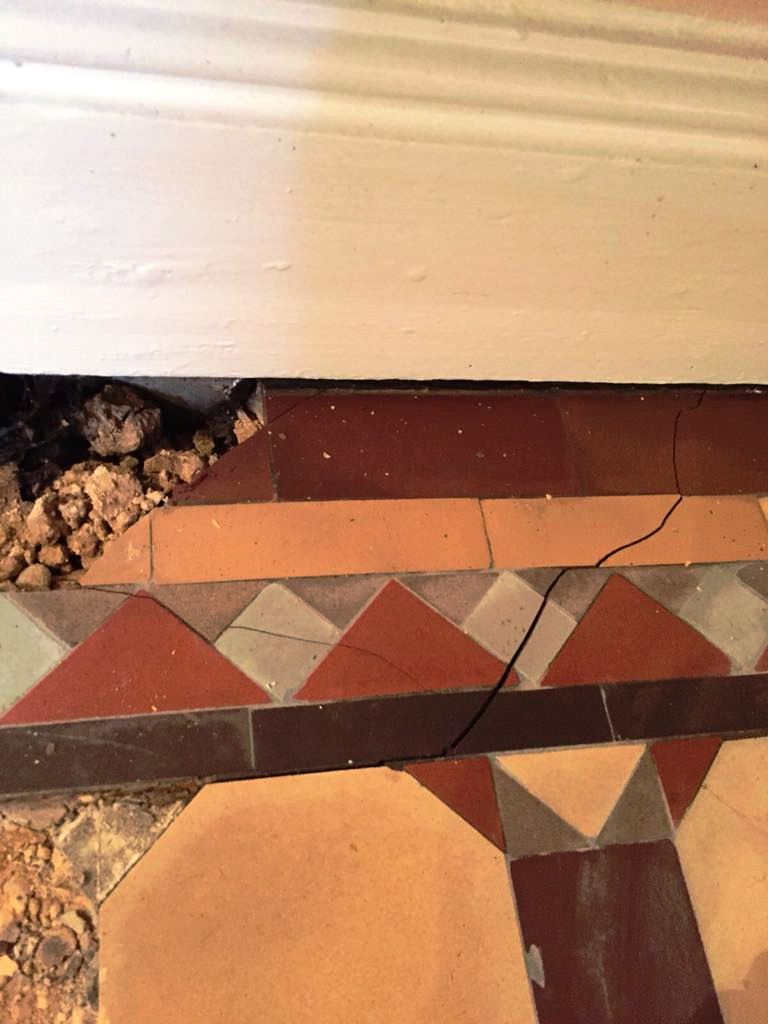
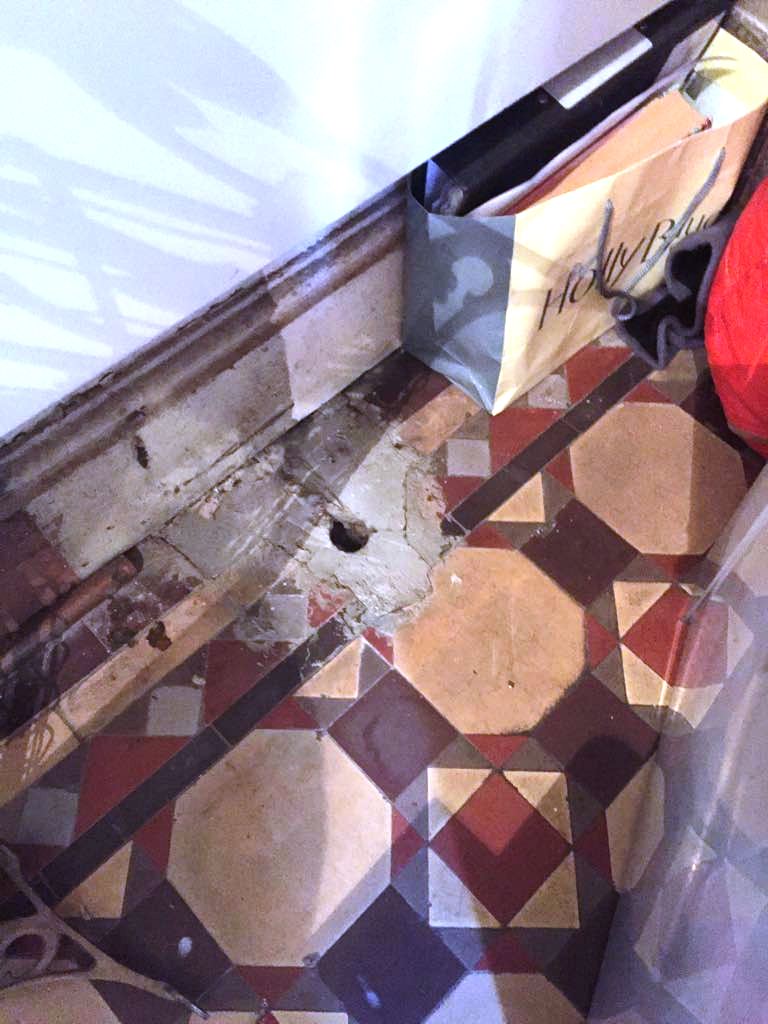
Once this was finished and with the floor looking cleaner the next step was to tackle the cracks in a few of the tiles under the stairs. This is when we discovered that the floor had become loose. When removing some of the broken tiles adjacent to the skirting we discovered a whole section of floor, about 1/3 of sqm had become loose and dropped slightly.
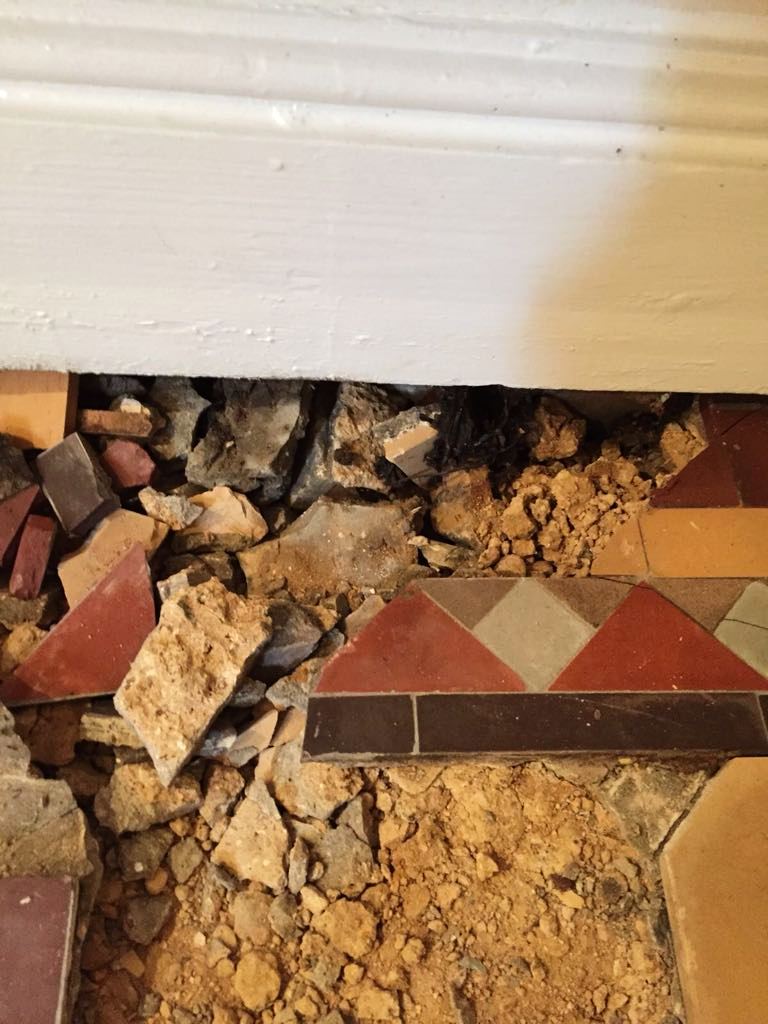
Edwardian Hallway During Rebuild Harpenden Edwardian Hallway During Rebuild Harpenden

The client was concerned with this setback and wasn’t sure what we would be able to do. However, the need not have worried, we have come across this situation before! To tackle the problem, we carefully excavated the area and re built the sub floor below the tiles in concrete. We then levelled the floor in preparation for tiling. Luckily, we were able to salvage the existing tiles and they were individually cleaned using a diamond wet cutter before being re-laid into the original pattern.
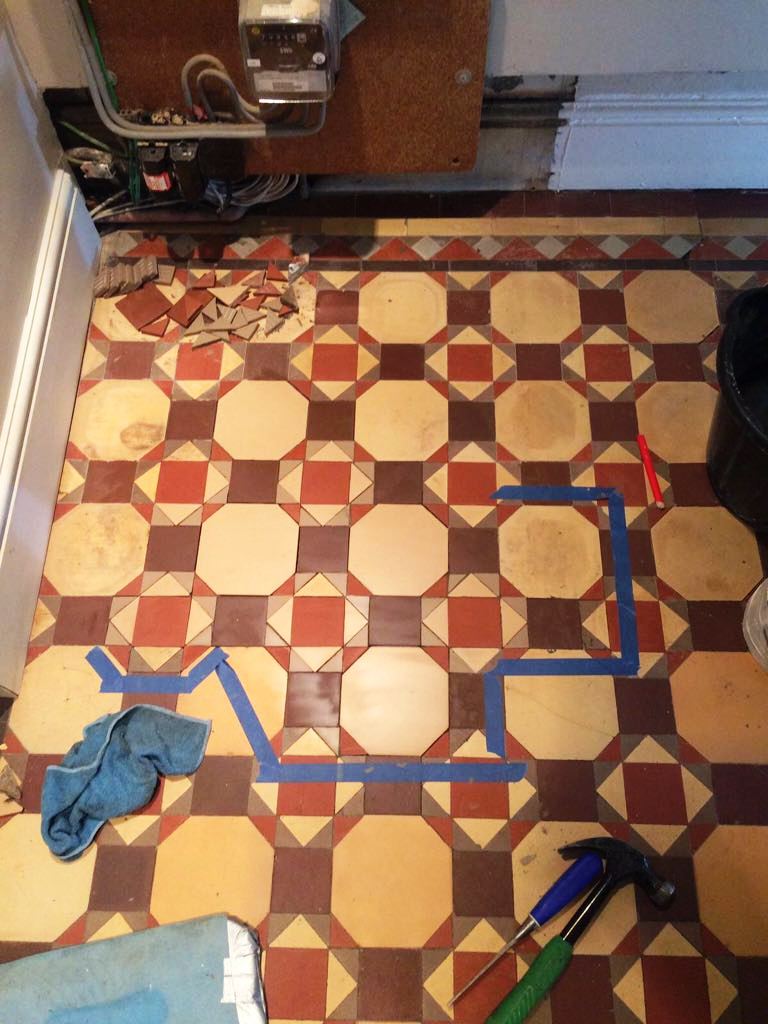
Edwardian Hallway During Rebuild Harpenden


Sealing an Edwardian Tiled Hallway Floor

With the original tiles laid back down clean and the flooring rebuilt under the stairs we re-grouted the floor before we were ready to apply a protective sealer. Before doing that however the floor needed to be dry, so we left it to dry off fully overnight.

Returning the following morning, we checked with a moisture meter that the floor was dry, which it was. Firstly, we applied a primer seal using Tile Doctor Colour Grow which is an impregnating sealer to protect the tiles and enhance their colour. Once the first coat of sealer was dry it was followed by five coats of Tile Doctor Seal & Go which adds further protection and leaves a glorious sheen.
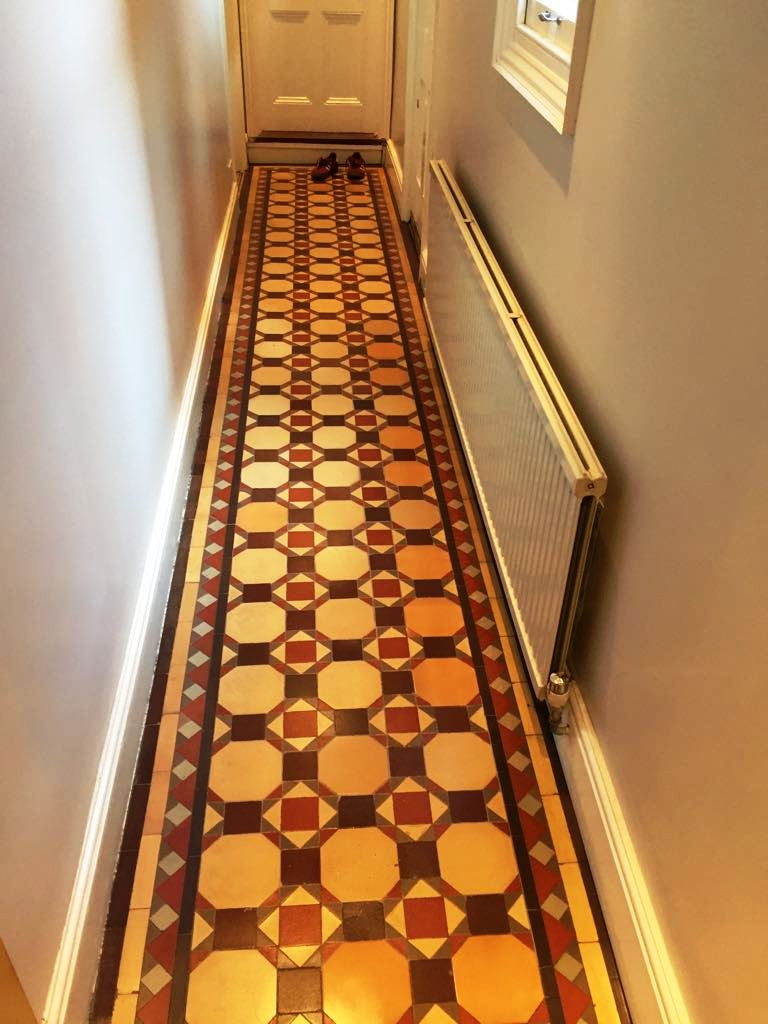
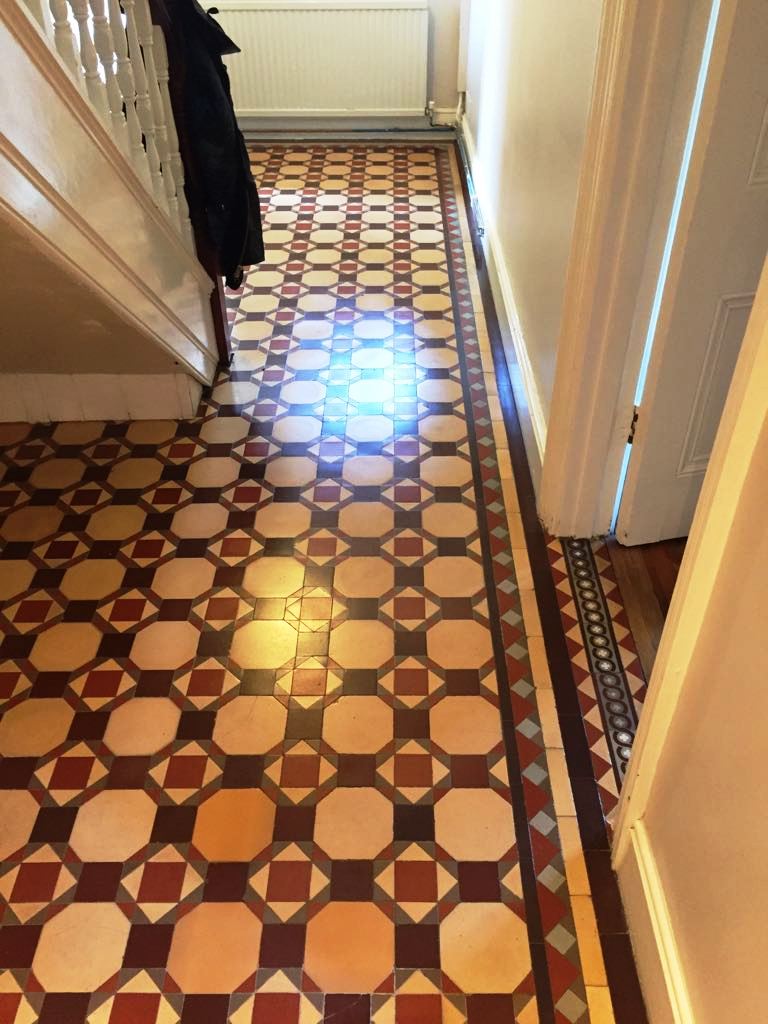
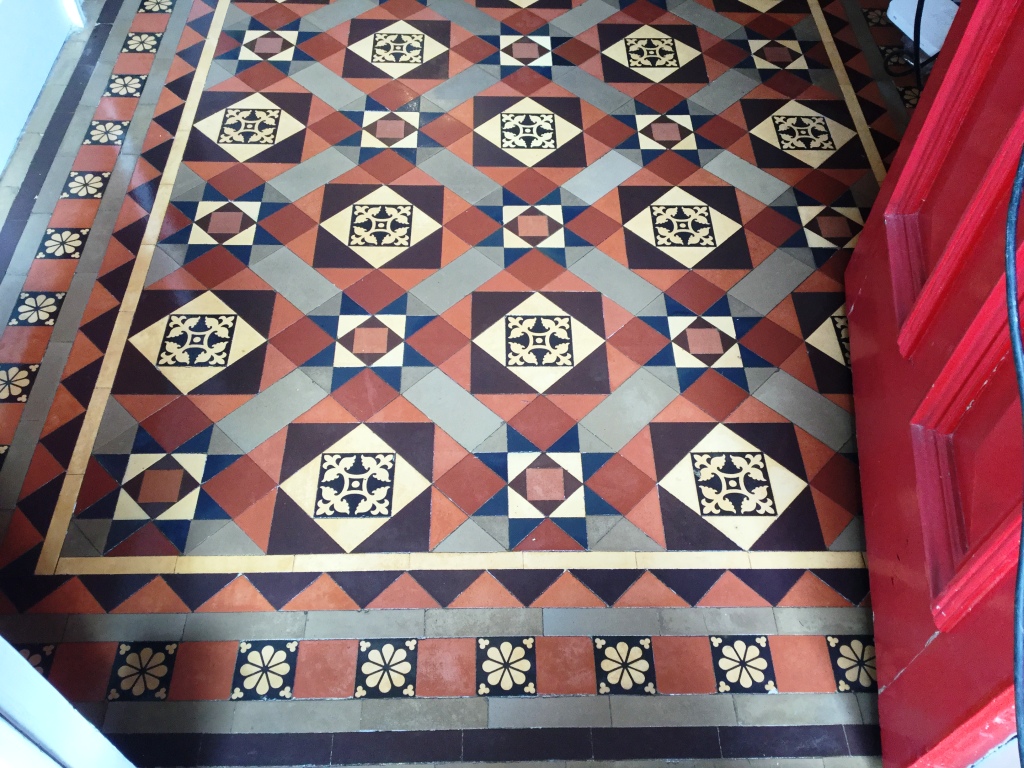
Edwardian Hallway After Rebuild Harpenden Edwardian Hallway After Rebuild Harpenden

The floor looks amazing and the client was over the moon with the end result. It far exceeded their expectations particularly after finding an area of the floor had collapsed.
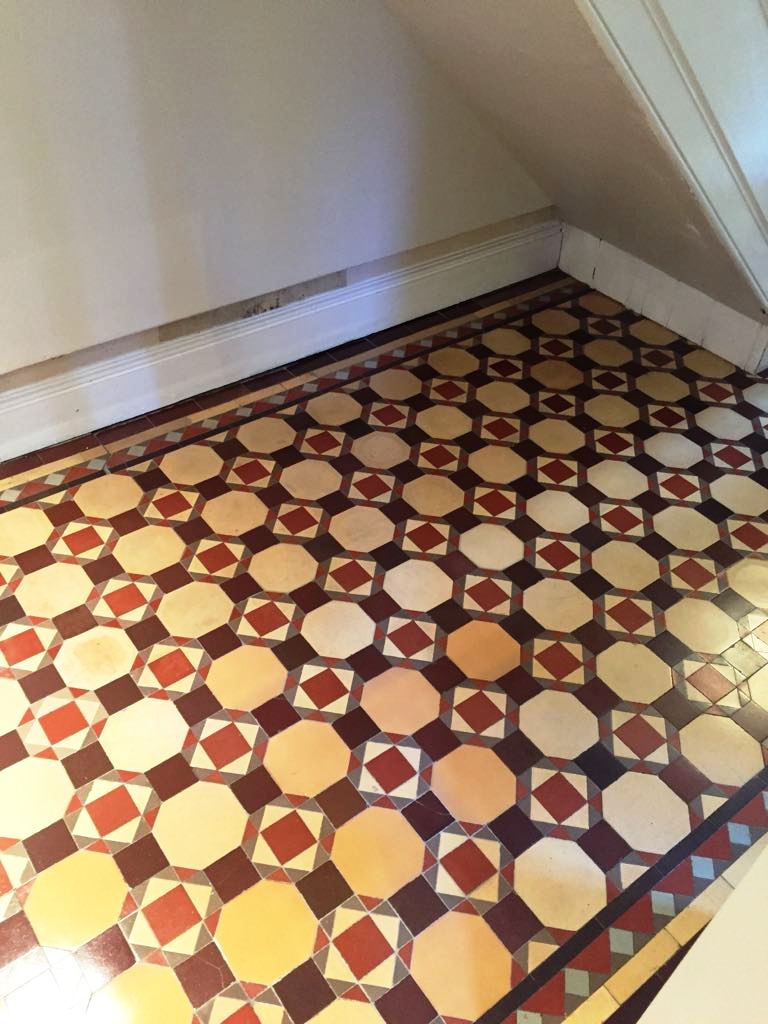
Edwardian Hallway After Rebuild Harpenden


Source: Edwardian Tiled Floor Restoration in Hertfordshire

Friday, September 21, 2018

Cleaning Linoleum Floors: How to Remove Stains

If any area of your home features linoleum flooring that has fallen victim to stubborn stains, it's time to get serious about cleaning it. Fortunately, removing stains from linoleum is a relatively easy procedure that can be successfully undertaken with a few basic tools. After carrying out the steps listed below, your linoleum flooring will be stain-free and sparkling like new.

What You'll Need:
  • Broom
  • Dustpan
  • Mini vacuum
  • Nonabrasive washcloth
  • Mild liquid soap
  • Warm water
  • Empty spray bottle
  • Plastic bowl
  • Baking soda
  • Lemon juice
  • Soft-bristled scrub brush

Step 1 - Remove Dust and Dirt from Your Flooring

The first step in cleaning your linoleum floors is to give your flooring a preliminary once-over. Begin by using a broom and dustpan to sweep up any noticeably large deposits; then, go over the freshly swept flooring with a mini vacuum for good measure. Alternatively, this step can be carried out by using a dampened washcloth or paper towel to soak up any caked-on dust. Once your linoleum flooring has been completely purged of loose dirt, you'll be ready to move on.
Step 2 - Clean Your Flooring

Now that they're dust-free, it's time to begin cleaning more thoroughly. Start by combining a mixture of mild liquid soap and warm water in a clean, empty spray bottle. Seal the bottle and proceed to shake it until the solution begins to form suds. Now, vigorously spray your linoleum flooring with the newly-formed cleaning solution, leaving it for several minutes to sit afterward. After, use a sponge or nonabrasive washcloth to thoroughly scrub your floors using broad, circular motions. Make sure to pay special attention to any stained areas of flooring, as this may be enough to remove fresh spills. If any stains remain on your linoleum flooring after this step has been carried out, proceed with step three.
Step 3 - Apply Your Homemade Stain Remover

Having carried out a thorough cleaning, you're now ready to remove any set-in stains on your linoleum flooring. Inside of a plastic bowl, combine a mixture of baking soda and lemon juice, stirring until it takes on a paste-like consistency. Take a washcloth or paper towel and use it to evenly spread the paste over any stained areas of your flooring. Once it has been applied, allow the paste to sit for three to five minutes to give it ample time to penetrate and lift the stains. Scrub it after with sponge, washcloth, or soft-bristled scrub brush to rid your flooring of the stains once and for all.
Step 4 – Rinse and Dry the Area
Begin by filling another empty spray bottle with warm water to rinse off any remaining portions of your stain remover. Then, use another clean, nonabrasive cloth to dry the now stain-free area.


Thursday, September 20, 2018

Renovating a Riven Slate Kitchen Floor in Lancashire

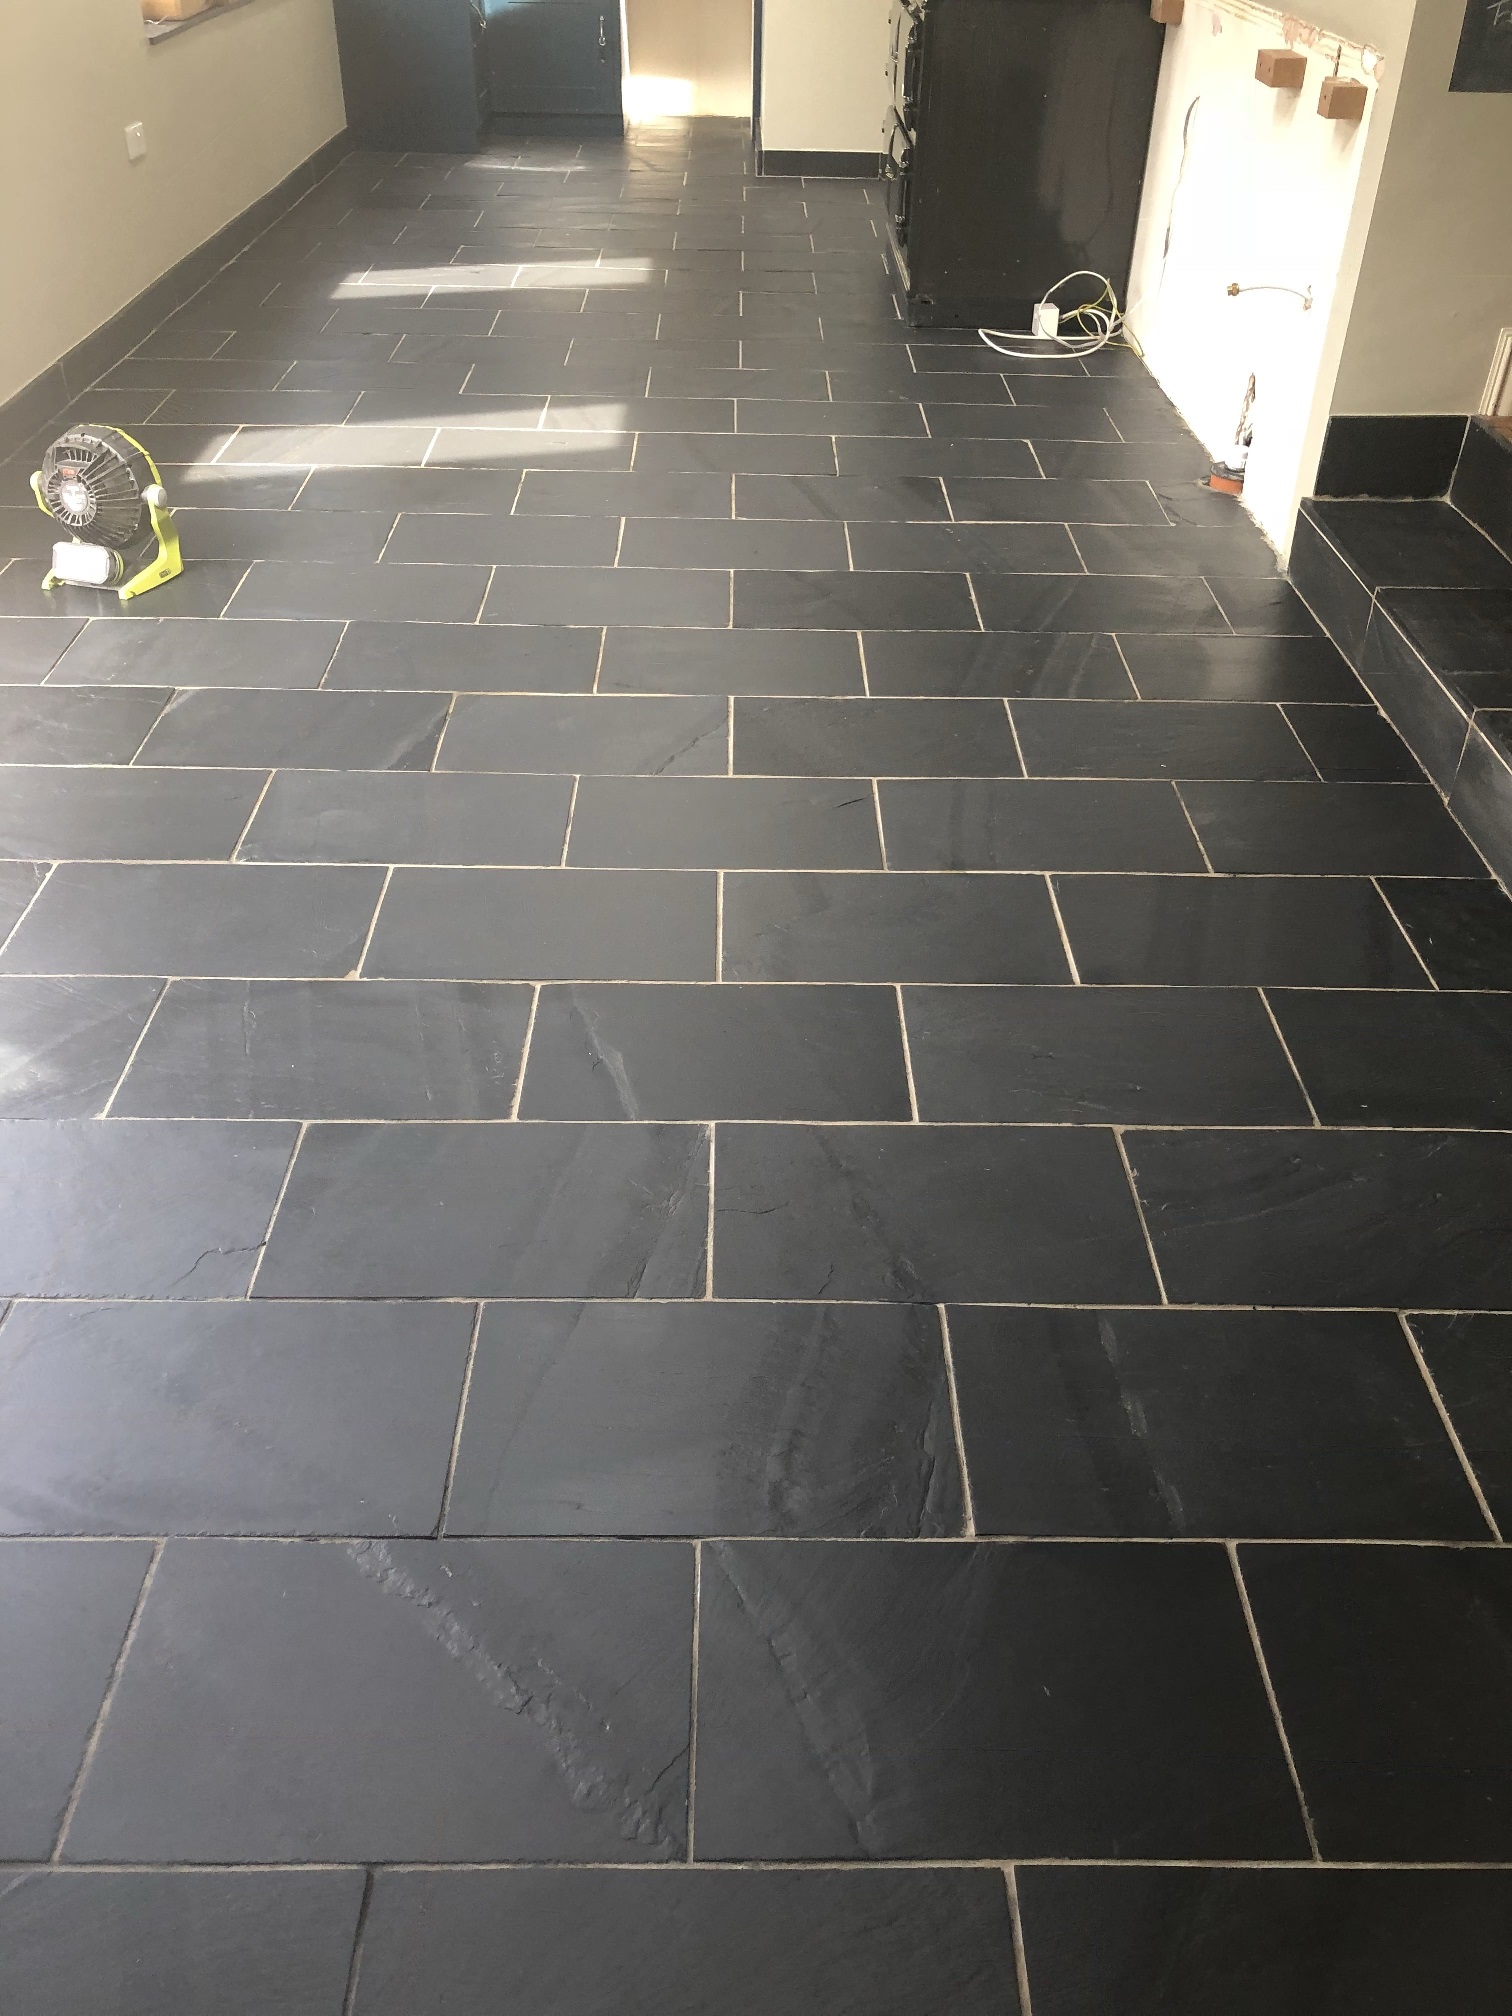
We were asked to come and advise a customer regarding their stone floor which the customer was struggling to keep clean. The property was in High Bentham which lies on the River Wenning, just West of the Yorkshire Dales National Park.

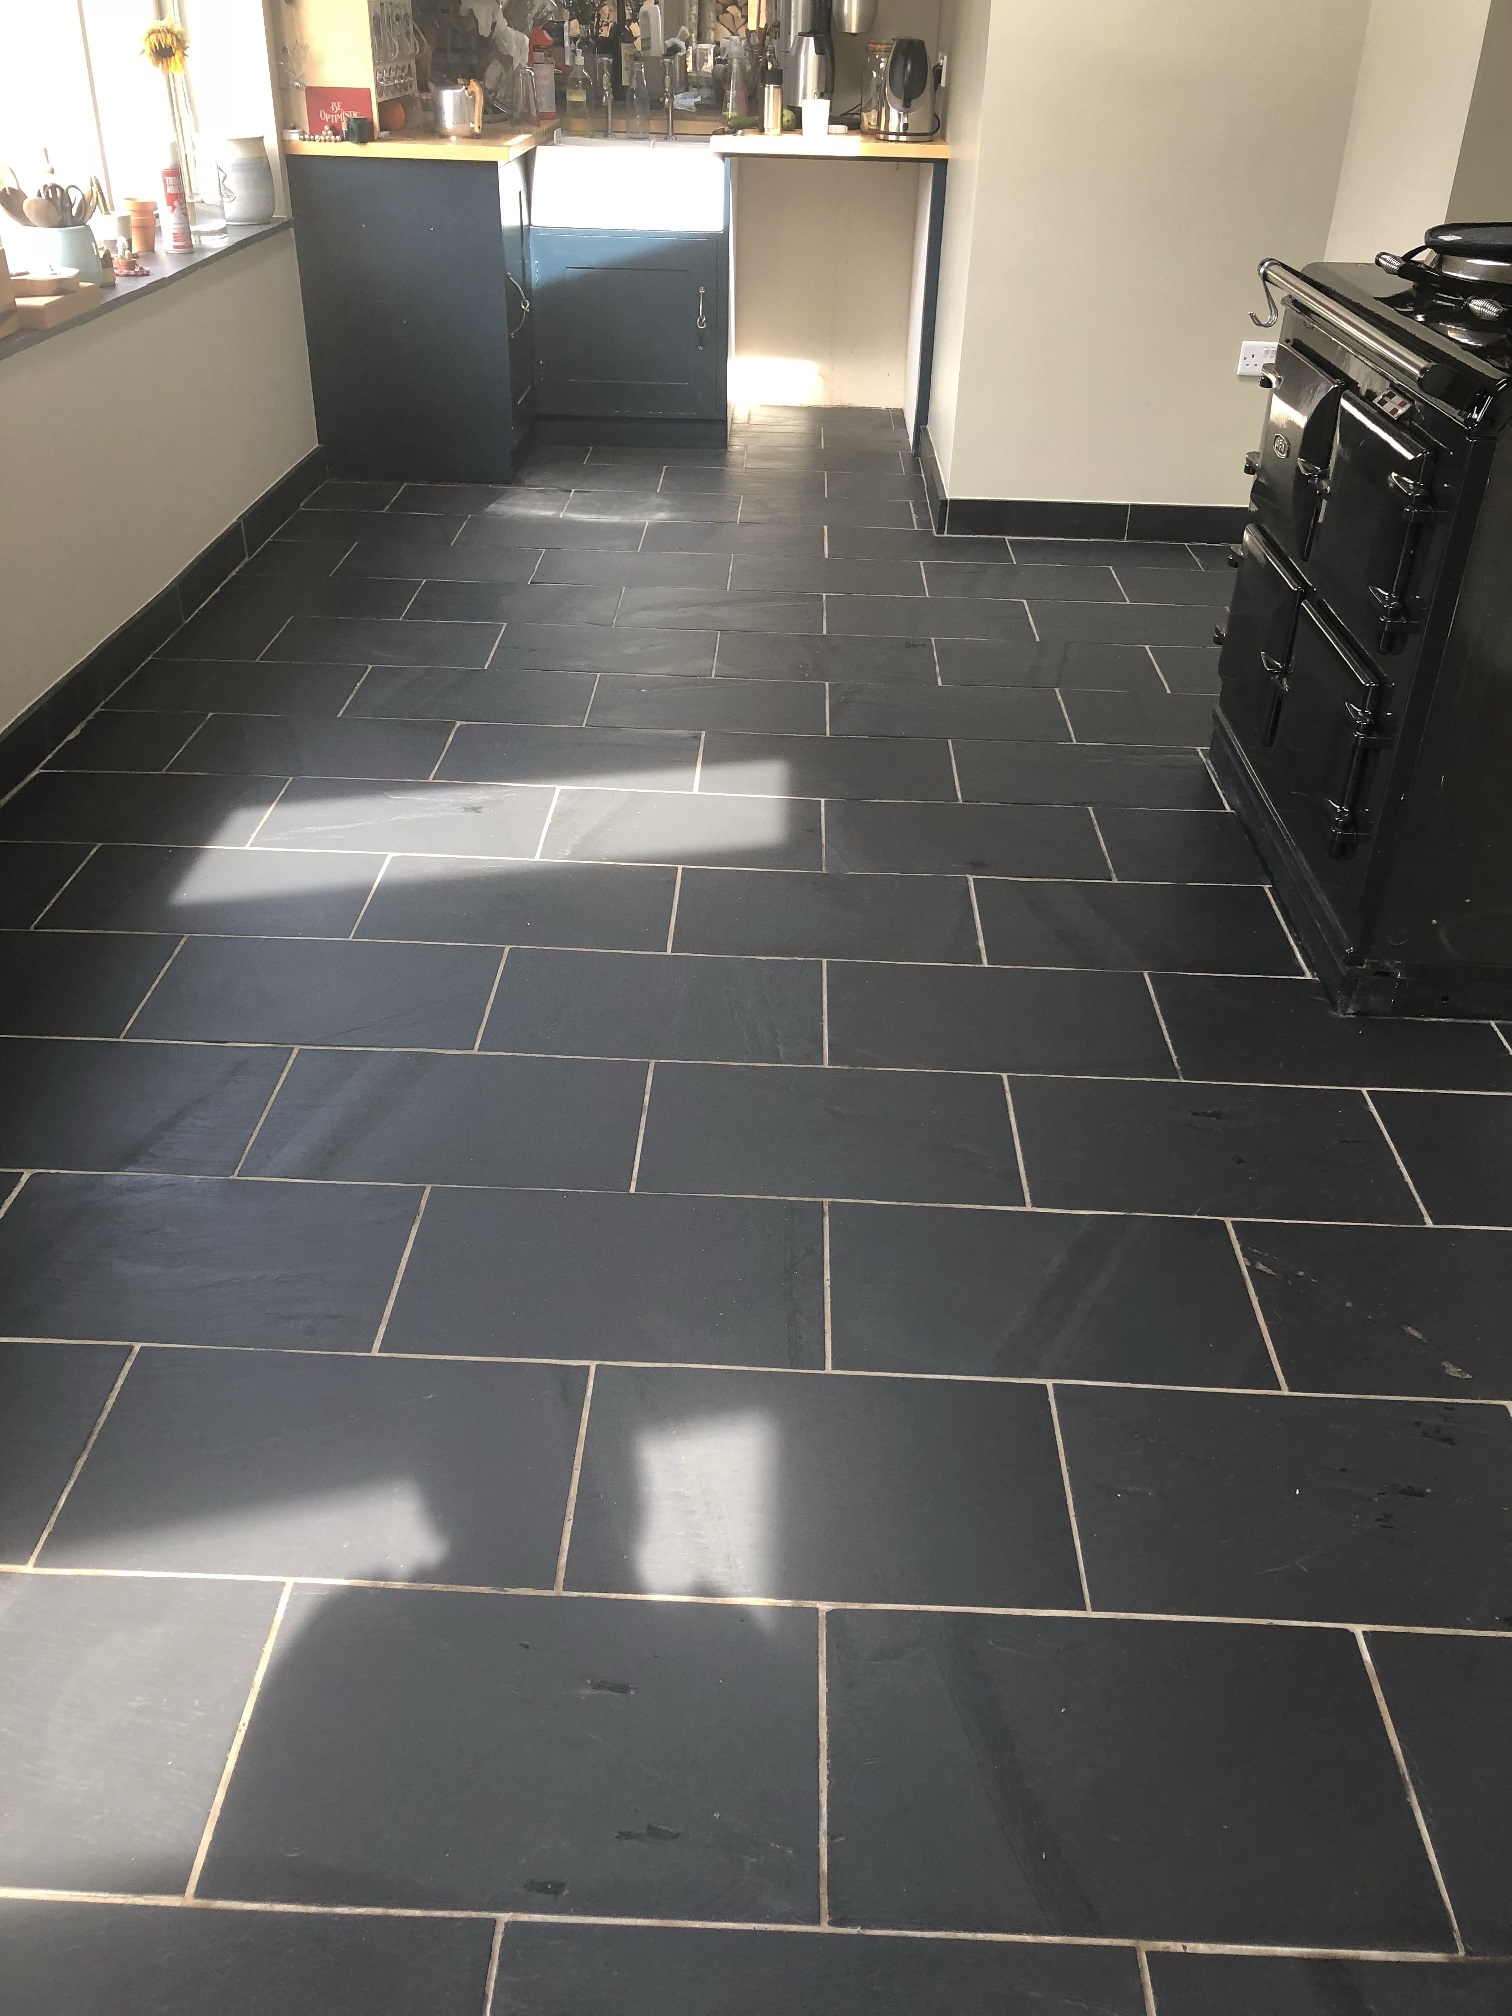
Slate Floor Before Cleaning High Bentham

We often get customers who give up looking after their tiles after a while as some stone like this Black Riven Slate need quite a bit of upkeep to keep them looking good and a standard mop and bucket at times isn’t enough to keep them looking pristine. In this case the sealant had worn away in the high traffic areas and the floor had a slightly rough texture to the surface which meant it was holding onto dirt making it difficult to keep clean. We proposed the floor should be cleaned and resealed, discussed the cost and agreed a time for the work to be carried out.

Slate Floor Before Cleaning High Bentham


Cleaning a Black Riven Slate Tiled Floor

To get the tiles clean we burnished the stone floor with a coarse 200-Grit Diamond pad fitted to a weighted buffing machine using water for lubrication. The floor was then rinsed and then the process repeated using a series of different graded pads, namely the 400 and 800 grit burnishing pads which further cleaned and resurface the appearance of the stone.

The grout was cleaned using Tile Doctor Pro-Clean which was scrubbed into the grout lines by hand; Pro-Clean is a heavy-duty cleaner which gets to the really stubborn stains and it did a great job at getting the grout looking like it should. The cleaning process was then finished off by rinsing the floor with water and extracted the slurry with a wet vacuum. The floor was inspected and retreated to the same process where more work was required. We usually find leaving Pro-Clean on a stain for longer and assisting with a bit of steam helps to lift the dirt out of the pores of the stone.

Once cleaned thoroughly we rinsed the floor again and then extracted as much moisture from the floor as possible with a wet vacuum before leaving it to dry off fully overnight.


Sealing a Riven Black Slate Tiled Floor

We called back the following day to apply a sealer first checking the floor was dry using a moisture meter. All was well, so we started to apply the first of two coats of Tile Doctor Colour Grow, a third coat was attempted but the slate would not accept any more sealer, and this was removed with a cloth. It is important to know if you have reached FCS (Full Cure Sealability) if not then the pores of the tiles will still be open to accepting dirt and the job won’t last long. Over a very short period of time the tiles will diminish in stature and finish.

Slate Floor During Sealing High Bentham

The sealer really restored the black colour to the Slate and transformed the look of the floor. As always, we left the customer a free bottle of Tile Doctor Neutral Cleaner, using the correct cleaning product in future will ensure they get maximum life out of the sealer.

Slate Floor After Sealing High Bentham Slate Floor After Sealing High Bentham

The floor looked lovely when finished and the customer was very happy with the overall result.   


Source: Slate Tile Cleaning and Sealing Service in Lancashire

Monday, September 10, 2018

Renovating a Chinese Slate Hallway Floor in Gloucestershire

This client from Cirencester got in contact about his Slate Tiled hallway floor which was now looking dull following renovations to the property by the owner who was a builder. If you have never been I can recommend you pay Cirencester visit, it’s a lovely old market town that dates to the Roman times and is incidentally is the largest town in the Cotswold District.

Chinese Slate Floor Cirencester Before Cleaning

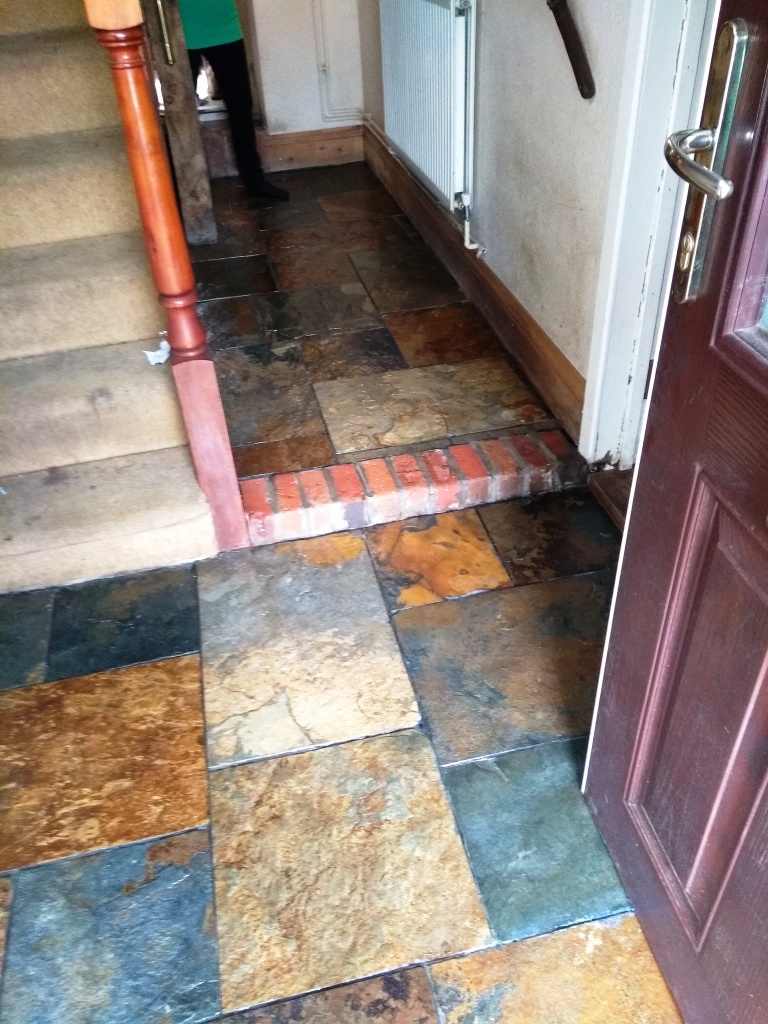
I arrived at the property and could see immediately that the floor had never been sealed properly and so the appearance had just got worse over the few years since it was laid. Dirt had become ingrained in the pores of the slate making it impossible to clean effectively. The client realised that the only way to fix the problem was to have the floor properly treated. We agreed a price for the work and popped a date in the diary to come back.

Chinese Slate Floor Cirencester Before Cleaning Chinese Slate Floor Cirencester Before Cleaning


Cleaning a Chinese Slate Tiled Hallway Floor

As the floor was in the hallway, we needed to protect the stairs and skirting with plastic sheeting before we started. I then started cleaning the tiles with a strong concentration of Tile Doctor Remove and Go, this is a multi-purpose stripper which can remove most coatings and sealers and works best it left to dwell and soak into the stone for a long time before scrubbing it in. This also helps it work on ingrained stains and remove heavy grease build-up. My primary reason for choosing Remove and Go was to remove what was left of the sealer so after applying it to the floor I left it to soak in for ten minutes before being scrubbed it into the tiles with a black pad scrubbing pad fitted to a rotary floor buffer. The dirt soon turned the cleaning solution black and the slurry was extracted using a wet vacuum.

Next, I worked on cleaning up the grout using Tile Doctor Pro-Clean, this is good for neglected and heavily soiled areas and it makes short work of cleaning dirty grout. I had to scrub the grout by hand and once I was happy that the slate and grout was as clean as it could be the floor was given several rinses with water to remove the remaining dirt and remove any traces of cleaning products. Once this was done this completed the cleaning process, I was satisfied with our efforts and the floor was left to dry off overnight.


Sealing a Chinese Slate Tiled Hallway Floor

The next day I checked the moisture level of the stone in several areas with a damp meter to check that the floor was dry. The sealer will not cure if the floor is not properly dried out. I chose a combination of sealers to achieve the look we were after. First, I sealed with one coat of Tile Doctor Colour Grow this is an impregnating sealer that occupies the pores in the stone thereby preventing dirt from becoming ingrained there. It’s also a colour enhancing sealer that works really well on Chinese slate to highlight all the colours. Once this was dry I followed with three coats of Tile Doctor Seal and Go which is water-based blend of acrylic polymers that provides both a stain resistant surface seal and a durable low-sheen finish, which was perfect for finishing this floor.

Chinese Slate Floor Cirencester After Cleaning Chinese Slate Floor Cirencester After Cleaning

The customers response was ‘It never looked as good as that’, and he now realised the importance of sealing the floor correctly! I love the natural patterns in this type of floor, it is one of my favourites.

Chinese Slate Floor Cirencester After Cleaning


Source: Chinese Slate Tile Cleaning and Sealing Service in Gloucestershire

Friday, September 7, 2018

Removing Linoleum Floor From a Concrete Base

If your floor has seen better days, it may be time to consider replacing it. Removing linoleum floor from a concrete base can be hard work. However, with the right materials and guidelines, this is a task you can accomplish yourself. The biggest challenge is created by the adhesive used to attach the linoleum onto the concrete, as it can leave a mess behind. Lucky for you, the steps outlined below will help you complete the project in an efficient manner so that your concrete floor is stripped back to its original form.

What You'll Need:
  • Razor knife and extra blades
  • Floor scraper
  • Hot water
  • Mop
  • Buckets
  • Straight blade scraper
  • Mineral spirits
  • Rags
  • Old towels
  • Mild detergent
  • Warm water


Step 1 – Cut Linoleum into Strips
Use your razor knife to cut the linoleum into strips that measure 2 feet wide. If your blade begins to get dull, replace it with a new blade to allow you to cut more efficiently.

Step 2 – Pour Hot Water on Linoleum
Fill a bucket with hot water, then pour it carefully onto your linoleum floor. Use a mop to spread the water over the entire floor. Allow the water to sit on the floor for about 10 minutes. It helps to soften the adhesive used to attach the linoleum onto the concrete base.
Step 3 – Mop the Water
Use a mop to soak up the water from the linoleum. This allows you to work more efficiently when you strip the linoleum.
Step 4 – Remove the Linoleum Strips
Insert your floor scraper underneath the topmost strip of linoleum. You should feel it easily separate the linoleum from the concrete. Once you have removed a portion, peel off the strip with your hands. Proceed to remove the rest of the strips in this manner.
Step 5 – Scrape off Adhesive and Backing
Use a straight blade scraper to remove residual adhesive and backing on the concrete. Begin at the first section of floor you stripped. Start to scrape off adhesive and backing from one end as you steadily work across to the other end. Work in this way until you’ve managed to work on the entire floor. It helps if you have extra blades. You can replace the dull ones when it becomes necessary so that you can work faster.
Step 6 – Pour Hot Water on Concrete Base
You may end up with stubborn bits of adhesive on the concrete. In this case, pour some more hot water over the concrete. Allow it to work on the adhesive for about 15 minutes.
Step 7 – Mop the Concrete and Scrape
Mop up the water. Proceed to remove remnants of adhesive with your scraper. It should come off easily due to the softening effects of the hot water.
Step 8 – Clean the Floor
Open all the windows in the room to encourage good ventilation and air circulation. This is vital when mineral spirits are used, as the odor can be quite strong. Apply some mineral spirits onto a rag. Wipe small sections of the floor at a time. Once the rag becomes dirty with adhesive reminance and other dirt and debris, switch to a clean rag. The mineral spirits help to clear residual adhesive, which leaves you with a cleaner surface. Proceed to mop the floor with a mild detergent and warm water. Once you’re done, mop the floor one more with plain warm water to remove the soap. Change the water a couple of times in between mops to avoid leaving soap residues on the concrete. Use an old towel to absorb excess moisture a few hours after mopping.


Wednesday, September 5, 2018

Stripping Wax of Hallway Tiles in Northamptonshire

This customer called me as she was concerned about the scratches on her hallway tiles, they were not only unsightly but were also starting to trap dirt. The Victorian property in Rushden which lies between Bedford and Kettering on the east side of Northamptonshire.

We always offer a site visit to take a look at the job before doing any work, that way we can discuss what the cleaning options are, and it also demonstrates to the customer that we know what we’re talking about.

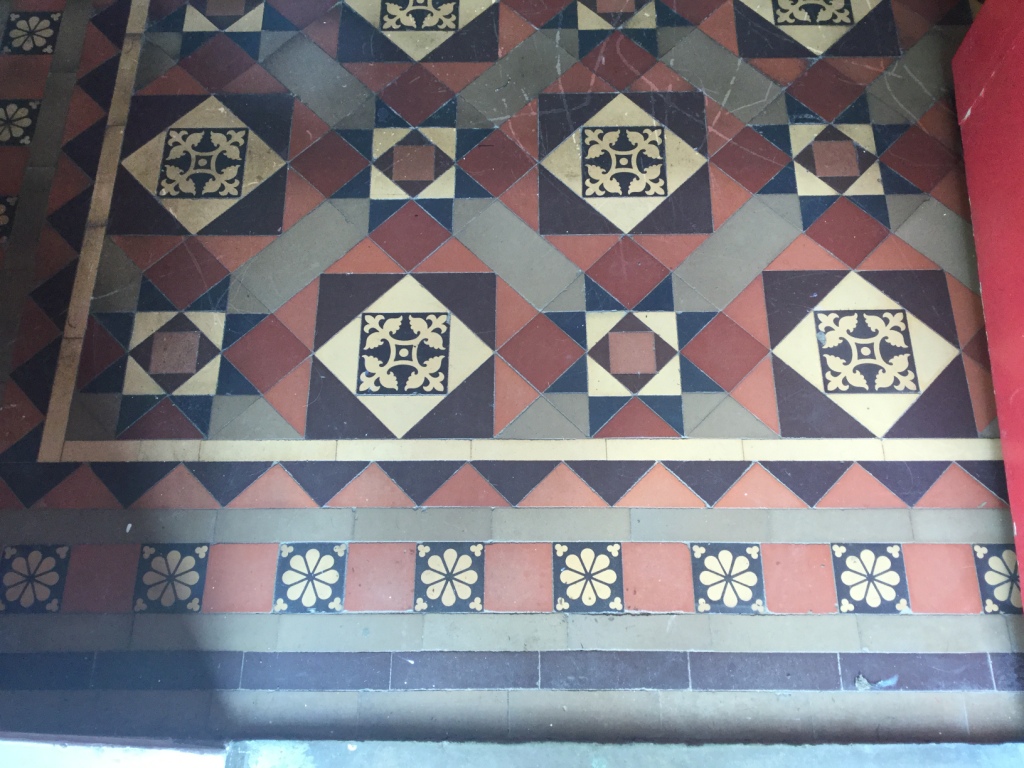
The hallway floor was a lovely and intricate example of Victorian tile installation and I could see that overall it was in good condition for its age. On closer inspection the customer was relieved to find out that it was the old wax sealant breaking down and not actually scratches on the tiles. I carried out a test on a small area to ascertain how difficult it would be to remove this wax. I realised I would be able to use Tile Doctors new product for the removal of the wax sealant, Tile Doctor Wax Away which is a fast and effective formula that is designed just for this type of job, it offers safe removal of wax and polish from tile and natural stone. We agreed the quote and the work was booked in for the following month.

Victorian Tiled Hallway Floor Before Wax Removal Rushden

Cleaning/Repairing a Victorian Tiled Hallway Floor

On our return we started to remove the wax coating using the Tile Doctor Wax Away product. It was applied neat and left to dwell for ten to fifteen minutes before working it into the floor with a small amount of water and a black stripping pad attached to a rotary machine. The resulting slurry was then removed using a wet vacuum. The floor was then inspected, and I decided to repeat this process with a hand brush in a couple of small areas and around the edges to ensure the old wax sealant was fully removed in these stubborn areas. The floor was then rinsed with water to remove any remaining slurry and trace of cleaning product and the wet vacuum was used to dry the floor again.

Victorian Tiled Hallway Floor During Wax Removal Rushden

My next course of action was to run over the floor with a 400-grit burnishing pad to remove imbedded dirt and stains from the tiles, this was followed by a second rinse with water. After removing the water with wet vacuum, the floor was then left to dry out fully for a few days aided by a large fan that I left on site. It’s important that the tiles are fully dry before applying a sealer and this is even more important on older floors where no damp proof membrane has been installed.

Sealing a Victorian Tiled Hallway Floor

I returned three days later and started by giving the floor a light vacuum and clean. I also took damp meter readings to check the floor was fully dry. Once I was satisfied I started to apply 2 coats of Tile Doctor Colour Grow Sealant, this is a breathable sealant which will allow the tiles to breath and allow moisture vapour from the sub floor to rise through the tiles which is important in these old houses where no damp proof membrane exists. Colour Grow is an impregnating sealer that works by occupying the pores in the tile thus preventing dirt from becoming ingrained there, the sealant enhances the natural colours in the tile and dries to a lovely natural matt finish.

Victorian Tiled Hallway Floor After Cleaning Rushden

Once finished the floor looked great and the customer was hugely relieved that the tiles could be restored easily and cost effectively, she had thought the damage may have been irreversible. Moving forward it will now be easier for her to maintain and keep clean. The floor is now back to its’ true self and properly in keeping with the rest of the period features in the house.

Victorian Tiled Hallway Floor After Cleaning Rushden


Source: Tile Cleaning and Sealing Service in Northamptonshire

Tuesday, September 4, 2018

6 Money-Saving Hacks for Wood and Laminate Flooring

New flooring offers a quick facelift to just about any space. While there are some jobs that you will want to hire out for, installing wood or laminate flooring is something you can most likely tackle yourself. Once you create a plan and read up on the topic, you’ll be covering a room with new flooring in no time. While doing the installation yourself obviously saves you money on installation fees, there are other tips to help you save money on the product and the process.

1. Shop Bulk Stores

Stores like Costco and Sam’s Club carry laminate flooring at a good price based on the fact that the store has already negotiated a bulk rate for the product. Many stores only carry flooring products seasonally or a few times a year, so you will want to check your local store occasionally for availability. You can also scour the websites and have the flooring shipped from the warehouse directly to your home.

2. Check With Your Local Lumber Discount Store

Similar to the clothing and housewares outlet malls spread across the country are lumber discount stores like Lumber Liquidators. These businesses buy discontinued products and make large bulk purchases, and then pass the savings on to you. The selection might be limited but, then again, they may have just what you're looking for. Check in with them frequently to see what’s new in the warehouse.

3. Check Your Local Habitat for Humanity ReStore

For smaller projects, make a trip to your local Habitat for Humanity ReStore. This organization makes home ownership possible for many families across the nation by helping them build homes and obtain an affordable loan. The ReStores accept donations of all building materials and resell them as a way to fund this goal. Check with your local ReStore for flooring that may have been donated. It’s common to see many unopened boxes of matching product at a steep discount from buying new!
4. Find a Coupon Online


If you find the perfect flooring to suit your needs, be sure to check for a coupon to save you some dough. For example, if you plan to install a Pergo product that you find at Lowe’s, peruse the internet for a discount coupon. Lowe’s issues coupons to new customers or local patrons whenever they open a store in a new area. Recipients often post these coupon codes online for other people to use. Start with the store’s website to see if they are offering a discount or mention a coupon code. If you don’t find anything there, run a search at RetailMeNot and try any coupon codes that pop up there. eBay members often sell coupon codes, as well. For example, you can commonly find a Lowe’s 10% off coupon, which you can buy for $ 0.99 and gain immediate access to via electronic transfer to your email. Then, use that coupon to place your online order or print and take it to the store.

5. Borrow Tools

Some jobs require special tools. For example, when installing wood flooring you will need a nail gun. But before you run out to buy one, ask your local flooring company if they have one that you can rent. Also, check with friends and neighbors to see if someone has the tool you need that you can borrow.

6. Avoid Waste

For most laminate or wood flooring, it's recommended that you factor in 10% waste. While it's impossible to eliminate all waste, careful planning and proper layout of materials can significantly reduce excess garbage. For example, when installing planks, use the end of the board cut off from one row as your starting piece for the next row. A room that is square will have less waste than one that includes many corners, curves, alcoves, and closets. Minimize waste in rooms with those features by using small, cut pieces inside areas that will not be seen, such as the back of the pantry or closet. This tactic will prevent you from having to purchase additional flooring.