Tuesday, February 27, 2018

Restoring an Old Quarry Tiled Floor in Derbyshire

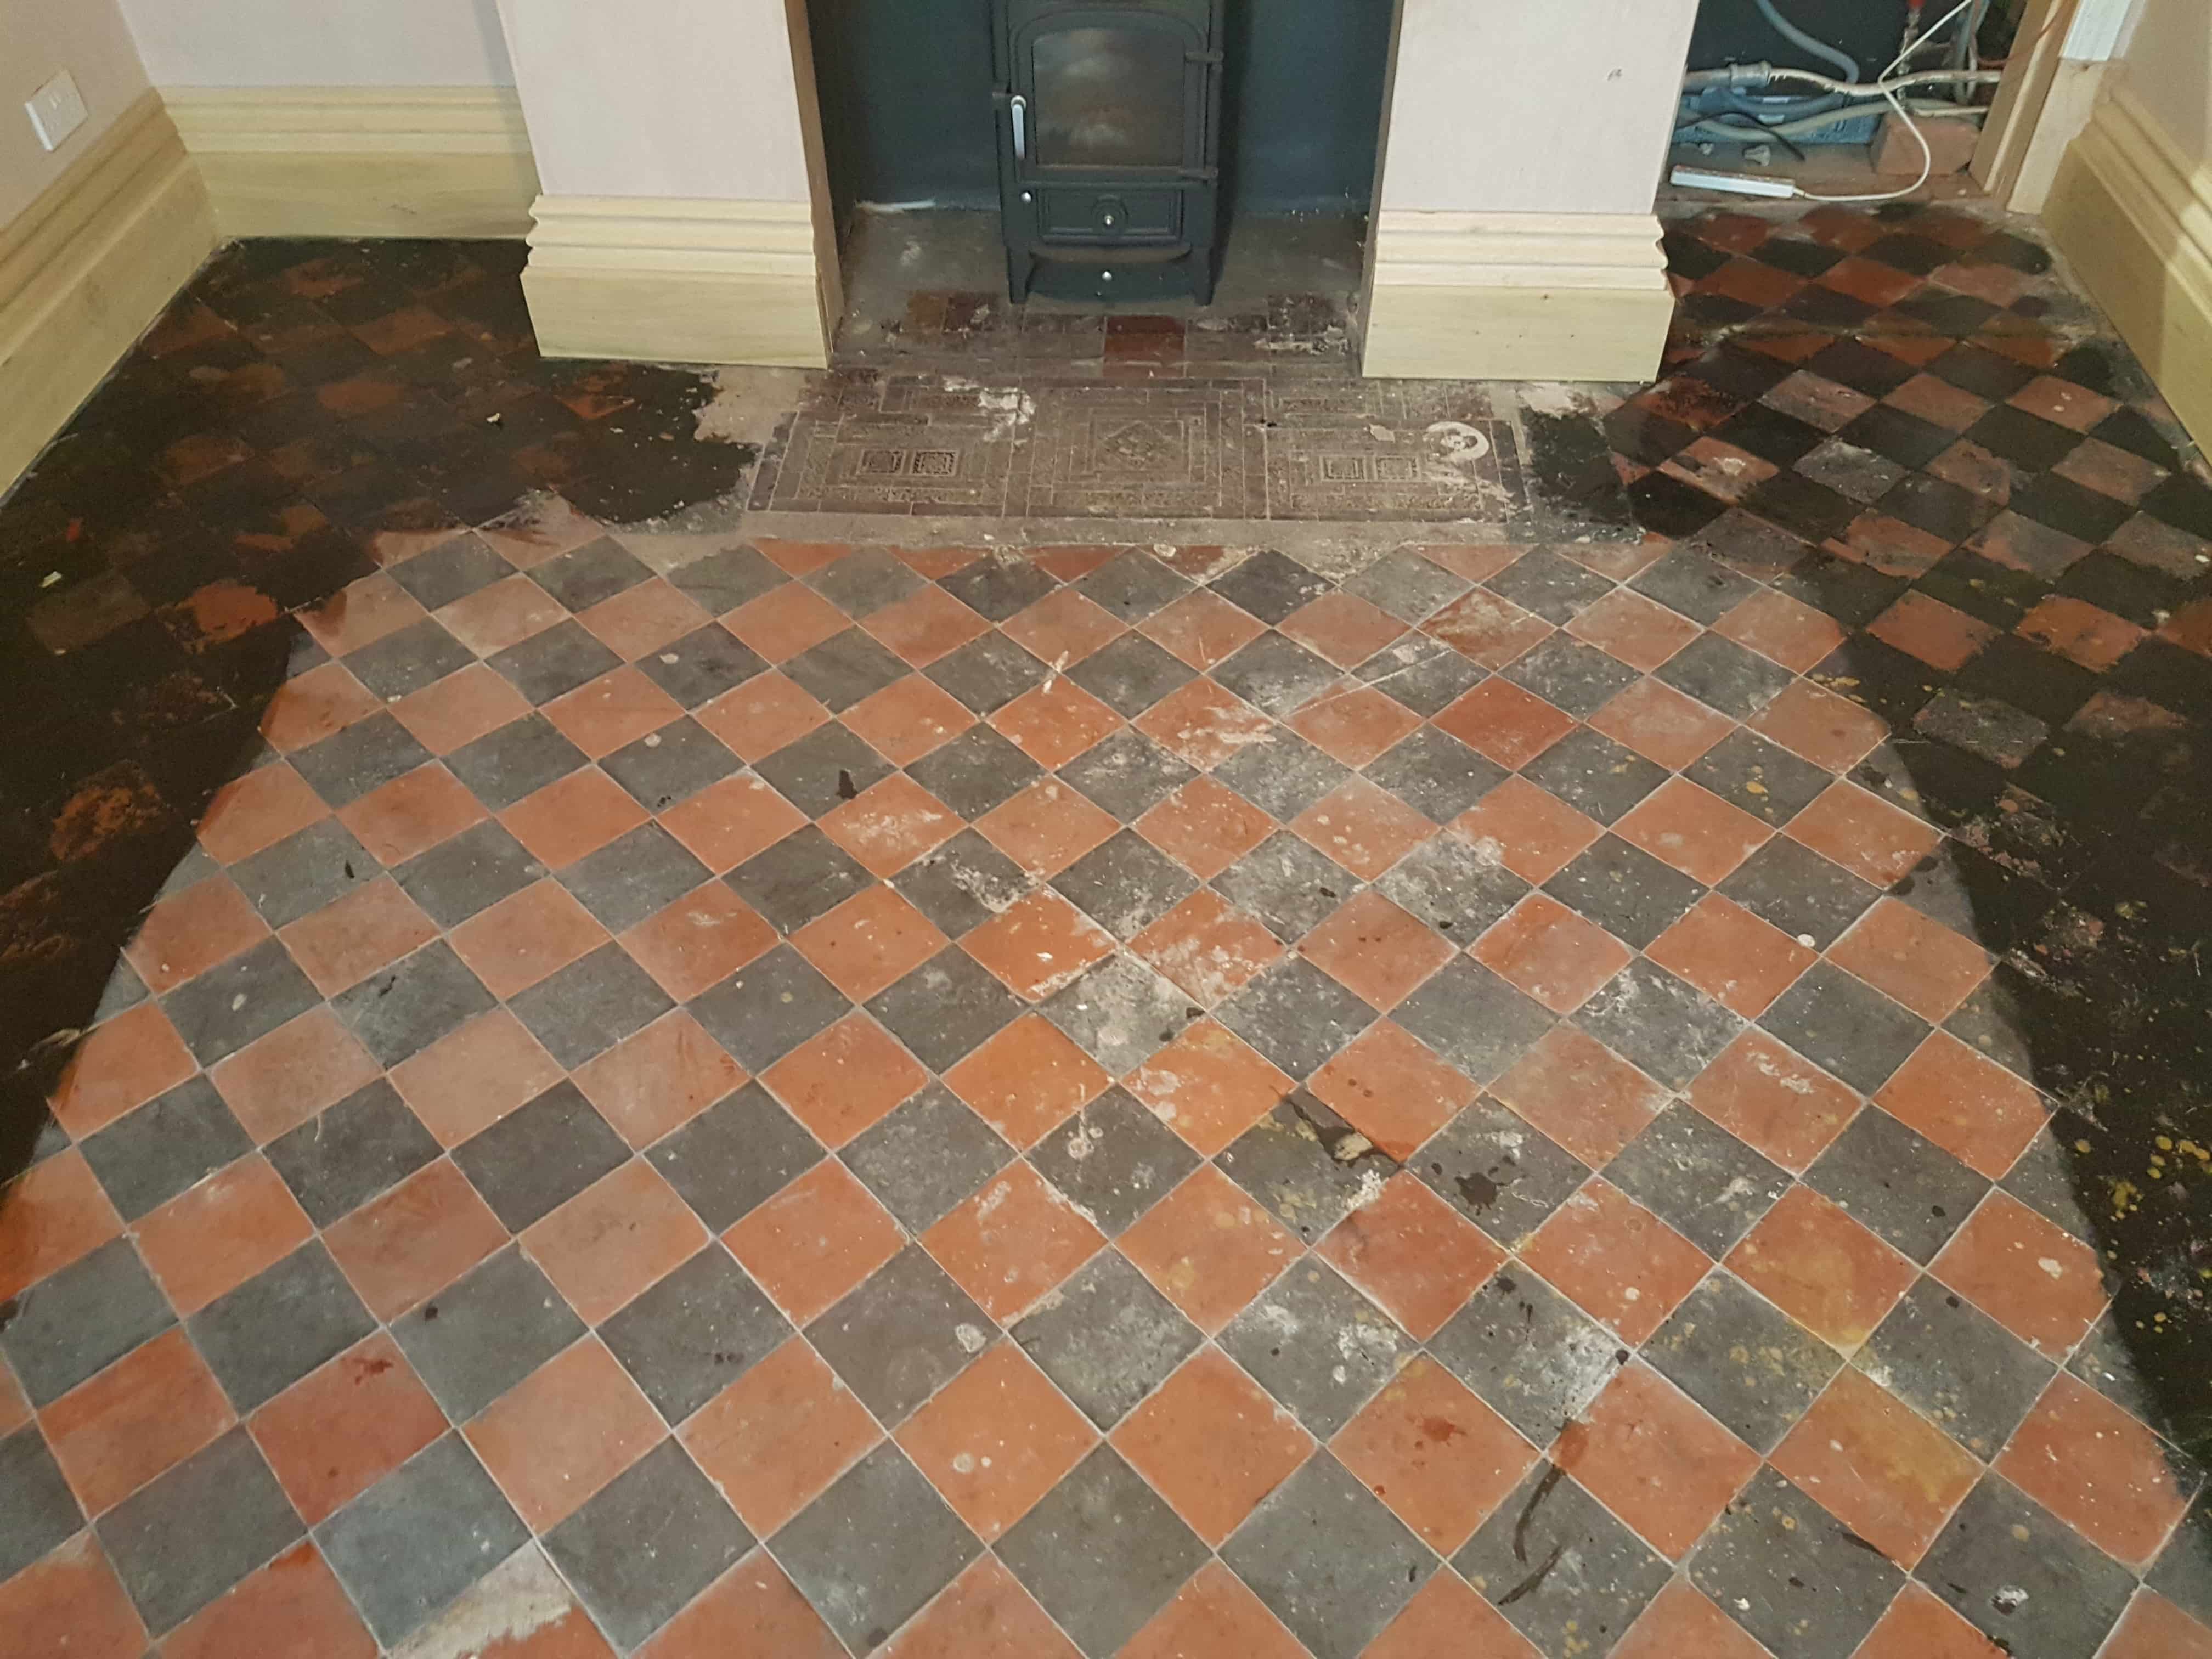
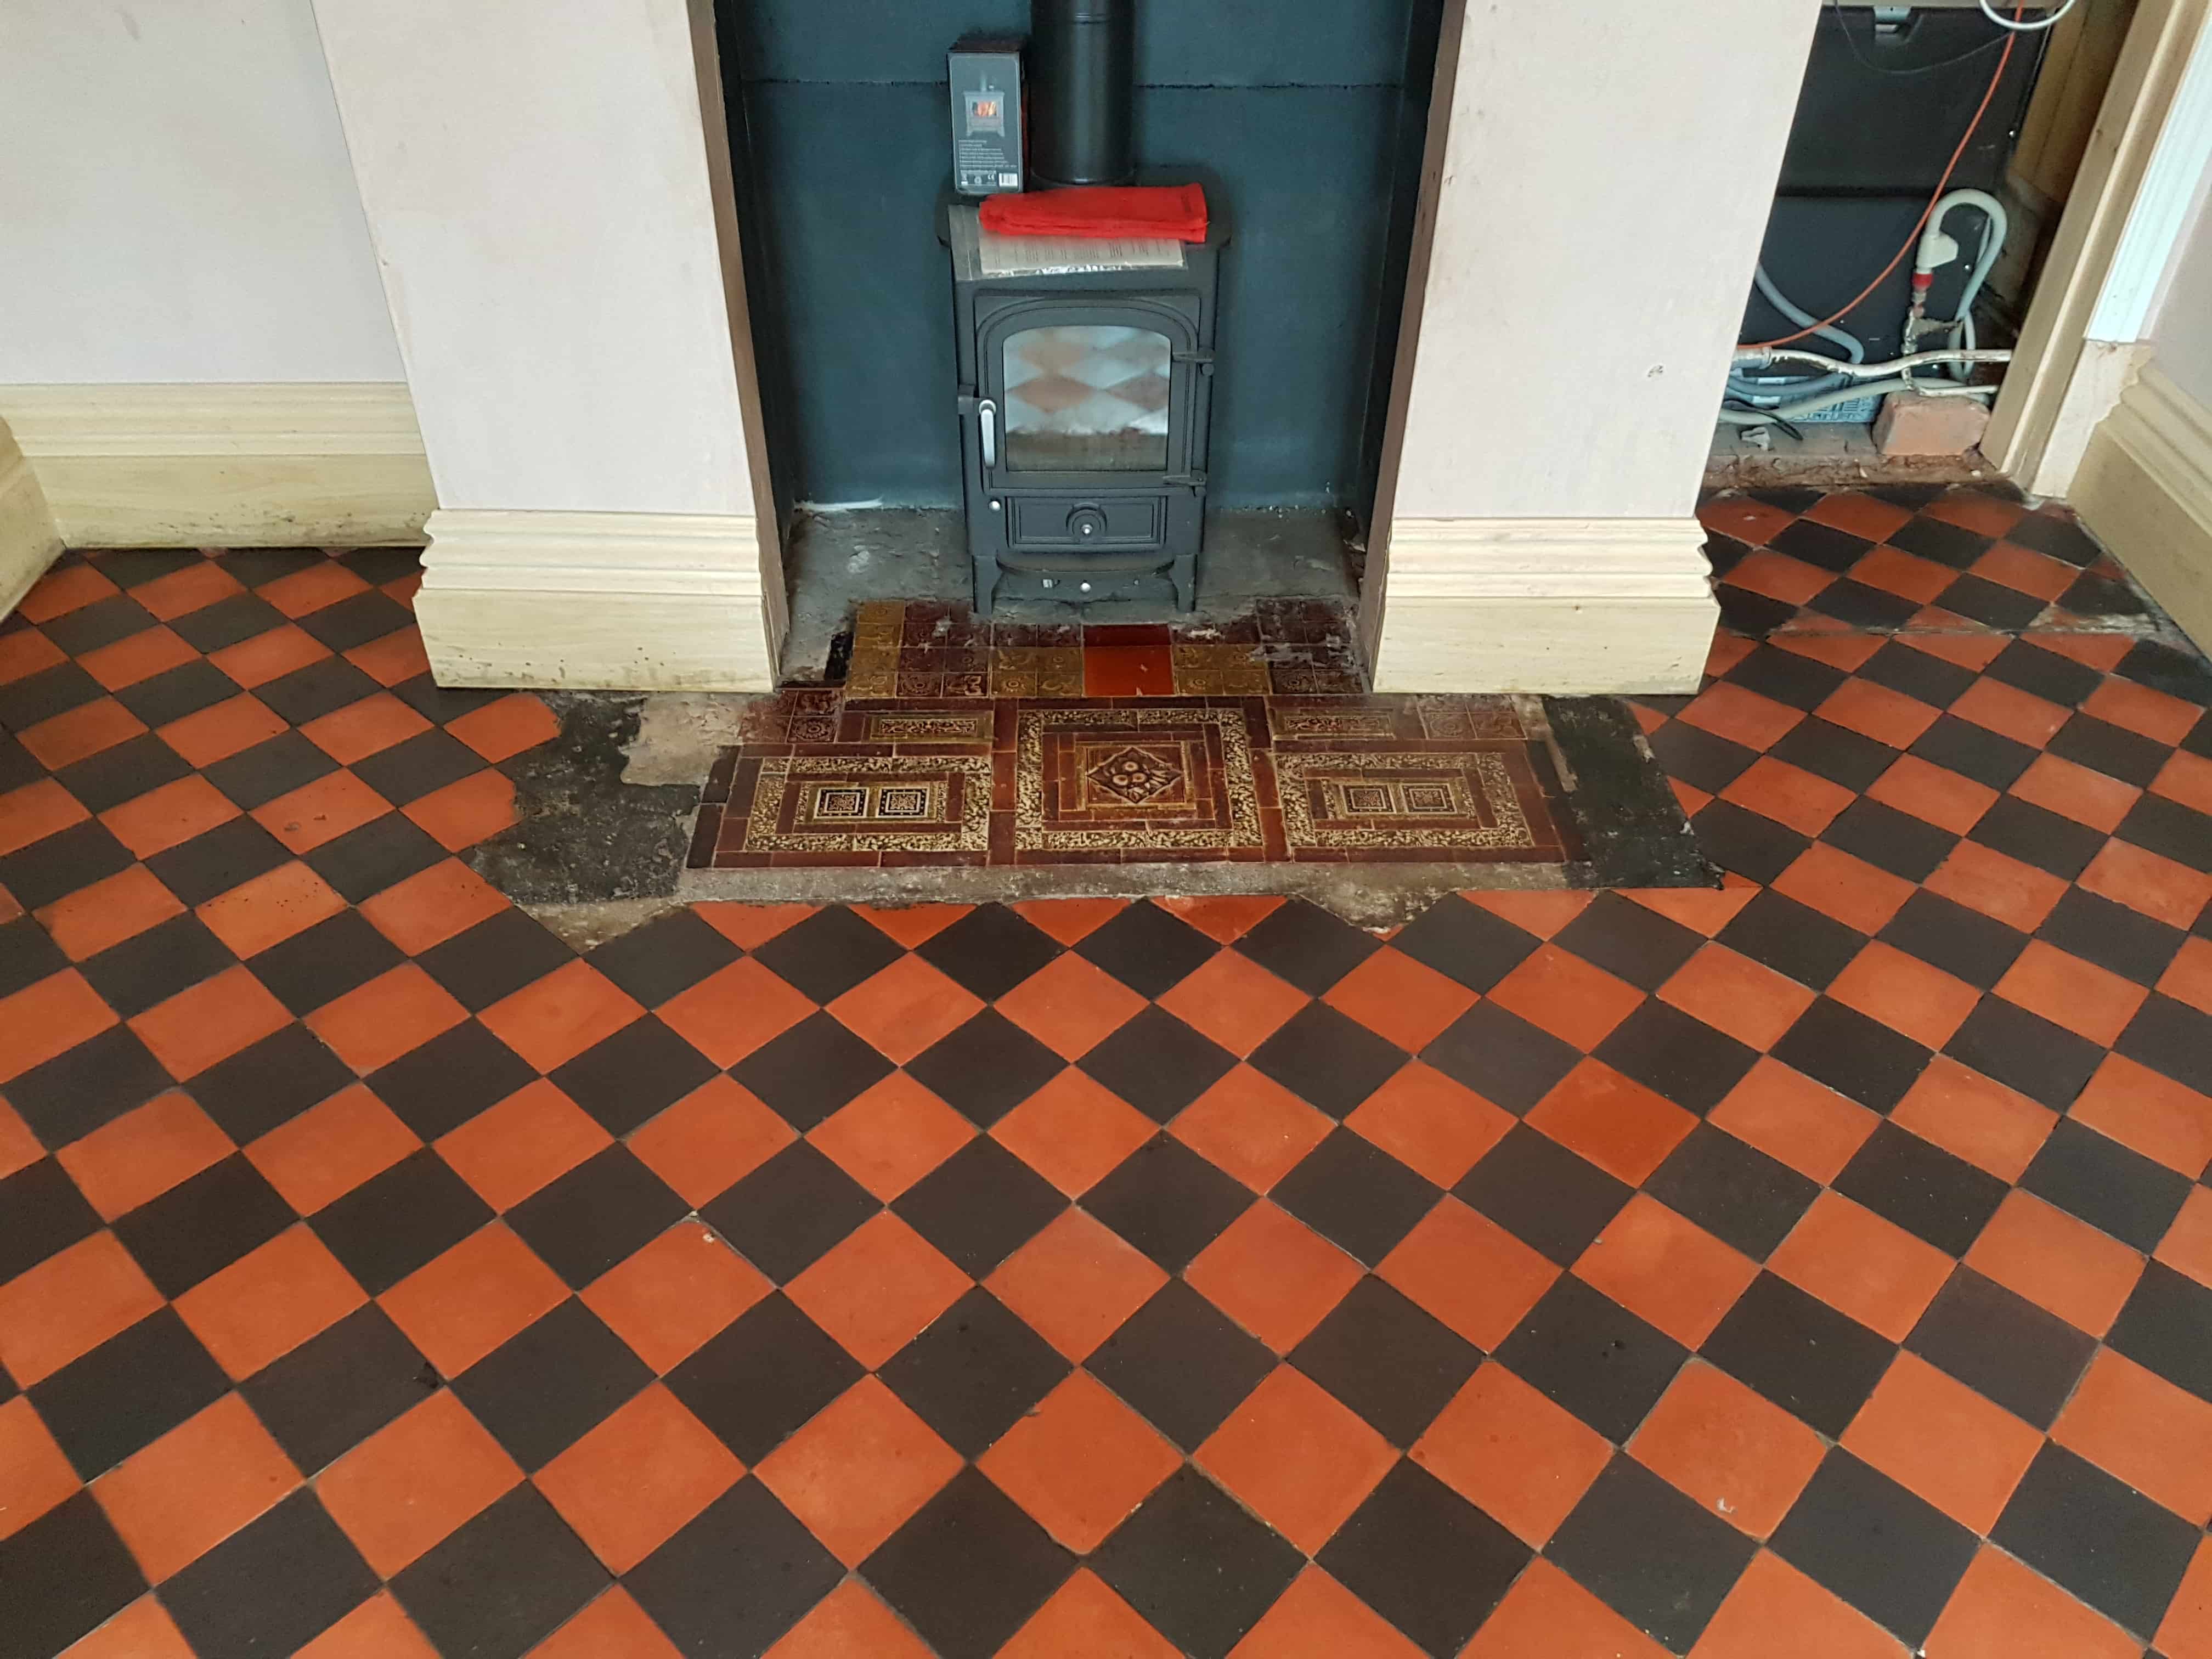
This was an unusual Quarry Tiled Floor that I was asked to renovate at a house in Whaley Bridge which is a small town in Derbyshire Peak district. The floor tiles were laid in a diamond pattern using alternating Black & Red quarry tiles. The house was more than 100 years old and recently changed hands. A large rug had previously occupied the middle of the floor and the tiles around the side has been painted over with black paint.

Old Black and Red Quarry Tiled Floor Before Cleaning Whaley Bridge

To restore the floor to a consistent appearance I could see the paint would need to be removed and then the whole floor given a deep clean and seal. Additionally, there was an old Fireplace at one end of the room decorated in antique Ceramic tiles that needed cleaning, the Tiles are very old but in good physical condition for their age.
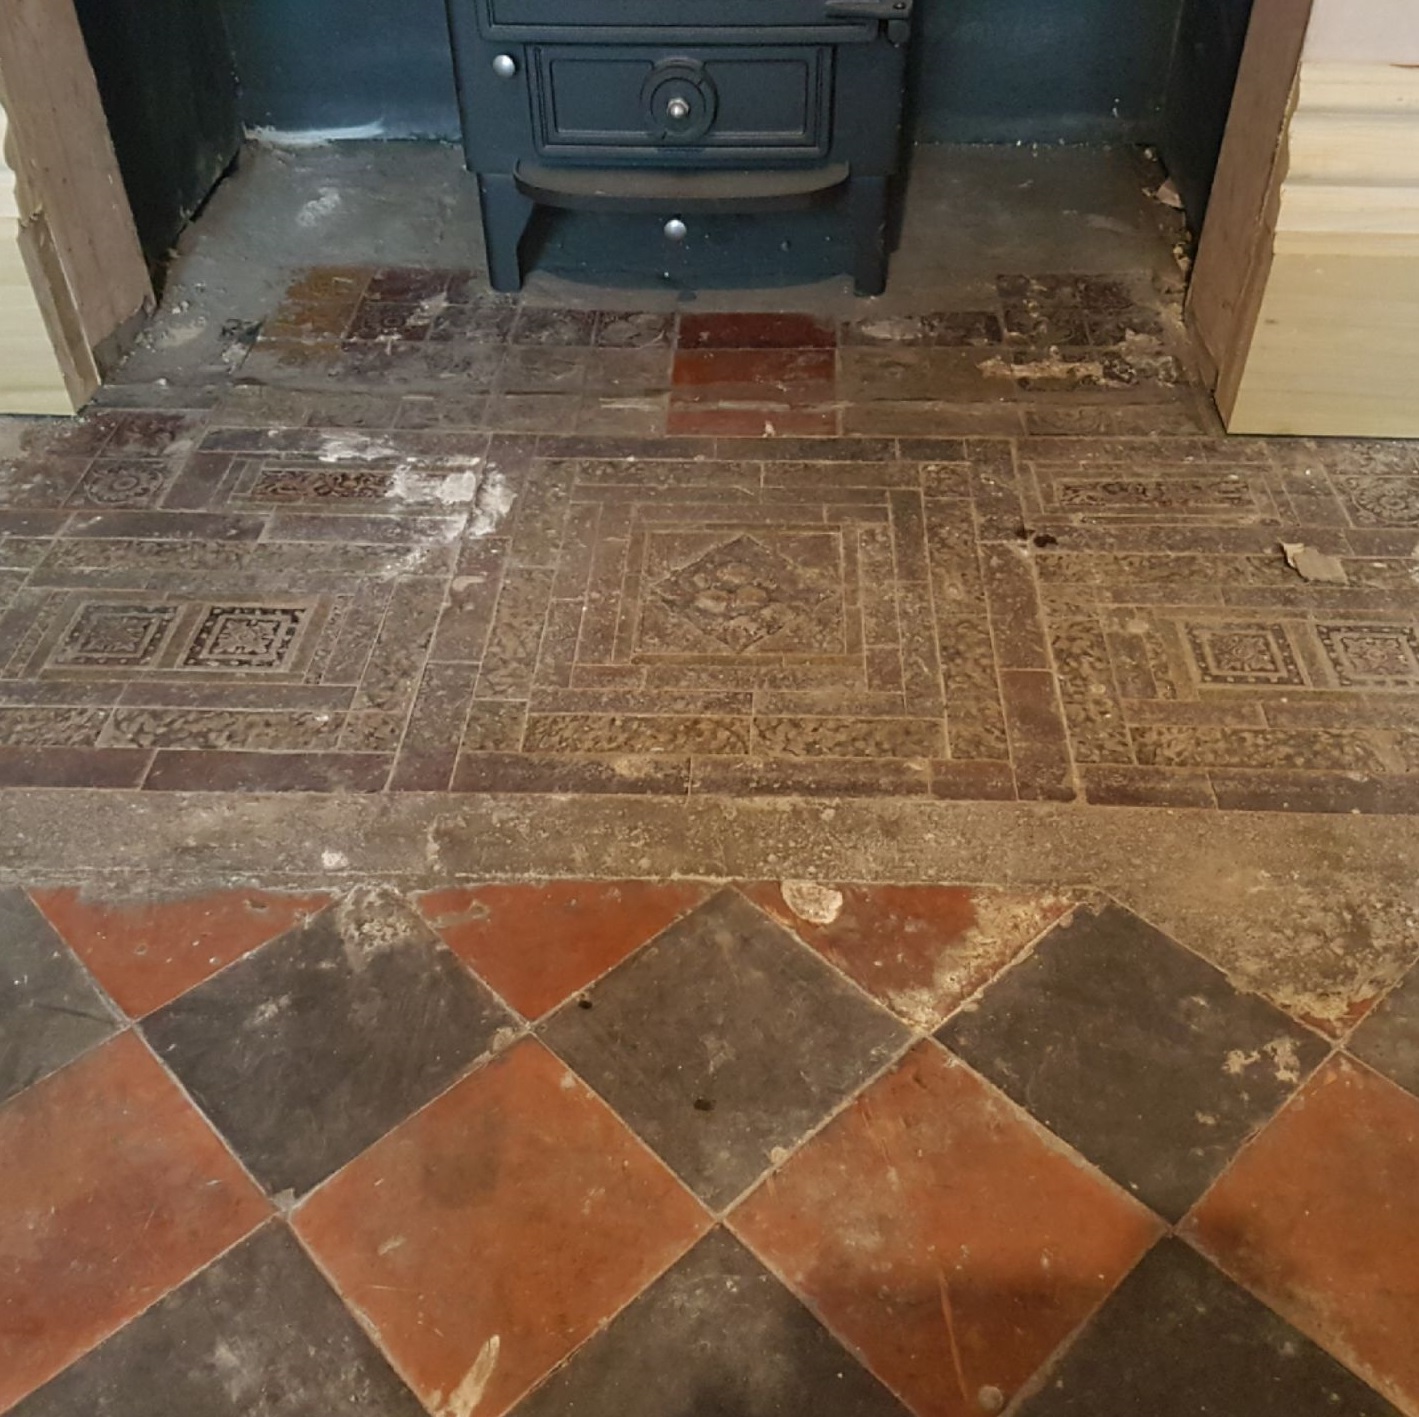
Old Ceramic Tiled Fireplace Hearth Before Cleaning Whaley Bridge


Cleaning Old Black and Red Quarry Tiles

My first task was to remove the black paint and years of ground in dirty by treating the tiles with a poultice made from two Tile Doctor products namely Nano-Tech HBU Remover and Remove and Go. Working in sections the solution was applied to the tiles and left to soak in for a good twenty minutes before scrubbing with a rotary machine fitted with a black scrubbing pad running at slow speed.

The resulting soil was extracted using a wet vacuum and then the tiles rinsed with water, so I would see where more work was needed. Stubborn stains were then spot treated with the same process before moving onto the next section. The Ceramic tiles in the fireplace hearth was treated in the same way.

After removing all the dirt, stains and paint I gave the floor a final rinse to remove any trace of cleaning product and extracted as much moisture as possible using the wet vacuum. The floor would need to be dry before applying a sealer, so to allow the floor to fully dry off I left the floor for two days.


Sealing Original Quarry Hallway Tiles

On my return I checked the tiles first to ensure they were dry. All was good so I set about applying a couple of coats of Tile Doctor Colour Grow which is a colour enhancing impregnating sealer that occupies the pores in the clay. Additionally, Colour Grow is a breathable sealer which is important for these old floors that don’t have a damp proof course. There was no need to apply the sealer to the ceramic tiles in the hearth however as they won’t take a sealer due to the glaze.
Old Black and Red Quarry Tiled Floor After Cleaning Whaley Bridge

Once completed the floor looked completely transformed and the client was more than happy. Work continues in other parts of the house and once they have finished decorating they have asked me to return to restore their beautiful old Victorian tiled hallway.

Old Ceramic Tiled Fireplace Hearth After Cleaning Whaley Bridge


Source: Quarry Tile Cleaning and Renovation Service in Derbyshire

Monday, February 26, 2018

Are Raised Floors Better than Concrete Slab Floors?

Raised floors are a much better, drier and warmer alternative than concrete slab floors. However, many home owners like the industrial look of polished concrete slab floors. Both have their advantages and disadvantages. The primary considerations are warmth, maintenance, comfort, durability and cost.

The Advantages of Raised Floors

Raised floors are the floor of choice for many reasons. They're easier to walk and stand on than concrete slabs. Wood floors give a little, making it easier on your knees and back if you must stand on them for any length of time. While a concrete slab may be easier to clean in a kitchen, workshop or bathroom, it's also harder on the body. If you live in a flood zone, you'll pay less insurance for a raised floor system.

Raised floors give a warmth and color to a room and are the classic and timeless choice for floors. Concrete can be painted or stained to appear warm, but nothing says true warmth like wood. They can also be installed in any room with ease.

Raised floors are warmer. Concrete tends to hold cold and to suck away warmth. If the concrete slab is on the ground, it will also tend to pick moisture up into the home and be a constant source of mold, even if sealed.

Raised floors allow homeowners to relocate plumbing with much greater ease. Pipes set into concrete slab are literally "set in stone." To move a kitchen sink, toilet or plumbing requires tearing up the concrete floor and re-pouring it. With a raised floor you'll have easy access to all your pipes, clean-outs and machinery.

Cost is a primary factor as well. If you're building in a flood zone or on a slope, the cost of pouring a concrete slab to meet code is much less expensive than setting a foundation on posts and beams and installing a raised floor. On the other hand, concrete slab poured on clay or unstable soil means you'll make up the difference in cost by repeated repairs to cracked concrete and ruptured pipes.

It's possible to add a raised floor to a concrete floor. If you have a loft, warehouse, commercial property or building where the floor already exists, you may be wondering whether to keep the concrete, or install a raised floor.

If you're constructing a home, raised floor construction makes it easier for others to continue work on the house.

Advantages of a Concrete Floor

Some of the advantages of a concrete floor include low maintenance. Once sealed and finished, a concrete floor is essentially a no-maintenance floor. If sealed, there aren't a whole lot of things that will penetrate the seal. Dropping objects on the concrete will do more harm to the object. If the concrete is chipped or damaged, it's easy to repair. Concrete can be painted or stained to look like wood, brick or tile. Heating elements can be installed in the concrete to make it less cold. Concrete, once laid, can also be tiled, carpeted or even finished in a variety of colors if you get tired of it.


Friday, February 16, 2018

Renovating a Brazilian Slate Tiled Kitchen Floor in Lancashire

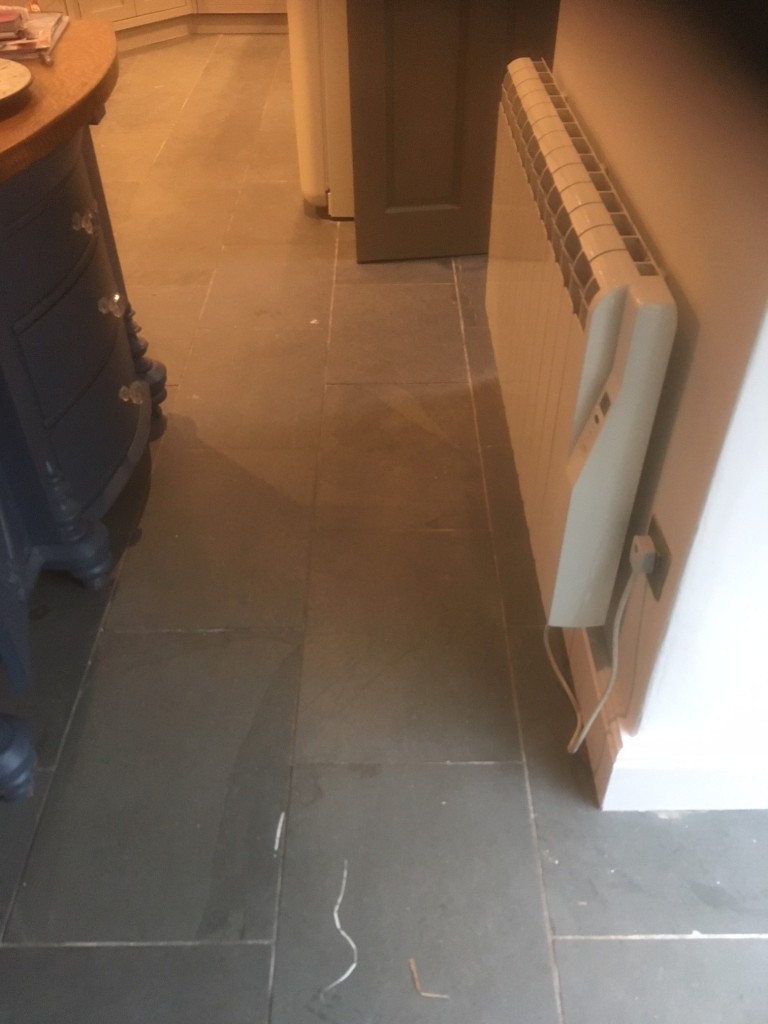
Rough Slate is notorious for homeowners to maintain as dirt can quickly become trapped in the rough surfaces. The example on this page is that of Brazilian Semi Riven Slate installed in the Kitchen of a house in the village of Hornby, which while naturally cleft from the rock loses none of its texture and style and yet has a much smother appearance than the typical rough Slates from China. Less processing means it’s not quite completely smooth but it is a lot less expensive to buy than say a honed or polished Slate which is more difficult to maintain due to various polishing techniques required to keep up the appearance. Brazilian Slate is in fact one of my favourite slates to clean and also one of the most rewarding of Slates to seal as the sealer really does bring out the colour and character of the stone.

Sealers provide a protective barrier on natural stone floors and without it dirt can penetrate into the pores of the stone making it more and more difficult to clean effectively. Unfortunately on this floor the new homeowners were unaware on what sort of Stone it was and had no idea how to look after it which resulted in the sealer wearing down prematurely and the floor becoming dull and un-inviting.

Semi-Riven Slate floor Before Cleaning Hornby Semi-Riven Slate floor Before Cleaning Hornby


Cleaning Black Semi-Riven Brazilian Slate Tiles

To restore the appearance of the Slate floor we started by taping up the edges of the new kitchen units to protect the wood from splashing. This was followed with an application of a strong dilution of Tile Doctor Pro-clean worked in with a black buffing pad fitted to a buffing machine running at slow speed (working at a slower speed results in less splashing). The pads can struggle to reach the edges and corners so these were cleaned by hand.

Once we had finished on the main floor area we then concentrated on the grout using a steam cleaner and more Pro-clean scrubbed in with a narrow stiff brush.

Last step of the cleaning was to rinse the floor with water to remove any trace of cleaning products from the Slate and then dried off the floor the best we could with our high wattage wet vacuum machine and left the floor to dry off naturally over night.


Sealing Black Semi-Riven Brazilian Slate Tiles

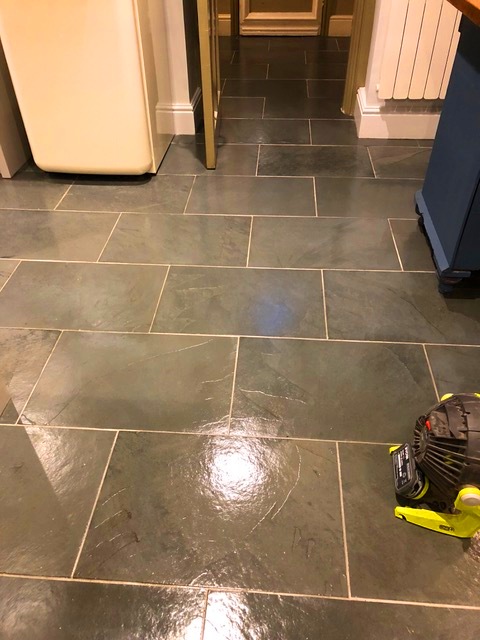
The next day we returned to seal the floor checking first that the floor had completely dried. The customer had requested a matt finish however we have worked on Brazilian Slate many times before and we knew how good they can look with this Satin finish sealer. Naturally its the customers decision so we offered to do a test piece and let them decide if they didn't like it we would strip off the test piece and apply a Matt finish sealer like Tile Doctor Colour Grow instead.

The floor was dry so a couple of coats of Tile Doctor Seal and Go were applied to one Tile so that they could appreciate how it would look. Luckily the customer agreed with us and so we set about sealing the whole floor with Seal and Go.

To speed up the drying process Air Blowers were installed as we worked and it wasn’t long before the sealer was dry and the customers were able to walk on the floor and inspect every area before we left. I’m please to report that they were over the moon with the floor and my recommendation of sealer.

Semi-Riven Slate floor After Cleaning Hornby Semi-Riven Slate floor After Cleaning Hornby

To maintain the slate tiles going forward we always give our customers a free bottle of Tile Doctor pH neutral tile cleaner, which is a little incentive for them to provide some feedback via our website. 


Source: Slate Tile Cleaning and Sealing Service in Lancashire

Thursday, February 15, 2018

Installing Granite Flooring Tiles

Granite flooring tiles definitely add attitude to any space. It is for this reason that a lot of people want to have this type of flooring option in their homes. Granite is, in fact, known for its sturdiness and beauty. If you are planning to install granite flooring tiles, here are the steps you should follow:
Granite flooring tiles

What You'll Need:
  • Sander
  • Plastic spacers
  • Backerboard
  • Backerboard screws
  • Wet saw
  • Thinset
  • Rubber mallet
  • Notched trowel
  • Grout sponge
  • Grout float
  • Grout sealer
  • Paper towels
Step 1 – Clean the Area

The area that you would be working on must be completely dried and cleaned. Sand off any peeling paint or sealant that is still on the area. Make sure to clear floor imperfections with waterproof products.

Step 2 – Lay Granite Flooring Tiles

Get to the an area with a 90-degree corner and lay out your granite flooring tiles. Plastic scrapers can be used to hold the granite flooring tiles in their places. Trim the tiles according to your need. Laying the granite flooring tiles beforehand would let you assess if you need more materials.

Step 3 – Create the Thinset

Read the package directions for mixing the thinset. Once this is mixed, get the trowel to apply a thin but even thinset layer on the subfloor. Get the backerboard in place by screwing down a backerboard screw. Do this carefully so you can be assured that your granite flooring tiles are protected from damages.

Step 4 – Press the Tiles on the Thinset

Create ridges while spreading the thinset that you’ve mixed by angling the trowel to a 45-degree position. Remember to lay out the thinset in areas that you can cover tiles within 10 to 15 minutes. Otherwise, the mixture will harden without the tiles on it. Lightly twist each granite flooring tile into the thinset. Use the rubber mallet to lightly hammer down the tile. This process would ensure that no airpocket is under the granite flooring tile. Carefully follow this step until all of your granite flooring tiles are installed. Stay off the tiles for at least 24 hours.

Step 5 – Apply Grout


Mix small batches of grout to a consistency similar of a toothpaste. Make sure that you only mix batches that are good enough for 20 minutes of application. Set your mixture aside for 5 minutes. After that, apply grout to the joints of each tile by using a grout float. Use a damp sponge to clean off any kind of grout excesses. Leave it to dry for approximately 72 hours.

Step 6 – Apply Grout Sealant

Once the grout on the tiles has completely dried, use a penetrating grout sealant to ensure that no moisture or water can get through your granite flooring tiles. Ready your paper towels to remove grout sealant excesses. Do this immediately as the sealant would easily dry out and mar the surface of your granite flooring tiles. Let the sealant dry for approximately 24 hours.


Monday, February 12, 2018

Deep Cleaning a Victorian Tiled Hallway in Devon

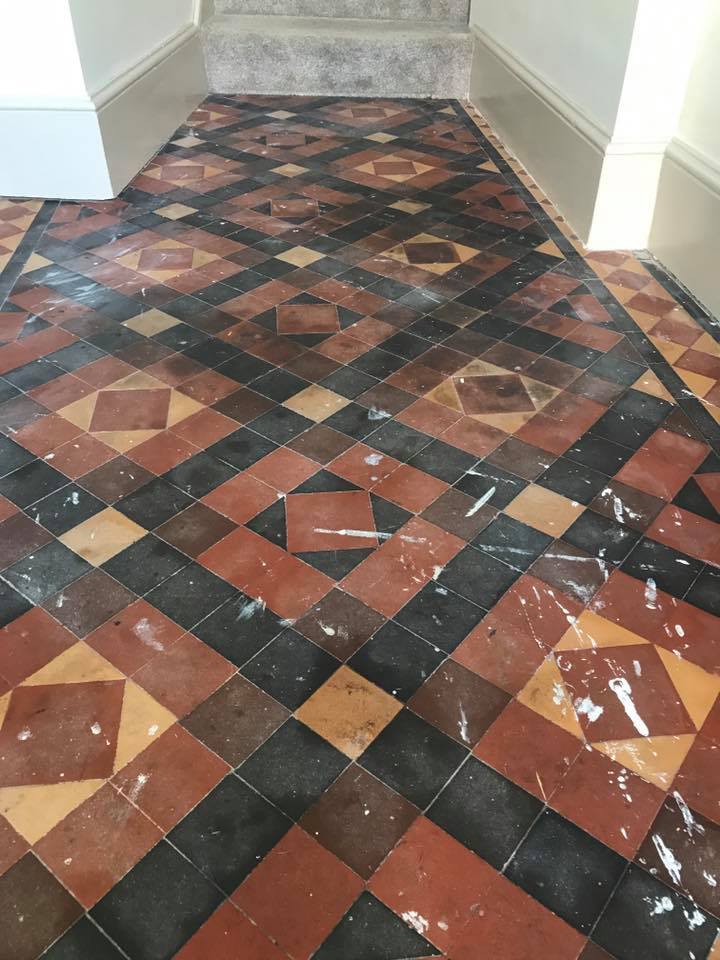
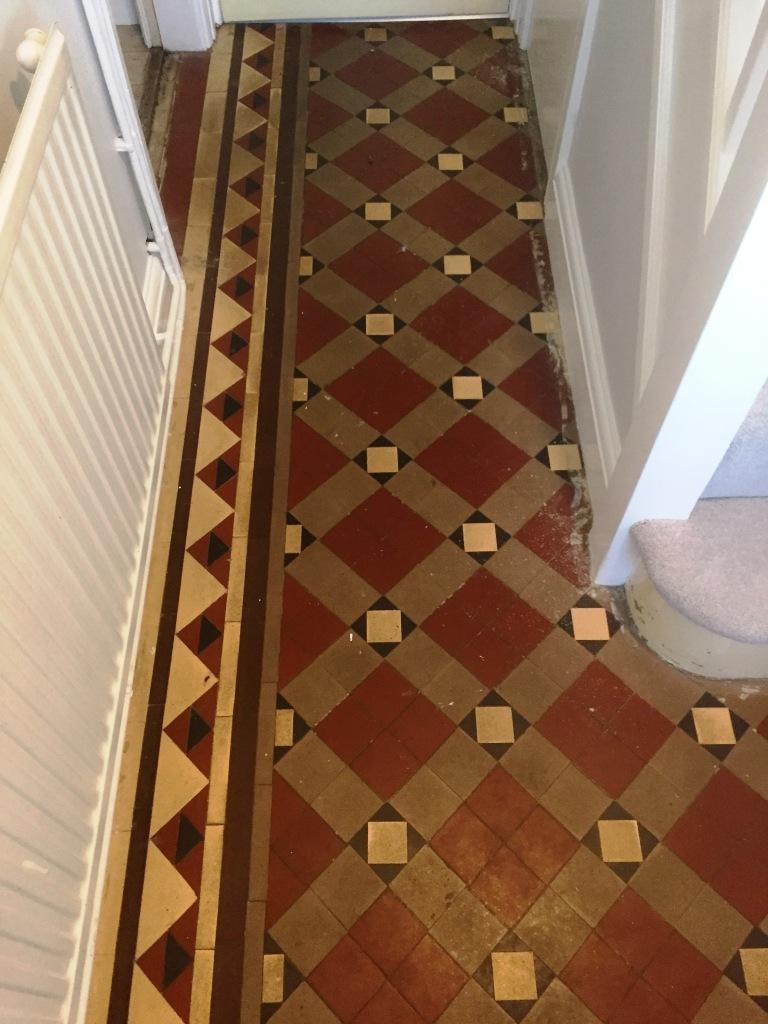
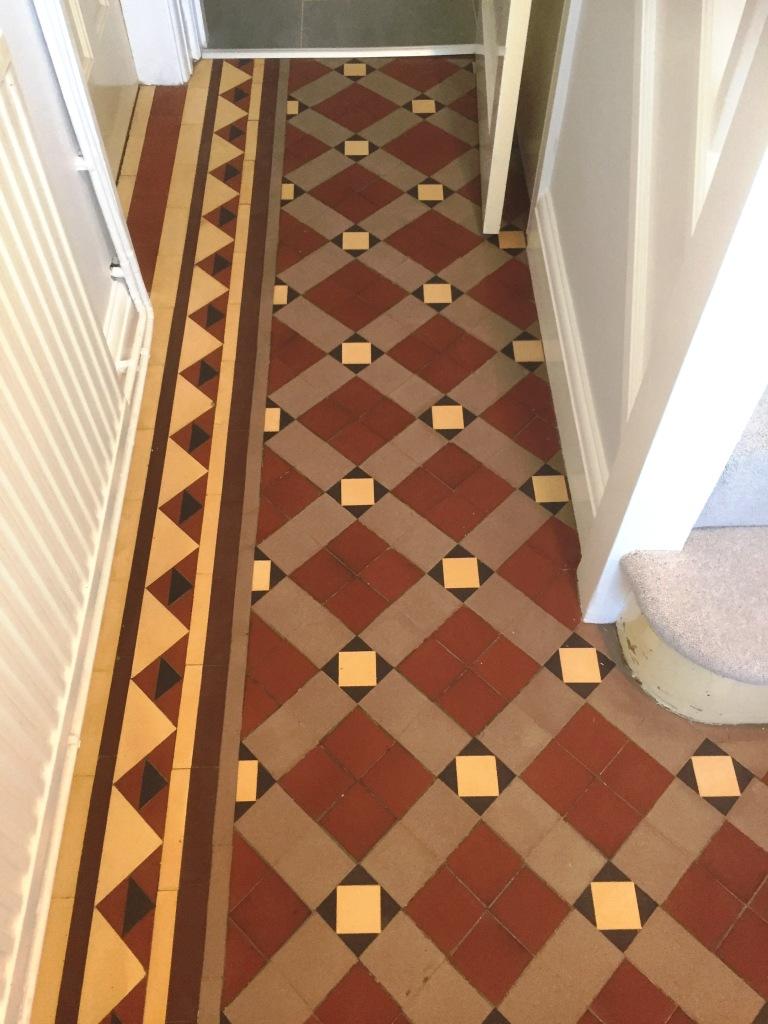
I was contacted by the owners of an old Farmhouse in the East Devon village of Broadclyst to look at their Victorian Tiled Hallway floor which as you can see from the photograph below was heavily stained and had also been splashed with paint from decorating. Victorian tiles are very robust and can take a lot of punishment which you certainly get in a farmhouse, however once the sealer wears off dirt gets into the pores of the tile making it very difficult to clean.

I visited the property to take a closer look and to take some moisture readings because these old floors don’t have a Damp Proof Course and moisture levels too high can restrict when this type of work can be done due to the sealers needing the floor to be dry in order to cure. I also did a test piece to show the customers what level of cleaning could be achieved.

Victorian Tiled Hallway Broadclyst Farmhouse before cleaning


Cleaning a Victorian Tiled Hallway

With the customers happy with the quote I returned to complete the work starting by covered the skirting and bottom of the stairs to protect the paintwork and carpet. I then put a strong stripper/degreaser called Pro Clean on to the floor, ensuring even coverage and keeping and eye on the floor to make sure that it didn’t dry out.

After a short dwell time I set to work scrubbing the floor with a 400 grit diamond burnishing pad and using small hand blocks to get into the corners and any edges not reached by my machine. Once I was satisfied that the tiles were as good as they could be I rinsed the floor to remove the alkaline cleaner and soiled water.

This was followed by giving the floor an Acid rinse using Tile Doctor’s Acid Gel, this process counteracts any alkaline salts that can rise up through the tile as it dries out, a process which is more commonly known as efflorescence. This can be quite a problem on floors like this that don’t have a damp proof course (floors generally didn’t pre-1950s). I had to be careful not to leave the acid down for too long because these tiles are susceptible to acid damage.

Dealing with salt issues on these old floors (efflorescence) is essential because they can damage the sealer or become trapped under it, detracting from the beauty of the floor. Given the age of the farmhouse it’s difficult to know what the floor had been laid onto. Often it was compacted rubble and building works from the erection of the adjoining buildings; additionally some of the later Victorian floors were laid on a wet limecrete scree which contain a high salt-content.

Before I left for the day I left an air mover on the floor to aid in the drying of the tiles. If there are radiators in the area I also suggest that they are turned on overnight to further aid the drying process. Occasionally these types of floors need to be left for several days to dry but it is worth the wait and the floors can be used in the meantime provided indoor shoes and socks only are used and care is taken not to get the floor dirty.


Sealing an Old Victorian Tiled Hallway

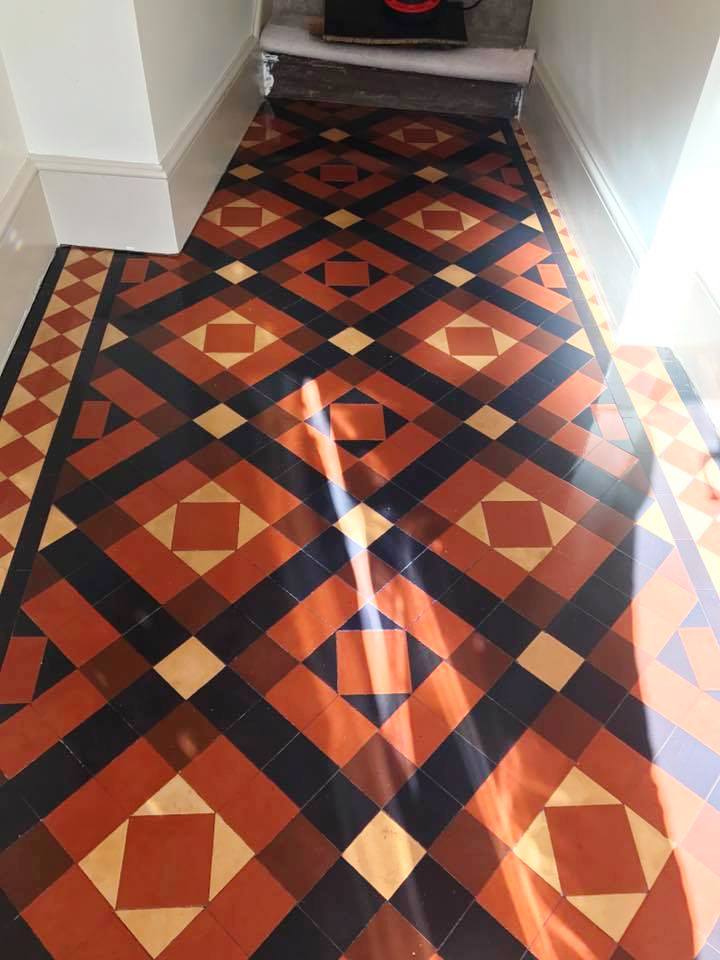
Upon returning the next day I tested the moisture content of the floor and was pleased to find that it was well within acceptable levels for the application of the sealer that I was planning to use. I quickly checked the floor for areas that I felt may be able to be improved and once satisfied a single coat of matt-finish, colour-enhancing sealer called Colour Grow was applied before two coats of a Seal and Go sealer was used to give the floor a satin finish, which I think gives it a slight glaze and freshly mopped appearance.

Victorian Tiled Hallway Broadclyst Farmhouse before cleaning

The customers were thrilled and said that they wished they had brought me in sooner!


Source: Victorian Tile Cleaning and Sealing Service in Broadclyst, Devon

Pros and Cons of Floor Heating Mats

When winter rolls around and your floors turn stone cold, use floor heating mats to take the chill out of going barefoot. Not only will you see heating bills reduced, but you will also get rid of dust and particles that traditional forced air systems spread around the house. There are many pros to electric floor heating mats. Floor mats work like a big electric blanket underfoot.

Pros

  • Energy efficient
  • Adds additional insulation
  • Noise-free
  • Reduces allergens
  • Easy installation
  • Safe
  • Invisible
Cons
  • Installation can be pricey
  • Sometimes cannot be retrofitted
In the past, it was difficult to install radiant flooring under existing wood or carpet. Usually, heated floor mats were added during construction. Older models often required cement to be installed with the electrical system, but not today. Most floor heating mats on the market are easily installed directly underneath carpet and floating wood.

Note, however, that certain types of tiled flooring will have to be replaced if you want to install heated floor mats. If you are doing a remodel, it would be the perfect time to add radiant flooring under your tile. For the rest of your house, installation should be quick and easy.


Thursday, February 8, 2018

Renovating a Small Victorian Tiled Entrance in Edinburgh

If you visit Victorian era houses throughout the UK, you will find that many them have colourful tiled entranceways (also sometimes known as vestibules). The tiles are commonly made from encaustic cement, stylised with distinct geometric patterns that really help to add character to the property.

The reign of Queen Victoria was a prosperous and confident time for Scotland – and many new houses and buildings were built in the well-known ‘Victorian’ style during the period. One of the best-known buildings to be built was Balmoral Castle, which is still in use by the Royal Family as a holiday home.

Homeowners who are fortunate enough to be in possession of original Victorian tiles will find that they are not easy to keep clean without the right products and methods. The entrance to any house of course is subject to high amounts of foot traffic, which means the tiles can become dirt and discoloured very quickly indeed.

Here is an example that we cleaned and sealed recently in Edinburgh, although in good physical condition for its age the sealer on the floor had worn off and dirt had become ingrained in the tile reducing its overall appearance.

Small Victorian Porch Before Cleaning Edinburgh

Cleaning Dirty and Discoloured Victorian Tiles

Having restored hundreds of Victorian tiled floors in the past, Tile Doctor has developed tried and tested methods for cleaning all types of tiled floors so tackling this small floor would not be a problem.

To begin, we gave the floor a deep clean to break down any old sealants and to cut through thick layers of dirt and grime. The cleaning solution we employed consisted of two products: Tile Doctor Pro Clean (which is a strong alkaline cleaner) and Tile Doctor Remove and Go (which is a stripping agent formulated for the removal of old sealants, synthetic coatings, glues, and paints). The solution is applied and left to soak into the tile for ten to twenty minutes before being scrubbed in, which for a small area such as this needs to be done by hand. The soiled solution is then rinsed off with water and this is then extracted using a wet vacuum. This deep cleaning process was repeated several times to make sure the tiles were as clean as possible.

Once we were happy that all the dirt and grime had been removed, we gave the floor a quick acid wash using Tile Doctor Grout Clean-Up to remove any old grout smears and to neutralise any potential salt efflorescence issues. The floor was then given a final rinse before leaving it to dry off fully overnight and a turbo air mover was left running to help speed up the process and ensure the floor was completely dry to be sealed the following day.

We are very conscious of the fact that many of these old Victorian tiled floors to have damp-proof membranes installed beneath them, so we wanted to guarantee there would be no damp issues that would prevent us from applying a fresh sealant. This is because even a small amount of excess moisture can potentially damage the performance of the sealant.

Sealing an Original Victorian Tiled Entrance

Returning to the property on the second day, we proceed to seal the tiles with three coats of Tile Doctor Colour Grow. This sealant soaks into the pores of the tile protecting it from within and providing long term protection, it also enhances the colours in the tile in the process.

The difference made by this two-day restoration is shown below. It is quite amazing how quickly these results can be achieved considering the age and previous condition of the tiles. Our customer was absolutely thrilled.

Small Victorian Porch After Cleaning Edinburgh


Source: Victorian Tile Cleaning and Sealing Service in Edinburgh

Wednesday, February 7, 2018

Refinishing Granite Flooring

Any kind or color of granite flooring provides a lively appeal to rooms and spaces. However, like all good things, the beauty of these items might fade over time. The luster of granite flooring may diminish thus making your floor look old and unattractive. Good thing there are steps that you can follow to make sure that your granite flooring always look as good as new. These steps include refinishing. This type of granite flooring maintenance is usually performed by equipped workers. However, those who believe that they can perform the job well, follow the steps below.

What You'll Need:
  • Industrial sander
  • Diamond pads with abrasive grits
  • Diamond pads with less abrasive grits
  • Buffing chemical solution
  • Clean rug
  • Broom
  • Pail of water


Step 1 – Clean the Granite Flooring Area

Granite flooring undoubtedly loses its luster and shine because of dirt and stains. Make sure that your granite flooring really needs refinishing by removing dust particles and stains using a broom, clean rag and water. Consider letting it dry after cleaning to see if you need to proceed to the next steps.

Step 2 – Flatten Your Granite Flooring

Once you have determined that your granite flooring really needs refinishing, start the steps to flatten out the tiles. Get a regular industrial sander to even out slants and rough edges on your granite flooring. Flatten areas that have seemingly irremovable stains. Clean off dusts and debris.

Step 3 – Hone Your Granite Flooring

Fit a diamond pad with an abrasive grit to your industrial sander. Get to the spots that have deep scratches, slants and rough surfaces. You can also use the diamond pad-powered industrial sander to get rid of the hardest to remove stains and similar impurities. Be careful not to hone the areas that do not need further sanding as this would only create irregular textures.

Step 4 – Polish Your Granite Flooring

Remove the diamond pad with abrasive grit from your industrial sander and replace it with one that has a lot less abrasive grit. Again, run your industrial sander on the entire space of your granite flooring. Remember to do this with care so as not to damage your precious granite tiles. Clean off dust with an airbrush to determine if you still need to do the next step. If you think that your granite flooring has gained back its shine and luster, stop your refinishing routine here.

Step 5 – Buff Your Granite Flooring

Buffing for granite flooring only takes place when the project involved is considered to be old. Those who have abandoned spaces usually resort to this last step to gain back the shine of granite flooring. Get a buffing chemical solution especially made for granite floor. Apply it to the area concerned as instructed by the packaging. Leave the chemical solution to dry unless otherwise advised. The solution would begin a chemical reaction that would bring out the best shine possible from your granite flooring. Read the instructions of the solution as you might need to use a floor polisher for the best results.

Tuesday, February 6, 2018

Renovating Victorian Tiled Hallway Oxford

The Victorian tiled hallway shown below had until recently been covered by carpet and was in surprisingly good condition for its age which is a testament to the durability of these floors. My client who lives in Oxford had managed to remove most of the glue that had been used to secure the carpet to the tile but found it had left an imprint on the floor. Unable to take the restoration any further we were asked to remove the ground in grime and seal the floor.

Carpet Covered Victorian Tiled Floor Before Cleaning Oxford


Restoring Victorian Quarry Tiles

My first task was to remove what was left of the carpet adhesive primarily with the aid of scraper which was used carefully along the edges. This removed the thicker parts of the glue but needed more work to remove all the traces; so a 50 grit disc fitted to a handheld machine was run around the edges of the whole floor to complete the job removing the residue and dirt in the process. I then used a 50 grit milling pad attached to a rotary floor machine to remove the ground in grime and clean the whole floor. The floor was then rinsed with water to remove the soil that was generated afterwards and then the process repeated this with a 100 grit and 200 grit milling pad to fully restore the appearance of the tile. This process took up most of the day so before leaving I gave the floor an acid wash using a mild dilution of Tile Doctor Grout Clean-up and then followed this with a good rinse and final clean with Tile Doctor Neutral Cleaner.


Sealing Victorian Tiles

Having finished cleaning the floor I left it to dry off completely for three days to ensure it was bone dry before returning to seal it. To seal I applied Tile Doctor Colour Grow which is an impregnating sealer that protects the tile from within by occupying the pores in the clay, it also enhances the natural colours in the tile in the process and leaves a matt finish.

Carpet Covered Victorian Tiled Floor After Cleaning Oxford

The finished floor looks a lot brighter now it’s now free of all the dirt and glue marks, the new sealer will also ensure it’s easy to clean and keeps its appearance for some time to come.


Source: Victorian Tile Cleaning and Renovation Service in Oxfordshire

Monday, February 5, 2018

Building a Floating Floor on an Uneven Surface

A floating floor can really spice up any kind of home design. Some even serve multi-purposes such as a small stage for live performances and the likes. However the floor will be used, it is necessary that the area where the floating floor would be installed first be inspected.

Ideal Locations for Floating Floors

Ideally, a floating floor must be installed in a sturdy and even space. If this is not the case in your set-up, you should search for ways to improve the location of your floating floor.

Preparations in Correcting Uneven Surfaces for Floating Floor

Decide on the space where you would be putting up your floating floor. If you are considering using wood, make sure that the area you would choose would be safe for such materials. As such, laying a wooden floating floor on soil would need more considerations to ensure the protection of the wood.

Measure the area to ascertain what materials you would be using. If you are laying floating floor on the ground, considering having dips filled up with soil. You could also have rising areas plowed prior to the installation of your floating floor.

Sanding and Filling

For concrete and other similar subfloors or grounds, it might be best to allot a budget for sanding and filling. Get a level to determine the areas which you need to level. Evenly sand those areas that are a lot higher than the rest of the surface. Dust off all debris before measuring it up using your level. For dips, get concrete putty or other similar filler. Apply this to areas that need fillings. Let it dry completely before measuring it again. Sand the fills that has risen to more than the desire level.

Installing a floating floor on an uneven surface could also be achieved by skipping all the above-mentioned steps. However, the task at hand would be trickier. Thoroughly clean the area where you would be building the floating floor. After that, measure the areas where there are depressions and rises. The “legs” of your floating floor should be made to fit such sections.

In this regard, you need to measure up each of the fills and rise to be able to adjust the sizes of your floating floor’s legs. Measuring and wood cutting are the most important steps here. Any miscalculation could lead you to the misfit of the floating floor’s legs to the surface. Also, remember that the materials you would be using for the floating floor’s legs should be the sturdiest. These parts are like foundations that would be tasked to carry most of the pressure to the floating floor.

After all the adjustments have been done, continue on attaching the floor boards of your floating floor. Drive down nails and screws next to each other to stop the boards from squeaking. Also, double check for surface impurities that would need sanding. Hammer down each nail to ensure that they don’t come loose. Apply varnish and paint as desired.