Sunday, May 31, 2015

How to Install Rolled Rubber Flooring

Make your garage floor neat and skid-free by installing rolled rubber flooring. Rubber flooring is made of skid-resistant materials and is ideally installed in restaurants, gyms and playgrounds. Rolled rubber flooring is easy to install and maintain. All you need to clean a rolled rubber flooring is to hose it down with water. Below are the materials that you need along with the instructions for installing rolled rubber flooring.

What You'll Need
  • Rolls of Rubber Flooring
  • Tape Measure
  • Utility Knife or Straight Edge Blade
  • Push Broom
  • Vacuum cleaner
  • Double-Sided Tape
  • Chalk Line
  • Rubber Mallet
  • Wood Piece (long and flat)


Step 1-Clean Garage Floor
Make sure your garage floor is clean. You can sweep the dirt off the floor using a broom, or you can use a vacuum. Be sure to remove all sorts of harmful hardware like nails or screws from your garage floor. If you encounter cracks, fill them with concrete mix and smooth it to prevent bumps or air gaps in your rubber flooring.
Step 2-Rubber Flooring
Bring in the rubber flooring and place it on a flat surface to let it settle. Let the rubber flooring stay outside for a while prior to putting it in your garage. This will limit the expansion of the rubber flooring once the taping or trimming process is finished.
Step 3-Roll Rubber Flooring onto Your Garage Floor
You can start installing the rubber flooring by aligning its edge to the front area of your garage floor, where the door of your garage would normally be. Make sure that the first roll is at the center in order to allow the succeeding rolls of rubber flooring to overlap.
Step 4-Smooth Rubber Flooring
Smooth the rubber flooring in your garage with a push broom. Make sure to get rid of all air pockets by pressing the rubber the push broom starting from the center of the rubber flooring and moving towards its edges.
 Step 5-Use Other Rolls Of Rubber Flooring
Take the other rolls of rubber flooring and overlap them six inches on both sides.
Step 6-Apply Waterproof Tape
Using double-sided waterproof tape, attach the rolls of rubber flooring together. Place the tape under the top rubber flooring so that it will connect with the rubber flooring under it. Avoid taping the rubber flooring directly onto your garage door, except for the section at the front edge of your garage.
Step 7-Mark Edges of Garage Floor
Mark the edges of your garage floor using a chalk line. Apply two-sided tape on the mark of the edges indicating where the rubber flooring starts. Press the edge of your new rubber flooring on the double-sided section on the edges of the floor to secure it.
Step 8-Cut Excess Rubber Flooring
Cut the edges of the rubber flooring found at the corner of the floor space, along posts and boards. If necessary, you can use a straight edge. Allot half an inch for expansion. Use a wet mop and a vacuum to clean the rubber flooring before allowing foot traffic.


Saturday, May 30, 2015

Deep Cleaning Slate Kitchen Tiles

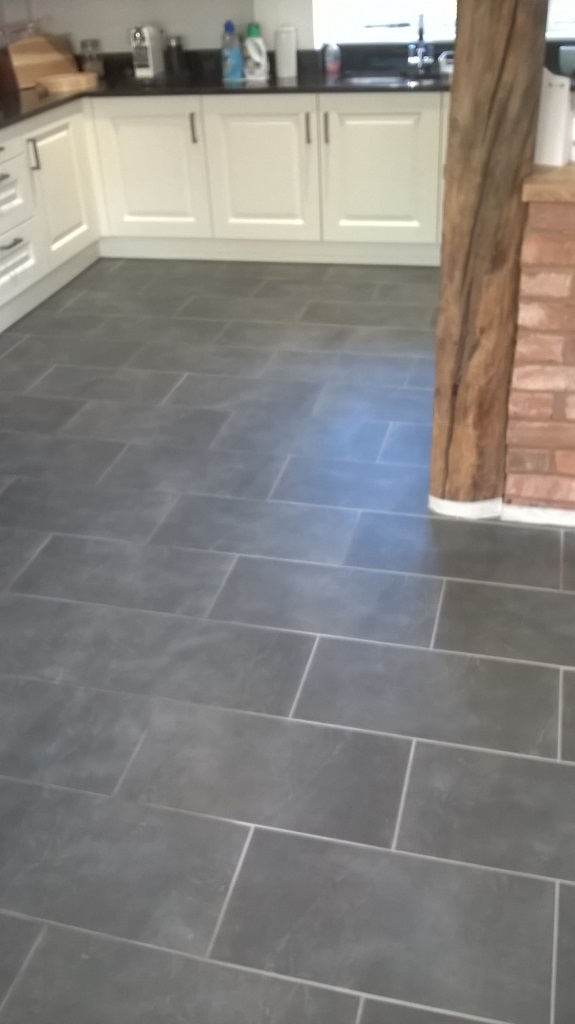
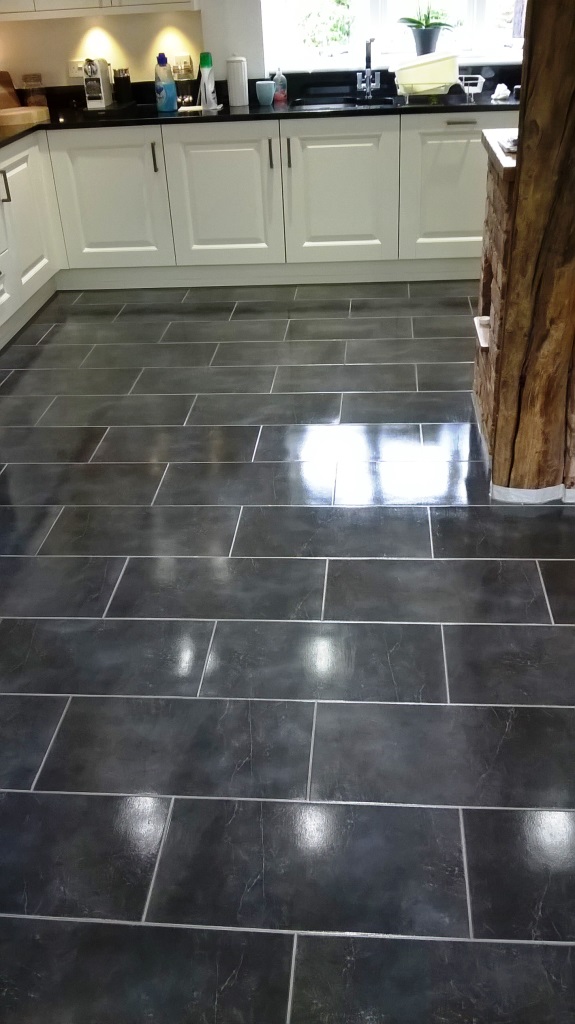
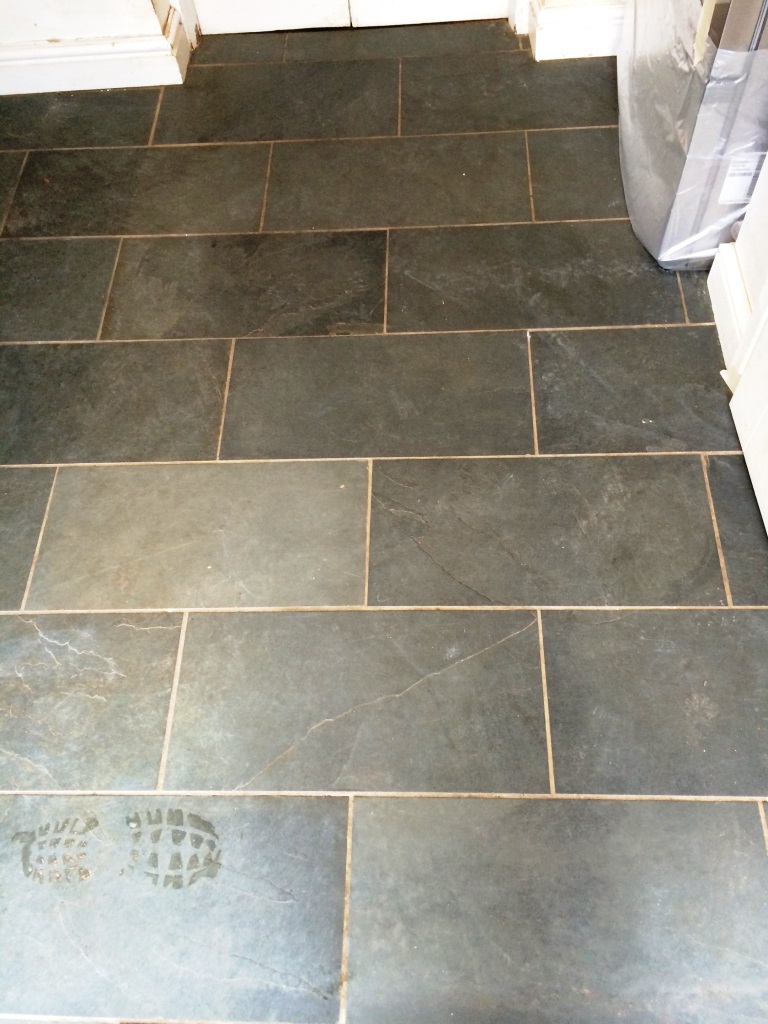
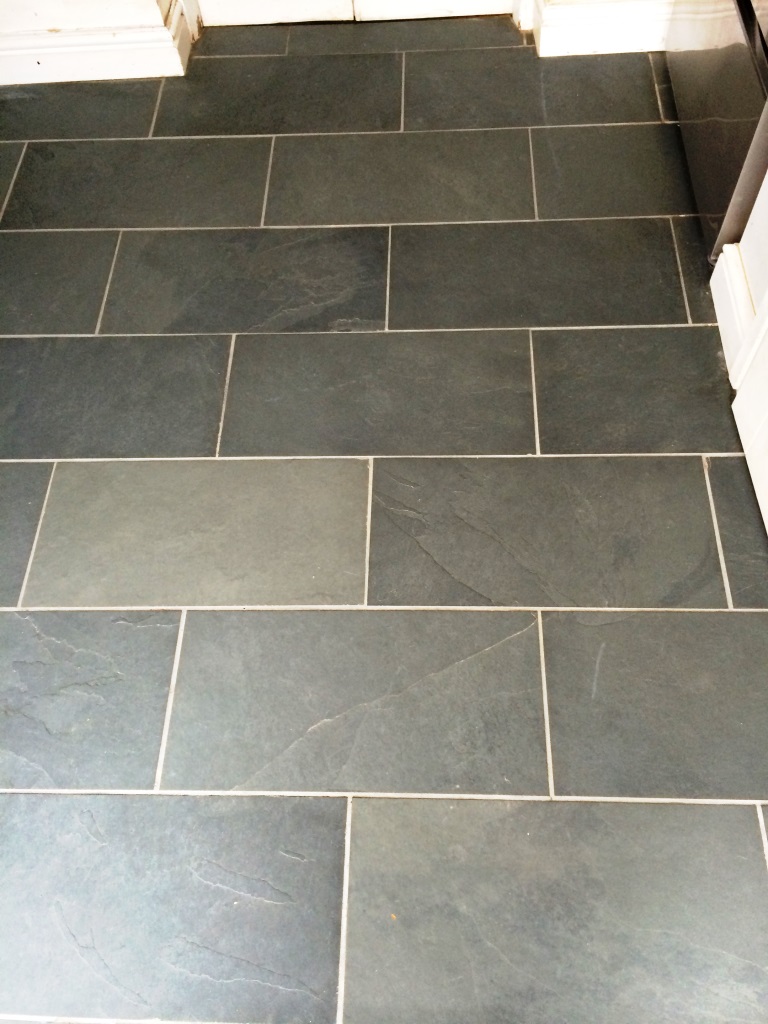
Pictures below of a slate tiled kitchen floor that I recently maintained at a house in Burton on Trent. The problem was the usual one that the sealer had worn down and the floor had lost its polished look leaving it dull and the owner of the house wanted it looking new again.

Cleaning black slate floor tiles

The floor was cleaned using a dilution of Tile Doctor Pro-Clean which was left to soak into the slate for ten minutes before being worked into the tile using a rotary machine fitted with a scrubbing pad. The process was repeated where there were stubborn stains and then the whole floor was washed down to remove the soiled cleaning solution and any trace of product. The floor was then dried as much as possible using a wet vacuum and left to fully dry overnight.
Slate Tiles in Burton on Trent Before Cleaning Slate Tiles in Burton on Trent Before Cleaning

Sealing Slate floor tiles

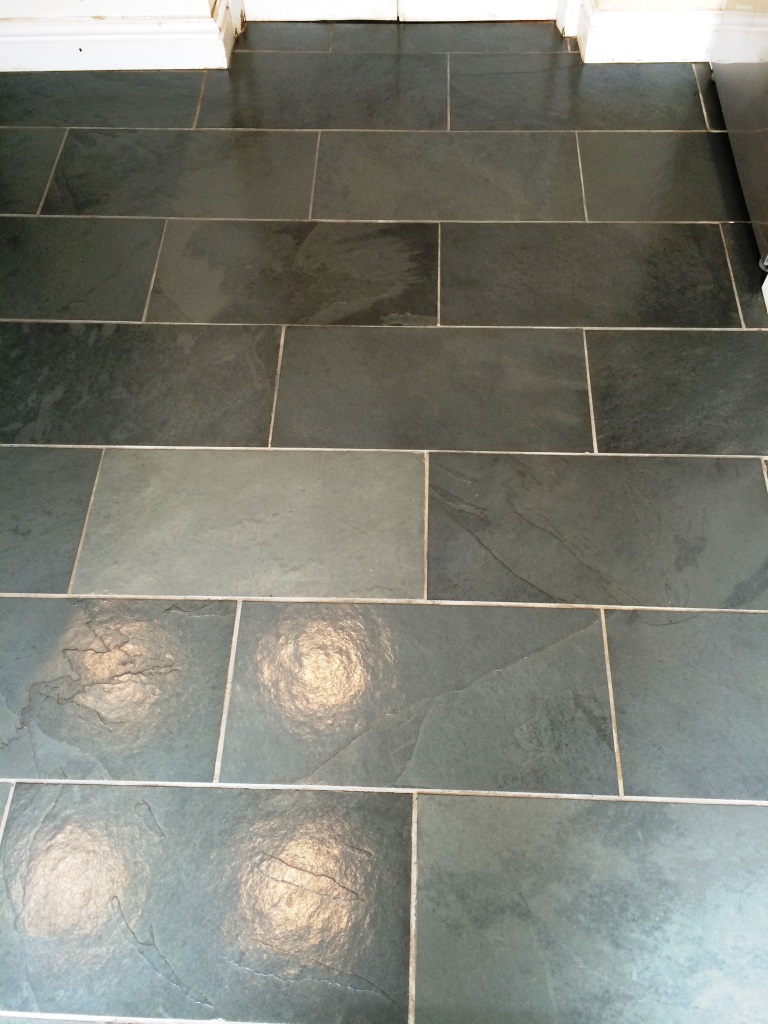
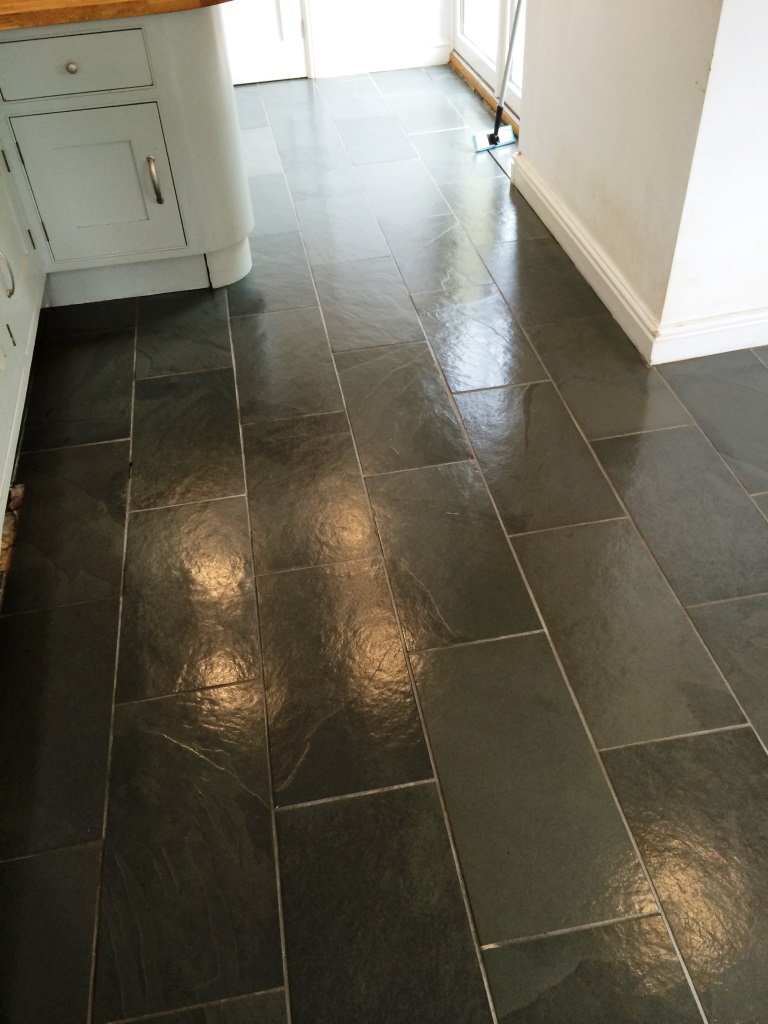
I left the floor overnight to dry then came back next day and used a damp test meter to verify the floor was dry and ready for sealing. Once happy I proceed to apply four coats of Tile Doctor Seal & Go which as you can see from the photograph below has really brought the slate back to life.
Slate Tiles in Burton on Trent After Cleaning Slate Tiles in Burton on Trent After Cleaning
The customer was delighted with the transformation of the floor.


Source: Stone and Grout Cleaning advice for Slate

Friday, May 29, 2015

How to Cover up Cracked Floor Tiles

A cracked floor tile is not a good sight to behold especially if it is very noticeable. When floor tiles crack, they create a gap that can become filled with dirt and dust easily and may even become a breeding ground for bacteria and other nasty microorganisms. When a cracked floor tile damages the outward appearance of the floor, there are some steps that can be followed to cover it up instead of replacing it with a new one. Read on for instructions.

What You'll Need
  • Tile poultice, cement fillings, or wax sealers
  • Wooden block
  • Sander
  • Color powder
  • Potted plant
  • Throw rug
  • Furniture


Step 1 – Vacuum the Cracks

Use a vacuum cleaner to suck out all dust and dirt trapped inside the cracks as these may get in the way when filling the cracks with sealers or fillers. If there are larger particles or debris inside the cracks that cannot be vacuumed, use a stick, metal wire or any other stiff object thin enough to penetrate the cracks and get rid of the trapped debris. Make sure that the floor is thoroughly cleaned before proceeding with the next steps.

Step 2 – Fill the Cracks

Use any of the following to fill in the cracks: cement filling, wax sealer, or tile poultice. Mix a sufficient amount of tile poultice or cement filler. Carefully fill every crack with the filler making sure that the material does not get in contact with the tile surface as much as possible to avoid more cleaning up to do. Use a wooden block to press the filler inside the cracks thoroughly. When air spaces are left inside the cracks, it may cause the filler to create a bulge during the drying process. Remove any excess material that oozes out of the cracks and allow it to dry.

Step 3 – Sand and the Dried Filler

Sand the filler thoroughly until smooth. Make sure that the surface is level with the tile as well. Sand any protruding surfaces until every surface is even.

Step 4 – Apply Color Powder

Use color powder that matches the exact hue or at least nearly the exact hue of the tile in order to cover up the cracks nice and well. Use your hands to apply the color powder. Apply an even amount and make sure it covers the filler completely.

Step 5 – Try Other Alternatives

There are also other much simpler ways to cover the cracked floor tile, especially when it is very hard to conceal. Try covering the tile with a throw rug, a potted plant or any furniture if the tile is found in an ideal location.

Tips:

If the tile cannot be covered up with fillers, it may be best to replace it with a new one instead. Floor tiles are sometimes best to remove when they are damaged to a certain extent that covering them up does not work. If such is the case, read a DIY guide on how to replace cracked floor tiles, an easy DIY project, instead of hiring an expensive home improvement builder to do the job.


Thursday, May 28, 2015

6 Reasons to Consider Installing Porcelain Floor Tiles

Porcelain floor tiles are commonly installed in laundry rooms, bathrooms, kitchens and places with heavy foot traffic such as an office building or a mail. Porcelain floor tiles are known for its durability, strength and other factors. Here are 6 reasons to consider installing porcelain floor tiles.

1 - Durability
Porcelain floor tiles are durable and do not wear and tear easily making it ideal in office buildings and malls where there is heavy foot traffic. Porcelain floor tiles are also chip resistant.
2 - Strength
Porcelain tile flooring can handle as much weight per inches as natural stone flooring. Porcelain tiles are composed of clay and feldspar.
3 - Clean
Since porcelain floor tiles are predominantly made of clay and clay is not a good habitat for germs and bacteria, having porcelain floor tiles in your kitchen is hygienic.

4 - Easy to Clean
You can use any type of cleaning solutions to clean porcelain floor tiles including acid-based solutions.

5 - Waterproof
Porcelain floor tiles do not have absorb water making it an ideal flooring option in areas where water is normally present such as laundry rooms, bathrooms and kitchens.
6 - Fireproof
Porcelain floor tiles are fireproof providing a house or any structure additional protection in the event of fires.


Wednesday, May 27, 2015

Cleansed and Polished Limestone Flagstone Floor in Austwick

The rather dirty but beautiful classic Minster Limestone flagstones had been installed in the Kitchen of a house in the village of Austwick. They were now overdue for a deep clean and polish and so we were asked to do to the work.

Limestone Floor Tiles Stripping and Polishing

In order to bring back the surface of polished stone we use a set of diamond encrusted pads however before starting we gave the floor tiles a general clean with a dilution of Tile Doctor Pro-Clean mainly to clean-up the grout and secondly to remove any loose surface grit. This was rinsed away and removed with a wet vacuum before starting the burnishing process using a rotary scrubbing machine fitted with a coarse diamond encrusted burnishing pad and a little water. The coarse pad strips off dirt and old sealers from the tile and the resulting slurry is then removed using a wet vacuum.


The burnishing pads come in a set of four so once we were done with the coarse pad we moved on to the Medium and then Fine pads again with a little water until the floor was polished. To bring up the polish on the Limestone tiles the last "Very Fine" pad was fitted to the rotary machine and run over the floor to buff it to a nice shine.

Limestone Floor Tiles Sealing

Once the floor was dry we set about sealing it using two coats of Tile Doctor Ultra Seal which is a penetrating sealer that soaks into the pores of the stone filling them so dirt can't penetrate below the surface. As well as offering excellent protection Ultra Seal doesn't enhance the stone the stone in anyway giving it a natural look. Once sealing was complete and dry the Limestone tiles were given a final buff with a soft white pad.

I think you will all agree that the Limestone tiles now look way better and now that's it's been sealed cleaning the floor should be so much easier.

Kitchen Slate Tiles Cleansing and Sealing in Towcester

The photographs on this text is of a Slate tiled floor were taken in the Kitchen of a house in Towcester where the slate was looking rather dull and had lost its appeal. This does happen with natural stone floor where the sealer which can add a shine to the stone becomes worn down and ineffective.

Cleaning Chinese Slate Tiles

We lifted the kickboards away from the kitchen units and lined the skirting boards with green Frog tape in order to protect them from cleaning fluids. The next step was to soak the floor in a dilution of Tile Doctor Pro-Clean which we let soak into the tile for 10-15 minutes before scrubbing it in with a rotary machine fitted with a black pad and then using a stiff grout brush to clean out the grout lines.


The floor was then thoroughly rinsed using clean water which was then cleared away using a wet vacuum. The floor was now free of sealers etc. and this showed up a few stubborn areas that needed to be retreated and washed down again. It's important to give the floor a good rinse to ensure it's free of any cleaning products as they can upset the sealer.

Sealing the Slate Tiled Floor

The floor was left to dry and we came back the next day to seal the slate using five coats of Tile Doctor Seal and Go applied using a paint pad applicator. I usually use Seal and Go for slate tiles as it provides good stain protection with adds a nice sheen finish that adds to the look of the floor.

The job took two days and the floor now looks much better and much easier to clean, certainly the customer was very pleased and left the following message on our feedback system.

“Phil is extremely professional and provided excellent customer service. He explained the process in detail and did a thorough job and worked extremely hard. The job was completed in the time proposed with a brilliant result. We have no hesitation in recommending Phil to others. Thank you.”
Pete and Angie, Towcester

Porcelain Marble Effect Floor Spruced Up in Maidenhead

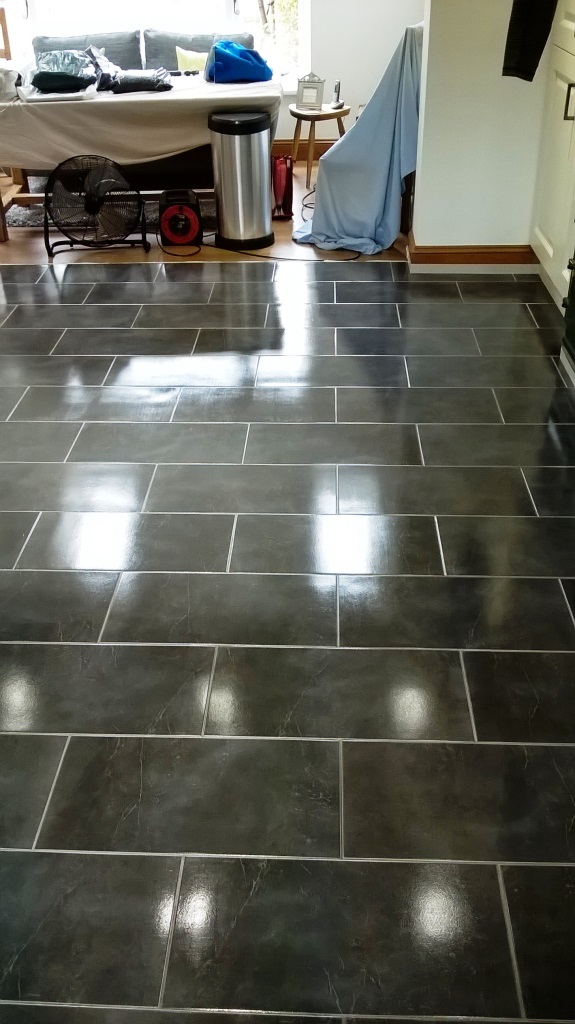
We were asked to take a look at these Marble effect Porcelain floor tiles installed in the Kitchen of a house in Maidenhead. Porcelain are very strong tiles which unlike natural stone does not normally need a sealer; they can still become surface stained however especially in a kitchen but the grout is more likely to become stained than the tile which was certainly the case with this floor.

Cleaning Black Porcelain Floor Tiles

To get the Tile and Grout clean we applied a mild dilution of Tile Doctor Pro-Clean which was left to seep and soak into the tile and grout for twenty to thirty minutes to help break down the oils, grease, skin fats, food fats and other soils which are found in the kitchen and stain the floor. The solution was then worked into the tile using a heavy rotary machine fitted with a white pad and also manually into the grout using a stiff grout scrubbing brush.


Next was to remove the dirty cleaning solution and give the floor a good rinse and for this we have invested in a high pressure, hot water, vacuum system that has been installed in our van. This tile and grout cleaning machine simultaneously extracts dirty solutions from the floor whilst blasting engrained soiling away from the grout and tiles.

After deep cleaning and extraction the floor was allowed to dry for a period of 1 hour and an air mover was introduce to help encourage drying.

Grout Coloring

The Porcelain tiles were now looking fantastic and the grout improved however the trouble with grout is that it is absorbent, and so gets dirty quickly and is difficult to clean. So to get the Grout back to the color it once was we applied a Grout Colorant to the grout lines which not only restored the uniform appearance of the grout but also adds an impervious layer to the grout protecting it from staining and making it easy to clean going forward.

Like a sealer the grout colorant can be damaged through the use of aggressive cleaning products and heavy scrubbing so for aftercare I recommended the use of a mild cleaning solution such as Tile Doctor Neutral Tile Cleaner applied with a microfiber cloth to simply wipe the grout lines clean again.

Stripped and Sealed Stained Limestone Tiled Floor in Slough

This 50 m2 Limestone tiled floor at an old thatched cottage in Slough had regrettably been stained following a radiator system leak which covered the tiles in dirty radiator water and sludge. The limestone tiles had been laid on a floor without a screed damp proofing membrane which resulted in the release of efflorescent mineral salts rising up through the stone from the soil beneath. This left a constant layer of reforming fine salt on the surface of the stone which looked like fine dust. The water had also damaged the surface of the stone leaving patches of dull etched stone next to clean polished areas.


Limestone Tiled Floor Stripping

In order to encourage the stone to dry out thoroughly we left a number of dehumidifiers in the room for a week and increased the room temperature. Once the stone was completely dry, it stopped releasing effloresce salts and we were able to restore the surface polish by burnishing the floor.

Burnishing involves stripping back the Limestone surface using a set of burnishing pads, these diamond encrusted pads come in a number of grades and each one does a different job. I started with the coarse pad together with water removed the slurry with a wet vacuum, rinsed the floor and then carried on with the medium, fine and super fine pads using the same processes until the surface was polished again. Lastly when I had dried the floor I used a green buffing pad to buff the floor up.

Limestone Floor Sealing

The next step was to seal the Limestone with a couple of coats of Tile Doctor Color Grow which will provide a durable protective sealer against future staining. The result was an even, polished limestone tiled floor with a durable sealing to protect against future soiling and staining.

Porcelain Tiled Kitchen Floor Grout Coloring in Maidenhead

A client near Maidenhead requested us to take a look at their dirty porcelain floor tile and grout which had degenerated following ten years of traffic from children and pets. Domestic cleaning products were proving ineffective and professional help was now required to get the floor looking healthy again.

Deep Cleaning Porcelain Tiles

In order to get the dirt out of the tiles they were cleaned with a very mild hot water dilution of Tile Doctor Pro-Clean which was spread over the tiles and left to soak into the tiles for twenty minutes, during this time the solution was scrubbed into the grout lines using a stiff brush.

Next was to connect up our van mounted high pressure hot water clean and capture system (see photo below) and rinse the tiles and grout. This system produces very little water or spray because of its unique recovery system to a waste tank in our van. It also neutralizes cleaning solutions and the high pressure penetrates into the pores of the tile removing all the soiling and pollutants.


Grout Colorant Application

The powerful pressure cleaning worked well on the tiles but unluckily the grout lines had absorbed too much soiling and staining over the years which had become ingrained to a depth which could not be removed without replacing the grout. Favorably there was another option which was to apply a Grout Colorant. Tile Doctor has a range of epoxy based colorants available in different colors which are relatively easy to apply and form a barrier over the existing grout to provide a uniform look and durable protection against future staining and discoloration

The floor was ready for surface traffic in a few hours and I think you will agree the final result has restored this dirty and tired floor to a fresh, revitalized as new finish

My client was very ecstatic with the results and left the following testimonial:

“Hi Tim, Many thanks for the amazing results you achieved with my Kitchen/Conservatory floor, I was blown away by the finish – it looks like new! Thank you for care instructions, we will make every effort to follow carefully. Best wishes and thank you again.” - Ms. J Walker

Saturday, May 23, 2015

Dealing with tricky Terracotta floors

This customer in rural village of Urchfont was having difficulty bring their Terracotta tiled kitchen floor back to the condition it was in when it was first laid. Upon inspection it was evident that the sealer on the floor had failed and dirt had become ingrained into the pores of the tile making it difficult to clean and causing it to become increasingly dirty over a period of time. This customer in the rural village of Urchfont contacted us because a competitor had attempted to restore their floor but ended up ruining it due to the over application of linseed oil which had left it both brown and sticky. I warned the customer that we may not be able to get rid of the Linseed oil as we don't know what products had been used previously however they were happy to proceed and they booked us in immediately after conducting a successful test.
Terracotta Tiled Floor Urchfont Before

Cleaning Oil and Wax from Terracotta Tile

We started by smothering the floor with Tile Doctor Remove & Go leaving it to dwell and soak into the floor. After thirty minutes the product was scrubbed into the grout lines using a stiff grout brush. We then attached a black scrubbing pad to a rotary machine and set about trying to bust through the top layer of wax and oil. It became apparent that this particular terracotta floor was very porous indeed and that it was going to take quite a few attempts to got a section clear we rinsed the tiles thoroughly and started again. This process was repeated every five square metres so that the slurry didn't drop back into the tile. Once we were satisfied that we had removed as much of the wax and oil as possible we then used a steamer on the areas that had an increased amount of linseed oil and scrubbed vigorously with a deck brush until happy. Once the entire floor was clear we rinsed the area thoroughly with fresh water to remove any trace of cleaning product using a wet vacuum to remove as much of the water as possible before leaving it to dry for 7 days.

Sealing Terracotta Tiles

Upon our return we tested the floor using a damp meter, this is important as adding sealer to a damp floor can have unexpected results. The test was OK so we began to seal the floor with Tile Doctor Seal and Go eventually applying nine coats until the tile was fully sealed. You can see from the photographs below that the floor looks much better and the sealer enhanced the look of the tile and will continue to protect it against day to day wear.
Terracotta Tiled Floor Urchfont Sealed
Our customer was over the moon with the result we had achieved even though not all the linseed oil could be removed due to its porosity.
Terracotta Tiled Floor Urchfont Sealed
    Source: Stone and Grout Cleaning advice for Terracotta Tiles

Thursday, May 21, 2015

4 Types of Rubber Flooring

Durable and easy to maintain, rubber flooring comes in a range of options. Whether for a kitchen, garage, basement, or playroom, you'll find a variety suited to your needs.

1 – Sheeting

Rubber flooring comes on a roll, and can be laid down similar to wall to wall carpet. The size of the roll you need is based on the longest wall in your space. The flooring can easily be cut to fit around obstacles and corners, for a perfect fit in your room. This type of flooring is available in a range of different designs and provides the benefit of enabling patterns to be used and easily continued, such as a diamond plate for a non-slip surface. It is possible to use this method for both commercial and residential properties, and the thickness of the rubber can be chosen according to the use. It's ideal for workshops and garages, where water or other liquids may be an issue.

2 – Tiles

Rubber flooring in tile form allows for more intricate or multicolored patterns. This method requires some additional calculation to ensure that you obtain the right number to cover the entire surface. Some cutting of the tiles is necessary to ensure that they fit precisely. In rooms where there is a large amount of water use, you may find that rubber tiles may not be the best option. Over time, water can seep between the seams of the tiles and cause problems for the subfloor. Rubber floor tiles are ideal for a playroom.

3 – Mats

Rubber flooring mats are a convenient way to lay an additional floor covering over one that already exists. This an good way to form a non-slip pathway from one point to another on a hard surface, such as slate or marble, or as a waterproof cushion for tired feet in the work area for your kitchen. It is easy to lay down, and can be moved whenever necessary. These mats are available in a range of different thicknesses and styles, to make it easy to find one to suit your needs. For example, a relatively thin mat is all that's needed if it will simply be walked across, while a thicker grooved mat is better for areas where you might be standing for extended periods.

4 – Recycled

For an eco-friendly option, recycled rubber flooring can be obtained in various forms. You will often be able to find details of the previous use of the rubber, whether it was once tires or athletic shoes. Of course, in the event the floor needs to be removed, it can be recycled again and used for a different purpose.

Tuesday, May 19, 2015

Victorian Quarry Tiled Floor Renovated in Telford

The video below of a Red and Black Victorian Quarry tiled floor were taken at a 109 year old cottage in the town of Telford. Regrettably the tiles were in a really neglected state after the completion of building works but we do like a challenge and agreed to do the work.

Washing a Quarry Tiled Floor

The whole floor was covered in layers of mortar and plaster so a strong solution of Tile Doctor Remove and Go was applied and scrubbed into the floor using a rotary machine fitted with a black scrubbing pad.


The initial clean revealed a lot more of the mess that had been left over from the builders mixing of mortar and concrete so I decided to try an acid based product called Tile Doctor Grout Clean-Up which is mainly used for the removal of grout from the tile surface but works on other cementitious materials as well. This worked well but it does require several applications to remove it all and once complete the floor was given a thorough rinse with clean water to ensure it was clear of the resultant slurry and there was no trace of cleaning product. A wet vacuum was used to remove the water from the floor and get it dry so it could be sealed.

Sealing a Quarry Floor Sealing

After being sure that the floor has dried completely, I sealed it using two coats of Tile Doctor Color Grow which was chosen as the customer wanted a matt finish; Color Grow also brings out the colors in the tile and it’s an impregnating sealer that occupies the pores in the tile to provide excellent stain protection.

The photographs below shows an amazing transformation that exceeded all expectations.

Red and Black Versatile Ceramic Tiles Washing in Penarth

This Ceramic Tiled Floor was in Penarth near Cardiff, the tile were 150 mm x 150 mm red dust pressed composition, known as versatile as it can be laid on both sides sometimes found around swimming pool areas due to their non-slip raised definition. The floor was looking a bit tired, so the client asked if they could be revitalized. I inspected the floor and noticed the grout was loose at the lounge doorway and this had to be re-grouted after my wet vacuum sucked it out part way through the cleaning process.

Cleaning Ceramic Tiles

Firstly, I tested for moisture which read very low, which was good news as it meant I was not going to have any issues with moisture in the tiles. I then applied masking tape to the skirting and carpet riser at the bottom of the staircase; I always tend to protect these areas as once I removed a little paint on another customers skirting with Tile Doctor Remove and Go and so I deducted £50 .00 off the bill by way of compensation.


I covered the floor with Tile Doctor Remove and Go let it soak in for half an hour, the floor was then rinsed twice and then to clean the grout I applied with Tile Doctor Pro-Clean which was then scrubbed into the grout joints; it was at this point some lose grout came away. The floor was rinsed twice again and I re-grouted the areas which needed it. The floor was dried with a wet vacuum and then it was left to dry for two days.

Sealing Ceramic Versatile Tiled Floor

On my return I checked the damp levels again before starting to seal the floor with three coats of Tile Doctor Seal and Go which also adds a nice shine to the tile. Extra care should be practiced to this type of tile as streak marks can be prominent when applying the sealer, in my experience I find as soon as the sealer is applied to the tile with a paint pad a cloth or any other method it marks the tile. It’s possible I’m just a being a perfectionist as the customer was thrilled with the finish.

Kitchen Slate Tiles Cleaning and Sealing in Corby

Here is another example of a tired Slate Tiled floor that was in need of a clean and seal, this time in the industrial town of Corby famous for its iron and steel works.

Cleansing Slate Kitchen Tiles

To get the Slate tile and grout clean the a dilution of Tile Doctor Pro-Clean was applied which was left to soak into the tile for ten minutes before scrubbing it in with a rotary machine fitted with a black scrubbing pad and then using a stiff grout brush to clean along the grout lines.


The floor was then rinsed thoroughly using clean water which was then removed using a wet vacuum; there were a few stubborn areas that needed further attention which were then treated again. The last step of the cleaning process was to use a high pressure cleaning tool that extracts as well as washes, we normally use this tool for cleaning carpets but it also does a great job of giving a hard floor a thorough rinse to remove any trace of cleaning product before sealing.

Sealing the Slate Tiled Floor

The floor was left to dry overnight and we came back the next day to seal the slate using five coats of Tile Doctor Seal and Go applied using a paint pad applicator. I usually use Seal and Go for slate tiles as it provides good stain protection with adds a nice sheen finish that adds to the look of the floor.

The job took two days and the floor now looks new.

Rehabilitated Old Victorian Tiled Hallway Floor in Splott near Cardiff

After they removed the hallway carpet in their new home, the new home owners had discovered a Victorian tiled floor. And they are very interested in restoring it as an original feature made and made contact with Tile Doctor. Restoring original features can add a lot a value to a house so it’s well worth pursuing.

Reconstructing a Victorian Tiled Floor

The floor actually caught me off guard because on initial visit I’d made my judgement on a small area located by the doorway which had been uncovered. After removing the rest of the floor covering however I could see the floor was in an extremely poor condition especially around the perimeter which had ingrained dirt and cement, old paint and was generally well worn. I would estimate the floor was original from at least 120 years ago

Before starting any cleaning I put the damp meter reader on several tiles to check the damp levels which read border line .15 -.17 in places which I was not very happy with especially as the weather we’ve had recently had been hot and dry in Cardiff for some time. Boldly, I scrapped the whole floor and then cutting the edges with Hammer and bolster; next I mixed a 50:50 batch of Tile Doctor Remove and Go with NanoTech Ultra-Clean cleaner and applied this to the whole area, installed it with a black pad fitted to a rotary machine and left it to dwell on the tile for half an hour so it could work on any old sealers that may have been present on the tile.


After rinsing the floor twice the floor was looking better however I could really see how bad the condition was so next I applied undiluted Tile Doctor Pro-Clean to the whole floor which is a strong alkaline cleaner. It was left to dwell on the floor for half an hour scrubbing in between, rinsing with clean water as I carried on.

Although improved again I was still not happy with the results especially the borders as there appeared to be dark cement stains deeply ingrained into the tiles which no doubt had been there for eighty years. So next step was to apply Tile Doctor Grout Clean-up which is designed to remove mineral deposits and cement, it’s very effective solution for this type of work and it removed most of the stains but not all.

The floor still needed more work so in my frustration I rinsed the floor and mixed a concoction of Remove and Go, Pro-Clean and Grout Clean-up together with a squirt of the NanoTech Ultra-Clean cleaner and spread it over the whole area leaving it to dwell for around 10 minutes before scrubbing it again. The floor was then rinsed and then for the final clean I steam cleaned the area twice rinsing in-between.

Sealing a Victorian Floor Sealing

The cleaning was done on a Friday and then left to dry out over the weekend. I returned on Monday and tested for moisture which was slightly high in places so being ever over precautions dried the whole floor with a heat gun until it gave me an absolute dry meter reading.

I left the floor to cool down to ambient temperature and then sealed it with three coats of Tile Doctor Seal and Go. The customer was over the moon and I think you will agree that the tiles have been renovated to a high standard.

Titchmarsh Garden Patios and Paths Restoration

The video below is about from the garden of a house in the beautiful village of Titchmarsh in Northamptonshire. The appeal was to wash the patios and paths which if not cleaned regularly become dirty and lose their appearance during the English winter.


Cleansing Patios and Paths

The process I follow for cleaning paths, patios and paving generally is basically to apply a strong dilution of Tile Doctor Pro-Clean and then let it seep in to get to work on the dirt and grime for about ten minutes before scrubbing with a stiff brush; this is then followed by pressure washing.

Home owners can buy pressure washing machines and many domestic models are available in DIY stores nationwide, however none are as powerful as the machines used by Tile Doctors which can generates pressures far in excess of a domestic system that make light work of cutting through grime.

How to Lay Rubber Flooring Tiles

Rubber flooring tiles have long been used because of their durability and noise absorption qualities. Many homeowners are now using rubber floor tiles in area like home gyms, bathrooms, and kids playrooms. Rubber flooring is made from recycled rubber, making it a green choice for the home. These tiles last for decades and are easy to clean. Laying these kinds of tiles is an easy process since they interlock and don’t require an adhesive. They are also easy to cut and some systems require no cutting at all.

What You'll Need
  • Vacuum
  • Broom
  • Rubber tiles
  • Chalk Line
  • Utility Knife
  • Steel Ruler
  • How to Install Tiles


Step 1 – Clean the Floor

Sweep or vacuum the floor where the tiles are to be laid. It should not have any dust, oil or debris on it when you begin laying the tiles.

Step 2 – Prepare the Guidelines

Use a chalk line to make a line 2 feet from the wall. Then, make another chalk line 2 feet out from the wall adjoining it. You now have two lines intersecting at a 90 degree angle.

Step 3 – Lay the Tiles

Use this grid to begin laying the tiles. Interlock the tiles as you lay them. The outside of the room nearest the walls will be laid last. Continue laying the tiles and interlocking them until you have covered the entire floor except for the perimeter.

Step 4 – Lay the Edge Tiles

Once the room is covered, you will fit the tiles in the perimeter of the room. Lay the tiles and cut them as necessary to fit into the space, using the utility knife and straight edge. You should not butt the tiles up too close to the wall. Manufacturers recommend that you leave a gap that equals the thickness of the tiles. The floor needs this extra space so that it can expand as needed.

Other Tips

These tiles are not meant to be used with any adhesive. This makes them easy to remove or replace if one becomes damaged. If it is necessary to secure them to the floor, use carpet tape that is double sided under the tiles around the edge of the room to minimize movement. Do not use any glue or adhesive since the tiles do need to contract and expand and are interlocked.
There are kits available that require no cutting. They have tiles designed to be placed at the corner of the room and make a border around the perimeter. Then, regular tiles are laid in the center to complete the floor. When ordering this kind of kit, careful measurements of the room should be taken, and the room should be relatively straight with no walls out of alignment.
Rubber flooring tiles can be a functional and attractive part of the home. They are a popular choice, especially in modern homes. They come in various colors and styles and can be made into interesting patterns. The ease of installation makes them a perfect do-it-yourself project.

Saturday, May 16, 2015

Travertine Tiled Floor Diamond Burnished in Surbiton

Just recently, I carried out a clean and diamond polish job on a Travertine tiled floor in Surbiton for a consumer who had been fed up with the floor since she and her husband had moved in 2 years ago. The floor was the last job on their list of things to be done and they wanted to make sure that it was done properly since regrettably they had fallen prey in the past to a deceitful tradesmen who had not lived up to the expectations.

When I was asked to quote I explained what I would do and showed pictures of previous work, and also my Trustmark Accreditation. They had also researched my work through my website and through the work history where there are lots of examples of Travertine tiles I have worked on in the past. I received the work order the next day and booked the job in for three weeks after.

Stripping and Burnishing Travertine Tiles

I arrived at the appointed date and time and was pleasantly surprised to see that they had put sheeting around all of their kitchen units and skirting so all I had to protect was the wooden flooring next to the travertine.


My first task at hand was to scrub the floors Using Tile Doctor Pro Clean to remove any deep-rooted dirt and clean the grout as well. The soiled cleaning solution was then removed using a wet vacuum and we moved onto burnishing the stone. This is done using a rotary scrubbing machine fitted with a coarse diamond encrusted burnishing pad and a little water began to strip off the old dirt and seal from the floor, the resulting slurry was then removed using a wet vacuum. The polishing pads come in a set of four so once we were done with the coarse pad we moved on to the Medium pad which is the first step in the polishing process.

At this point, I could see more work was required in order to improve the grout which was done using a combination of pressurized steam, more Tile Doctor Pro-Clean and a stiff brush. Once I had removed all the dirt and old seal from the grout I went on to the next stage of polishing and used the fine pad finally moving on to the extra fine pad to give the floor that extra deep shine.

Sealing Travertine Floor Tiles

We left the floor to dry out completely and once the floor was dry we set about sealing it using two coats of Tile Doctor Color Grow which is a color enhancing impregnating sealer designed to provide maximum stain protection on natural stone floors whilst bringing out the color in the stone. After the second coat was applied I waited for 10 minutes before buffing any excess residue with a white buffing pad.

I offered the consumer the option of creating a higher shine by applying Tile Doctor Shine Powder to give it a mirror polish but she refused as she was more than happy with the finish. Overall the floor came out really well and I found it quite a humbling experience as she was constantly saying thank you due to the fact that she had been messed about by previous contractors so was quite relieved to find someone who could actually do the job properly.

Fixing Up Terracotta Tiles in Shrewsbury

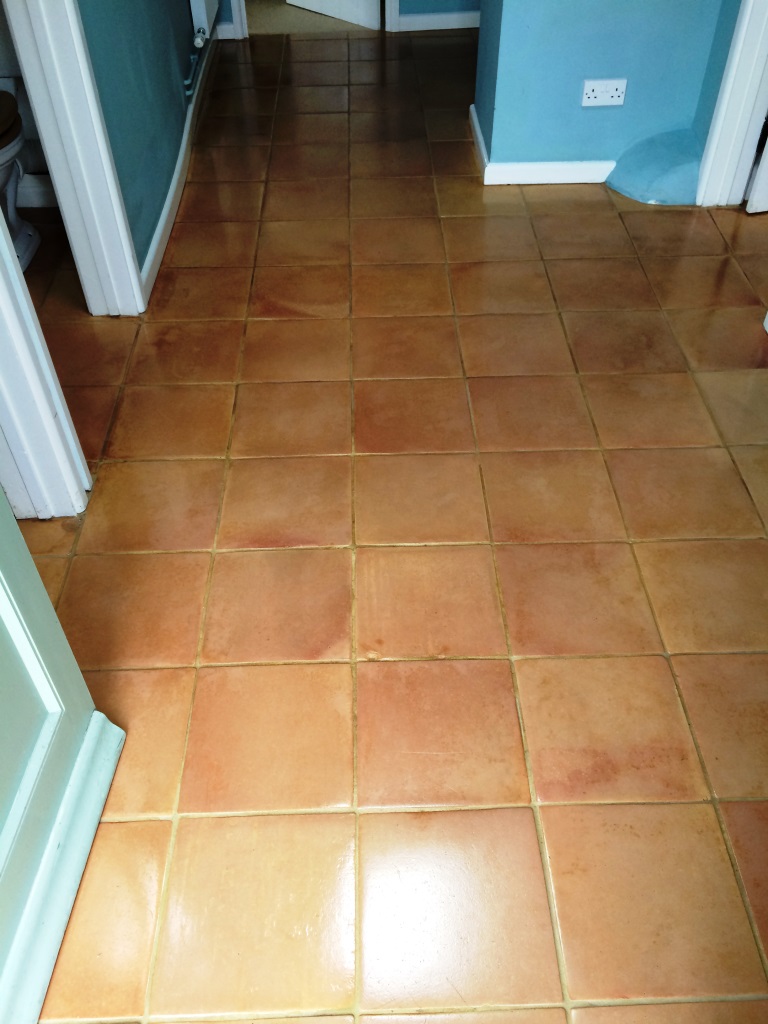
Below are the details of a Terracotta tiled hallway and kitchen at a house in the historic town of Shrewsbury. The floor had been laid a couple of years previously but the customer had found it difficult to maintain the appearance especially in the kitchen in fact the customer’s description on their enquiry form was “Need to spruce up the hallway and kitchen floor.”

Washing a Terracotta Tiled Floor

I washed the Terracotta floor using a strong dilution of Tile Doctor Pro-Clean scrubbed into the tile and grout with a black pad and then rinsed off with clean water which was then removed with a wet vacuum. After rinsing the floor there were a couple stubborn spots left behind so they were spot treated using Tile Doctor Remove and Go which is a strong coatings remover that is safe to use on tile and stone and usually takes care of most issues and certainly worked in this case. The floor was then thoroughly rinsed to remove any cleaning product prior to sealing and then left to dry completely.


Sealing a Terracotta Floor Sealing

The owner and I agreed that I was to return a week later to ensure the tiles were bone dry and ready to be sealed and on my return I checked the floor for any problem areas in need of further cleaning and also for dampness. The Terracotta was dry enough to take the sealer so I sealed it using two coats of Tile Doctor Color Grow which was chosen as the customer didn’t want a shine on the floor.

Out of interest I’ve included the photograph below which shows how the sealer causes water to form on the surface of the tile due to the surface tension provided by the sealer.

The customer was very glad with the result and left the following testimonial on the Tile Doctor feedback system:

“Very pleased with the work carried out by Jozsef. He is a pleasant and hard working individual and very conscientious about his work. No hesitation in recommending his work.”

Washing Rough Black Slate at an Enterprise Centre in Millom

The said images below are taken at an Enterprise Centre in Millom where local business are encouraged to network and they also offer various training courses, all of which results in a large amount of people coming and going across the 120m2 of rough black Slate which covers the communal areas. Interestingly enough this is not the first time we have cleaned and sealed this floor with the last visit being five years ago. Five years of wear and tear had taken its toll on the tiles though and the black Slate was looking tired but not horrendous given its location so I think it’s fair to say the sealer had performed well over the Intermitting period.


Washing Rough Black Slate

As I mentioned before the area in total was about 120m2 which is a large area so we operated in sections working around the public and ensuring the correct signage was displayed were relevant.

To clean the Slate tile and grout and remove the remaining sealer the floor a good deep clean using a dilution of Tile Doctor Remove and Go leaving it to soak in for fifteen minutes before working it in with a black scrubbing pad fitted to a rotary buffing machine. It was then followed by rinsing and cleaning with lots of fresh water, stubborn areas were treated again and the water was removed using a wet vacuum to the get the floor as dry as possible.

Sealing Rough Black Slate

Once the section of floor was clean we left it to dry and moved onto cleaning the next section coming back later to seal it which we did with two coats of Tile Doctor Color Grow which is an impregnating sealer that occupies the pores preventing contaminates from becoming ingrained. Color Grow is also a color enhancing sealer that brings out the deep color in the slate.

The client knew about using the right cleaning solution for regular cleaning however as it had been five years since our last visit we thought it best to remind them and recommend the use of Tile Doctor Neutral Cleaner which will not reduce the life of the sealer like an acidic cleaning product would.

Washed and Sealed Limestone Kitchen and Hallway Floor in Westminster

Below are the details of a Limestone Tiled Floor that I just cleansed and sealed at a residence in Westminster in the heart of London. The tiles were not looking their best and after deciding to do something about it the owner searched the internet for a solution and saw my website and emailed to book me in 2 months prior.

Washing a Limestone Tiled Floor

I arrived on site at the appointment and decided to scrub the floor first using a hot 4:1 dilution of Tile Doctor Pro-Clean which is a heavy duty alkaline cleaning product specially designed for cleaning stone floors. This was left to soak for a while and then scrubbed it using a rotary machine fitted medium brush head. The soiled solution was then removed using a wet vacuum and the floor was then rinsed down with fresh clean water. Doing this process removed a lot of grime and dirt that were deep-seated in the stone, and by using the brush it got into the recesses of the grout, once I had done this the floor looked great but I could see it would still needed to be burnished to restore the original appearance.


Polishing Limestone Floor Tiles

We used a set of diamond encrusted Burnishing Pads fitted to a rotary buffing machine to polish the Limestone floor. The said pads are ideal for recovering the shine on hard stone surfaces such as Limestone, Travertine and Marble, the come in a set of four and you start with the Coarse pad together with plain water and this cuts through and removes surface grime and any surface seal. You then progress through the Medium, Fine and Superfine polishing pads one to achieve a high polish.

Sealing Limestone Tiles

The floor was left to dry for a couple of days and later on I went back to seal it using two coats of Tile Doctor Color Grow which is a color enhancing sealer that brings out the colors in natural stone, finally buffing the floor using a soft white buffing pad.

The lady of the house was really pleased with the result and left a nice testimonial on the tiled doctor website, she has also booked me in to sort out two bathroom floors (one Marble and one Limestone) and she has also booked me in to carry out the cleaning of all her carpets.

Revived Red and Black Victorian Quarry Tiled Floor in Oswestry

Victorian Quarry tiled floor details below belonging to a client in Oswestry who had currently moved back to the area and was keen in restoring the original features of the house including the Quarry tiles floor which had several coats of red floor paint and was later was covered with carpet for a number of years. The customer described the floor as:

“I have 2 areas of quarry tiles that need a serious make over, in the hall and the back room. There are patches of red paint and areas of mineral deposit and lots of ingrained filth!””


Tidying a Quarry Tiled Floor

I opted to clean the floor using a strong dilution of Tile Doctor Remove and Go which was left to seep into the tiles for a while before being scrubbed in using a rotary machine fitted with a black pad; the resultant grime was washed away with more water and a wet vacuum. We repeated the whole process several times as the paint was really stubborn and in places I had to remove the paint removal with a scraper. Once I was happy with the condition it was given a final rinse to remove any cleaning products and then left to dry for five days leaving an air mover with the customer to accelerate drying.

Sealing a Quarry Floor Sealing

The tiles have to be completely dry before sealing and even though I returned five days later the damp meter still indicated that there was moisture in the tiles which I suspect was due to there being no membrane in place under the old Victorian tiles. I agreed with the client to come back a week later which proved sufficient enough and the floor was dry enough to take in the sealer.

The client wanted a matte finish so I sealed the floor with two coats of Tile Doctor Color Grow which is an impregnating sealer that occupies the pores in the tile and also enhances the color of the tile.

The customer was out when I applied the sealer but when the she got home she sent me the following message:

“The floor looks brilliant. So much better than I had ever hoped. Thank you.”

Discarding Deep-seated Dirt from Crushed Edge Limestone Tiles in Corby

Limestone is a natural stone with a lot of unique character and surface features with each tile being uniquely different from the last. These surface characteristics can however make a stone very difficult to clean and unless it is sealed it can result in dirt becoming trapped and ingrained. These particular Limestone tiles installed throughout the downstairs floor of a house in Corby are known as Crushed Edge Limestone and have an increased susceptibility to this issue. As you can see from the images below the crevices in the tile have become black with trapped dirt which has proved very difficult to clean.

Purifying Crushed Edge Limestone

Limestone is a very hard surface that has to be burnished with diamond encrusted pads to restore the finish so we set about this task using a set of Tile Doctor Burnishing Pads. Before starting however we soaked the floor in Tile Doctor Pro-Clean and scrubbed this into the tile surface particularly paying attention on the grout lines; this process gets a head start on the cleaning and also remove any grit etc. that might cause problems before burnishing. The soiled solution was then rinsed away using water and all was removed using a wet vacuum.


Brightening Crushed Edge Limestone

The burnishing pads come in a set of four, you start with the coarse pad together with a little water and this cut’s through and removes surface grime and any remaining surface sealer. The resultant slurry is washed away and you then progress through the other finer pads one by one until you get to the final polishing pad which provides a nice shine. You need to rinse the tiles in-between and use a wet vacuum to remove the slurry.

Sealing Crushed Edge Limestone

We left the floor to dry overnight and when we came back the following day, we tested a few areas for dampness before starting to seal the floor, this is an important step for this type of tile as it can easily trap dirt. We chose Tile Doctor Ultra-Seal for this, it’s a natural look impregnating sealer that occupies the tiny pores in the stone preventing dirt and other contaminates from becoming ingrained, two coats were sufficient. Once the sealer had fully dried we went over it with a white buffing pad to finish.

Blue Lias Limestone Tiles in Silverdale Needs Grinding and Polishing

The owner of this Blue Lias Limestone tiled floor in the village of Silverdale was disappointed with the installation which happened two years ago and several attempts by the Builder/Tiler to put it right had not resolved the problem. Basically the floor was not flat and had several raised tile edges resulting in what is known in the trade as a Lippage problem. Favorably, natural stone can be ground down to eliminate such problem.

Milling and Polishing Limestone Tiles

To level a stone surface such as Limestone you need to use a special grinding disc formed of diamond segments that is attached to a heavy rotary machine and run over the tiles until the desired effect is achieved, in our case up to 4mm of Limestone had to be removed in some areas to ensure the tiles were flat. Once this was done the floor was rinsed down to remove the slurry that was generated from the milling process and also scrubbed clean with a dilution of Tile Doctor Pro-Clean with particular attention paid to the grout lines.

Once the surface was level the next step is to burnish the Limestone tiles and restore the polish which is done via the application of a different set of diamond encrusted pads which come in a set of four. You start with a coarse stripper pad with water to strip back the surface and then move onto the finer pads to polish the floor.


Sealing Limestone Tiles

It being a natural stone, the tile needs protecting from contaminants which can stain and this is especially relevant in a kitchen. So the next step was to completely dry the floor and then seal it using two coats of Tile Doctor Color Grow which is an impregnating sealer that soaks into the pores of the stone. Color grow is a great sealer to use on natural stone as not only does it offer good stain protection but it also brings out the colors in the stone.

While we were sorting out the floor we noticed that the skirting boards and kitchen units had not been sealed to the tile with silicone to prevent water ingress that could damage the wood so to finish the job off we sealed in-between.

The client was extremely happy with the end results as they were considering taking it all up and starting again, and left the following feedback on the Tile Doctor website.

“We’re absolutely delighted with the result. The floor, of blue limestone, was laid unevenly and unpolished. Russell and Heidi removed the lippage, polished and buffed the stone and sealed it properly, so it now looks the way it ought to have looked in the first place. It was certainly not cheap; but it was considerably cheaper than having a new floor laid – and it was done in three days without putting the kitchen completely out of action.”

Noche Marble Tiled Hallway in Oundle Cleaning and Sealing

The said Noche Marble tiles were installed in the hallway of a house in Oundle. They are a premium product with a warm antique look but like any natural stone tile it needs to be sealed properly in order to prevent any dirt and grime becoming deep-seated in the pores of the stone. In this case the sealer had worn off and the floor was now difficult to keep clean thus we were called in to deep clean the tile and grout and then re-seal it. Sealers can last a few years depending on its wear.

Washing Noche Marble Tiles

In order to deep clean the tile and grout and remove any remaining sealer, I concocted a strong dilution of Tile Doctor Pro-Clean 50/50 with NanoTech UltraClean. The UltraClean adds tiny abrasive particles which makes it a more effective cleaning product, both products are safe to use on natural stone floors. It is best to let the solution soak into the tile for about ten to twenty minutes before scrubbing it in with a rotary machine fitted with a scrubbing brush or black scrubbing pad. The rotary pads can struggle to get into the grout lines so it’s best to use a stiff brush along those.


Removing the soiled cleaning solution and rinsing the tiles, I made use of a high pressure spinner tool which is a brilliant machine for tile cleaning as it deploys water under high pressure water whilst extracting the dirty water back to a container in the van.

Sealing Noche Marble Tiles

We left the floor to dry thoroughly for days and we returned the following week to seal the tiles and using a damp meter first to verify the floor was indeed dry which it was so we proceeded to seal the tiles using two coats of Tile Doctor Color Grow.

Color grow was chosen as it’s an impregnating sealer the seeps into the pores of the tile bringing out and enhancing the natural colors in the stone in the process.

I took myriad of images of it so you should be able to see how much cleaner the floor now looks, especially the grout and how the color has been restored to the Marble.

Messed Up Victorian Tiled Hallway Restored in Port Talbot

A client in Port Talbot found an original but damaged Victorian Tiled Floor, circa 1890, hidden under laminate flooring in their hallway and was very interested to restore it back to its original condition. They probed on the Internet and discovered the Tile Doctor website, contacted us and a visit was arranged to conduct a survey.

The Victorian floor tiles were in a very poor condition and to make matters worse a central heating pipe had been laid through the width of the hallway floor destroying the Victorian tiles. I assured the owners something could be done and a booking was made and arranged for me to return and do the work; in the meantime I spent a considerable amount of time sourcing tiles with the right measurements to replicate the original. Luckily, I managed to find a similar looking tile with the supplier called Original Style.


Rehabilitating Victorian Floor Tiles

As always, my first task was to check for moisture then to scrape as much adhesive and paint off the tiles as possible; then resorting to a chisel and small jackhammer tool around all the edges of the area to be restored to take out any more badly damaged tiles.

It was obvious right from the start that I was going to need all the assistance I could get to clean this floor and lift the stains out. In order to deep clean the tiles I put on Tile Doctor Remove and Go mixed 50/50 with NanoTech UltraClean which adds fine abrasive particles to an already powerful coating remover. I brushed the solution over the whole floor and then went over it with a rotary machine fitted with a black scrubbing pad. I left it for the solution to seep in for at least an hour before going over it again with the machine. Next was to wash the floor with water to remove the worst of the dirt and to enable further attention to be focused on the more stubborn stains. Further cleaning was required so I covered the tiles in Tile Doctor Pro Clean which is a strong alkaline cleaning product and then rinsed the floor again scrapping off any old paint and stubborn glue residue in the process.

The floor was looking much better however there were still areas with light cement smears and deeply ingrained dirt so this time I opted to apply Tile Doctor Grout Clean-up which is an acid based product so you can’t leave it on too long but it’s the only effective way to treat mineral type deposits. I wanted to be sure all this product was removed so afterwards the floor was rinsed three times using a wet vacuum to remove the water. Once I was convinced that the floor was clean enough already, I applied a levelling compound to the area damaged by the heating pipes for the new base so I could tile it the following day.

Refurbishing a Victorian Tiled Floor

During the second day, I begun by cutting larger tiles into small pieces as the tiles were only certain sizes available from the tile supplier, but the color match was nearly perfect so I went on with it. Next was for me to tile the area using a fast setting adhesive so I could grout the tiles the same day. Once everything had set I gave the rest of the floor a final steam clean to make sure there was no trace of chemical that could upset a sealer.

Victorian Floor Sealing

I left the floor to dry out completely over the weekend and then went back on the Monday to seal the tiles with Tile Doctor Seal and Go which is ideal for this type of tile as it adds a nice shine. Three coats were applied leaving and interval in-between so it could dry before putting on the next coat.

The client was ecstatic with the results and that she chose Tile Doctor to do the work, we were not the cheapest quote she had received but you have to admit the floor looks like new so it was money well spent.

Renewed Quarry and Terracotta Tiled Floors in Alveley

Recently purchased cottage in Alveley, Bridgenorth and the new owner was interested in overhauling the floors. The quarry tiles in the lounge had grout haze and general dirt on also the grout needed changing in several places.

The rest of the areas were covered with Terracotta tiles which they had thought were quarry tiles. At first look I thought they were a patterned ceramic tiles as there was a slight sheen on them and the “pattern” appear to be in uniform however upon closer inspection I realized that they were definitely not ceramic so I did a test clean on a small portion and it turned out that the apparent pattern was in actual fact from a build up dirt and grime all over the tile; the owners were also shocked at the discovery.


Restoring Quarry and Terracotta Tiles

I cleansed both floors with a dilution of Tile Doctor Remove and Go which was left to soak unto the tiles for quite some time before being scrubbed using a rotary machine fitted with a black pad and the dirty water was removed using a wet vacuum.

The Terracotta tiles needed the extra attention so I did another round of scrub on them once using a brush paying special attention to the tiny holes in the surface of the tiles which had become ingrained with grime. Once I was contented, both floors were given a final rinse to remove any cleaning products and I finished the day repairing the grout line in the lounge area.

Quarry Floor Sealing

I left the floor for a week so it could dry completely and I went back to seal it. The damp meter indicated that the floor was dry enough to take in the sealer. At the same time I did a final inspection of the floors and spot cleaned those areas where it was needed using a heat gun to dry the tiles afterwards. The client had pet dogs and had requested for a matte finish so I sealed the Quarry and Terracotta tiles several coats of Tile Doctor Color Grow which is an infuser-type of sealer that occupies the pores in the tile and also enhances the color of the tile.

Needless to say the customer was really pleased with the result.

Thursday, May 14, 2015

Maintaining Slate Floor Tiles

This was a straight forward refresh of a Slate Tiled floor that had been installed in the kitchen of a house the village of Malmesbury. You can see from the photo below how the Slate had become dull with wear and how the grout had become discoloured; it was clear that the previous sealer was starting to fail and the tile and grout was now in need of a deep clean and seal to bring it back to life.
Slate Floor Malmesbury Before Cleaning

Cleaning a Slate Tiled Floor

To get the floor clean and remove and remaining sealer a strong dilution of Tile Doctor Pro-clean was brushed over the floor and left it to soak in for around twenty minutes. A grout brush was then used to scrub out all grout lines and get them clean. A black scrubbing pad was then attached to a rotary machine and the entire kitchen floor was scrubbed. This process generated a fair amount of slurry as the remaining sealer, dirt and grime came out of the pores of the tile. This was then removed using a wet vacuum and the floor rinsed thoroughly with clean water. At this point it became evident that the tiler who installed the floor previously had left grout smears on the surface in some places (aka grout haze) and this was removed using a solution of Tile Doctor Grout Clean-Up applied with a black pad and thoroughly rinsed again to remove any trace of cleaning product. The floor was then dried as much as possible using a wet vacuum and left overnight.
Slate Floor Malmesbury After Cleaning

Sealing a Slate Floor

We returned the next day and tested the floor for damp by using a damp meter to ensure it was dry enough to seal; the test came back OK so we proceeded to seal by applying five coats of Tile Doctor Seal & Go which adds a nice subtle sheen to the tile and will protect it from staining for some years to come.
Slate Floor Malmesbury After Sealing Slate Floor Malmesbury After Sealing
    Source: UK wide Tile, Stone and Grout Cleaning service

Monday, May 11, 2015

Deep Cleaning an Indian Sandstone floor at a Cottage in Cleestanton

This consumer had bought a cottage in Cleestanton (Ludlow) six months agowhich has a beautiful Indian Sandstone flagstone floor installed across the ground floor. The Sandstone slabs were however in an unfortunate state and had not been deep cleaned for some time, in fact it was very easy to see where the most foot traffic had been because of the dark lanes visible on the stone.

Cleaning Riven Sandstone Tiles

I cleaned the floor with a dilution of Tile Doctor Remove and Go which was left to seep into the Sandstone before being worked in with a rotary machine fitted with a scrubbing brush attachment. I used a brush rather than a pad since the floor had a riven texture and a flat pad may not have had the desired effect. Tile Doctor is an effective coatings remover ideal for removing sealers for tile, it’s also a good cleaning product having said that there were areas where the old sealer was really stubborn so and I had to retreat those and use steam in the really difficult areas.


Once the floor was stripped back I gave it a thorough rinse with water using a wet vacuum to remove the liquids from the floor and get it as dry as possible.

Sealing Riven Sandstone Tiles

For four days, the floor was left to completely dry out and then I returned to seal it first checking with a damp meter that it was dry. All was as expected so proceeded to seal the stone using four coats of Tile Doctor Seal and Go which is a water based sealer (no smell) and ideal for these types of floor as it offers good protection whilst adding a nice sheen to the surface.

The client was really happy with the result and can now see all the amazing detail and character in this natural stone floor including evidence of fossilised plants.

Ghastly Terracotta Tiled Floor Restored in North Chailey

This customer in North Chailey, near Haywards Heath and Uckfield, called me up asking for her Terracotta tiled kitchen floor to be cleaned and sealed. To quote the customer she said the tiles were “horrendous” and upon inspection it was indeed true.

Nevertheless, I thought that most of the floor could be greatly improved but several areas around the washing machine and dishwasher were particularly soiled. Once I spoke of my concerns, the client admitted that both the washing machine and dishwasher had flooded the floor twice and leaked on a regular basis. Washing powder is very caustic and causes permanent damage that cannot be fixed.


Terracotta Tile Cleaning

I stripped off what was left of the previous sealer using a strong dilution of Tile Doctor Pro-Clean which is a heavy duty alkaline cleaner/coatings stripper ideal for tiled surfaces. We let the solution dwell on the floor for 10 to 20 minutes before working it into the tiles by hand and deck brush, usually I’d use a rotary buffing machine with a scrubbing pad but it was quite a narrow kitchen. Once I’d washed it down and sucked up any excess water with the wet-vax I left it for two days to dry.

Terracotta Tile Sealing

After 48 hours, I went back and sealed the Terracotta tiles using four coats of Tile Doctor Pro-Seal which is a water based (no smell) penetrating sealer recommended for food preparation areas such as kitchens. Sealers can take some time to apply as you have to wait for the first coat to dry before applying the next, luckily however we were blessed by a warm windy day which blew through the kitchen and increased the drying time. You can notice from the images on this page the amazing conversion that was achieved. Whilst I was waiting for the sealer to dry I noticed their patio was in need of attention so I gave that a blast from my industrial pressure washer.

Reviving a New Laid Black Limestone Floor in Pillerton Hersey

For this year, this is the second black limestone tiled floor wherein the tiler struggled to get the right finish. In this case the floor tiles were newly fitted but unfortunately the tiler had decided not to seal the tiles prior to grouting which resulted in grout becoming trapped on the tile surface (aka Grout Haze). In order to rectify this problem, brick acid was used which will remove the grout but this stripped off the black finish turning the tiles grey then in a further attempt to improve the appearance the tiles were covered in boiled linseed oil which just sat on top locking in the grout haze. Linseed oil is a traditional method of sealing stone tiles and is normally used with Terracotta tiles but it’s not ideal and does not have the performance of a modern sealer, certainly in this case it didn't help at all.

Eliminating Oil and Grout from Limestone Tiles

To address the issues with the floor it had to be fully stripped back to remove the linseed oil so the grout haze problem could be tackled. This was done by applying a solution of Tile Doctor Remove and Go which was mopped on to the floor and left to soak in for a while before being scrubbed using a rotary machine fitted with a black pad. This process lifted the linseed oil off the tiles and was removed using a wet vacuum.


Once the Linseed oil was gone I could get to work on the grout haze and for that we have a special product called Grout Clean-Up, it’s a very strong acid based product and normally you would need to be very careful using it on stone as it can damage the stone, in this case however the surface of the Limestone had already been damaged by the brick acid. Once the floor was free of coatings and the grout haze problem had been treated I gave the floor a thorough rinse down to make sure all trace of products had been removed from the floor before the next step.

Sealing Limestone Floor Tiles

There was a lot of Limestone to cover so on the first day I focused on the kitchen and on day two the lounge, hallway and toilet. On the third day I went over the whole area applying Tile Doctor Stone Oil to restore the black colour of the Limestone that had been damaged by the brick acid.

By the third day the Grout Haze was gone but was still looking washed out. To bring back the colour into the black limestone, it was treated with stone oil which as you can see turned the tiles back to their original colour. Stone Oil is an interesting product, if you check the tin it will tell you it’s “an easy to apply pre-polish impregnating sealer, ideal for low porosity stone and terracotta designed to enhance the colour and texture of floors and improve mechanical strength once cured”. Certainly from the customer’s point of view the floor now looks how it was intended and they were much relieved.

Sandstone Flagstone Upgrade In Grange Over Sands

We got a request to take a look at these Sandstone flagstones at a house in Grange over Sands, the request stated that all it required was a usual clean and Re-seal however once we took a look at the floor it was clear a lot more was involved and the floor was in need of a facelift including Sandstone floor restoration, grout replacement and paint stripping.


Cleaning Sandstone

In order to have the floor clean, I decided to apply a strong dilution of Tile Doctor Remove and Go combined 50/50 with NanoTech UltraClean to give it more cleaning power. We normally use Remove and Go to remove old sealers but it works just as well softening up paint splashes so they can be removed. It was left to seep into on the flagstones for twenty minutes before we begun scrubbing into the tiles with a rotary machine fitted with a scrubbing pad. The resultant muck was removed using a wet vacuum and the floor was washed down so we could get a glimpse on what was the improvement on the floor. There were quite a few stubborn areas so the whole process has to be re-done until I was happy the floor was as good as I could get it and at that point rinsed the whole floor down again with clean water to neutralise the floor before dealing with the missing and loose grout which was replaced with a close a colour match as possible before leaving for the evening so the floor could dry overnight.

Sealing a Sandstone Tiled Floor

We left and came back the following day and tested the floor with a damp meter in a few different locations to make sure no dampness remained in the stone. The sandstone was dry so we proceeded to seal the floor with Tile Doctor Colour Grow which is an impregnating sealer that occupies the pores in the stone preventing contaminates becoming ingrained there and also as its name suggests brings out the colours in the natural stone.

Rejuvinating a Slate and Flag Stone Floor in Cookham

Below are the details of a tired Slate and Flag Stone floor installed in a house in Cookham, Berkshire; the consumer was actually the son of an existing customer whose floor we had also recently cleaned. The existing sealer had been wearing away over time and the floor had becoming progessively ingrained with grime making it hard to clean, the solution was to strip the floor back and re-seal it.

Stone Floor Cleaning

To tidy and strip the tiles of the remaining sealer the floor was soaked in a solution of Tile Doctor Pro-Clean and was buffed using a weighted rotating machine to help loosen the soils and break down the sealers. The soiled solution was taken away and it was clear some areas of the floor needed thorough attention to remove the sealer so an application of Tile Doctor Remove and Go was applied which was left to seep in for a while to assist in breaking down the sealer before being scrubbed again. Once the floor was clean and the sealer was gone the floor was rinsed using our hot truck mounted extraction system and was then left to dry for 36 hours.

Stone Floor Sealing

When we came back, I checked to make sure the floor was completely dry and ready for sealing, all was well so I then sealed both the Slate and Flagstone floors with six coats of Tile Doctor Seal and Go using a paint pad applicator.

The floor looked much enhanced when finished. I took time to explain how to maintain the cleanliness of the floor using a Neutral Cleaner that will extend the life of the sealer, the consumer was glad with the service and left the following comment on the Tile Doctor feedback system.

“We are very pleased with the results.”
Peter Young, Cookham”