Monday, March 29, 2021

Middlesex Stone Floor Expert Shares Secrets of Travertine Floor Renovation

Our client had inherited this Travertine floor when purchasing in a lovely street in Walton-On-Thames, close by was the River Thames which runs all the way into London. The new owners were unhappy with the floor in that it did not look very clean, and they were keen to get this rectified. I arranged a site visit to survey the floor and see what could be done to restore its appearance. 

 
Travertine Floor Before Cleaning Walton-on-Thames

The floor itself was in good physical condition, however, it was apparent from the level of dirt ingrained in the stone that it had not been maintained very well by the previous owner. I carried out a small test clean which came out well and they could see straight away what the floor should look really like! They were happy with my renovation quote and we agreed a mutually convenient time where I could work in relation to the COVID guidelines.


Cleaning a Travertine Tiled Kitchen Floor

The Travertine floor was scrubbed using a mixture of Tile Doctor Pro Clean and Remove and Go. These are heavy duty cleaning products designed for use on tile and stone can be combined to form a powerful cleaning/stripping solution which is left to dwell on the floor surface. After a short while the solution was worked into the stone using a rotary machine fitted with a black scrubbing pad.

This cleaning recipe works extremely well breaking down dirt, stains, and grease in the stone. Following a machine scrub and a more manual hand scrub of the grout lines, we then pressure rinsed the soil away and then it was extracted using an industrial wet vacuum. In a couple of areas, it was necessary to repeat the process to ensure it was completely clean. Once we were satisfied that the stone was fresh and clean, the floor was left to dry off overnight, so it would be ready for sealing the following day.

 
Travertine Floor During Cleaning Walton-on-Thames


Sealing a Travertine Tiled Kitchen Floor

After drying overnight, the floor was checked with a damp meter to make sure it was dry. Once reassured I started with the application of the fresh sealer to the floor using Tile Doctor Colour Grow Sealer which is a colour enhancing sealer that works from within by soaking into the pores of the stone. Several coats were applied allowing each one to dry before applying the next. This sealer does not provide a glossy finish, just a nice natural sheen. This brought back the contrast and natural colours in the stone, whilst adding protection to stone for many years to come.

 
Travertine Floor After Cleaning Walton-on-Thames

The client was very happy with the work we carried out, the floor had come up much better than they had expected, and it really made a difference to the lovely kitchen space. The floor looked like new. I recommended the regular use of Tile Doctor Stone Soap for future cleaning which will keep the floor in great condition and ensure the longevity of the newly applied sealant.


Friday, March 26, 2021

Non Sanded vs. Sanded Grout: Which to Use?

Sanded grout is just one of the two main types of grout available for construction use. Home builders use grout to secure the joints between tiles of various sorts. Laying the right grout with the right tiles needs careful consideration, depending on the type of project.

Sanded Grout
Sand can be added to all grout to supplement the strength in the tile joint. The amount of sand added depends on what sort of tiles you are using. If the tile joints are equal to or larger than 1/8th inch, sand should be used to increase the joint strength.

Ceramic tiles
Ceramic tile grout needs less or no sand at all. If the joint is a thin joint between the set tiles and no greater than 1/8th inch, then there is less reason to use sanded grout. Non-sanded grout is usually Portland cement based. It also contains colored pigments and water retardant additives.

Conclusion
When you decide which grout to use, you should consider the size of the joints, the type of the tile, and the base upon which the tiles will be laid, for example, whether you are laying tiles on the floor or they are being set onto a wall.


Source: www.DoItYourself.com

Friday, March 19, 2021

Removing Drips of Wall Paint from Ceramic Tile Floors

If you have ceramic tile floors and you paint the walls, there is a good chance that you will get paint on the ceramic tile at some point. When you do this, the process of removing the paint is not difficult but it will take a little bit of work on your part. Here are the basics of how to remove drips of wall paint from ceramic tile.


Scrape the Paint

One of the good things about ceramic tile is that it is hard and flat in many cases. This means that you should be able to scrape the majority of the paint drips off of the tile. In order to do this, you can use a putty knife. Take the putty knife and angle it. Then apply pressure to the paint and scrape it up. 


Scouring Pad

You may also need to remove the paint with a scouring pad. If the putty knife does not work or if you get paint on the grout, you can use a scouring pad to get it up. Put some soapy water on the spot and then use a scouring pad to try to remove it. In most cases, this should remove the paint.


Source: www.DoItYourself.com


Sunday, March 14, 2021

Tile Restoration Expert Details Floor Restoration Project in London

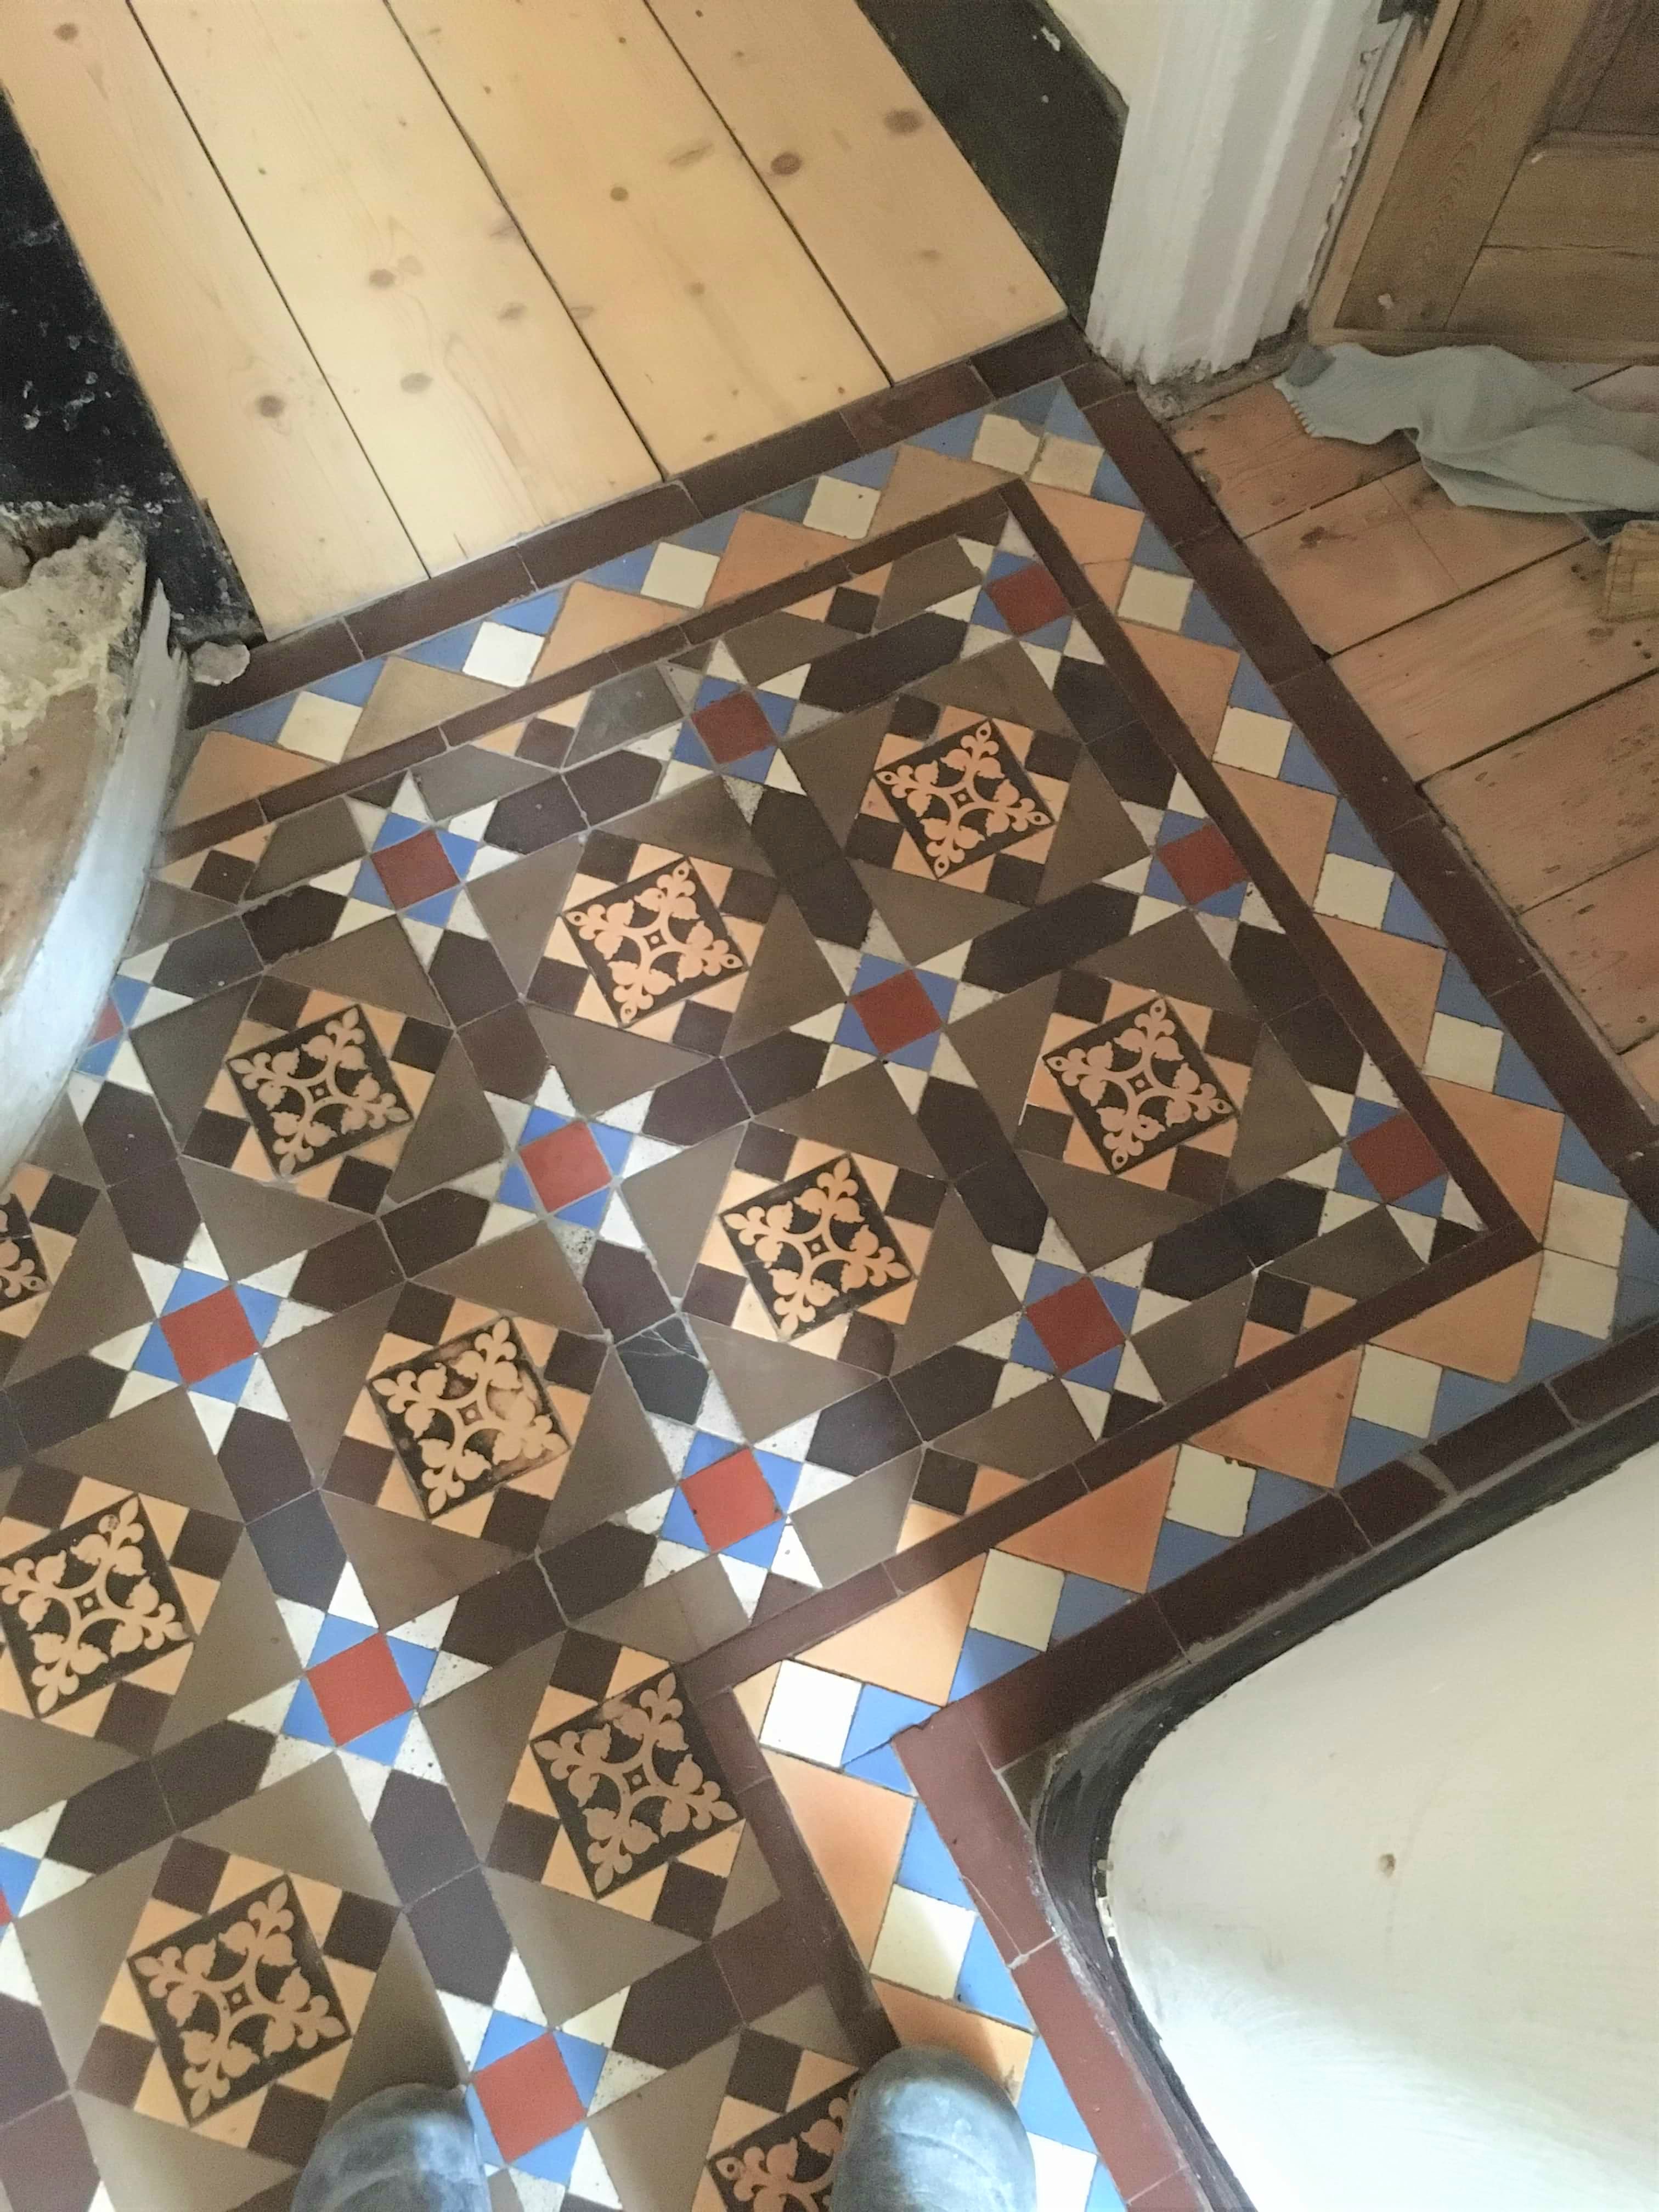
This client owned a property in Haringey, North London, which had a classic Victorian tiled floor laid in the hallway. Unfortunately, the floor was in a bad state, the tiles were dull and dirty and there was a missing section by the bottom of the stairs that had been back filled with cement. Fortunately for him however his neighbour decided to remove their front path which was made with matching tiles and so he was able acquire replacements from him. He then contacted us to see if we could use those tiles to fill in the missing ones and revive the whole floor with a clean and seal at the same time.

 
Victorian Tiled Floor Before Restoration Haringey

Before quoting for the restoration work, I paid a visit to the property to survey the floor. I can give quotes from photographs, but much prefer to visit and conduct a test clean, and in this case, I was able to check the spare tiles he had acquired. From that I emailed a quote which the client was happy with, so we arranged a date to return and do the work.

 
Victorian Tiled Floor Before Restoration Haringey

Cleaning and Reviving a Victorian Tiled Hallway Floor

This was a large job, so I teamed up with Jackson Davis the Central London Tile Doctor and whilst Jackson started on cleaning the floor, I took the reclaimed tiles outside and carefully grinded off the excess cement and adhesive from them and cleaned them by hand. We managed to do this by about 3pm. Jackson and I work on a lot of jobs together so it made sense to work as a bubble from the beginning of Covid so we could continue to work together, with two of us on the job it also means we can get the job done quicker.

Cleaning the floor involved applying a 200-grit diamond burnishing pad to the tile lubricated with a strong dilution of Tile Doctor Remove and Go, the slurry was then rinsed off the floor with more water and then extracted with an industrial vacuum. The process was repeated on stubborn areas until we were satisfied the tiles were really clean.

We then moved onto carefully removing the cement from the floor at the bottom of the stairs and cleaning up the base. Once done the newly renovated replacement tiles were laid in place using a rapid setting adhesive which meant they could be grouted later that day before heading home. The floor was then left overnight to dry off.


Sealing a Victorian Tiled Hallway Floor

We then returned the following day and took some moisture readings with the damp meter. The readings were within the expected range, so we were good to go ahead and apply the sealer. If the floor is not dry the seal will not cure properly, and this can lead to a patchy finish.

 
Victorian Tiled Floor After Restoration Haringey

Three coats of Tile Doctor Colour Grow were applied to seal the tiles. This is a colour intensifying impregnating sealer that works from with and will gives the Victorian tiles durable protection, ideal for a high traffic area such as the hallway. In addition, Colour Grow is a fully breathable sealer so it will allow for moisture to rise through the tile and evaporate, this is critical for floors of this age that will not have the benefit of a damp proof membrane installed under the floor.

 
Victorian Tiled Floor After Restoration Haringey

The hallway is now looking transformed by the work we did, we certainly thought so, but more importantly our client was very happy with the result and now has the floor he hoped for.


Wednesday, March 10, 2021

Removing Drips of Wall Paint from Ceramic Tile Floors

If you have ceramic tile floors and you paint the walls, there is a good chance that you will get paint on the ceramic tile at some point. When you do this, the process of removing the paint is not difficult but it will take a little bit of work on your part. Here are the basics of how to remove drips of wall paint from ceramic tile.

Scrape the Paint

One of the good things about ceramic tile is that it is hard and flat in many cases. This means that you should be able to scrape the majority of the paint drips off of the tile. In order to do this, you can use a putty knife. Take the putty knife and angle it. Then apply pressure to the paint and scrape it up. 

Scouring Pad

You may also need to remove the paint with a scouring pad. If the putty knife does not work or if you get paint on the grout, you can use a scouring pad to get it up. Put some soapy water on the spot and then use a scouring pad to try to remove it. In most cases, this should remove the paint.


Source: www.DoItYourself.com

Sunday, February 21, 2021

Grout Restoration and Recoloring

Grout restoration and recoloring can be a major concern whether you just bought an older home or have developed dirty, dingy lines between your tiles over time. Grout is not just the glue that holds your tiles together; it can also be an important decorative element in your floors and walls. Unfortunately, grout is also prone to absorbing liquids and aging as it comes into contact with air, water and chemicals, which can result in an unsightly appearance.

Stained and discolored grout is particularly frustrating because it can poorly affect the visual appearance of the space in such a dramatic fashion. Fortunately, as you’ll find out below, there are several DIY methods ranging from the cheap and easy to the slightly more expensive that anyone can try to restore their gout to its former glory.

What You'll Need:

  • Water
  • Vinegar
  • Heavy-duty cleaner
  • Acid-based cleaner
  • Grout dye
  • Grout Respirator

Simple Fixes: Vinegar and Water

If you have a simple case of grout discoloration that has resulted from stagnant water in the bathroom or a spill in the kitchen, a first line of defense is a solution of water and vinegar. Mix one part warm water with one part vinegar in a bucket, and scrub the affected area with a soft brush or sponge. Repeat as necessary, then rinse and dry.

Other Options: Chemicals Cleaners

For severely discolored grout, chemical solvents might be the answer to restoring the grout to its original color. Start off with heavy-duty cleaners intended for removing rust and calcium deposits, like those available at most grocery stores. Scrub carefully without damaging the tiles. If this doesn’t do the trick, kick it up a notch with a powerful acid-based cleaner. When using this type of cleaner, be cautious: wear rubber gloves and make sure you have adequate ventilation. You’ll also want to test these cleaners on a small piece of tile first to make sure they won’t be damaged.

Grout Dyes

Still can’t get that grout white, light-brown or any other desired color? Try one of the grout dyes that are readily available at hardware stores. If you don’t have the time or energy to replace the grout completely, choose one of these colorants (available in white, gray and many other colors) to brighten up the appearance of your floor. Start by thoroughly cleaning and drying the entire working surface. Then carefully apply the colorant to the grout (avoiding tiles) with a brush, let dry and enjoy. A good quality colorant can retain its pigment for over 10 years.

Repairing Cracked Grout

If your grout is also cracking, flaking and crumbling, then it can’t just be restored: it will need to be replaced. First, verify that your damaged grout isn’t a sign of severe water damage under the tiles, which would necessitate a much more intensive job. If the floor or wall is fine, then use a utility knife to scrape out the old, damaged grout. Mix up the new grout and spread it in between the tiles with a trowel, quickly wiping the excess away with a sponge. Make sure to take care of any drips within 30 minutes so that the grout doesn’t set on the tile.


Source: www.DoItYourself.com

Saturday, February 20, 2021

How to use a Pin Gun to remove Self-Levelling Compound from a Quarry Tiled Floor

We were contacted by a client from Formby asking for advice on how to remove a thick layer of floor leveller from her Quarry tiled floor. I suspect at some point in the past a previous owner had decided to cover the tiles with lino and a cement-based levelling compound was applied to level the floor first. My client had tried to remove it herself but found it very hard going and after realising she had quite a project on her hands decided to call us instead and see if we could help with the restoration.

 
Quarry Tiled Floor During Self-Levelling Compound Removal Formby

I worked out a quote for the client which would include removing the self-levelling compound, cleaning up the tiles and then sealing them to improve its appearance and protect it going forward. The quote was accepted, and a date agreed for the restoration to be completed which would take two days.


Cleaning and restoring a Stone Tile Kitchen Floor

We have a variety of tools that we can use for removing cement but in this case, I decided to use an air operated pin gun. The head of the gun has long pins of different length which are fired at the floor gently chipping away at the floor compound, this made short work of breaking up the cement so it could be swept away. A lot easier than the method the client had previously tried.

Quarry Tiled Floor During Self-Levelling Compound Removal Formby Quarry Tiled Floor During Self-Levelling Compound Removal Formby

With the floor clear of cement, it was given an acid wash with Tile Doctor Acid Gel scrubbed in with a buffing machine fitted with a black pad. The acidic formula cleans up the stone of old cement including fine particles of dust. Afterwards the gel was rinsed off the floor with water and extracted with a wet vacuum.


Sealing a Stone Tiled Kitchen Floor

We let the floor dry out overnight and returned the next morning to apply the sealer. For the best results, the stone needs to be dry so before sealing I always take several moisture readings with a damp meter to make sure. The results were good so the first of what would be three coats of sealer were applied to the floor. I used Tile Doctor Colour Grow for sealing, it is an impregnating sealer that works by occupying the pores in the store thereby protecting it from within, it also brings out the colour in the stone.

Once done the floor looked great, the old self-levelling compound was gone and the rich colours in the tile had been restored. In fact is was only when finished did we realise these were in fact Baked Clay Quarry Tiles, minerals are added during manufacturing to give then colour, although 95% clay they are very tough like stone. The client was over the moon with the outcome, the floor had been restored to its’ former glory.

 
Quarry Tiled Floor After Self-Levelling Compound Removal Formby

For aftercare I recommended the use of Tile Doctor Neutral Tile Cleaner to keep the floor in good condition. It is pH neutral so will ensure the newly applied sealer is not compromised and the floor will continue to look good for a long while to come.