Tuesday, April 14, 2015

Deep Cleaning Limestone Floor Tiles

This Polished Limestone floor had been laid in the communal hallway of a block of flats in Aston Clinton and as you can see from the photograph below the stone had become ingrained with dirt over time and was now overdue for a deep clean and polish. Apologies for sounding like a dentist and also the photographs as the lighting wasn’t brilliant in the corridor.

Polished Limestone before cleaning in Aston Clinton

Cleaning Limestone Tile and Grout

Due to the heavy soling of the stone and grout lines we started by applying a strong dilution of Tile Doctor Pro-Clean which is an alkaline cleaning product that’s safe to use on Stone and Grout. The solution was scrubbed into the floor using a commercial rotary machine fitted with a fitted poly brush; once the cleaning solution had become dirty the floor was rinsed with water and the process re-applied until the stone and grout were clean.

Polishing Limestone Floor Tile

Our next task was to re-build the polish on the stone using a set of Tile Doctor Diamond encrusted burnishing pads which are applied to the tile in sequence from Coarse to fine further cleaning and polishing the stone until its returned to its original condition. The pads come in a set of four and you start with the coarse pad together with a little water. This this cuts through and removes surface grime, dirt and any remaining sealer. The floor is then rinsed and you move on through the remaining pads until the polish has been restored to the tiles. This process took up much of the first day so the floor was given a final rinse and left to dry overnight.

Sealing Limestone Tiles

On the second day we returned to find the tiles had dried and we started to seal the Limestone using three coats of Tile Doctor Colour Grow which is a colour intensifying sealer that soaks into the pores of the stone bringing out the natural colours whilst providing that all important lasting protection.

Polished Limestone after cleaning in Aston Clinton


Source: Deep Cleaning Limestone flooring

Tuesday, April 7, 2015

How to Install Tile to Laminate Floor Transition Molding

Learning how to install tile to laminated flooring transition molding may be an effective way to define your space. Installing tile can give your home a brand new look and cost about half the price of other flooring types. The installation is simple for any do-it-yourself enthusiast and can be as easy as snapping the boards together like a jigsaw puzzle. But what do you do to make the transition from one room to another, especially for areas that may share functions like a kitchen dining area, where you may want to easily define one space from another? Transition molding may be the answer. You can even add a slightly different paint scheme or a Japanese panel. This tutorial will guide you through installing tile to laminated flooring transition molding.

What You'll Need
  • Screws
  • 1/4 inch Masonry bit
  • Nails
  • 1/4 inch wooden dowels
  • Screwdriver
  • Hammer
  • Transition strip
  • Transition track
  • Cutting tool


Step 1) Choose Your Style

Choose a transition track that will go with the flooring you are installing. You can even choose a different color or material to mix things up a bit. Transition molding is a decorative item.

Step 2) Measure

Measure the length you need your molding to be and use a saw or tin snips to cut it to the correct length. Sandpaper any rough edges.

Step 2) Measure the Cut Pattern

Place the track and use the pre-cut holes to mark where you will be drilling. You can use a pencil for this.

Step 3) Drill Holes

Using the masonry bit, drill at your marks 1 1/2 inch down.

Step 4) Use Wooden Dowels

Using your hammer, tap the wooden dowels into the holes you just drilled. The dowels will need to be flush with the floor, so you will have to use a flat head screwdriver to chip them down, if needed. They will not show, so do not worry if they are ugly or rough.

Step 5) Place the Track

Place your track and line it up with the holes you drilled. You should be able to screw or nail it into place using the dowels for the screws to bite into.

Step 6) T Molding

Measure the doorway you will be installing the molding in. You may wish to measure it a little big so you can avoid the door stop area.

Step 7) Mark for the Doorstop

You will need to cut the T-molding to allow for the door stop. The easiest way to do this is by turning the T-molding on its side and using a pencil to show where to cut.

Step 8) Cut the T Molding

Use your saw to cut the T-molding for length and to allow for the door stop. Use sandpaper to smooth out the rough edges.

Step 9) Install the Molding

The T-molding is installed by pressing it into place along the track. Start at one end and work your way across until complete. You can use a piece of scrap lumber and the hammer to really get a good set.


Tuesday, March 31, 2015

Rubber Floor Tiles: Pros and Cons

Environmentally conscious builders and DIY enthusiasts are using rubber floor tiles in home and commercial gyms, kitchens and other applications where non-slip, durable performance are motivating factors. In determining whether your next project might include rubber interlocking tiles, consider the following pros and cons.

Benefits of Rubber Tiles

  • Installation is easy. You'll be able to place the interlocking tiles in a number of positions, by hand or with use of a rubber mallet and very little force.
  • Manufacturers fabricate tiles that are almost seamless for a stunning visual effect.
  • Rubber tiles can be installed over most flat surfaces with very little sub-floor preparation, are very easy to keep clean and work well inside or outdoors.
  • Noise suppression is inherent with rubber flooring, so you won't have to add the expense of sound dampening materials.
  • Thick rubber will also provide shock absorption and anti-fatigue properties.

Drawbacks of Rubber Tiles

  • When new, rubber can have a distinct odor. However, the smell will dissipate with time.
  • Color matching can be tough with re-orders. Order extra tiles with your initial purchase to accommodate for damaged pieces or repairs.
  • Water seeping under tiles can sometimes cause mildew and odors. Ensure your flooring will have appropriate drainage, especially if outside.
Many rubber floor tiles are made from 100 percent recycled materials. Using them is a great way to build amazing floors with an eye on being environmentally aware.


Thursday, March 26, 2015

Stripping and re-sealing a Slate tiled floor

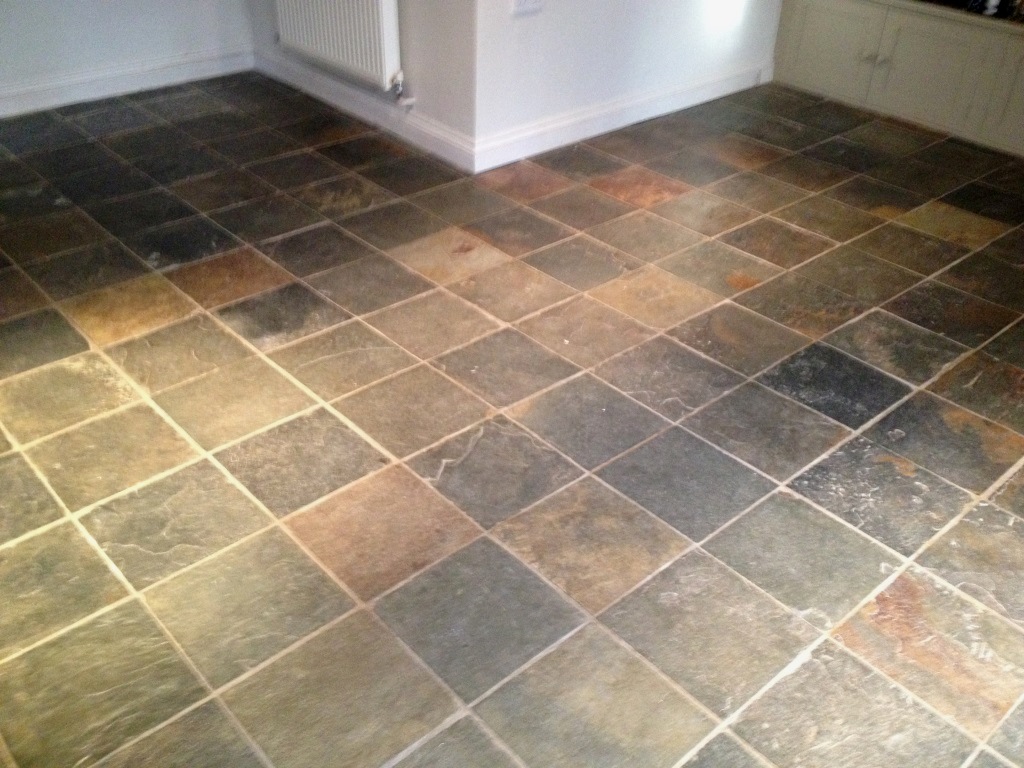
This Multi-Coloured Slate tiled floor in the kitchen of a property in Barnard Gate near Witney was in good solid condition with no damage but had been poorly maintained with layers of sealer applied to un-clean tiled; the new home owners were keen to make this floor into a talking point as you entered the property and asked us to address the problem.

Coloured Slate Tiled Floor Barnard Gate Before Cleaning

Deep Cleaning a Slate Tiled Floor

The first task was to remove the layers of sealer from the tile so on day one the floor was covered with Tile Doctor Remove and Go which was left this to dwell for a while so it could soak into the pores of the slate and penetrate the remaining sealer. The product was then scrubbed into the tile with a Rocky rotary floor scrubber and then rinsed off with clean water and dried with a wet vacuum. The next process was to clean the floor with a strong mix of Tile Doctor Pro Clean to remove the remaining dirt in the floor and to scrub the grout clean, again the rotary floor machine came in useful for this task and again the floor was thoroughly rinsed with clean water a few times and dried with the wet vacuum. I then left the floor for a couple of days to allow enough for it to completely dry before sealing.

Sealing Slate Kitchen Tiles

To seal the slate I first applied a coat of Tile Doctor Colour Grow which is an impregnating sealer the gets into the pores of the stone and also enhances the natural colours. I then applied a few coats of Tile Doctor Seal and Go which is a topical sealer that added a nice sheen finish that the customer wanted.

Coloured Slate Tiled Floor Barnard Gate After Cleaning

The end result was fantastic and the combination of the two sealers really got the best from the slate which is now very much appreciated and loved by the customer.


Source: Deep Cleaning Slate Tiles

Tuesday, February 24, 2015

Tactics for Finding Cheap Granite Floor Tiles

Granite floor tiles can provide you with one of the most beautiful floors on the market today. Granite is a very popular building material for a number of different applications. It has been used very commonly as a material for counter tops and is now becoming popular as floor tile as well. While it is very beautiful, it is usually not one of the more affordable options that you have. Granite is traditionally on the expensive side of the tile industry. However, there are times when you can secure a good deal on granite floor tiles. Here are the basics of how to find cheap granite floor tiles.

What You'll Need
  • Phone book
  • Notepad
  • Pencil
  • Internet


Step 1 - Shop Around

The first thing that you need to do is locate all of the local flooring stores in your market. Look up the locations of all of them in your phone book and then start shopping. The flooring industry is a very competitive business and they will be willing to work with you to get your business. Typically, there are many different stores in the same market that sell a lot of the same things. If you find a deal at one store, do not be afraid to try and find a better price at another store. Many of the sales associates in the market work on commission and therefore, they will be willing to negotiate with you on the price. Keep all of the quotes that you get in a notebook so that you can refer to them easily when you need them. 

Step 2 - Check Surplus Stores

Another great place that you should check with for granite tiles is a local surplus store. If you have a surplus store in your local market, you should definitely take advantage of it for any building supplies. They buy extra inventory from factories and other retailers at closeout prices. Most of the time, the companies that sell to surplus stores do so just to eliminate their inventory. As a result, the prices that surplus stores can charge are much less expensive than a retail merchant. You can often find granite tile in there that is a fraction of the cost of some other places that you may have looked. You need to be sure to buy a little more than what you need from a surplus store because you will most likely not be able to buy any more from them in the future. 

Step 3 - Internet Sales

Another great resource to use when shopping for granite floor tiles is the Internet. There are many online retailers that sell granite tiles and they do so at very low prices. Online retailers have a much lower overhead than a traditional flooring store. They just have a website and a warehouse to worry about. Therefore, they can sell to you at a deep discount. Just be careful not to pay too much for shipping with this method. 


Source: www.DoItYourself.com

Saturday, February 21, 2015

Laticrete Grout

Laticrete is a global company that makes and sells ceramic tile and stone installation products, like Laticrete grout, which are used in many different ways in construction. They have been around for more than 50 years and are a world leader in technology, products and experience where permanent and innovative installations for tile and stone are concerned.

Used for Grout

Laticrete is a producer of grout, which is a construction material that is commonly used to embed rebars in masonry walls. Other uses for grout include filling voids, sealing joints and connecting sections of pre-cast concrete. It is made from a mixture of water, cement, sand and gravel. Grout is also available in different colors. 

Laticrete Grout

One of the best performing grouts, SpectraLOCK PRO Grout, is made by Laticrete. Available in 18 colors,  it has the most accurate color samples on the market. It also promises to have color uniformity and be stain resistant. A very durable form of grout, it has anti-microbial protection and a non-staining system. It is great for narrow joints, re-grouting and never requires sealing.
Laticrete is one of the best companies where stone and ceramic tile installation is concerned. One of the many products they make and market is grout.


Source: www.DoItYourself.com

Thursday, February 19, 2015

Removing Grout Haze

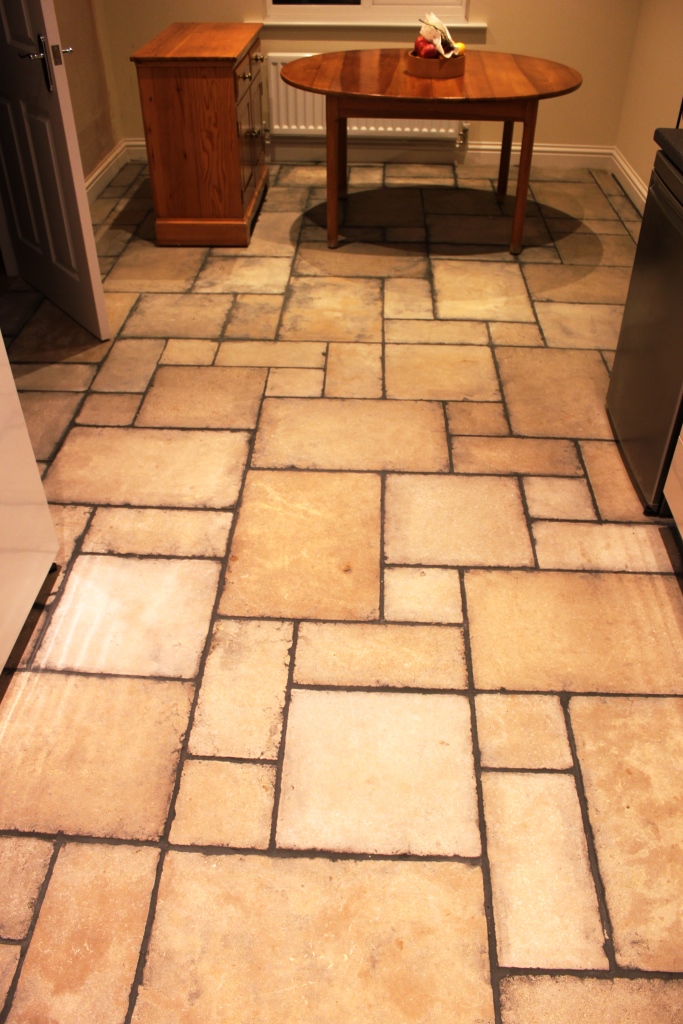
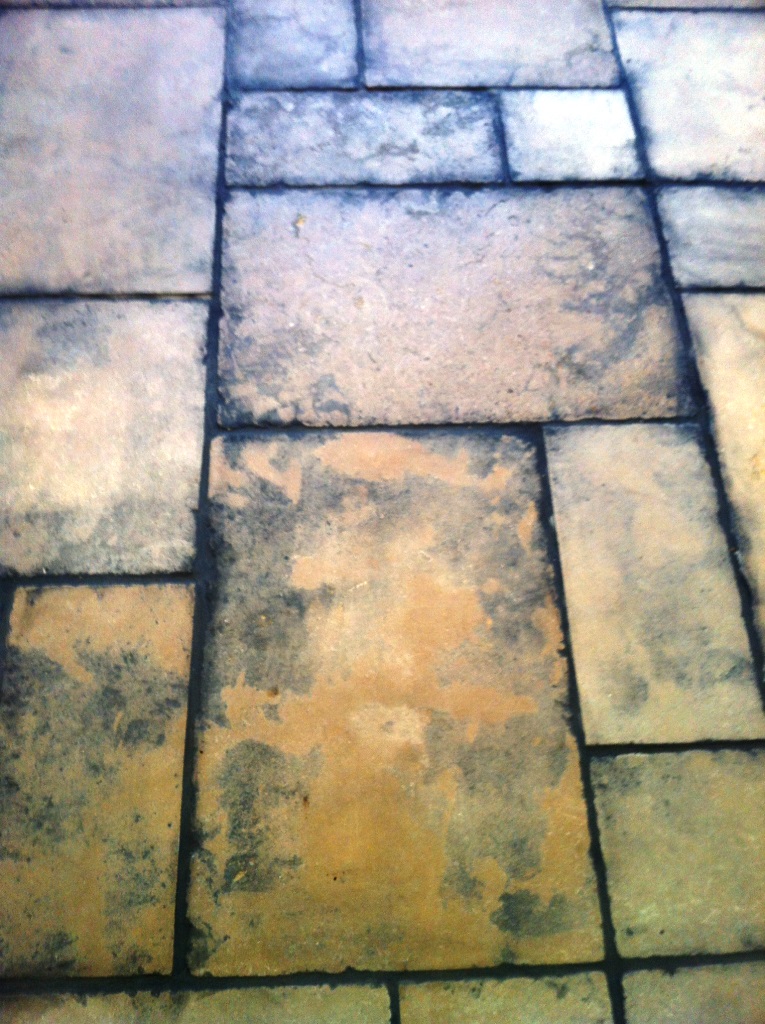
The photographs below are of a honed Limestone floor in the kitchen/diner of a house in Bingham, Nottinghamshire which had been contaminated with heavy grout haze from dark grout that had penetrated into the surface of the natural stone tiles due to the face that they had not been properly sealed prior to grouting. The customer had asked the tiler to rectify the issue, but without the proper equipment and knowledge he was unable make any impact on the problem and so we got the call.

Honed Limestone Tiled Floor in Bingham Before Cleaning Honed Limestone Tiled Floor in Bingham Before Cleaning

Milling a Limestone Tiled Floor

Before starting we cleared any furniture from the area and masked skirting boards and kitchen units. We then set about rectifying the problem with a set of Milling Pads that which remove a layer off the surface of the stone; this also has the added advantage of removing any lippage issues between the tiles. Milling natural stone flooring is a controlled process using water, and specially manufactured diamond milling pads. We have a special low speed rotary floor machine for this purpose which is weighted with 65kg to ensure the right level of tension on the floor. A rotary hand polisher and oscillating multi-tool fitted with smaller milling pads were used to remove the grout haze from the wall edges and wall corners of the tiled kitchen. Once satisfied the contamination had been removed, then the floor was thoroughly rinsed with fresh water to remove the resulting slurry created by the milling process and then left to dry off overnight.

Sealing the Limestone Floor

The next morning I arrived to find the floor had dried out enough for me to seal it which was done using a couple of coats of Tile Doctor Colour Grow which is an advanced sealer from the Tile Doctor range that impregnates into the stone and lifts the natural colours in the Limestone floor as well as providing stain protection from both water and oils spills. Once the sealer had dried I then finished it all off with a quick buff using a white buffing pad.

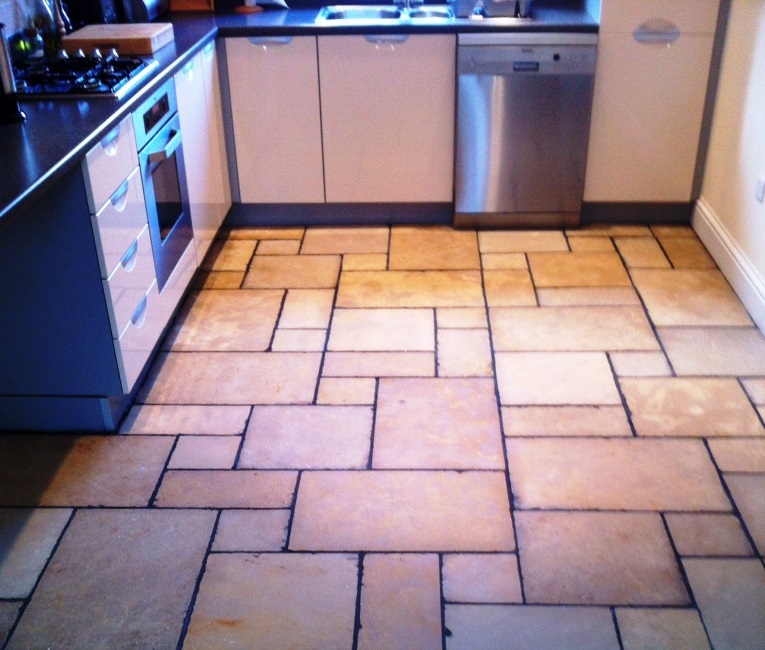
Honed Limestone Tiled Floor in Bingham After Cleaning

After an hour of sealing the floor can be walked on, but impregnating sealers take up to 48 hours to fully care so care should be taken before the floor is subjected to normal use. For maintenance I recommended regular cleaning with a damp mop using a diluted solution (1:100) of Tile Doctors Stone Soap which is PH neutral and won’t affect the sealer.


Source: Expert Limestone tile maintenance