Tuesday, October 20, 2020

How to Renovate a Terracotta Tiled Floor

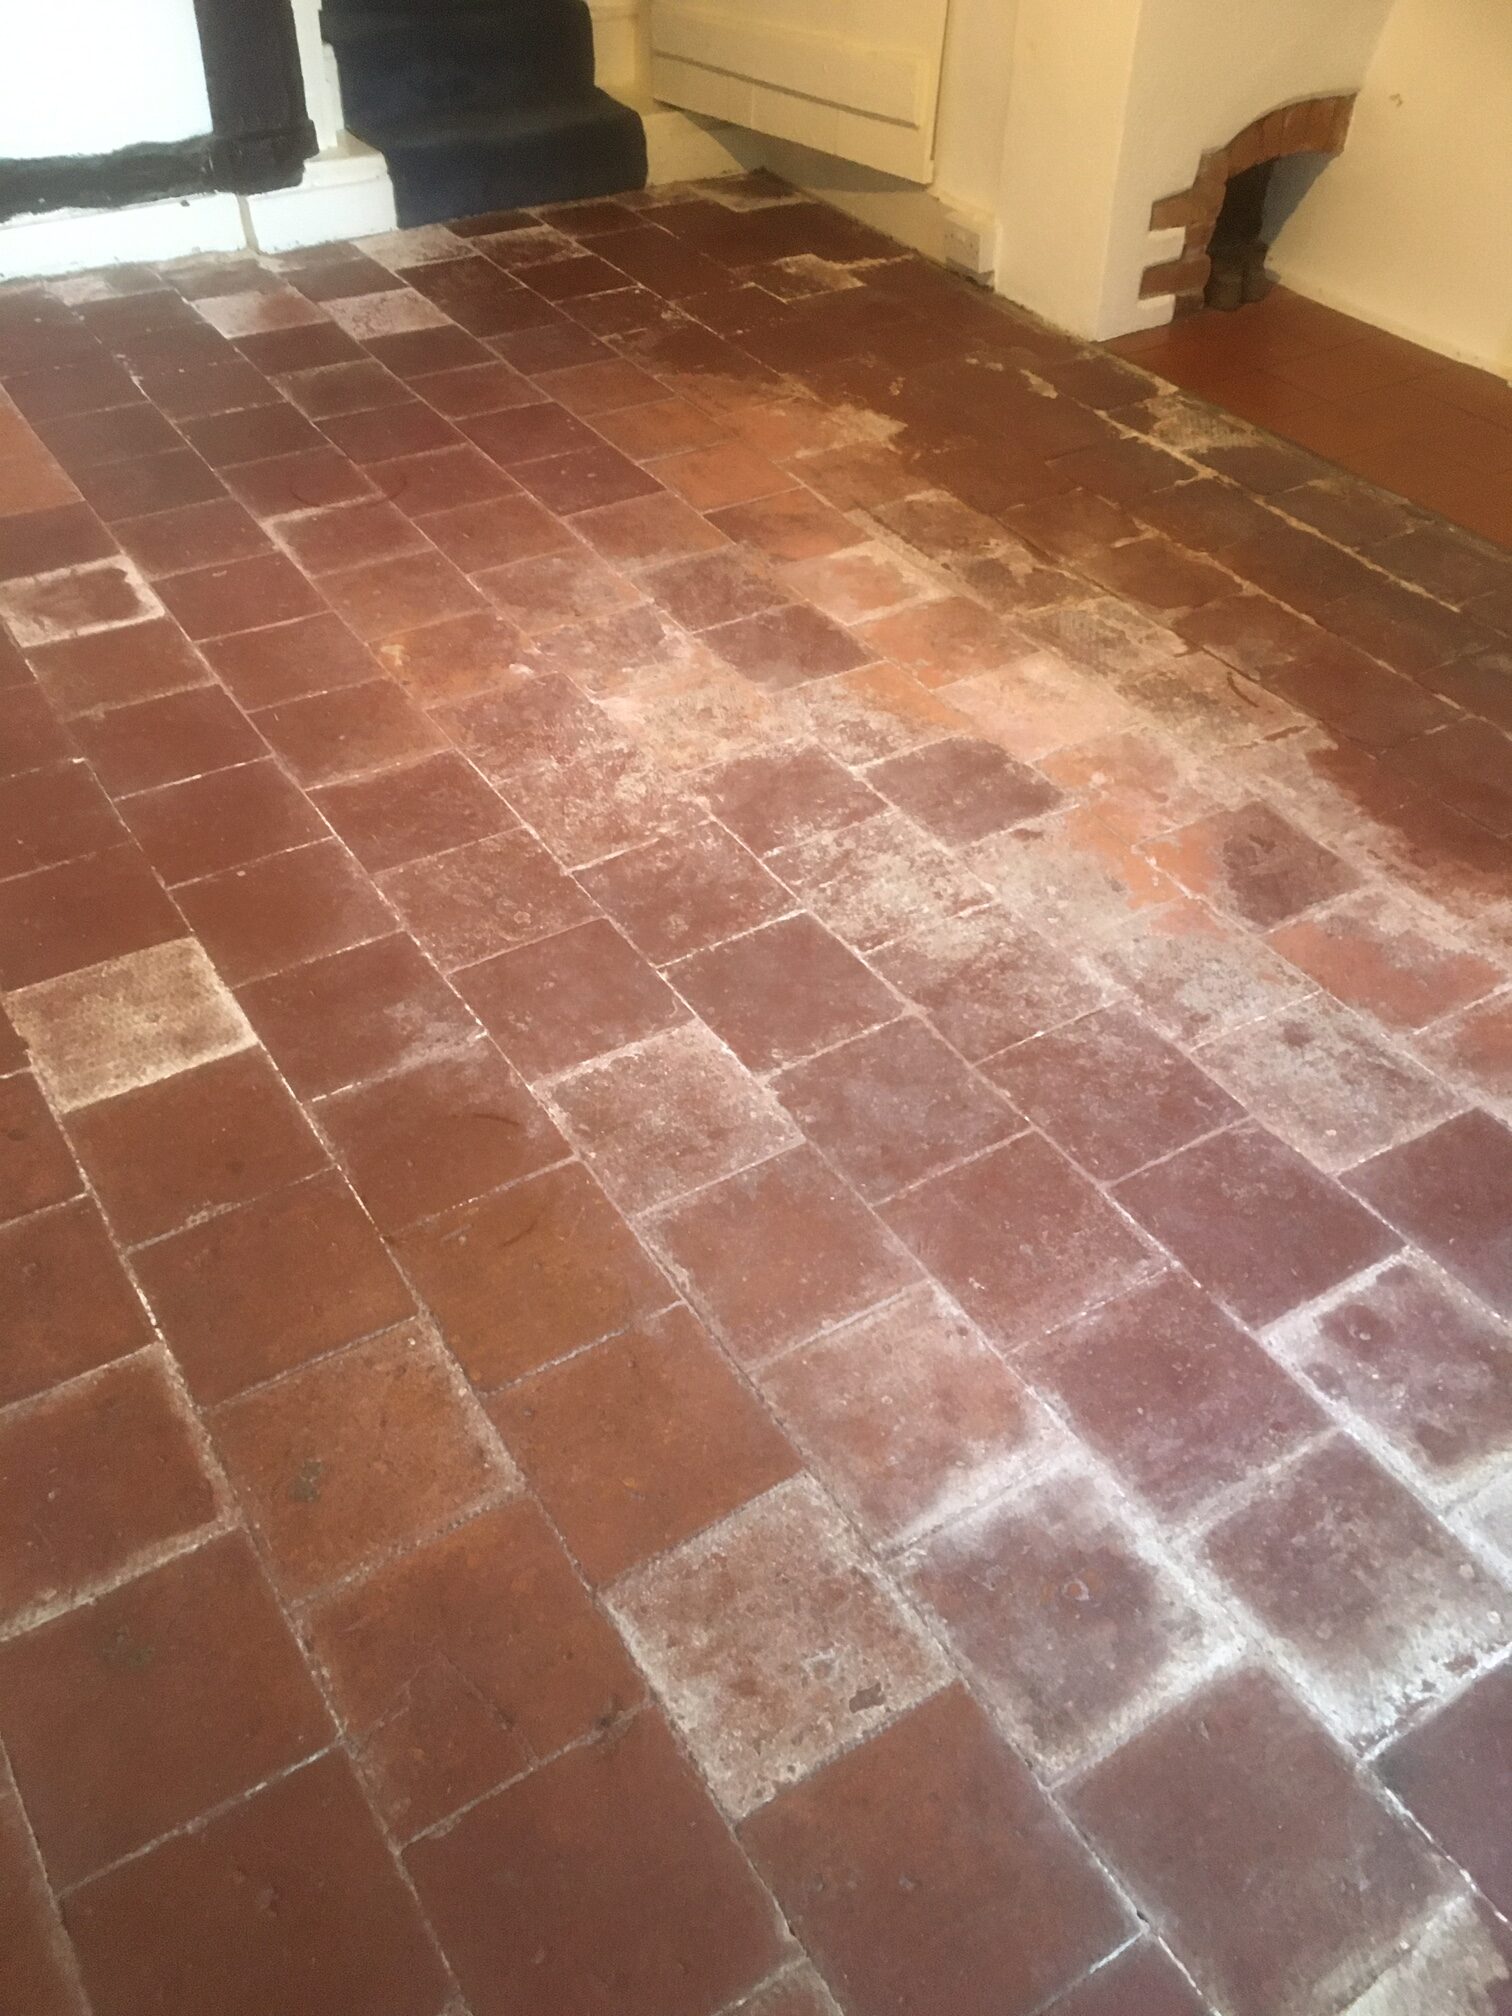
I was called in by a client from the Cotswolds market town of Witney who had lifted up a carpet to discover a Terracotta tiled floor underneath. Although the floor was in good physical condition the carpet and underlay had been trapping moisture from evaporating resulting. Old floors like this one were laid before damp proof membranes became standard so covering them up can cause damp issues. It is important to allow moisture from underneath tiled floors to evaporate unimpeded otherwise moisture can reach out to the walls resulting in rising damp.

 
Terracotta Floor Before Cleaning Witney

Moisture can also penetrate the pores of the clay Terracotta tile potentially leading to its degradation over time and in this case resulted in the appearance of white efflorescent salts being deposited on the tile surface causing unsightly staining.


Cleaning Terracotta Tile

I started cleaning the Terracotta by doing applying strong dilution of Tile Doctor Pro-Clean which is an effective alkaline tile cleaner. For best results I spread the solution on the floor and then leave it to dwell and soak in for up to twenty minutes. This gives the product time to eat into the dirt and old coatings before being scrubbed in with a black pad fitted to a rotary floor machine. This worked very well on the floor and the cleaning solution was soon dirty with the released soil which was removed using a wet vacuum and more water to rinse it away and dry the floor as much as possible.

To remove the white efflorescent staining the floor was given an acid wash using Tile Doctor Grout Clean-up which is designed for removing grout and other mineral stains from tiling. This was brushed into the tile and grout by hand and left to fizz as it reacted with the efflorescence. After another rinse and extract with the wet vacuum the floor was left to dry out for a couple of days. The next step would be to seal the Terracotta and for best results the tile needs to be dry.


Sealing Terracotta Tile

On my return I checked the tiles were dry by taking a few moisture readings with a damp meter. The readings came back fine so I need not have been concerned however Terracotta tiles being made from clay are very porous so its always a good idea to check.

Given the previous issues with damp I knew I would need to use a fully breathable sealer, so I opted to use Tile Doctor Colour Grow. This product will cope well with the moisture and contains a colour enhancing formula that really brings out the red colour of the Terracotta.
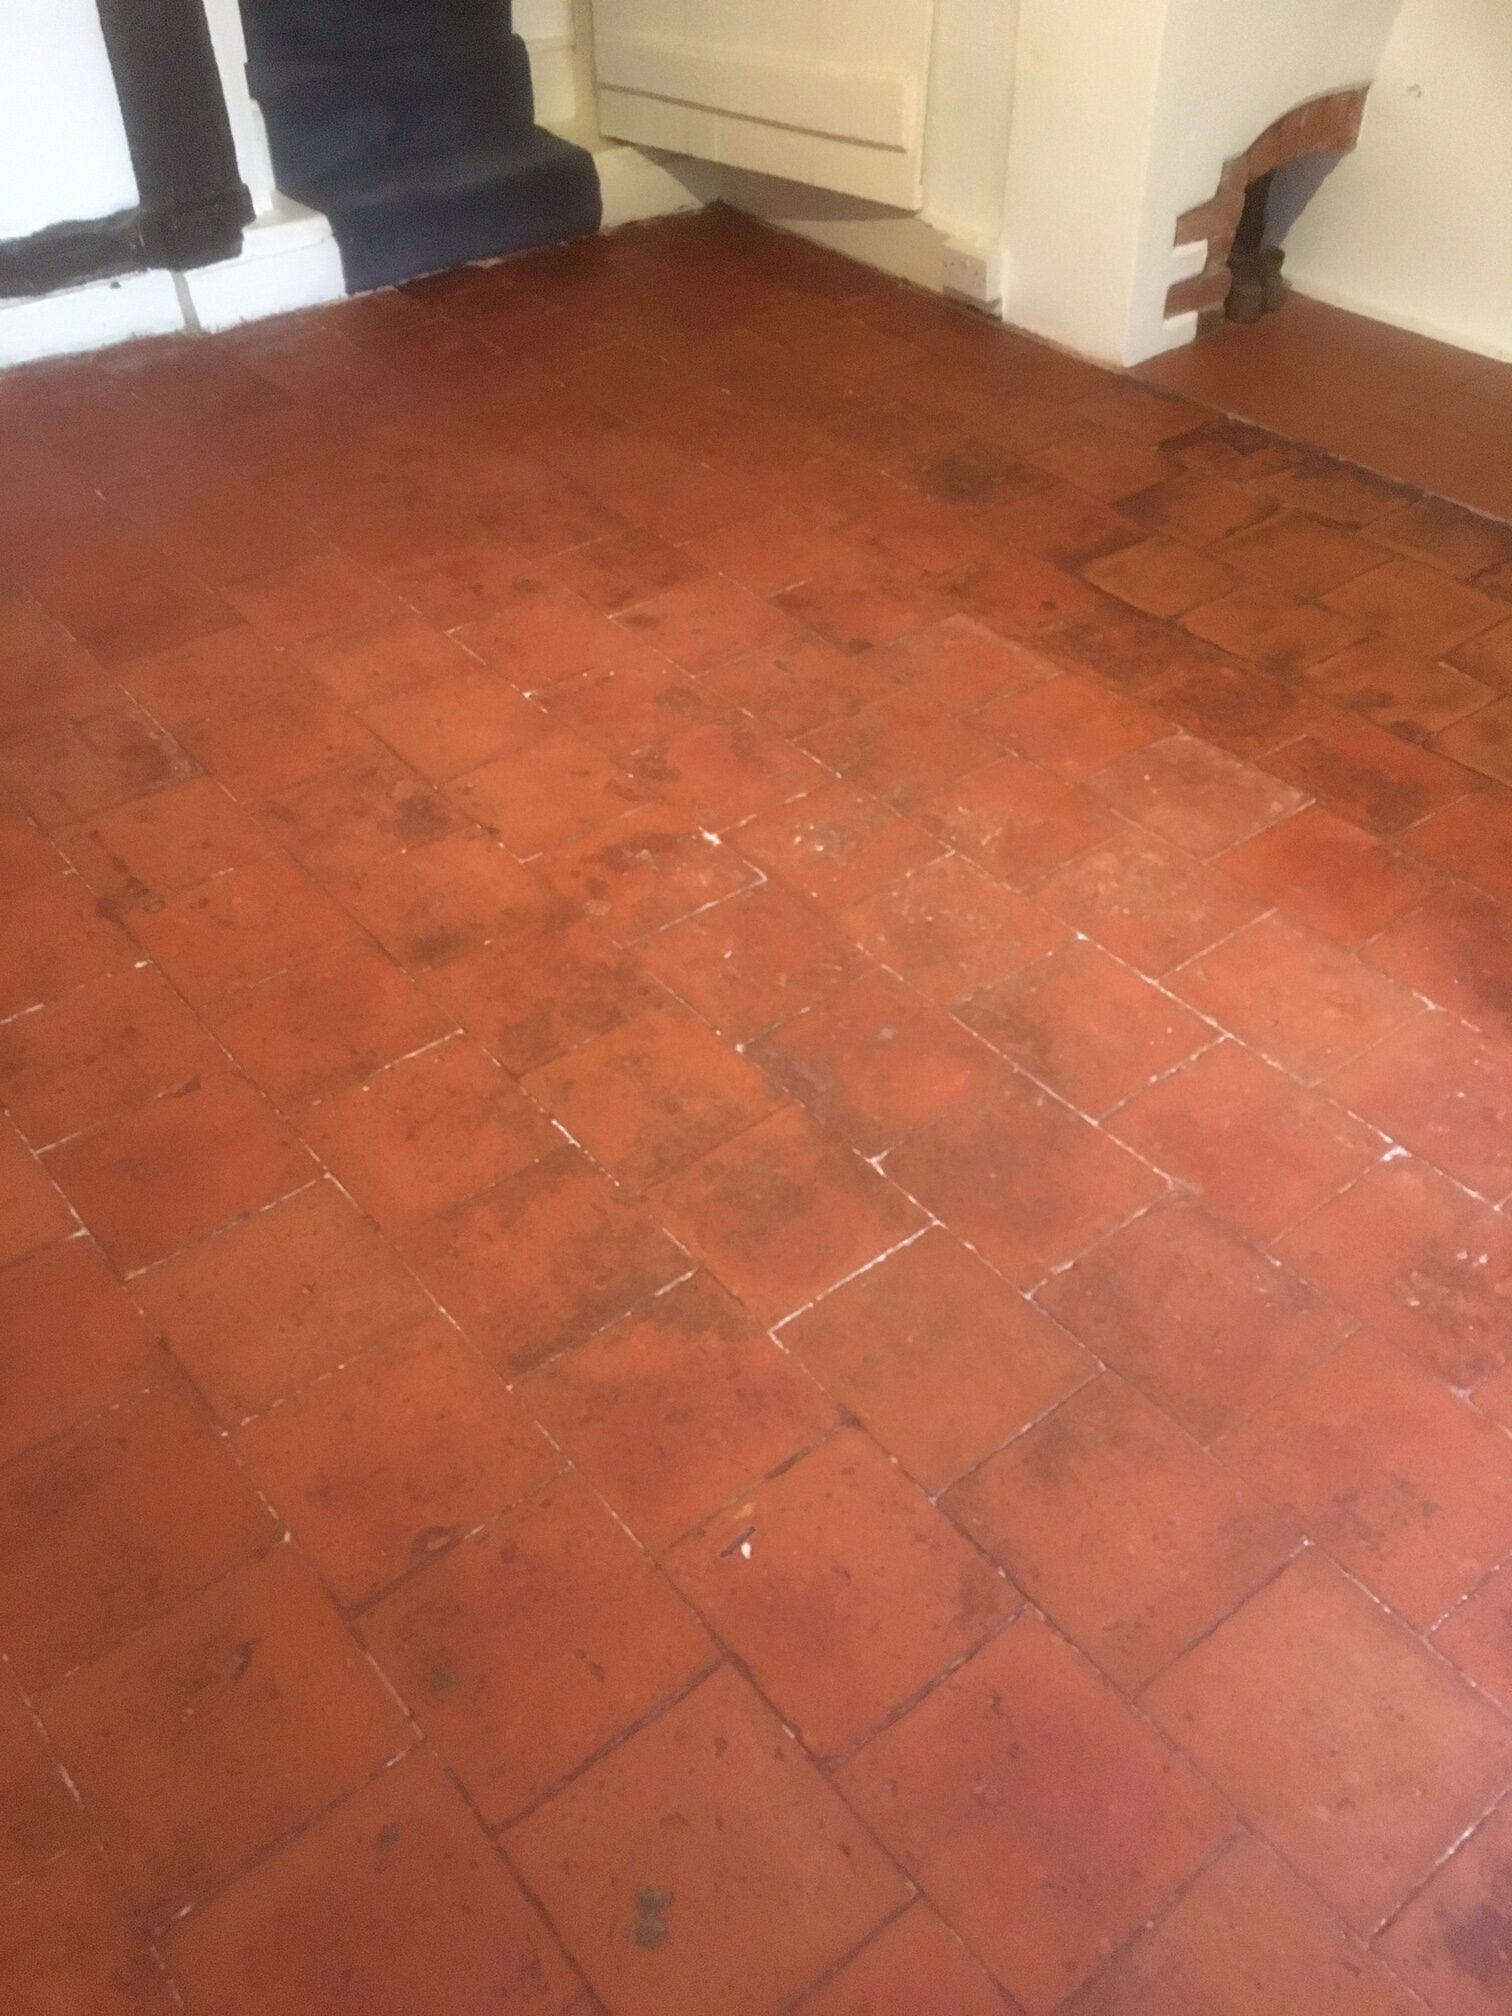
 
Terracotta Floor After Cleaning Witney

Except for a few deep efflorescent stains in the grout, the floor responded very well to the treatment and made a massive improvement to the overall appearance. My client was pleased with the transformation and the newly restored floor matched well with the character of the property.


Sunday, October 11, 2020

How to Pattern Ceramic Countertop Tiles

Depending on the size, shape and color of the tiles, the number of options can be staggering when it comes to creating a pattern for your ceramic countertop tiles. Countertops can be tiled with ceramic tiles, natural stone tiles, glass tiles with glittering metallic flakes embedded in the surface, glazed porcelain tile, and even elegant polished marble tiles. You can make patterns with mosaic sheets that are covered with a myriad of tiny ceramic tiles or design your own pattern and add personality to any room.

Thing You'll Need:

  • Measuring tape
  • 3 different colored tile samples
  • Paper
  • Pencil
  • Ruler
  • Digital camera
  • Colored pencils

  1. Research tile patterns for decor themes on the Internet or in home decorating magazines. Print or make a copy of any patterns that you would like to use as a visual aid.
  2. Measure the dimensions of the countertop and write them down. Keep these measurements handy as you go to purchase sample ceramic tiles as they help you determine the size of the tile and how they fit together.
  3. Select a main color tile, called a field color, for your countertop that matches the color scheme of your kitchen or bathroom.
  4. Select two to three accent colors tiles that go with the color scheme and your overall decorating theme and enhance the visual appearance of the field color tile. Accent tiles are a lighter or darker hue of color, or they can be a matching color that draws attention to the simple pattern on your counter top. They can be square, diamond shaped or circular and can be a single color or have a striking design painted or embossed on them.
  5. Draw a map of your countertop. Sketch tile design ideas on it to start brainstorming patterns for the ceramic tiles you selected.
  6. Cut a 1-square-foot piece of paper and draw a grid of 1-inch squares on it with a ruler. The grid helps you visualize sections of the counter space and the tile positions of your pattern.
  7. Experiment with tile patterns by laying out your ceramic tile samples on the paper grid. Start with simple designs and set the larger tiles down first.
  8. Fill spaces between the larger tiles with smaller accent tiles as you begin to design your own tile pattern.
  9. Create borders or lines of tile that goes across the entire counter near the midway point to create the illusion of a larger countertop.
  10. Place the tiles on your counter in the desired pattern to see how they look once they are installed. You may need to come up with several different patterns before you find one that fits your room perfectly.
  11. Take a picture of the tile pattern with a digital camera or draw the tile pattern and shade it with colored pencils that match the tile colors. These visuals assist with laying the tiles in your personalized pattern, as you are able to quickly see the color and position of the tiles without having to read over notes.
Tips:
  • Find fabric prints that match the style of your decorating theme and use swatches of the fabric to help you find the perfect tile color combinations for your counter top.
  • Brick patterns, straight, diagonal, checkerboard and herringbone patterns are common tile designs.