Thursday, July 30, 2020

How to Remove Bitumen and Cement from Stone Flooring

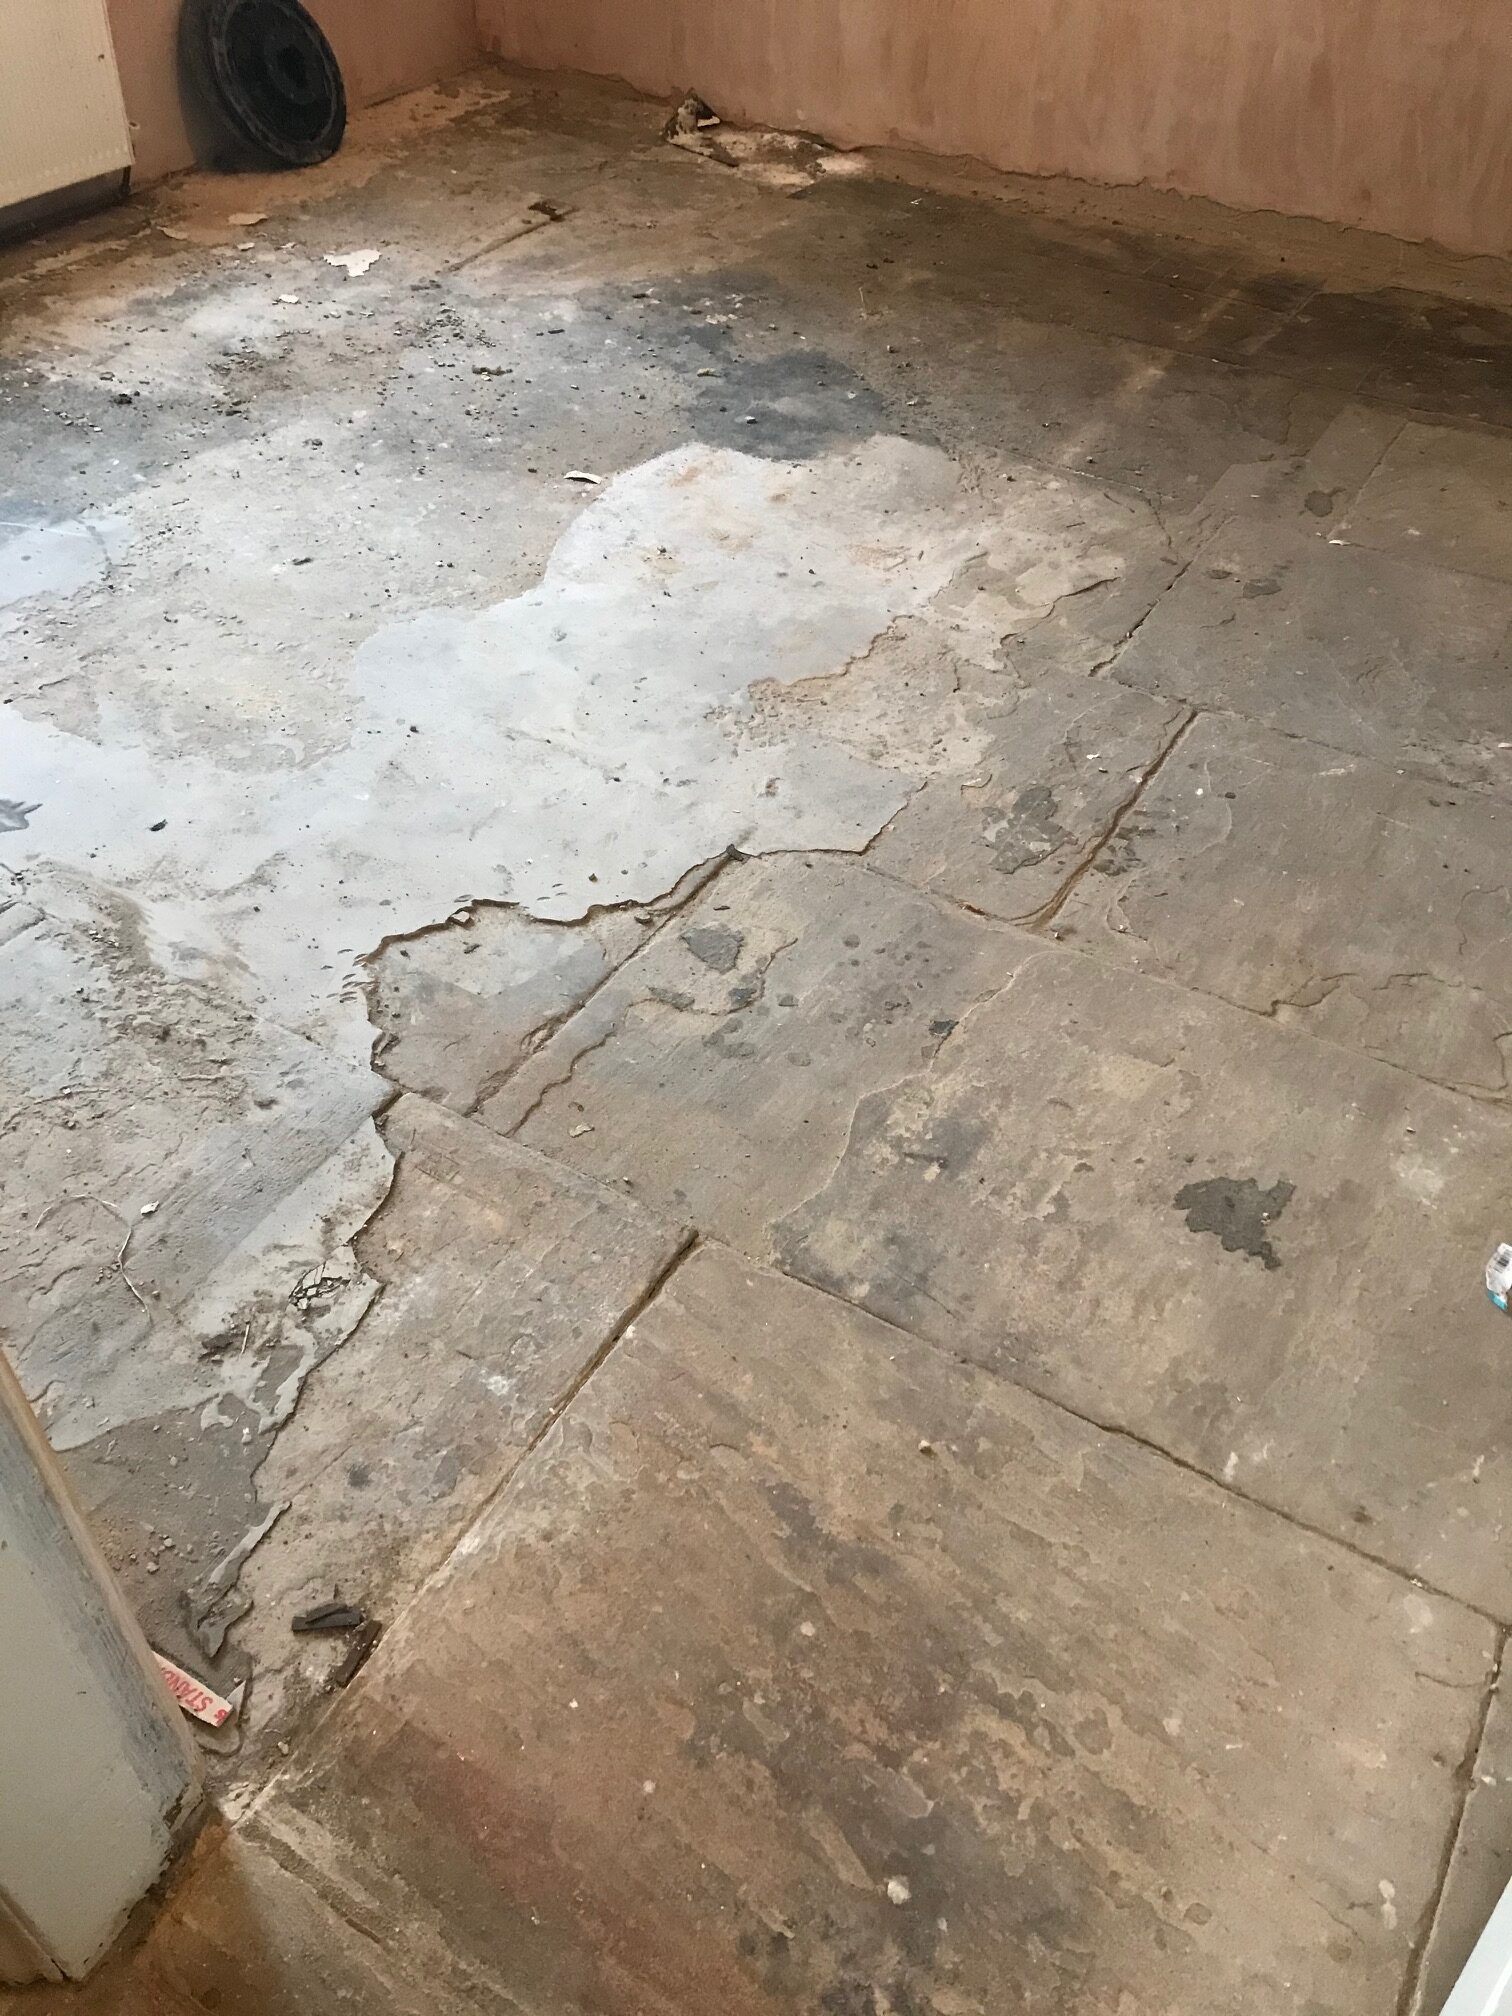
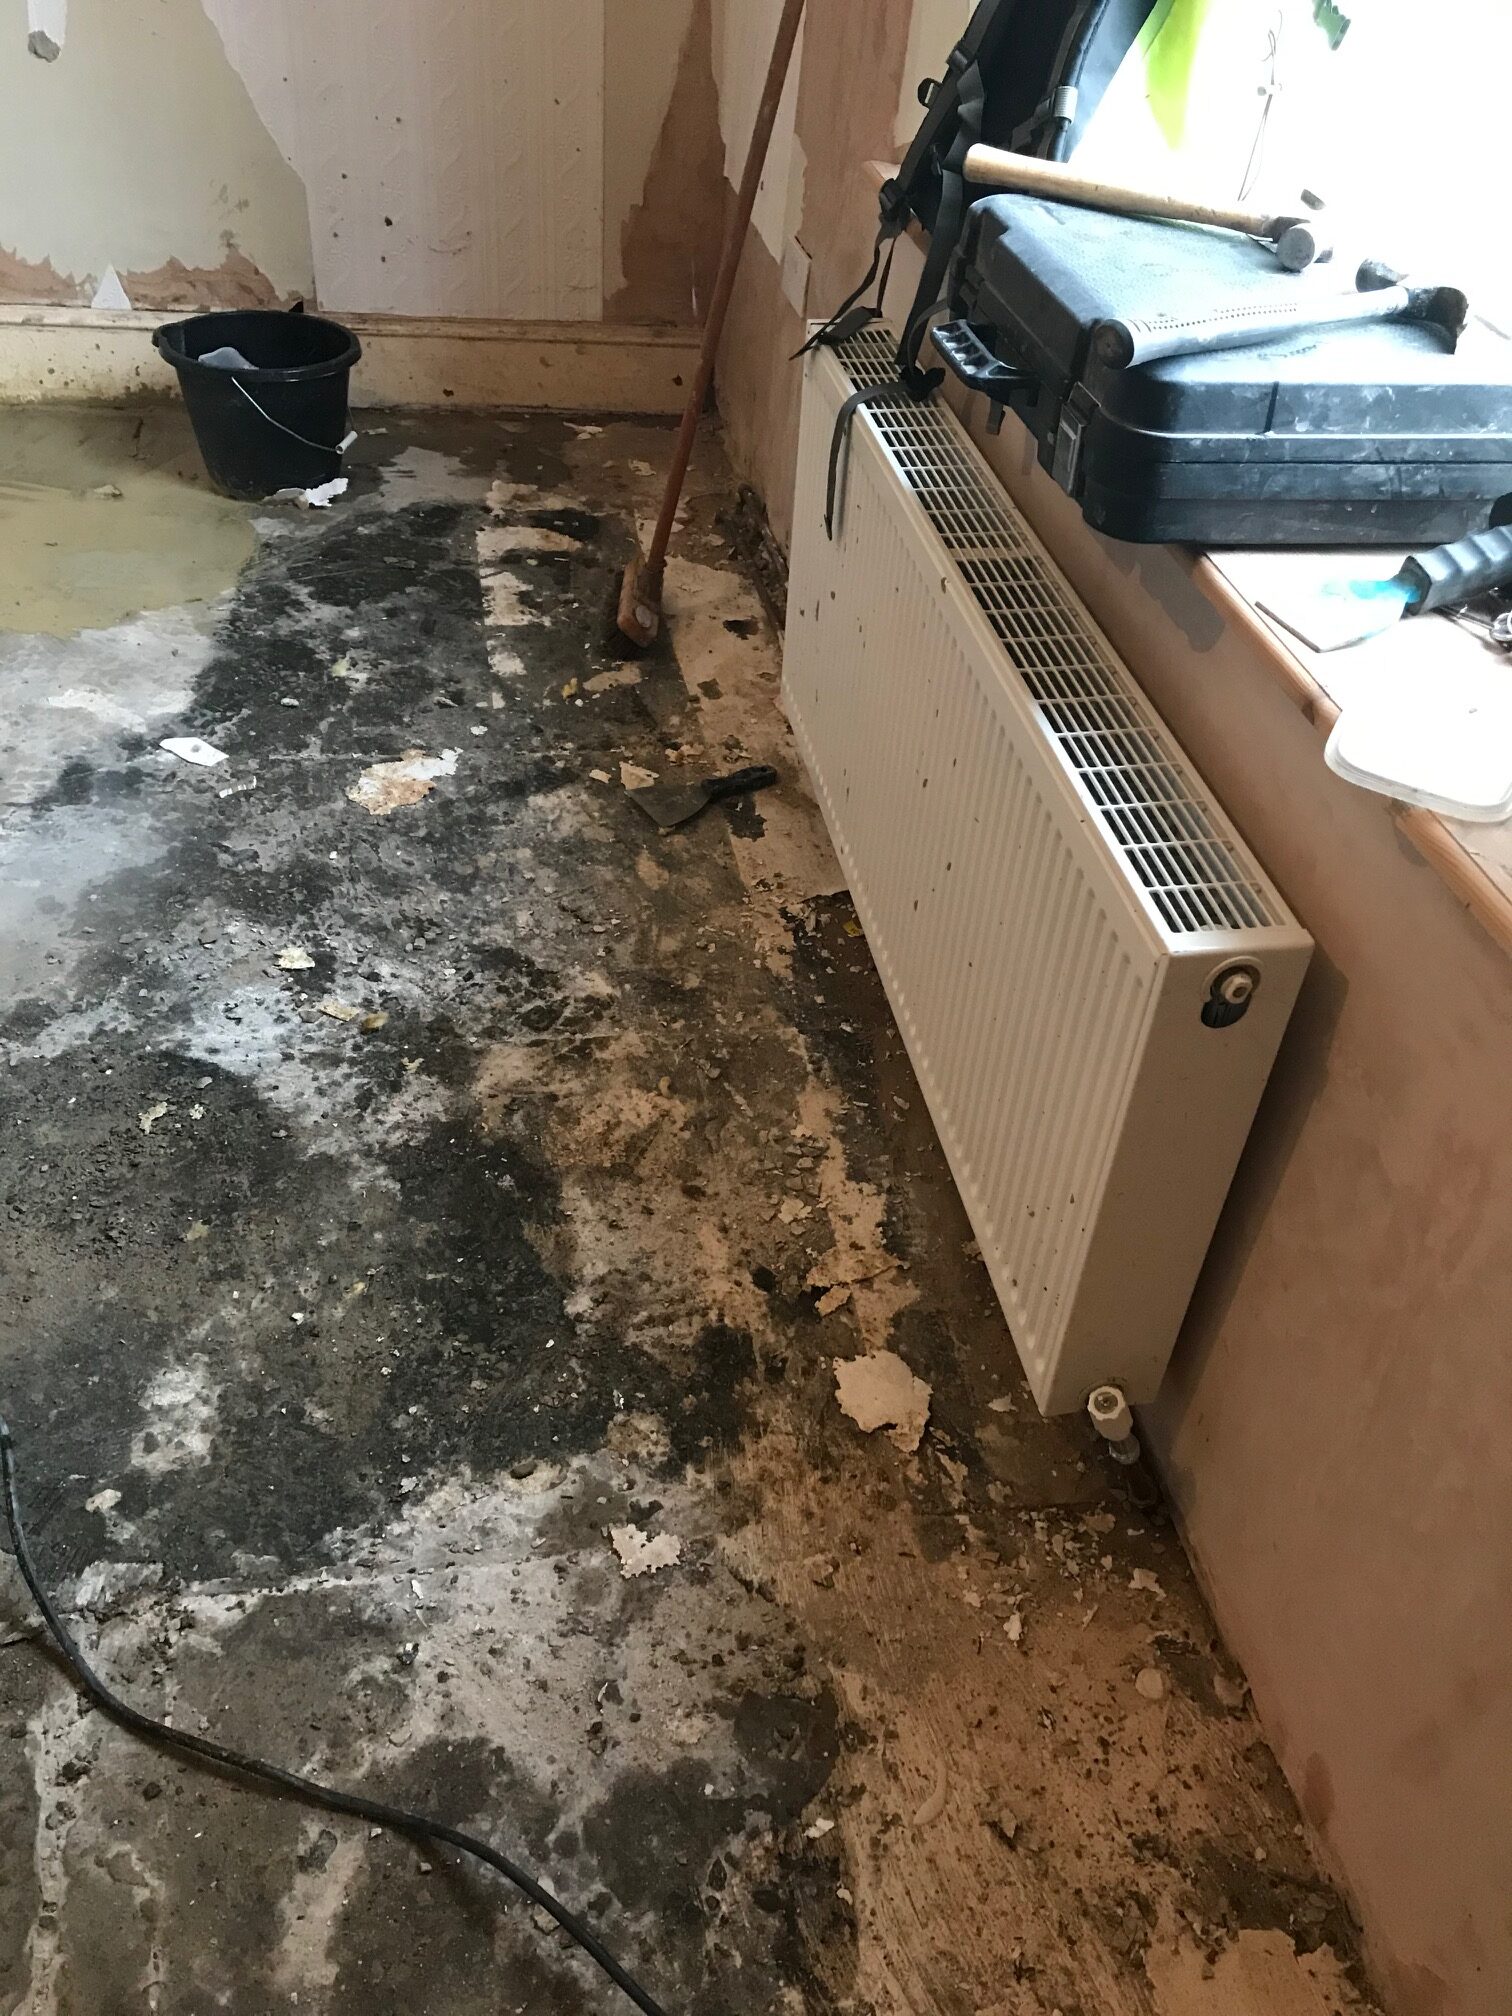
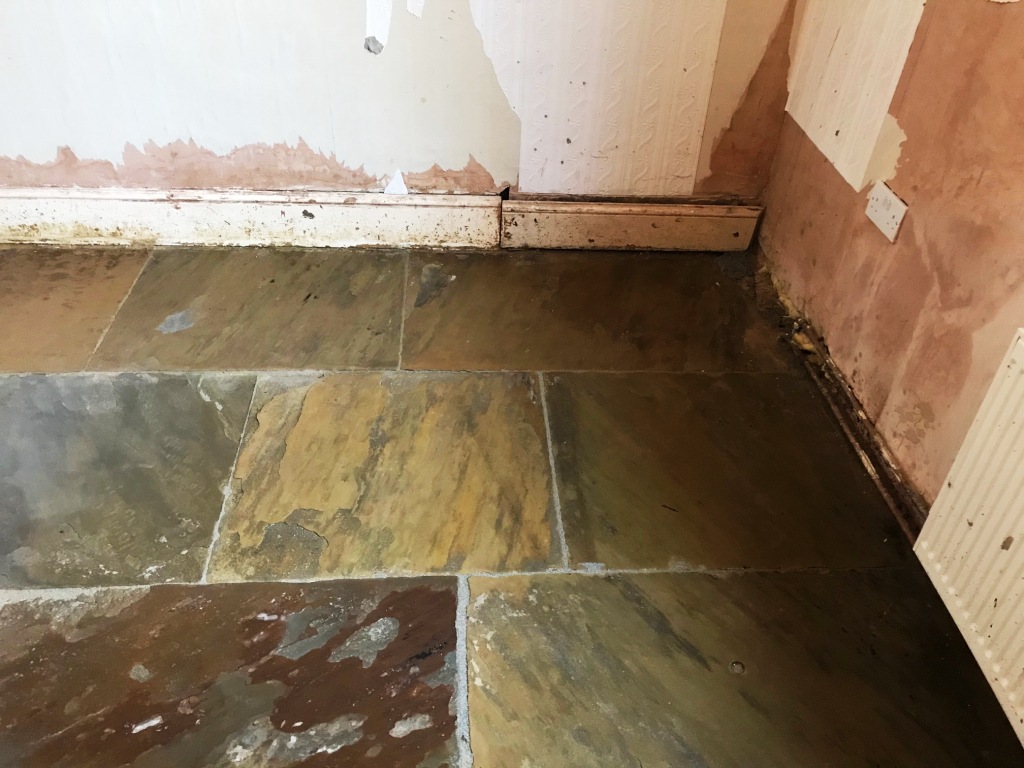
Late last year I was asked to survey a Flagstone floor in Morecambe which appeared to be beyond restoration. The floor had a long history and at some point in its past was covered with carpet which had been secured onto self-levelling cement with bitumen. All the companies that had visited before we got there said nothing could be done with it and recommended replacing the carpet or covering it with vinyl. As mentioned, it had been previously covered with carpet however this is an old floor and damp had been rising though the floor causing the carpet to rot. My client didn't want to entertain that as a solution and so kept on looking for a company that could restore the stone.

Flagstone Floor Before Restoration Morecambe Removing Self-Levelling Compound and Bitumen from Flagstones in Morecambe

Old houses like this one do not have a damp proof membrane installed under the floor and moisture rising through the stone needs to be allowed to evaporate or you will find damp spreads outwards towards the walls leading to rising damp. In this case I suspect the bitumen which acts as a water barrier had either failed or damp was coming up the wall and into the carpet and underlay. Certainly, in our experience, if you have an old natural stone floor like this it is best not to cover it with anything more than a rug.

 Having inspected the floor, I recommended restoring the appearance of the flagstones by grinding the surface down a few millimetres to reveal new stone. We can do this using several different grades of coarse diamond encrusted diamond pads, a process we call Milling.


Cleaning/Repairing a Flagstone Tiled Hallway Floor

After being given instructions to restore the floor we returned on the schedule date and began by removing as much of the loose cement and bitumen by hand using hand tools.
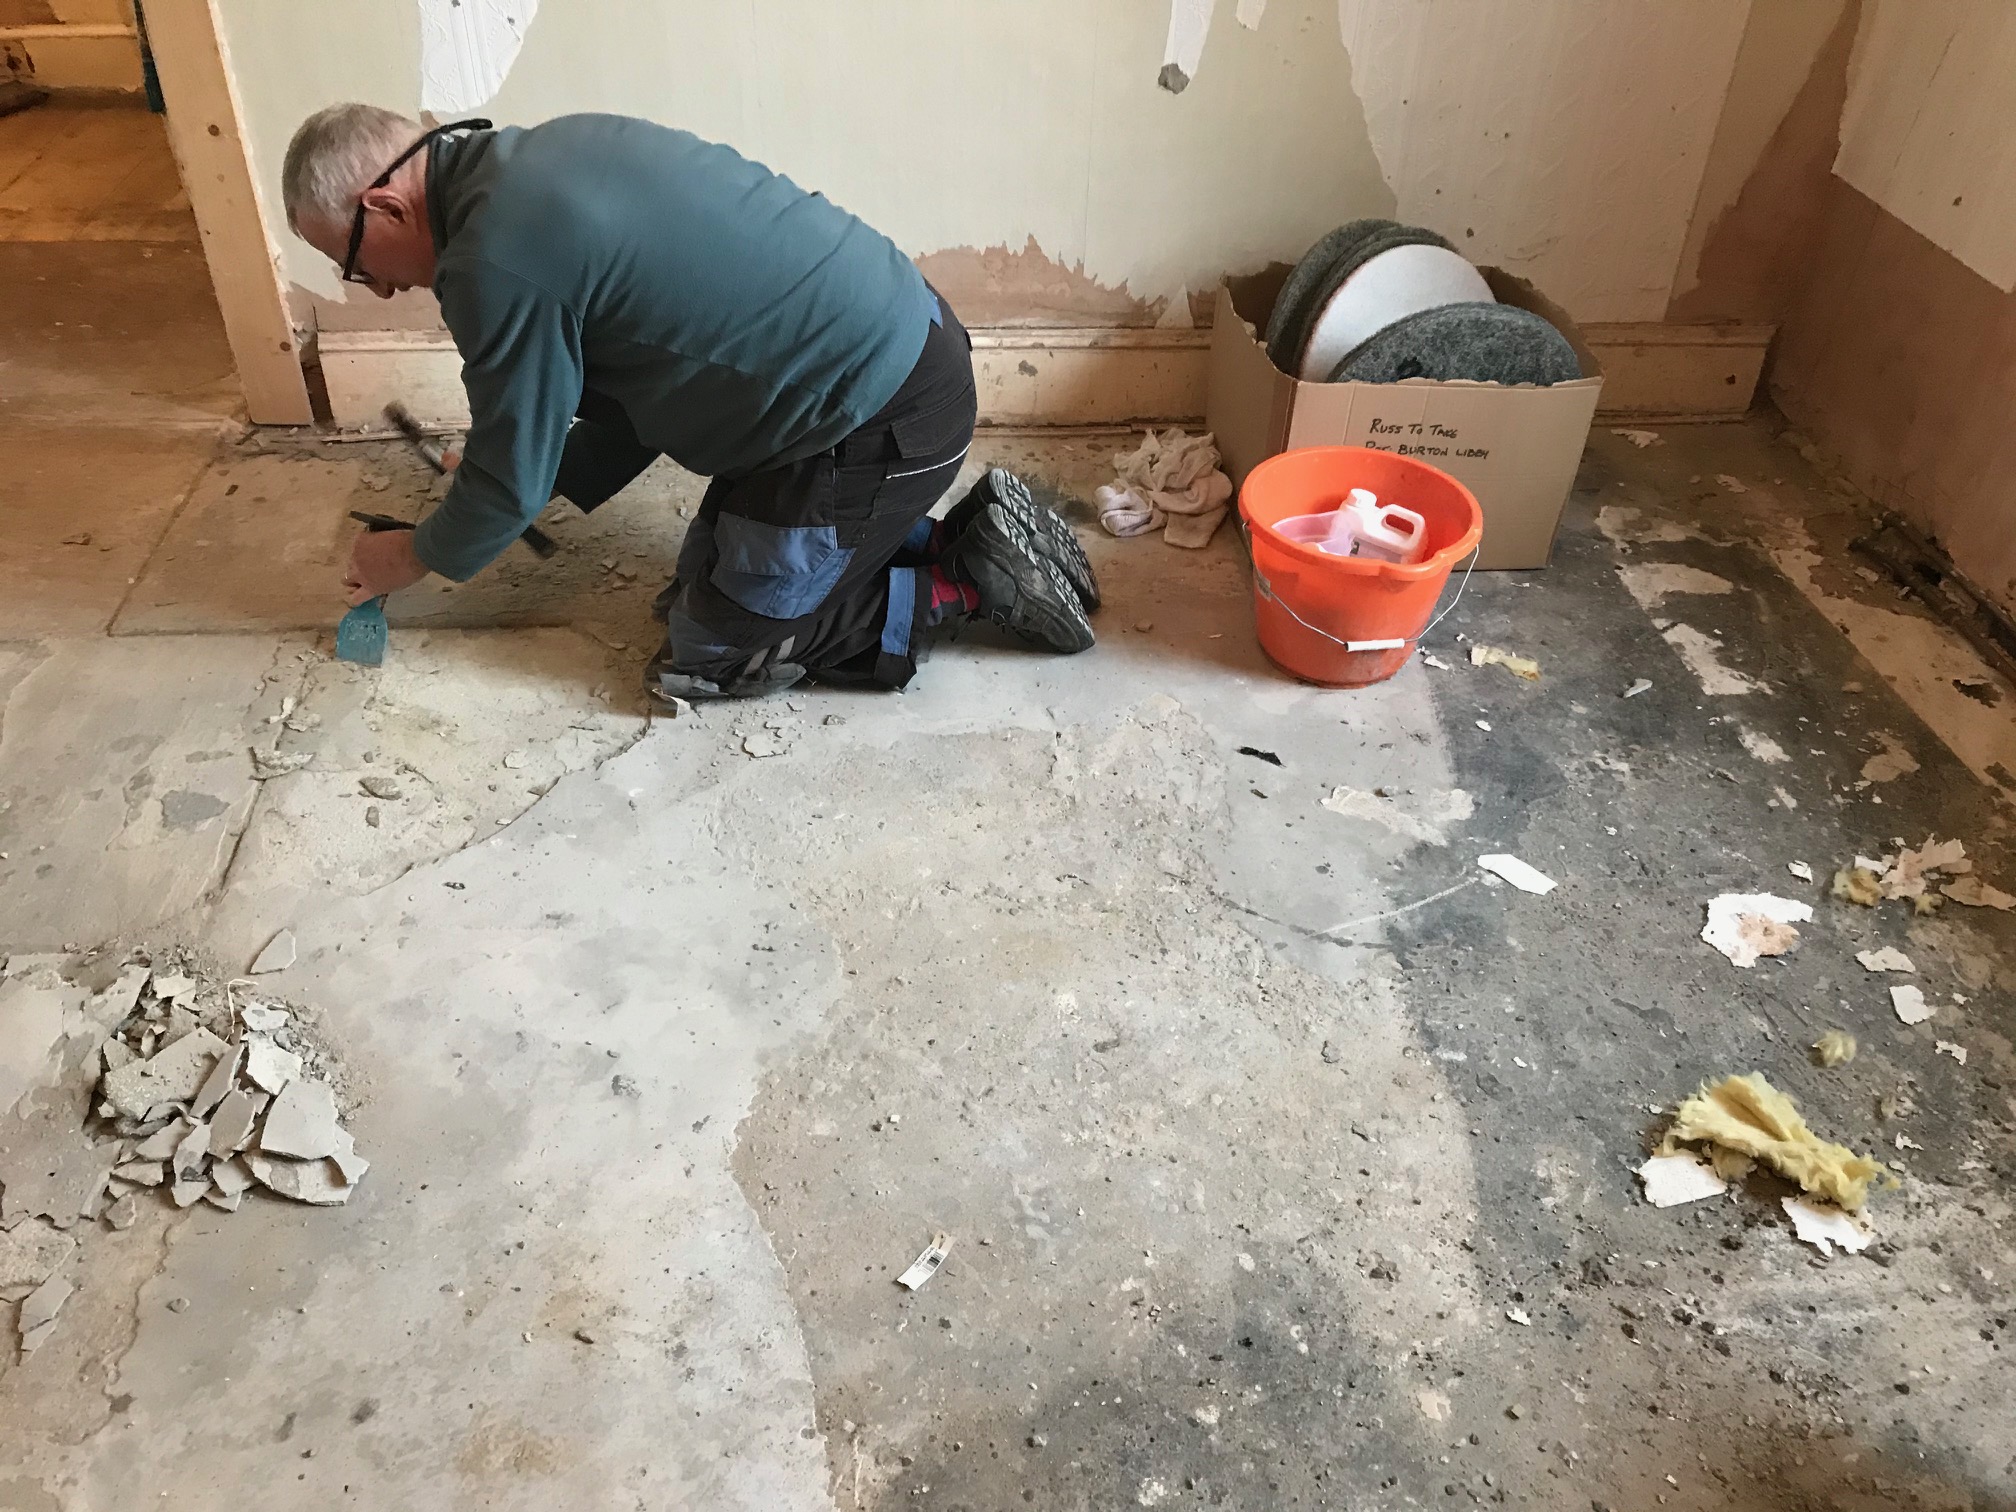
Removing Self-Levelling Compound and Bitumen from Flagstones in Morecambe

Milling the floor using a very coarse 50-Grit pad fitted with DRB segments (Diamond Resin Blocks). Cutting the surface of the stone like this is hard work and requires the use of a weighted floor buffer to apply the pads. The process is lubricated with water and generates a lot of slurry which is extracted off the floor with a wet vacuum. The 50-grit pad was followed with a 100-grit DRB pad and then 200-grit DRB pad which start the slow process of refining the surface. It’s a two-man job so I brought a colleague along, whilst one was milling the other could take a rest and help with the clean-up.

The milling did a great job of removing the Black Bitumen, Self-Levelling compound and old paint revealing the true beauty ` and colour of the Flagstones, in fact the stone had quite a variance of colour which was lovely to see coming through. Half the pointing was missing so after milling the stone we moved onto replacing what was left of the old pointing and replacing with a modern breathable product.

We called back the next day to finish the stone cleaning by further renovating the stone surface using finer grades of diamond encrusted burnishing pads of 400 and 800-grit. Again, you need to water to lubricate the process and rinse the slurry of the floor with water after each pad, then extract with a wet vacuum. This does leave the floor damp, so once we had finished it was left to dry out for a few days, old floors without a damp proof membrane can take longer to dry and especially so in the Winter months.
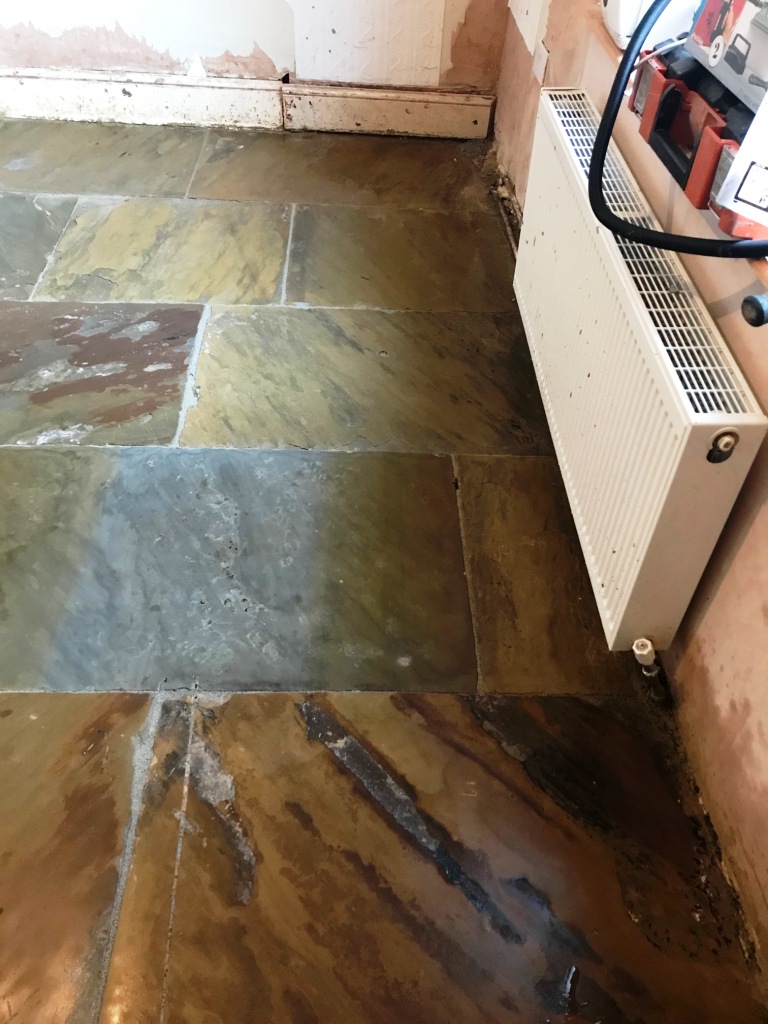

Flagstone Floor After Restoration Morecambe


Sealing a Flagstone Tiled Hallway Floor

Returning a few days later the stone was first checked with a damp meter to check it had dried out before sealing. The moisture readings were fine, so it was then sealed with a couple of coats of Tile Doctor Colour Grow which penetrates deep into the stone protecting it from within and enhancing the natural colours in the process.
Flagstone Floor After Restoration Morecambe

The flagstone floor was completely transformed by the process and our client was over the moon with the result. In fact, they have asked us back to do the same in the Kitchen as the vinyl in there has since been torn up and revealed the same stone.


Source: Stone Floor Cleaning and Restoration Service in Lancashire

Thursday, July 16, 2020

How to Use Granite Tile Outdoors


Commonly used on cement patios and walkways, granite tiles add elegance to any outdoor space. However, poorly-placed granite tiles can become yellowed, cracked or waterlogged. Ensure your granite tiles withstand the elements by choosing weather-resistant materials and installing these materials with the outdoors in mind.

What You'll Need:
  • Class A, B or C granite tile
  • Tape measure
  • Level
  • Epoxy-based cement filler
  • Moisture barrier (exterior grade)
  • Tile adhesive/mortar (acrylic-or epoxy-based)
  • Notched trowel
  • Grout
  • Grout float (rubber coated)
  • Sponge
  • Grout sealer (exterior-grade)


  1. Measure the space you wish to cover with granite to determine how many tiles you will need. Purchase roughly 10 percent more tile than you will need, to allow for mistakes or broken pieces.
  2. Choose a Class A through C granite for your outdoor space, and steer clear of class D granites. Class D granite tiles are highly pocked and filled with a UV-sensitive polyester epoxy resin. After continuous exposure to the sun's rays, the resin breaks down, causing a crackled yellow appearance. Also, avoid dark granite tiles, as these will absorb the sun's intense heat.
  3. Remove debris from your existing concrete walkway or patio, and repair any cracks or fissures using an epoxy-based cement filler. Allow the filler to dry completely.
  4. Coat your existing concrete slab with a layer of thin-set, acrylic- or epoxy-based tile adhesive or mortar, using a notched trowel.
  5. Place the moisture barrier onto the thin-set, and press the barrier into the mortar to be sure it is tightly sealed. Common exterior barriers are polyethylene or plastic sheeting or exterior-grade plywood.
  6. Smear a layer of thin-set, acrylic- or epoxy-based tile adhesive over a small portion of the moisture barrier, using a notched trowel.
  7. Install the granite tiles quickly, before the mortar dries. Use a level as you go, and add more or less thin-set to raise or lower the tiles, so they remain level with one another. Allow the mortar time to set, according to the manufacturer's directions.
  8. Grout over the tile seams, using an exterior grout and a rubber-coated grout float. Wipe away excess grout haze using a moist sponge. For tougher spots, spray off the haze using a garden hose.
  9. Seal the grout from stains, using an exterior-grade sealer.

Tips:
  • Buy all of your tiles at once, as there may be slight variations from box to box.
  • Place tiles close together for exterior surfaces. This helps to keep moisture out of the underlayment.
  • Use a moisture-resistant underlayment and slope it away from the home. This will prevent the tiles from becoming waterlogged and then freezing and cracking in the winter.
  • Dry fit the tile before installing it to determine how the finished project will look. If pieces need to be trimmed -- using a tile saw -- this is a good time to do so.


Monday, July 13, 2020

How to Grout Stainless Steel Tile

Stainless steel tiles are primarily installed on walls but they can also be used on floors except those where water pools like in a shower stall. Because these tiles are susceptible to being scratched, they are face taped to protect the surface during shipping and throughout the installation.
It's only when the installation is complete that the face tape is peeled away from the surface of the tile. Because these tiles are more prone to damage, grouting needs to be done more carefully.

What You'll Need:

  • Tile sponge
  • Bucket
  • Putty knife
  • Grout saw
  • Utility knife
  • Grout, sanded or unsanded
  • Rubber float
  • Silicone caulk
  • Caulk gun
  • Silicone grout sealer
  • Cheesecloth
  • Tile cleaner


  1. Clean the stainless steel tile installation to prepare it to receive the grout. Dip the tile sponge in a bucket of cold, clean water and wring it out. Wipe the grout joints to clear away any dirt, dust, debris and thinset mortar that hasn't yet hardened.
  2. Use a putty knife, grout saw or utility knife to remove thinset that oozed up between the stainless steel tiles and has dried hard. Clean joints will create clean grout lines.
  3. Mix up an unsanded grout if the grout lines between the stainless steel tiles are 1/8-inch wide or less. If grout lines are over 1/8-inch wide use sanded grout. The grout should be good quality and contain latex additives. Mix per manufacturer's directions in a bucket, adding water as needed.
  4. Scoop grout out of the bucket with a rubber grout float--a hand tool used to press grout into the tile joints. Holding the float at a 45 degree angle to the tile surface, move the grout-loaded float across the surface of the wall at a 45-degree diagonal to the joint lines.This ensures the grout fills the joints without it being pulled back out with every consecutive pass of the float. Move the float diagonally from left to right and vice versa. Use the same technique if grouting a floor installation.
  5. Wait 20 to 30 minutes before wiping the grout the first time. Dip a tile sponge in a bucket of clean water and wring out any excess. Focus mainly on wiping the grout off the surface of the stainless steel tiles. If you notice any low spots in any grout lines, refill them with the float.
  6. Wait another 20 to 30 minutes. With a fresh bucket of clean water dip the sponge in, wring it out and wipe the sponge vertically and horizontally across the grout lines to smooth them.
  7. Fill the bucket a third time with clean water after a 15 to 30 minute wait. Dip the sponge in and wring it out. The purpose of the third wipe is to wipe the last of any grout residue left on the stainless steel tiles. Wipe once with one side of the tile sponge. Flip it over, and wipe a second time. Dip the sponge into the water and rinse it well. Wring out excess water and repeat you have wiped the entire installation clean.
  8. Caulk along the stainless steel tiles with a flexible sealant where they meet the floor, at inside corners or where they come in contact with any surfaces that are restraining like pipes or cabinets. Wait two days to caulk to give the grout time to dry.
  9. Apply silicone sealer to the grout lines per manufacturer's instructions. Wait between two days and two weeks for the grout to thoroughly dry before application. Check the grout packaging for generally how long it takes the grout to dry.
  10. Peel off the face tape from the front of each of the stainless steel tiles. Clean the metal with a neutral, concentrated tile cleaner. First wipe the surface of the tiles with clean cheesecloth. Next dip a clean tile sponge in the tile cleaner, wring it out and wipe the surface of the tile.
Tip:
Unsanded grout doesn't have silica sand in it which means that as the grout float presses the grout in between the stainless steel tile it can more easily penetrate the space between the tiles. Sanded grout does contain silica sand; this makes the grout more durable, which is necessary with wider grout lines. Grout should be mixed to a consistency where it's loose enough to be pressed into the joints and stiff enough to stay put once it's in the joints. Use a plastic knife to help lift the initial corner of the face tape on the tile when peeling it off. The plastic won't scratch the tile surface. Using warm water to wipe grout will accelerate the drying of the grout. If you are grouting for the first time, use cold water. It will give you more time to work.


Wednesday, July 1, 2020

How to Clean Old Brick Walls

Though they add character and charm to any home, brick walls become dusty and dirty over time. Clean your brick walls regularly to maintain their appearance; use the proper products and methods to clean old brick walls so not to damage the brick surface. Whether you have old brick walls are inside or outside of your home, keep them clean to preserve the beauty of the brick.

Things You’ll Need

  • Feather duster or vacuum cleaner with hose attachment
  • Garden hose
  • Two buckets
  • 1/2 cup clear dish soap
  • Rags
  • Old toothbrush
  • Table salt
  • Bowl
  • Spoon


Instructions


  1. Dust off the brick. Use a feather duster or vacuum cleaner hose attachment to remove loose dust and dirt from interior brick walls. Rinse exterior brick walls with plain water from the garden hose.
  2. Fill a bucket with 3 gallons warm water. Add 1/2 cup clear dish soap to the water. Use your hands to mix up the soap and water. Fill a separate bucket with 3 gallons of plain, warm water if you are cleaning interior brick. Exterior brick cleaning does not require the use of the second bucket of plain water.
  3. Start cleaning at the top of the brick wall, working your way toward the bottom. Clean the wall in sections of about 3 to 5 feet.
  4. Dip a rag into the bucket of soapy water. Wring out the rag well.
  5. Scrub the bricks with the rag and soapy water. Rinse and wring out the rag often while cleaning. Use an old toothbrush dipped in the bucket of soapy water to clean the mortar between the bricks.
  6. Rinse interior brick walls with a rag dipped in a bucket of plain water. Rinse and wring out the rag often to avoid reapplying dirt and soap to the walls. Rinse exterior brick walls with plain water from your garden hose, rinsing from the top of the wall toward the bottom. Allow the brick walls to air dry.
  7. Use a salt and soap cream as an alternative method for cleaning brick walls. Mix equal parts liquid dish soap and table salt into a bowl. Stir the ingredients well with a spoon. Dip a rag into the bowl, and scrub the mixture onto the brick walls. Allow it to sit on the walls for 10 minutes, then rinse with a rag and plain water, or water from a garden hose if the walls are outside.