Monday, December 26, 2016

Deep Cleaning a Terracotta Tiled Kitchen in Somerset

Anyone with familiar with tile cleaning and maintenance will know that Terracotta is one of the most difficult of tiles to seal. This is due to the clay being particularly porous thus requiring several coatings of sealer to ensure complete saturation and protection against ingrained dirt and stains. The next problem is that a sealer will wear down in high traffic areas first and without regular maintenance will wear off allowing dirt to penetrate resulting in areas which seem to be impossible to keep clean.

Terracotta Floor Before Cleaning Minehead Somerset

At this property in Minehead, the coastal town in Somerset known for its beaches, the sealer on the Terracotta kitchen tiles had not been maintained in over four years and during that time, the sealer had deteriorated, allowing dirt and dust to enter the pores of the stone. Trying to get the floor to look clean was now an impossible task so I was contacted by the property owner to resolve the problem first by cleaning the tiles with professional products and methods, and second by applying a fresh sealer.
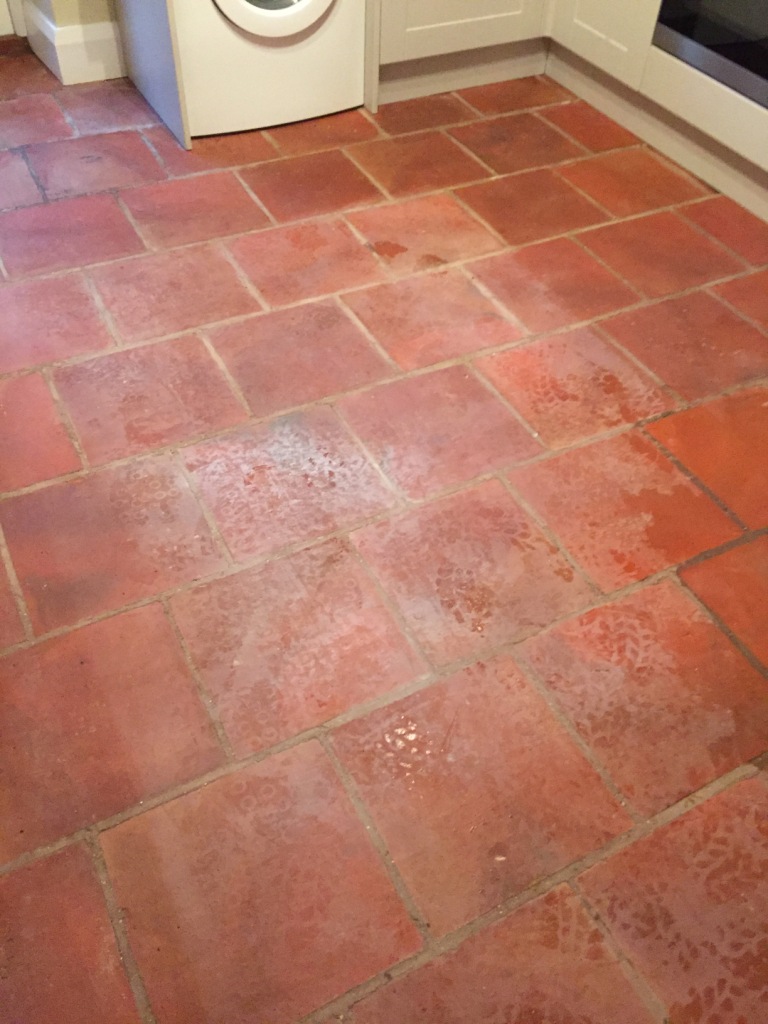
Terracotta Floor Before Cleaning Minehead Somerset

Cleaning a Dirty Terracotta Tiled Floor

My focus for the cleaning process was soak the Terracotta tiles in Tile Doctor Pro-Clean for around ten minutes before scrubbing the solution into the tiles with the aid of a rotary machine fitted with a scrubbing pad. Pro-Clean is a powerful alkaline cleaner designed for use on all types of natural stone. In concentrated form, it breaks down old sealers as well as removing dirt, while the rotary machine helps the product to penetrate deep into the pores of the stone to eradicate ingrained dirt and stains. The now soiled solution was extracted from the floor using a wet vacuum and the then the floor rinsed with water. With the floor clear I was able to see stubborn areas that need more work and spot treated them using the same process. One I was happy that the floor was clean and free of old sealers it was given a final rinse and then dried as much as possible using the wet vacuum and then then left to dry off overnight.

Sealing a Terracotta Tiled Floor

The next day, I returned to the property to find the tiles fresh, dry, and ready to be sealed. My sealer of choice was Tile Doctor Seal and Go, a topical sealant which provides a robust seal and the durable low sheen finish in one product. Sealing the floor took some time as you need to let the first coat dry before applying the second and if you recall from my note at the beginning of this post it's important to use several coats of sealer on Terracotta to achieve saturation due to the naturally high porosity of the clay.

Terracotta Floor After Cleaning Minehead Somerset

The floor is now fully sealed and looking like new, additionally It will be easy to keep clean simply by using a mop and Tile Doctor Neutral Tile Cleaner which is a pH neutral product designed for the routine cleaning of sealed tiled floors.
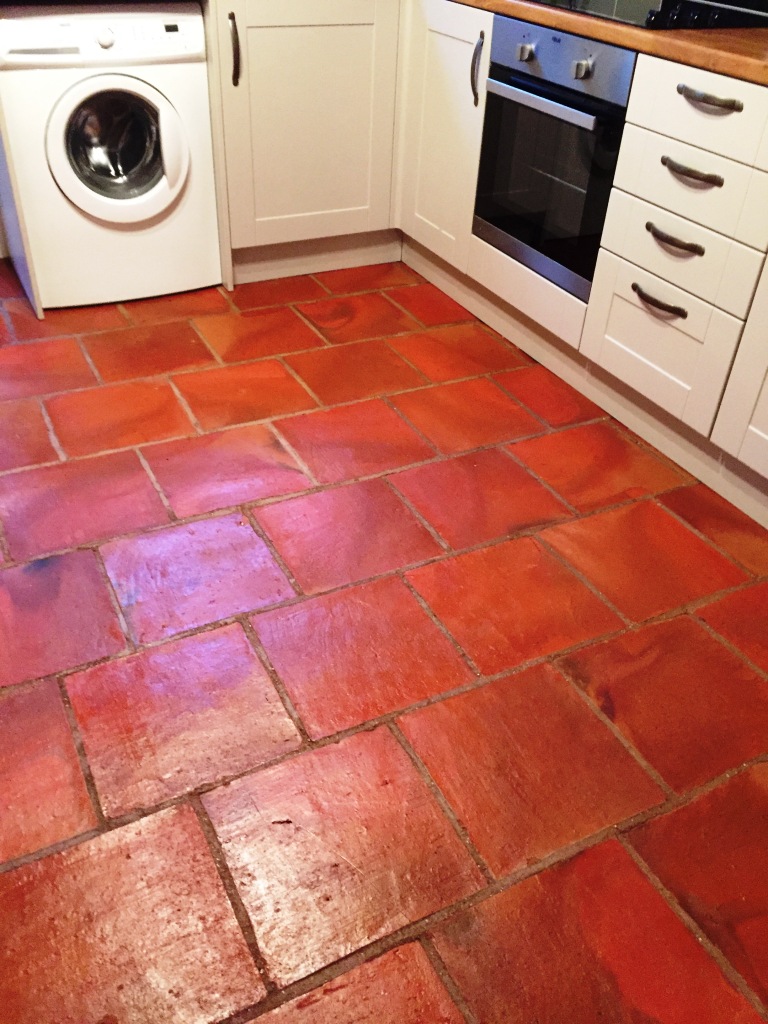
Terracotta Floor After Cleaning Minehead Somerset


Source: Terracotta Tile Cleaning and Restoration Service in Somerset

Saturday, December 24, 2016

How to Stain Terrazzo Floors

Terrazzo floors look impressive, but sometimes people want them to have more of an impact and change the color from the standard white. To do this it's necessary to apply a color stain to the terrazzo floors. This can be done, although it’s an involved procedure that contains several steps. However, it’s important to be aware that you can’t stain all the terrazzo floor. The porous part, known as the cementious part, will take the stain, but the particles of marble that are in it won’t. As long as you take this into account you won’t be disappointed by the result after you stain the terrazzo floors.

What You'll Need:
  • Ammoniated wax stripper
  • Muriatic acid
  • Stain
  • Water
  • Buffer
  • Black pad
  • Wet/dry vac
  • Safety glasses
  • Respirator mask


Step 1 - Cleaning

The very first step is the cleaning of the terrazzo floors. To do this, begin by sweeping them and then vacuum them to remove all the dust and dirt. Use an ammoniated wax stripper. Before using it, put on a respirator mask and safety glasses to protect yourself. You can buy the stripper in 5 gallon buckets. Apply it according to the instructions. Complete the process by rinsing off the solution, and then leave the terrazzo floors to dry.

Step 2 - Acid Etch

In order for the stain to penetrate the terrazzo floors properly you need to open up the pores of the cementious area of the terrazzo floor and to do this you'll use acid etching. Put on safety goggles and a respirator mask. Start by preparing a solution of 1 part muriatic acid to 10 parts water, and then apply it to the floor with a mop. Leave it in place for a few minutes and then clean it off. Follow by rinsing with cold, clear water and leaving to dry completely.
Step 3 - Stain

No matter what color stain you choose for the terrazzo floors, it’s important that it’s only mixed with a very small amount of water. Cover the floor in the stain, preferably using a brush or a roller to reach into all the crevices.

Work one section at a time, starting at the corner toward farthest from the door and gradually working toward the exit. After completing each section the stain needs to burnished into the terrazzo floors. To do this you’ll need a buffer and a black pad, which is available at hardware stores. Keep buffing until you can see the stain penetrating into the cementious part and then rinse the section with water before moving on to the next section.
Step 4 - Finishing

To complete the staining, once you’ve finished burnishing the entire floor, plug in your wet/dry vac and vacuum the entire floor to remove all the excess specks of stain. Then, you will still need to seal the floor. Do this after the stain has had time time dry, making sure no one walks on it in the meantime. Be sure to use a good wax that is made specifically for terrazzo floors, one with a high solid content. Apply it according to the instructions and you’ll see that you have terrazzo floors that have taken on the new color of your choice.


Thursday, December 22, 2016

7 Tips for Installing Travertine Pavers on Concrete

Travertine pavers are marble pavers that can be laid on concrete. There are a lot of pavers to use, but travertine pavers are very popular and match almost every color. There are things you should know before attempting to install pavers to concrete, so here are some tips on installing travertine pavers on concrete.

Tip 1: Having the Concrete Ready

Before you even think about laying down your travertine pavers you have to have your concrete ready for them. All loose pieces of concrete have to be swept off the concrete so it's completely smooth. Once done, bleach that is used for outdoors has to be applied so that any mildew or mold on the concrete is killed.

Tip 2: Patch All Holes That Are In the Concrete

All the tiny or large holes seen in the concrete have to be patched with a concrete patching product. The kinds of products you need are available at the local hardware store. The one good thing about the patching products is they are better than normal concrete. Patching products have a much better adhesion and bonds much better.

Tip 3: Layout Dry to Make Your Design

Place your travertine pavers on the concrete and decide on a pattern by moving the pieces around. This allows you to find out if any of your travertine pavers have to be cut to fit into the concrete. Measure and mark the pavers to indicate where cuts will be needed.

Tip 4: Preparing the Mortar

As you will be working outdoors it is best that you mix your mortar in a place that will hold the entire bag. A wheelbarrow is a great item to use for mixing the mortar. Using the entire bag is good as it saves you trying to guess how much mortar you need for doing small sections.

Tip 5: Spreading the Mortar

Once the mortar is mixed, it is time to spread it on the concrete. To spread the mortar onto the concrete you will use a trowel. When you spread the mortar onto the concrete, hold the trowel on a 45-degree angle and only spread enough mortar for 2 to 4 travertine pavers.

Tip 6: Placing the Full Travertine Pavers

When you are placing the travertine pavers use a smaller trowel to spread a small layer of mortar on the back edge so that it joins to the travertine paver beside it. This will ensure that the pavers have great adhesion to the concrete and mortar. Continue until all your full-piece pavers are down.

Tip 7: Cutting the Travertine Pavers

Now that you have laid all your whole travertine pavers it is time to cut the ones needed to finish your design. You will use a tile saw to cut the pavers on the marked line you placed on the tile earlier. Once you have cut all the pavers you need then you are ready to lay them. The cut pavers are laid the same way as the whole pavers with mortar on the back edge of the paver that will connect to the travertine pavers beside it.

Tuesday, December 20, 2016

Rebuilding a Victorian Floor in South Wales

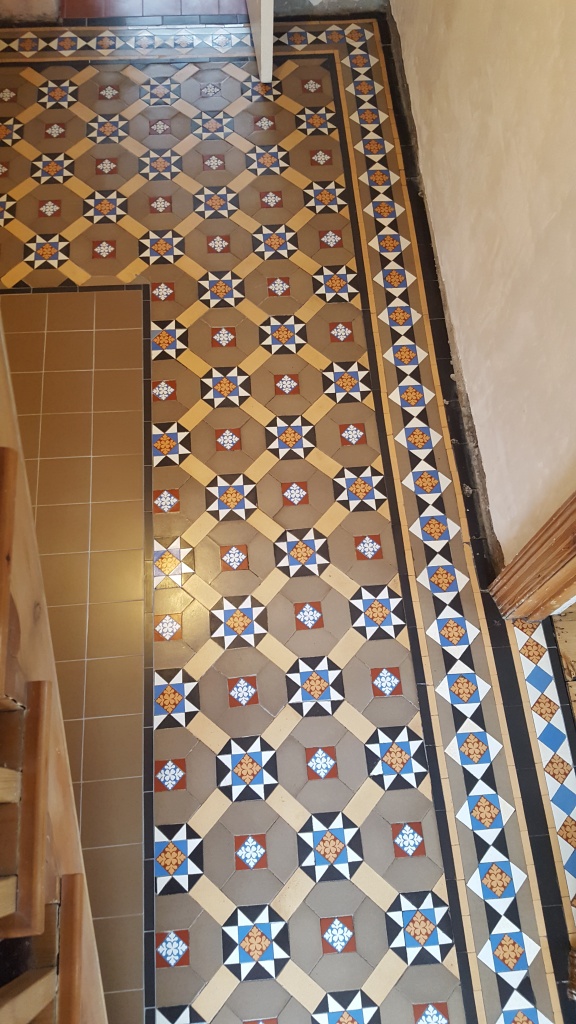
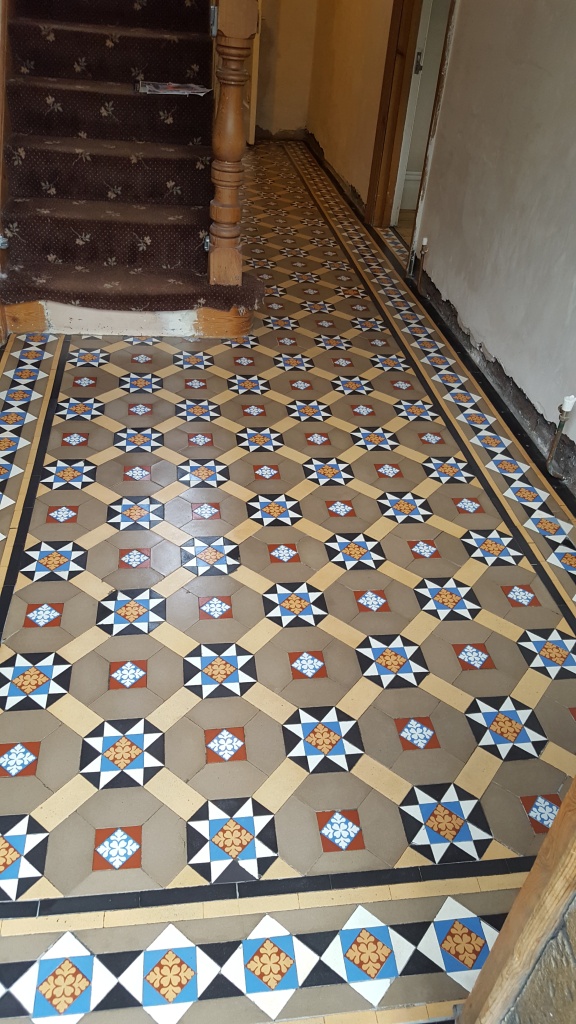
This Victorian tiled hallway floor at a house in Penarth needed a deep clean and seal but also there was the added complication of what to do with the under stairs area as you will see in the photographs below. There were many options to consider and after many visits to the property to discuss various options we finally decided on adding new replacement tiles that complimented the main colour in the floor.

Victorian Hallway Penarth Before Restoration

This floor was in quite a bad state covered in paint splashes and cement after new damp proofing also under the staircase there were no tiles just cement which the customer hoped could be tiled. I assured the customer that they made the right choice by contacting Tile Doctor that they would be very happy with the outcome of their project.

Repairing a Victorian Tiled Hallway Floor

Using a Kango hammer I first removed all the cement from area under the stairs that was to be retiled to get the main mess out of way then scraped off as much cement and paint off the tiled surface as possible. Once this was done and the area clear I was able to re-cement the area to be tilled to the right level and once dry tile the area with tiles in the chosen colour from a company known as Original Style which produce good tile replicas.

Victorian Hallway Penarth During Restoration Victorian Hallway Penarth During Restoration

Deep Cleaning Victorian Hallway Floor Tiles

The floor was checked for moisture which proved dry and then cleaned with a mixture of Tile Doctor products including NanoTech HBU Remover (HBU stands for Heavy Build-up), Remove and Go to tackle the paint splashes and to ensure any sealers were removed and Pro-Clean which is another powerful cleaning product. All these products are safe to use on tiles floors and were worked into the tile and grout using a scrubbing pad fitted to a rotary machine. Once the floor was clean the soiled cleaning solution was extracted from the floor using a wet vacuum and the floor then thoroughly rinsed down with water, again extracted using a wet vacuum. Problem areas were re-treated by hand and scraped using wire wool and Tile Doctor Grout Clean-up which is an acid product designed to remove cement stains and grout smears. The floor was then rinsed again to remove any product traces, dried as much as possible with the wet vacuum and left to dry off overnight.

Sealing a Victorian Floor Sealing

I came back the next day to seal the floor, checking the tiles for moisture first using a damp meter. To seal the tiles, I used Tile Doctor Seal and Go which adds that protective layer and a nice sheen to the floor.

Victorian Hallway Penarth After Restoration Victorian Hallway Penarth After Restoration

The replacement tiles blended in well with the original Victorian floor tiles which now following the deep clean and re-seal looks like a new installation.

Victorian Hallway Penarth Before Restoration


Source: Victorian Tile Cleaning and Restroation Service in SE-Walesshire

Monday, December 19, 2016

4 Natural Stone Flooring Design Tips

Natural stone flooring is one of the best choices as far as floor decoration is concerned. No matter how you want to include it, one of the main worries always remains about the durability, cost and suitability of it with the surrounding environment. Natural stone flooring is one of the more fashionable styles when it comes to home décor. Unlike most fashionable ideas, natural stone flooring also offers a big durability advantage. However, maintenance of natural stone flooring is a requirement.

Tip 1: Choose a Quality Natural Stone Flooring

There can be different varieties of stone flooring, each of them telling a different tale about color, surface, durability and polish. Natural stone flooring materials often undergo polishing and fabrication. If you are looking for an entirely natural product, the polished and fabricated items may fail to satisfy you. Repair and re-polishing is one of the most common aspects of selling slightly defective natural stone flooring. However, you can easily spot such products, as they sport distinct looks which are absent in purely natural stone flooring.

Tip 2: Check the Suitability of the Stone in Your House

Many natural stone flooring products are available to suit a wide range of interiors. Since natural stone flooring is increasing in popularity, one always gets the chance of using different color patterns. Color patterns and textures are the main factors that help one in deciding about the flooring ideas that are applicable amidst one’s personal décor. You can also choose to lay out a certain degree of variation in color and texture, but that can push your costs higher as well.

Suitability of the stone also pertains to its resistant qualities. Water resistance is important as is acid resistance when it comes to bringing home natural stone flooring.

Tip 3: Keep the Stone Design Suitable for Cleaning

While choosing a suitable stone texture, it can be useful to check for gratings. Gratings are the main cause of dirt collection, especially with heavier foot traffic in homes. Rough surfaces on natural stone flooring also help in the growth of germs. Choosing adequately smooth natural stone flooring will help in keeping the surface cleanable as well.

Tip 4: Check for Evenness and Smoothness of Natural Stone Flooring

It is important to check that the stone flooring turns out more comfortable than its counterparts in wilderness. Evenness, sustainability of furniture, slope adjustments and such factors are important for your room to remain in a stable shape. If you ignore such factors, you may face difficulties regarding the positioning of furniture in the desirable places. Leveling and installation are thus very important when it comes to actually getting one made for your home.

Always remember that natural stone flooring and its maintenance requires expert service and knowledge. Handling it yourself and using concrete for installing natural stone flooring can be done by nonprofessionals, but only after considerable thought and preparation in order to prevent wastage of a great amount of money.


Thursday, December 15, 2016

Deep Cleaning Dirty Slate Flagstone Flooring in Oxfordshire

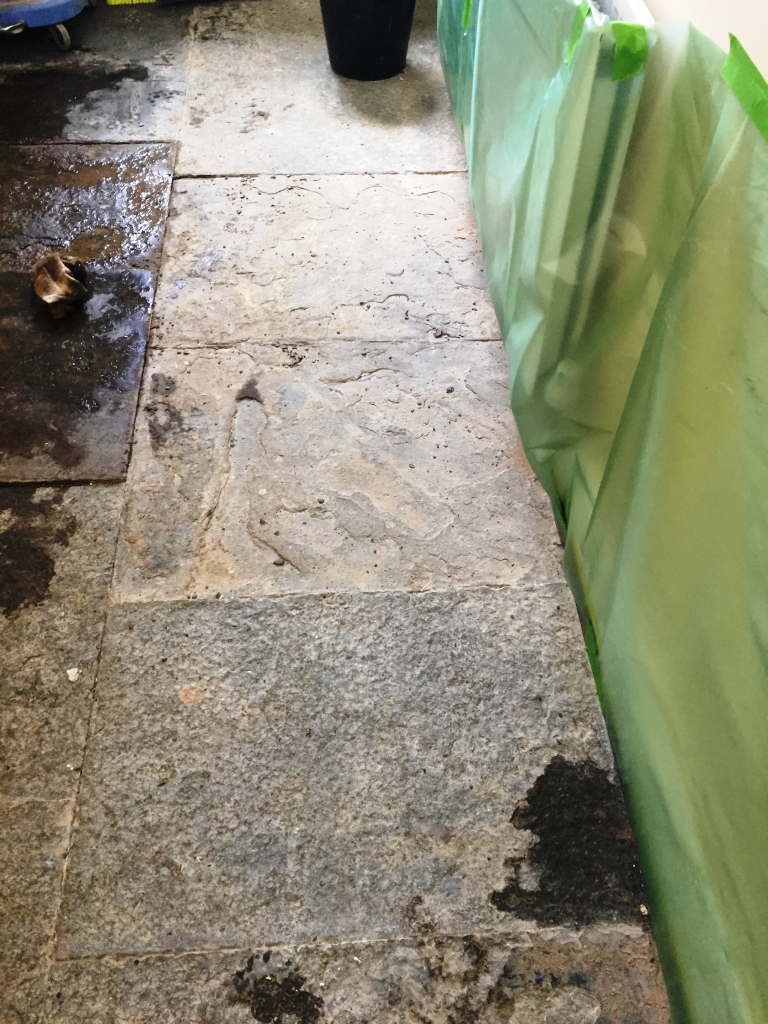
Every so often we come across exceptionally old tiles that are in desperate need of restoration. These Slate flagstones at a property in Banbury, Oxfordshire had to be a couple of hundred years old, the grout had come loose and I wagered that it’d been covered by bitumen (also known as asphalt), plaster, and concrete for a significant portion of its life. The property owner was keen to try and restore them and had tried to clean them, only to realise that it was a bigger task than initially thought. Flagstones are known to be hard wearing and durable, but no floor can be easily restored when subject to this kind of treatment. However, at Tile Doctor we are experienced with cleaning tiles in this kind of condition – and I was more t

Old Slate Flagstone floor before cleaning Banbury

Cleaning Old Slate Flagstones

Upon arrival at the property, the first thing I did was to cover the walls to protect them from splashes of cleaning products I would be using. I then started the process by mixing two products – Tile Doctor NanoTech HBU and Tile Doctor Remove & Go – in a bucket and spread it over the entire floor. These two products are both very powerful cleaners on their own and work even better together: NanoTech HBU utilises nano-sized particles to penetrate areas that normal cleaners simply can’t reach, while Remove & Go is specifically designed for the removal of coatings such as old sealers. For added impact and so the blend of cleaning products would not dry out, I covered the floor with a plastic sheeting, leaving the solution to dwell and work to break down the bitumen, plaster and concrete overnight. The following day, after removing the plastic sheeting I used my rotary floor machine fitted with a silicone carbon brush to slowly scrub the floor, beginning to loosen the soil. After this, I thoroughly rinsed the floor with water. I then used Tile Doctor Grout Clean Up, which is a concentrated phosphoric acid cleaner to remove the plaster and thin layers of concrete, before again rinsing the floor with water. Next, I had to remove the particularly thick chunks of concrete carefully using a chisel, before scrubbing the floor with Grout Clean Up once more. To complete the cleaning process, I then mixed a solution of our strong alkaline cleaner, Tile Doctor Pro Clean, with water and scrubbed and rinsed the flagstones with water.

Sealing Old Slate Flagstones

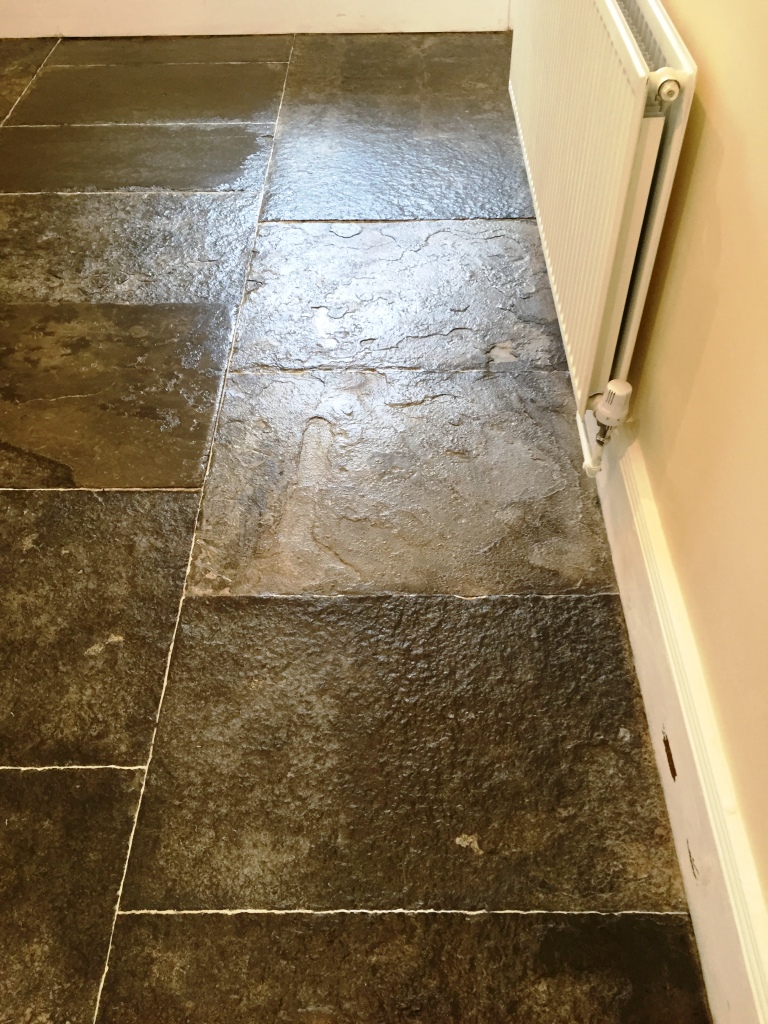
The next day I returned to the property to grout the floor, before leaving it again for another day to fully cure. On the final day, I sealed the floor using Tile Doctor Seal & Go, which is a topical water-based blend of acrylic polymers that provides a stain resistant surface seal combined with a long-lasting low-sheen finish. This eliminates traditional two-step sealing methods. I applied eight coats of this to give the floor the strong sheen (seen in the below photo), that the customer requested.

Old Slate Flagstone floor after cleaning Banbury

The floor had been in awful condition, for decades or perhaps even hundreds of years, yet using the right methods and products I successfully completed the full restoration within a single week. The customer was absolutely over the moon with the result.


Source: Slate, Stone and Grout Cleaning and Restoration Service in Oxfordshire

Sunday, December 11, 2016

A List of New Slate Tile Projects to Take On

Slate tile is a perfect material to use for decorative home projects. Leftover slate tile pieces can be used in both indoor and outdoor areas as well and bathrooms, kitchens, patios, and front entry areas. Slate is a natural material and can easily coordinate with different home decor styles.

Slate is a by product of volcanic material, forming when clay from eruptions hardens. This makes it very durable for floors that can withstand dropped objects and roofs that can withstand harsh weather conditions.

Craft Slate Photo Frames

Use decoupage glue to attach one of your favorite photos to a flat piece of slate. Make sure you wash the slate tile with soap and water beforehand to remove any remaining dust or grit and allow to dry. Apply the glue carefully with a brush, press the photo in place. If you prefer, apply a thin coat of glue to the photo surface if you would like to add a glossy sheen.

Slate Wall Mosaics

If you have leftover slate tile of various sizes from a flooring or counter installation, you can create a unique wall art piece with some paint, decorative appliques, and your creative inspiration. Clean off any dust before sticking on appliques, and allow each paint color planty of time to dry.

Make Your Own House Numbers

Create customized address numbers for the front of your house by mounting metal digits (found in hardware stores) on pieces of slate tile. Be sure to use a good industrial adhesive to hold the numbers in place. Even if your tile pieces are not completely square, they can still be used for this project and give your house numbers more character.

Easy Slate Trivet


Use a larger piece of slate tile to make a trivet that will protect your kitchen counter from hot pans just taken off the stove or out of the oven. Simply take four felt tabs with peel off adhesive backing and attach them to each corner of the underside of your slate tile. The felt will prevent the bottom of the slate from scratching the surface of your counter, especially if it is made of a more delicate material.

Pressed Leaves

Dried and pressed colorful fall leaves mounted on slate tiles make a beautiful and artistic wall hanging. Begin by pressing leaves in between the pages of a large book; it helps to stack one or two other thick hard back books on top. This can take a couple of weeks, but it is worth the wait.

Use a mixture of water and craft glue to attach your leaves to the slate tile. Be sure to only use a thin coat; a little goes a long way when working with dried leaves. Allow this to completely dry, and then apply a coat over the top of each leaf as a protective coating. This can be hung on a small easel or wall area, and these pressed fall leaf pieces also make great gifts. The same project can also be done with dried and pressed flowers. Many of them are more delicate than leaves, so it is a good idea to pick those with thinner petals and small centers. 


Monday, December 5, 2016

Refurbishing Travertine Floor Tiles

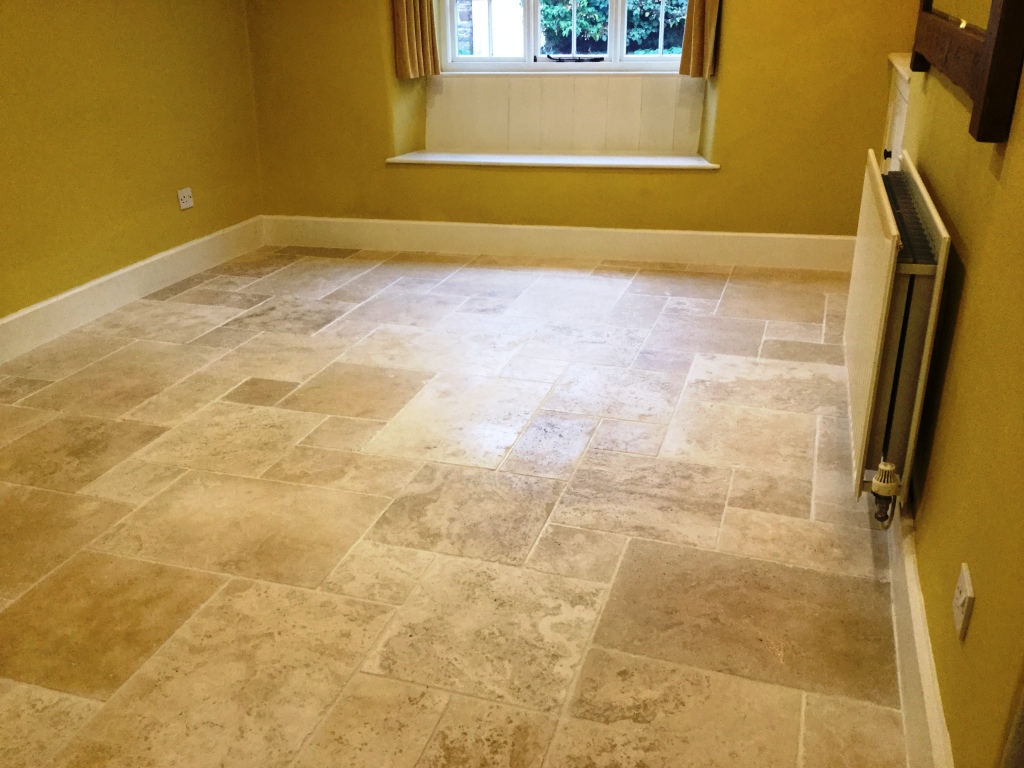
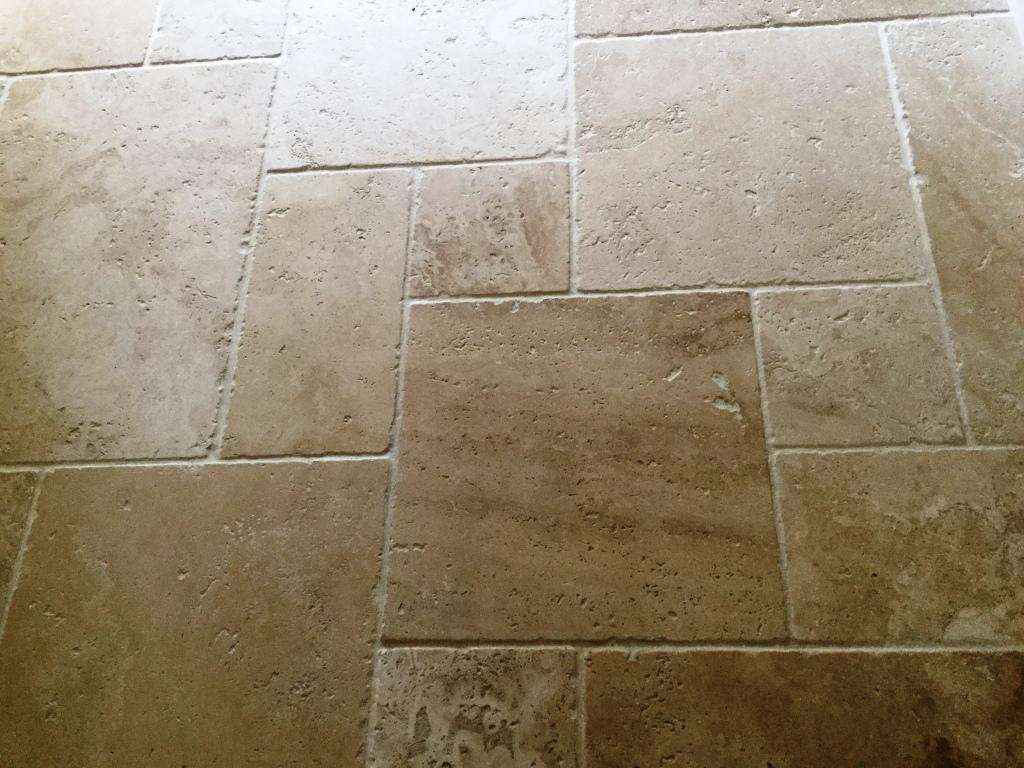
Travertine is a highly coveted and popular choice for tiled floors - and it's easy to see why. At peak condition, it's one of the most beautiful and eye-catching types of tile that is available. However, the appearance of the stone tends to suffer heavily from a natural process of corrosion know as pitting, which results in small holes developing that easily fill up with dirt and muck over time. This ingrained dirt is particularly difficult to remove with domestic, supermarket-quality cleaning products. This customer, who lives in Staverton, near Daventry in Northamptonshire, was very concerned that his Travertine tiled floor had lost its former lustre and shine due to pitting issues, continued foot traffic, and the fact that the sealant has lost its performance over the last few years and hadn't been topped up. Dirt had therefore been allowed to penetrate both the grout and stone making it look dull and uninviting.

Travertine tile before burnishing Steverton Travertine tile before burnishing Steverton
A quote was issued and accepted to restore the floor to its former glory. It was agreed the work would best be carried out whilst the customer was away on a short break with his family.

Burnishing and Cleaning a Travertine Tiled Floor

I decided the best course of action to bring the floor back to its former glory would be to hone and polish the stone with Tile Doctor diamond encrusted burnishing pads. Our burnishing process involves removal of a very thin layer of the top surface of the stone using four pads of different grits. The first pad has a Coarse 400 grit. It is attached to a rotary machine and, with only water for lubrication, removes minor scratches, sealers, and the top surface dirt. Working in small areas of four-six square metres each, I applied the pad across the the entire floor, rinsing in between eras and picking up the soiled solution with a wet-vac machine. I then repeated this same procedure with the second pad, which is a Medium 800 grit pad used to remove dirt from minor scratches and holes in the stone. Next, I mixed up some Tile Doctor Pro Clean and sprayed it on the grout lines, which were only lightly soiled, and used hand brushes to clean them. The next burnishing pad I used had a Fine 1500 grit, which is used to start the polishing process. Following the application of the first three pads, I stopped to allow the area to dry overnight. To get the best results with burnishing, it is best that the tiles are dry as otherwise you won’t achieve the highest level of shine possible. Returning the following day, I proceeded to apply the final Very Fine 3000 grit burnishing pad to achieve a very high quality polished finish.

Sealing a Travertine Tiled Floor

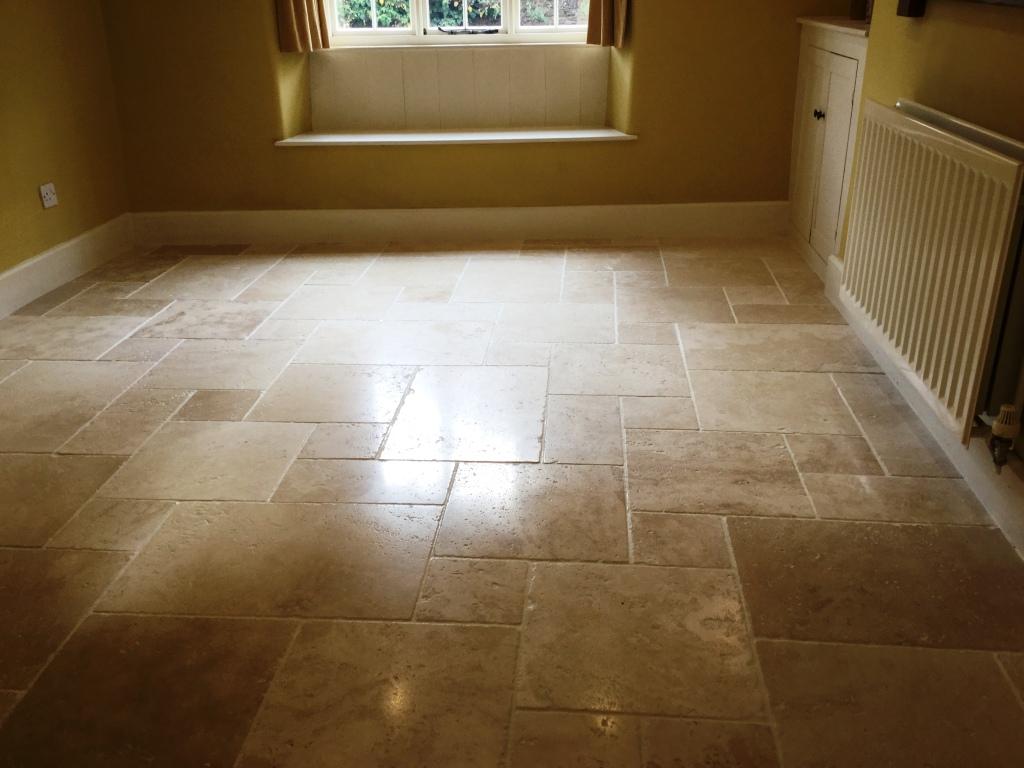
Once the burnishing process was completed, I applied two coats of Tile Doctor Ultra Seal to seal the tiles. Ultra Seal is a no-sheen, natural look impregnating sealer designed to provide maximum protection against dirt and stains. The second coat was allowed to dry for an hour before I re-polished the entire floor with a very fine 3000 grit pad to refine the polish even further. The fantastic results can be seen in the photos below.

Travertine tile after burnishing Steverton Travertine tile after burnishing Steverton

The customer was very happy with the result, leaving the following feedback:

“Just wanted to thank you for an excellent job in cleaning and returning our dining room and kitchen floor to its former glory. It looks fantastic! The floor definitely benefits from a more honed/polished finish.”

It’s always nice to get feedback like that, it really does make your efforts feel appreciated.

Travertine tile after burnishing Steverton


Source: Grout Cleaning and Colouring Service in Northamptonshire