Saturday, October 31, 2015
Slate tiled floor cleaned and sealed in Burton on Trent
This slate tiled floor was installed in a Kitchen in Burton on Trent, Staffordshire. The owner of the house felt it was time to get it cleaned and re-sealed so gave us a call. Cleaning black slate floor tiles We set about cleaning the kitchen floor with a mixture of Tile Doctor Pro-Clean mixed
Read more...
Friday, October 30, 2015
Slate tile maintained in Bridgenorth
This slate tiled floor was installed in the Kitchen of a house in the town of Bridgenorth which is in the Severn Valley Staffordshire. The owner of the house wanted to have the floor deep cleaned and re-sealed and so gave us a call. Cleaning black slate floor tiles We set about cleaning the
Read more...
How to Replace Sections of a Tiled Marmoleum Floor
A marmoleum floor is an attractive and inexpensive choice for your home. It is also an easy floor to install. This is because it doesn’t require a high level of skill or specialized tools. The floor is available in a wide variety of patterns and colors, which allows you to create a stylish kitchen or bathroom. Marmoleum floors keep in good shape for several years. However, it sometimes becomes necessary to undertake repairs. The tiles may crack when a heavy item falls on them. Some tiles may also become loose with time. Quick repair helps to protect your entire floor. Obtain replacement tiles that match yours from a flooring supply center. Be sure to purchase an extra amount to cater for future repairs.
What You'll Need
What You'll Need
- Replacement tiles
- Tile adhesive
- Plastic putty knife
- Grease pencil
- Margin trowel
- Cold chisel
- Hammer
- Scraper
- Masking tape
- Vacuum, with hose attachment
- Damp rag
- Damp sponge
Step 1 – Mark Damaged Sections
Carefully inspect your floor to identify the damaged tiles. Use a grease pencil to circle the damaged or loose tiles. This ensures that you attend to all faulty tiles, which helps to restore the fine appearance of your floor.
Step 2 – Pry the Loose Tiles
Insert the edge of your trowel underneath loose tiles. Firmly pry the tiles off the subfloor. Remove the tiles and place aside.
Step 3 – Attach Masking Tape
Tape the edges of the adjacent tiles that are intact. This helps to protect them from damage while you work.
Step 4 – Remove Cracked Tiles
Place a cold chisel in the center of the cracked tile. If the tile is cracked along the middle, position your chisel in the middle of one segment. Hit the chisel firmly from the back with a hammer. Position the chisel at 3 to 4 different areas on the tile and hit with the hammer again. This helps to disintegrate the tile further. It also loosens the tile from the subfloor. Remove the loose pieces of tile from the subfloor. Remove all other cracked tiles in this way.
Step 5 – Scrape off Adhesive
Clear away as much adhesive as you can from the subfloor with a scraper. This step requires some effort so as to ensure that the substrate is as smooth as possible. A smooth surface ensures that the new tiles remain in place for longer.
Step 6 – Clean the Subfloor
Use a vacuum with hose attachment to clean out the subfloor. This gets rid of dust and fine debris which hamper effective attachment of the new tiles. Wipe the subfloor with a damp rag, to leave you with a clean surface.
Step 7 – Attach New Tiles
Apply a bit of adhesive at the back of a new tile. Spread the adhesive with a plastic putty knife, to create a light, even coat. Place the tile on the subfloor and press firmly in place. Install all the other new tiles in the same way. Clear away excess adhesive with a damp sponge. Let the adhesive dry overnight before the floor is used.
Source: www.DoItYourself.com
Thursday, October 29, 2015
Limestone tiles cleaned and polished in Burton on Trent
This Limestone tiled floor was installed in a Kitchen at a house near Burton on Trent. You can see from the photographs below that the Limestone had lost its polished appearance and was trapping dirt on the surface including a few stubborn marks; the grout was also looking grubby and dark.
Read more...
Wednesday, October 28, 2015
Grout Cleaning and Grout Colouring of a Dull Shower Cubicle in Stafford
The photographs below were taken at a private residence in the town of Stafford, the owner of the house was unhappy with the state of the grout lines in their ceramic tiled shower which had, over time, had become grey and stained. As you cans see from the photograph, the whole area in general
Read more...
Sunday, October 25, 2015
Restoring Quarry Tiles Covered in Lino
Recently I was called to a house in the very small town of Marton in Warwickshire which is known for its proximity to the medieval "Marton Bridge", which lies just to the north, crossing the River Leam.
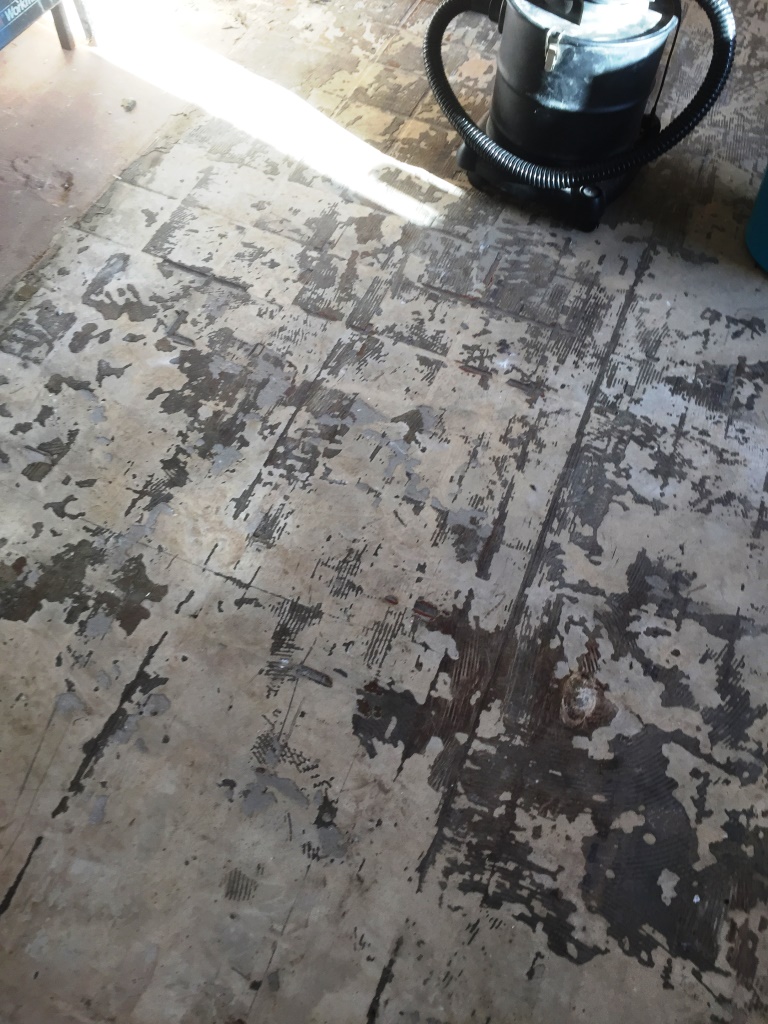
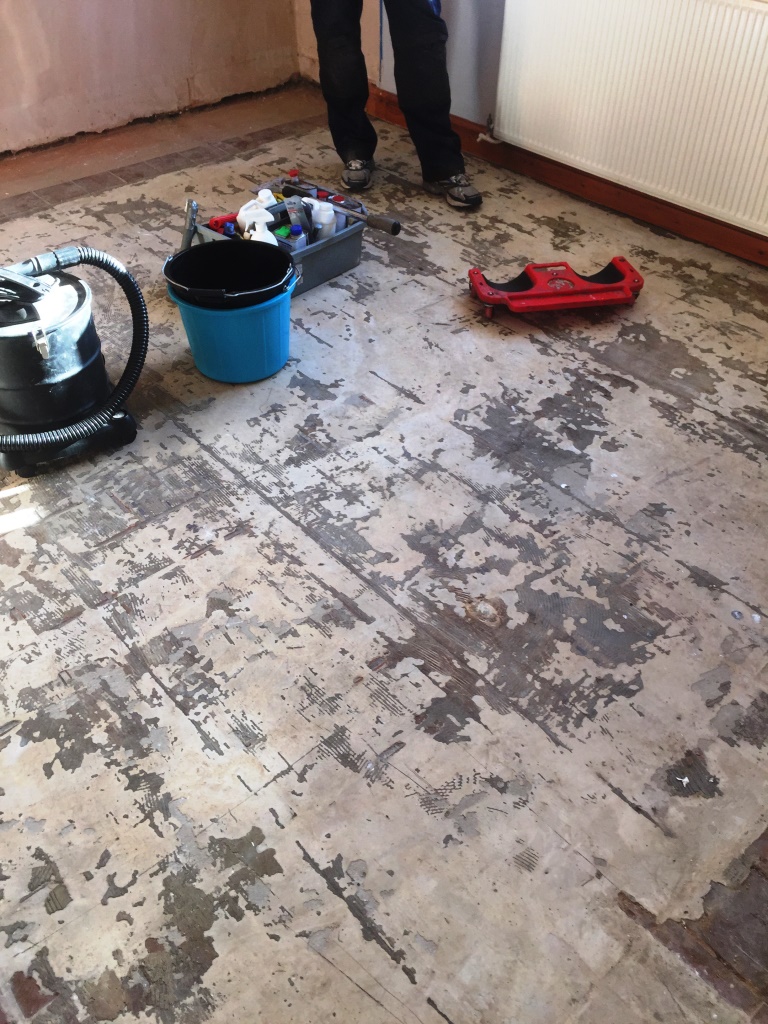
The entire downstairs flooring of my client's house consisted of Quarry tiles apart from one room where the tiles had been covered by screed and then linoleum. Quarry tiles are a classic hard wearing tile used for both internal and external commercial and residential flooring due to its ability to withstand heavy usage. Reception areas, outdoor patios and porches, for example, are commonly tiled using Quarry.
My client wanted to restore the covered floor back to its original state so that it would match the rest of the downstairs. Realising that this would be a complex and physically demanding task, my client decided to call in Tile Doctor to carry out the restoration.

After two long days of work the job was done and the transformation was fantastic and highly rewarding to see, the house now has a fantastic looking Quarry tiled floor running throughout the entirety of the lower level.
Source: Tile and Stone Floor Cleaning and Restoration Services in Warwickshire
 |
 |
Removing Screed and Linoleum from a Quarry tiled floor
Removing the Linoleum covering was a relatively straightforward process, so I was able to do this relatively quickly. The main issue concerned removing the screed, which is far more difficult to remove, requiring a lot of physical scraping. Thus I opted to call in some extra manpower in the form of the Nottinghamshire Tile Doctor, Steve Carpenter. With the two of us armed with scrapers we set about removing the screed, taking extra care not to damage the Quarry tile underneath.
Cleaning a Quarry tiled floor
Once Steve and I had scraped off as much of the screed as physically possible, I applied a strong dilution of Tile Doctor Remove & Go, a stripper with cleaning properties that is particularly effective at breaking down coatings such as adhesives, plasters and sealers. The product was left to dwell for ten minutes before I worked it into the stone with a scrubbing pad. After cleaning the tiles, I noticed a layer of grout haze on the surface of the exposed Quarry tiles, so I applied Tile Doctor Grout Clean-Up to remove it. Once the cleaning process was complete I gave the floor a thorough rinse with clean water, before soaking up the resulting residue with a wet-vac machine. The first day of work was a gruelling 12 hours long, but I was very pleased with the results and left the floor to dry overnight.Sealing a Quarry tiled floor
On day two I returned to finish the job by sealing the newly uncovered Quarry tiles, but not before using a damp meter to check that they were completely dry. Any excess moisture left on unsealed tiles can potentially effect the performance of any sealers that are applied. I sealed the tiles using Tile Doctor Colour Grow, an impregnating, colour-enhancing sealer which gave the surface an aesthetically pleasing shine, as well as durable protection against dirt and wear for the future. |
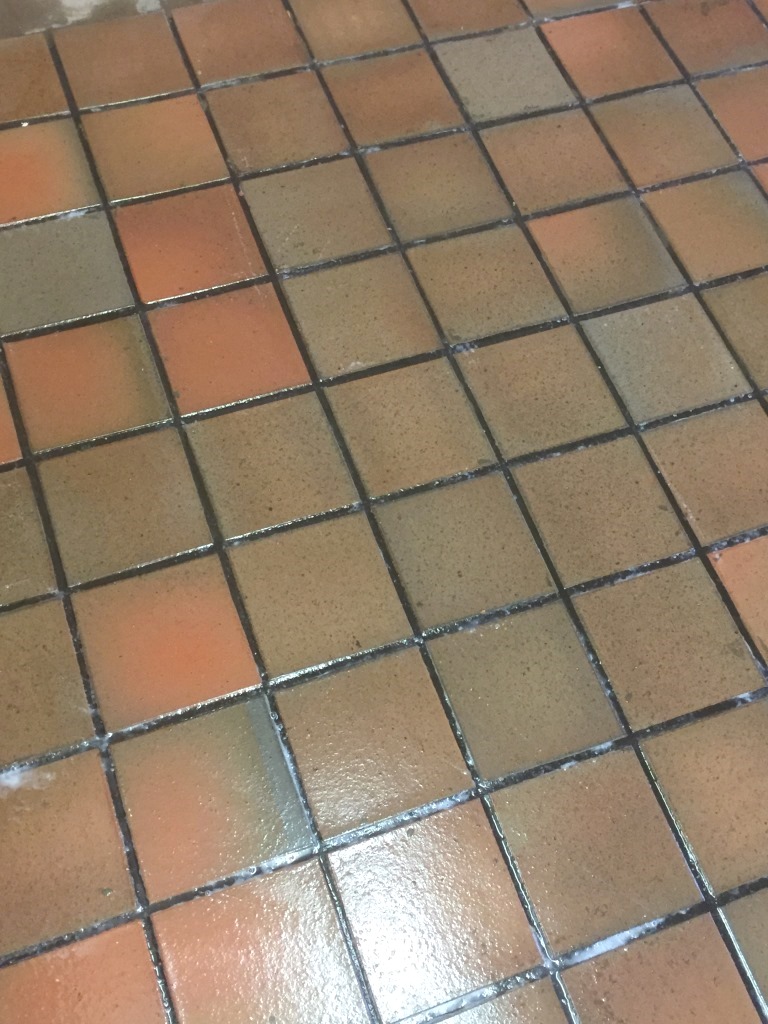 |
After two long days of work the job was done and the transformation was fantastic and highly rewarding to see, the house now has a fantastic looking Quarry tiled floor running throughout the entirety of the lower level.
Source: Tile and Stone Floor Cleaning and Restoration Services in Warwickshire
Wednesday, October 21, 2015
Types of Interlocking Rubber Flooring
Interlocking rubber flooring is a type of flooring made from rubber. It is a very versatile product and can be installed in several types of locations such as playgrounds, gyms, pet areas, and garages. Here are some of the types of interlocking rubber flooring.
Recycled Rubber
Recycled rubber flooring is eco-friendly and made from old tires, plastic bottles and other consumer waste. These are made in several different ways, including different textures and thickness. These can be used in places like gyms or garages where they want flooring that provides a surface that can withstand a lot of wear and tear.
One variation of these types of tiles is the kind produced by recycled crumb rubber and painted to look like rainbow colors. These are used on playgrounds to pad the ground and make it safer for children.
Foam Rubber Tiles
Interlocking rubber flooring is made out of foam to make a softer surface than some of the other types. These types of tiles are excellent for playrooms because they are easy on a child’s body.
Athletic Type Rubber Flooring
This type of interlocking rubber flooring is made to be slip resistant and to absorb shock. They are used on gym floors to pad exercise machines. They are harder and stronger than some of the other types of rubber flooring. These are some of the sturdiest of rubber flooring.
Source: www.DoItYourself.com
Monday, October 19, 2015
Maintenance Pointers for a Rubber Floor Covering in a Garage
Rubber floor covering is a great choice for installing in a garage because it is pliable and skid resistant. After you get it installed, you want to be able to keep it clean and in good shape. Here are some maintenance pointers for rubber floor coverings in a garage.
Cleaning Rubber Floor Coverings
If your floor isn’t that dirty, then all you should have to do to keep it clean is to sweep with a vacuum cleaner to ensure you get up all the embedded dirt and then go over it lightly with a wet mop. Make sure the mop is only damp because you don’t want the floor to soak up the water.
Extra Embedded Dirt Removal
If the rubber floor coverings are extra dirty, you may have to take a few more steps. If so, you would use a buffer or use an automatic scrubber with a soft pad on it to clean the floor. Any leftover water needs to be vacuumed up with a wet/dry vacuum. Then you have to rinse it with a damp mop and dry as in the method for light dirt.
Daily Cleaning Maintenance
Daily damp mopping and vacuuming needs to be done to keep your rubber floor coverings in shape. This will ensure it doesn’t pick up oil from your car, etc. With proper maintenance your floor will last for many years.
Source: www.DoItYourself.com
Friday, October 16, 2015
Maintaining Marble Floor and Shower Wall Tiles
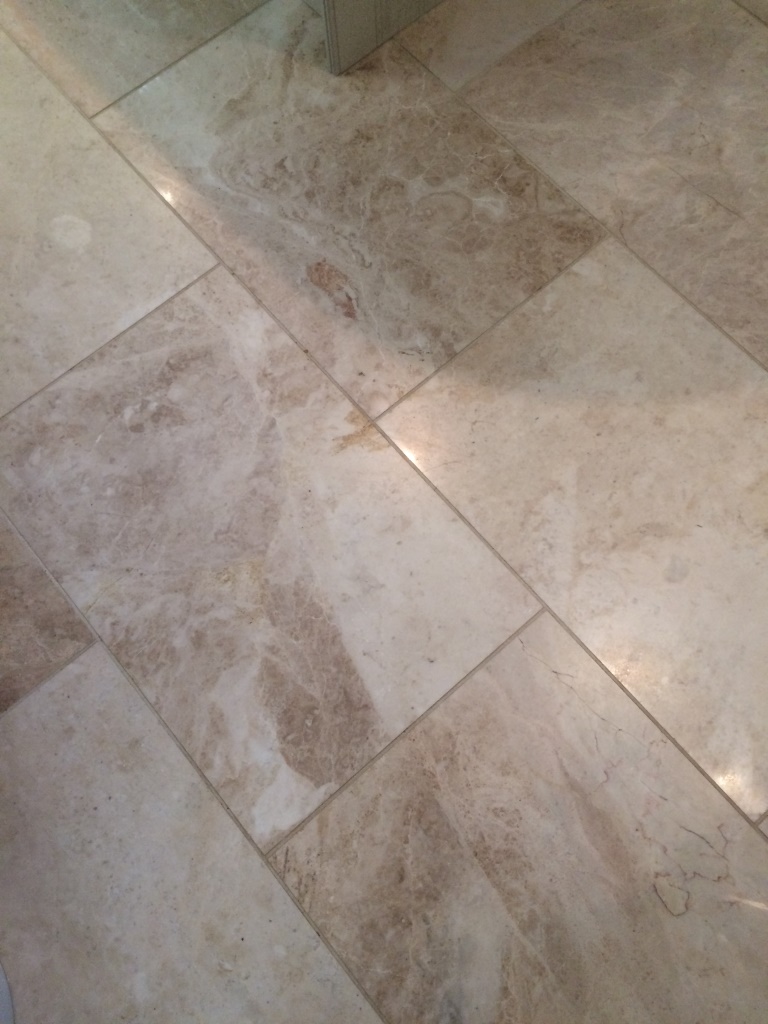
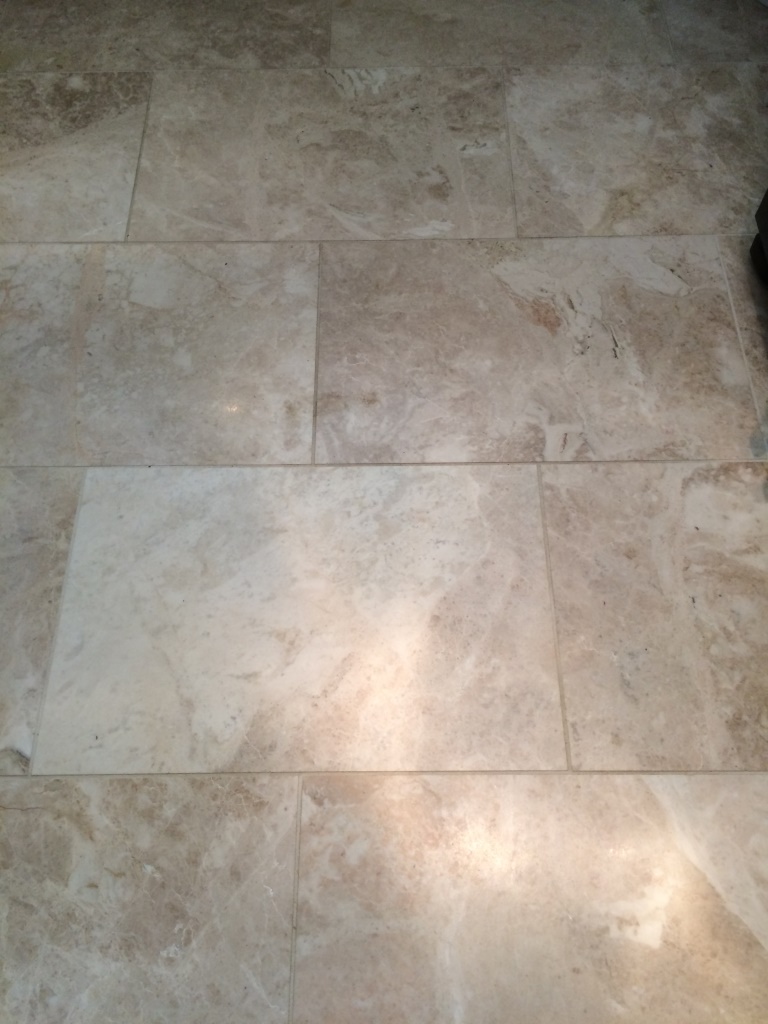
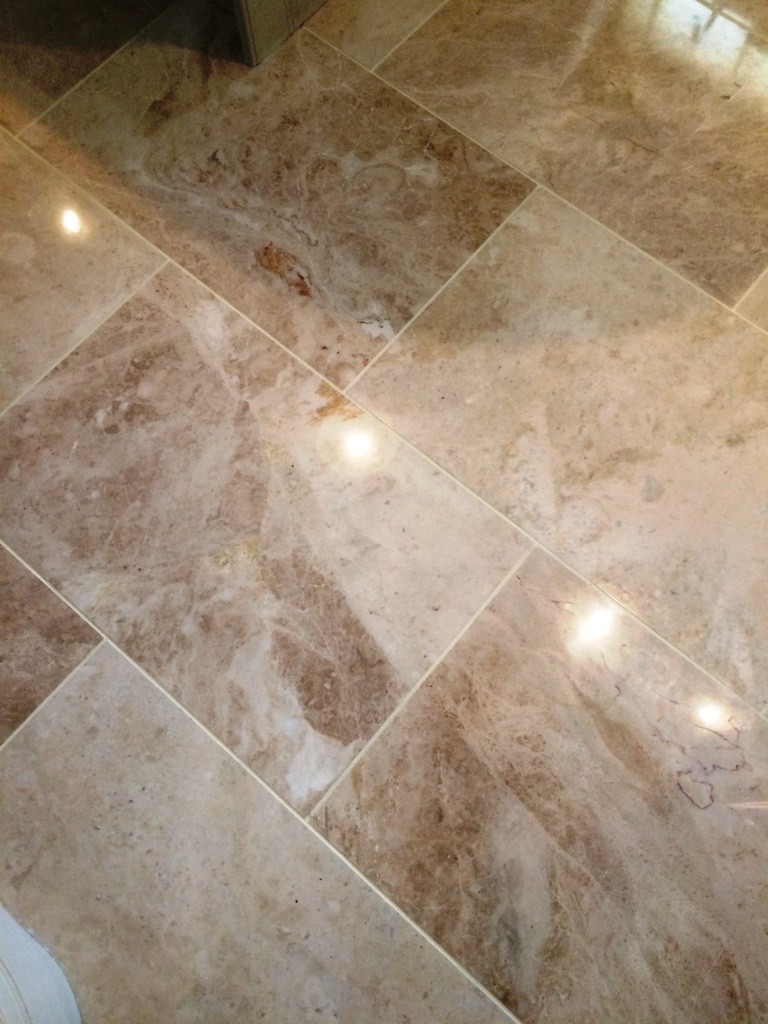
Not too long ago I was called down to a house in the small village of Elmswell, Suffolk. I was asked to take a look at a Marble floor and wall tiles which had become dull and lifeless over time, especially in high traffic areas and now need to be burnished to bring the polish back. In addition, my client was unhappy with the beige colour of the grout lines, requesting that I change the colour to white following the clean and polish.
My client was very pleased with the results of my work and took the time to leave the following comment on the Tile Doctor feedback system. "I cannot praise the standard of Bruce Copping's work enough. He completely transformed the marble floors and shower room walls in my home and made them look brand new. His attention to detail was excellent, plus no mess, just a perfect finish and valuable advice on maintaining the walls and floors. I'm so relieved I was able to find Tile Doctor online; I'd almost given up hope of finding someone to sort out the problems with my marble, but Bruce Copping was superb. I'm absolutely delighted with the results and have no hesitation in recommending him."
Source: Tile and Stone Floor Cleaning and Polishing Services in Suffolk
 |
 |
Cleaning and Polishing a Marble tiles
To get the floor clean and bring back the polish I used a set of four diamond encrusted burnishing pads which have different levels of grit, applied to the Marble tiles with a small amount of water. I started with a Coarse pad, before moving on to a Medium pad, a Fine pad, and finally a Very Fine pad to achieve the desired polished look. The floor was given a thorough rinse between each pad in order to remove any excess residue that had resulted from the burnishing process. Once I had finished the floors I moved onto the Marble wall tiles in the bathroom where the same process was repeated, for wall tiles however you need to use the smaller six inch burnishing pads fitted to a hand held buffer.Sealing Marble Floor Tiles
I left the floor to dry for a few days before returning to seal it for which I used Tile Doctor Shine Powder. This is a crystallising powder that offers a very high shine and tough durable finish. It it ground directly into the tiles, and can be used to seal all natural stone, including Marble, Granite, Limestone, Slate and Travertine, for both interior and exterior floors.Changing the Grout Colour
My final task was to change the colour of the grout, as per my client's request. I did this using a couple of tubes of Tile Doctor Grout Colourant in white. The colourant is painted onto the grout with any excess wiped off the tile before it gets chance to harden. It’s an epoxy product that looks completely natural and additionally provides excellent stain protection for the future.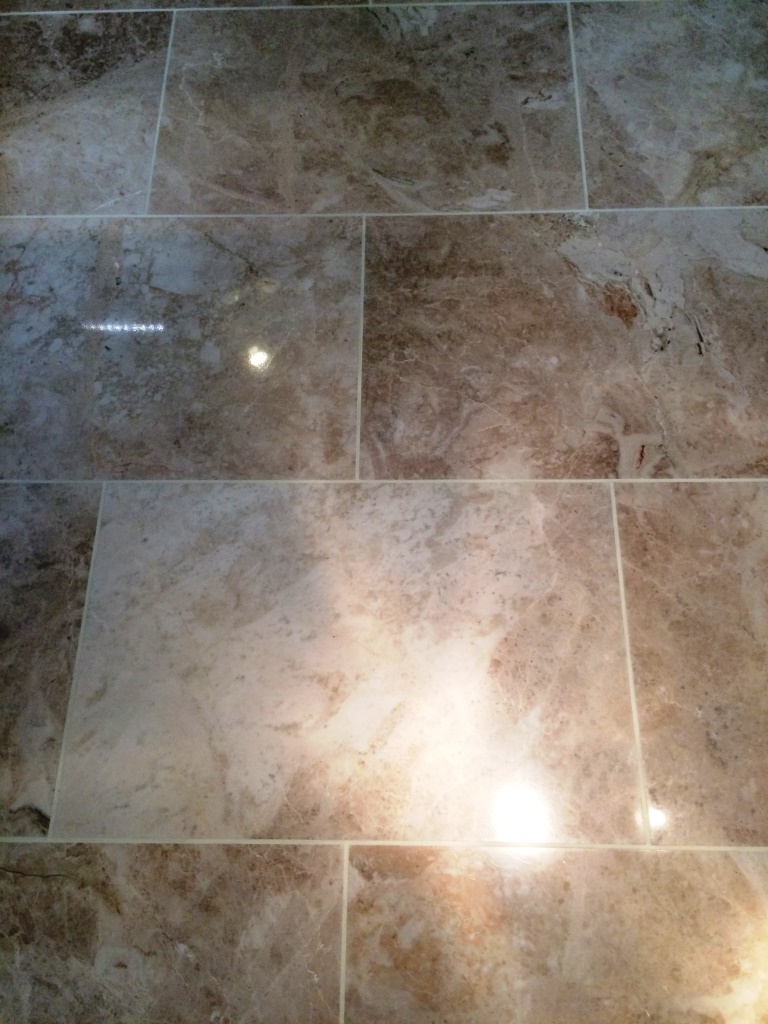 |
 |
My client was very pleased with the results of my work and took the time to leave the following comment on the Tile Doctor feedback system. "I cannot praise the standard of Bruce Copping's work enough. He completely transformed the marble floors and shower room walls in my home and made them look brand new. His attention to detail was excellent, plus no mess, just a perfect finish and valuable advice on maintaining the walls and floors. I'm so relieved I was able to find Tile Doctor online; I'd almost given up hope of finding someone to sort out the problems with my marble, but Bruce Copping was superb. I'm absolutely delighted with the results and have no hesitation in recommending him."
Source: Tile and Stone Floor Cleaning and Polishing Services in Suffolk
Wednesday, October 14, 2015
How to Clean Your Home Rubber Flooring
Home rubber flooring is relatively easy to clean and maintain. Apart from this, it also has the advantages of being relatively durable, yet affordable. Here are the main steps involved in cleaning your home rubber flooring properly.
What You'll Need
What You'll Need
- Broom
- Vacuum cleaner
- Mop or floorcloth
- Bucket
- Water
- Floor detergent
- Rubber floor conditioner
- Towels or Rags
Step 1 - Sweeping
Sweeping your rubber floor regularly will reduce dust from building up. Use a soft bristled broom or a vacuum cleaner.
Step 2 - Washing
Apart from sweeping, it is vital to wash your rubber flooring. This is best done by wiping it with a damp floorcloth or a mop. You may wish to add some mild floor detergent to the water. Never use harsh cleaning agents with solutions that are acetone based or acidic. Afterwards, wipe with clear water so as to remove any soapy residues. Finally, wipe the floor dry by dabbing with an old towel or rag.
Step 3 - Removing Stains
If your rubber floor has any stains, try to ascertain what actually caused the stain. This will help you treat it better and improve your chances of getting rid of it successfully. Any fresh spills should be dabbed away immediately. A specialized stain remover suitable for rubber flooring should always be kept at hand just in case.
Step 4 - Applying Rubber Floor Conditioner
From time to time you should apply rubber floor conditioner to your floor and buff it. This will help you restore your rubber flooring's glossy finish, and as a result, improve its look.
Source: www.DoItYourself.com
Tuesday, October 13, 2015
How to Prevent a Slippery Outdoor Rubber Floor
Having an outdoor rubber floor is a popular thing to install in areas like a garage or other outdoor area such as a patio. This type of flooring is naturally slip resistant, but there are other things that you can do in order to make them even less likely to cause slips and falls. Here are some steps to show what can be done.
What You'll Need
What You'll Need
- Rubber flooring
- Brush
- Epoxy
Step 1 – Order Knobbed Rubber Flooring
One thing you can do in order to prevent slipping on an outdoor rubber floor is to order the type of rubber flooring that comes with little knobs all over the rubber. You can buy different types of rubber flooring like this if desired.
Step 2 – Add an Epoxy Coating
A remedy that lasts a long time is to add non-slip solution to your outdoor rubber floor to prevent slipping. You can do this by putting on an epoxy coating. The epoxy can be purchased in several varieties and is spread on the rubber flooring. It can also be mixed with things like aluminum oxide to make it have more of a sandpaper texture.
All in all, an outdoor rubber floor is a great choice to install outdoors in areas that you need to be slip resistant, such as around a pool, around a patio, or in your garage.
Source: www.DoItYourself.com
Monday, October 12, 2015
How to Cut Rubber Tile Flooring
Rubber tile flooring is a popular flooring alternative. It is easy to install and there are interesting varieties to choose from in terms of colors, patterns and textures. Rubber tile is also relatively easy to maintain, as well as highly resistant. Here are the steps involved to cut rubber tiles yourself. This is a central part of the installation process, so you will need to do it well.
What You'll Need
What You'll Need
- Rubber tiles
- Linoleum knife or utility knife
- Measuring tape
- Marker
- Paper
Step 1 - Laying out the Tiles
First, you will need to lay out the tiles on the floor where they are going to be installed. By doing this, you will be aware where you need to fit tiles of smaller sizes, so as to cover the floor area. These tiles will need to be cut. Take note of the necessary measurements.
Step 2 - Marking the Tile
Utilizing the measurements you recorded, use a marker to draw a line on the tile's back part.
Step 3 - Cutting the Tile
Using a linoleum knife or a utility knife, carefully cut along the marked line. Try to be as neat as possible in order to have a linear result. Repeat these steps for all the tiles you need to trim.
Source: www.DoItYourself.com
Cleaning and Sealing Slate and Terracotta Tiles Together
I was recently contacted by a client living in the historic market centre of Bicester, one of the fastest growing towns in Oxfordshire. Many will know Bicester for its famous shopping village.
They had a small, dirty Terracotta and Slate tiled conservatory which had suffered from water damage and a loss of colour. Terracotta and Slate are examples of naturally porous tiles which can suffer from dirt becoming trapped/ingrained into its pores making it difficult to clean for the regular homeowner with everyday cleaning products. The water damage had also left stubborn stains on the floor which would require professional attention to remove.


My client was very pleased with the results. They were especially happy to see the fantastic natural colours and shades in the tiles brought to life again, after forgetting they were there to begin with!
Source: UK Wide Tiled Floor Cleaning Services"

Cleaning a Terracotta and Slate tiled floor
My first task was to cover the whole floor with Tile Doctor Remove & Go, mixed with water to form a solution. Remove & Go is a powerful cleaner that needs to be left to dwell for roughly ten minutes when first applied. This allows the product to soak into the pores of the stone, thereby getting underneath dirt and lift it out. After allowing the solution to dwell, I then agitated the surface with a brush attached to a floor machine to remove the particularly difficult muck. In this process of doing this, I unveiled some staining in the floor. To tackle this I used NanoTech HBU (previously known as Ultra Clean), which uses nano-sized particles to remove heavy soil build-up in places other products simply cannot reach. Following this I repeated the cleaning process with Remove & Go until I was satisfied that the conservatory floor had been cleaned to the best of my abilities. All of the resulting soiled residue was quickly extracted using a wet-vac machine. The floor was then given a final rinse before leaving to dry completely overnight before returning the next day to seal the tiles.Sealing a Terracotta and Slate tiled floor
On day two and after checking the floor had dried, I applied several coatings of Tile Doctor Seal & Go to seal the floor. This helped to restore the desired colourful sheen finish to the floor, whilst also guaranteeing durable surface protection for the future. Seal & Go is suitable for use on internal, unsealed porous surfaces such as Terracotta, Sandstone, Slate, and more.
My client was very pleased with the results. They were especially happy to see the fantastic natural colours and shades in the tiles brought to life again, after forgetting they were there to begin with!
Source: UK Wide Tiled Floor Cleaning Services"
Thursday, October 8, 2015
How to Lay Rubber Tile Flooring Around Concrete Fixtures
Rubber tile flooring is a widely used and well favored type of flooring. It is affordable, available in an interesting range of colors and quite easy to install and maintain. In fact, you can easily do the whole installation by yourself. During the installation process you may have cases where you will need to trim the rubber tile so as to make it fit in a smaller space, or to install it around any obstructions. If for instance there are any concrete fixtures on the floor, you will have to install the rubber tiles around them. Let us describe how this is best done.
What You'll Need
What You'll Need
- Rubber tiles
- Marker
- Ruler
- Linoleum knife
- Adhesive
- Linoleum roller
Step 1 - Clean the Subfloor
Primarily you have to clean and level off the sub-floor so as to make sure to have a proper foundation for the rubber tiles and a better adhesion for the adhesive.
Step 2 - Lay Out the Rubber Tiles
It is best to lay out the rubber tiles on the floor as a trial, so as to see how they fit and where you need to cut. Mark on the back part of the tile, to have a clear guidance where and how much you need to cut.
Step 3 - Cutting the Rubber Tile
Then, start to cut the rubber tile carefully, using a utility knife or a linoleum knife. Cut along the marked lines and try not to deviate.
Step 4 - Installing the Rubber Tiles
Once you have cut the tiles, you can spread adhesive on their back and on the subfloor so as to install them. Try to lay the tile snugly and neatly around the concrete fixtures so as to achieve a neat result. When done, press them with a linoleum roller.
Source: www.DoItYourself.com
Saturday, October 3, 2015
Mistakes to Avoid When Laying Rubber Floor Tile
Rubber floor tile is a good flooring alternative due to the fact that it is relatively easy to install and maintain. It is available in an interesting range of colors and patterns, so as to suit customers' varying needs and preferences. Being rather easy to install, you should attempt to give it a try yourself. Let us highlight some common mistakes that you should be aware of, so as to avoid doing them.
Not Laying Out the Tiles in Advance
A common mistake is not laying out the tiles onto the floor area. This trial will greatly help you to get a feel of what the layout will look like, how many tiles are needed to cover the whole floor, and how many tiles you need to cut so as to fit them in.
Not Making Any Markings and Templates
Another mistake is to refrain from drawing any markings or guidelines on the floor. A lack of visual guidance will most likely cause a not-so-linear result. You will also err if you fail to draw out templates on the tiles, in places where you need to cut the tiles, or where there are any obstructions.
Not Applying the Adhesive Well
To install rubber tiles you need to apply adhesive. A common mistake is to apply adhesive only on the subfloor or only on the back part of the tiles. It is best to use a notched trowel to spread it evenly, and to apply adhesive on the subfloor and on the tiles' bases.
Failure to Finalize the Job with the Roller
Once all the tiles have been laid, you should press them with a linoleum roller so as to apply an even pressure and fix them in place. Failure to do so may result in bumps and an uneven floor.
Source: www.DoItYourself.com
Subscribe to:
Comments (Atom)