Monday, February 26, 2024

4 Wood Floor Wax Mistakes to Avoid

Wood floor wax is one of the most conventional ways to make your floors look more expensive quickly. Moreover, waxed floors tend to look cleaner for a longer time than unwaxed wood and will thus save you cleaning time. However, when applying wax to wooden floors there are certain common mistakes which can be easily avoided by following the steps listed here.

1. Tools and Supply Choice

Wood floor wax comes in two different types: liquid and hard. When applying any liquid floor wax you should use lamb’s wool applicator because it is softer and applies the wax evenly while penetrating the small cracks you cannot see. On the other hand, if you are using hard floor wax you can use a lint-free cloth as an applicator.

It is important to note that liquid and hard floor wax have different properties and different preliminary requirements. In fact, liquid wax is easy to use and is not only waterproof, but also antistatic. Moreover, it can be applied on wooden surfaces that have a layer of varnish and even plaster decoration.

Hard floor wax is colorless, has a satin finish and is suitable for paneling, timber floors, and both hard and soft woods. Furthermore, it allows the wood to breathe and repels both dirt and water. Therefore, the ideal solution to use is hard floor wax because although it may be a bit more demanding during its application process, it gives the best result.

2. Prepare

Before setting on applying any wood floor wax it is always very important to check the present status of your flooring. It is ideal to buff the wood and you may even need to clean it from any present wax (especially if old) before applying any new wax layers. Therefore, it is important to buff the wood and clean it by either sweeping or mopping the surface with a damp rag. It is important not to have any grease or dust particles which can be ground into the wood and thus damage the final result.

3. Application Process and Technique

Once you are ready to apply the wax you should always remember to apply several thin layers rather than a thick one. If you notice any opaque streaks on the wood while applying the wax, you should immediately stop because that would mean that you are applying too much wax. Wax doesn’t take too long to dry, so after an hour or so you can go about applying a second and then a third layer. You should stop applying wax layers when the surface presents a visible thin layer on top of it. Then you should polish it to the desired shine level.

4. Finishing Touch

It is important to note that the wax needs to be buffed before it has the desired shine. Moreover, before starting the buffering process you should use a polisher so that the final result has an added shine to it. However, when buffering, consider using a large machine rather than a small one because it gives you greater shine. It is also important to note that after a long time has passed and the shine has been lost, you do not need to go through this process all over again, but you can simply re-buff your waxed floor so that they regain the original shine.

These are just a few tips on the application of wood floor wax and on how to avoid the most frequent mistakes people fall into when applying any wax to their floor. However, applying wax to your floor is relatively easy as long as you have the patience and correct tools.

Source: www.DoItYourself.com

Monday, February 19, 2024

How to Use a Carpet Edging Tool

Refurnishing floors using carpets may require carpet edging tools and will have its challenges. Particularly when the subject is the finishing, the point at which tile and carpet meets. It is actually not that difficult to accomplish. Following the instructions below will help in completing the task, provided of course you have the appropriate tools for the job.

What You'll Need:
  • Tape measure
  •  Tack strip
  •  Knee kicker
  •  Hammer
  •  Carpet edging tool

Step 1 – Understanding the Method

Before making use of carpet edging tools, you should understand how it fully functions with other tools in completing the task finishing carpet edges. There is a line that you have to quantify and its distance from tiles’ edge is a 1/4 inch. This procedure is in preparation for the inner edge, the installation of the strips.

Step 2 – Preparations before Using the Edging Tool

Set the tack of strips up on the platform or floor. Complement the edges’ interior to counter the marking that measure a 1/4 inch away from a tiles’ edge. Be certain that tacks upon the strips slant directly upon the tiles. Hammer the strips of tack on the designated spot. Be careful and avoid hitting the tiles. Extend the carpets’ edges on the strips of tack. Press the carpets’ edges down using the kicker after it is extended 1/2 inch over the edges on the side of tiles on the strips of tack.

Step 3 – Cutting the Excess Portion of the Carpet Using the Edging Tool

Using the carpet edging tool, slice the carpets’ leftover piece onto the space amid the tiles and tack strips measuring a 1/4 inch.

Monday, February 12, 2024

5 Types of Oak Hardwood Floors

 Oak hardwood floors have been a popular choice for flooring homes for centuries. In the modern age however, home-owners not only go for oak wood depending on the climate they live in but also to achieve a traditional and contemporary look. Although actual genuine wood has been traditionally used in homes for years, it is expensive and difficult to maintain. The addition to the market of types of oak wood that looks like genuine wood has created modern and cheaper options for wooden flooring.

White Oak

White Oak is one of the more traditional types of oak that is used for hardwood floors. Having a charcoal tone with shades of gray, white oak helps create a natural look for a home. Its durability and versatility enables it to be used in all areas of a house that may be exposed to different environmental conditions. This oak can be used for flooring living rooms and also bathrooms and is easy to maintain. White oak costs more than the modern synthetic wood you can use for flooring but is still cheaper than other types of traditional oaks.

Red Oak

Another popular type of oak is Red Oak. Hardwood floors made using red oak usually have a reddish tone, thus the name. Some pieces of red oak however can have a lighter tone too and a nice shaded reddish look can be achieved. One quality of red oak is that it is easier to work with than white oak. Being more porous than white oak, it is very easy to sand. Red oak however can not withstand different types of environmental conditions in different rooms in the house and is less durable and versatile. It is mainly used for flooring living rooms.

Engineered Red Oak

Engineered red oak is not very different from traditional red oak. The look achieved after hardwood flooring based on this oak will have a reddish shade too. Engineered oak however is coated with eight or more layers of aluminum oxide. This multi-layer coating not only gives the oak a smooth and flat finish but also increases wood longevity. Engineered red oak can withstand harsh conditions over a long period of time and requires minimal maintenance. It costs almost the double the amount you would spend on traditional red oak flooring though.

Engineered White Oak

Engineered white oak is differs from engineered red oak in the way that it is not coated with aluminum oxide but is layered with real hardwood. Some types of this oak have layers of just a thin veneer of hardwood while others have a thicker layer, which increases durability and longevity. The grayish-finish oak has been known to last for around 25 years on average.

Oak Laminate

Oak laminate floors are the newest addition to the wooden flooring market. It is not pure oak but has been engineered to look like rich wood. The finish achieved after oak laminate flooring is installed is of traditional wood colors. Many home owners now prefer oak laminate as it is cheaper to buy and install and requires almost no maintenance as it is immune to regular aging that genuine wood experiences in different environmental conditions.

Source: www.DoItYourself.com

Sunday, February 4, 2024

Hardwood Floor Finish: Polyurethane

Adding a hardwood floor finish to your home can improve the luster and quality of the shine on your floors. Hardwood floors are sometimes very difficult to find the right finish for, as they often require a lot of sanding before you start to notice an improvement. Polyurethane is a rather difficult liquid to apply as a finish, although once you have added it to the floor, it can create a better shine, and will also protect the floor against serious damage. In order to prevent the floor from being marked by the application of your hardwood floor finish, you will need to follow a certain series of steps.

Before Applying Your Polyurethane Hardwood Floor Finish

When you are ready to start refinishing your floor, always start by using a sander to remove previous finishes. This will give the floor a new layer, and will also help you to avoid refinishing marks which were caused when applying the last finish. Once you have used the sander, you should ensure that you brush the floor thoroughly, and then get good ventilation for the room you will be adding the finish to. The room may need a couple of fans to help blow the air around the room, and prevent fumes from building up. You should also equip yourself with a vapor respirator.

Applying the First Coat

The first coat of your Polyurethane hardwood floor finish will probably be the most difficult to apply well. You should always have a wet edge to apply the polyurethane to, and the application should progress uniformly across the room so that you are not leaving out areas. Make sure that you apply the hardwood floor finish with the grain of your wood, and you could use a soft applicator, such as a Lambs Wool, for the first coat.

Applying the Second Coat

Before you add another coat to the hardwood floor, you must ensure that it is completely dry. Applying your second coat too soon will result in bubbling, which is where the wet undercoat rises up, and the second coat then dries and seals these in place. You should apply a scruff sanding to the first coat before the second application, and if you are getting a urethane by-product on the sandpaper, this means it is not yet dry enough.

Removing Problems

If you do find that you have had a problem with applying the second coat of urethane, then you will need to remove all of the second coat. You may see wrinkles or bubbles forming in the second layer, and some of this will be cloudy. The only answer to this problem is simply to remove the second coat entirely. Use a paint scraper to peel off the second coat, and then sweep the floor thoroughly. Be careful when disposing of your scrapings, as they can combust if they are left in an ordinary trash can.


Source: www.DoItYourself.com

Monday, January 15, 2024

The Only Carpet Installation Tools You'll Ever Need

Carpet installation tools are tools that allow people to install carpets on their own, without professional help. They include chalk, duct tape, gripper edge, hammer, knee-kicker, masonry nails, power stretcher, saw seaming iron, seaming tape, stair tool, staple gun, tackless strips, and a utility knife.

Preparing for Installation

Arrange tackless strips around the perimeter of the room, leaving about 1/2 inch between the strip and the wall. Use the saw to cut them to the proper length. Use a hammer and two nails to attach each strip to the floor and join the strips at the corners. Attach padding waffle side up using the staple gun, spacing the staples 6 inches apart. Use the utility knife to trim the excess padding. Once all padding is applied, cover the seams with duct tape.

Setting Carpet Dimensions

Measure the room and add six inches to the measurements. Use the chalk to set the measurements down on the carpet. Cut off the extra fabric. If you are using more than one piece of carpet, leave some extra space where they meet. That way you can cut away the excess pieces without creating gaps.

Applying the Carpet

After the carpet is cut, place the seaming tape, adhesive side up on the floor where different pieces of the carpet will meet. Use the seaming iron to melt the tape and press the carpet against it to attach. Use the knee kicker to attach the carpet to the tackless strips at each corner. Attach the rest using the carpet stretcher.

Final Steps

Once the carpet is secured, trim away the excess carpet. Smooth out the edges by tucking them into the space between the tackless strip and the way using the stair tool. Once that is done, put away the tools and enjoy your new carpet.

Source: www.DoItYourself.com

Monday, January 8, 2024

Maintaining a Historic 1850's Minton Tiled Floor in Cheshire

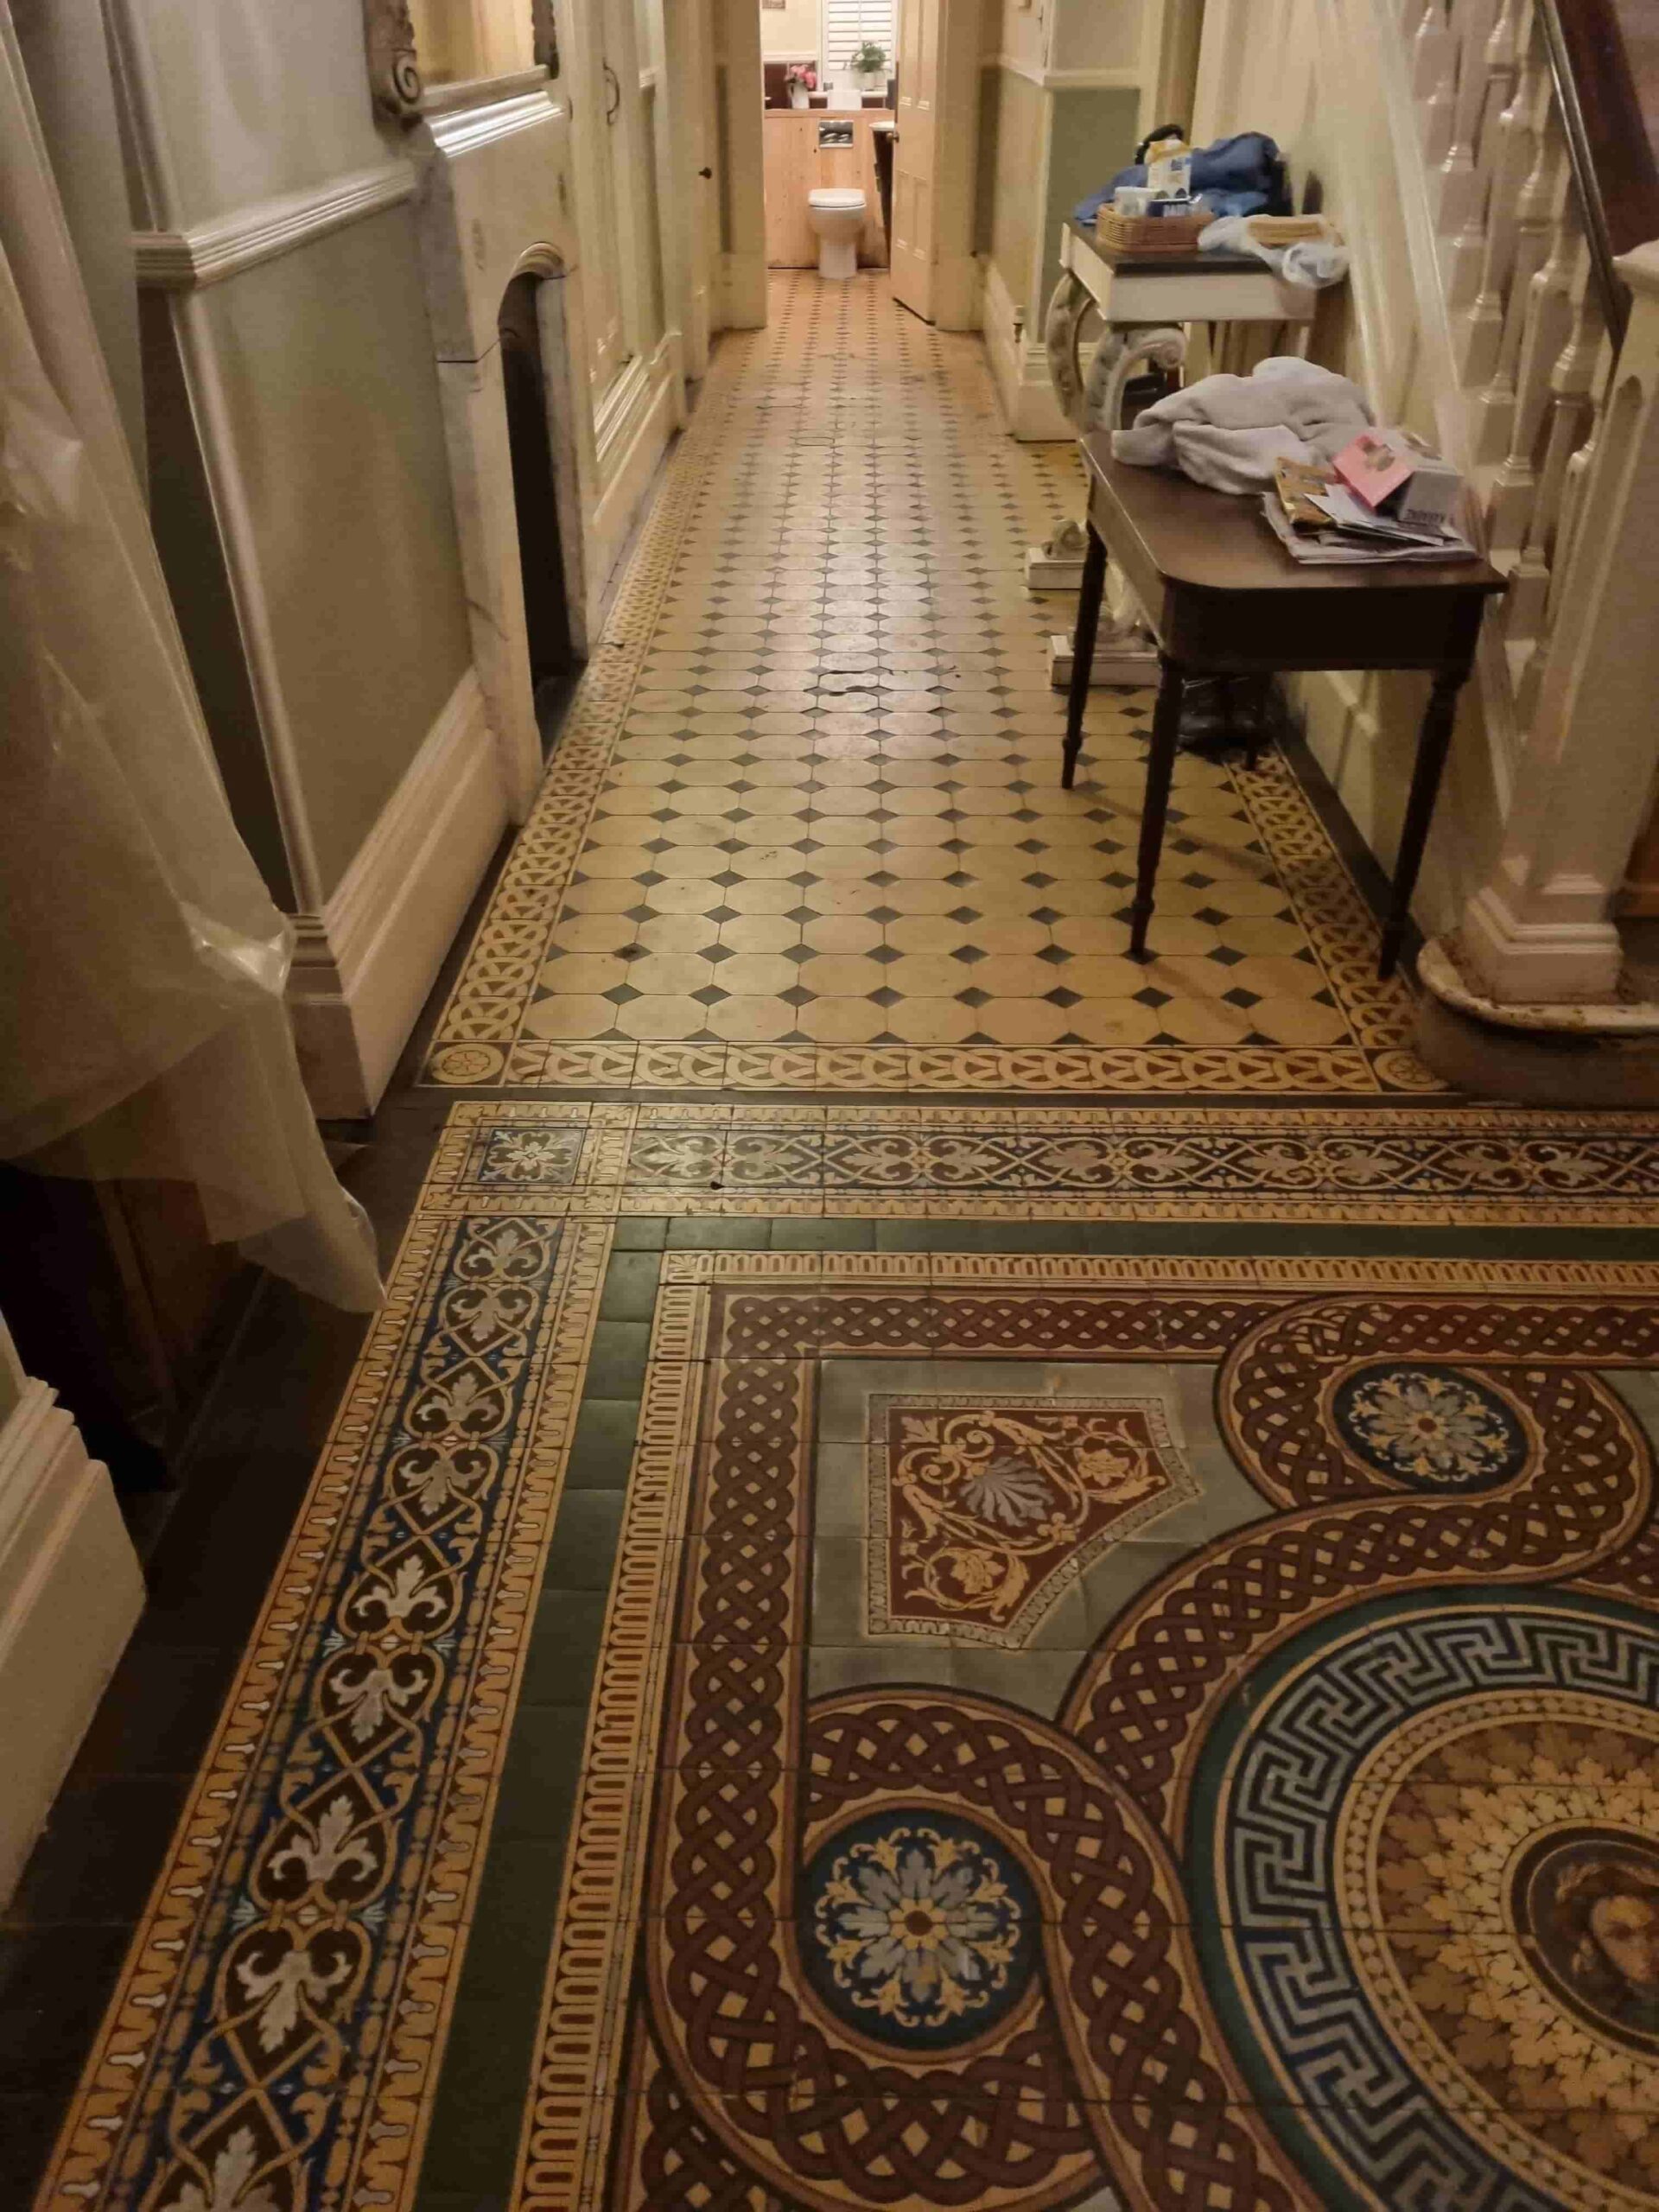
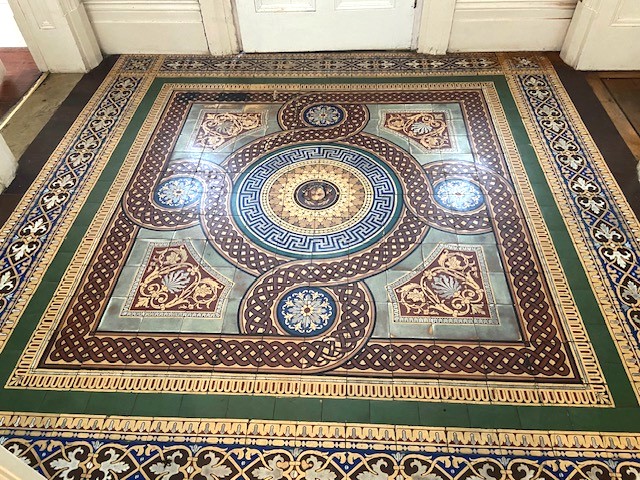
I was first asked to restore the large Victorian tiled hallway floor at this mansion type property in Handbridge, Cheshire two years ago. The floors had a lot of history and had been used as a template for the famous Minton Hollins encaustic tiled floor at St George’s Hall in Liverpool that was built in 1854. Unfortunately, however my work was put on hold as other restoration works including repairing dry rot took priority.

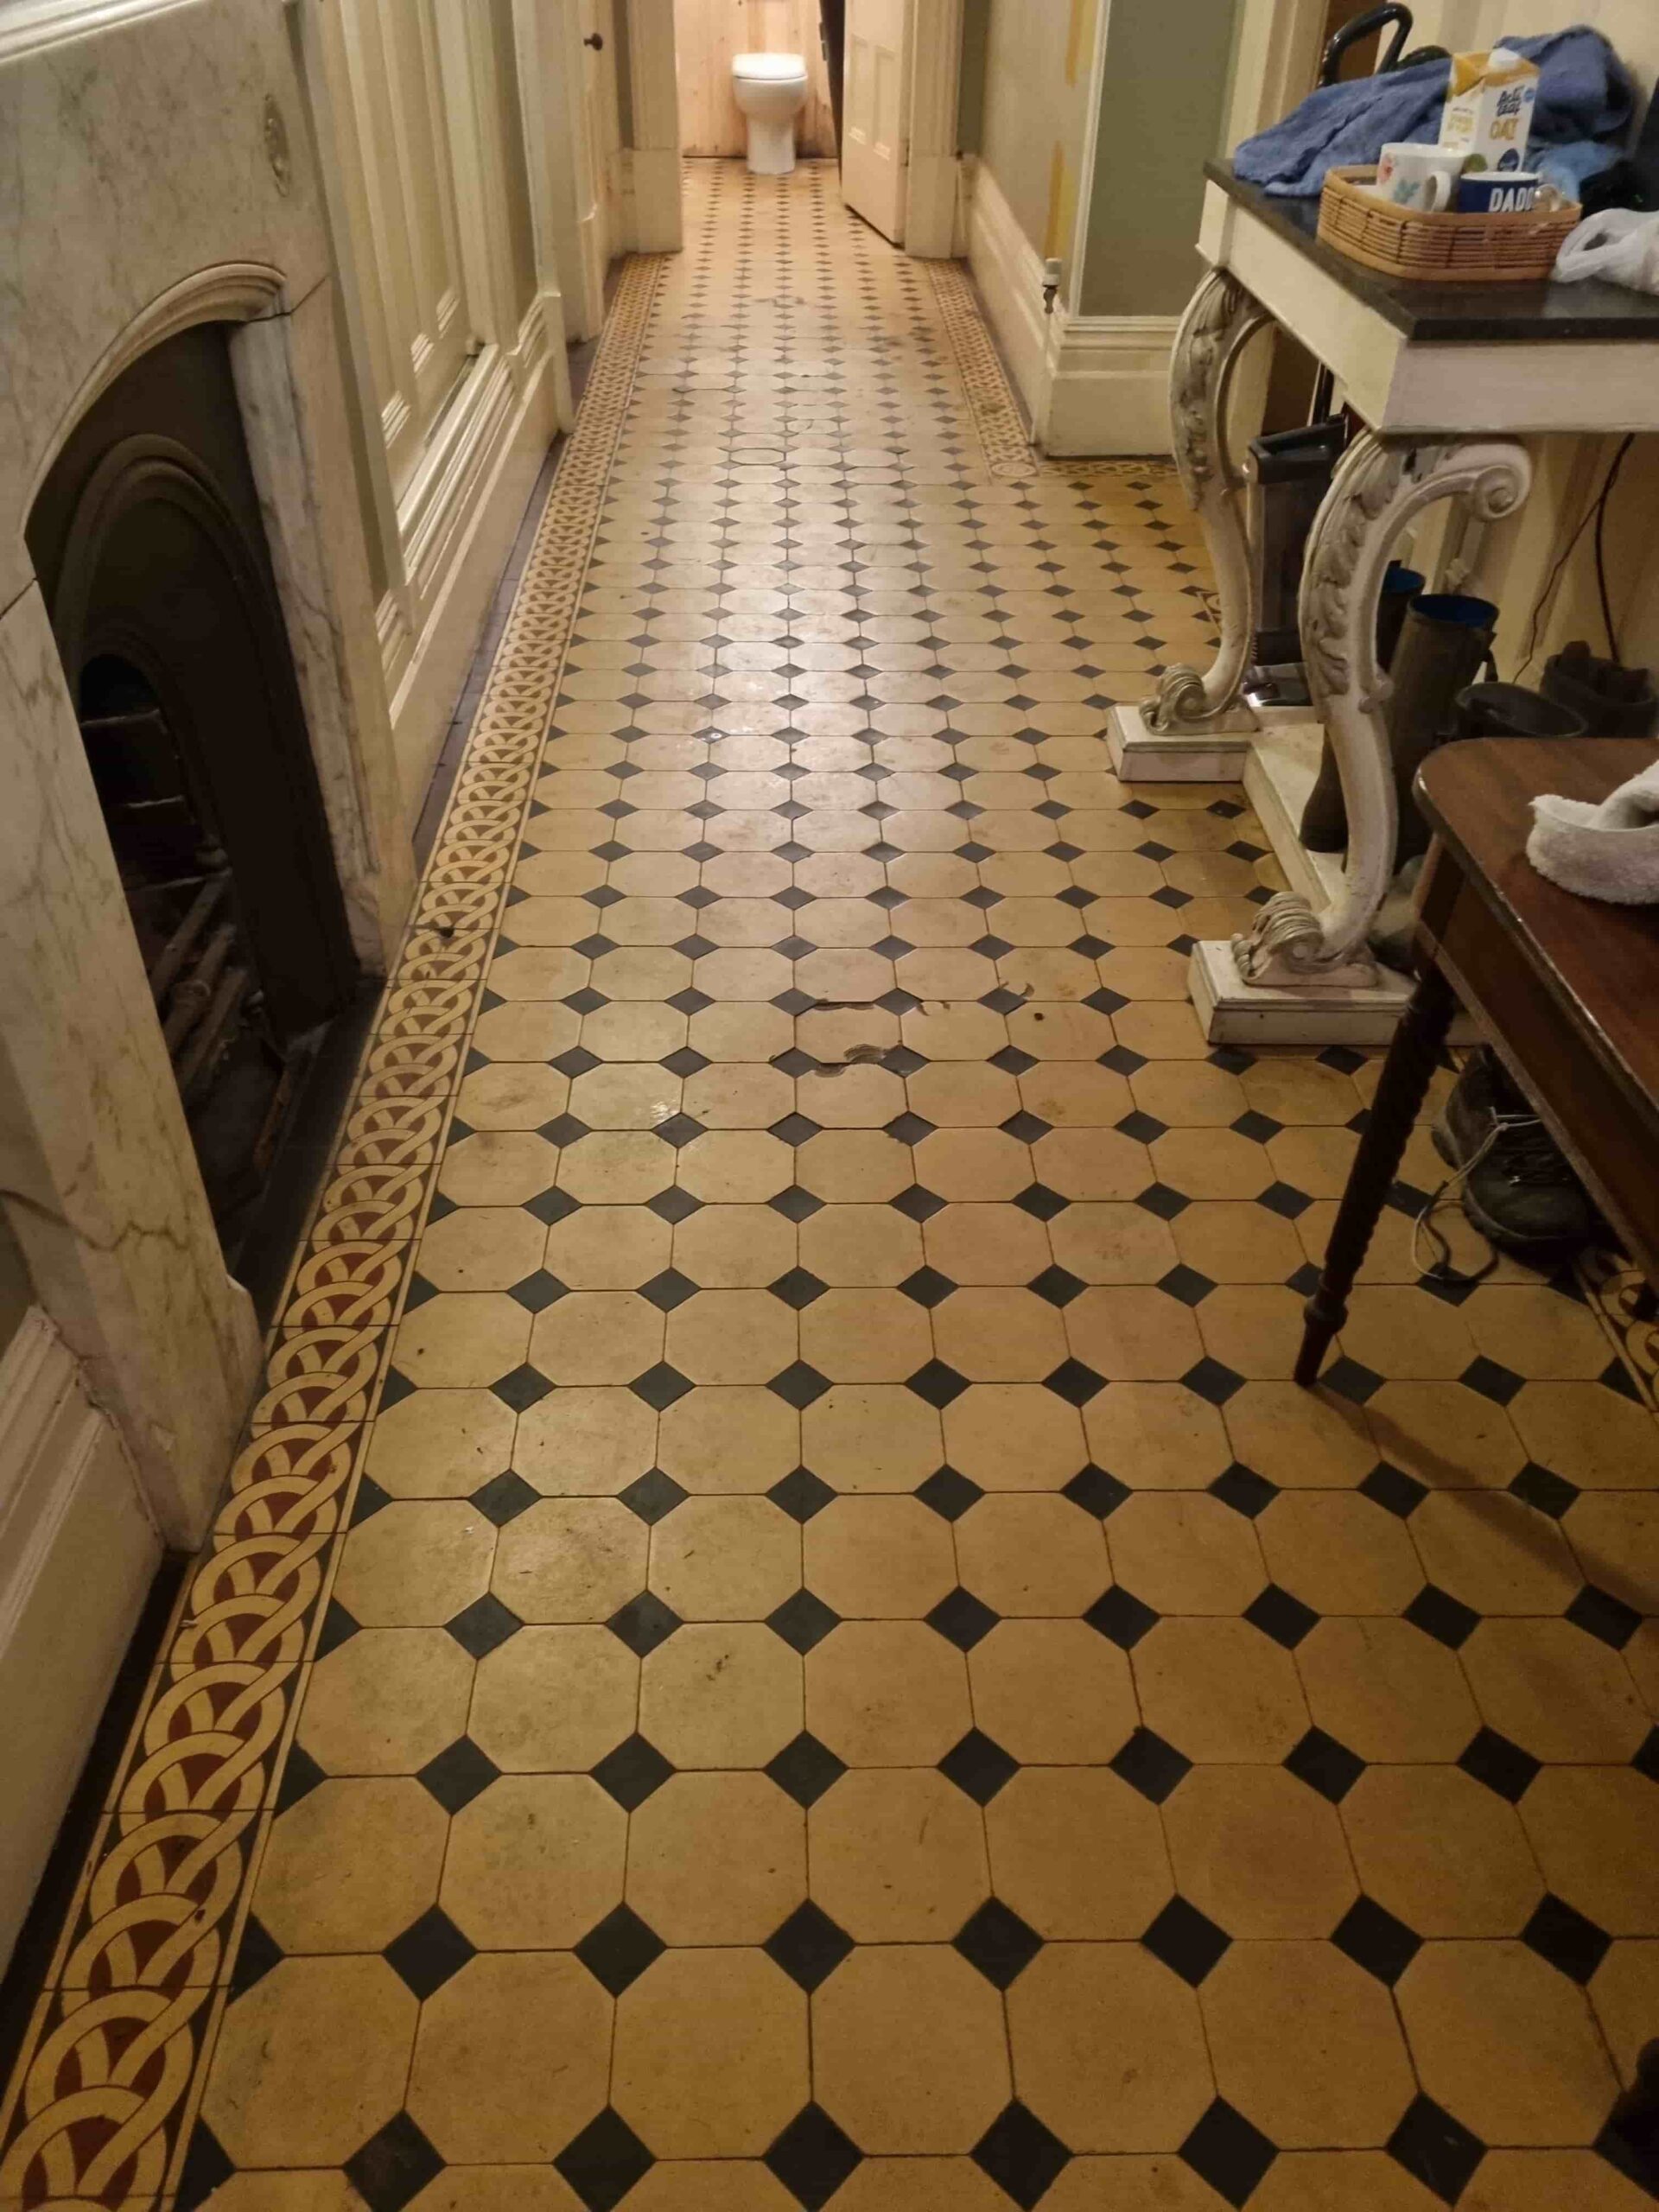
Victorian Tiled Floor Before Renovation Handbridge Cheshire

I kept in touch with the owners whilst the other works progressed and kept a look out for 22 beige Octagon shaped tiles that were needed to replace some of the damaged tiles in the floor. In fact, it wasn’t until later in 2023 that I was called back to start the renovation work to the floor, by which time I had managed to source all the replacement tiles needed.
     
Victorian Tiled Floor Before Renovation Handbridge Cheshire Victorian Tiled Floor Before Renovation Handbridge Cheshire
Handbridge is a district of Chester with a mixture of large Victorian mansion type properties on the South bank of the river Dee and workers cottages built to service the water powered factories that sprung up along the river.

Repairing and Cleaning a Victorian Hallway Tiles

Before starting the cleaning process my first task was to replace all the broken tiles. This needs to be done carefully so as not to dislodge any adjacent tiles and make more work for myself. Once removed the base is cleared of old cement and then the replacement tiles fitted using rapid set adhesive and cut to size where required.

Once the repairs were complete and the adhesive set, I began the cleaning process which is designed to remove and remaining protective sealer and flush out ingrained dirt from the pores of the tile. This is done by applying a strong dilution of Tile Doctor Pro-Clean with a mop and then leaving it to soak into the tile for ten minutes. The floor was then scrubbed using a buffing machine fitted with a black pad and lubricated with water. The cleaning alkaline cleaning solution soon turns black with the dirt and then floor is then rinsed with water and the residue extracted with a wet vacuum.

Attention then turned to the decorative historical piece of flooring at the entrance to the hallway. This only needed to be cleaned with Tile Doctor Neutral Tile Cleaner which is used for regular cleaning and maintenance of tiled floors. this was applied with a two-minute dwell time before cleaning by hand using soft scrubbing brush then wiped down with damp microfiber cloths then left to dry.

Sealing a Victorian Tiled Hallway Floor

The next day damp meter readings were taken from both floors to make sure they had dried and were ready to be sealed. The readings were within tolerance so work could begin on applying the first of what would be three coats of sealer.

Tile Doctor Colour Grow was chosen to seal the tiles, it’s an impregnating colour intensifier sealer which is fully breathable so it will allow for moisture to rise through tile, an important consideration for old floors that don’t have a damp proof membrane.

The sealer was applied using a paint pad and any excess is wiped off after five minutes with microfiber cloths before leaving it to dry for twenty minutes. I use air blowers around the floor to increase the drying speed.
   
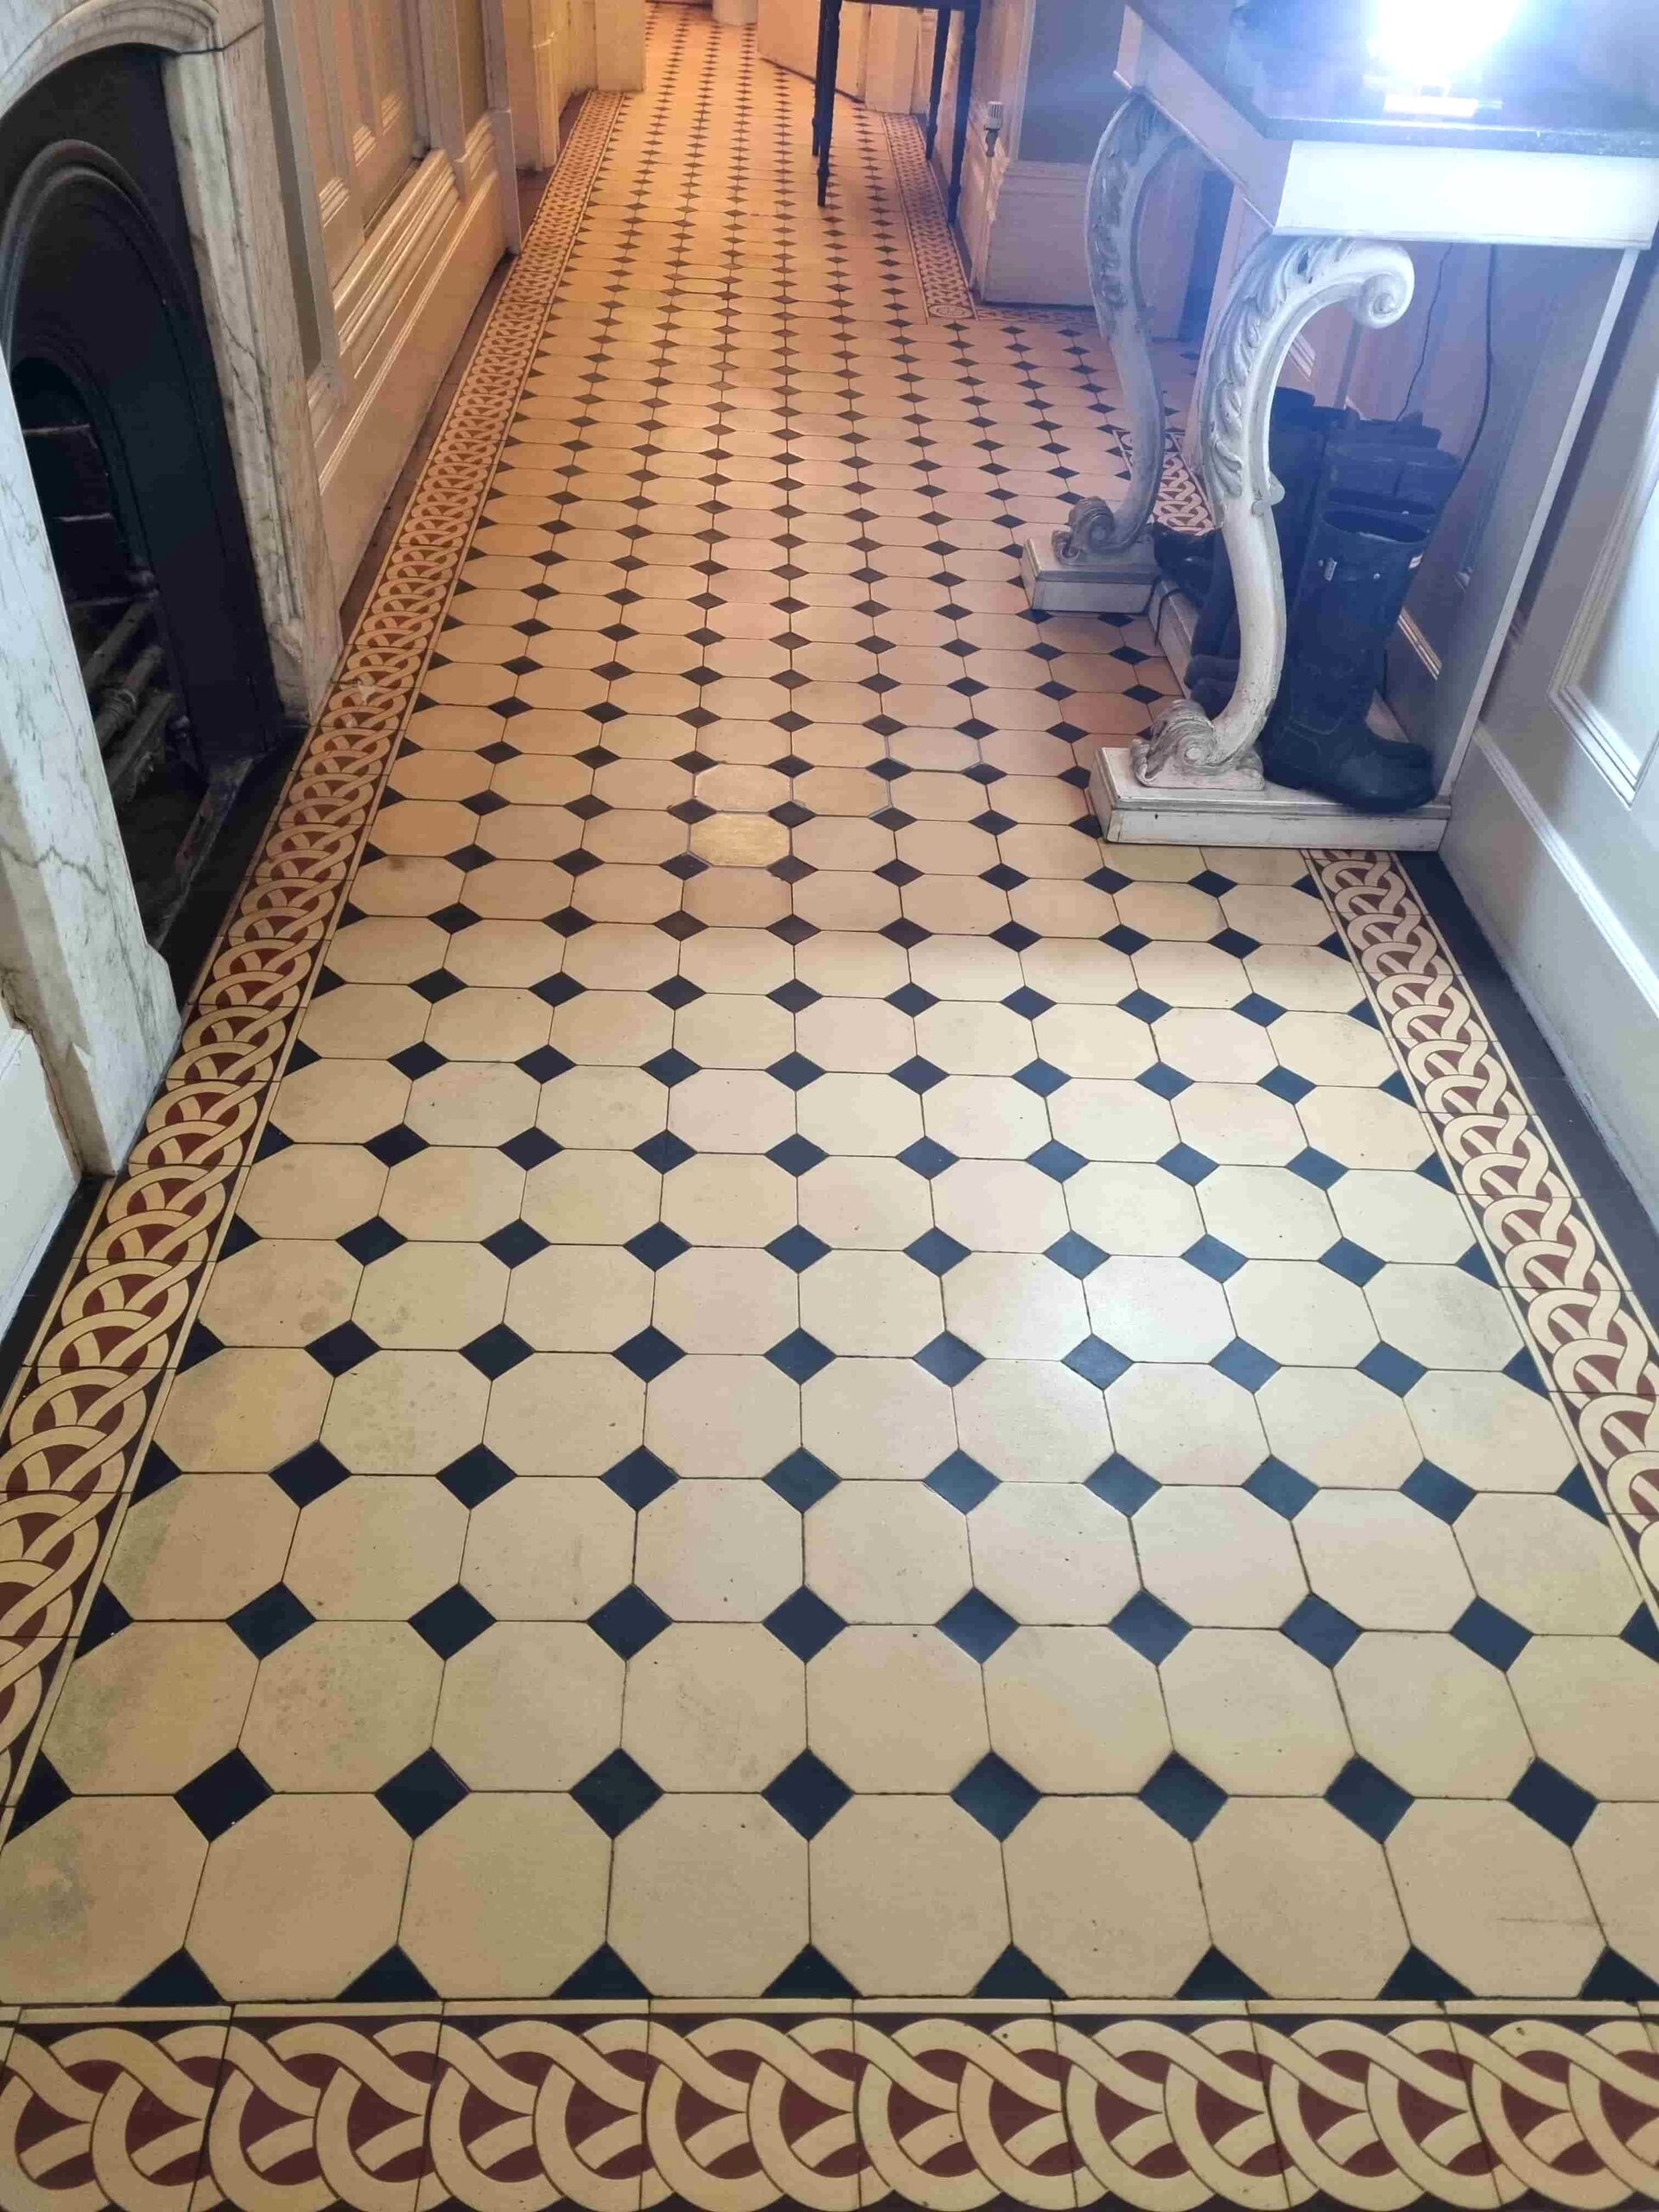
Victorian Tiled Floor After Renovation Handbridge Cheshire Victorian Tiled Floor After Renovation Handbridge Cheshire

The owner of the property was over the moon with the work and pleased that the work to restore the property to its former condition was nearing completion after what had been four years of restoration.
  Victorian Tiled Floor Before Renovation Handbridge Cheshire 

Wednesday, December 20, 2023

Dry Foam Carpet Cleaning: How it Works

Dry foam carpet cleaning is a good way to clean your carpets with minimal moisture. Many people are switching to this method because it is effective and dries quickly.

What You'll Need:

  • Dry foam carpet cleaner (rental)
  • Dry foam


Dry Foam Basics

In order to take advantage of dry foam carpet cleaners, you will need a carpet cleaning machine to lay down the foam. The machine is required because, in addition to the application of the foam, you use the bristles from the machine to agitate the carpet and break loose any dirt or stains.

Most machines are also designed to vacuum up the leftover residue, if any, directly after the application. If the machine does not have a vacuum built-in, simply wait until the carpet dries and go over it with a regular upright vacuum to remove any leftover residue.

Getting Started with Dry Foam

Before you start cleaning with dry foam, you need to first vacuum the whole area you will be cleaning. This is important because it eliminates any unnecessary waste of dry foam chemicals. This will also allow the entire dry foam application to get down deep into the carpet fibers and pull out the dirt. But when all dry cleaning attempts fail, steam cleaning is often still the last chance solution, with its really effective way to lift dirt and buildups from the carpet fibers including pet scents and mold

You can find dry foam carpet cleaning products online or at your local general merchandise store as well as specialty vacuum shops.