Sunday, May 3, 2015

Restoration of Limestone Kitchen Floor Near Staines

This marvelous Limestone tiled floor was installed in the kitchen area of a house near the town Staines where it had become dull and tired, helped I might add by the customers dog who loved to swim in rivers and get muddy at every chance they could get. The customer was frustrated to clean the floor, the grout lines wouldn't come clean and after spending so much time scrubbing with a tooth brush and getting nowhere she called Tile Doctor.

Cleaning the Limestone Kitchen Floor


The floor was obviously in need of a proper cleaning and re-seal a very mild dilution of Tile Doctor Pro-Clean applied evenly across the floor and allowed to dwell and penetrate through the soils engrained into the grout. The grout lines were scrubbed with a specialist grout brush to release the soil and a rotary machine with a nylon deck scrubbing brush was used to release the soils from the Limestone tiles.

About half an hour of scrubbing, the remaining slurry was extracted using our truck mounted clean and capture system. This system combines heat, pressure, and vacuum extraction to gently blast engrained soils away from the limestone and the grout lines.


To get the Limestone really clean a two pad diamond burnishing process was used; normally we use four pads however the customer did not want the stone to be too shiny and reflection was already starting to happen after the second pad had been applied. Using diamonds to refinish calcium stone such as marble, travertine and limestone is the modern chemical free solution to restoring the surface of sedimentary stones.

Sealing the Limestone Floor


After deep clean and refinishing the surface of the limestone, it was allowed to dry for a period of 36 hours, after this a liberal coat of Colour Grow which is a solvent based impregnator was applied to the floor. The sealer was allowed to dry on the surface of the stone for approximately 5 minutes before the excess was buffed away. Buffing the excess away is important to ensure a great, smear free finish.

Before leaving we recommended a system to care for the floor to make sure it continues to look as good as the day we left. Also we recently contact the client to check everything was okay and I’m proud to confirm they are still really happy with the floor and after professional cleaning and sealing is now finding the floor much easier to clean and maintain itself.

Saturday, May 2, 2015

Honed Travertine Tiled Floor Restoration in Kensington

The task was to restore this Honed Travertine flooring in Kensington, London which ran through the ground floor area and to a small area in the basement. The floor had been laid nine years prior and had only had regular washing by the housekeeper and was now overdue a deep clean and re-seal..

Restoring Travertine Tiles

It was a large area so it was necessary to work in sections which had the added complication of having to move the customer’s furniture around. With each area I scrubbed the floor with a rotary machine fitted with a medium brush head and a hot 3:1 dilution of Tile Doctor Pro-Clean. I scrubbed it in and soaked it on the floor for 10 minutes before scrubbing again then vacuumed it away with a wet vac. I then checked all the grout lines were clean in case the brush head had missed any. Next I fitted a pad holder to the rotary machine and using a medium grade burnishing pad scrubbed the area again, I then followed this up with the fine grade pad to build a nice sheen on the stone to match the customers’ requirements. During the cleaning process it became obvious that some of the Travertine tiles had holes in them, it’s possible they had been this way when supplied but it’s also possible that they had been worn through by the use of an acidic cleaning solution. so after once the tiles were cleaned and polished I filled in the holes with a matching filler.

Sealing Travertine Tiles

The next step was to seal the Travertine to keep it from future staining and for this I used Tile Doctor Colour Grow which is a colour enhancing impregnating sealer that fills the pores in the stone. In total I had to use three coats on sealer on the stone due to its porosity. I finally buffed the floor using a white soft buffing pad; this was to take off any seal left sitting on the surface of the stone and helps to work it in. In total it took four days to do this job and the client was really grateful with the result and left a very nice testimonial on the Tile Doctor website.

Monday, April 20, 2015

Top 3 Laundry Room Floor Options

It’s important to have a good laundry room floor that can take water and all kinds of abuse. That might seem to limit the options, but in fact there are plenty of good flooring possibilities that will work in a laundry room.

1. Concrete

If your laundry room is in the basement, then you probably already have a concrete laundry room floor. It’s very serviceable and easy to clean up in the event of a leak from the washing machine. You don’t need to do anything to install the floor, either.

2. Linoleum

A linoleum floor offers several advantages as a laundry room floor. Since it’s in one piece, clean up is remarkably easy, and installing the linoleum floor is an easy procedure. If you have a leak from the washing machine you’ll be able to clean the mess up easily with a mop.

3. Tile

A well-grouted tile floor gives a solid base. As a laundry room floor it can work very well as long as there’s a good sealant on the top. The sealant is vital in case of a water leak or spillage; it will stop liquid soaking into the tile or grout. More than concrete or linoleum, tile forms an extremely attractive laundry room floor that will last well.


Floor Transition Molding: Options for Uneven Floors

Using floor transition is necessary when installing a new floor in your house. Where one floor meets another type of flooring, you will have to install some sort of transition piece. This will help you cover the gap and make it a smoother transition from one floor to the next. Here are a few options when you have to combine 2 uneven floors.

Wood or Laminate Transitions

When you install wood or laminate, the manufacturer of the floor should be able to offer you a transition piece that matches the floor. They make the transitions in a number of profiles and styles. Therefore, you should be able to find something that will work for you.
One type of transition that you could use whenever a wood or laminate floor is higher is a reducer. These are also sometimes referred to as a vinyl reducer. A reducer is a flooring transition that is higher on the side that goes over the edge of the wood. Then it gradually slopes down to the adjoining floor. This will provide you with a nice slope that forms a bit of a ramp up to the next floor.
If you need to, you can even adjust these transitions a bit by sawing off part of the bottom portion. Sawing off part of the bottom of the higher edge of the reducer can provide you with a bit more height for the higher floor if you need it.

Rubber Transitions

Another great option that you have for this type of situation is a rubber transition piece. Rubber transition pieces are offered by a number of different companies and they come in many different shapes and sizes. With rubber, you have many more options. For example, when you need a reducer, you can specify that you want it in a certain height. It may also come in different widths and angles. Therefore, you can get a custom solution for the particular height that you need.
You can get it in a flat ramp down or you could get it in a rounded style. Therefore, you can choose exactly the style that you want before you order it. This type of transition also comes in a number of different colors as well. Therefore, you should be able to match up the color of the transition to the laminate, wood, tile or other floor that you are going up against.

Metal Trim

In addition to wood and rubber, another option that you have is to go with a metal transition. They make a number of different metal transitions that could be used in this application. You could potentially get one that just covers the edge of the higher surface and gives it a finished look. You could also get one that ramps down to the other surface. These hard metal transitions are often used in commercial applications, so you know that they will be very durable regardless of the amount of traffic that goes over them.


Friday, April 17, 2015

Deep Cleaning Victorian Floor Tiles

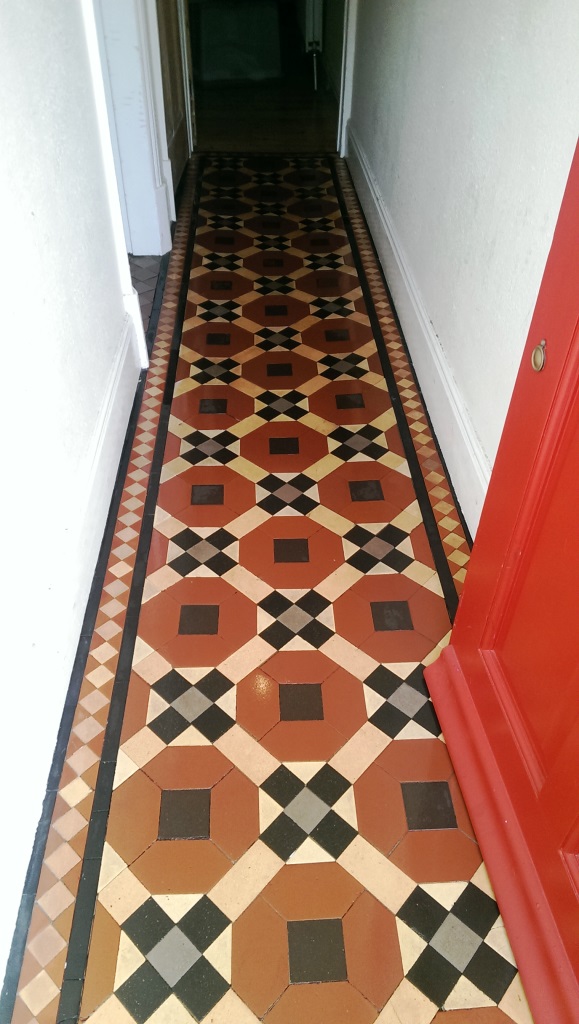
Coalvile in the heart of the Midlands was a coal mining town and with that history has many period properties with traditional floors including the one in this post which has a Victorian tiled hallway. The tiles were in good physical condition for their age but were now looking faded and lifeless due to a build-up of ingrained dirt in the tile and were now overdue for a deep clean and re-seal.

Victorian Tiled Hallway Before Cleaning in Coalvile

Cleaning Victorian Hallway Tiles

Before I could seal the floor it would need to be stripped of any old coatings and in the process given a really good clean. To do this I applied a dilution of Tile Doctor Remove and Go and left it for to soak in to the tiles for about 15-20 minutes before scrubbing it in with a rotary buffing machine fitted with a black scrubbing pad. Once the whole floor had been scrubbed it was washed down with water which was then removed using a wet vacuum. Stubborn areas were then re-treated and grout lines also scrubbed using more Remove and Go and a stiff brush. Last step of the cleaning process was to give the floor a thorough rinse with more water to remove any trace of cleaning product and then as much was as possible was extracted using the wet vacuum. I wanted to seal the floor the next day so it was important to get the floor as dry as possible.

Sealing Victorian Hallway Tiles

I returned the next day to seal the floor and the work I spent into getting it dry was well spent as the floor had dried fully overnight and I was able to seal the Victorian tiles with two coats of Colour Grow which is an impregnating sealer that enhances colour and occupies the pores in the tile so contaminates can’t become ingrained in there. Colour Grow also provided the matt finish the customer wanted.

Victorian Tiled Hallway After Cleaning in Coalvile


Source: Deep Cleaning Victorian Tiles

Wednesday, April 15, 2015

What Is the Best Floor Transition for Vinyl Tile and Ceramic Tile?

Whenever one type of floor meets another type of flooring, a floor transition is required to go between them. This is because different types of flooring often meet at different height levels, creating an awkward transition. Transition products come in many different types, good for transitioning between many floors, like ceramic and vinyl tile. They are especially made for various flooring needs: 

Gripstrip 

You can use gripstrip when tile meets other floor coverings. It will create a connection that looks nice while providing a safe transition between different types of flooring. It is touted as easy to install. It comes in silver, chrome and gold finishes. 

Floor Edge Strip 

A floor edge strip will not only create a smooth transition between two types of flooring but it protects your flooring against any cracks, chips or blows.  

Tile Trim 

Tile trim comes in an array of materials and looks. Like floor edge strips, it protects the tile from cracks or chips. It is durable and has a rounded and smooth edge. You can choose yours depending on the thickness of the tile you are using. It is available in 6 mm, 9 mm or 12.5 mm.

Hardwood to Marble Floor: Transition Molding Installation

Changing the materials you use on a floor can be difficult, and you will often need to use a floor transition piece to help you keep both edges of the flooring in perfect condition, and also prevent people from tripping over the edges between the floors. A perfect way to transition between materials is to use a transition molding piece. These come in different varieties, depending upon the types of flooring that you are changing between. If you are trying to transition between a hardwood and a marble flooring, this can be somewhat daunting, and you may be concerned about doing it yourself. Rather than call in an expensive handyman, you can follow the instructions below and install your own floor transition pieces.

What You'll Need
  • Screwdriver
  • Hammer
  • Screws
  • Transition Piece
  • Saw

Step 1 - Installing Your Floors

The first thing you need to do is to install the floors. The marble floor will probably have been laid by a professional, so bring in the hardwood floor as close as possible to the other, while still leaving a gap of a few millimeters. The hardwood should be cut so that it is straight on to the marble, rather than curving or forming a diagonal pattern, as this can mean that you will have gaps in the floor. Once the floors are laid, ensure that they are both as clean and free of debris as possible.

Step 2 - Installing the Transition Piece

You will need a piece with a lip that hangs over the edge of the hardwood, but not the marble. This lip will have small screw holes in it. You will also need a top which extends over the ends of both floors. You will need to take the base of the transition piece, which forms a track between the two sides, and place it so that the lip hangs over your hardwood floor. Bang the track molding down between the floors until it is around level with the floors, and then screw the lip down onto the hardwood.

Step 3 - Adding the Top

When you have screwed the transition track down into the hardwood, you should take the top of the transition piece. This may be longer than  the space between the walls, or the door frame, and you will need to trim it to size with a saw. Cut across so that the top fits snugly in the gap, and sand down if necessary. Place the top over the track, ensuring that it is completely in alignment with it, and then hammer into position. The top should be flush with both floors so that you are in no danger of tripping over it.
Once the top has been hammered into position, leave the transition molding to settle. Then you can walk on it as you would with any other part of the floor.