Tuesday, February 28, 2023

How to Clean up Victorian Floors following Building Works in Stroud

 This client from the town of Stonehouse near Stroud contacted us about their Victorian tiled hallway following a recommendation by a neighbour. She wanted to get the floor renovated and had been struggling to find someone to complete the work. They had tried to clean the floor themselves but had little success and decided it was time to call in the experts.
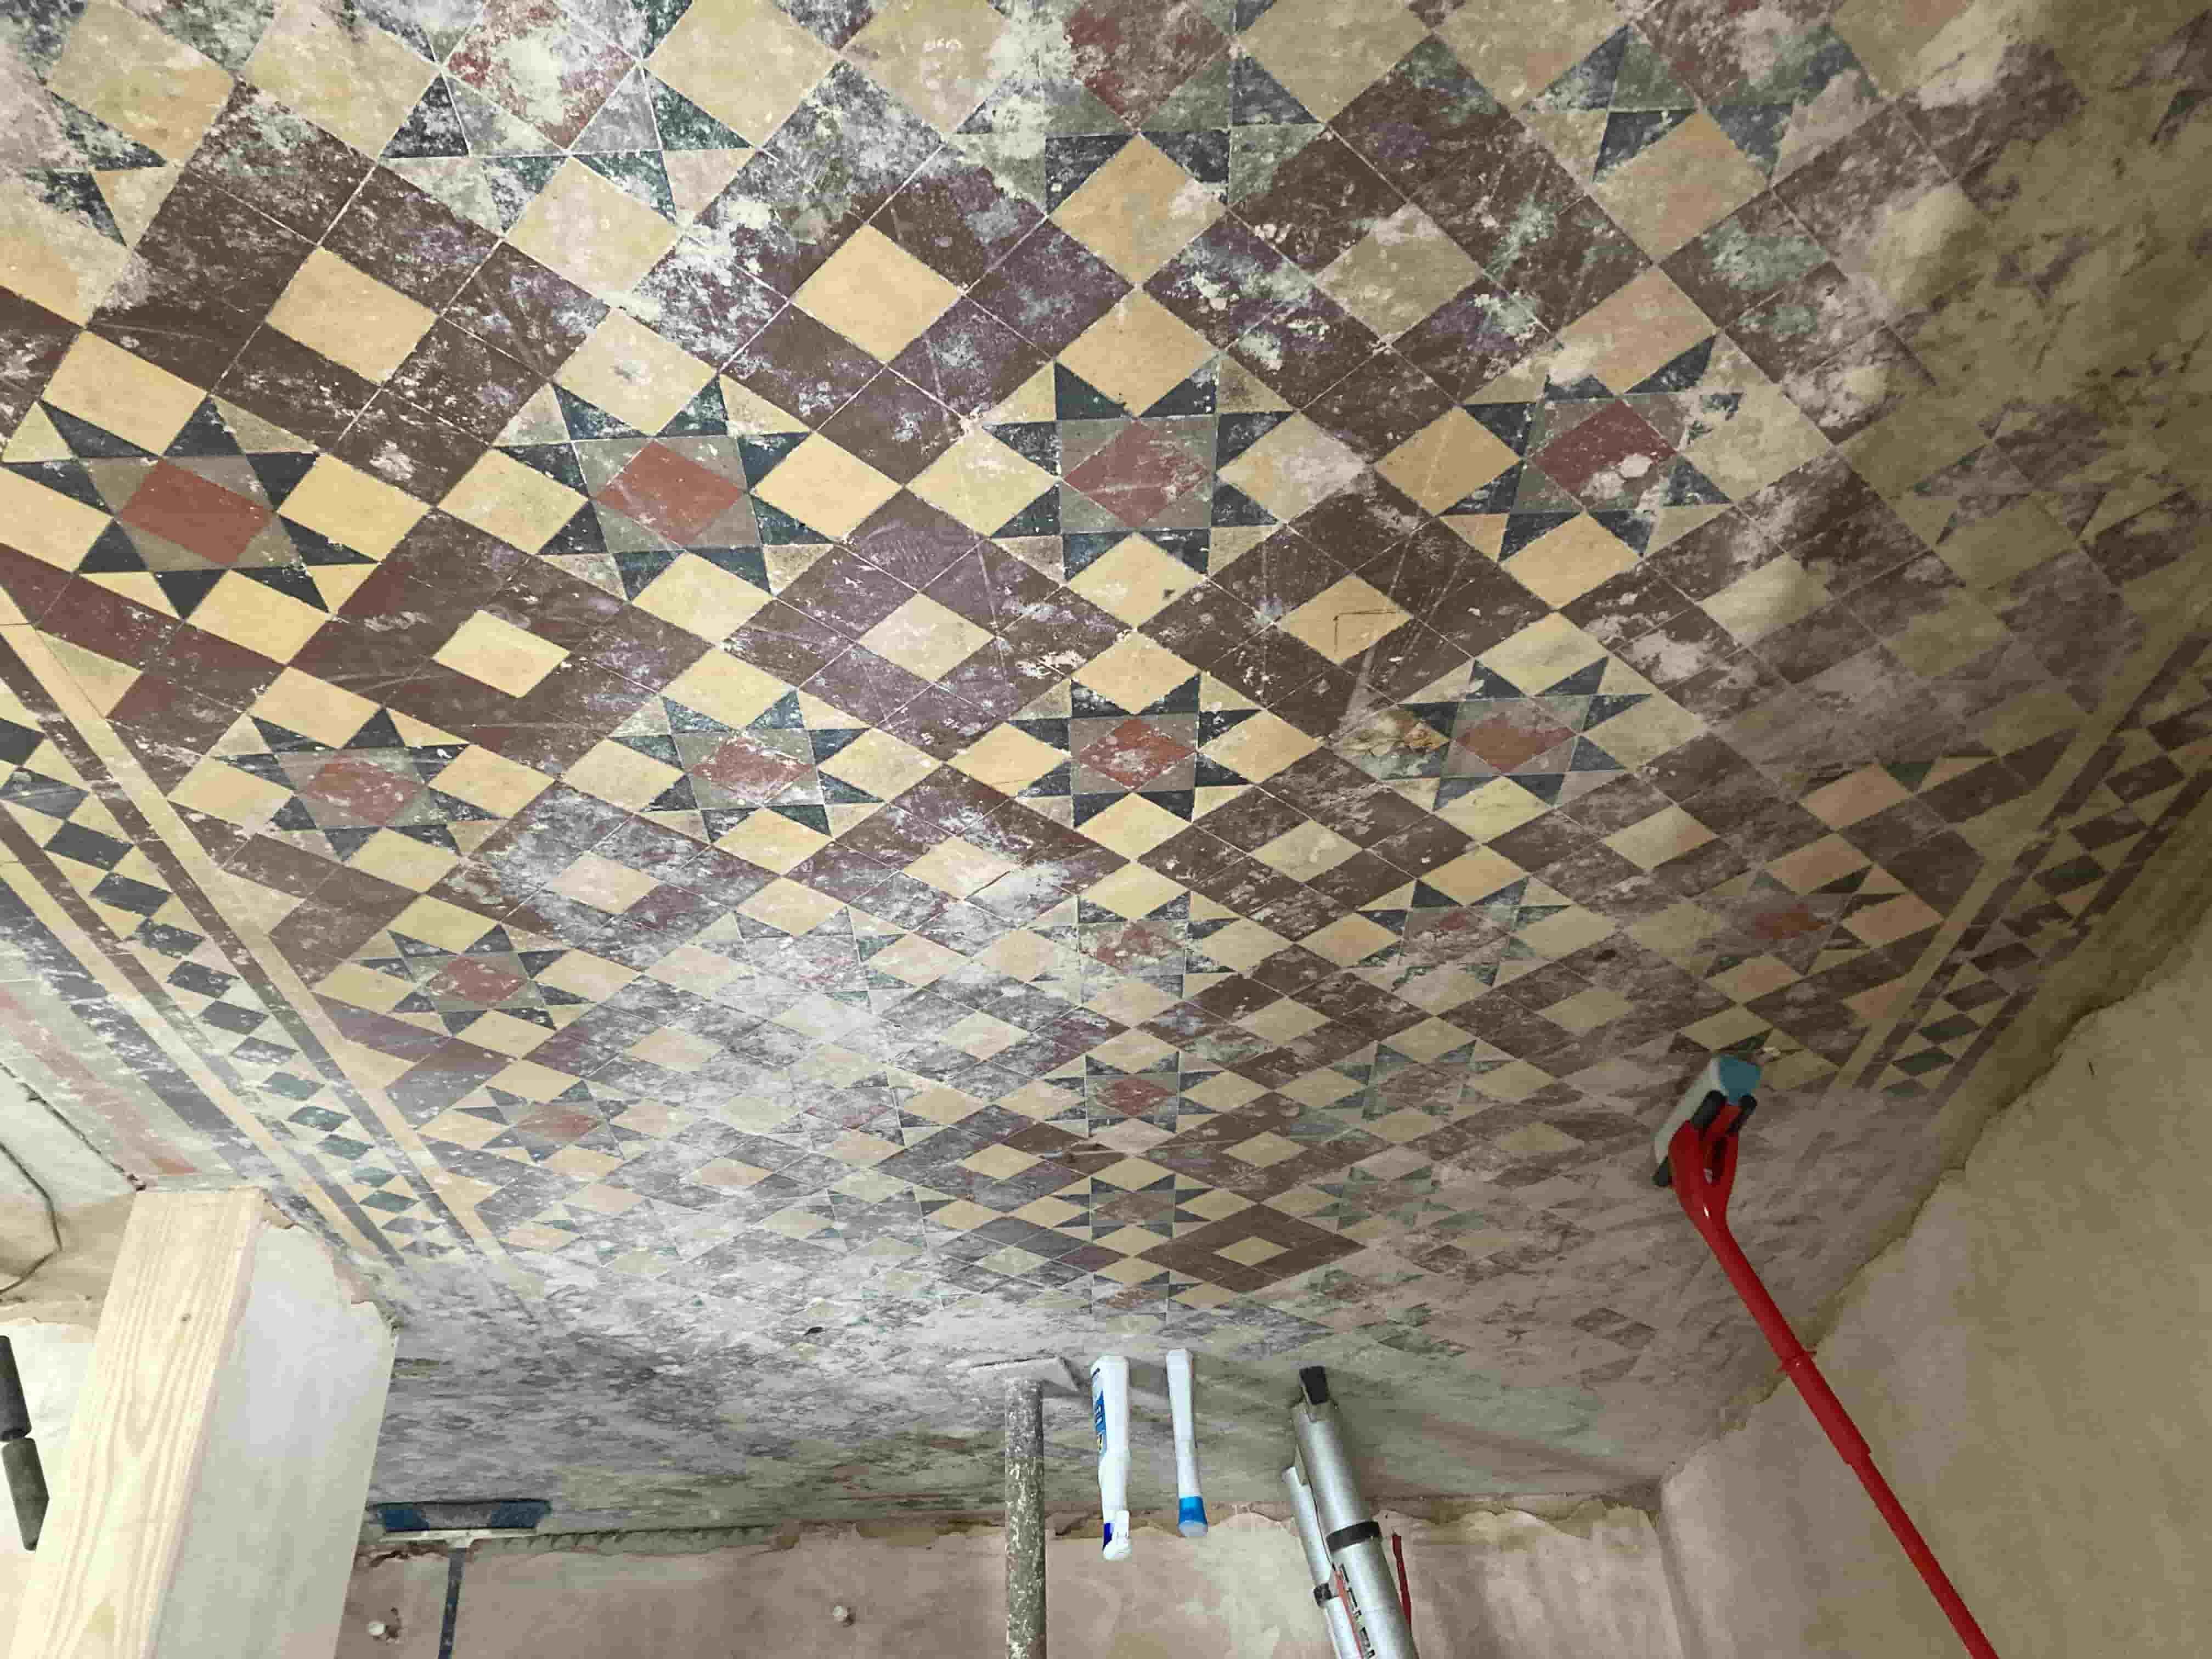
Plaster Stained Victorian Hallway Floor Tiles Before Cleaning Stonehouse

The whole house was being renovated and unfortunately the contractor working on the hallway had not taken care to cover up the floor and it has subsequently become covered in all sorts of mess including a lot of plaster. I explained that it would not be an issue and was confident we could remove the plaster and renovate the floor back to health.

Happy with my quote we scheduled a date for our return which was following conclusion of the remaining renovation works.

Plaster Stained Victorian Hallway Floor Tiles Before Cleaning Stonehouse

Cleaning a Victorian Tiled Hallway Floor

Before starting the renovation of her floor, the first job was to cover the walls and skirting with masking film to protect the newly plastered walls from splashing during cleaning. Next and with a focus on removing the plaster a strong dilution of Tile Doctor Remove and Go was sprayed onto the tiles and left it to dwell for 10 minutes. Then using a Black scrubbing pad fitted to a rotary buffing machine the solution was scrubbed into to remove as much of the plaster and old coatings etc as possible. Once done the resultant slurry was vacuumed away using a wet extraction vacuum.

The next step was to treat the floor to an Acid Wash using Tile Doctor Acid Gel which was left for 5 minutes and then worked in with a coarse 100-grit pad. This treatment has a lot of benefits for tiled floors and is great for removing old grout smears and other contaminates such as salt staining. The floor was then wet vacuumed again and the process repeated with a finer 200-grit pad.

After another wet vacuum to extract the slurry, the floor was rinsed with water and extracted again. The floor was then left for two days to allow it to fully dry off.

Sealing a Victorian Tiled Hallway Floor

On our return the floor was tested with the damp meter to check it was dry. The moisture readings were good, so I was happy to go ahead with the sealing process.

I had discussed a desired finish with the customer earlier and as a result Tile Doctor Seal and Go Extra was chosen. This is a modern product that provides high stain resistance and is perfect for a hallway. It has a low sheen finish so does not make the floor too shiny, but allows the lovely colour of the tiles to shine through. Two coats of sealer were applied leaving each one to dry before the next was applied.
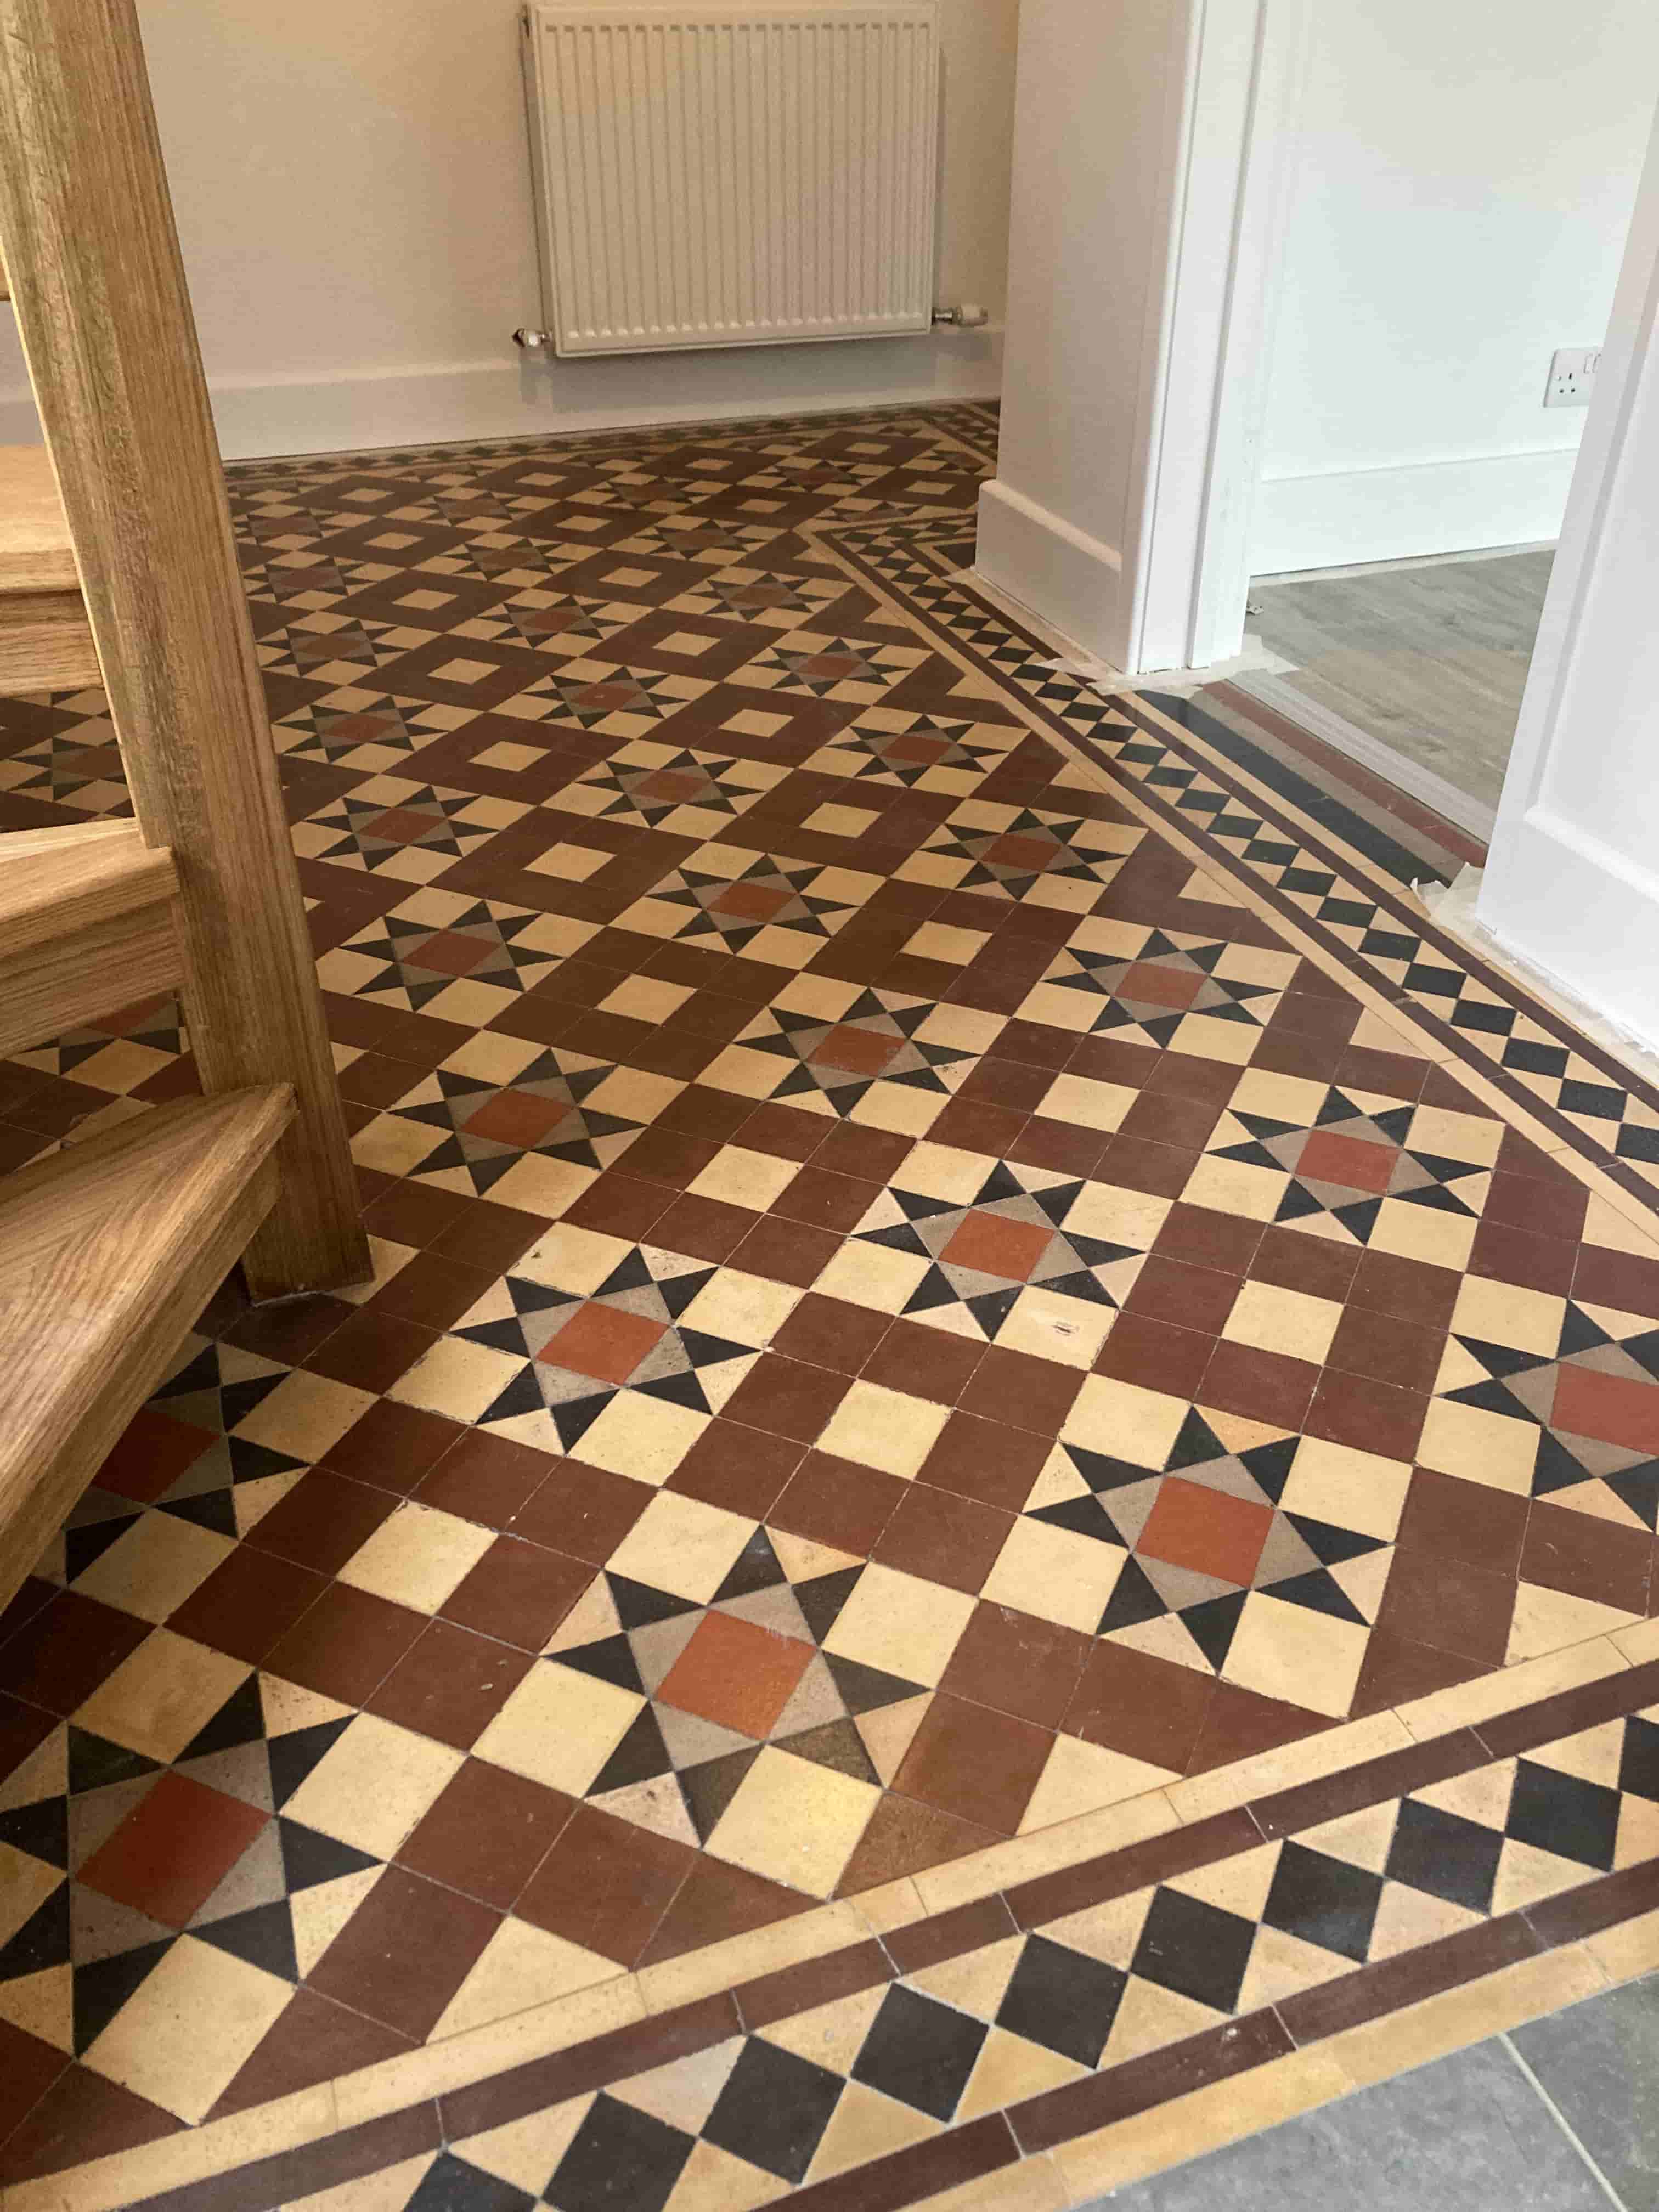
Plaster Stained Victorian Hallway Floor Tiles After Renovation Stonehouse

My client was amazed how well it came up and delighted that the contractors had not ruined her floor! For aftercare cleaning I recommended the use of Tile Doctor Neutral Tile Cleaner to maintain the floor going forward, this is an effective yet gentle tile cleaning product that won’t damage the sealer.
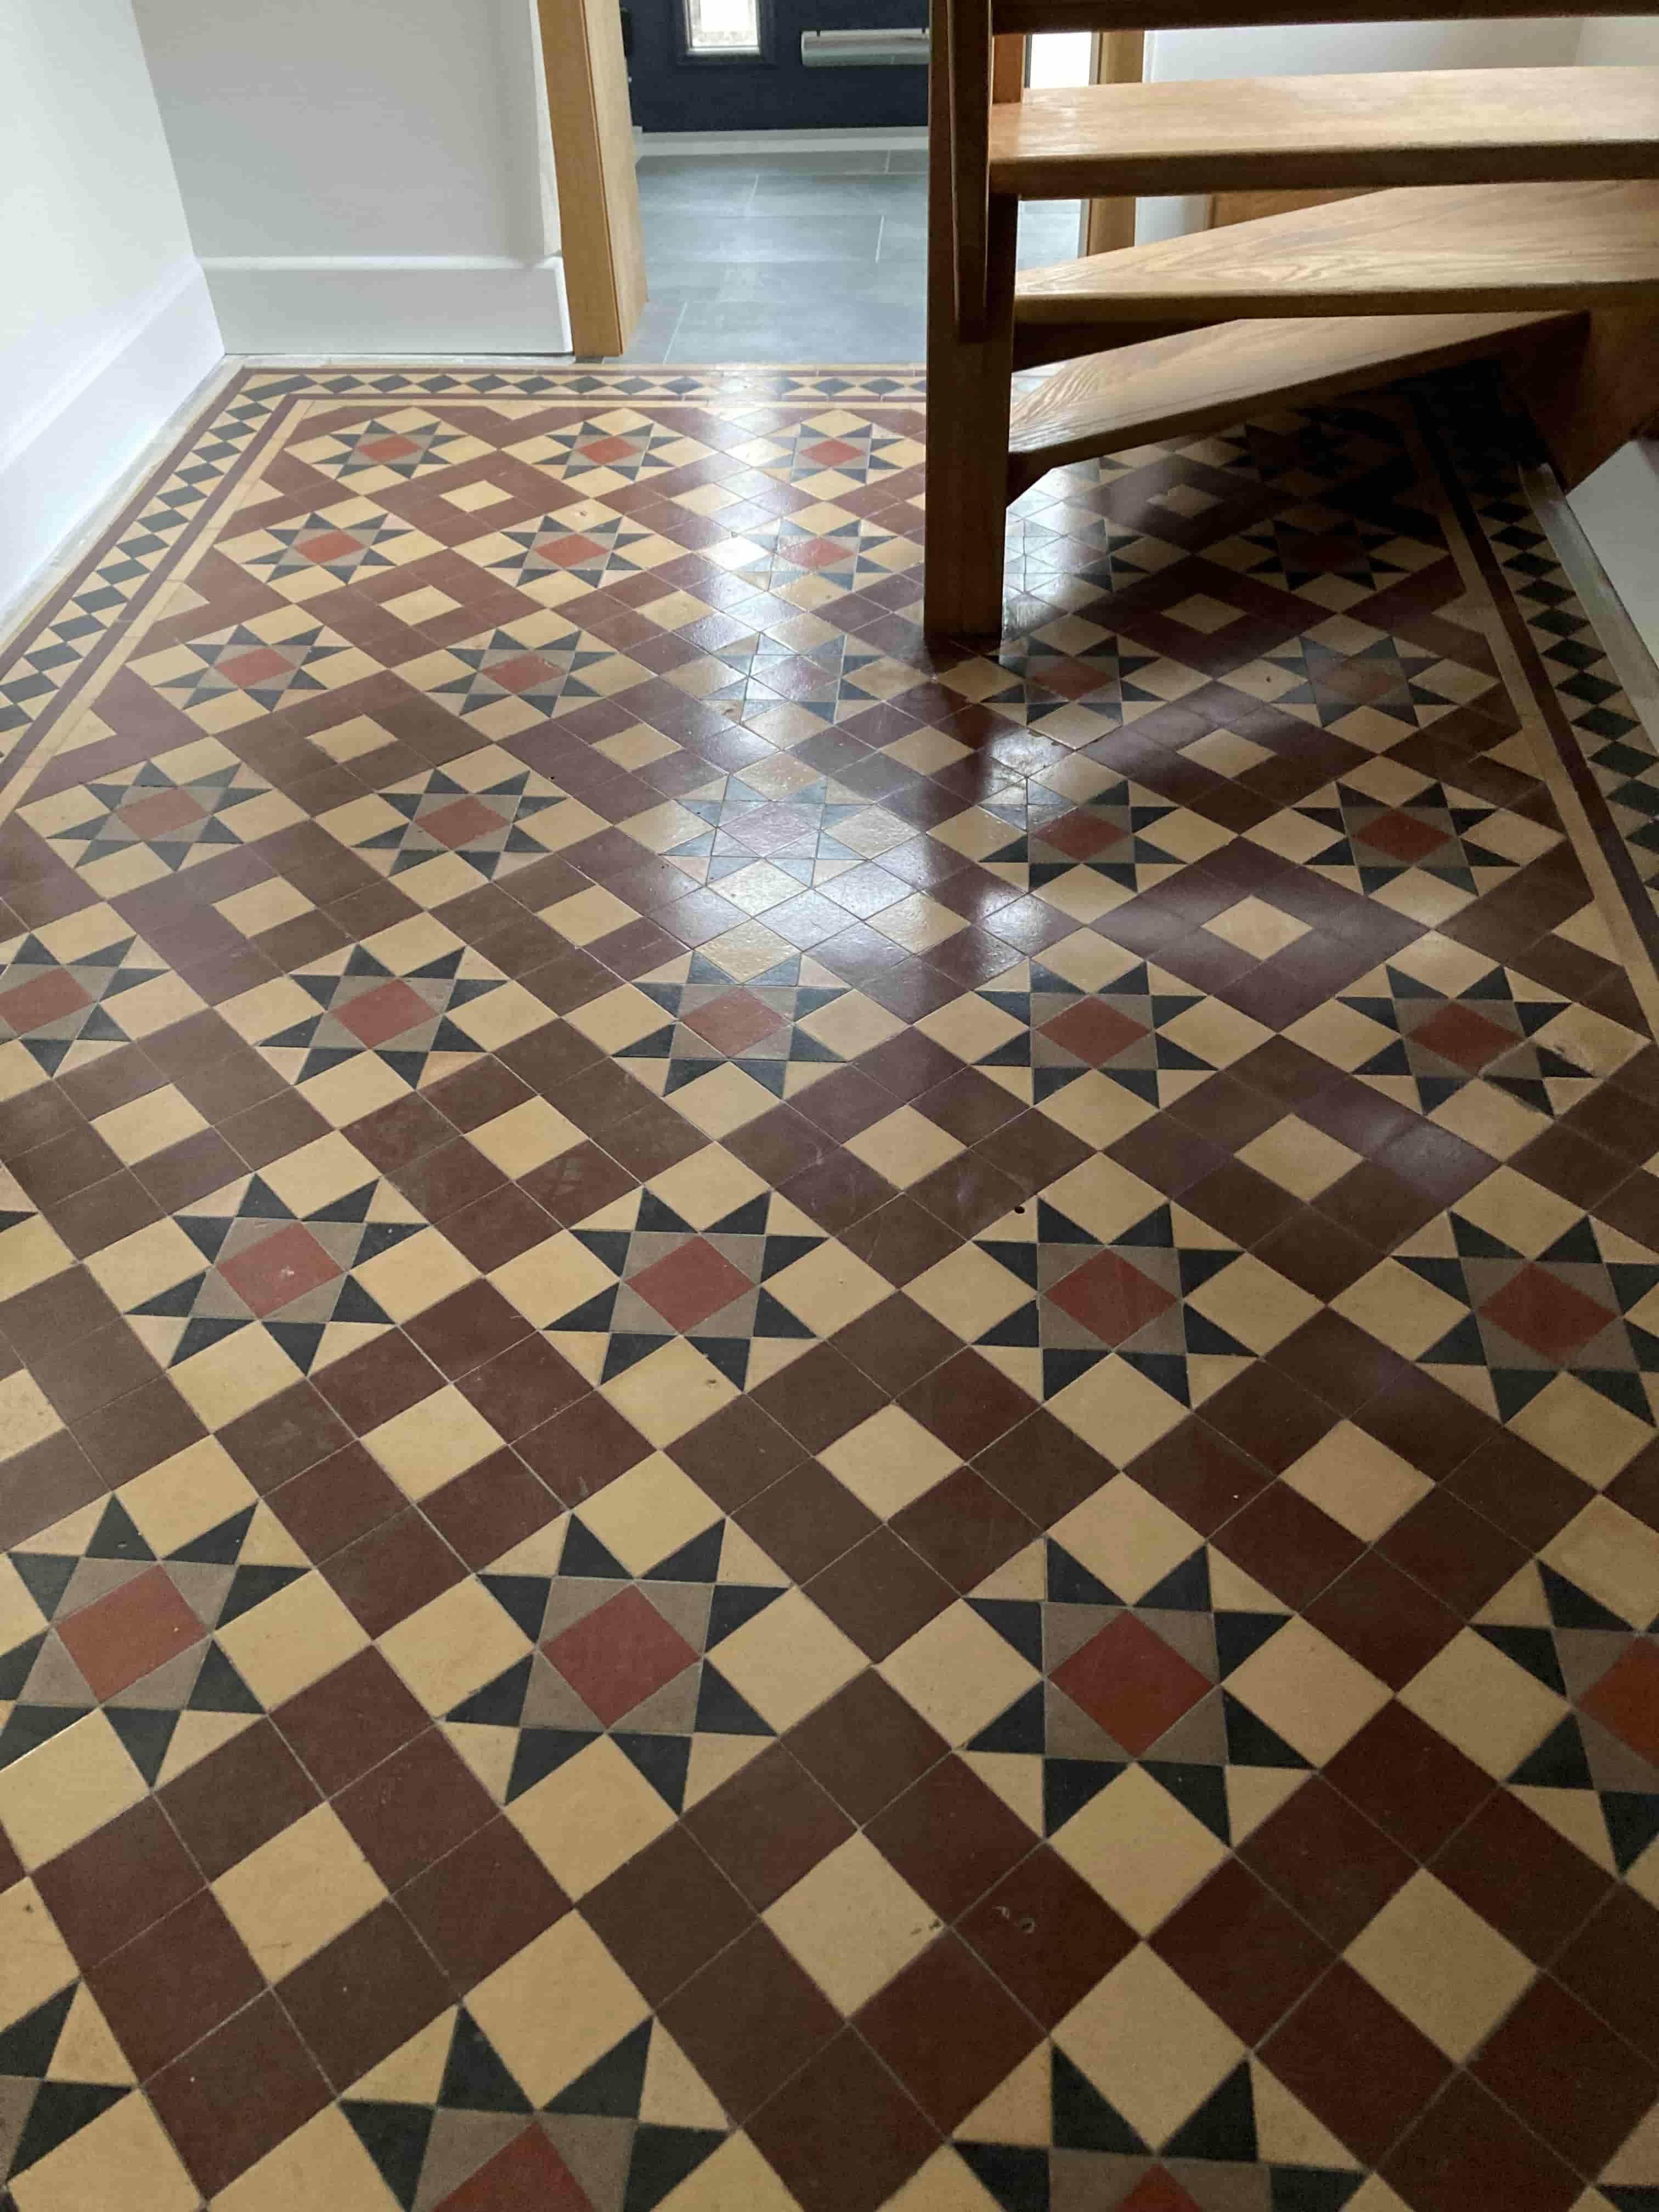
Plaster Stained Victorian Hallway Floor Tiles After Renovation Stonehouse

Source: Victorian Tile Cleaning and Renovation Service in Stroud, Gloucestershire

Monday, February 27, 2023

Why Choose Hickory Laminate Flooring Over Other Wood?

 Hickory Laminate flooring is the laminate flooring designed to look like hickory. But while hickory laminate flooring may look like natural wood, it is actually made up of plywood, plastic, resin, and other artificial compounds. That is why the type of wood that the laminate flooring is supposed to represent has no bearing on the flooring’s actual quality.

Understanding Hickory Laminate Flooring

Like other types of laminate flooring, hickory laminate flooring is made up of several layers. Each is designed to perform a distinct function, but together, they work to shield the flooring from damages, ensuring it will remain appealing. That is why the quality of the flooring depends on the quality of individual layers.

Melamine Wearlayer—a clear resin-filled membrane that coats the top of the flooring, shielding the layers beneath if from stains, scratches, burns and small concentrations of moisture.

Film Print—the texture that gives the hickory laminate flooring its hickory-like appearance. The film print is usually based on natural textures, but in many cases, those textures are manipulated to make the flooring look more even and aesthetically pleasing.

Core—a high-density fiberboard, it is designed to absorb impact. In some models, melamine plastic resins are incorporated into the core’s design, creating additional protection against moisture.

Backing—a melamine plastic layer, it lies between the floor and the sub-flooring. In many cases, it has to be installed separately from the rest of the floor. Its primary purpose is to provide additional structural stability. It is also designed to absorb any damage that the above layers fail to stop.

Reasons to Choose Hickory Laminate Flooring

When the laminate flooring’s hickory appearance has no bearing on the flooring’s quality, there are still many reasons why one should consider hickory laminate flooring. Some of those reasons are specific to this particular type of flooring, while others apply to all types of laminated flooring in general.

Aesthetics—hickory flooring can make the room look more traditional and, by extension, more dignified. Its colors can compliment the room’s overall palette. It can go well with carpets, furniture, and textiles.

Cost-Effectiveness—While the above aesthetic benefits can be achieved with natural hickory flooring, hickory laminate flooring is significantly more affordable. Furthermore, some of the flooring can be installed without glue, which saves on the installation costs.

Ease of Installation—Generally speaking, hickory laminate flooring is easier to install than non-laminate flooring. So long as the directions are followed to the letter, even those who do not have any professional experience can install it.

Ease of Cleaning—Hickory laminate flooring can be easily cleaned using a damp cloth or a mop.


Source: www.DoItYourself.com

Wednesday, February 15, 2023

How to Prevent Uneven Floors

 Preventing uneven floors is the first step in any flooring project. Whether you are installing hardwood, tile, or laminate flooring if the floor is even slightly uneven your new flooring will not perform as well or last nearly as long as it should. It may also result in bounces or squeaky spots on the floor. It is entirely worth investing a bit of extra time and money to make sure that the floor is even before installing flooring. Here is how to ensure you get an even floor.

What You'll Need:

  • Replacement lumber
  • Construction adhesive
  • Wood screws
  • Drill
  • Hammer
  • Level (laser level is best)

Inspect Existing Joists

You will want to inspect the existing floor joist for rot, damage, or decay. Some may just be old and need reinforcement. Replace any floor joists if needed, or reinforce the existing floor joists. If there is obvious sagging in the existing sub-floor, you may want to consider adding support beams for additional support. In many homes, particularly old ones, floor joists could be spaced too far apart or are not sufficiently supported for the required load.

Evaluate Sub-floor

The sub-floor is usually of plywood and is also subject to decay and rot. If this is an existing sub-floor, evaluate the wood to see if replacement is indicated. If in doubt, replace it. The plywood is critical to the amount of flex in the floor, which can compromise the integrity of the flooring above it if there is too much. Sometimes, all that is needed is some additional strategically placed screws to secure a particular spot.
Make sure that screws are not placed immediately next to seams between plywood sheets, but in the body and straight into the joists. Construction adhesive can also be helpful to add some additional reinforcement to a troublesome spot. Ideally, particularly for tile floors, tongue and groove plywood is best to eliminate any flexion around butt joints of sheets.

Evaluate Floor

Check the floor at different points in the room with the level. Assess the floor at different angles and identify any uneven areas. There are a variety of ways to even the floor, and a broad spectrum of ideas and suggestions can be found on the Internet. However, there is a common opinion that the solution is shims (on top of existing sub-floor) and additional plywood can help even spaces out.

That is, assuming, that all that can be done to correct uneven floor joists has been done. If the area that is uneven is low, it can be built up using shims cut from a 2x4 with 1/2 inch plywood over the top. If there is a particular area that is raised, screwing it more tightly into the floor joists may correct the problem.

Evaluate Flooring

damaged, or warped materials can also cause an uneven floor installation. Warped hardwood will create ridges in the floor. Laminate can bubble up. Tile can break. If any of these are the culprit of the uneven floor, it can be corrected by replacing that particular section of flooring.

Sunday, February 12, 2023

Getting a Great Finish on a Black Slate Kitchen Floor in Hounslow

This Slate tiled floor at a property in the West of London suburb of Hounslow was not looking its best and now in need of a strip and seal to restore its appearance. The decorators the client used had agreed to clean and re-seal the floor after painting but unfortunately didn’t do a good job of it. I suspect they applied the sealer without rinsing properly and didn't allow the floor to dry fully beforehand.

 
Slate Tiled Kitchen Diner Floor Before Cleaning Hounslow Slate Tiled Kitchen Diner Floor Before Cleaning Hounslow

My client was unhappy with the finish and so asked me to quote for resolving the problems. I went over to survey the floor and advised the client that to rectify the problems we would need to strip off the sealer they had applied, clean the floor again and then reseal with the correct product. They were happy to go ahead with my recommendation as they wanted the floor restored to its pre-decoration state. They agreed my quote and we scheduled a mutually convenient time to carry out the works.

 
Slate Tiled Kitchen Diner Floor Before Cleaning Hounslow


Cleaning a Slate Tiled Kitchen Diner Floor

In order to break up the sealer, a coatings remover was applied to the floor called Tile Doctor Remove and Go. This is a strong sealer stripper that breaks up the sealer allowing it to be removed. This was left to dwell for a short while to lift the sealer.

The products were then scrubbed into the floor using a heavy-duty machine, alongside this we also applied another cleaning product called Tile Doctor Pro-Clean. This action ensured that all the sealer was removed and it also removed any dirt that had been left on the surface. The floor was then low pressure rinsed and the old sealer and soils were then vacuumed away leaving the floor ready for sealing.


Sealing a Slate Tiled Kitchen Diner Floor

The following day, after allowing the floor to dry overnight with the under-floor heating it was ready for sealing. Two coats of Tile Doctor Colour Grow sealer were applied which is a durable impregnating product that works by occupying the pores in the stone preventing dirt from residing there.

This sealer also contains a colour enhancer which is ideal for Black Slate as it further darkened the colour and brought out the contrast in the tiles. This product is also fully breathable and recommended for use on a large variety of flooring and can even be used externally.

 
Slate Tiled Kitchen Diner Floor After Cleaning Sealing Hounslow

The client pointed out that it looked like it did when originally installed and was very pleased to say the least. Before leaving I took time to discuss aftercare and recommended the use of Tile Doctor Neutral Tile Cleaner. This is a pH neutral tile cleaning product that is mild enough to be used regularly and will ensure that the newly applied sealer will stay in place. The new sealer will also ensure cleaning will now be easier which the client was very grateful for.

 
Slate Tiled Kitchen Diner Floor After Cleaning Sealing Hounslow Slate Tiled Kitchen Diner Floor After Cleaning Sealing Hounslow


Thursday, February 9, 2023

Wood Floor Wax: Not for Laminate Flooring

Many people try to use wood floor wax on laminate flooring. While this might seem like it would make sense, it is not a good idea. Here are a few things to consider about why you should not use wood floor wax on laminate flooring.

Will Not Penetrate

When you put wax on a wood floor, one of the reasons that it works so well is that it penetrates the surface of the floor. Wood is a natural product and it has room for the wax to penetrate down into it. Laminate will not allow anything to penetrate through the top layer. The top layer of laminate is much like plastic that will not allow moisture or anything else to get through it. Therefore, the wax is going to sit on top of the surface of the floor.

Streaks

If you do try to put wood floor wax on top of your laminate flooring, you are going to notice that it will leave streaks all across the floor. You will have a hard time getting the streaks off the flooring. Once you apply the wax, you might find that you are stuck with this look.


Source: www.DoItYourself.com

Monday, February 6, 2023

Causes of Squeaking Carpeted Floors

 Carpeted floors can add beauty, warmth and comfort to your home, but a squeaking carpeted floor may indicate a serious problem. Not only is a squeaking floor annoying to live with, it can also significantly affect the value of the house. This is especially troublesome if you are planning to put your house on the market or have recently bought your home and found it to have defective carpeted flooring. There are several solutions you can do to fix your carpeted floor problem, but you have to identify the cause behind it first. Here, are several possible causes of squeaking carpeted floors.

Shrunken Floorboards

Several factors can cause floorboards to shrink. If the wooden boards had not been dried sufficiently before they were installed, shrinkage could occur. Floorboards can also shrink when they are not properly seasoned. When floorboards shrink, the boards can easily come lose and go out of place when someone walks on the carpeted floor or whenever pressure is applied. The movement of the boards rubbing against each other can cause the squeaking noise.

The Floors are Cramped Improperly

The cramping process for floorboards is ideal for wooden floors. The process also helps make sure that the wooden joints are tight and will not easily move. Unfortunately, there are some cases where the floorboards are not cramped tightly or are not cramped in the proper way. This causes the boards to move and rub against each other and produce the squeaking noise.

Floorboards are too Dry when Installed

When wooden boards are too dry, there is a possibility that they will accumulate and retain some of the moisture from the air or its surrounding areas. When this happens, the floorboards could expand and later spring up from their place. The squeaking noise occurs when the boards spring up. This is quite difficult to repair as it could involve removing the carpet and floorboards and relaying them again.

Wooden Floor Moves Away from the Subfloor

The common way of installing hardwood floors is to nail the wooden floorboards onto a plywood subfloor. The joists or support beams hold the subfloor. The nails that fasten the floorboards to the subfloor can come loose over time or the subfloor itself can warp. This can cause the wooden floor to move away from the subfloor and consequently become squeaky.

Gaps in the Floor or in Between the Joists

It could also be possible that there is a gap or space in between the subfloor and the joists. The gaps can cause the floorboards to wobble or rub against each other. This will then result in squeaking sounds.

Bearers Are Not Properly Supported

The piers of the house need to be able to give ample support to the bearers. Weak support can cause gaps and extra spaces to occur in the bearers which can later cause floorboards to squeak when they move against each other.

The problem of squeaking carpeted floors can be solved more easily and effectively once you have identified the cause behind it.


Source: www.DoItYourself.com

Wednesday, February 1, 2023

How to Install Vinyl Tile Adhesive

There are hundreds of designs and colors to choose from when installing vinyl tiles. The installation technique varies from one type to another. Below are the instructions for how to install self-adhering sticky tiles. If you are using dry adhesive tiles, the directions will be different.

What You'll Need:

  • Chalk line
  • Carpenter's square
  • Utility knife
  • Scissors
  • Hair dryer
  • Pencil
  • Tiles
  • Pry bar
  • Utility knife
  • Handsaw
  • Hammer
  • Leveling compound
  • 3/4 inches
  • Plywood
  • 1/4 inches plywood
  • 6 penny ring
  • Shank nails

General Preparation

When you are replacing the floor in a room, be sure to clean the old flooring and remove any uneven places. The biggest mistake people make is not properly cleaning the floor before installing the new flooring.

Extra Cautions Before Installing

Self-adhesive tile requires more floor preparation than sheet tiles. Self-adhesive tiles have to be placed on a clean flat surface. Be sure to start in the middle of the floor for a more even finish. Your pattern will be staggered so you don’t have a straight seam across the floor.

Measure the Midpoints

Measure from wall to wall, creating a midpoint. Midpoints can be found using chalk lines or running string from one joist to another. This midpoint will be where you start to lay your tiles.

Start to Lay Tile

Start at the midpoint when you start to lay the tiles. As you work your way to the edges, remember to stagger the tile. When you get to the walls, you will have to use a utility knife to cut them to the right size. It is easier to cut the tile if you warm it with a blow dryer. Tiles are easily cut with a utility knife or a pair of scissors and will cut even easier if you first warm the tile with a blow dryer.

Sizing the Tile

When you are dealing with walls that have rounded shapes, you have to take a pencil and paper and create a template to cut by. This is easier than putting the tile up against the wall.

After you Lay the Tile

Once you have laid the flooring, go around the room replacing any wall trimming or door trimming. If you had to use underlayment and it makes the edges taller than the floor, use the trim to reduce the edges.

Tip:

If you are using a pattern tile, take the process a little slower and go one tile at a time. Secure each tile as you place it to make sure it doesn’t slip. If you are starting a room from scratch, you need to be aware of the wall design before picking the flooring. If you are unsure, then go with a neutral color.