Tuesday, March 17, 2020

How to Remove a Single Tile

Upgrading the appearance of your bathroom may include installing a new soap dish in the shower or repairing a damaged tile. In either case, you will most likely have to remove an existing tile. Forget hiring an expensive professional, this is a perfect project for the budget-minded, DIY homeowner. All you need, in addition to a few basic tools and supplies, are an inexpensive specialized handsaw and drill bit.

Things You Will Need
  • Drop cloth (optional)
  • Masking tape
  • Safety glasses
  • Carbide handheld grout saw
  • Nail set
  • Hammer
  • Chisel
  • Putty knife
  • Cordless drill
  • Carbide-tipped masonry drill bit

Damaged Tile Removal

1

Spread a drop cloth below the work area if the damaged tile you plan to remove is a wall tile. Protect the tiles around the damaged tile. Tear off several strips of masking tape and adhere the pieces to the edges of the surrounding tiles. Wear safety glasses to protect your eyes.

2
Remove the old grout in the joints around the tile with a carbide handheld grout saw. Use a back-and-forth sawing motion to cut away the old grout. Be careful not to cut into the drywall or underlayment behind the tile.

3
Position the tip of a nail set against the tile at the cracked or chipped area. Tap the end of the nail set with a hammer to shatter the tile and pry the pieces off with a chisel. Move the nail set to several areas on the surface of the tile and continue to shatter and chisel away the pieces until you remove the majority of the tile.

4
Chip away at the old tile adhesive with a chisel and hammer. Scrape and smooth the area clean with a stiff putty knife. Be careful not to gouge into the drywall or underlayment during this process. The area is now ready for the new soap dish or replacement tile.

Undamaged Tile Removal

1

Follow the instructions as outlined in Step 1 and Step 2 for the removal of a damaged tile.

2
Take your nail set and punch a series of holes in an “X” pattern along the surface of the tile. These holeshelp to keep the drill bit from wandering when drilling through the tile.

3
Drill through the tile at each hole with a drill equipped with a carbide-tipped masonry bit. Be careful not to drill through the drywall or underlayment behind the tile. Use your chisel and hammer and connect the “X” pattern of holes.

4
Shatter the tile and remove the pieces with your chisel and hammer. Follow the instructions in Step 4 for the removal of a damaged tile.


Monday, March 9, 2020

How to Clean Dirty Kitchen Floor Corners

Corners become a magnet for dirt in the kitchen. Crumbs and dirt tend to get kicked into the corners, which aren’t always perfectly visible if the corners sit beneath cabinets or behind a table. By the time you notice the dirt, it may have built up to a thick layer of grime that doesn’t easily sweep or wipe up. Getting into the corners and washing the soil from both the floor and the baseboard without damage regularly prevents them from developing a heavy dirt layer and makes the entire kitchen look cleaner.

Things You Will Need

  • Broom
  • Whisk broom
  • Vacuum
  • White vinegar or ammonia
  • Spray bottle
  • Soft-bristle toothbrush
  • Rags


1
Sweep the entire kitchen floor. Use a small hand-held whisk broom to get into the corners if a standard broom is too large. Alternatively, use a vacuum baseboard attachment to get grime and dust from the corners that has worked between the flooring and the baseboard.

2
Combine 2 tablespoons white vinegar or ammonia with 1 quart water in a spray bottle. Spray the corner with this solution, which is safe for most flooring and for vinyl or painted baseboards.

3
Scrub the corner with an old soft-bristled toothbrush. Use the brush to access the tight corner and along the seam where the baseboard meets the floor.

4
Rinse the corner with clear water and wipe dry with a rag. Inspect the area for remaining dirt and scrub a second time if some remains.

5
Mop the rest of the kitchen after the corners are clean, using your preferred floor cleaner or the vinegar solution. Do not use a bleach-containing cleaner if you used ammonia to wash the corners. Rinse and dry the floor after mopping so water and dirt don’t accumulate in the corners again.

Tip
Sweeping or vacuuming the baseboards and corners of the kitchen at least twice a week prevents dirt from accumulating in kitchen corners.

Warning
Avoid harsh abrasive cleaners and brushes, because these can scratch kitchen floor tiles and baseboards.


Source: HomeGuides.sfgate.com

Monday, March 2, 2020

How to Restore and Extend a Victorian Tiled Hallway Floor

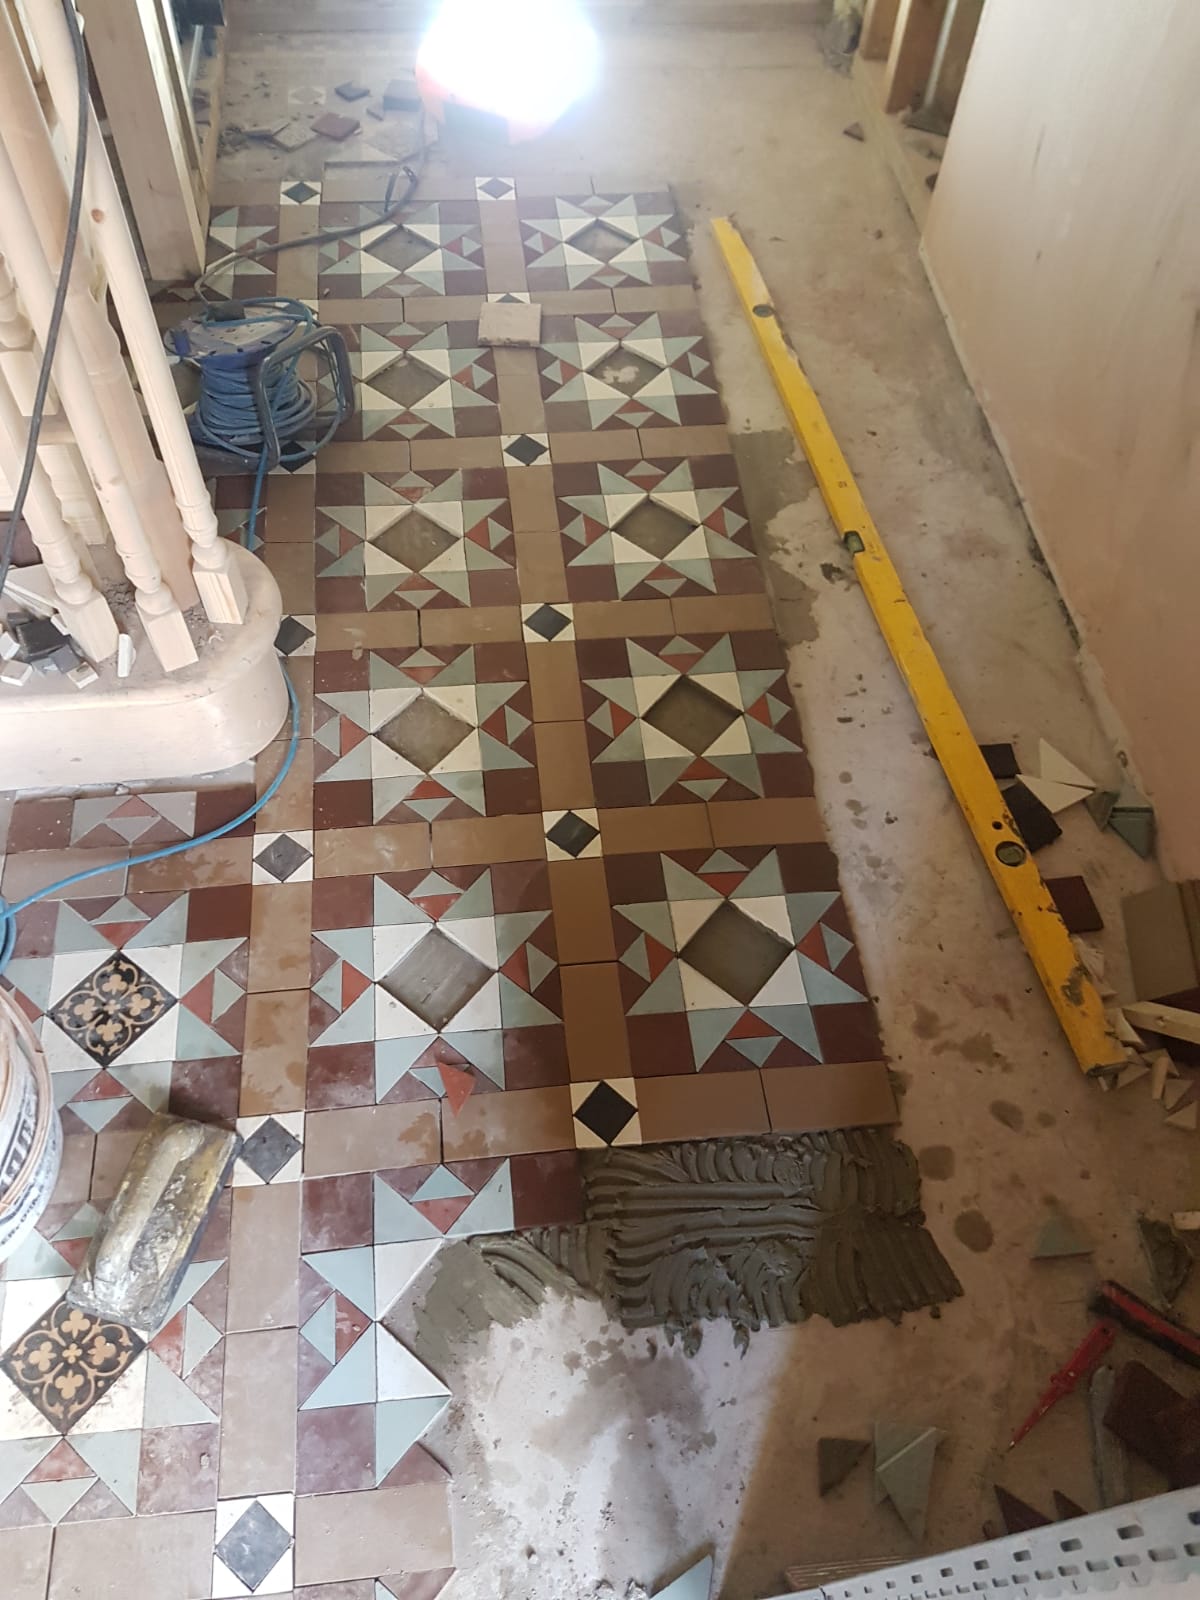
This client had recently moved into an older property in Bridgend and having pulled up the previous hallway covering had found a heavily soiled Victorian tiled floor underneath. However, for some reason we never discovered the answer to it only ran from the porch to the foot of the stairs which I guess explains why it had been covered up and neglected.

Victorian Tiled Hallway Floor Before Extending in Bridgend

The client asked if we would be able to restore the existing Victorian floor and if would be possible to extend the tiling throughout the hall continuing the original pattern. Cleaning the original floor and completing the tiling work didn't present a problem however it can be tricky finding tiles to match the pattern of the original floor. Unsure if it could be done, I offered to do some research and get back to him once I had found a workable solution.

Fortunately, there are still a few suppliers that produce tiles and after speaking with other members of the Tile Doctor network I was able to source matching tiles. The owner was still keen to proceed and so I agreed a price, placed an order for the tiles and scheduled a date to start the work.


Cleaning and Repairing a Victorian Tiled Hallway Floor

Before starting the tiling work, I applied a latex levelling compound to bring the height of the floor we were going to lay up, level and flush with the existing Victorian floor. After allowing the latex to dry and now having an equally level surface, we were ready to begin laying.

Victorian Tiled Hallway Floor During Extention in Bridgend Victorian Tiled Hallway Floor During Extention in Bridgend

Laying a tiled floor to match an existing pattern is a tricky process as your constantly having to check the geometry of the pattern as well as keeping everything in line with our levels. Another issue we ran into with this job was the new tiles that we had ordered, all differed in width from the originals which made it a very long strenuous process having to cut them to fit.

Victorian Tiled Hallway Floor During Extention in Bridgend Victorian Tiled Hallway Floor During Extention in Bridgend

Once the floor was laid and had dried out it was time to turn our attention to the original floor which needed several deep cleans. For this we used Tile Doctor Pro-Clean which was worked in with a black scrubbing pad to release all the ingrained dirt from the tile. The dirt was then rinsed off and extracted with a wet vacuum.


Sealing a Victorian Tiled Hallway Floor

The job took eight days in total and ended with the application of five coats of Tile Doctor Seal and Go sealer. Each coat is left to dry before applying the next. This seal gives the floor protection and a lovely finish. This final step of sealing really brought both floors together and left the subtle sheen finish the client requested.

For aftercare I left the client a bottle of Tile Doctor Neutral Tile Cleaner, which we recommend for cleaning sealed tiled floors. Neutral clean has a pH neutral formula which won’t harm the sealer like stronger cleaners which can prematurely strip a sealer off the floor.

Victorian Tiled Hallway Floor After Extention in Bridgend


Source: Victorian Tile Cleaning and Restoration Service in Swansea

Sunday, March 1, 2020

How to Clean Limestone Tile

Limestone is a natural calcium carbonate (CaCO3), a sedimentary stone with a smooth, granular appearance and varying degrees of hardness. It is highly reactive to acids, so acidic cleaners like citrus cleaners can easily etch or interact with the calcium carbonate in ways that damage the limestone. Limestone tile comes in three basic finishes: honed, semi-polished and highly polished. However, unless it is a hardened grade of limestone, it will never polish to the degree of granites or marbles. Cleaning limestone tile starts with understanding what makes it dirty. Limestone is soft, porous and stains easily, it is also sensitive to hard water. Limestone should be treated with a limestone-specific penetrating sealer to reduce the potential for staining.

Step 1
Remove all grit and surface dirt using a canister vacuum cleaner. Grit is the primary abrasive that breaks down the sealer on natural tiles. When the sealer breaks down, its protective quality is compromised, allowing stains and marks to occur more quickly. Daily floor cleaning should include using an untreated dust mop as well as mats to trap dirt at entryways.

Step 2
Scrub your tiles with a pH-neutral stone cleanser that is specifically approved for limestone. Typically, these are sprays, but if you have a large area, there are products that can be mopped on and rinsed off. You will need to dry the floor with towels, as you go, to remove the dirt from your floor. Do not wash limestone with household soap and water. Soaps will build up and make the surface look scummy.

Step 3
Use your toothbrush to remove stains. Work in a circle from outside to inside, mopping up with a clean rag. If the stain persists, there are special stone and grout cleaners for limestone that may be stronger than the a cleanser or designed for specific stains like oil and grease stains. There are also poultice products available for hard stains. These work by a capillary action and take as much as 48 hours to draw a stain out.

Step 4
Rinse your scrubbed tiles with soft or distilled water and immediately wipe dry. Do not leave water or fluids to sit on your tiles. Soft drinks, vinegar, fruit juices and wine, as well as many bathroom products, are just some of the liquids that etch and stain limestone.

Step 5
Consider steaming the tile. Because limestone is porous, even if it is sealed properly there are often indentations or pockets where water and dirt can accumulate. Hard water in small pockets can cause black spots or discoloration. You can often rent steamers from rental companies or home improvement stores. Many steamers come with interchangeable heads and disposable towel attachments. The heat and intensity of the steam, coupled with the moisture and absorption aspects of the towel, should loosen and dissolve many types of soils or stains. Dry your limestone tiles thoroughly after steaming.

Step 6
Reseal your tile if a water drop, sitting on the tile for five minutes, leaves a dark spot or appears to be absorbed into the tile. Seal your tile using a quality sealer with a good reputation like AquaMix Sealer's Choice Gold. Don't wax your stone floor with the waxes found in most supermarkets. Buy the type of polish or wax product recommended for your tile and sealer.


Source: www.Hunker.com