Monday, December 23, 2019

How to Achieve a Deep Polish on Marble Floor Tiles

The pictures below are of a Polished Marble floor installed at a property in the village of Callow End which is a few miles South of Worcester. The owner of the house had attempted to clean and seal the floor by themselves and as you can see from the photographs, they ended up dulling its appearance. The physical nature of Marble and natural stone floors in general make them a difficult project to attempt without expert knowledge and the right equipment.

Marble Tiled Kitchen Floor Before Polishing Callowend Marble Tiled Floor Before Polishing Callowend

I arranged to survey the floor and explained to the client how I intended to restore the appearance of the Marble to how it should look. I demonstrated the process on a small test area so they could get an idea of the result and explained that the floor could look even better than the day it was installed. Tile Doctor has developed a system called burnishing for natural stone floors which involve the application of a set of diamond pads which are used in sequence to clean and restore the polish to the stone. My quote was accepted, and a date set for the work to begin which should take two days.


Cleaning and Polishing a Marble Tiled Floor

I arrived on the agreed date and started by sealing up the bases of the kitchen kickboards and skirting with silicone to protect against any damage from water ingress. I then vacuumed the floor to remove any debris and grit. Tile Doctor Stone Soap was then worked into the floor with the first of a set of diamond encrusted Burnishing Pads. The first pad is a coarse 400-grit pad and is run over each Marble tile four times. The floor is then rinsed with water and the soil extracted with a wet vacuum. This process was then repeated with an 800-grit, 1500-grit and then finally a 3000-grit pad which is applied dry with only a little water spayed onto the floor. Tile Doctor Stone Soap is a stone cleaning product designed for maintaining the patina on polished stone. Additionally, it has a sealer friendly pH Neutral formula which is ideal for floors like these. Many floor cleaning products you find in supermarkets are too harsh for use on natural stone and can cause damage over time (always read the label).


Sealing a Polished Marble Floor

Once the burnishing was complete the floor needed to be sealed to protect its’ final finish. Tile Doctor have a whole range of sealing products available but for a really durable shiny finish on Marble I recommend the application of Tile Doctor Shine Powder. This is a crystallising powder that provides a very high shine and tough durable finish, it’s worked into the stone using a white pad fitted to a rotary machine.
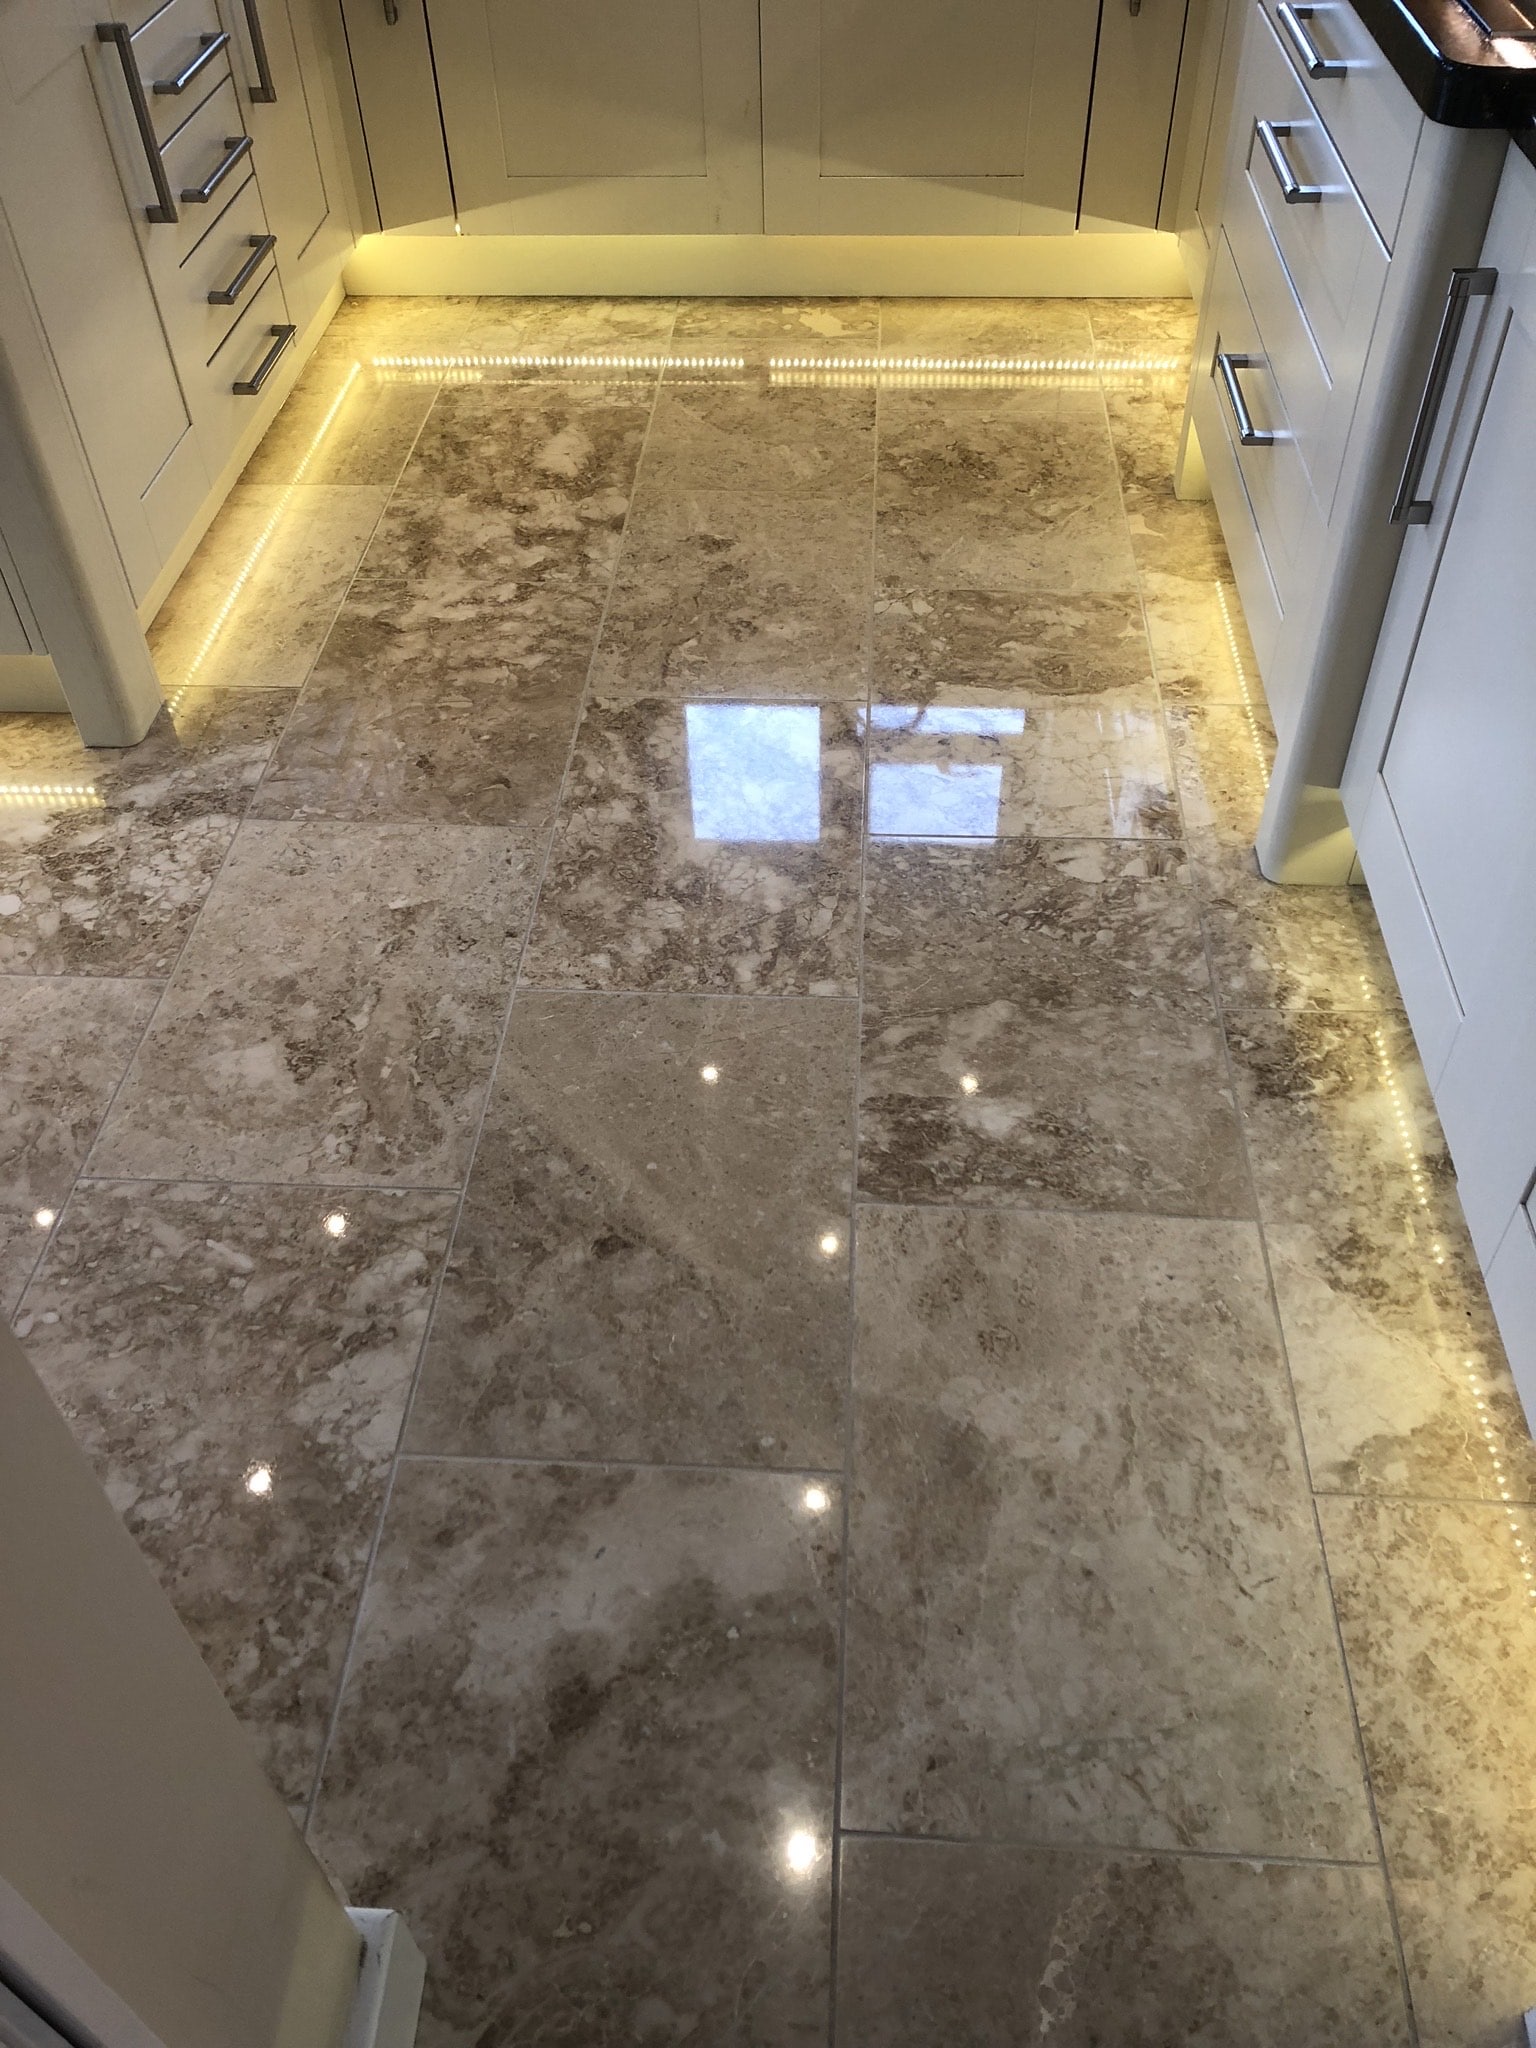
Marble Tiled Kitchen Floor After Polishing Callowend

My client was absolutely delighted with the result and agreed the floor had never looked so good and lived up to the high standard I told them they could expect. For aftercare I recommended the use of Tile Doctor Stone Soap which will keep the floor clean and help maintain the deep patina that I had built-up on the Marble tiles.

Marble Tiled Kitchen Floor After Polishing Callowend Marble Tiled Floor After Polishing Callowend


Source: Marble Tile Cleaning and Restoration Service in Worcestershire

Sunday, December 22, 2019

Advantages of Not Using Limestone Sealer

A limestone sealer is usually advertised as a product that will prevent the entry of water and/or oil on the pores of a limestone tile or limestone slab. While it is ideal to seal limestone installed in certain areas, most limestone applications do not require a limestone sealer. Walkways or foot paths lined with limestone usually become dirty when unsealed. This is because dirt and other debris get into the pores of the stone material and turn into a nasty looking surface. However, limestone installed in walls and other areas that are not usually stained or dirtied can be left as is without using a limestone sealer. Here are some advantages of not using limestone sealer.

1. Preserves Natural Beauty and Color of Limestone

Limestone provides natural beauty that adds decorative quality to where it is installed. When a limestone sealer is used to coat the material, it will loose its natural color and look more artificial. Furthermore, sealers have a tendency to cause discoloration. Poor limestone sealer products cause the limestone to turn into a nasty yellowish color.

2. Preserves the Breathable Quality of Limestone

Unsealed limestone is breathable, meaning that it allows vapor to enter and escape its pores. When a sealer is applied, water may be repelled, but moisture may find its way into the pores of the limestone and escaping will not be easy. When moisture is trapped inside the stone, it increases the risk of damage. It can soften the stone and cause cracks especially when the temperature rises. However, an unsealed limestone will allow moisture to enter its pores, but will also allow it to easily escape, therefore decreasing the chances of damage.

3. Lessens Maintenance Costs

Limestone on walls does not really need to be sealed because it does not get in frequent contact with acids and other harmful contaminants. Therefore the cost is lessened because it does not require constant sealing. Remember that topical sealers need to be replaced every once in a while. If the limestone does get stained, it only requires a few natural cleaning agents to get the stain out.

In addition, some limestone sealers can be easily scratched because they are softer than the limestone itself. When scratch marks are produced in sealed limestone, this requires additional maintenance cost because the entire coating needs to be rebuffed or replaced.

4. It Makes the Limestone More Durable

Limestone in itself is durable. However, when treated with sealers, especially those that are permanent, it will require constant chemical treatment especially when the sealer needs to be replaced or removed. Constant chemical cleaning and sealer removal will definitely make the limestone more susceptible to damage.

5. Helps the Environment

Some chemicals used in limestone sealer products may have negative effects on the environment. Impregnators, for example, cause toxic vapors to be released in the environment after use.


Sunday, December 15, 2019

Eco-Friendly Types of Limestone Sealer

It is necessary to seal your limestone before use to preserve and protect its beauty, and there are eco-friendly limestone sealers available. You must seal your limestone, as it is a very porous and soft stone. The sealant will fill the porous holes in the stone and prevent corrosion and decay of the stone.

Limestone Sealants

Limestone sealants enter the interior of the stone surfaces where they resist and prevent damage while allowing the porous stone to breathe and release moisture. Therefore, these sealants protect the stone from stains, the formation of mold or mildew and prevent discoloration. Sealing limestone is a vital process in maintenance and installation to preserve the integrity and protection of your stone.

Environmentally Friendly Sealants

There are numerous types and varieties of limestone sealants available for purchase. There are several varieties of eco-friendly sealants that offer the same level of stone protection as other sealants, while remaining safe and environmentally friendly as well. Some sealants are notably more environmentally friendly than other sealants. The more environmentally friendly sealants are water-based solutions and are free from solvents while remaining non-toxic as well. All eco-friendly sealants will, by nature, be non-hazardous and non-flammable due to the lack of added chemical that other sealants may contain. In addition, all environmentally friendly solvents will not release and VOC or noxious fumes.


Sunday, December 1, 2019

Ways to Prevent Tile Grout Stain

Tile grout stain can give your bathroom, tub, shower enclosure, and even kitchen sink backsplash an unsightly appearance. Stains can happen in a variety of different ways. Cleaning the tile grout that has been stained can be done, but it is time consuming and labor intensive. In some instances, the stain is set in so deep that you will need to chisel out the grout and replace it with new grout. This, of course, would be the last resort.

Prevention Is Better than Replacement

One of the best ways to make sure that you do not have to go to the extreme and replace the grout on your tile is to prevent the stain in the first place. There are plenty of ways that you can be proactive with your tile and eliminate most of the stains that can occur. While you can not completely eliminate all of the stain causes, you can do a lot to give your tile a much better appearance for a long time.

Keep Clean

The first way to prevent tile grout stain is to keep it clean. Each time you use the tub, or the shower, give the tile a good rub down so the dirt and soap does not set into the grout. A dry sponge, or rag, will do the job quickly. You do not have to do a complete cleaning of the grout, just a good rub down after use.

Seal Tile

Another way to give some protection to the tile grout is to seal the tile with a quality sealer. There are plenty of sealers that you can choose from to protect not only the finish of the tile, but also the grout itself. The sealer is spread out over the entire tile surface with a squeegee. When using a sealer you want to keep it even so that there is not too much in one area and not enough in another.

Keep Heated Objects Away from Tile

When you have a tile countertop, it can be easily stained if something that is hot is placed on top of the tile without any buffer or insulation. The heat will actually burn the grout and leave a dark brown stain. This is impossible to remove as it is burned into the grout itself.

Use Placemat for Drinks and Food

One of the problems with having tile on a coutertop is that it can be easily stained through regular everyday use. By placing a glass on the tile and letting the condensation settle into the grout you will see a dark ring develop. Juice from food is also a notorious cause of stain on the grout. Always use a placement, or a cutting board to prepare foods.

Dye the Grout

While this is not actually a way of preventing stains it is a way to hide the presence of a lot of stains. You can dye the grout before you even put into on to the tiles with special dye packs. You can also dye the grout while it is already on the tile. However, there is a lot of risk in ruining the tile itself. Regrouting the tile is an option if you want to add dye to the grout.