Tuesday, July 30, 2019

How to Renovate Dirty Terracotta Tiling

We were contacted by the owner of a property in Moulton with a problematic Terracotta tiled kitchen floor. She was seriously considering ripping up the entire area of tiling and replacing it as she was having a new kitchen installed. Both her and her husband were concerned that unless I could restore this floor to somewhere near to its original condition, they would need to replace it.

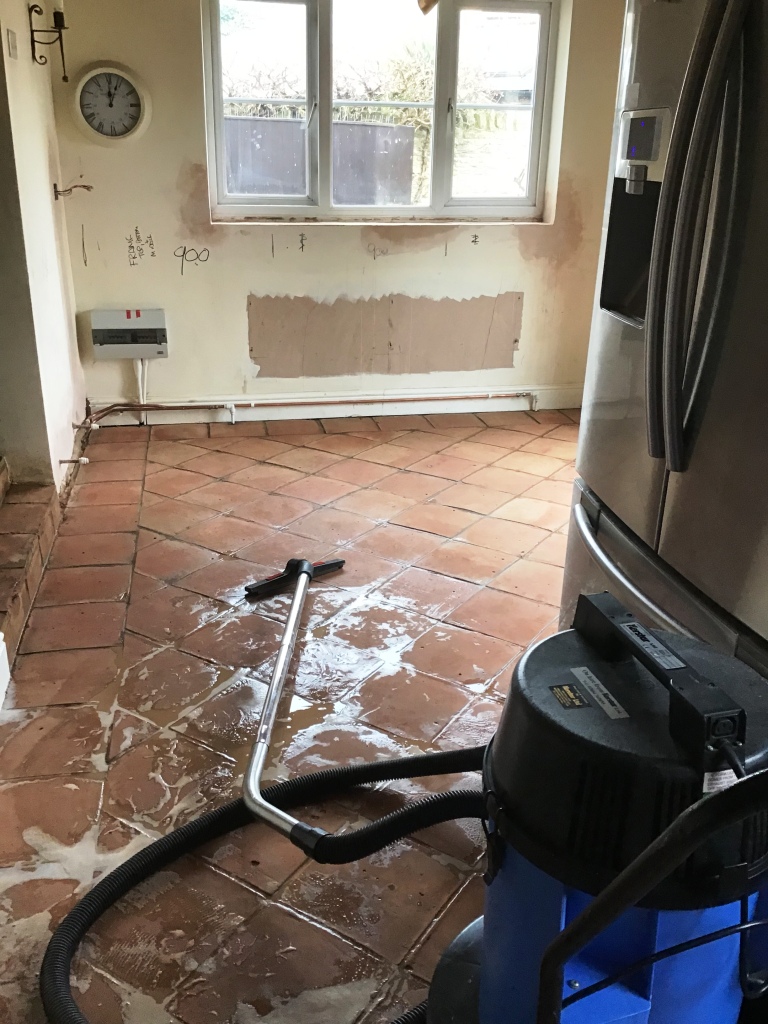
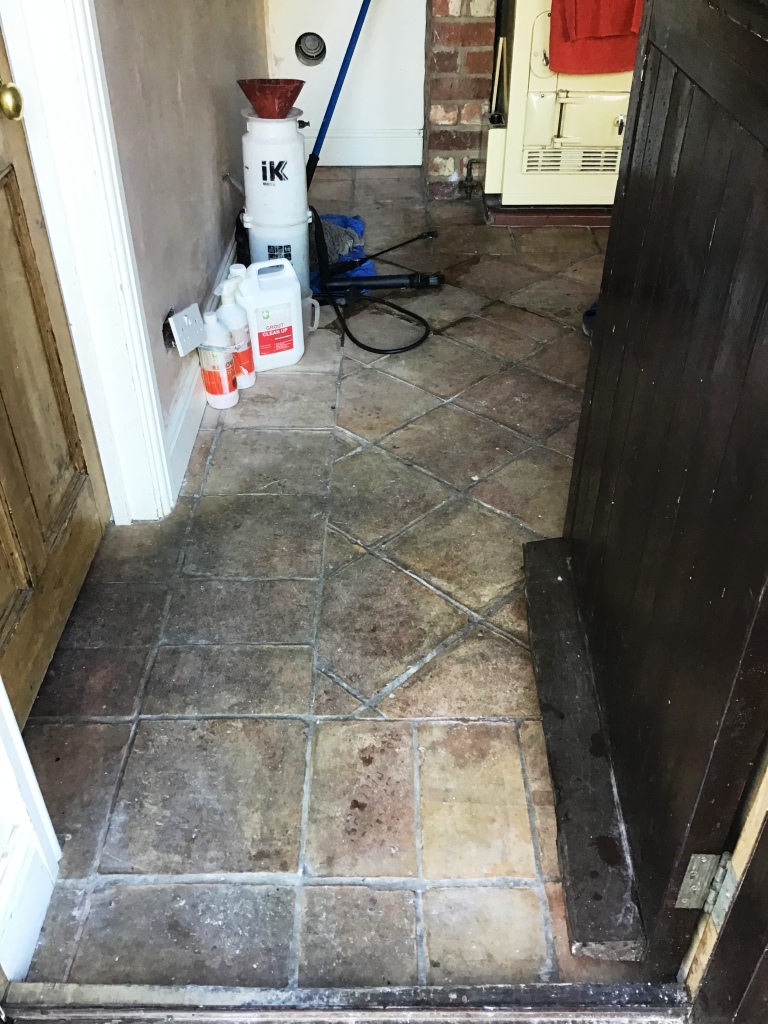
Terracotta Tiled Kitchen Floor Before Restoration Moulton

I went over to inspect the Terracotta tiles and could see the entire surface was deeply ingrained with soiling and the grout lines were filthy. After carrying out a test it became obvious that the previous sealer had been applied very sparingly and had mostly worn away, leaving the stone prone to staining. Terracotta is a very porous tile and dirt had become ingrained in the pores leaving it looking very dull and difficult to clean.
Terracotta Tiled Kitchen Floor Before Restoration Moulton

I completed the test on a small part of the floor and the customer could see the results which could be achieved. Happy with the result they agreed my quote and we set a date for my return to complete the floor.


Cleaning a Terracotta Tiled Kitchen Floor

The tiles turned out to be made of a fairly soft Terracotta which meant that we were able to deep clean them extremely effectively using a strong dilution of Tile Doctor Pro-Clean. We used Tile Doctor Remove and Go in particularly stubborn areas.

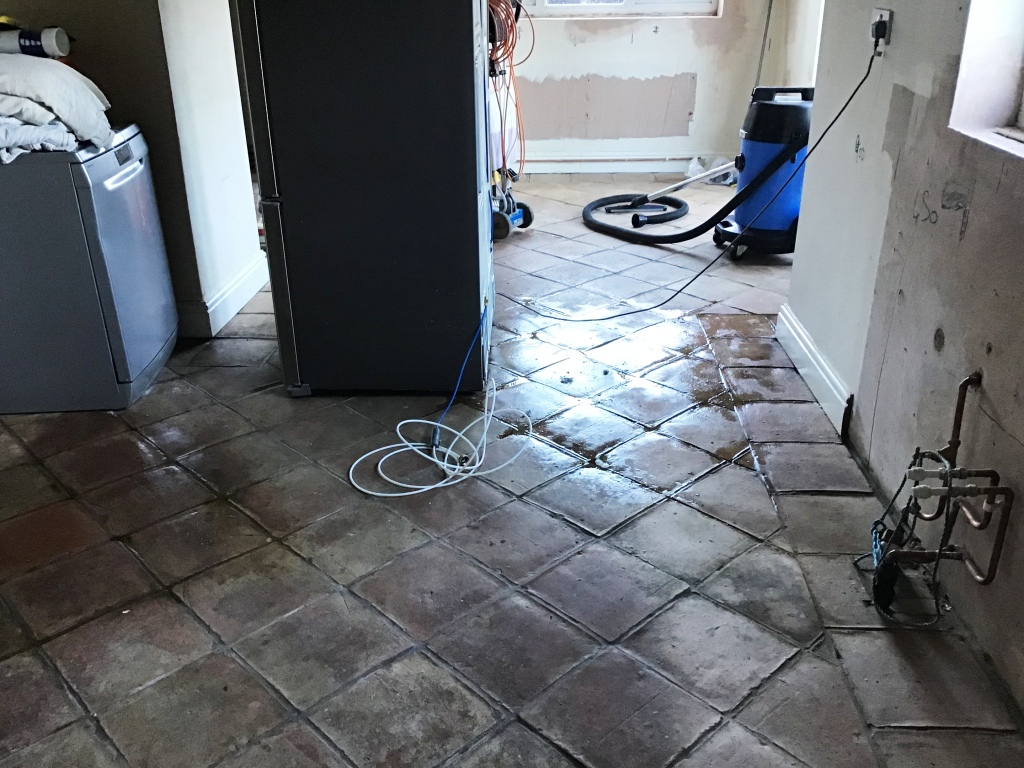
The process I use is to spray the Pro-Clean onto the floor and leave it to soak in for about ten minutes before being worked in using a heavy rotary machine fitted with a black scrubbing pad. The resulting slurry is removed using a wet pick up vacuum. All the dirt and virtually all of the old sealer was removed at this stage; the remaining patches around the edges of the area being finished by hand with a 200-grit burnishing block. The grout lines were then cleaned by hand with an angled grout brush.
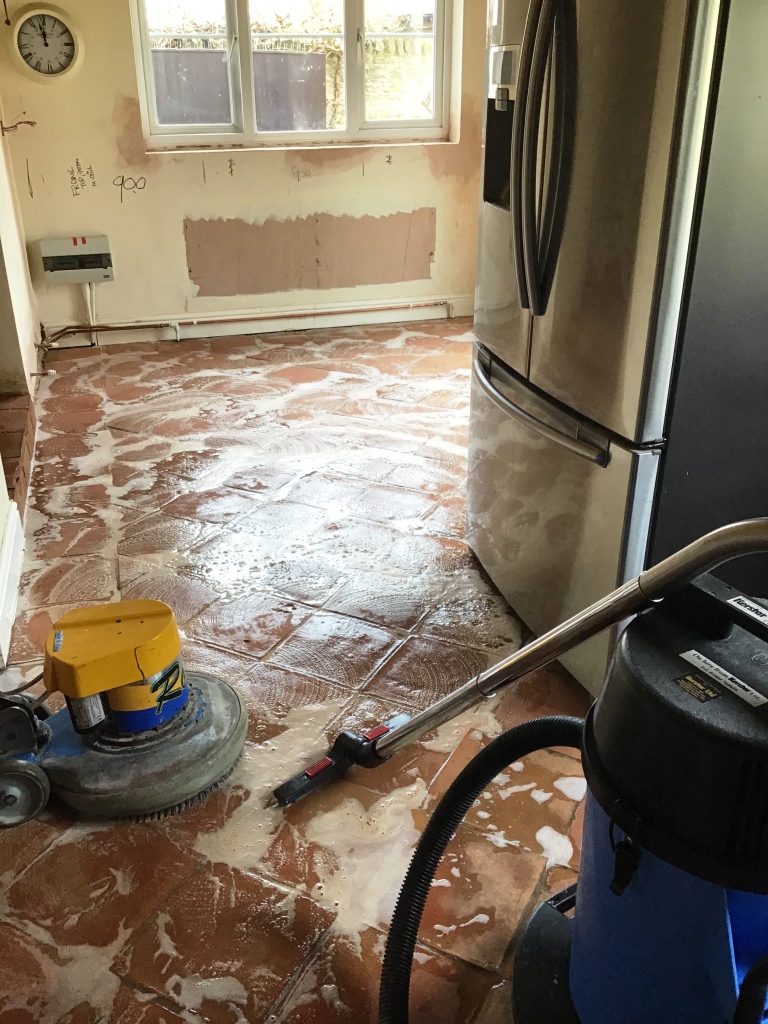
Terracotta Tiled Kitchen Floor During Restoration Moulton Terracotta Tiled Kitchen Floor During Restoration Moulton

Finally, the deep-seated oil stains in front of the cooker were brought out using Tile Doctor Oxy-Gel which was left to dwell on the marks for an hour before being agitated with a diamond burnishing pad and rinsed away with a wet pick up machine. The floor was rinsed with water and allowed to dry off overnight.
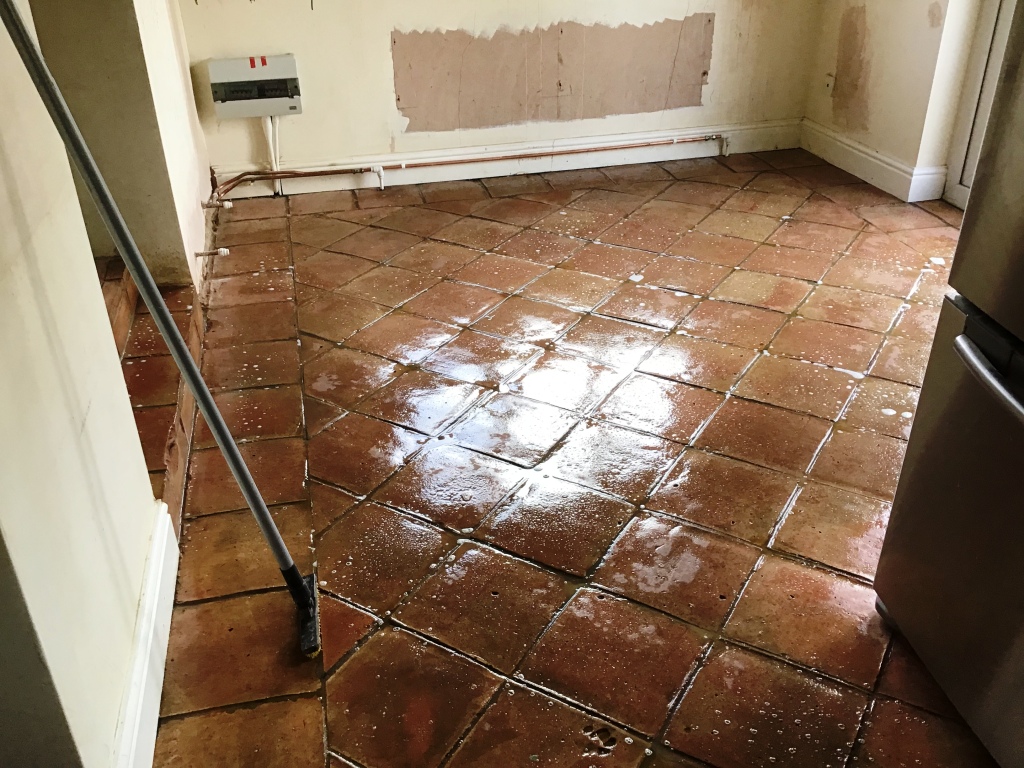
Terracotta Tiled Kitchen Floor During Restoration Moulton


Sealing a Terracotta Tiled Kitchen Floor

The following day I inspected the floor and checked it was ready to be sealed. All was well so I applied an initial coat of Tile Doctor Colour Grow which is an impregnating sealer that occupies the pores in the tile enhancing the natural colours of the Terracotta and provide a base layer of protection from staining.
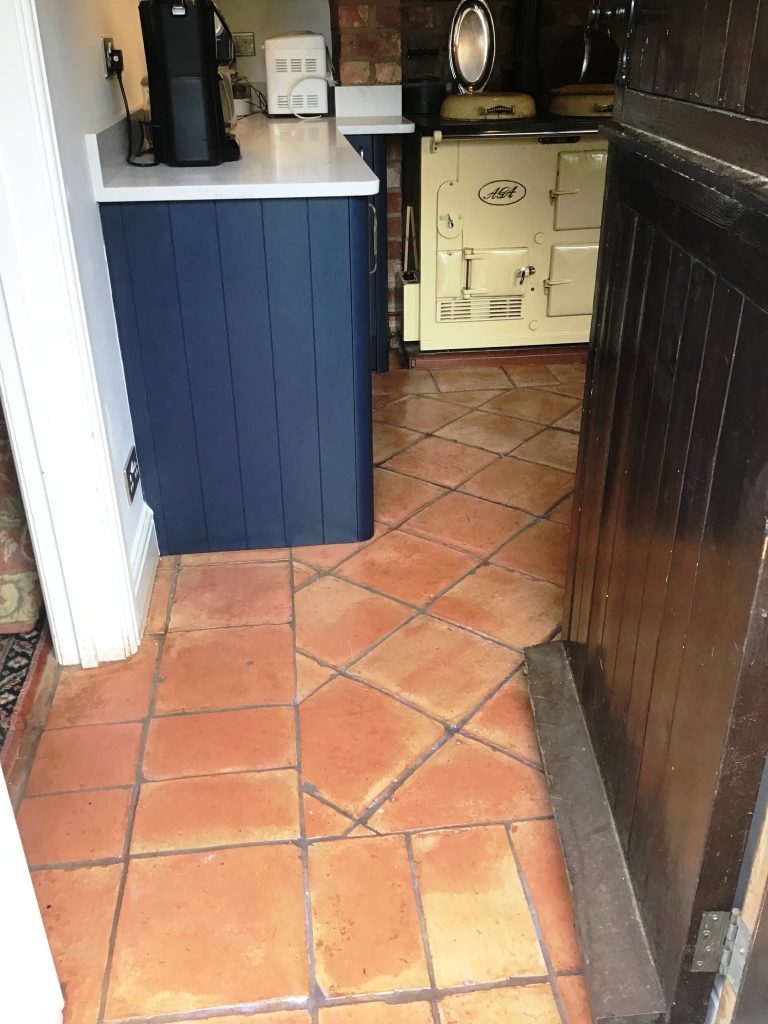
Terracotta Tiled Kitchen Floor After Restoration Moulton

I returned at a convenient time once the kitchen was completely installed to finish the job. This involves carrying out a light maintenance clean with Tile Doctor Neutral Cleaner and once the floor was dry, I applied 5 further coats of Tile Doctor Seal and Go which provides a pleasing satin finish which is really suited to this type of floor.
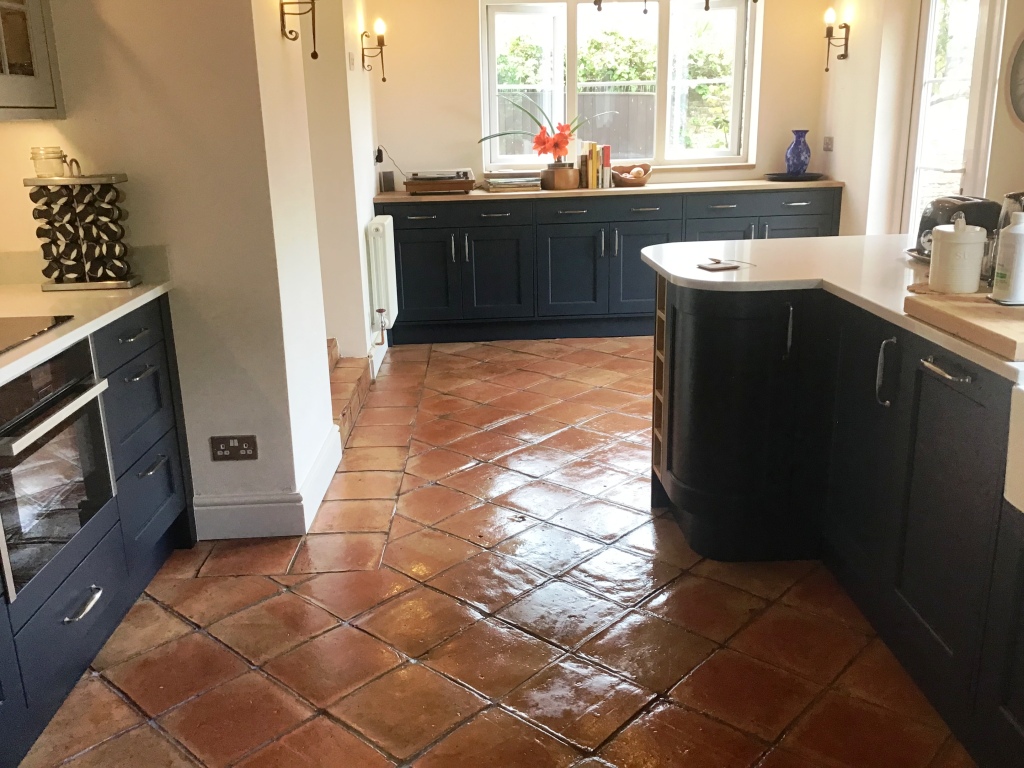
Terracotta Tiled Kitchen Floor After Restoration Moulton

The customer was very happy with the results and has left the following feedback. "We were really pleased with the results, thank you!"
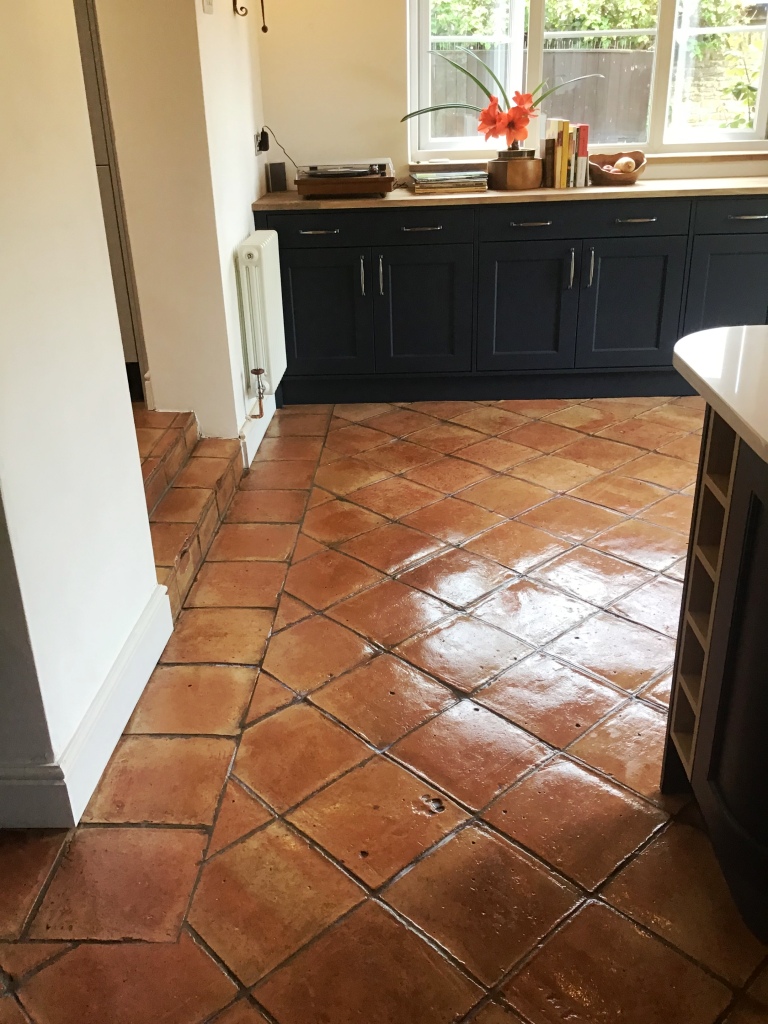

Terracotta Tiled Kitchen Floor After Restoration Moulton


Source: Terracotta Tile Cleaning and Sealing Service in Northamptonshire
Monday, July 29, 2019

How to Remove Epoxy Coating from a Garage Floor

Removing an epoxy coating from a garage floor is a labor intensive process. It will involve hours of scrapping the epoxy with a metal or plastic scraper to remove as much of the materials as possible. Once you scrape the floor with the metal or plastic scraper, you will need to apply a solvent, such as lacquer or acetone to remove the remaining coating.

You may need to remove epoxy coating from a garage floor in the case where the epoxy coating was improperly applied or it is old and flaking on its own. This article will discuss the step-by-step process and tool and materials needed to remove epoxy coating from a garage floor.

If you intend to place a new epoxy coat on the same garage floor, remove as much of the old epoxy as you can, understanding that you may not possibly remove all of the material. Enlisting additional help in scraping the floor will help tremendously in removing the epoxy coating from your garage floor.

What you’ll need
  • Stiff Metal or Plastic Scraper
  • Lacquer, Paint Thinner, Epoxy Remover (Acetone) or Alcohol
  • Garden Hose
  • Rags

Step 1: Acquire Materials Needed to Remove the Epoxy Coating

Purchase the materials needed to remove the epoxy coating from the garage floor. The two essential tools needed for this project are a scraper (metal is preferred over a plastic scraper) and some type of solvent needed to pull up the loosened epoxy on the garage floor.

Step 2: Remove Items from the Garage

Remove all items from the garage and make sure that it is cleared. Sweep the floor up to remove any dirt and debris that has accumulated before you begin.

Step 3: Scrape the Garage Floor

If it is possible, organize a small group of friends to assist you in the process of scraping the floor with the metal scrapers. The more people that you can enlist in this project, the easier it will be to complete. With the friends, get down on your knees and begin scraping the floor. You will find this process slow and tedious, but unfortunately necessary in order to remove the epoxy coating from the garage floor. Work as methodically as you can to remove as much of the epoxy coating possible.

Step 4: Apply Solvent to the Garage Floor

After you finish scraping as much of the floor as you can, you need to pour solvent such as lacquer, paint thinner or acetone to remove additional amounts of epoxy coating. The scraping will allow the solvent to penetrate the epoxy coating and make it easier to continue scraping. With the solvent applied. Go back to scraping the floor to remove the remaining amounts of epoxy coating.

Step 5: Hose the Floor with Water

Use a garden hose when you complete all of the scraping to hose off the floor with water. This will remove the remaining epoxy coating and allow you to work with the concrete to reapply the epoxy coat.


Thursday, July 18, 2019

How to Use a Grout Float Properly

A grout float is a tool that is used to apply grout to the tile. It consists of a rectangular and flat metal head with a handle that facilitate the application of a smooth and even coat of grout on the floor. Although the grout float is a simple tool, handling it requires skill, thus here are the steps on how to use the grout float properly.

Step 1 – Mix The Grout

Mix the grout to its proper consistency and put ample amount of grout on the grouting float.

Step 2 – Apply Grout On The Tile

Apply the mixture of grout to the surface of the tile.

Step 3 – Spread The Grout Evenly

Spread the grout on the tile evenly. Make sure that you spread it in a unidirectional manner. Do this procedure until the entire surface and the spaces between the tiles are completely filed with grout.

Step 4 – Remove The Excess Grout From The Tile Surface

Hold the grout float at a 45-angle and drag or scrape it across the surface of the tile.

Step 5 – Clean The Grout Float

Clean the grout float using a squeegee or a wet sponge to prevent the grout from drying completely on the flat metal surface.


Wednesday, July 17, 2019

How to Cut Into Limestone Tiles

Cutting limestone tiles is a technical task and requires precision and accuracy. When cut precisely and assembled properly, limestone tiles can give a beautiful and rich look to your floor. They provide superior decor at half the rate of marble and other expensive stones. Properly cut limestone tiles are easier to maintain and last long.

What you’ll need
  • Diamond Wheel Tile Cutter/Machine
  • Chalk
  • Safety Mask
  • Safety Goggles
  • Thick Heavy Gloves
  • Water
  • Hose / Bottle


Step 1- Precautions

Before you begin work, it is essential that you take precautions to avoid any accidents. While you cut limestone, the shattering fine particles can be dangerous. The shreds can cause minor scratches so keep a safe distance from the cutter. Clouds of limestone dust can cause different allergies. Do not ever cut tiles without wearing a proper safety mask. The particles could also affect your eyes so put on safety goggles. Also protect your hands by wearing thick heavy gloves. Make sure that the gloves fit your hand perfectly so that they do not hinder work. Lastly, wear thick, insulated old clothes.

Step 2- Area Selection

After you are safely dressed, you need to decide where to place the stone to cut it. You will need a hard, flat surface for your diamond wheel tile cutter. It is best to do the cutting outdoors because the flying particles can make a big mess which can be a hassle to clean later.

Next, you mark the areas for cutting on the tile with a chalk or pencil. Be very careful when you make your marks because one wrong mark will mean a badly shaped tile. Also, be sure the mark can be easily removed later, use a pencil or chalk.

Step 3-Preparing the Diamond Wheel Tile Cutter

Fill water bottles or get a hose and fill the drain of the diamond wheel tile cutter with water. Once it is full, switch on the tile cutter for at least two to three minutes and let the blade get wet. Once the blade is completely lubricated with the water, switch off the cutter and put the tile on the selected area.

Step 4- Positioning the Limestone Tile

After your wheel tile cutter is ready, you need to place the tile in a way that the blade lays at the edge of the cut that was marked. The safety guard bar is to be kept as close as possible to the tile. Keep your hand away from the blade to avoid any injuries.

Next, switch on the diamond wheel tile cutter and push the tile against the blade smoothly and slowly. Be careful with your hands. After cutting all the pieces, turn the diamond wheel tile cutter off. Remove the tile pieces from the area and see if you need more cuts. Repeat the exercise if you want to cut more limestone tiles.


Thursday, July 11, 2019

How to Clean an Outdoor Concrete Patio Floor After Winter Ends

A concrete patio floor is durable and hardwearing. However, it still needs to be properly maintained and cleaned. This is even more important when the winter months come to an end. At such a stage the concrete floor would have been exposed to extreme conditions including heavy rains, strong winds, frost and snow. These are some basic guidelines to follow in order to clean your patio floor well.

What you’ll need
  • Shovel
  • Straw push broom
  • Garden hose
  • Squeezer
  • Floor cleaning product
  • Ice-melt products
  • Grouting
  • Sealer

Step 1: Removing Ice and Snow

Ice and snow are common problems in most countries. There are various ways in which they can be removed. Ice-melt products are sometimes used, especially if there is a lot of snow and ice to eliminate. However, these products need to be used with caution. Once the snow melts through their effect, puddles will form. These can cause additional damage if not removed within a short period of time. Sometimes, simply shovelling snow away is the best option. Unfortunately, sand and grit tend to surface once the snow has melted. These need to be cleaned away too. The best way to do this is by sweeping them away on a routine basis until they have been greatly reduced.

Step 2: Removing Other Residues and Debris

Once the tough job of removing ice and snow is over you still have much to do. First of all, the sand and grit may have caused mud to develop in the process. Hence, you have to wash it off. It is best to use a garden hose to spray water directly on it. Once the mud has been sprayed away, dirty water will remain. Keep spraying fresh water while squeezing away the dirty water with a squeezer. Make sure to add a suitable cleaning product to reduce the tendency of dust from getting instigated. At this point, your patio will look partially clean.

Step 3: Sweeping Other Leftovers

Once the water has dried up you may notice that there are leftovers such as leaves, twigs, rocks and similar residuals. These easily get caught up in the process. Sweep these with a straw push broom. Then dispose of them by throwing them away in waste baskets.

Step 4: Inspect the Floor and Fill Any Cracks and Holes

Now that the floor has been cleaned up inspect it for any cracks and other damage that could have been caused. There may even be weeds sprouting from such cracks. Make sure to remove them immediately. Then, clean the cracks to remove any loose stones and other residuals. When done allow the patch to dry before proceeding. Use a grout mixture to fill the cracks and allow it to settle. Apply sealer for further protection.


Monday, July 8, 2019

Best Method to Restore a Terrazzo Patio

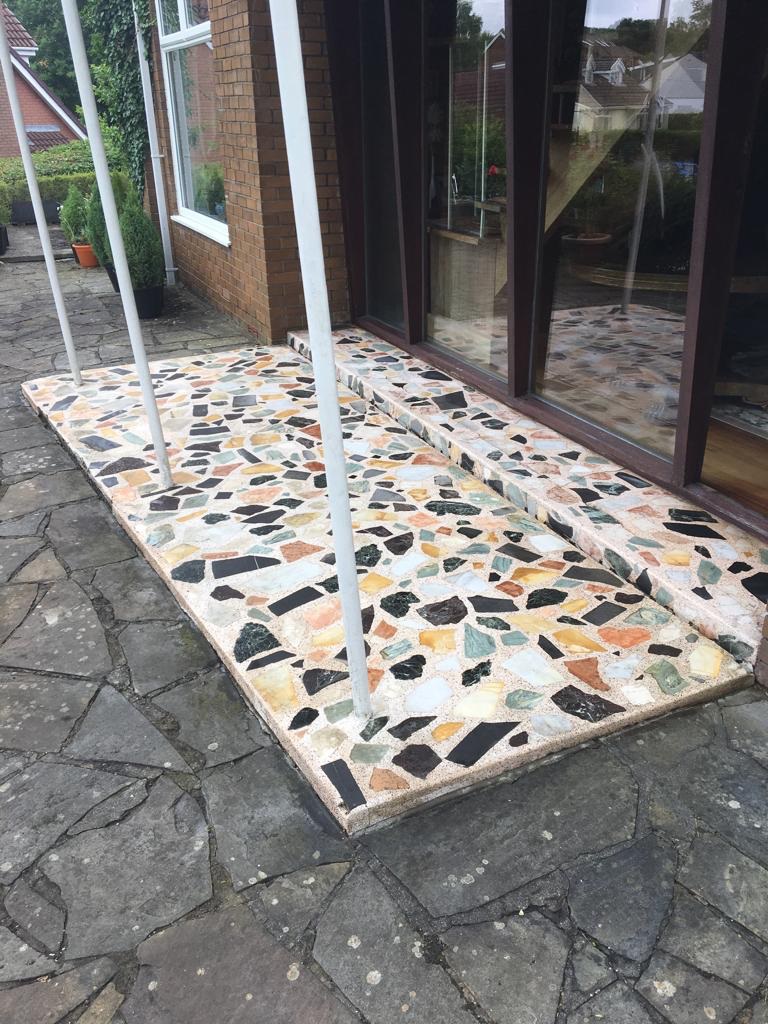
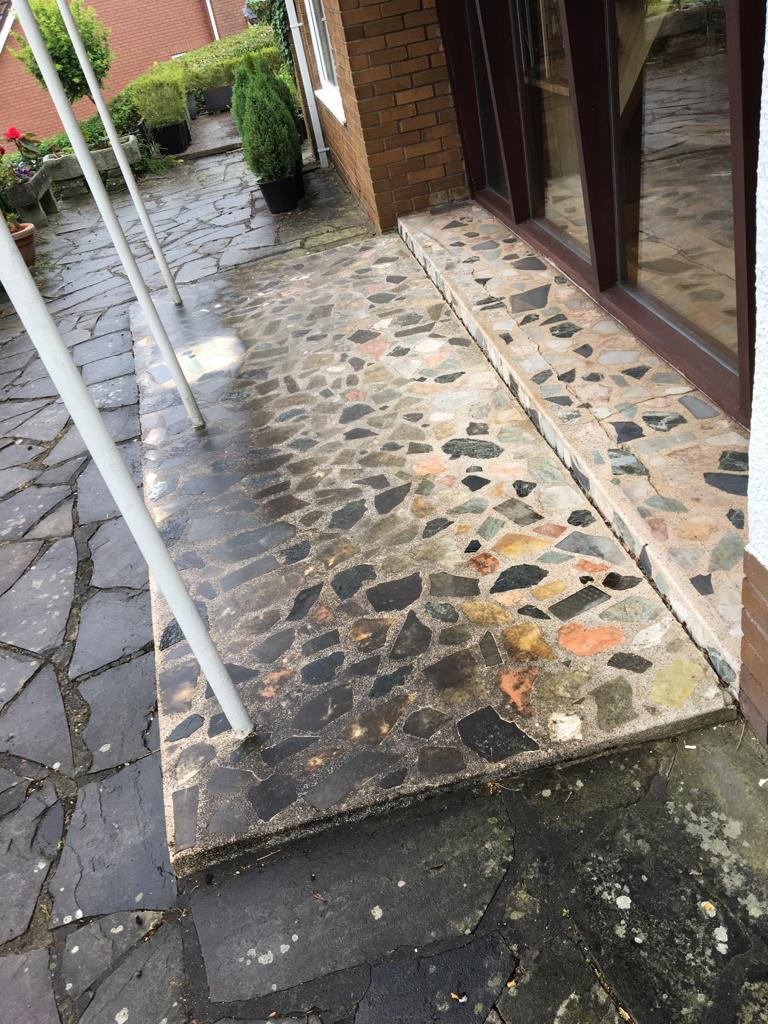
This was an unusual request to bring back to life a Terrazzo porch entrance that was installed by the customers father many years earlier at a house in Newport. The installation resembled very colourful crazy paving which was very popular in the 70's but if you look closely you can see it has more in common with Terrazzo due to the inlaid stone which has been ground down within the concrete base.

Terrazzo Porch Entrance Before Cleaning

Years of exposure to the elements had left much of the stone and concrete discoloured and almost black in places. I discussed with the client how we would be able to clean the area and we agreed a price for the work which would take a day to complete assuming the weather held. Being an external job, I would need a warm day before coming back, this would ensure it dried easily.

Cleaning a Terrazzo Tiled Porch Floor

Thankfully for once the forecast was correct and the weather was good on the day, we had booked in to complete the job. To restore the appearance first I used a set of diamond burnishing pads with water to grind off the dirt and refine the appearance of the stone and aggregate. I used a variety of pads with different grades of grit to ensure the floor was as clean as possible rinsing the slurry off the floor after each pad. The transformation was dramatic. The patio was then rinsed with water to remove the slurry that was generated, and I used a wet vacuum to extract it.

This process took much of the morning, it made a pleasant change to work outside in the fresh air, most of our jobs tend to be indoors. After a final rinse I left the porch to dry out in the sun over lunch and came back in the afternoon to seal.

Sealing a Terrazzo Tiled Porch Floor

First, I checked the floor had dried out with a moisture meter, it was within the acceptable levels, so had the green light to processed and seal the floor. Since cleaning it really was starting to look like a nice feature.

To seal the patio, I used a couple of coats of Tile Doctor Colour Grow which works well externally as it copes with damp conditions. It’s a colour intensifying impregnating sealer that provides durable protection to the surface as well as allowing the floor to breath. You can see from the photograph below how just how well Colour Grow improved the colours in the stone. Once I had finished it looked like a new installation.

Terrazzo Porch Entrance After Cleaning

The client was over the moon I had managed to get the area looking this good. He said he could remember when it was laid, and his dad would be very proud of it now. It had definitely stood the test of time.


Source: Terrazzo Cleaning and Restoration Service in Newport South Wales