Sunday, July 31, 2016

Getting the best out of a Quarry Tiled Floor

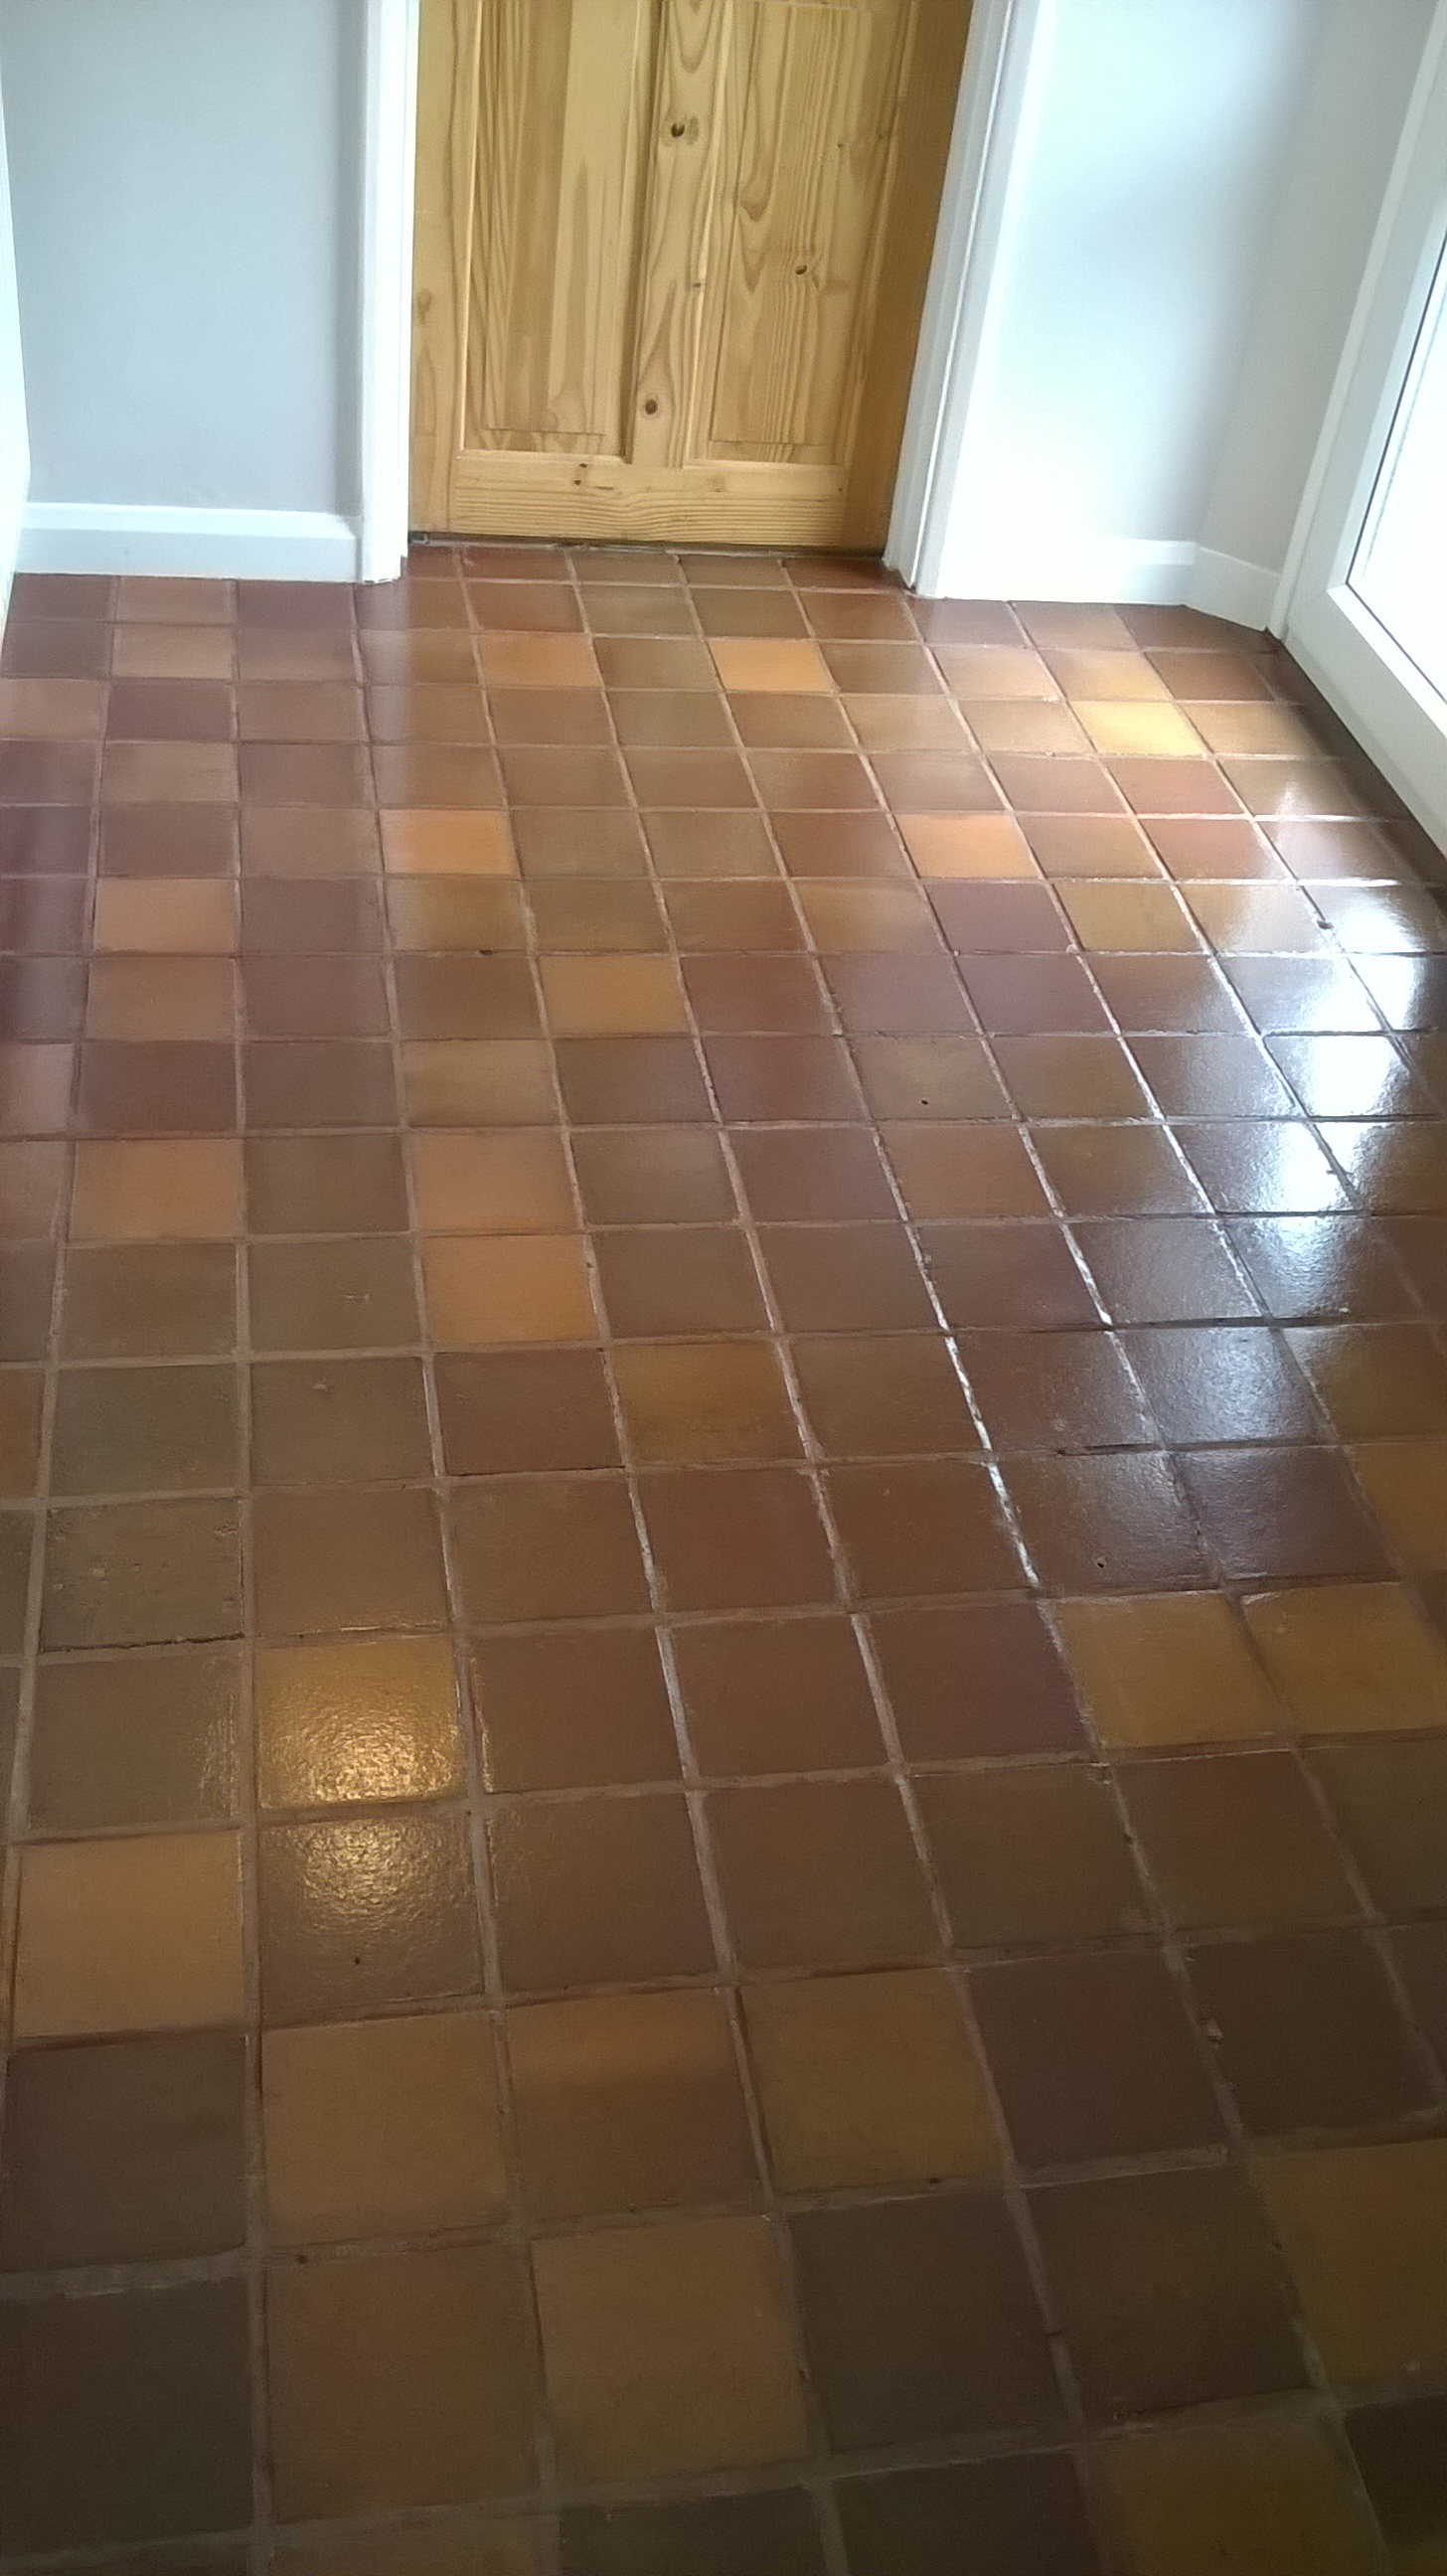
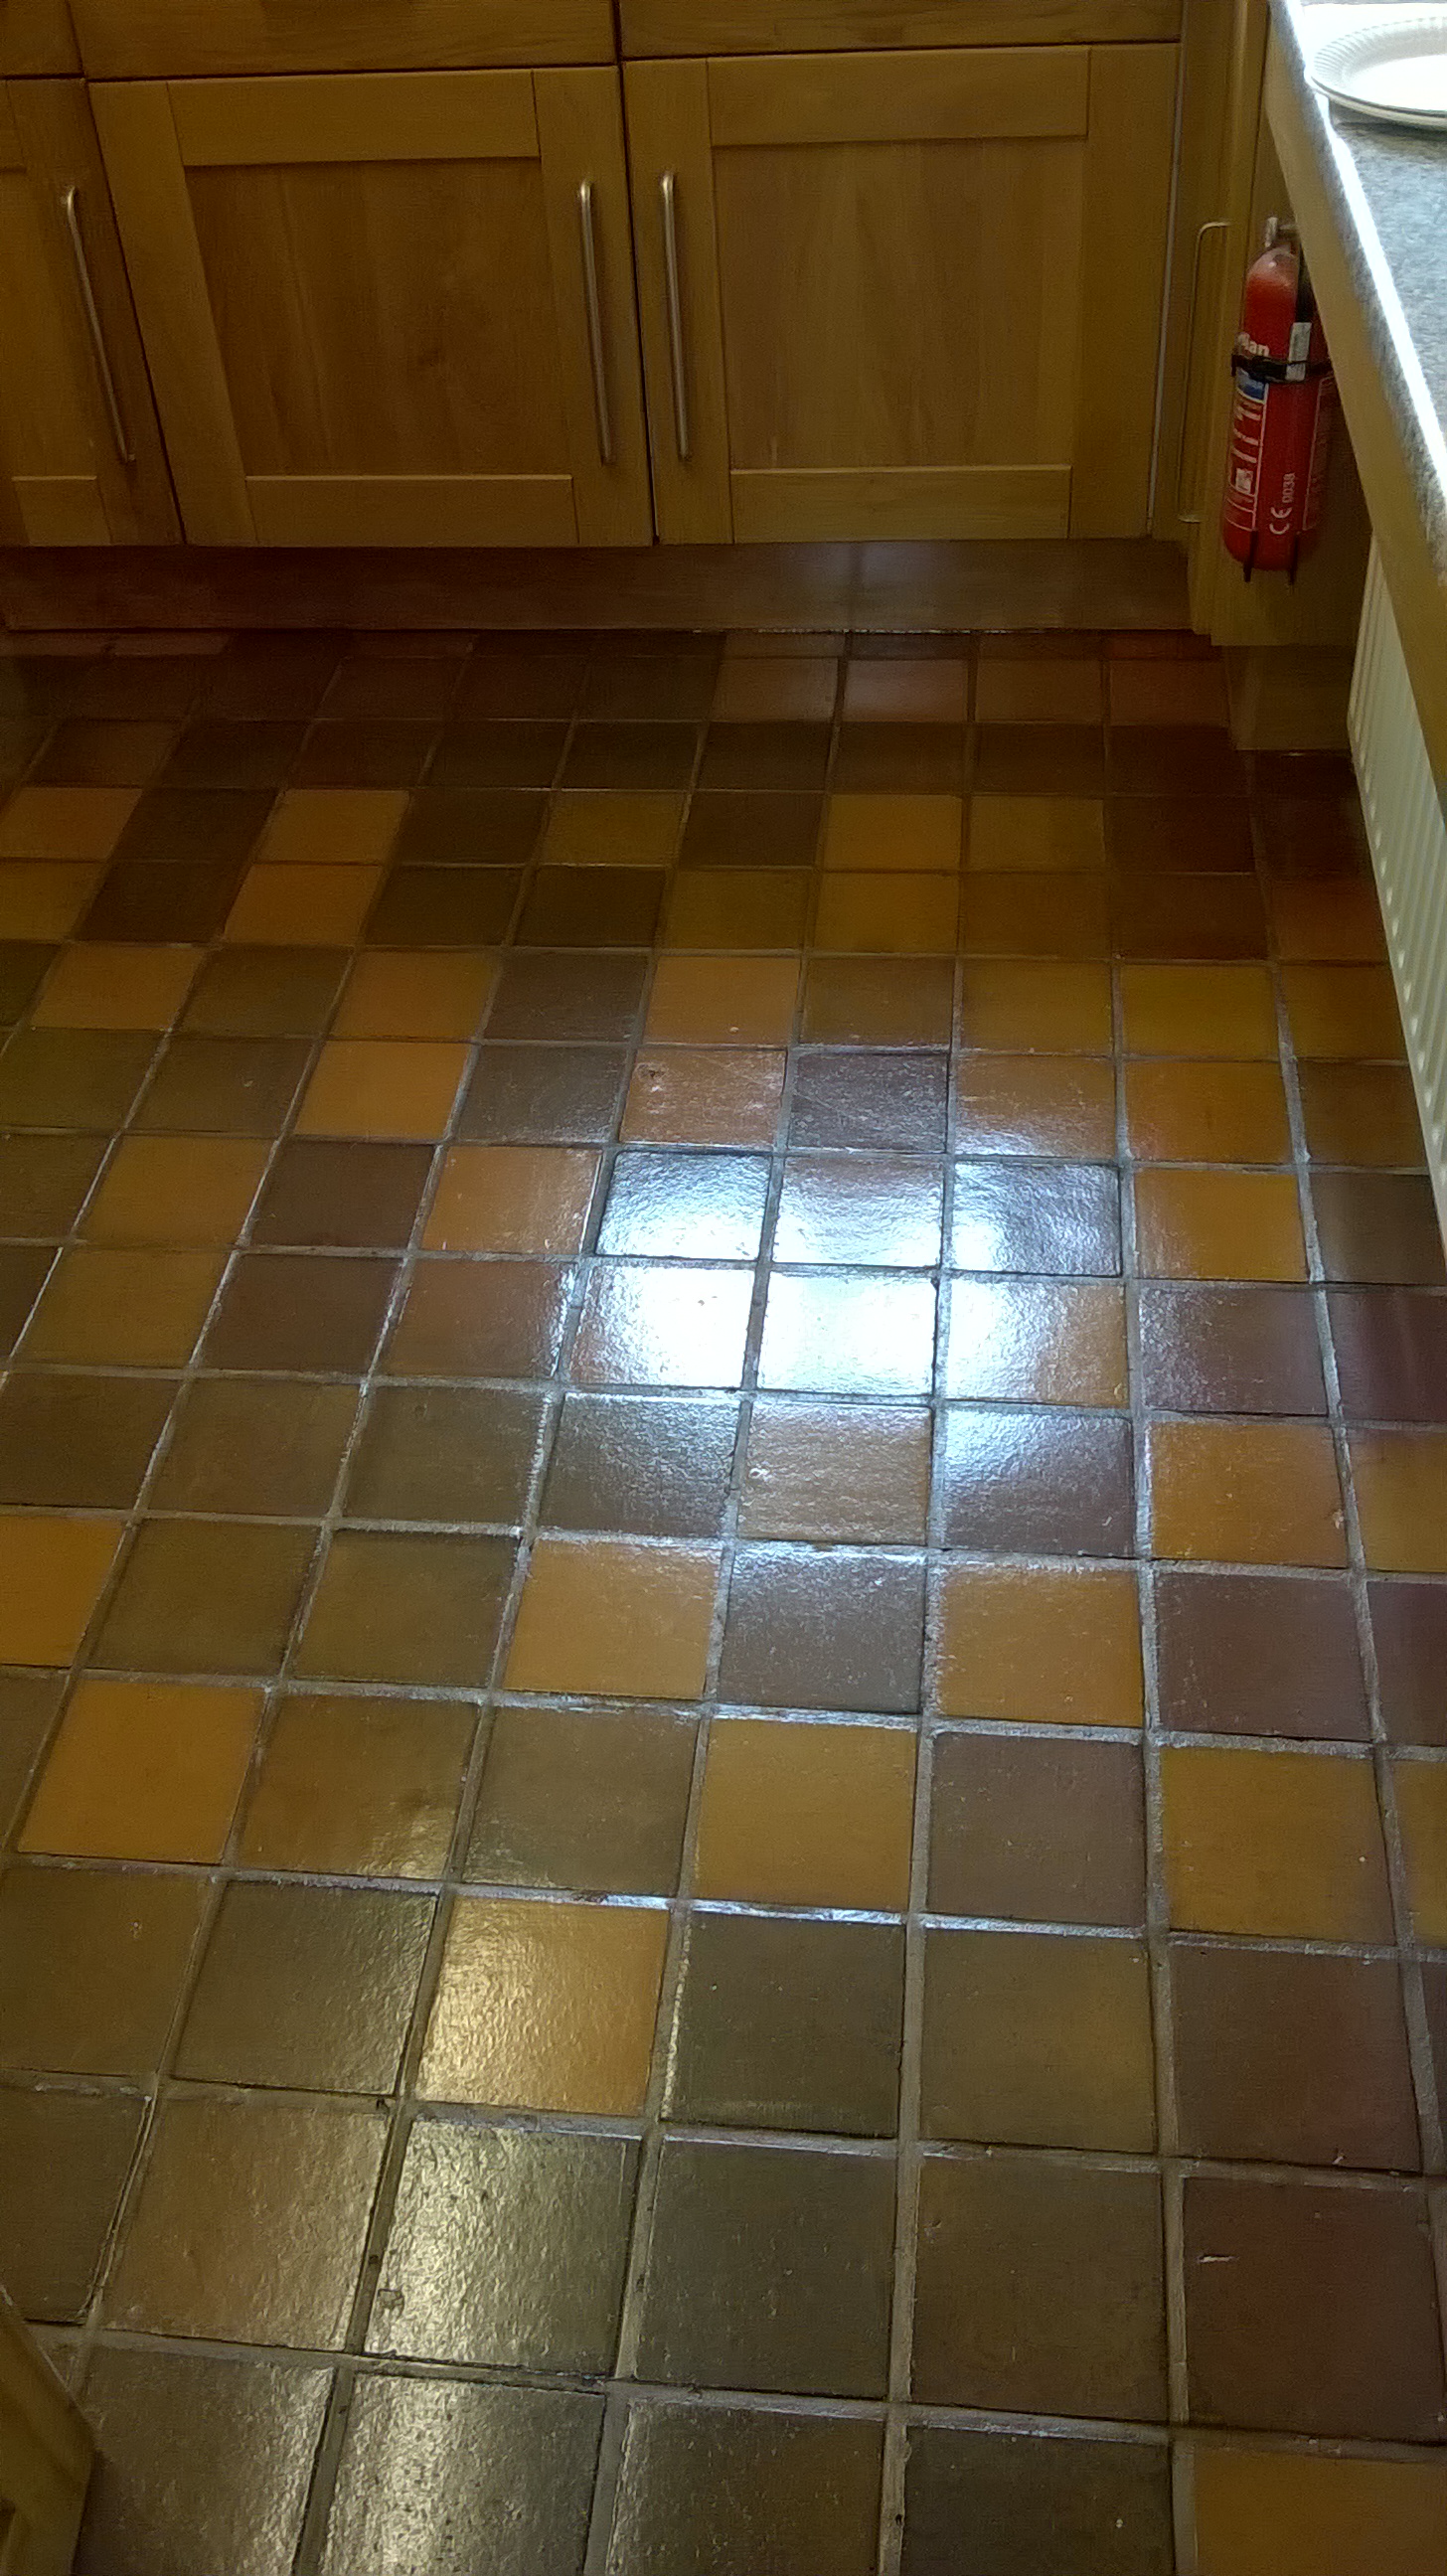
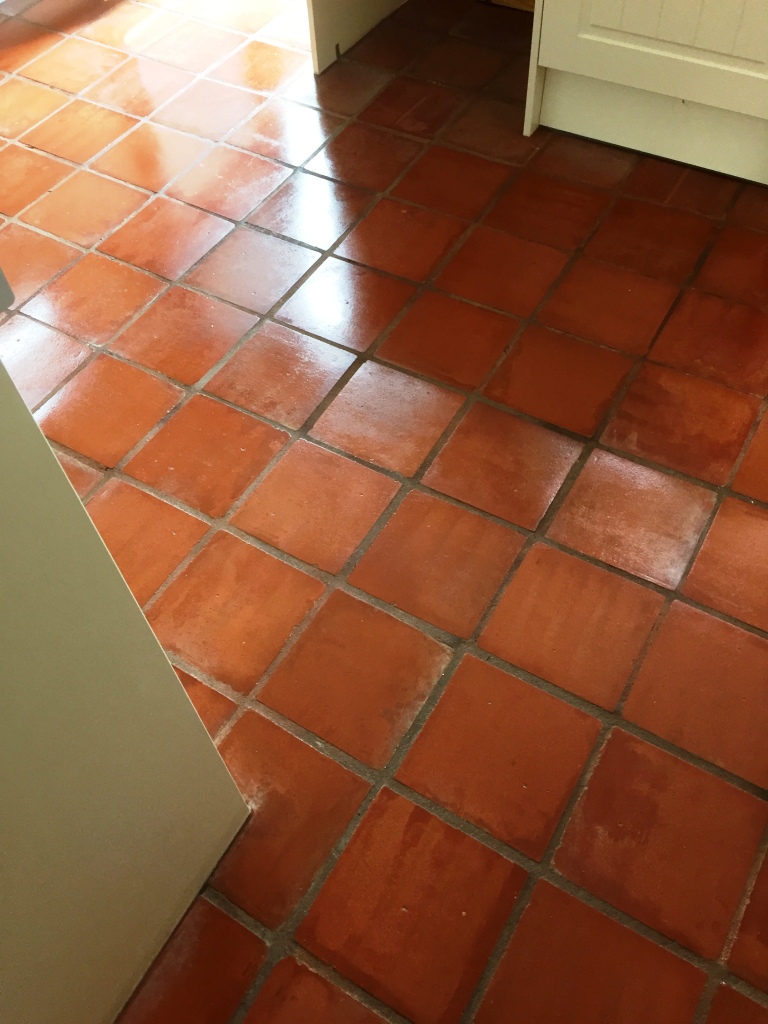
This Quarry tiled kitchen floor was in very good condition, with no cracked or broken tiles. However, my customer, who lives in the town of Tutbury, near Burton-on-Trent, was keen to boost the condition of the tiles further through professional maintenance, including a deep clean and a fresh seal to restore the sheen to the Quarry. NB, did you know it's estimated that Tutbury has actually been inhabited for 3000 years, having once been the site of an Iron Age hill fort, this house of course was a lot more recent.

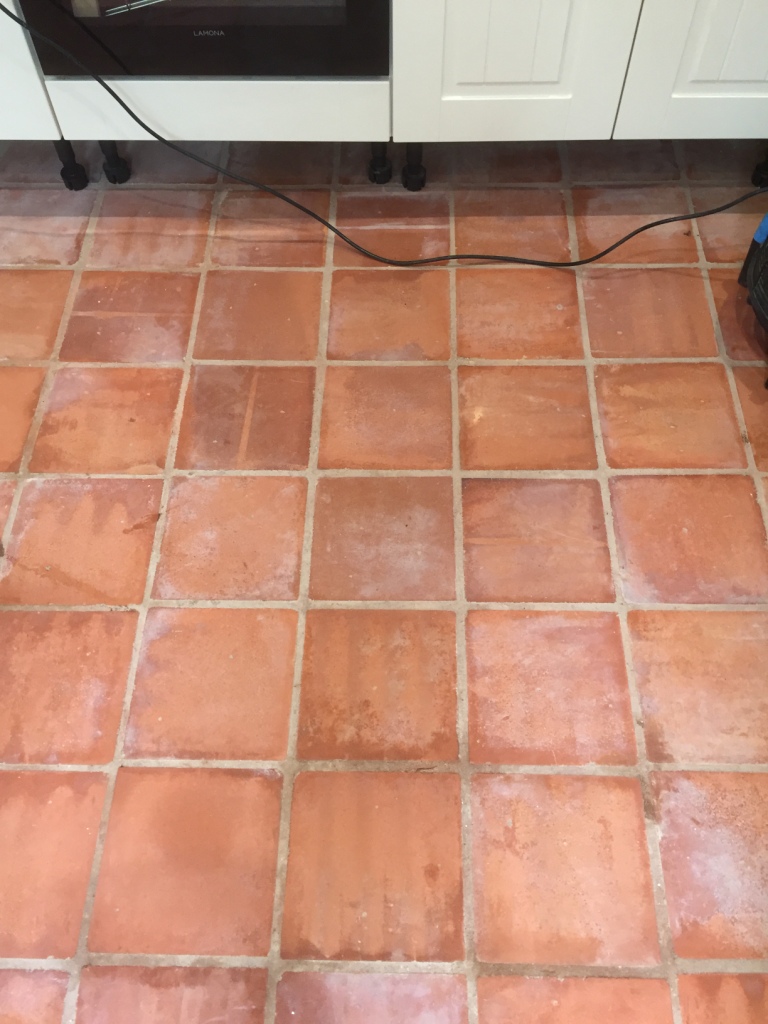
Quarry Tiled Kitchen Before Cleaning in Tutbury Burton on Trent Quarry Tiled Kitchen Before Cleaning in Tutbury Burton on Trent

Cleaning a Quarry Tiled Kitchen Floor

To clean the tiles, I chose to use our tried and trusted alkaline cleaner, Tile Doctor Pro Clean. We use Pro Clean on most types of natural stone floor, including Quarry, Slate, and Victorian. I applied Pro Clean liberally across the floor and left it to dwell for a short period, giving it time to seep into the tile to get underneath and lift out any ingrained dirt. The cleaner was then agitated using a scrubbing pad fitted to a rotary machine to remove the dirt and other general muck. I then rinsed the floor with cold water and soaked up the resulting slurry with a wet-vac machine. Some areas of the floor proved to be quite stubborn to clean, so in these areas the cleaning process was repeated until satisfactory results were achieved. Finally, the floor was given another rinse and left to dry off overnight.

Sealing a Quarry Tiled Kitchen Floor

The next day I returned to the property and checked that the floor was ready to seal by running several damp tests, with the results indicating that was no excess moisture remaining on the tiles. We carry out these tests before sealing because moisture can cloud the sealer and prevent it from properly protecting the tiles. My choice of sealer was Tile Doctor Seal & Go, a cost effective topical sealer that builds up a robust layer of protection on the surface of the floor and provides a durable sheen finish that, as you can see from the photographs, really lifts the appearance of the tiles.

Quarry Tiled Kitchen After Cleaning in Tutbury Burton on Trent Quarry Tiled Kitchen After Cleaning in Tutbury Burton on Trent
It’s a fact that any sealed tiled floor will need to be regularly maintained as sealers do wear off over time, especially in the high traffic areas, and this is when the floor starts to lose its appearance as dirt becomes trapped in the pores of the stone. The life of the sealer can be extended however by ensuring you only clean the floor with a PH Neutral cleaner.


Source: Quarry Tile and Grout Cleaning and Sealing Service in Greater Staffordshire

Quarry Tiled Kitchen Floor Deep Cleaned and Sealed in Tutbury

This Quarry tiled kitchen floor was in very good condition, with no cracked or broken tiles. However, my customer, who lives in the town of Tutbury, near Burton-on-Trent, was keen to boost the condition of the tiles further through professional maintenance, including a deep clean and a fresh seal to restore the sheen to the Quarry. NB, did you know it's estimated that Tutbury has actually been inhabited for 3000 years, having once been the site of an Iron Age hill fort, this house of course Read more...

Thursday, July 28, 2016

Refreshing the Appearance of a Slate Tiled Kitchen

This small rough Chinese Slate floor in the kitchen of a house in the village of Cheadle near Stockport in Greater Manchester had not had any sealer put on it for many years and was very grubby (dishevelled as described by the customer) looking even after the customer had tried to clean it. Read more...

Dirty Porcelain Tiled Utility Room Cleaned and Sealed in Hull

This Porcelain tiled utility room at a property in Hull had been primarily used as an area for the household dogs, and so had suffered over the years from plenty of wear and tear. Originating in China, Porcelain is a type of ceramic that is known to be quite hard-wearing and durable, however, dogs are known to bring all manner of muck into the house from outside, and it was certainly beginning to show here. The property owner was keen to have the tiles professionally cleaned and sealed, Read more...

How to Repair a Scratched Marble Floor Tile

Marble floor tiles add a touch of class and elegance to any room. Unfortunately, unlike other floor tiles, marble tiles are more prone to scratches and damage. Since they are quite expensive, replacing scratched marble floor tiles is not always the best option. Fortunately, if your marble floor tile has only a minor scratch, getting rid of it is relatively simple.

What You'll Need
  • Marble cleaner
  • Steel wool
  • Gloves
  • Safety goggles
  • Marble polish
  • Hand buffer
  • Buffing machine or drill with buffing attachment
  • Soft towels
  • Distilled water


Step 1 – Clean the Marble

The first step is to clean the marble floor tile of all dirt and grime by using a cleaner and soft cloth. You should opt for a cleaner that is specifically suited for cleaning marble. Cleaners with harsh chemicals or abrasives that are not meant for marble floor tiles can end up causing further damage to your precious tiles by staining them permanently. Cleaners with a neutral pH and no abrasive elements are the only ones that are suitable for cleaning marble floor tiles. 

Step 2 – Scour with Steel Wool

Once the floor tile has been properly cleaned it’s time to scour the scratched area using steel wool. Remember to wear gloves when handling steel wool and always use safety goggles to prevent any pieces of steel wool from coming into contact with your eyes. Restrict your ministrations to the scratched portions of the marble floor tile. If you over-zealously scour the other areas of your floor tile with steel wool, you might end up scratching the unblemished areas too. 

Step 3 – Polish

Once you have scoured the scratched floor tile with steel wool, you should clean the tile again so that any steel wool particles are completely removed. Now apply some marble polish to the hand buffer and gently polish the entire floor tile. Follow the instructions given on the label of the marble polish for best results. Once you have applied the polish, allow it to dry completely. 
Step 4 – Buff
Now use the buffing machine to restore the shine to your marble floor tile. If you do not have a buffing machine, you can use a buffing attachment with a portable drill. Before using the buffing machine, do ensure that the material used in the buffer is soft and suited for use on marble. Incorrect usage can permanently damage the marble. Also, do ensure that you follow all safety precautions while using a buffer and wear your safety goggles at all times. If the shine is not restored to your liking with one application, you may have to repeat Steps 3 and 4 until you obtain the desired shine on your marble floor tile.

Step 5 – Wash and Dry

The next step is to simply wash the tiles with distilled water to remove any accumulated residue. Once the tiles are thoroughly washed, remember to dry them properly to prevent water streaks from ruining all your hard work. 

Leave a Review

Read more...

Rough Chinese Slate Kitchen Floor Revitalised in Cheadle

This small rough Chinese Slate floor in the kitchen of a house in the village of Cheadle near Stockport in Greater Manchester had not had any sealer put on it for many years and was very grubby (dishevelled as described by the customer) looking even after the customer had tried to clean it. Sealers do take a lot of punishment, especially in a high traffic area such as a small kitchen and will wear off over time and once this happens the floor will start to lose its appearance as dirt Read more...

Wednesday, July 27, 2016

Leave a Review

Read more...

Refreshing a Procelain Tiled Utility Room Used by Dogs

This Porcelain tiled utility room at a property in Hull had been primarily used as an area for the household dogs, and so had suffered over the years from plenty of wear and tear. Originating in China, Porcelain is a type of ceramic that is known to be quite hard-wearing and durable, however, dogs are known to bring all manner of muck into the house from outside, and it was certainly beginning to show here. The property owner was keen to have the tiles professionally cleaned and sealed, Read more...

Leave a Review

Read more...

Monday, July 25, 2016

Grout Cleaning and Recolouring for a Stained Shower Cubicle in Ramsbottom

Many homeowners will be able to relate to this post about tiled shower cubicles which can become mouldy, grubby, and just plainly unappealing to look at. The reality is that dirt, mould, and stains can be quite easily removed with the right products if addressed on a regular basis. However, many busy homeowners simply don't have the time, and subsequently the mould problems gradually worsen over time. This is what had happened at this property in Ramsbottom (a town known for its annual Read more...

Refreshing the Appearance of a Mouldy Ceramic Tiled Shower Derbyshire

Many homeowners will be able to relate to this post about tiled shower cubicles which can become mouldy, grubby, and just plainly unappealing to look at. The reality is that dirt, mould, and stains can be quite easily removed with the right products if addressed on a regular basis. However, many busy homeowners simply don’t have the time, and subsequently the mould problems gradually worsen over time. This is what had happened at this property in Ramsbottom (a town known for its annual Chocolate Festival) - the customer’s Ceramic tiled shower cubicle had not been adequately cleaned in a long time, resulting in severe staining that would prove impossible to remove entirely.

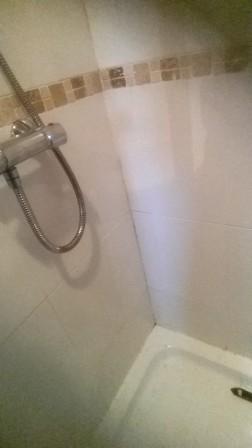
Deep Cleaning a Shower Cubicle In Ramsbottom Before

When the customer contacted me after finding Tile Doctor over the internet, I suggested that I could provide the grout with the best clean possible before re-colouring the grout with a white Grout Colourant to hide the staining and it back to looking similar to its original condition. The customer agreed that this would be the best course of action, and booked me in to complete the work.

Deep Cleaning a Shower Cubicle In Ramsbottom Before

Cleaning Ceramic Tiled Shower Cubicle Grout

The first step in the restoration was to get the grout ready for the new Grout Colourant to be applied. This involved cleaning the grout with Tile Doctor Pre-Treat Cleaner, which successfully removed the various dirt, soil, soap scum and hard water deposits that had built up after plenty of exposure to acidic shampoos and soaps. Getting the grout joints clean allows the colourant to form a better bond with the grout. The Pre-Treat Cleaner was sprayed onto the grout and left to dwell for roughly five minutes before being agitated with a grout brush. Next, I rinsed the grout with water and removed the old and mouldy silicone around the shower cubicle.

Colouring Grout and Siliconing for a Ceramic Tiled Shower Cubicle

After running tests I discovered a few damp issues, but these were quickly resolved with the help of my heat gun. With the grout now ready to be coloured, I applied two coats of Tile Doctor’s white Grout Colourant, allowing the first coat to dry before applying the second.

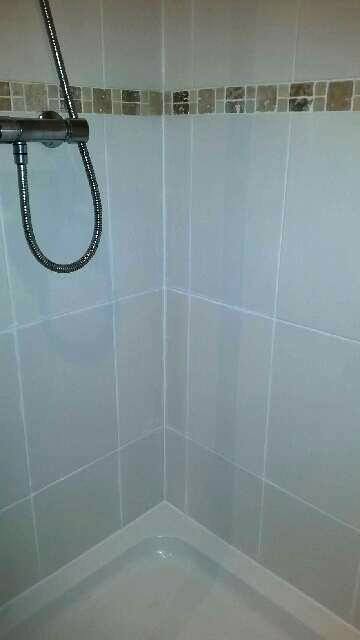
Deep Cleaning a Shower Cubicle In Ramsbottom After

The Grout Colourant is an epoxy-based product that seals and rejuvenates the grout, protecting it against future staining and making it easy to clean in the future. After completing the grout colouring I cleaned up the area - including removing any excess product - and then applied fresh silicone in a matching white around the base of the shower cubicle.

Deep Cleaning a Shower Cubicle In Ramsbottom After

As you can see from the photographs, the appearance of the shower cubicle was transformed by the new Colourant. My customer even left the following comment on the Tile Doctor feedback system: “Tony was polite punctual and efficient. We are very happy with his work!”


Source: Shower Tile Cleaning and Grout Colouring Service in Derbyshire

Sunday, July 24, 2016

Pros and Cons of Epoxy Aggregate Flooring

Generally, epoxy aggregate flooring can be found in garages, work rooms and perhaps even areas where people gather for social activities. This flooring usually has a very polished glossy look and if taken care of, can be quite attractive even for a garage floor. Some people love it and some people hate it. Here are the pros and cons:

Pros of Epoxy Aggregate Flooring

One of the things that most people like about this type of flooring is that not much sticks to it, making it easier to clean up a mess. Another reason why some prefer this type of flooring over others is that it is durable as long as it has been applied properly. This type of flooring should and could last for many, many years with proper care.

Cons of Epoxy Aggregate Flooring

If you pick a darker shade, it has more hardeners in it than the lighter shades. The darker ones tend to have an ammonia smell after applying. This flooring is also very sensitive and needs to be installed exactly according to directions. If not allowed to dry properly, which takes several days, the epoxy aggregate flooring will not last as long as it should.
As long as you follow the instructions exactly, you should get a great deal of use out of your epoxy aggregate flooring.

Friday, July 22, 2016

Restorating the Appearance of a Terracotta Tiled floor

In our experience there is a general lack of good maintenance advice given when new tiled floors are installed which results in floors that looked fantastic following installation losing their appearance of the years that follow. Naturally Tile Doctor aims to fill this gap and this Terracotta Read more...

Badly Maintained Terracotta Professionally Restored in Twickenham

In our experience there is a general lack of good maintenance advice given when new tiled floors are installed which results in floors that looked fantastic following installation losing their appearance of the years that follow. Naturally Tile Doctor aims to fill this gap and this Terracotta tiled floor at a property in Twickenham, Middlesex is a good example. It had not been professionally cleaned since it was installed 18 years prior and due to a multitude of advice over the year's Read more...

Thursday, July 21, 2016

Quarry and Victorian Tiles Repaired, Cleaned and Sealed in Swansea

The owner of this property in Swansea contacted me recently about a two-part job that would involve the restoration of both a Quarry tiled hallway and a Victorian tiled lobby. The property itself dates back to 1918 - making it nearly a century old - and its safe to assume that both sets of tiles are of a similar age. As you can see from the photographs, they had certainly had absorbed a lot of wear and tear over the years, and as these tiles get older it becomes in increasingly difficult to Read more...

Restoring Old Victorian Lobby Tiles and Hallway

The owner of this property in Swansea contacted me recently about a two-part job that would involve the restoration of both a Quarry tiled hallway and a Victorian tiled lobby. The property itself dates back to 1918 - making it nearly a century old - and its safe to assume that both sets of tiles Read more...

To read more on this topic click here

Wednesday, July 20, 2016

Oyster Slate Tiled Fireplace Installed, Cleaned, and Sealed in Hull

While at Tile Doctor we are more often than not asked to carry out professional maintenance for existing tiling installation we have also been known to do the installation as well. This was the case with this customer, living at a property in Hull, who contacted me about a full tile installation on their fireplace, situated in a living room which itself was undergoing some redecoration. I recommended an Oyster Slate tile, a natural stone which contains a nice range of black, brown and white Read more...

Tiling a new Fireplace in Oyster Slate

While at Tile Doctor we are more often than not asked to carry out professional maintenance for existing tiling installation we have also been known to do the installation as well. This was the case with this customer, living at a property in Hull, who contacted me about a full tile installation on their fireplace, situated in a living room which itself was undergoing some redecoration. I recommended an Oyster Slate tile, a natural stone which contains a nice range of black, brown and white Read more...

Tuesday, July 19, 2016

Tiling a Fireplace with Oyster Slate in Yorkshire

While at Tile Doctor we are more often than not asked to carry out professional maintenance for existing tiling installation we have also been known to do the installation as well. This was the case with this customer, living at a property in Hull, who contacted me about a full tile installation on their fireplace, situated in a living room which itself was undergoing some redecoration. I recommended an Oyster Slate tile, a natural stone which contains a nice range of black, brown and white shades to give walled areas a really distinct look.

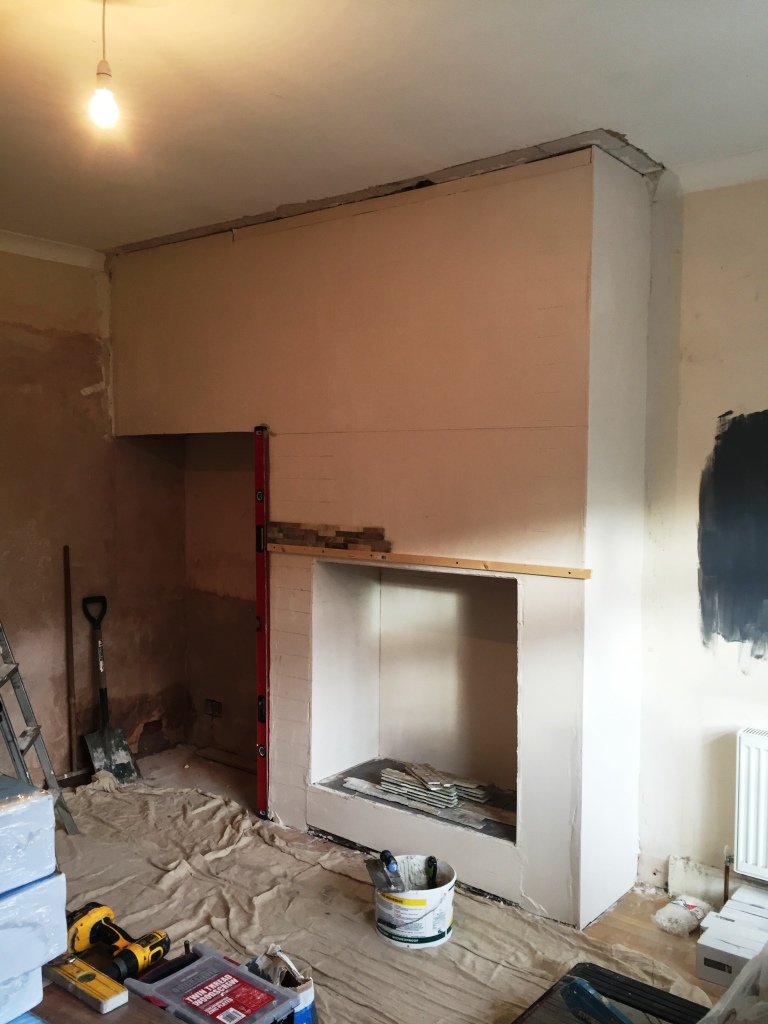
Oyster Slate Fireplace Before Installation Hull

I explained to my customer - who was very happy with the choice of tile - that the fireplace would have be cleaned and sealed once the Slate tiles had been installed. This customer planned on having a coal fire installed following the tiling, but without a robust seal the Slate would be blackened by the coal and become difficult to clean.

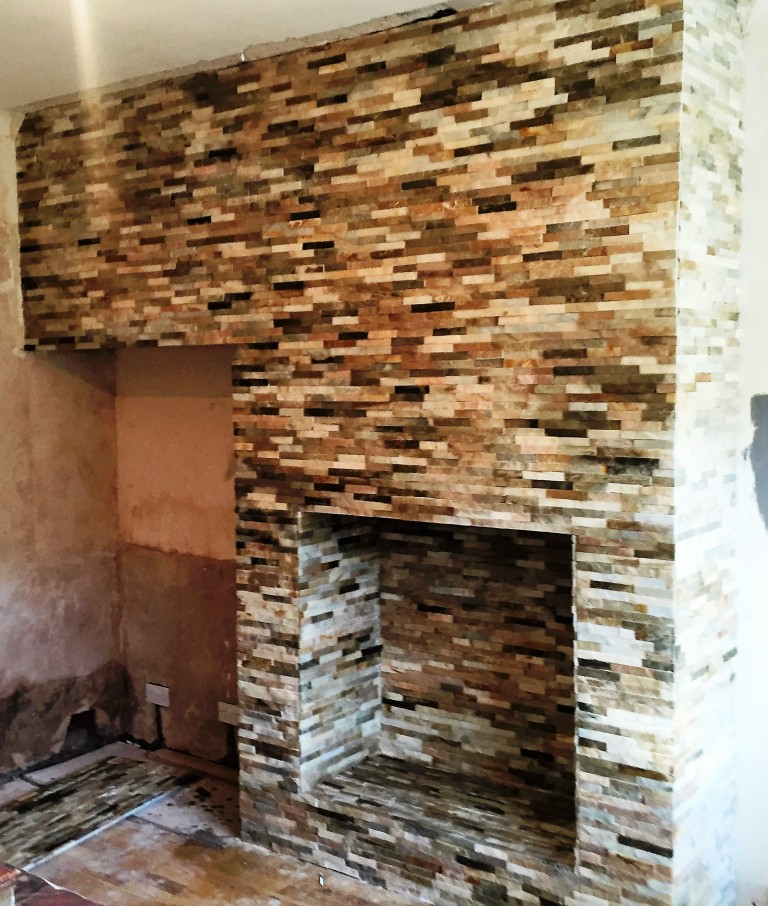
Oyster Slate Fireplace After Installation Right Hull


Cleaning and Sealing an Oyster Slate Tiled Fireplace

Once I had successfully tiled the fireplace with the new Oyster Slate, I set about cleaning the area with an application of Tile Doctor's versatile alkaline-based cleaner, Pro Clean. The tiles were caked with debris and dust from the tile installation, but Pro Clean - which is suitable for use on most types of natural stone tile - quickly cut through the layers of dirt and left the area looking perfectly clean and ready to be sealed. My choice of sealer was Tile Doctor Ultra Seal, an impregnating sealer which soaks into and fills the pores of the Slate, thus preventing dirt - such as debris from a coal fire - from becoming ingrained in the stone. Ingrained dirt can make tiles notoriously difficult to clean, so it's always recommended that you have use a suitable sealer - and keep it topped up - to make your life easier when maintaining the appearance of your tiles in future.

Oyster Slate Fireplace After Sealing Hull

The sealer also enhanced the natural colours in the slate enhancing the look of the fireplace and the customer was very pleased with her new tiled fireplace with a robust seal in place she will not have to worry about its appearance becoming spoiled any time soon.


Source: Tile Installation, Cleaning and Sealing Service in East-Yorkshire

Monday, July 18, 2016

Refinishing Kitchen Floor Tiles in Chester

If you're a first time buyer in the process of renovating or redecorating your new property, you may well discover some fantastic tiled floors hidden under your carpets. Certainly in my experience this happens quite often, so it came as no surprise when I got a call from a couple who had pulled Read more...

Terrazzo Floor Repair: Mistakes to Avoid

Terrazzo floors are often thought of as being either marble or granite and, as such, people try to conduct terrazzo floor repairas though it were. This is a big mistake, because despite its appearance, it's not the same as these other stone floor types. Terrazzo floor repair follows some of the same methods as marble, but is not completely repaired the same way. Terrazzo floors are a type of artisan floor that was created in the Venetian period. Stone masons would cart away scrap marble from other work they were doing and mix it with concrete. This is how terrazzo floors were born, and they offer a cheaper alternative to marble floors while still maintaining the beauty. Here are some mistakes you should avoid when trying terrazzo floor repair on your own.

Nail Removal

Many people like putting carpet on sections of terrazzo floors in order to section it off. When it comes time to remove the carpet it will usually just be pulled up. This can chip the terrazzo floor, as the nails will be forced out at many angles. In order to remove carpet properly, you have to cut it along the nail line. You can then roll the carpet up and pull it from the carpet glue if there's any on the floor. Break the board away from the nails and then hammer the nails into the terrazzo floor with a rubber mallet. Removing the nails will cause more harm than good, as it would leave holes and possibly chip away pieces of the floor.

Not Granite

Terrazzo floors are not granite, despite looking like it. Terrazzo floor repair should be treated more like marble. Terrazzo floors are much softer than granite, so they can easily be stained and worn down quickly.

Never Clean with Vinegar

Vinegar is a natural cleaner and that's why many people think it's suitable to use for removing stains. Vinegar, unfortunately, is too acidic for terrazzo floors. Using vinegar can etch the surface of the floor or dull its appearance.

Simplicity Is Key

When it comes to terrazzo floor repair, you should just keep it as simple as possible. Terrazzo floors have a layer of wax that gives it the shine you're familiar with. Using abrasive cleaners can remove this wax and, if using a scrub brush, can seriously scratch the floor surface. You should never use anything harsher than mild detergent, water and a soft cloth or sponge.

Scratches and Scuffs

Damage to terrazzo floors is often found to be as simple as a scuff mark or small scratches. There are no chemicals to use in this process, so don't attempt to use any to remove these marks. A clean rag and soapy water should be all that you need to remove them. If these marks are much deeper, then you can remove the wax and sand down the floor with fine grit sandpaper. Buff it with oil and then reapply floor wax.

Sunday, July 17, 2016

Refreshing Worn Kitchen Quarry Tiles at a Pub in Somerset

The proprietor of this pub in the good old English country town of Yeovil, Somerset had plans for a complete refurbishment, including the restoration of the very poorly maintained Quarry tiled floor in the kitchen. Without professional attention the kitchen floor had suffered under years worth of food and drink stains and grease, and plenty of general dirt, leaving it looking dull and grotty. In a busy kitchen environment this is to be expected, but the pub owner decided it was finally time for a thorough clean and a fresh seal, and recruited me to get the job done.

Quarry Tiles Before Cleaning Yeovil in Somerset

Cleaning a Dirty Quarry Tiled Kitchen Floor

To begin the restoration I covered the entire floor with Tile Doctor Remove and Go, our heavy duty remover designed to break down soil and grease buildup, and to strip away any old sealer on the tiles. I then proceeded to scrub the floor with a rotary machine fitted with a black scrubbing pad to remove the many layers of muck. Special attention was paid to cleaning the grout lines by hand using a special grout brush. The difference made by the cleaning was immediate once I had throughly rinsed the floor to remove any excess cleaning residue. As per usual, I then left the floor to dry completely. Having the floor completely dry before sealing it is essential as even the smallest amount of moisture can cloud the sealer and damage its ability to protect the tiles.

Sealing a Quarry Tiled Kitchen Floor

The floor was left for two full days, leaving it plenty of time to dry. Upon my return to the pub, the owner requested a sealer that would provide a natural matte finish since this is a high traffic commercial kitchen used for a lot of cooking, and therefore would not suit a sheen finish in the same way that a residential kitchen would. I sealed the floor with multiple coats of Tile Doctor Colour Grow, an impregnating sealer that fills the pores of the Quarry to prevent muck from becoming ingrained, which will prove important in this area that is prone to spillages. Colour Grow also accentuated the reddish shades in the stone, while providing the natural no-sheen finish requested by the customer.

Quarry Tiles After Cleaning Yeovil in Somerset

To say that the condition of this Quarry tiled kitchen floor has been transformed would be quite an understatement. A deep clean has taken it from looking excessively grotty and greasy to fresh and clean, while the addition of a new, robust seal will prevent it from falling back into such a bad state. The customer was very pleased indeed!


Source: Quarry Tile and Grout Cleaning Service in Somerset

Tuesday, July 12, 2016

Restoring the Appearance of Old Yorkshire Flagstones

This Yorkshire flagstone floor was about 20m2 in size and was well overdue a deep clean, additionally a lot of the pointing was loose or missing which would need to be resolved. The location of this job was at a house in Haworth village which is situated at the edge of the Pennine moors in West Yorkshire, the area is known as Bronte country after the famous Bronte sisters who lived here in the local parsonage in the 19th century. Cleaning Yorkshire Stone To deep clean the floor the sandstone Read more...

Old Yorkshire Flagstones Revitalised in Haworth Village

This Yorkshire flagstone floor was about 20m2 in size and was well overdue a deep clean, additionally a lot of the pointing was loose or missing which would need to be resolved. The location of this job was at a house in Haworth village which is situated at the edge of the Pennine moors in West Yorkshire, the area is known as Bronte country after the famous Bronte sisters who lived here in the local parsonage in the 19th century. Cleaning Yorkshire Stone To deep clean the floor the sandstone Read more...

Monday, July 11, 2016

How are Terrazzo Floors Made?

People have been using terrazzo floors since the 16th century; artisans laid this flooring in Venetian villas. The name comes for the Italian word for terrace. Terrazzo is a perfect flooring choice because of its classic look, longevity, durability and low maintenance cost.
Production
Terrazzo floors need 3 layers of materials. Terrazzo workers first create a concrete foundation that’s solid and level about 3 to 4 inches deep. Once the forms are taken out from the foundation, they add 1 inch layer of sandy. Before the layer sets, the workers partly set in metal divider strips on the concrete; this divides the area where there is to be a color change in the terrazzo; thus beautiful floor designs may be created.
For the last layer, mix and place a fine marble, granite or glass chips combination in cement; the cement may also be color-pigment for a particular panel created by the metal strips. Terrazzo workers use a variety of colors of chips into each panel while the mixture is still wet. To achieve a smooth and uniform surface, it needs to be hand-troweled. A lightweight roller is the used to smooth out the whole surface.
Once the terrazzo is completely dry, a terrazzo grinder is used to grind it. Slight dents caused by the grinding are filled with grout. The dry surface is then cleaned, polished and sealed for a shiny finish.
Terrazzo floors can be used indoors or outdoors because of its durability. It is even perfect for high traffic areas such as hallways and lobbies. If you want a reasonably-priced, durable substitute to stone or ceramic tiles, then terrazzo is your answer. 

Cleaning and Sealing a Mouldy Ceramic Tiled Shower in Galgate

If you have a tiled shower area in your home, it's very likely you've experienced problems with the grout becoming excessively dirty and ridden with displeasing black spots of mould. The underlying issue is due to inadequate ventilation which can be a real problem in modern insulated houses and occasionally the grout can get so imbued with contamination that the problem needs to be resolved professionally. In the case of this Ceramic tiled shower area, located at a property in Galgate, Read more...

Dealing with Mould on Shower Tiles in Lancashire

If you have a tiled shower area in your home, it's very likely you've experienced problems with the grout becoming excessively dirty and ridden with displeasing black spots of mould. The underlying issue is due to inadequate ventilation which can be a real problem in modern insulated houses and Read more...

Sunday, July 10, 2016

Unsealed Terracotta Kitchen Tiles Treated for Grout Haze in Malvern

Newly built properties are not without their problems and often take a while to resolve all the snagging which occasionally extends to resolving problems with newly laid tiled floors. At this new property in the village of Malvern, and overlooked by the Malvern hills, the builders had left the Terracotta tiled kitchen floor covered in grout smears (also known as Grout Haze) following installation. They had also neglected to seal the tiles, which was actually quite fortunate in this case as Read more...

Commissioning a new Terracotta Tiled Floor in Warwickshire

Newly built properties are not without their problems and often take a while to resolve all the snagging which occasionally extends to resolving problems with newly laid tiled floors. At this new property in the village of Malvern, and overlooked by the Malvern hills, the builders had left the Read more...

Getting the best out of a Terracotta Tiled floor

Newly built properties are not without their problems and often take a while to resolve all the snagging which occasionally extends to resolving problems with newly laid tiled floors. At this new property in the village of Malvern, and overlooked by the Malvern hills, the builders had left the Terracotta tiled kitchen floor covered in grout smears (also known as Grout Haze) following installation. They had also neglected to seal the tiles, which was actually quite fortunate in this case as they would have sealed in the grout haze, making it more difficult to remove. Naturally, the property owner wanted the problem to be resolved as soon as possible, and for me to make the tiles easy to keep clean in future, which can be achieved by sealing the tile.

Grout Haze Removed from new Terracotta Tiles at Malvern Village

Removing Grout Haze from a Terracotta Tiled Floor

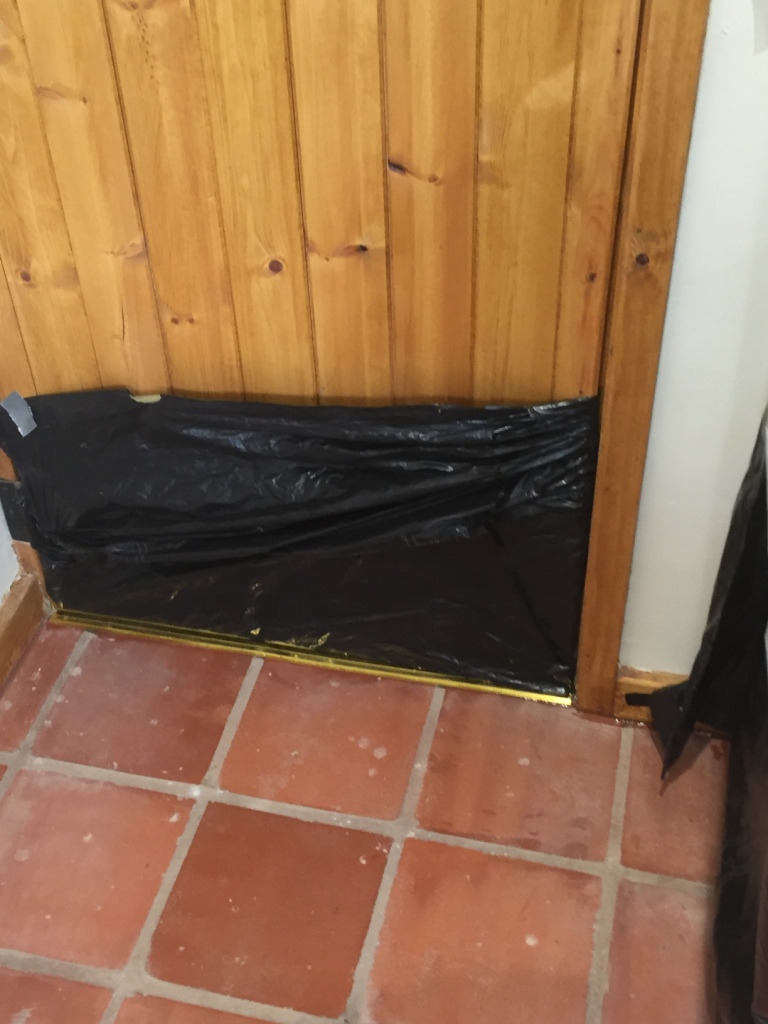
Before starting work, I made sure to fully protect any exposed woodwork with a plastic sheet covering to protect them from potential damage. I then proceeded to give the floor a thorough clean, using Tile Doctor Remove and Go to clean the floor and eradicate some stains that had been left behind as a result of the building work.

Grout Haze Removed from new Terracotta Tiles at Malvern Village Grout Haze Removed from new Terracotta Tiles at Malvern Village

Next, I paid special attention to the grout, where the very visible problem of grout haze had arisen. To neutralise these smears I used Tile Doctor Grout Clean Up, a concentrated phosphoric acid cleaner that can also remove alkaline mineral deposits and efflorescence. Grout Clean Up is only to be used on acid resistant stone, as sensitive stone can suffer from irreparable etching if it comes into contact with the product. Once completely clean and free of grout smears the floor was thoroughly rinsed with water to remove any trace of product and then dried as much as possible with a wet vacuum, afterwards an air mover was installed to speed up the drying process.

Sealing a Terracotta Tiled Floor

Later that afternoon the floor was dry and I was able to apply a sealer. To do this I opted to use several coats of Tile Doctor Seal and Go Extra, a topical, fully breathable sealer that works really well on Terracotta.

Grout Haze Removed from new Terracotta Tiles at Malvern Village

The sealer builds up a layer of protection on the surface of the tiles, protecting against ingrained dirt and stains. Seal and Go Extra also provides a high quality sheen finish which really did well to enhance the look of the Terracotta.

Grout Haze Removed from new Terracotta Tiles at Malvern Village

The property owner was exceptionally pleased with the results, and to have this problem dealt with quickly and efficiently, additionally the sealer will ensure the Kitchen floor is easy to keep clean in the future.


Source: Terracotta Tile Cleaning and Maintenance Service in Warwickshire

Thursday, July 7, 2016

Very Old Quarry Fireplace Deep Cleaned and Sealed in Bedford

The oldest properties often have the most interesting tiled features and this Quarry Tiled Fireplace was a fine example. The customer lived in a quaint old cottage just outside the main town centre of Bedford and contacted us about restoring their fantastic Quarry tiled fireplace. While the customer knew that the cottage itself was over 200 years old, they had no idea whether or not the fireplace is an original feature. However, it's safe to say that the fireplace is very old in its own Read more...

Old Quarry Tiled Fireplace Deep Cleaned in Bedford

The oldest properties often have the most interesting tiled features and this Quarry Tiled Fireplace was a fine example. The customer lived in a quaint old cottage just outside the main town centre of Bedford and contacted us about restoring their fantastic Quarry tiled fireplace. While the customer knew that the cottage itself was over 200 years old, they had no idea whether or not the fireplace is an original feature. However, it's safe to say that the fireplace is very old in its own Read more...

Colour Restored to a Faded Black and Red Quarry Tiled Floor in Welton

There are numerous factors that can contribute to a Quarry tiled floor looking worse for wear, including lack of sealer, dampness issues, and the wrong type of cleaning products. Unfortunately, this black and red Quarry tiled floor was suffering from a combination of all three: there was no sealer evident to protect against dirt and stains, and dampness in the sub-floor had caused the tiles to fade in colour and shine. The red tiles especially had faded so much that they appeared almost Read more...

Wednesday, July 6, 2016

Quarry Tiled Floor Restored in Northamptonshire

There are numerous factors that can contribute to a Quarry tiled floor looking worse for wear, including lack of sealer, dampness issues, and the wrong type of cleaning products. Unfortunately, this black and red Quarry tiled floor was suffering from a combination of all three: there was no Read more...

Costs of Travertine Flooring

Travertine flooring is a popular natural rock choice for many people. The beige, reds, yellows, and browns that are naturally found in this stone compliment almost any style. It is a more delicate material to work with, and the costs can start to add up. Even with that, once someone has their heart set on this type of stone, it's hard to change their minds. Here's what you should know about the costs of a travertine floor.

Cost of Stone

The cost of travertine flooring isn't terribly high when you first start looking at the individual stones. It's most commonly found in 18 x 18-inch pieces, and averages around $2.50 a square foot. Marble can start at $4 and range up to $35 a square foot, and granite can be pricey as well. Considering carpeting and other types of stone can be much higher than this, travertine can be a great alternative to other flooring types.

Thinset Cost

Another consideration to factor in to the overall cost of travertine flooring is the thinset that needs to be used during installation. When you are installing ceramic or porcelain, using a standard thinset is all that's required. For travertine, however, a multipurpose thinset should be used. The thinset needs to be mixed differently as well, meaning you may need more than you would with other jobs. A standard thinset is cheaper, but the multipurpose will give you much better results.

Professional Installation

Any kind of natural stone flooring will take more time and attention to detail to install. Natural stones, such as travertine, aren't as forgiving as ceramic or porcelain. A professional will charge by the job, and you can expect the installation of travertine to be as much as 3 times more than other types of flooring. You will want to check around for pricing options, but in general you can expect to pay as much as $6 a square foot just for the installation.

Repairs

While it's always a good idea to purchase some extra material in case you need to replace or repair a tile later on, travertine won't be as hard to match up again as ceramic would be. Since the travertine has natural variations in the color throughout the floor, if you need to replace a tile after you've installed it, it will be much easier to track down and purchase. With ceramic and porcelain, there isn't a lot of room with matching up the tiles. You can spend a tremendous amount of time, and possibly money, looking for a replacement with other flooring types. travertine makes this easy.
Travertine may cost a little more to install than other flooring types, but the benefits are high. It's easy to maintain, easy to replace, and for anyone who loves natural stone, the look is unmistakable.
Tuesday, July 5, 2016

100+ Year Old Quarry Tiles Revitalised in Market Weighton

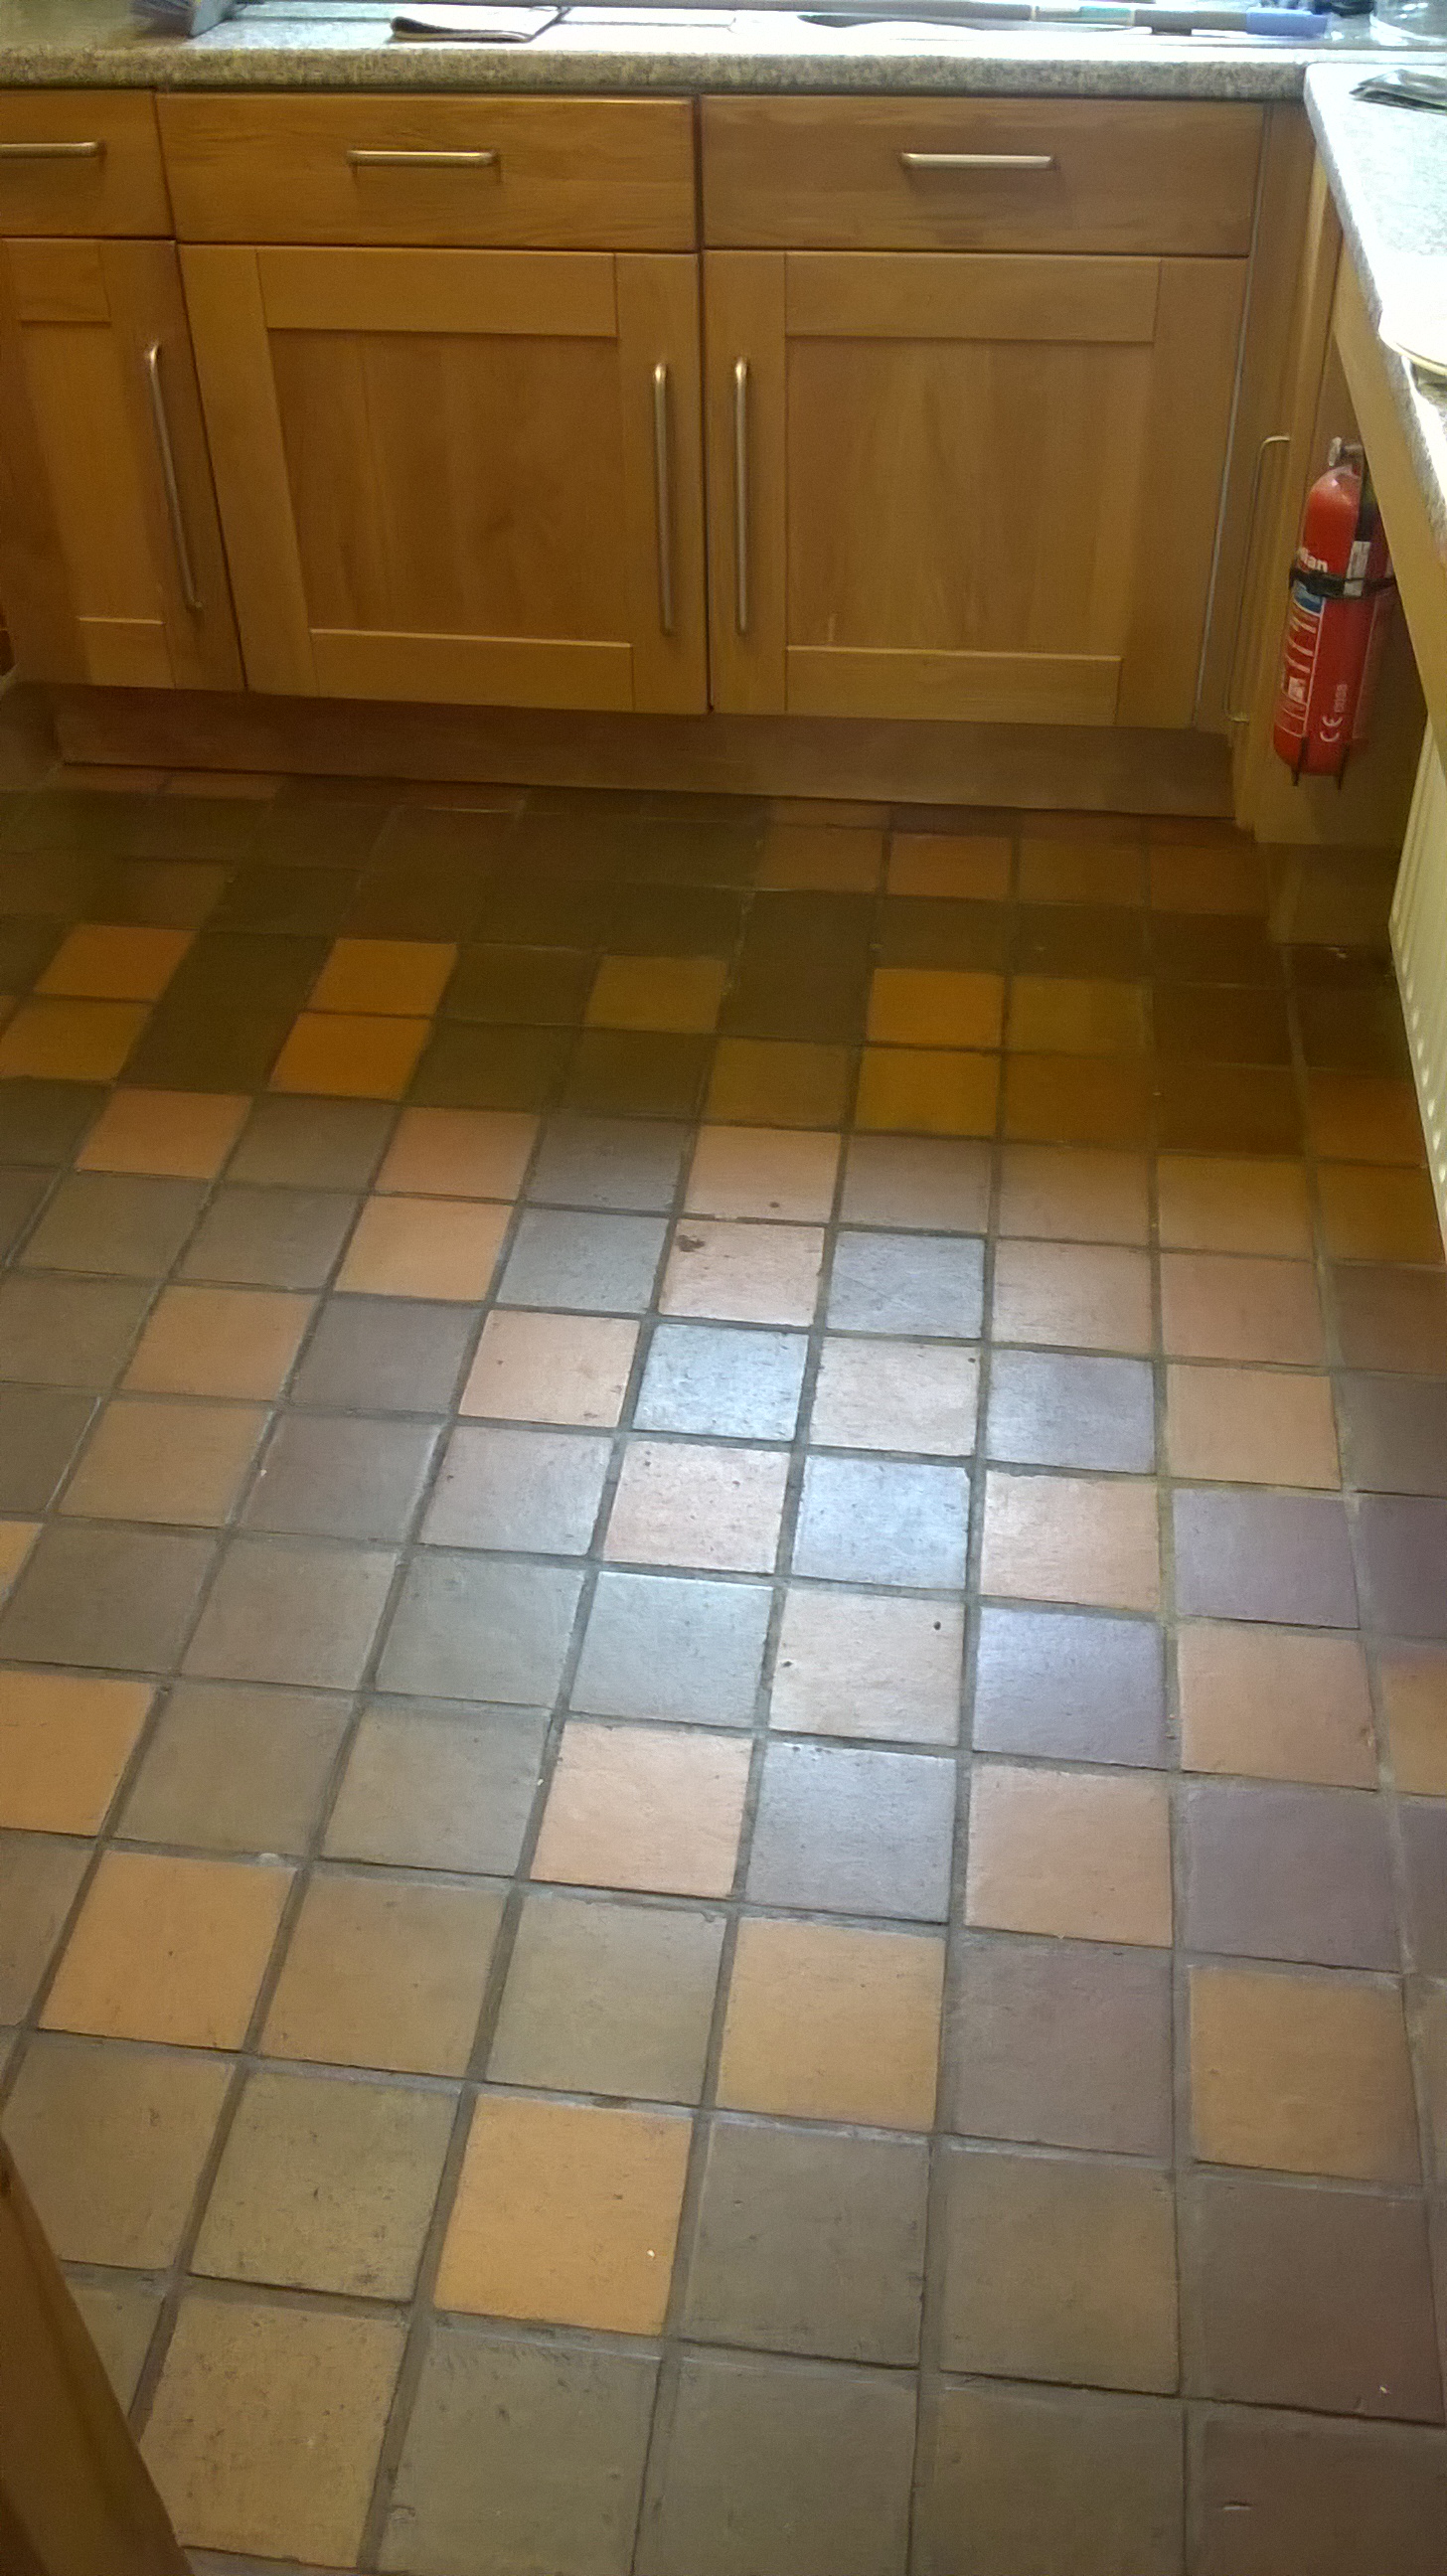
When you have a Quarry tiled floor like this one that is well over a century old, it's inevitably going to have developed a number of problems over the years and be in need of some TLC. The floor, located at a property in the East Yorkshire town of Market Weighton, had been laid on a bed of sand and had no damp proof membrane which isn't surprising for a floor of this age as a DPM didn't really become standard until the 1960's. The customer was primarily interested in getting the tiles as Read more...

To read more on this topic click here

Quarry Tiled Floor Restored in Yorkshire

When you have a Quarry tiled floor like this one that is well over a century old, it's inevitably going to have developed a number of problems over the years and be in need of some TLC. The floor, located at a property in the East Yorkshire town of Market Weighton, had been laid on a bed of sand Read more...

Friday, July 1, 2016

Terracotta Hallway Tiles Restored in Cheshire

These Terracotta tiles, located at a property in the town of Pendle, Lancashire had the unique circumstances of being covered by a thick layer of wax which had turned black over the years. Anyone from the Lancs area will have heard of the famous Pendle Witch Trials, and we would need to channel Read more...

Wax Covered Terracotta Tiled Floor Restored to New in Pendle

These Terracotta tiles, located at a property in the town of Pendle, Lancashire had the unique circumstances of being covered by a thick layer of wax which had turned black over the years. Anyone from the Lancs area will have heard of the famous Pendle Witch Trials, and we would need to channel some serious magic to successfully remove the unsightly wax. The wax had been settled on the tiles for many years, proving difficult to remove even for a seasoned tile cleaning professional, Read more...